Você está no 3DFinder
Buscamos em Thingiverse, MakerWorld e Printables ao mesmo tempo para te dar o melhor de cada uma.
Descrição
I wanted to design a case that is uses only 3d printed parts. No metallic screws, magnets etc.
At, the same time, I didn't wanted to make any compromises for this one. ( still strong, reliable locking mechanism and customizable )
Key features:
* strong build and simple print with NO Supports.
* strong and reliable locking mechanism using only 3d printed parts. This has a very satisfying click.
* print-in-place hinges.
* replaceable/changeable top/bottom covers for great color customization.
* many optional top covers available in second profile. ( blank, skull, angry cat, tools logo )
* no AMS required for multicolor print ( except the small cover details, which require 3 color changes only )
The top/bottom covers and the screws are printed separately, so you can use different colors than the base case.
The label is also printed separately and you can do only one filament change for the top text on the label.
* hanger for keychain/strap/label or whatever you want to attach to this case (for fun or utility).
Tested with a 3kg weight, even shaking the weight and holding the case horizontally (smallest resistance). Please check the small gif attached.
* Inside space: 175.8 mm x 68.4mm x 46 mm.
* Inside space of A1 Mini Version: 165.8mm x 68.4mm x 23 mm.
Assembly notes:
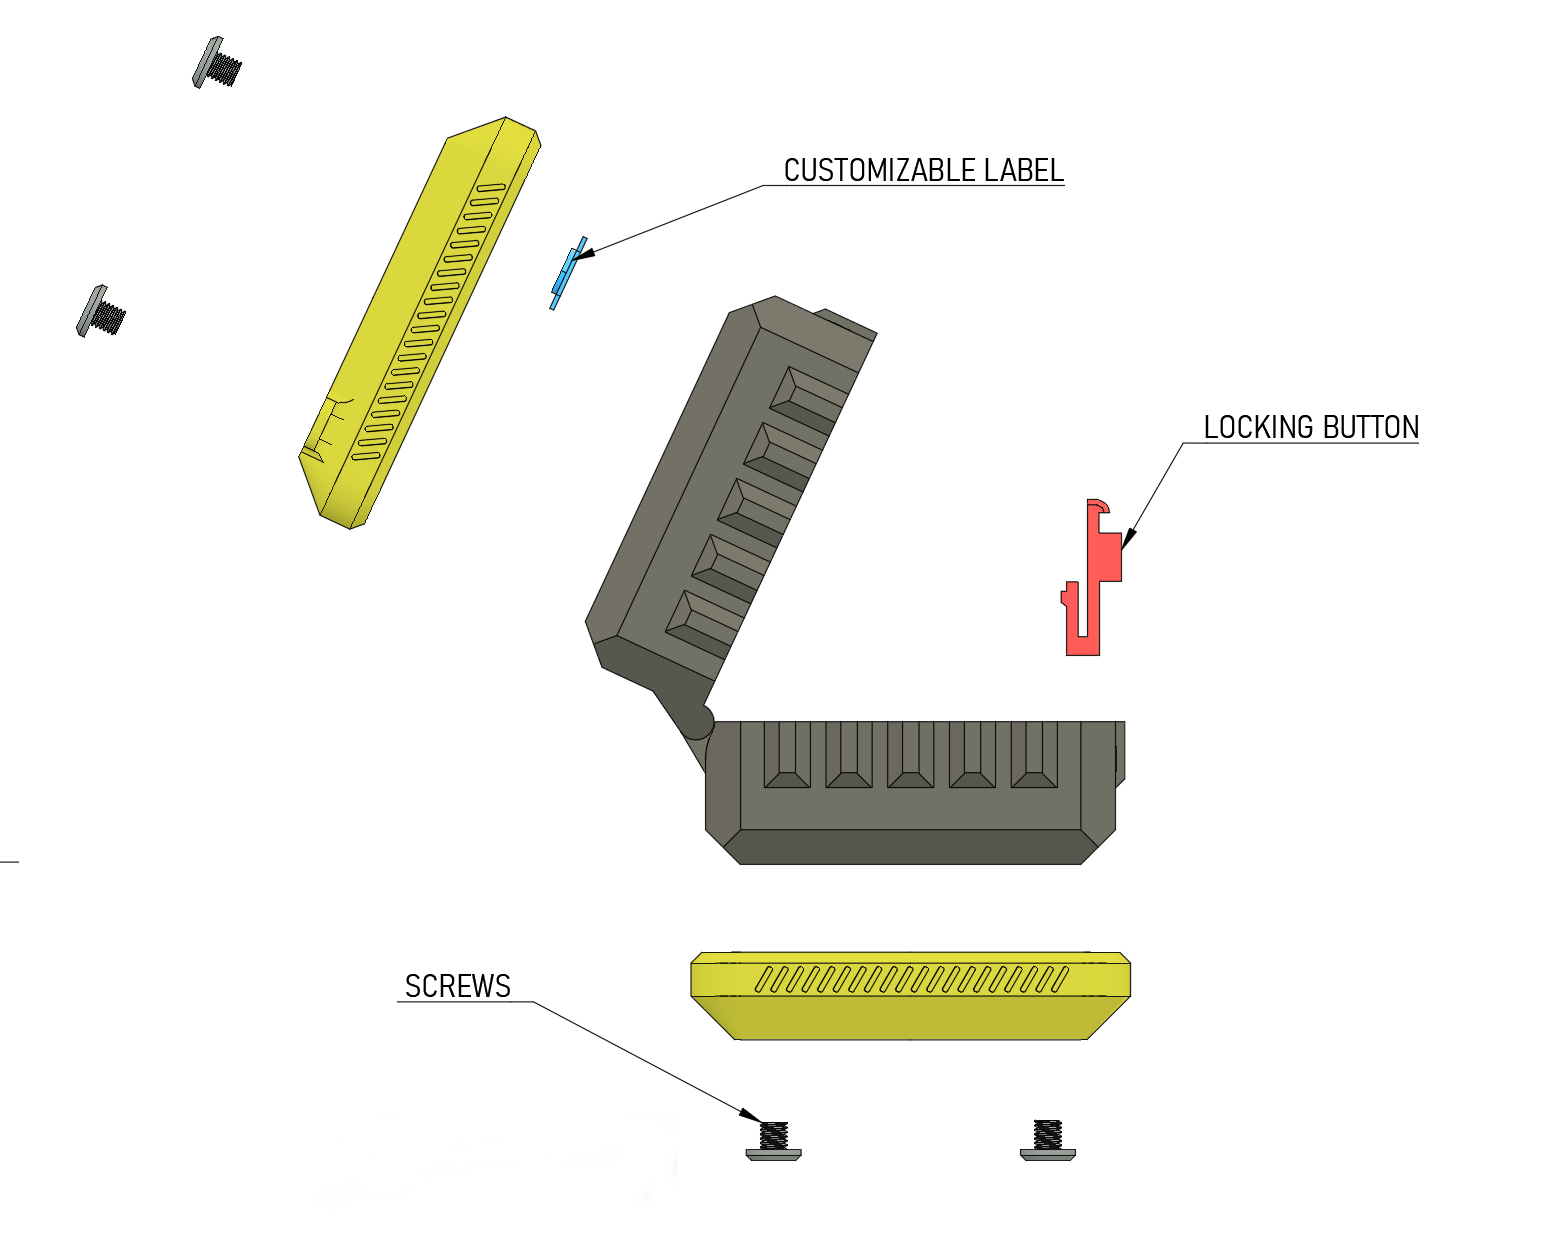
* This is the exploded view of the complete model (side view)
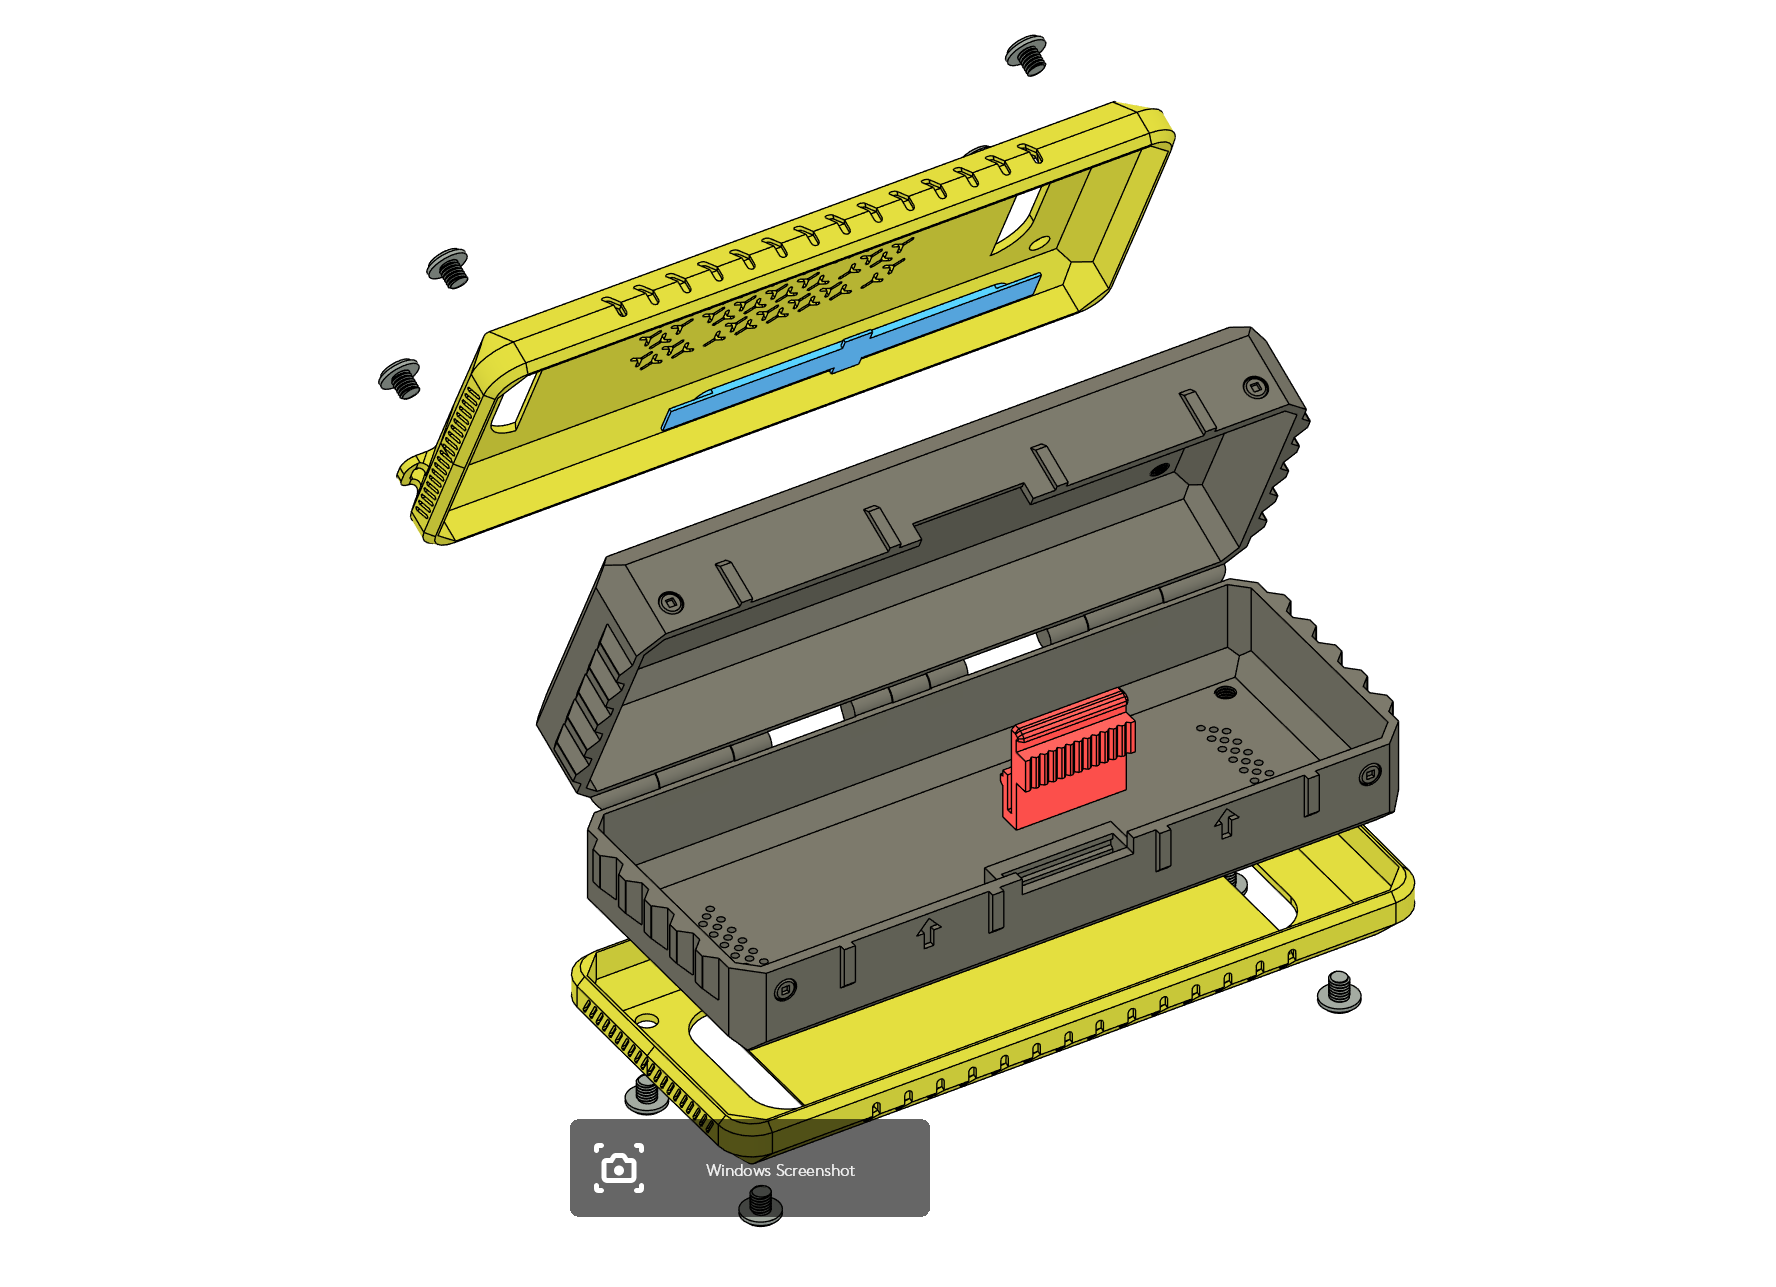
Another exploded view of the parts, for better understanding:
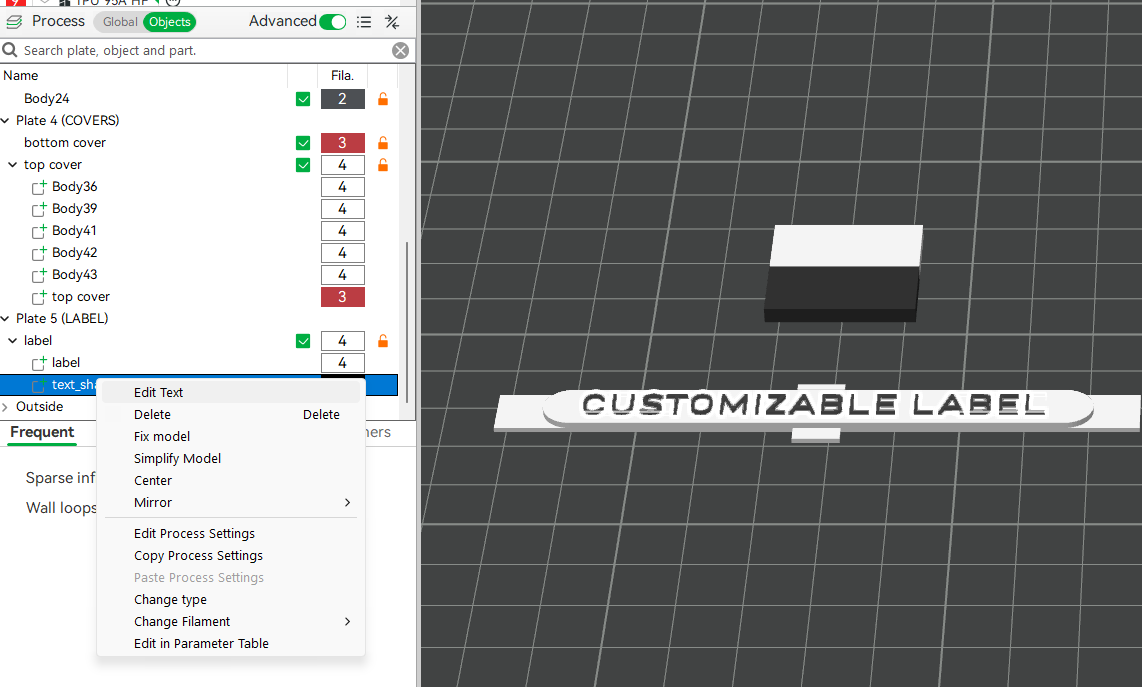
Customizing Label text:
In Bambu Studio, after you open my main profile, go to plate 5 (LABEL), select “text_shape”, right click on it and press “Edit Text”.
A popup will be displayed and you can change the text font, size thickness etc.
You can set the filament you want for this “text_shape” and the printer will only need one filament change. You can do it with AMS or Without AMS, by pausing the print when the text starts and do a manual filament change (one time).
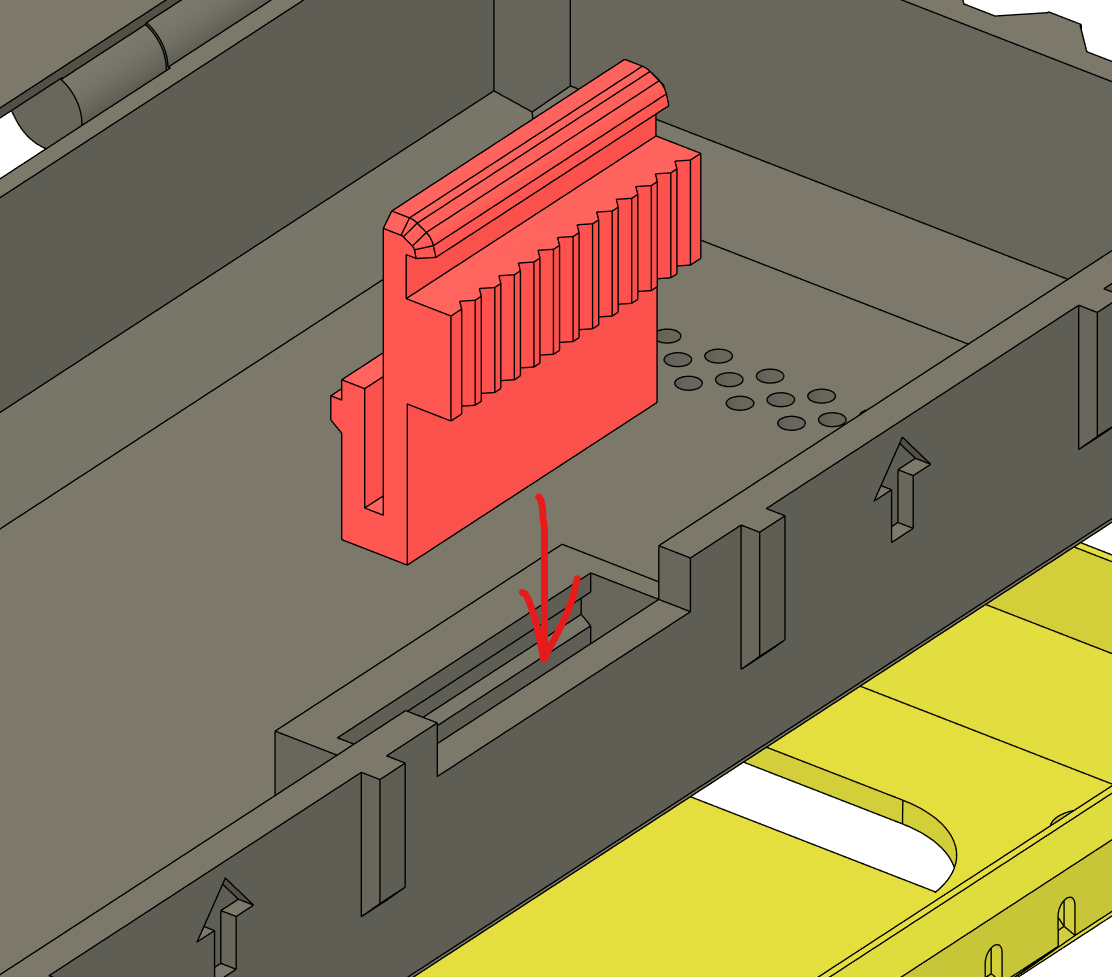
STEPS:
* insert the “locking button” into the bottom case and press it firmly. Try to press vertically and it will make a satisfying click when correctly inserted.
* add the label to the top cover and slide in the cover over to top part of the case.
* slide in the bottom cover over the bottom part of the case.
* Add the screws by carefully screw them clockwise. Be sure you insert them flat (not at angle). Don't force them (overtight) at the end, the covers will stay in place even without these screws.
CUSTOMIZE THE BLANK COVERS WITH VECTORS:
-Open the covers profile, and go the the blank cover.
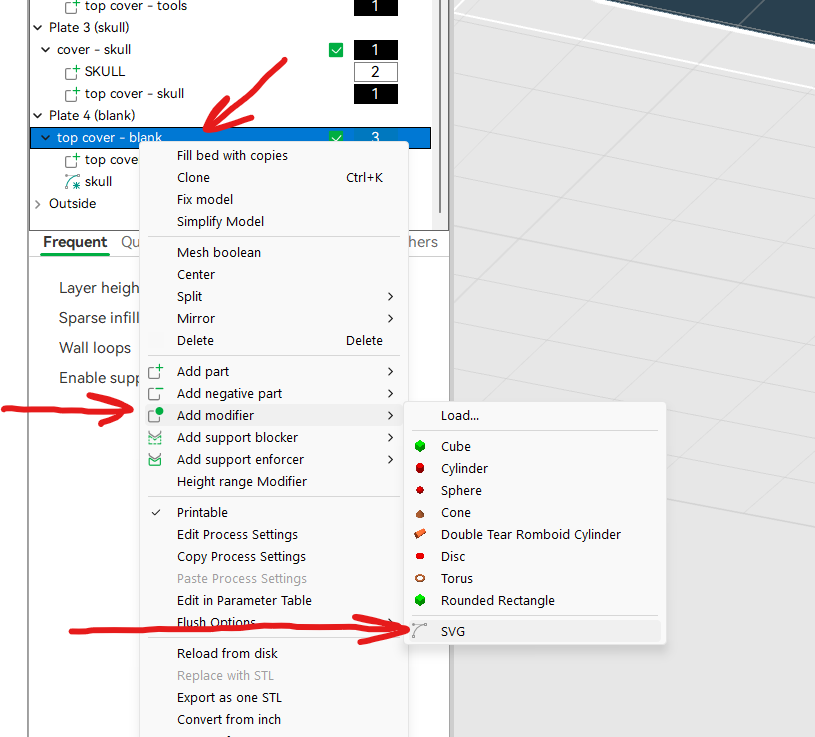
-Right click on “top cover - blank” and select “add modifier” → “SVG”
-Load up the SVG file you want
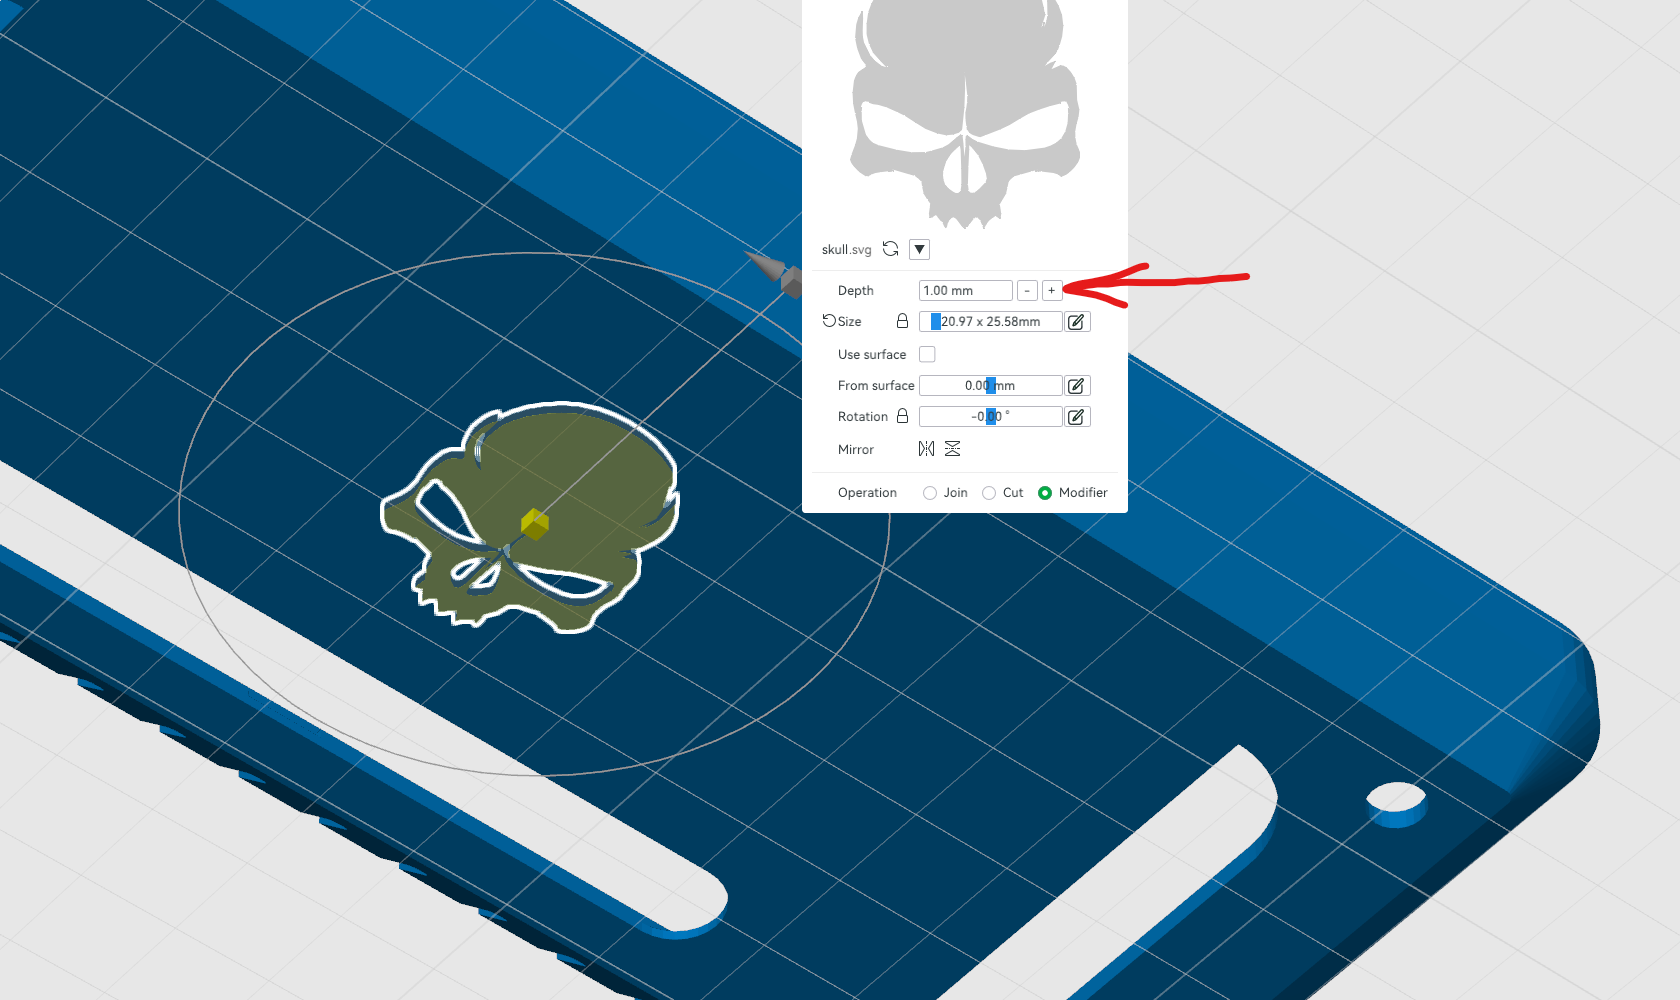
-Change the depth of the vector to 1mm and be sure to look under the plate, to see the front of the cover. You want to move the vector and position it on the face of the cover, not the interior (if you move it from above the plate)
-Scale down/up the vector, arrange it as you wish, but be sure to have the depth not too big (i suggest 1mm, as I said above)
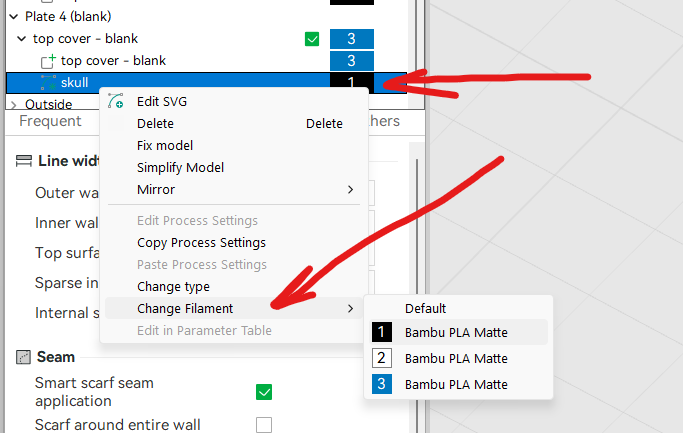
-Then, on the object list, right click on the newly added SVG (vector) to select another filament (to have a different color)
SIZE CUSTOMIZABLE VERSION:
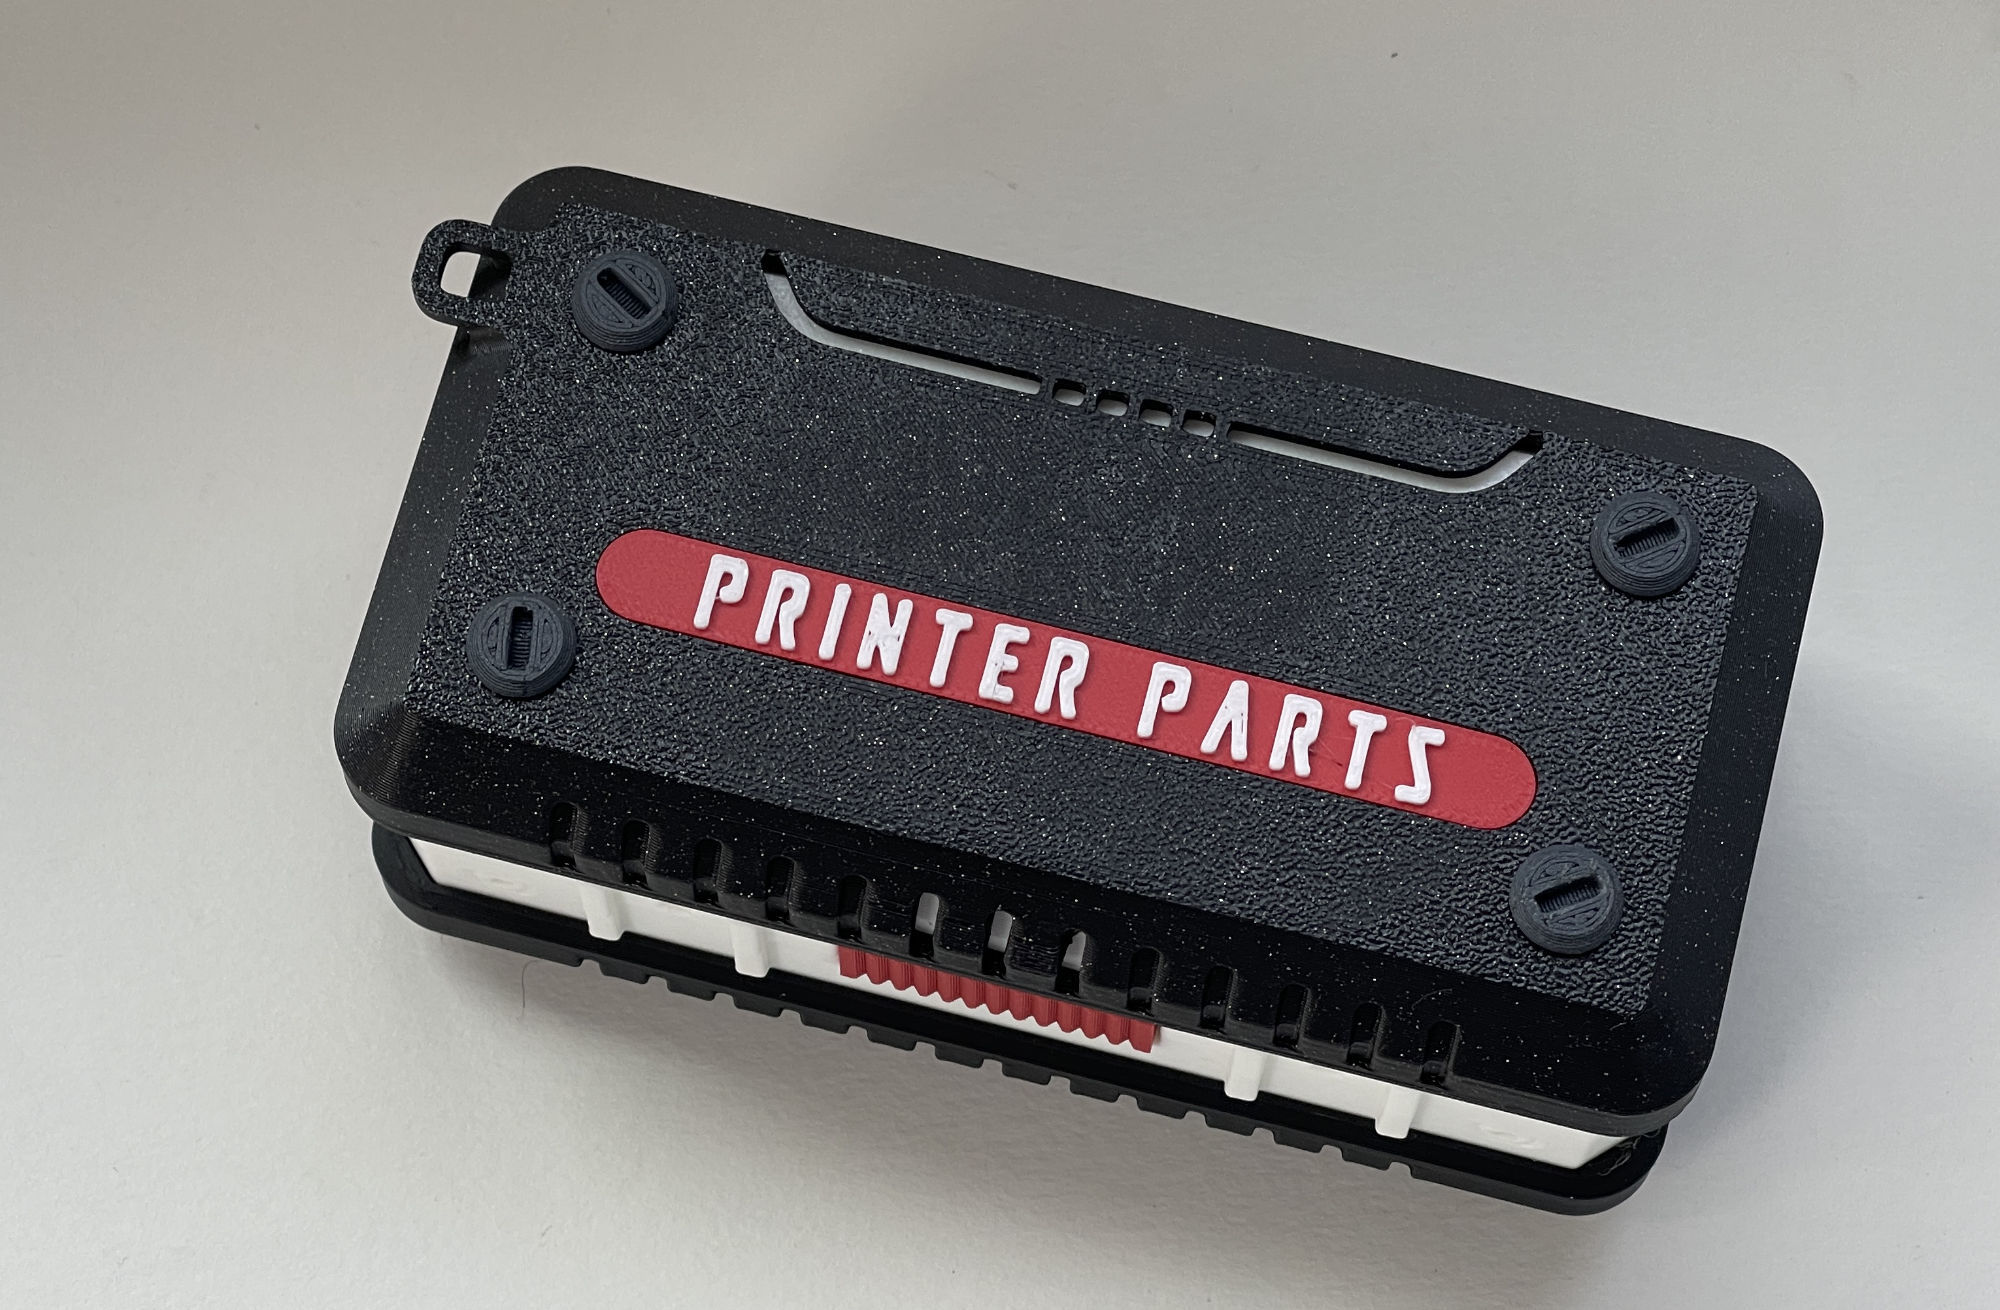
Initially i didn't planned to make this case size customizable, so I had to redo from scratch all the case in order to provide this kind of customization. Therefore, the size customizable case is a bit different in design, with some improved small things, basically it's a different model that looks similar.
You can customize: length, width, height and label height. (and of course you can add whatever text you want on the label in Bambu studio)
THE DIMENSIONS REFER TO THE INTERIOR OF THE GENERATED BOX.
Because this is a rather complex model, with many dependencies, PLEASE CHECK CAREFULLY THE GENERATED PARTS before printing, to be sure there is nothing strange in any parts generated. If you see something wrong, try to reopen the customizing window and set again your final values.
After you download the customized model, you will have to arrange the parts on plates depending on your preferences.
There are two different screws available: normal one and one that can be used for the bottom of the case, to make it stackable.
Either screws you want to use, just be sure to clone it. ( the whole case uses 8 screws in total: 4 top and 4 bottom )
If you print the “stackable” screws for the bottom, you will have to activate supports for them.
Otherwise, no part needs support, so PLEASE DON"T USE SUPPORTS for any of the case parts beside the special bottom screws for stackable cases.
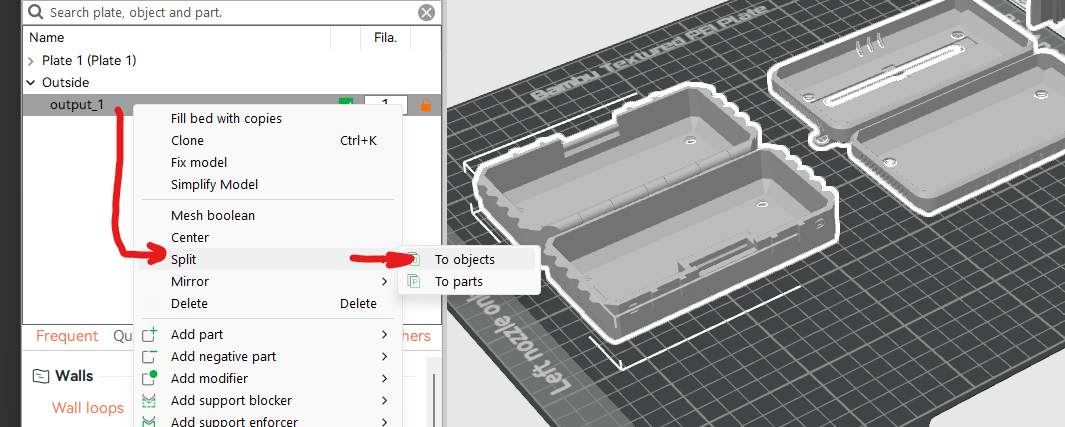
The generated customizable case will generate one object containing all the parts.
* first right click on the object and select Split→To Objects.
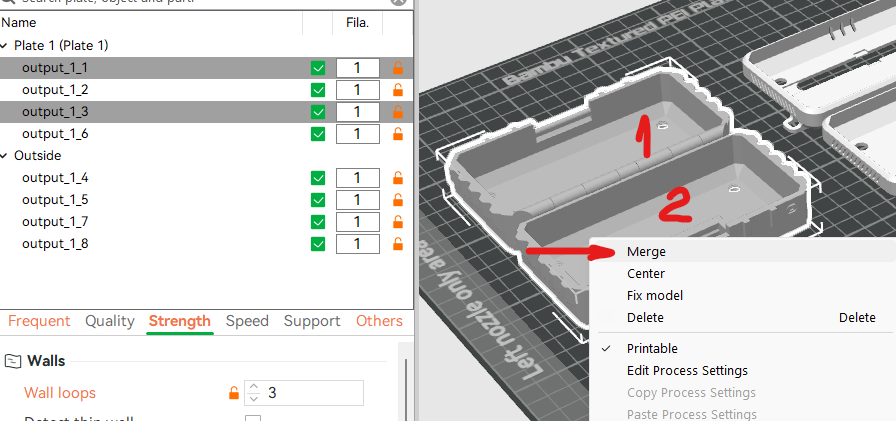
* don't move any part, as the top and bottom case parts should be printed together and any movement will result in wrongly printed hinge
* select the two parts that are connected with the hinge and right click → Merge.
* now you can move the parts and arrange them on plates as you wish.
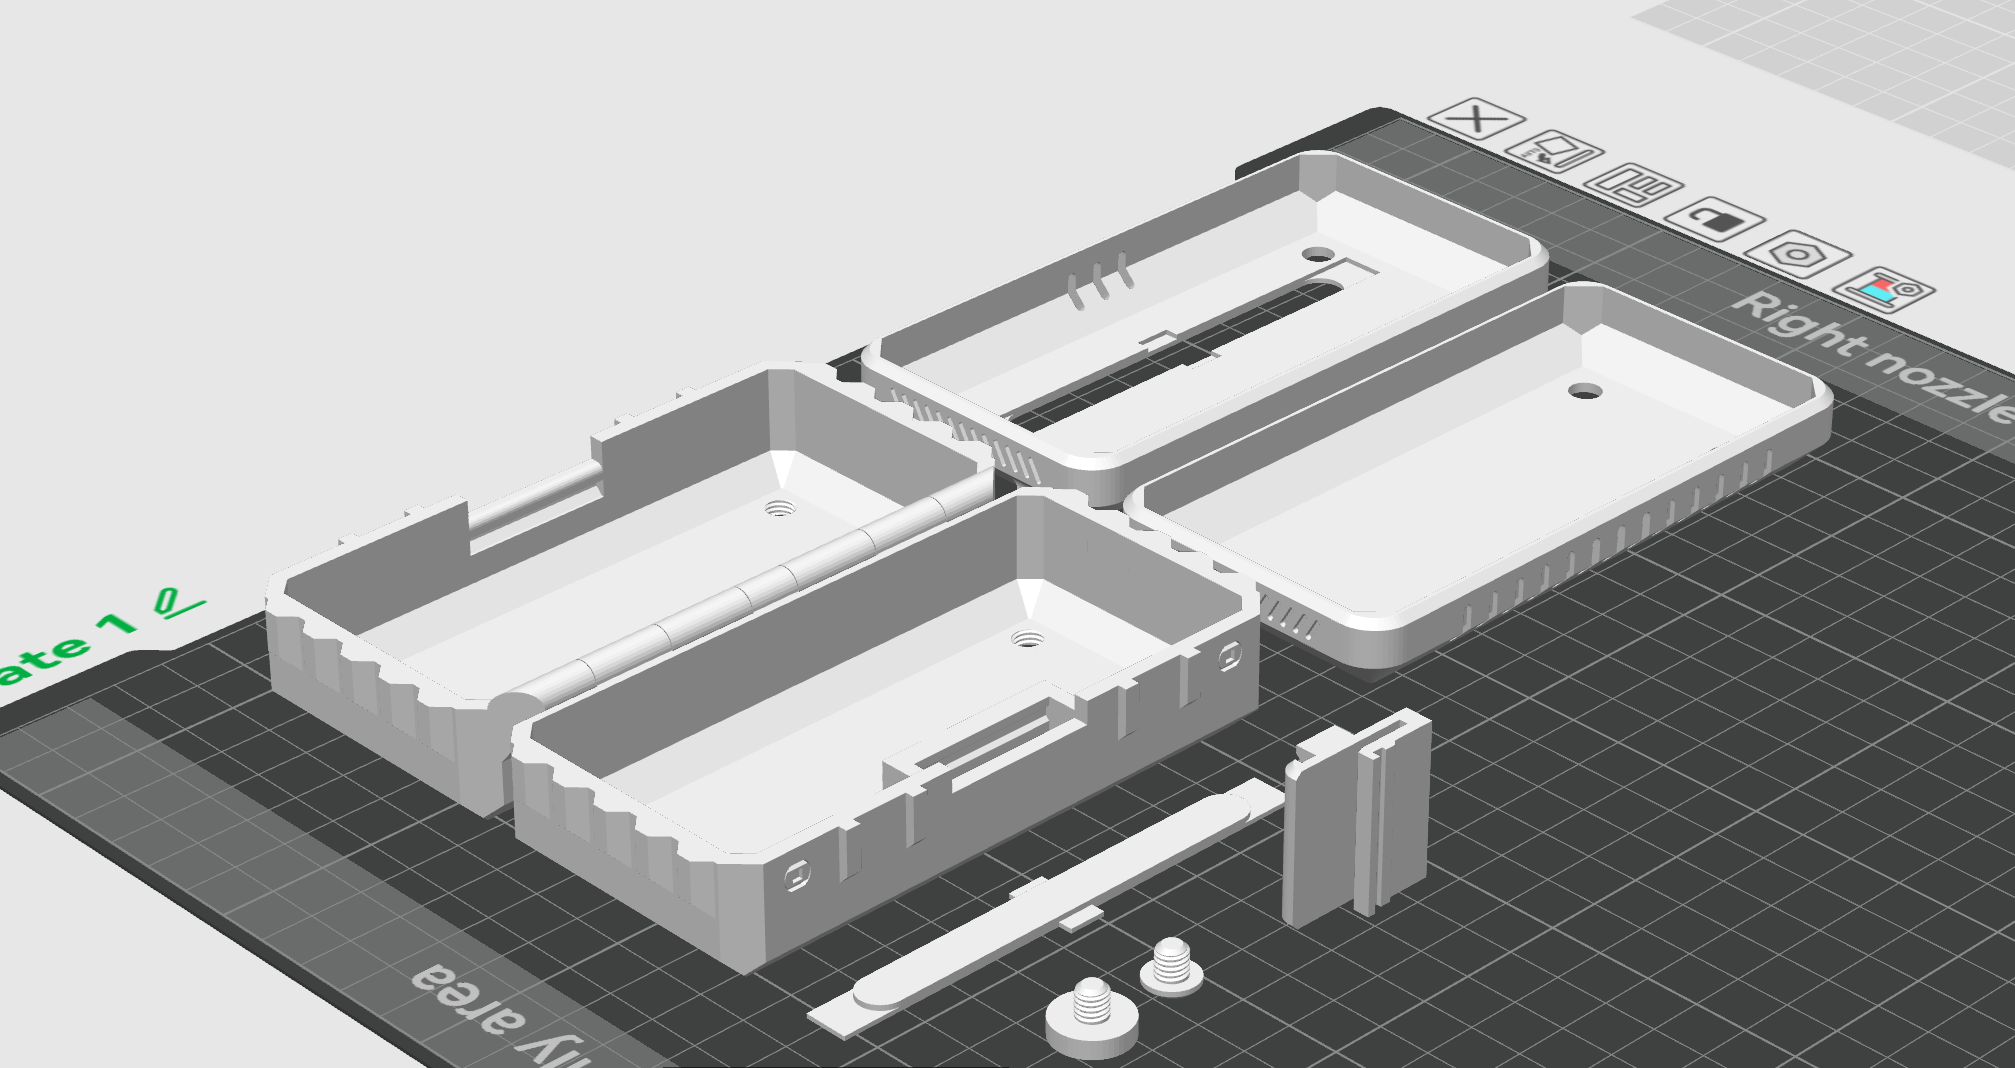
This is the correct orientation for all the parts:

Gostou deste modelo? Crie uma conta grátis para salvar seus favoritos e voltar a eles depois.
Criar conta