Você está no 3DFinder
Buscamos em Thingiverse, MakerWorld e Printables ao mesmo tempo para te dar o melhor de cada uma.
Descrição
The TEMPUS Arch Clock Kit Version 2 is here!
This kit has been designed to make more than 200 variations, so you can customize your TEMPUS Arch Clock to your taste.
Choose from:
- 4 Body Styles - Classic, Medallion, Panel, and Drawer! Each body style is its own Print Profile.
- 2 Base Styles - with or without feet. Both look great - the choice is up to you!
- 6 Distinct Clock Faces & Hand Sets in Classic, Art Nouveau, and Modern styles. Make the one that best fits the decor in your bedroom, office, living room, kitchen, etc.
- NEW! Enjoy even more options with the TEMPUS Clock Parts Bonus Kit. Choose from even more faces and hand sets to make your clock truly yours.
- YES! The new hands, faces, and base parts included in the TEMPUS Cathedral Clock Kit are compatible with TEMPUS Arch.
All clock models are approximately 257mm high x 195mm wide x 90mm deep when assembled. The large 150mm clock face makes it easy to tell the time from across a long distance.
The TEMPUS Arch Clock Kit is compatible with the Bambu Lab Kit MH011 and similar quartz clock mechanisms from third parties. The included components support a range of shaft lengths and widths, which can vary with mechanisms from different manufacturers.
The Clock Face is attached with two screws and the hands are friction-fit. That means that you can change the look of your TEMPUS Arch at any time by replacing the face and hands with a different set from the kit!
Each print profile contains 20 or 21 plates. You will print 8-9 plates in total since most of these plates are for optional parts (e.g. different clock faces and hand sets).
Owners of Bambu P- and X-Series printers can print this model by unlocking the full print volume with the modification descibed here: [https://wiki.bambulab.com/en/knowledge-sharing/print-volume-limitations](https://wiki.bambulab.com/en/knowledge-sharing/print-volume-limitations)
| TEMPUS Arch Clock Kit Assembly Guide | |
|---|---|
| Hardware |
|
| Tools |
|
| New Options! Enjoy even more options with the TEMPUS Clock Parts Bonus Kit. | 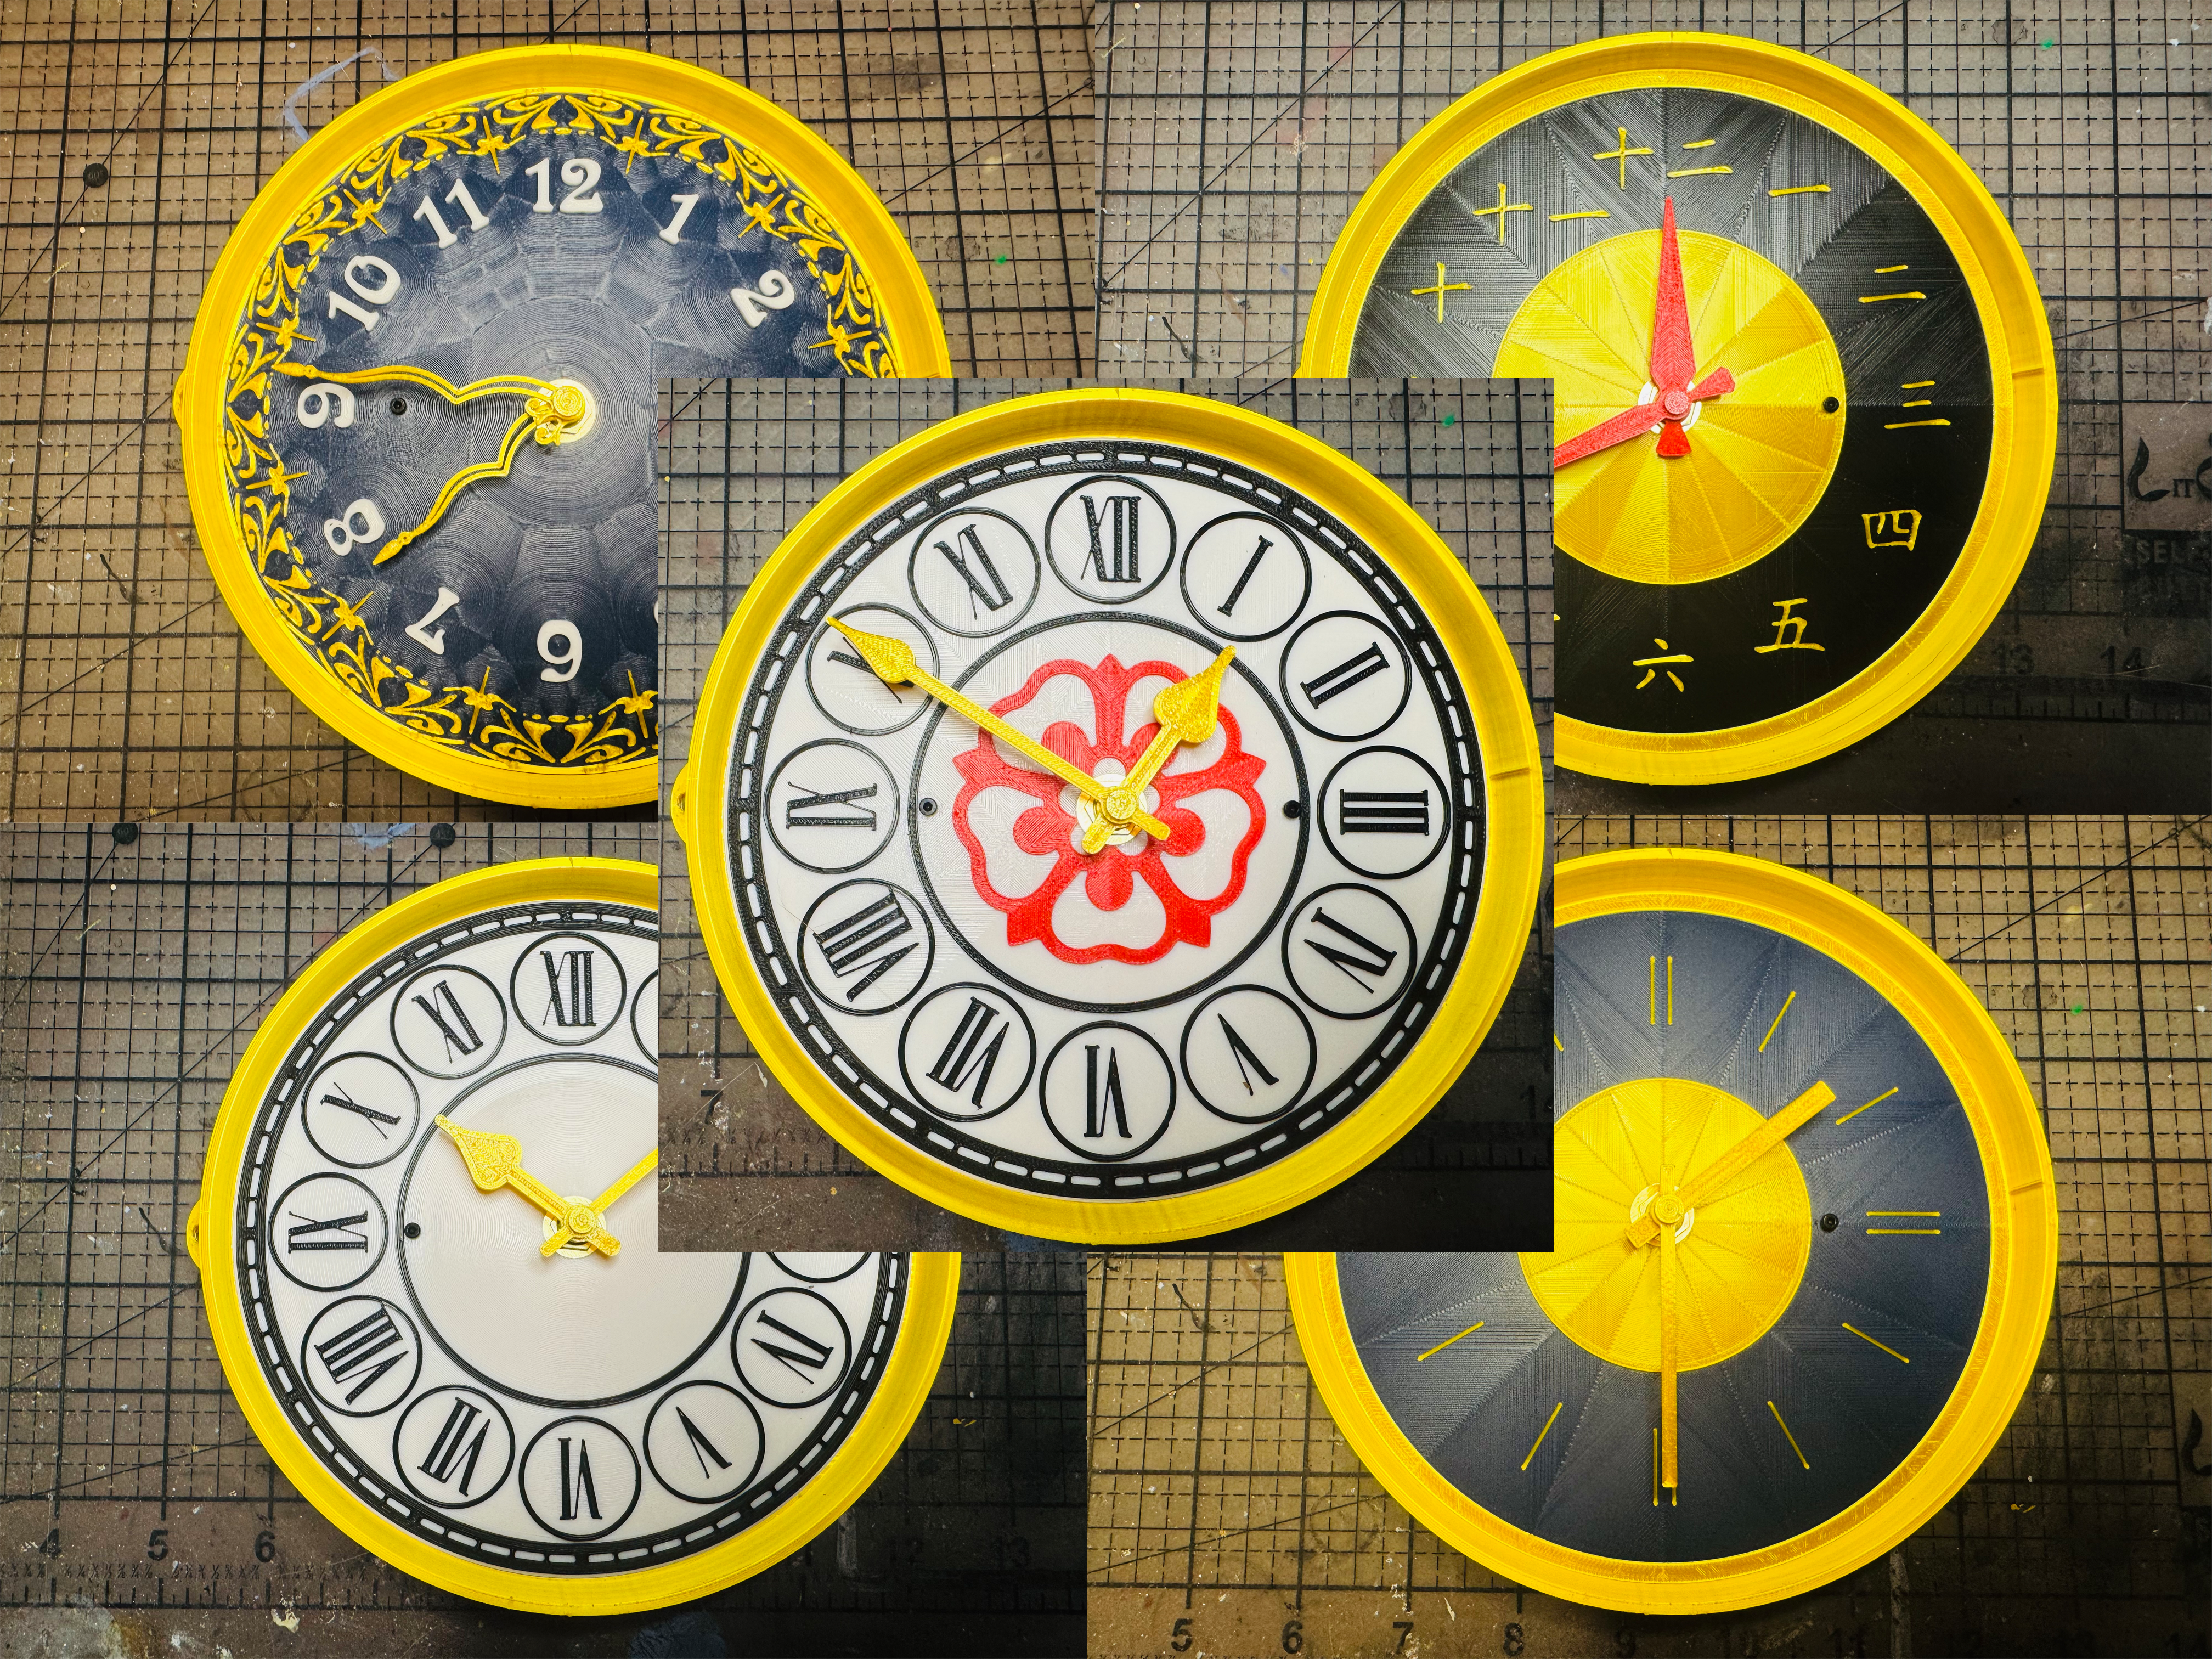 |
| Begin by removing the supports from the depressed area around the clock face aperture. | 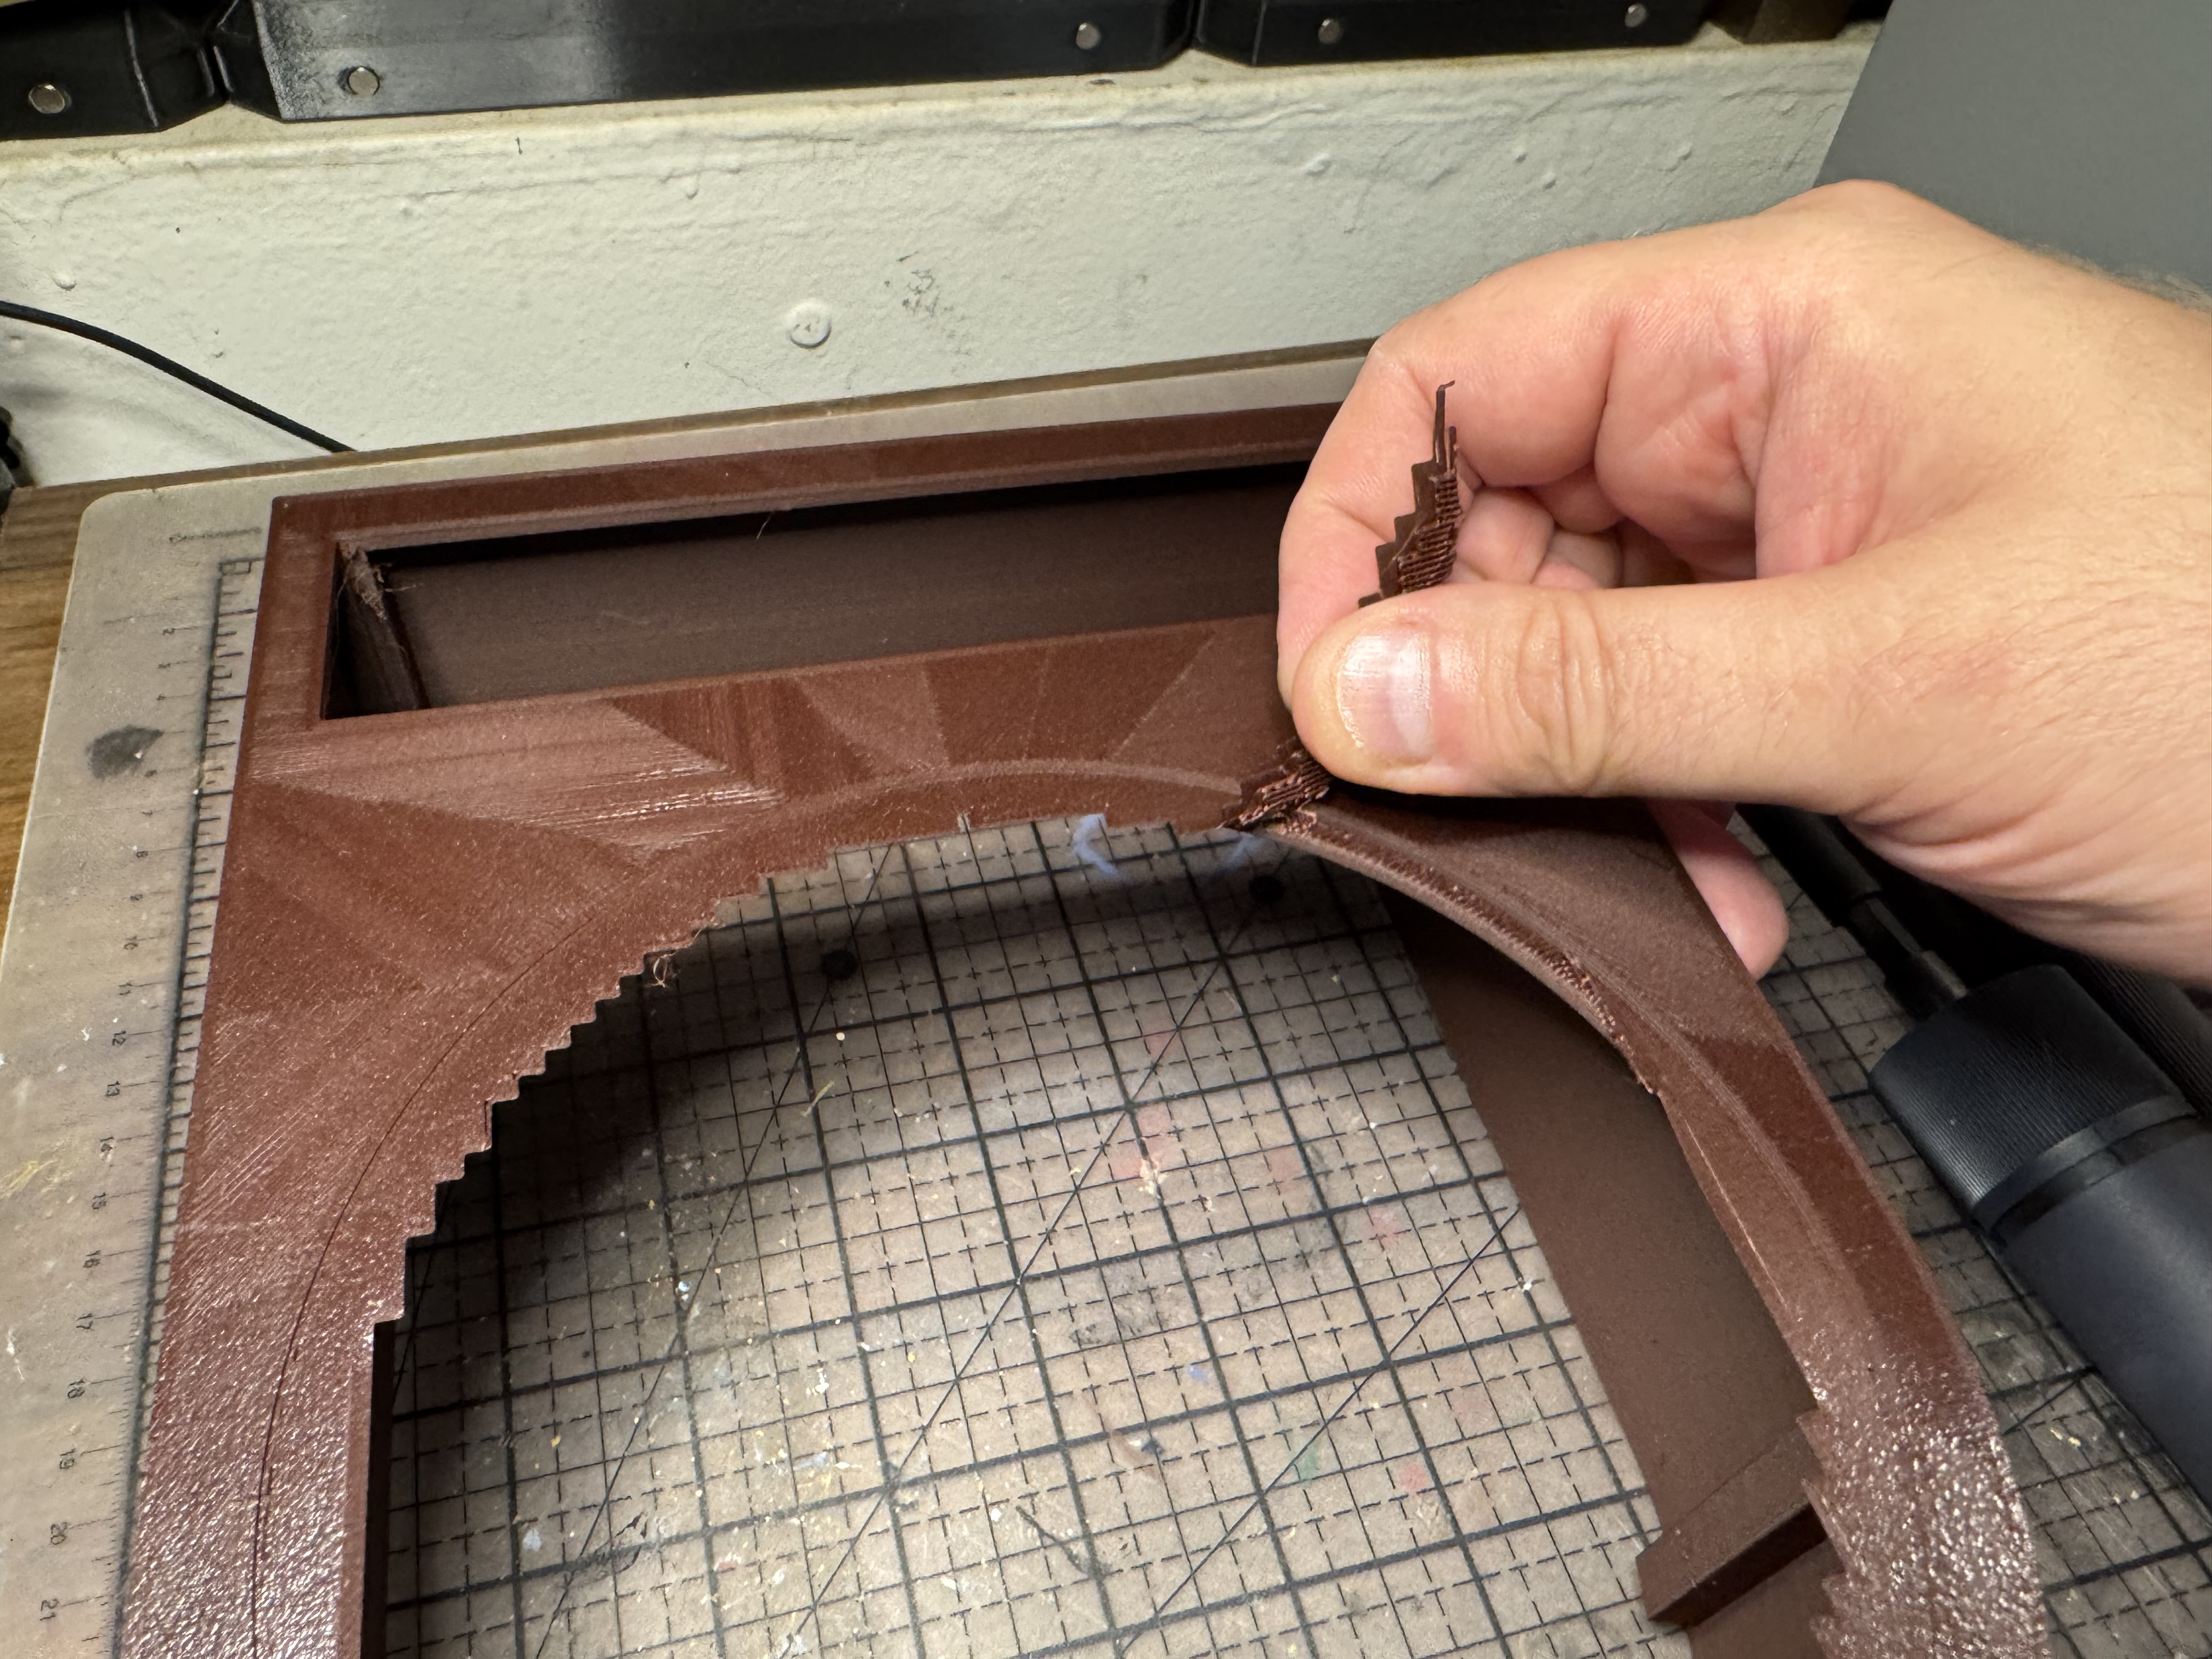 |
| Use a small amount of cement or CA glue to affix the Lens Ring to the Body. Set aside and allow to dry. | 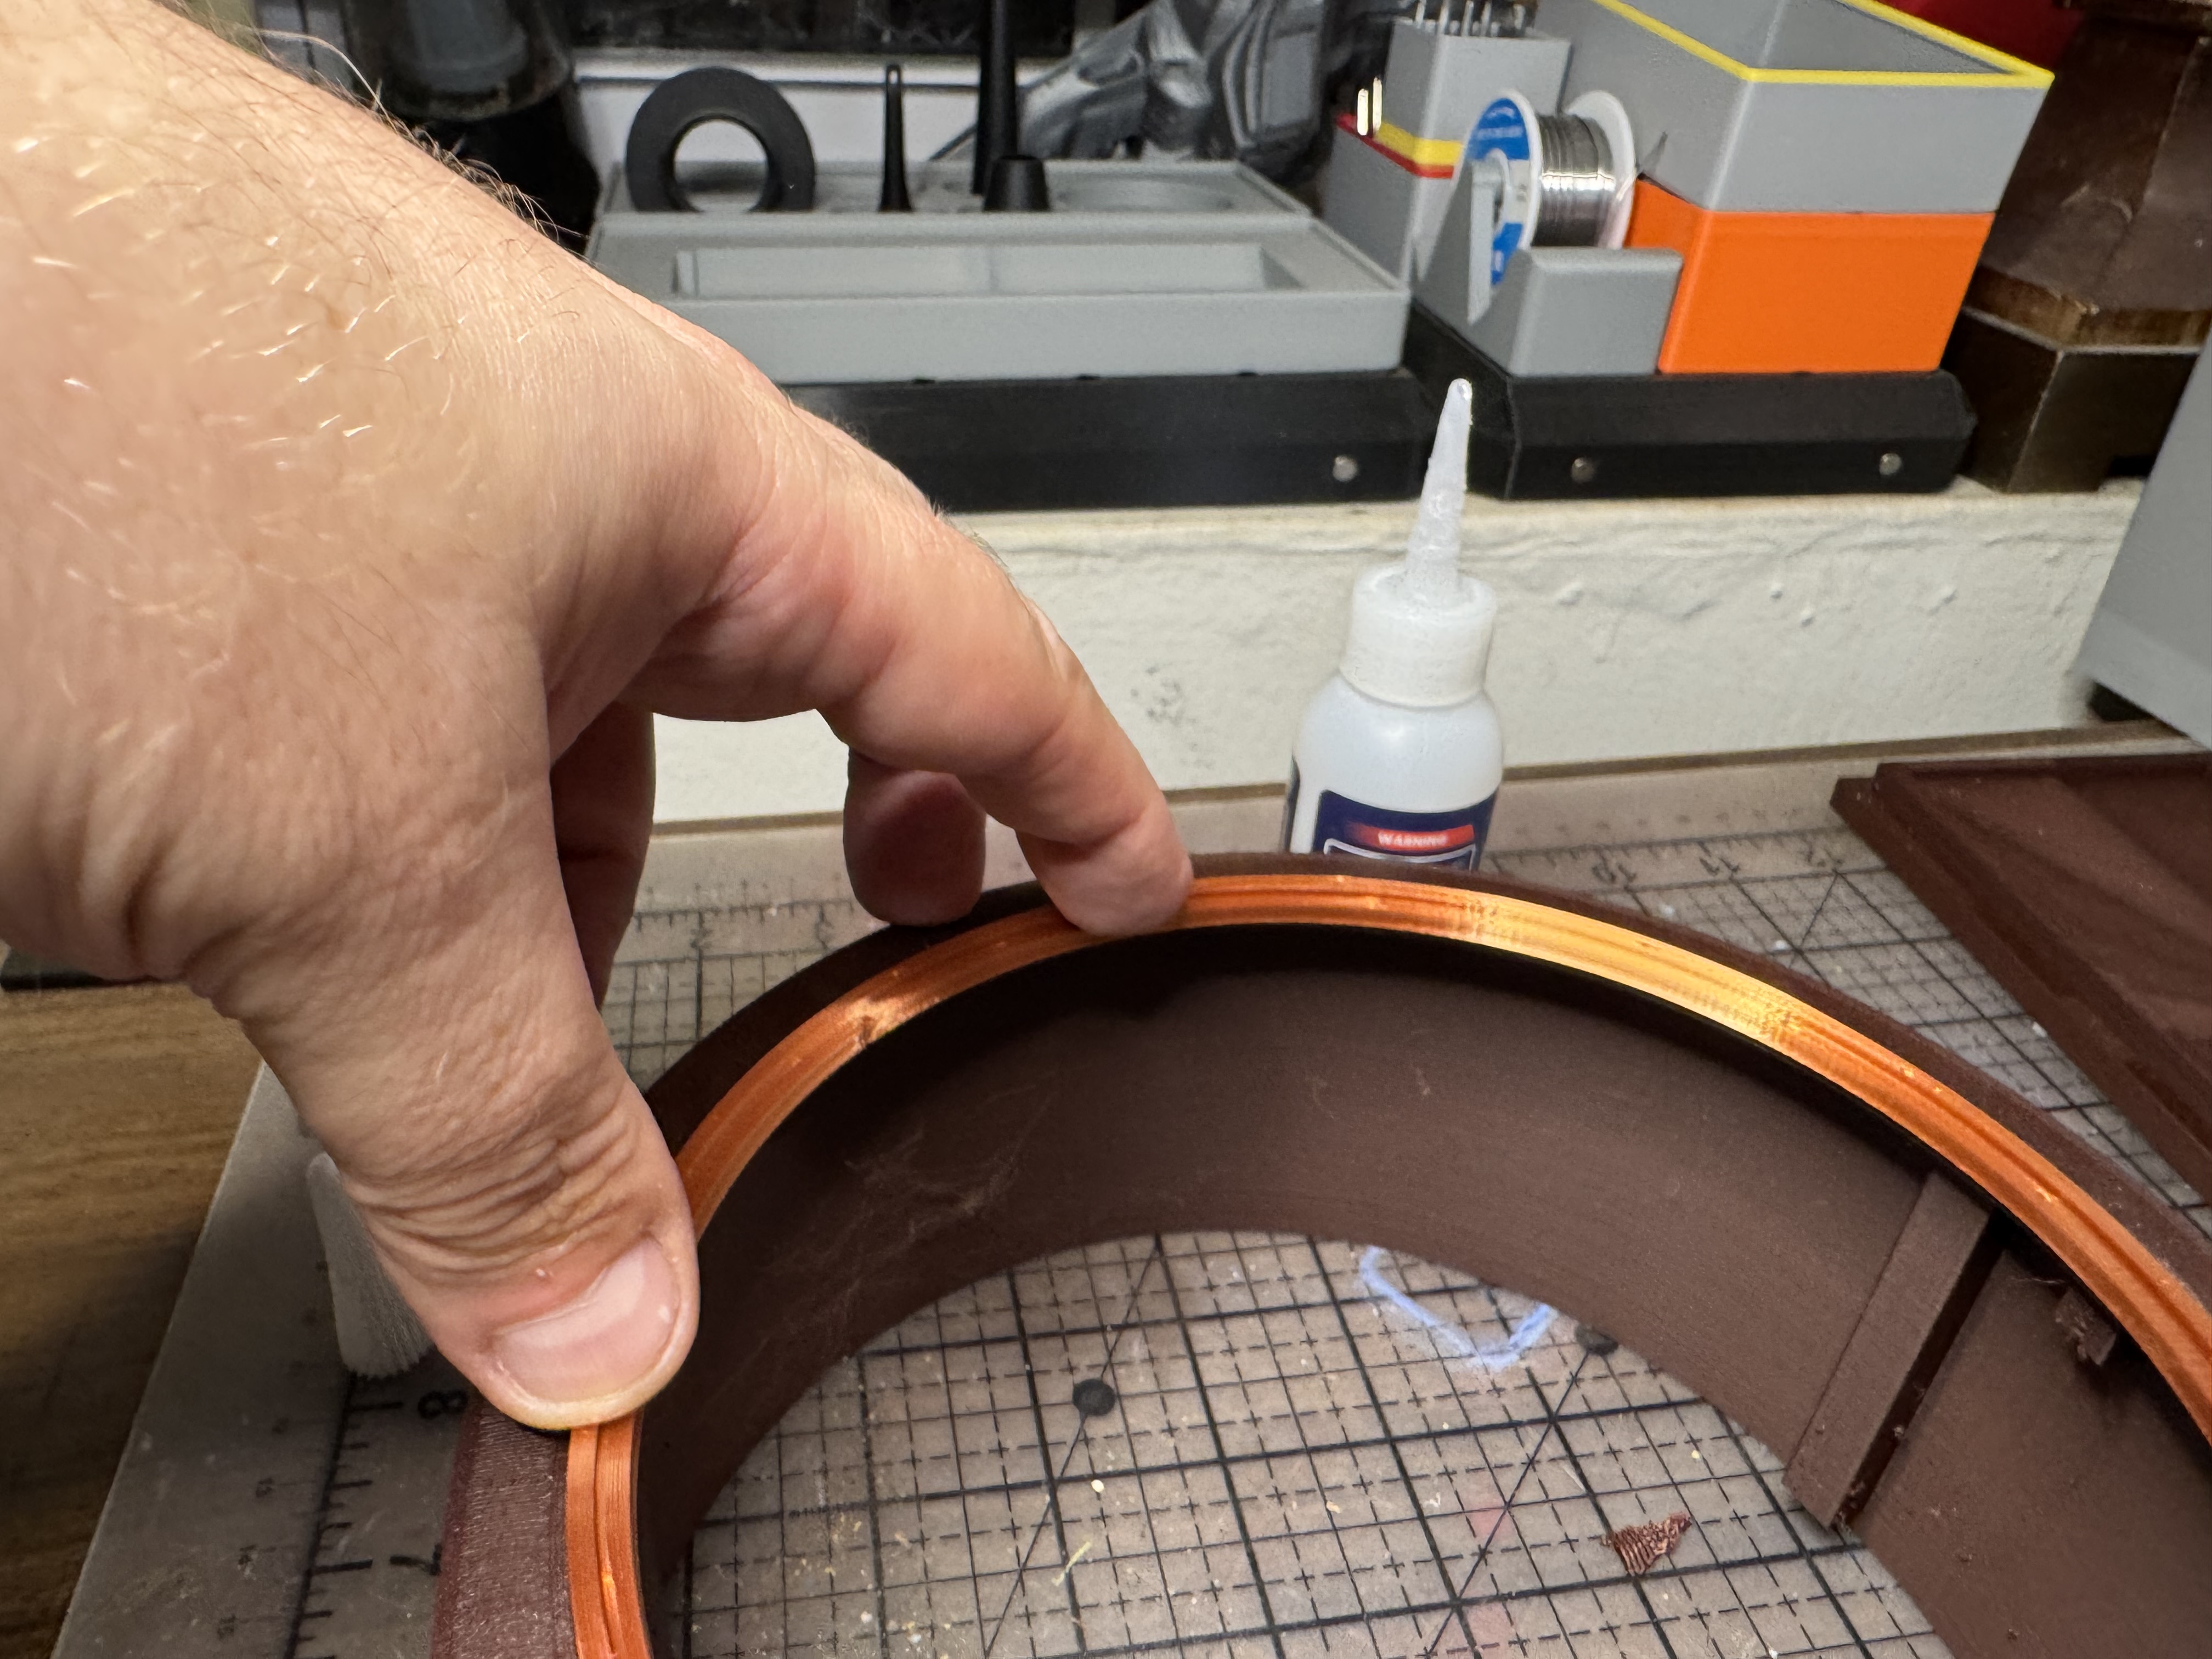 |
| Insert the clock face of your choice into the Clock Face Frame. Align the two screw holes on the Clock Face with those in the Frame. | 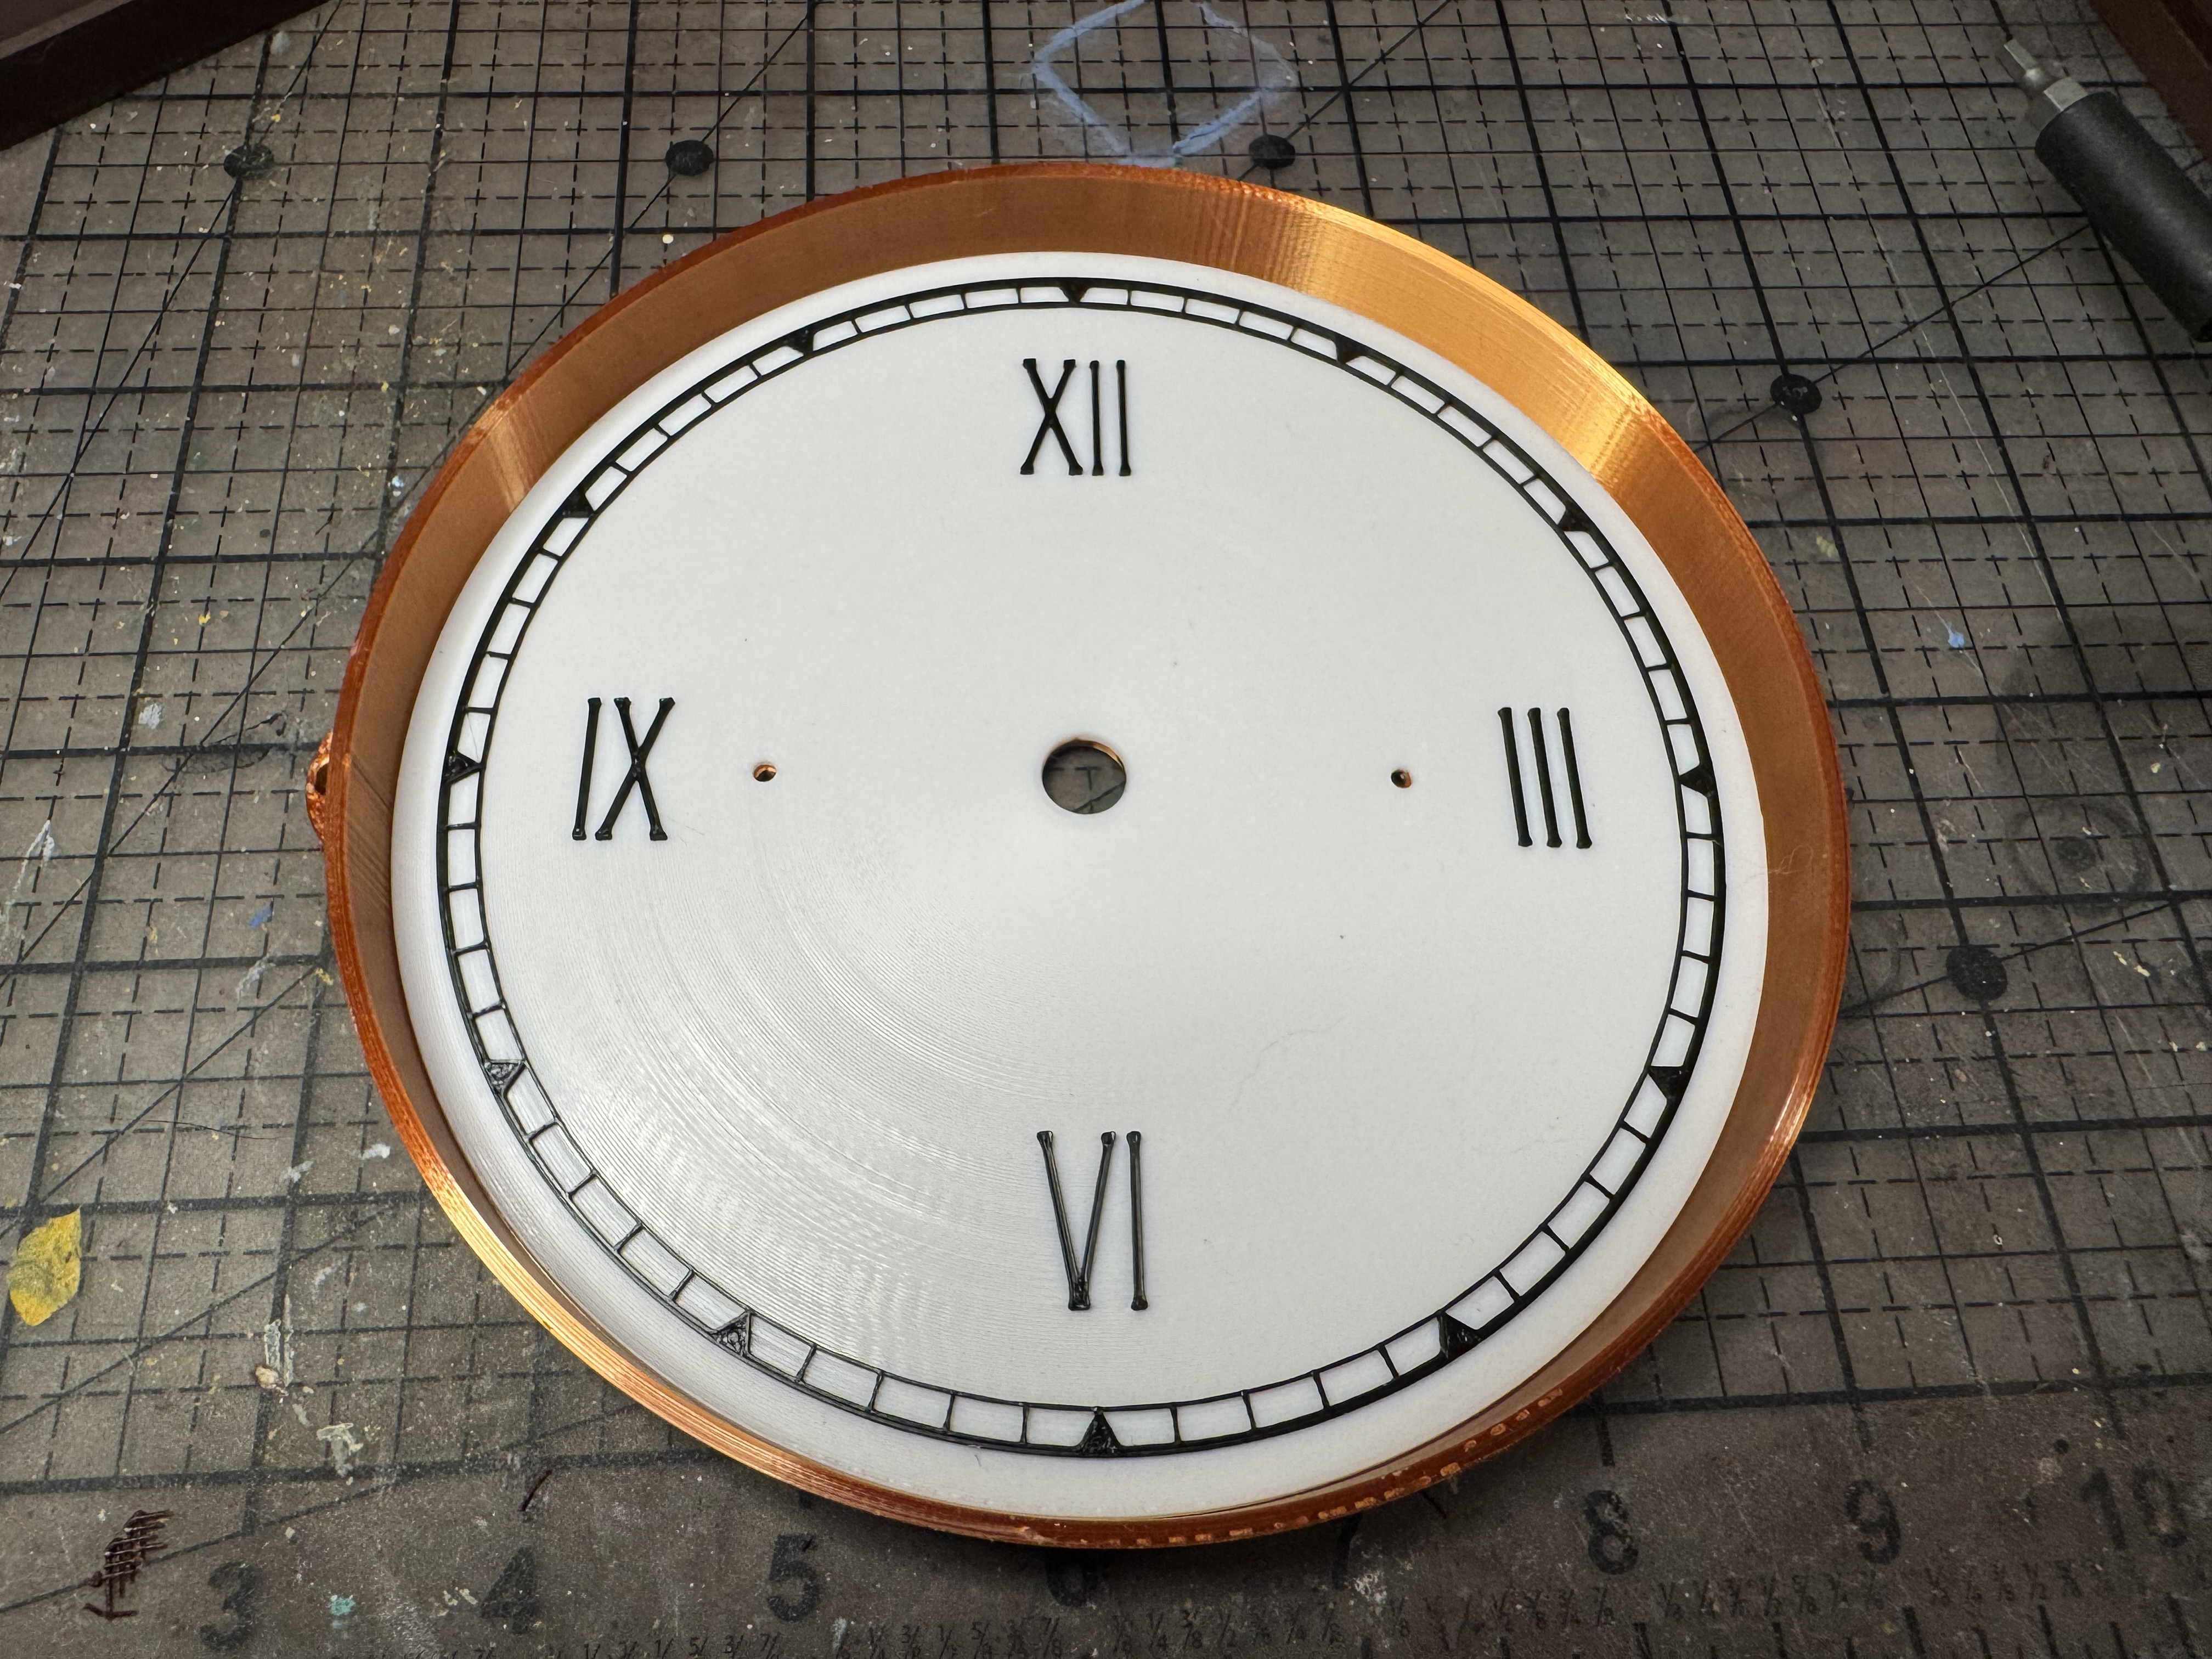 |
| Align the Mechanism Holder with the screwholes on the back of the Clock Face Frame. Insert two M2x12mm screws through the Clock Face Frame through the front. Secure with two M2 nuts. | 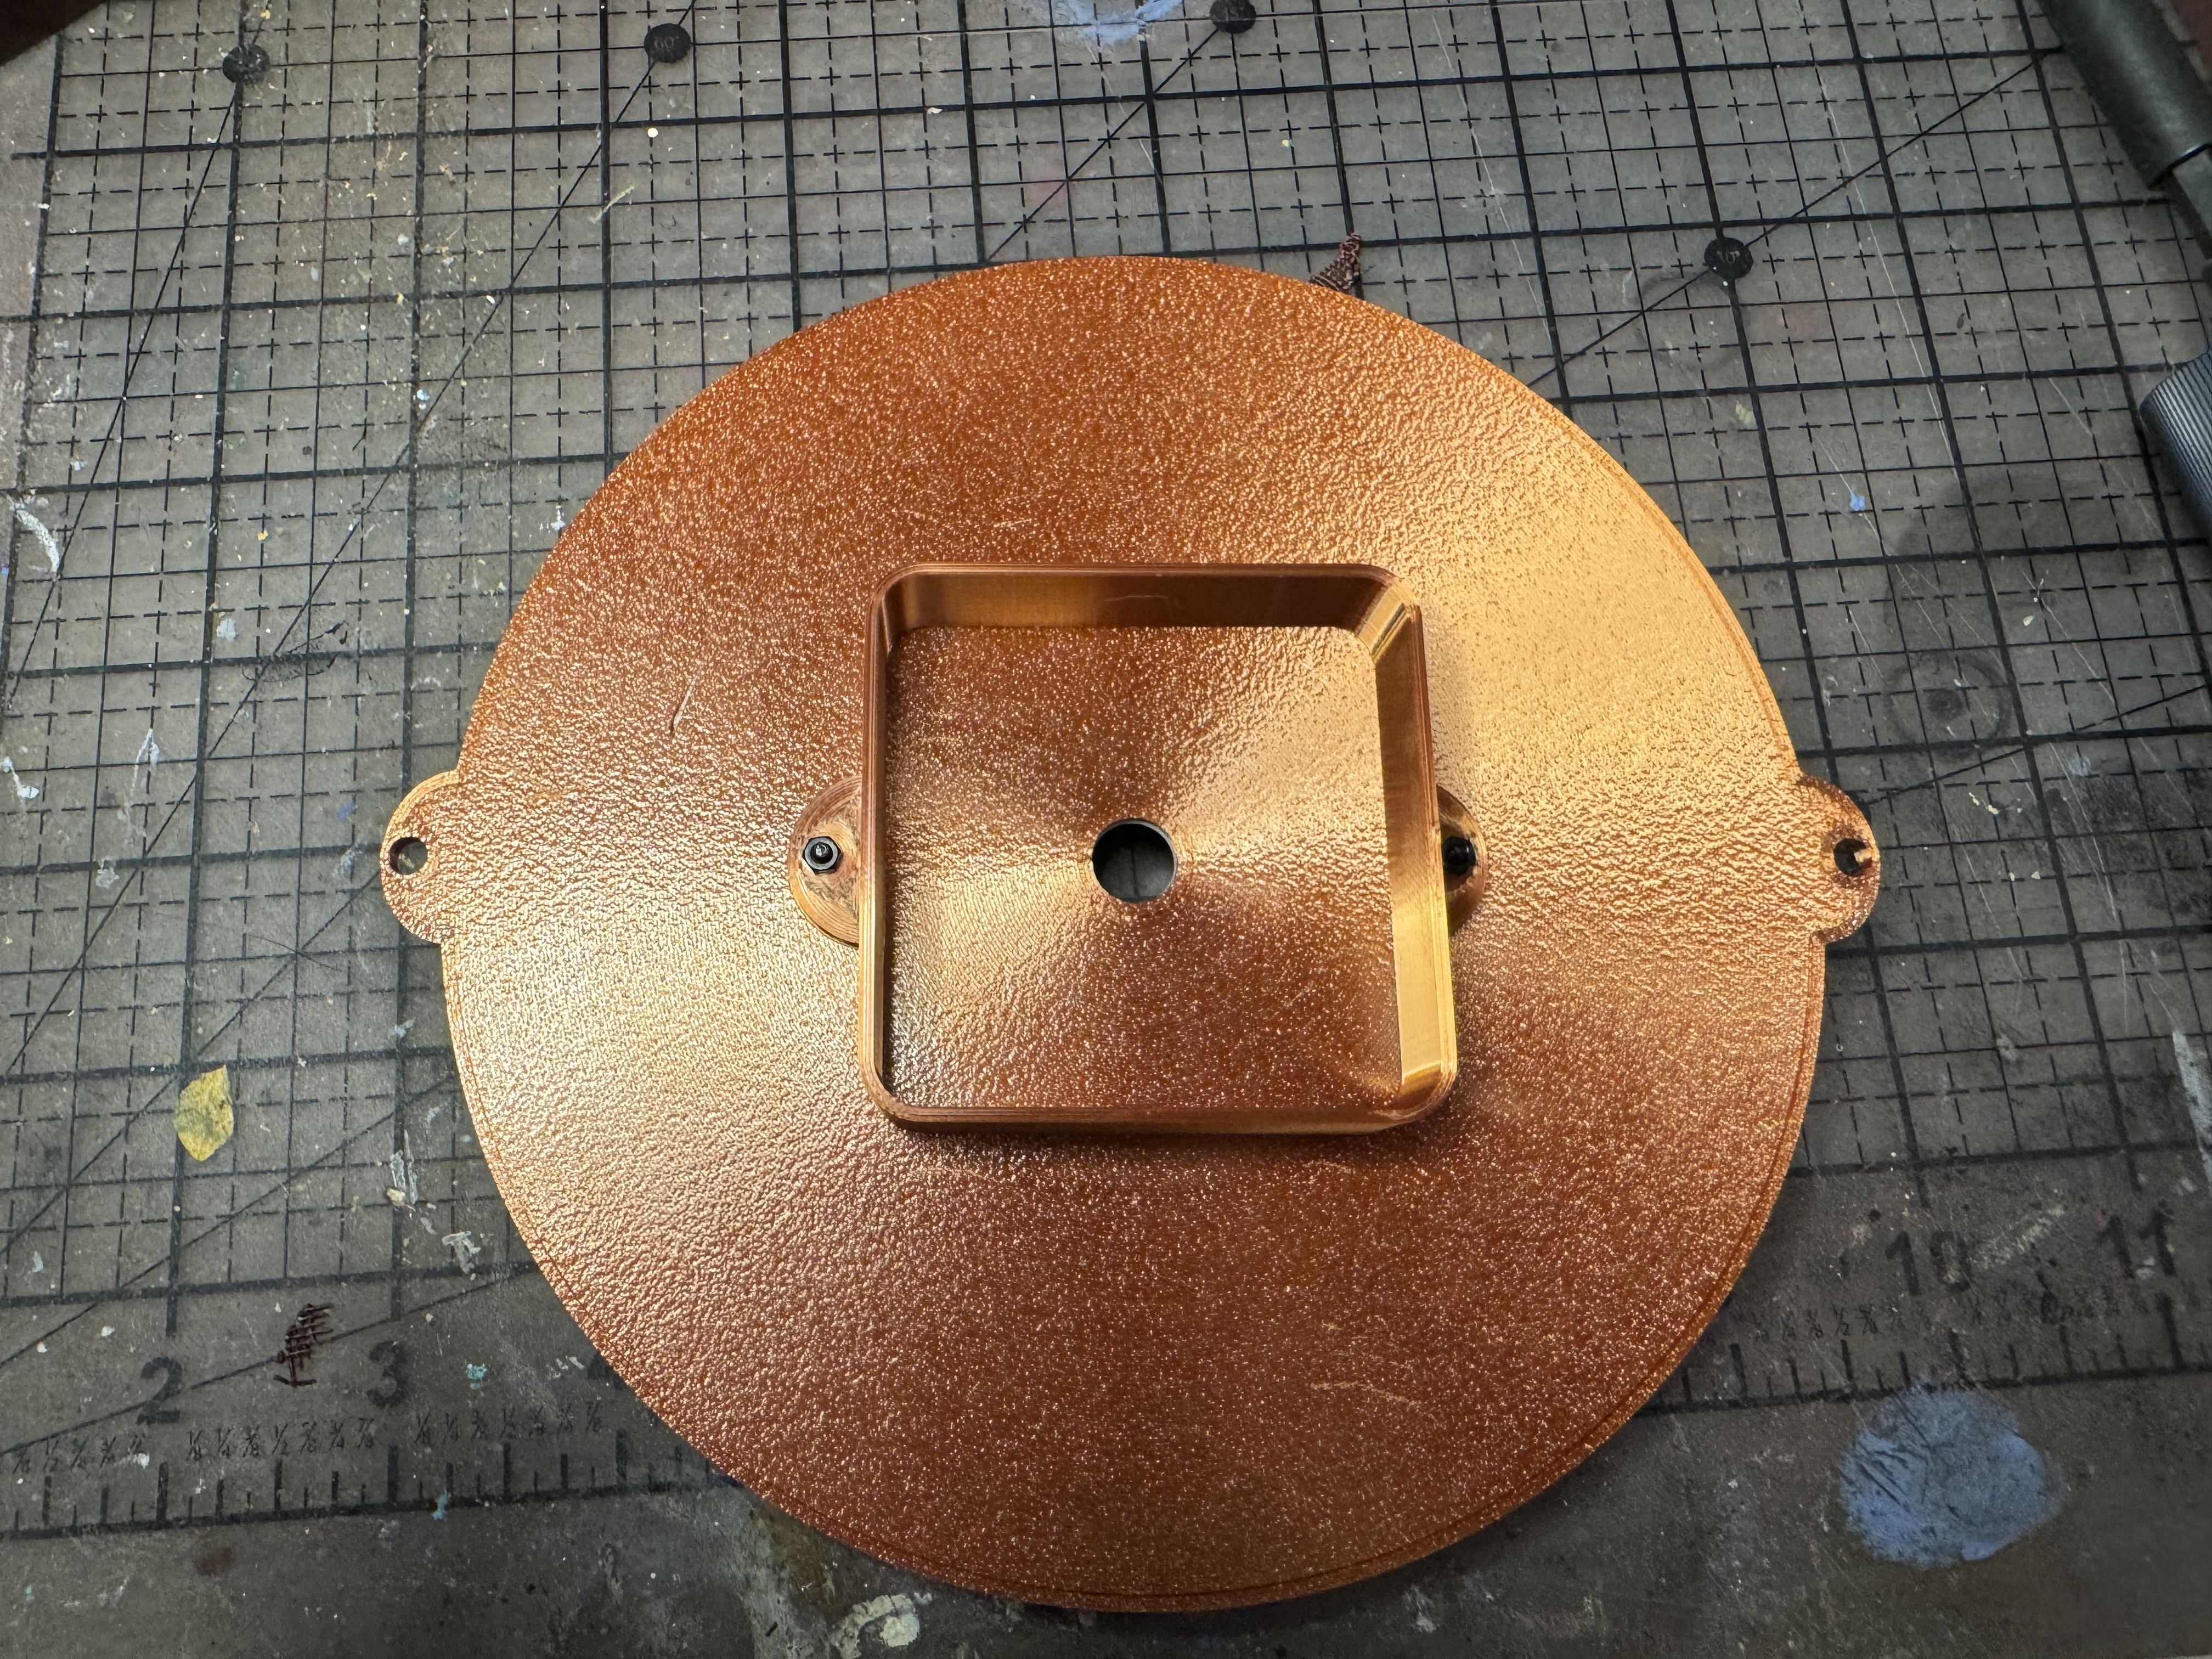 |
| Test fit the Quartz Clock Mechanism. If the mechanism of your choice has a longer shaft, it may touch the Lens or even prevent the Lens from being fitted. Place the Spacer component between the Mechanism and the Clock Face Frame if this is the case. (Note that you can use Bambu Studio to increase or decrease the thickness of the spacer, as necessary.) | 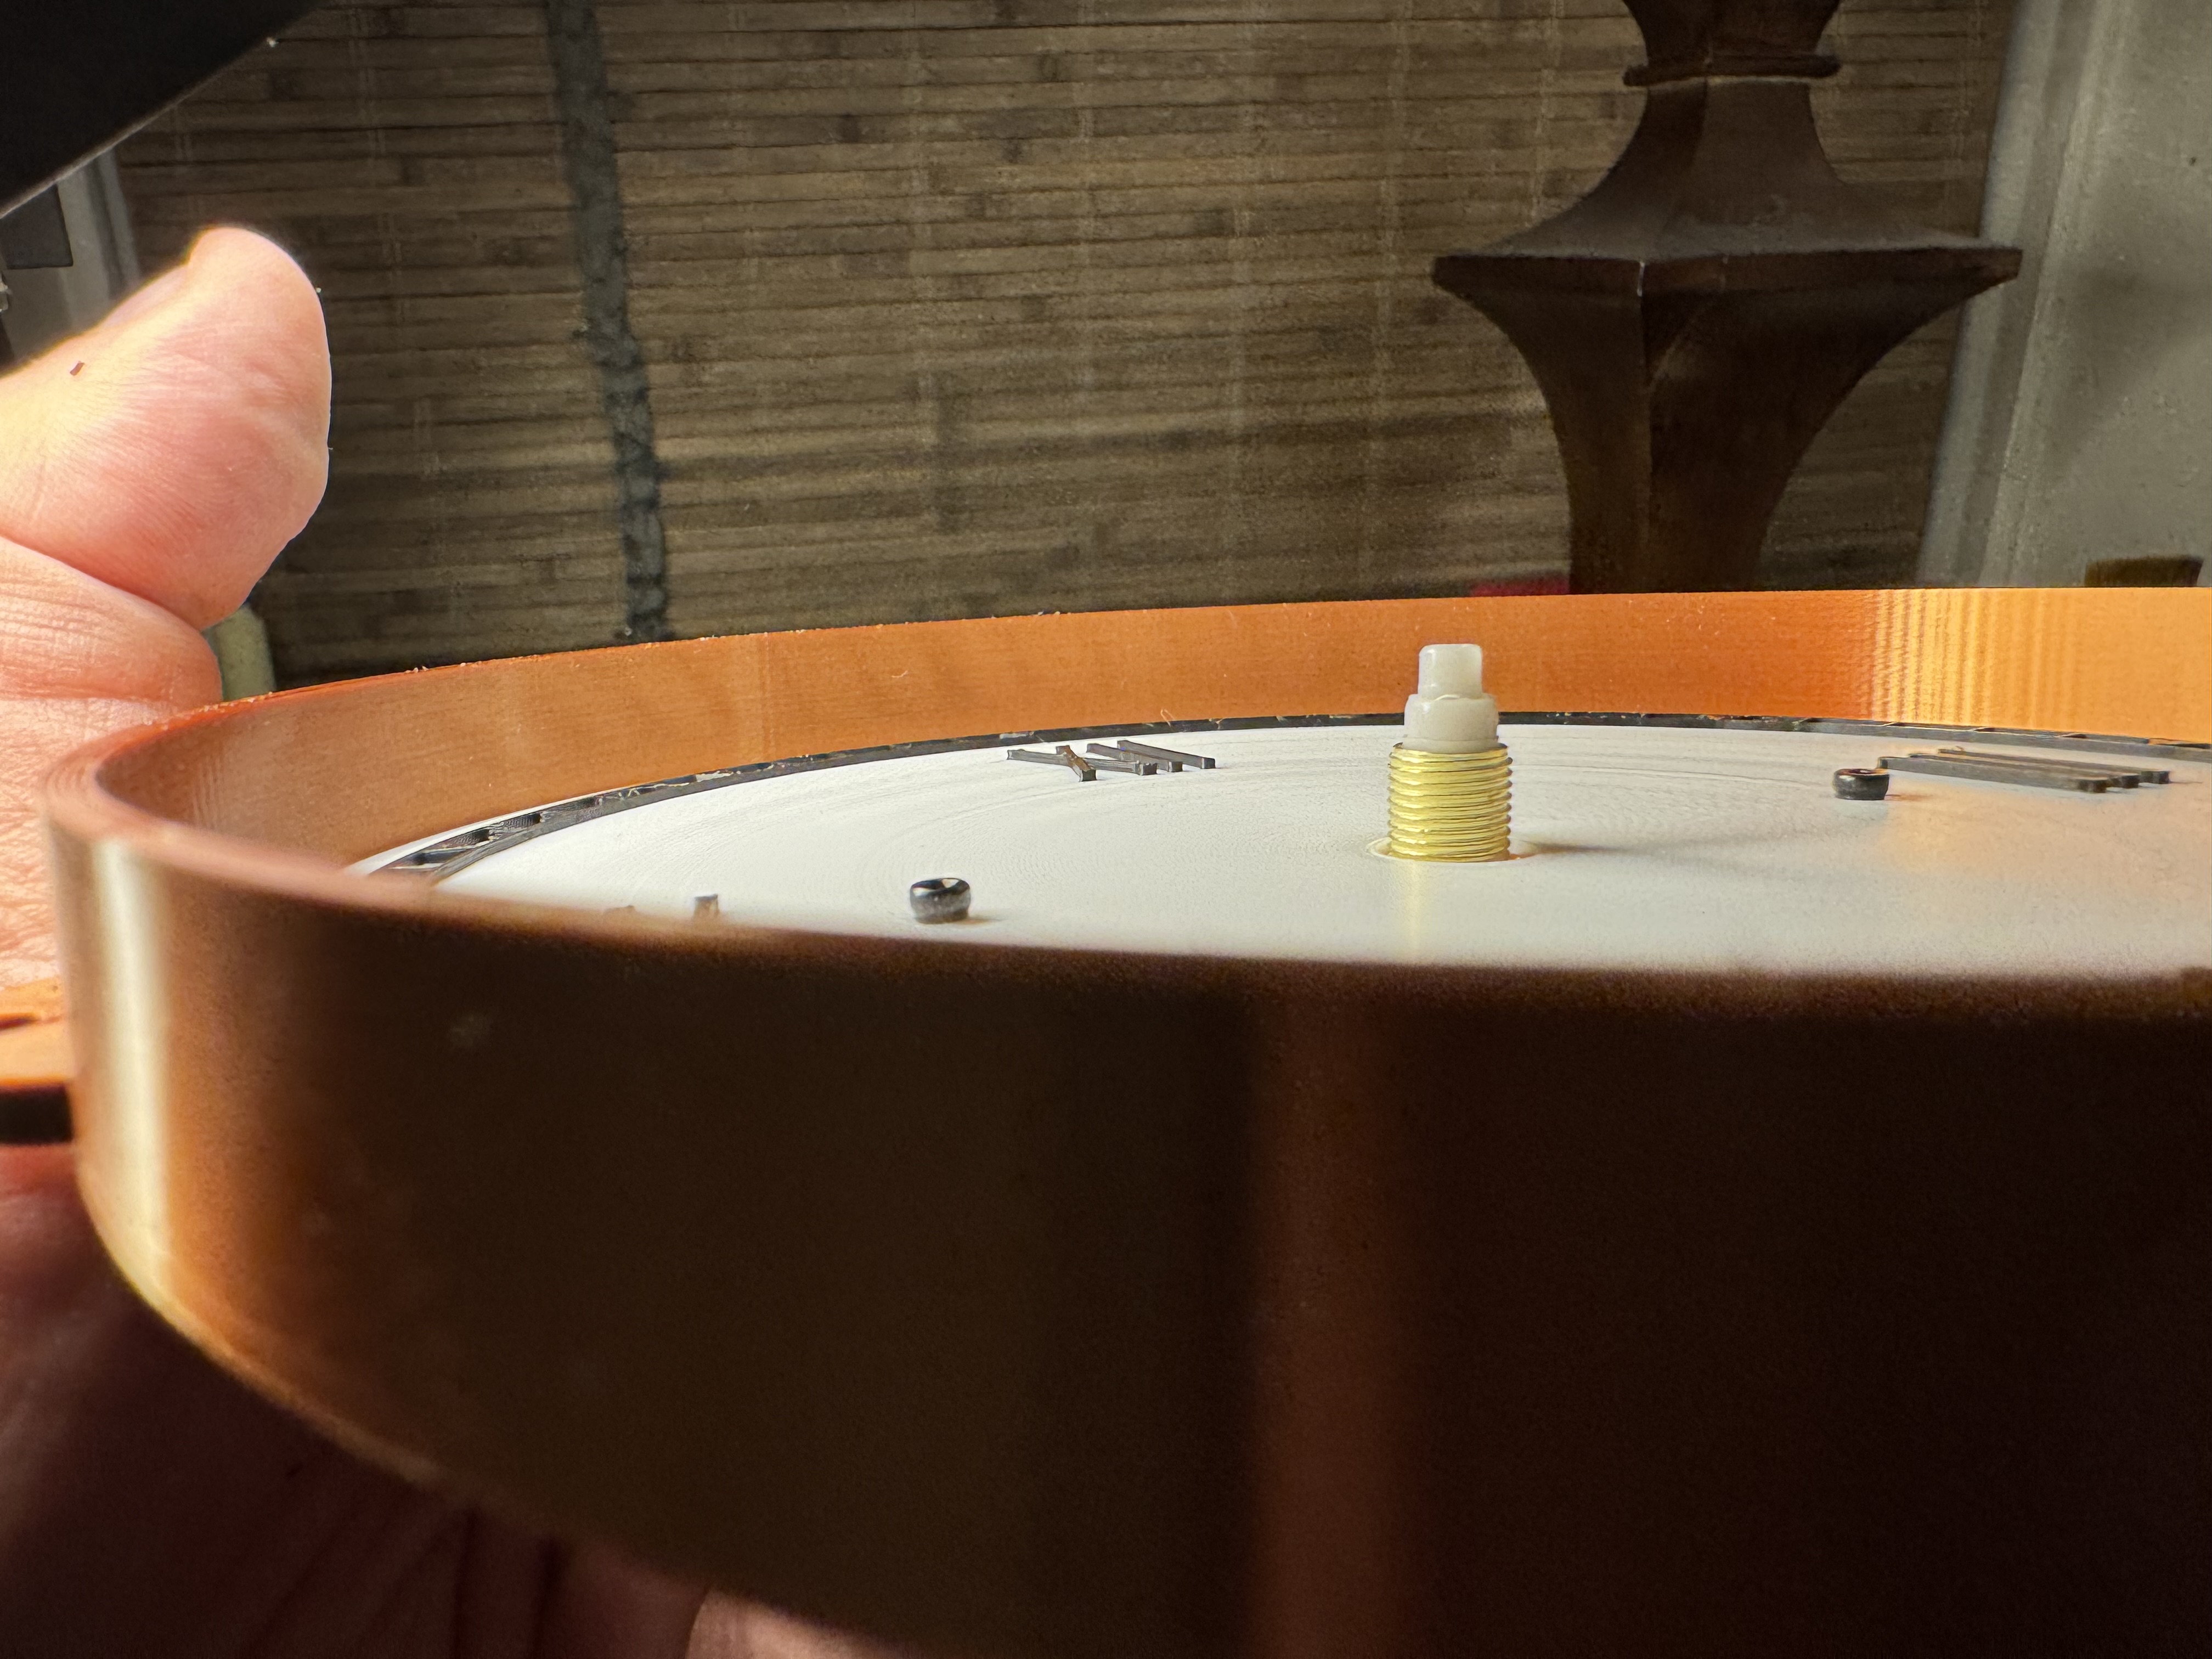 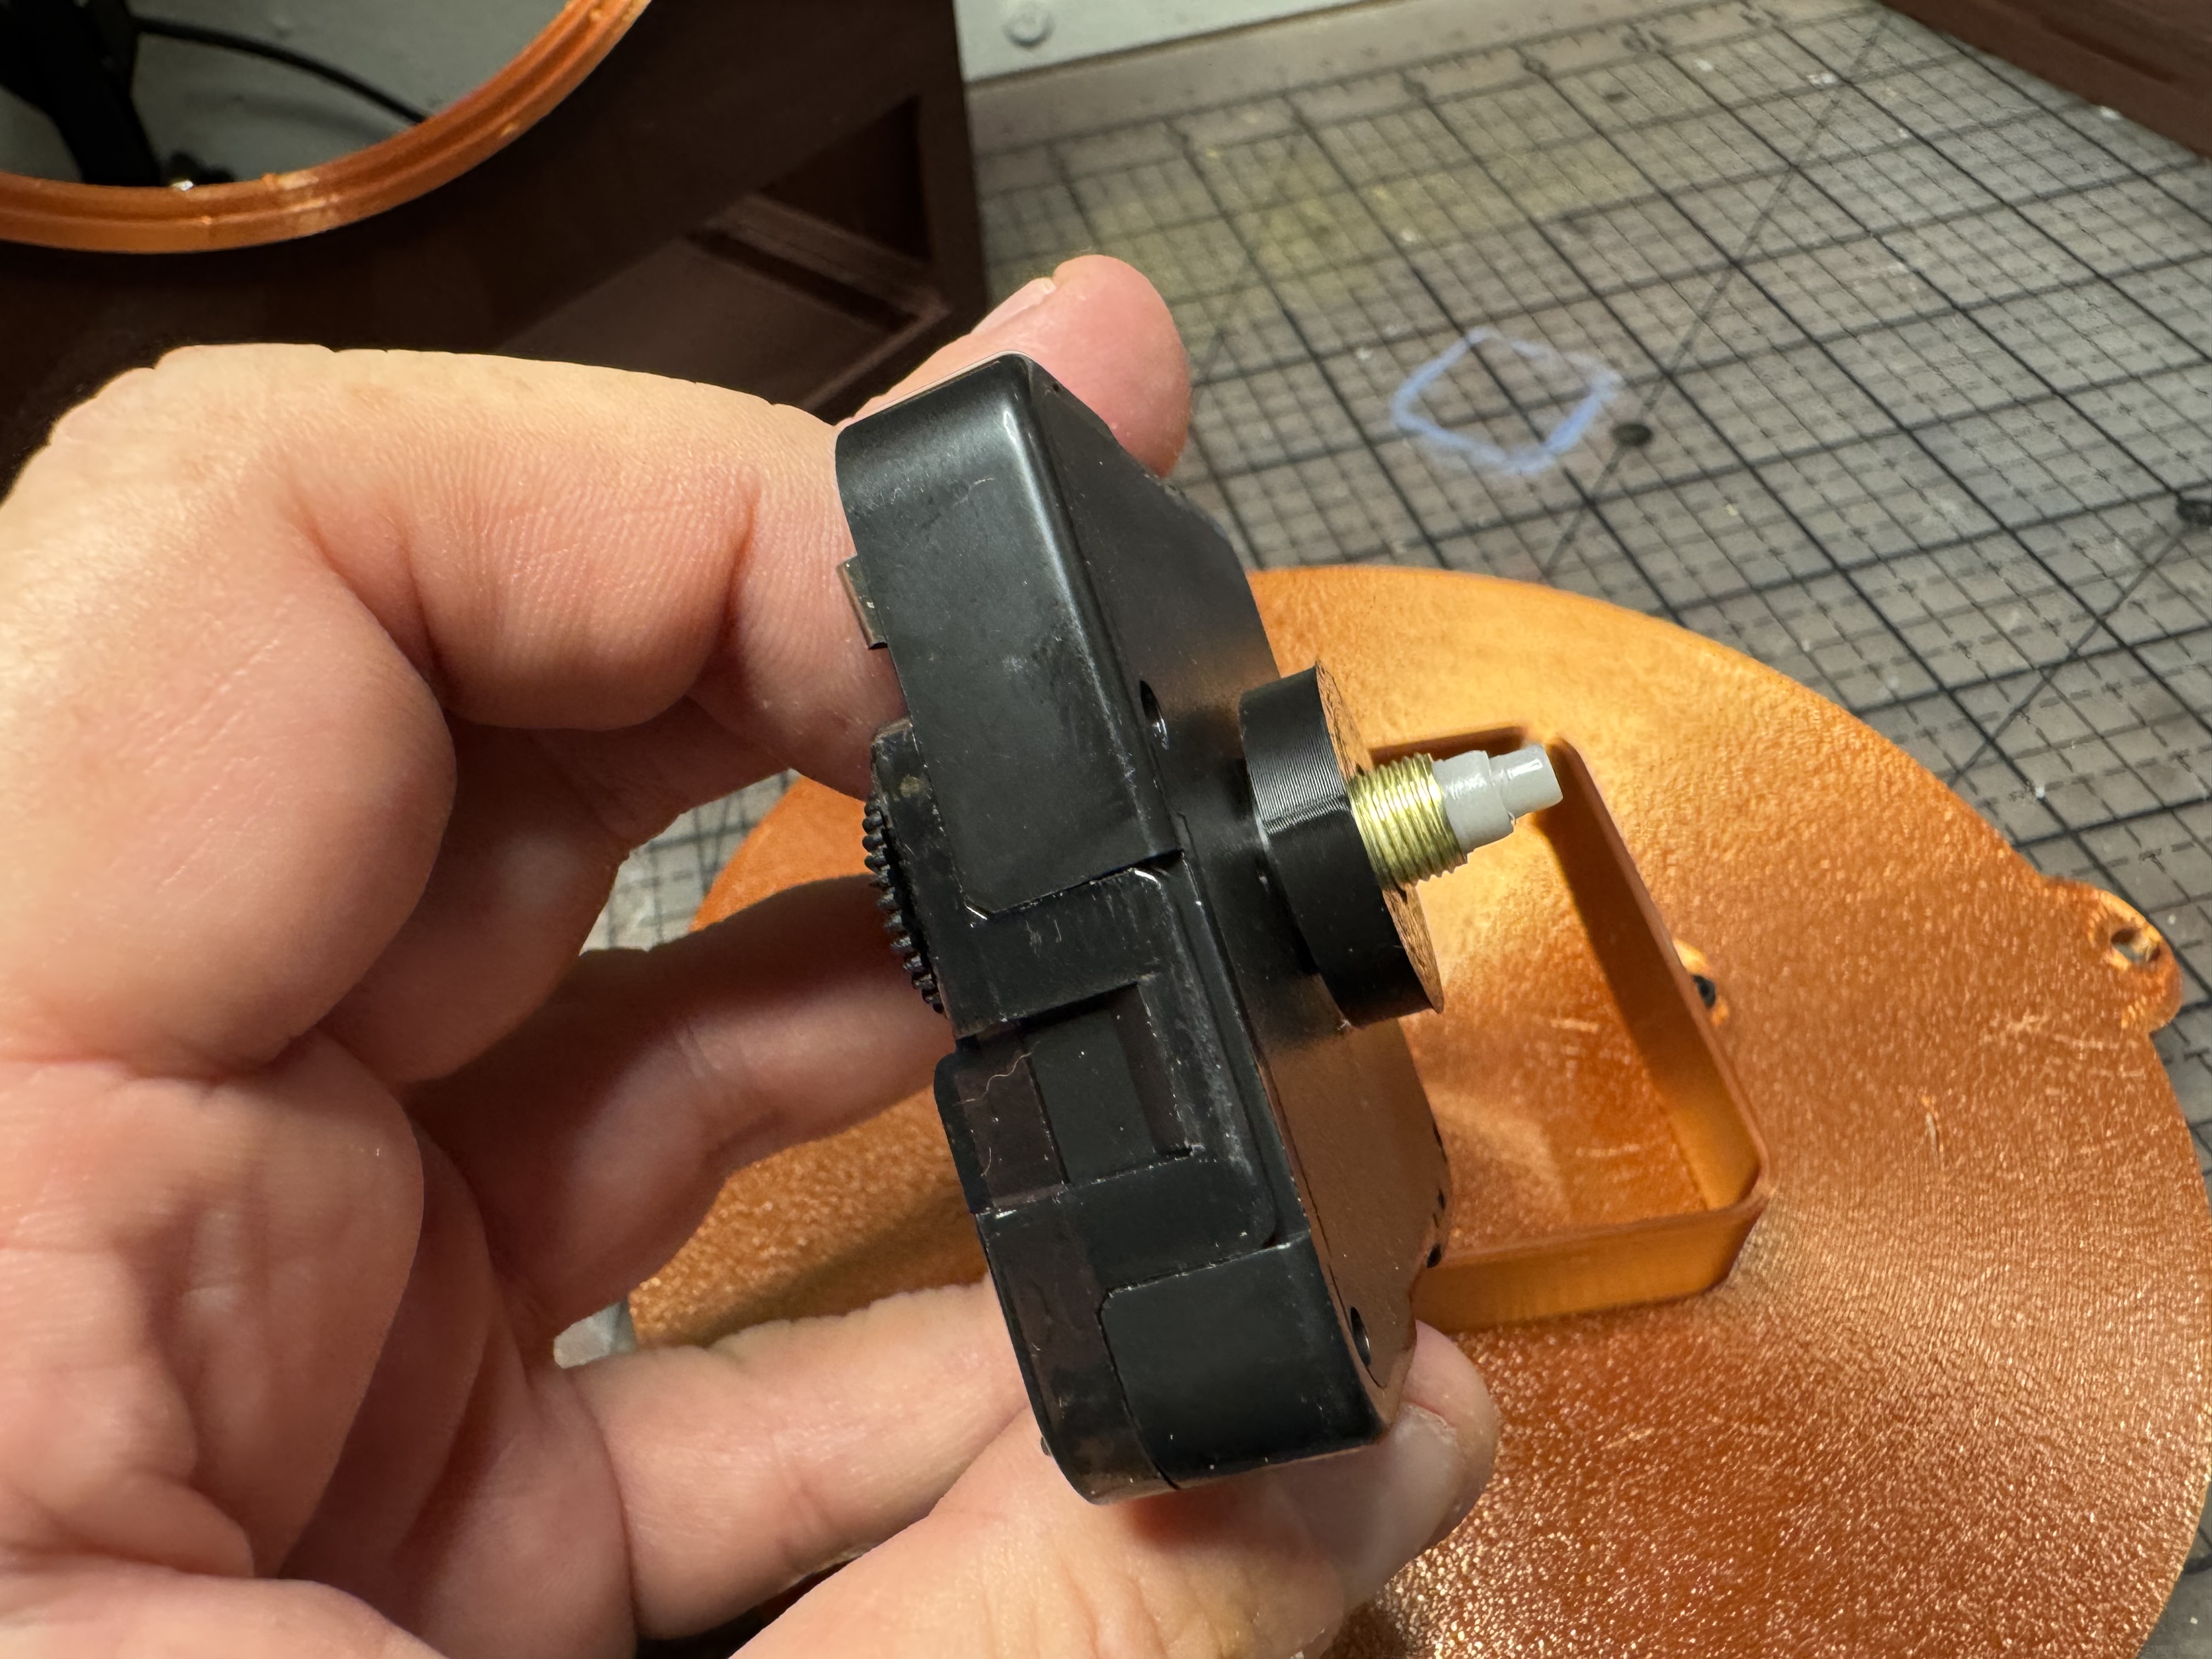 |
| Use the included rubber washer, brass washer, and nut to attach the mechanism to the Clock Face Frame assembly. | 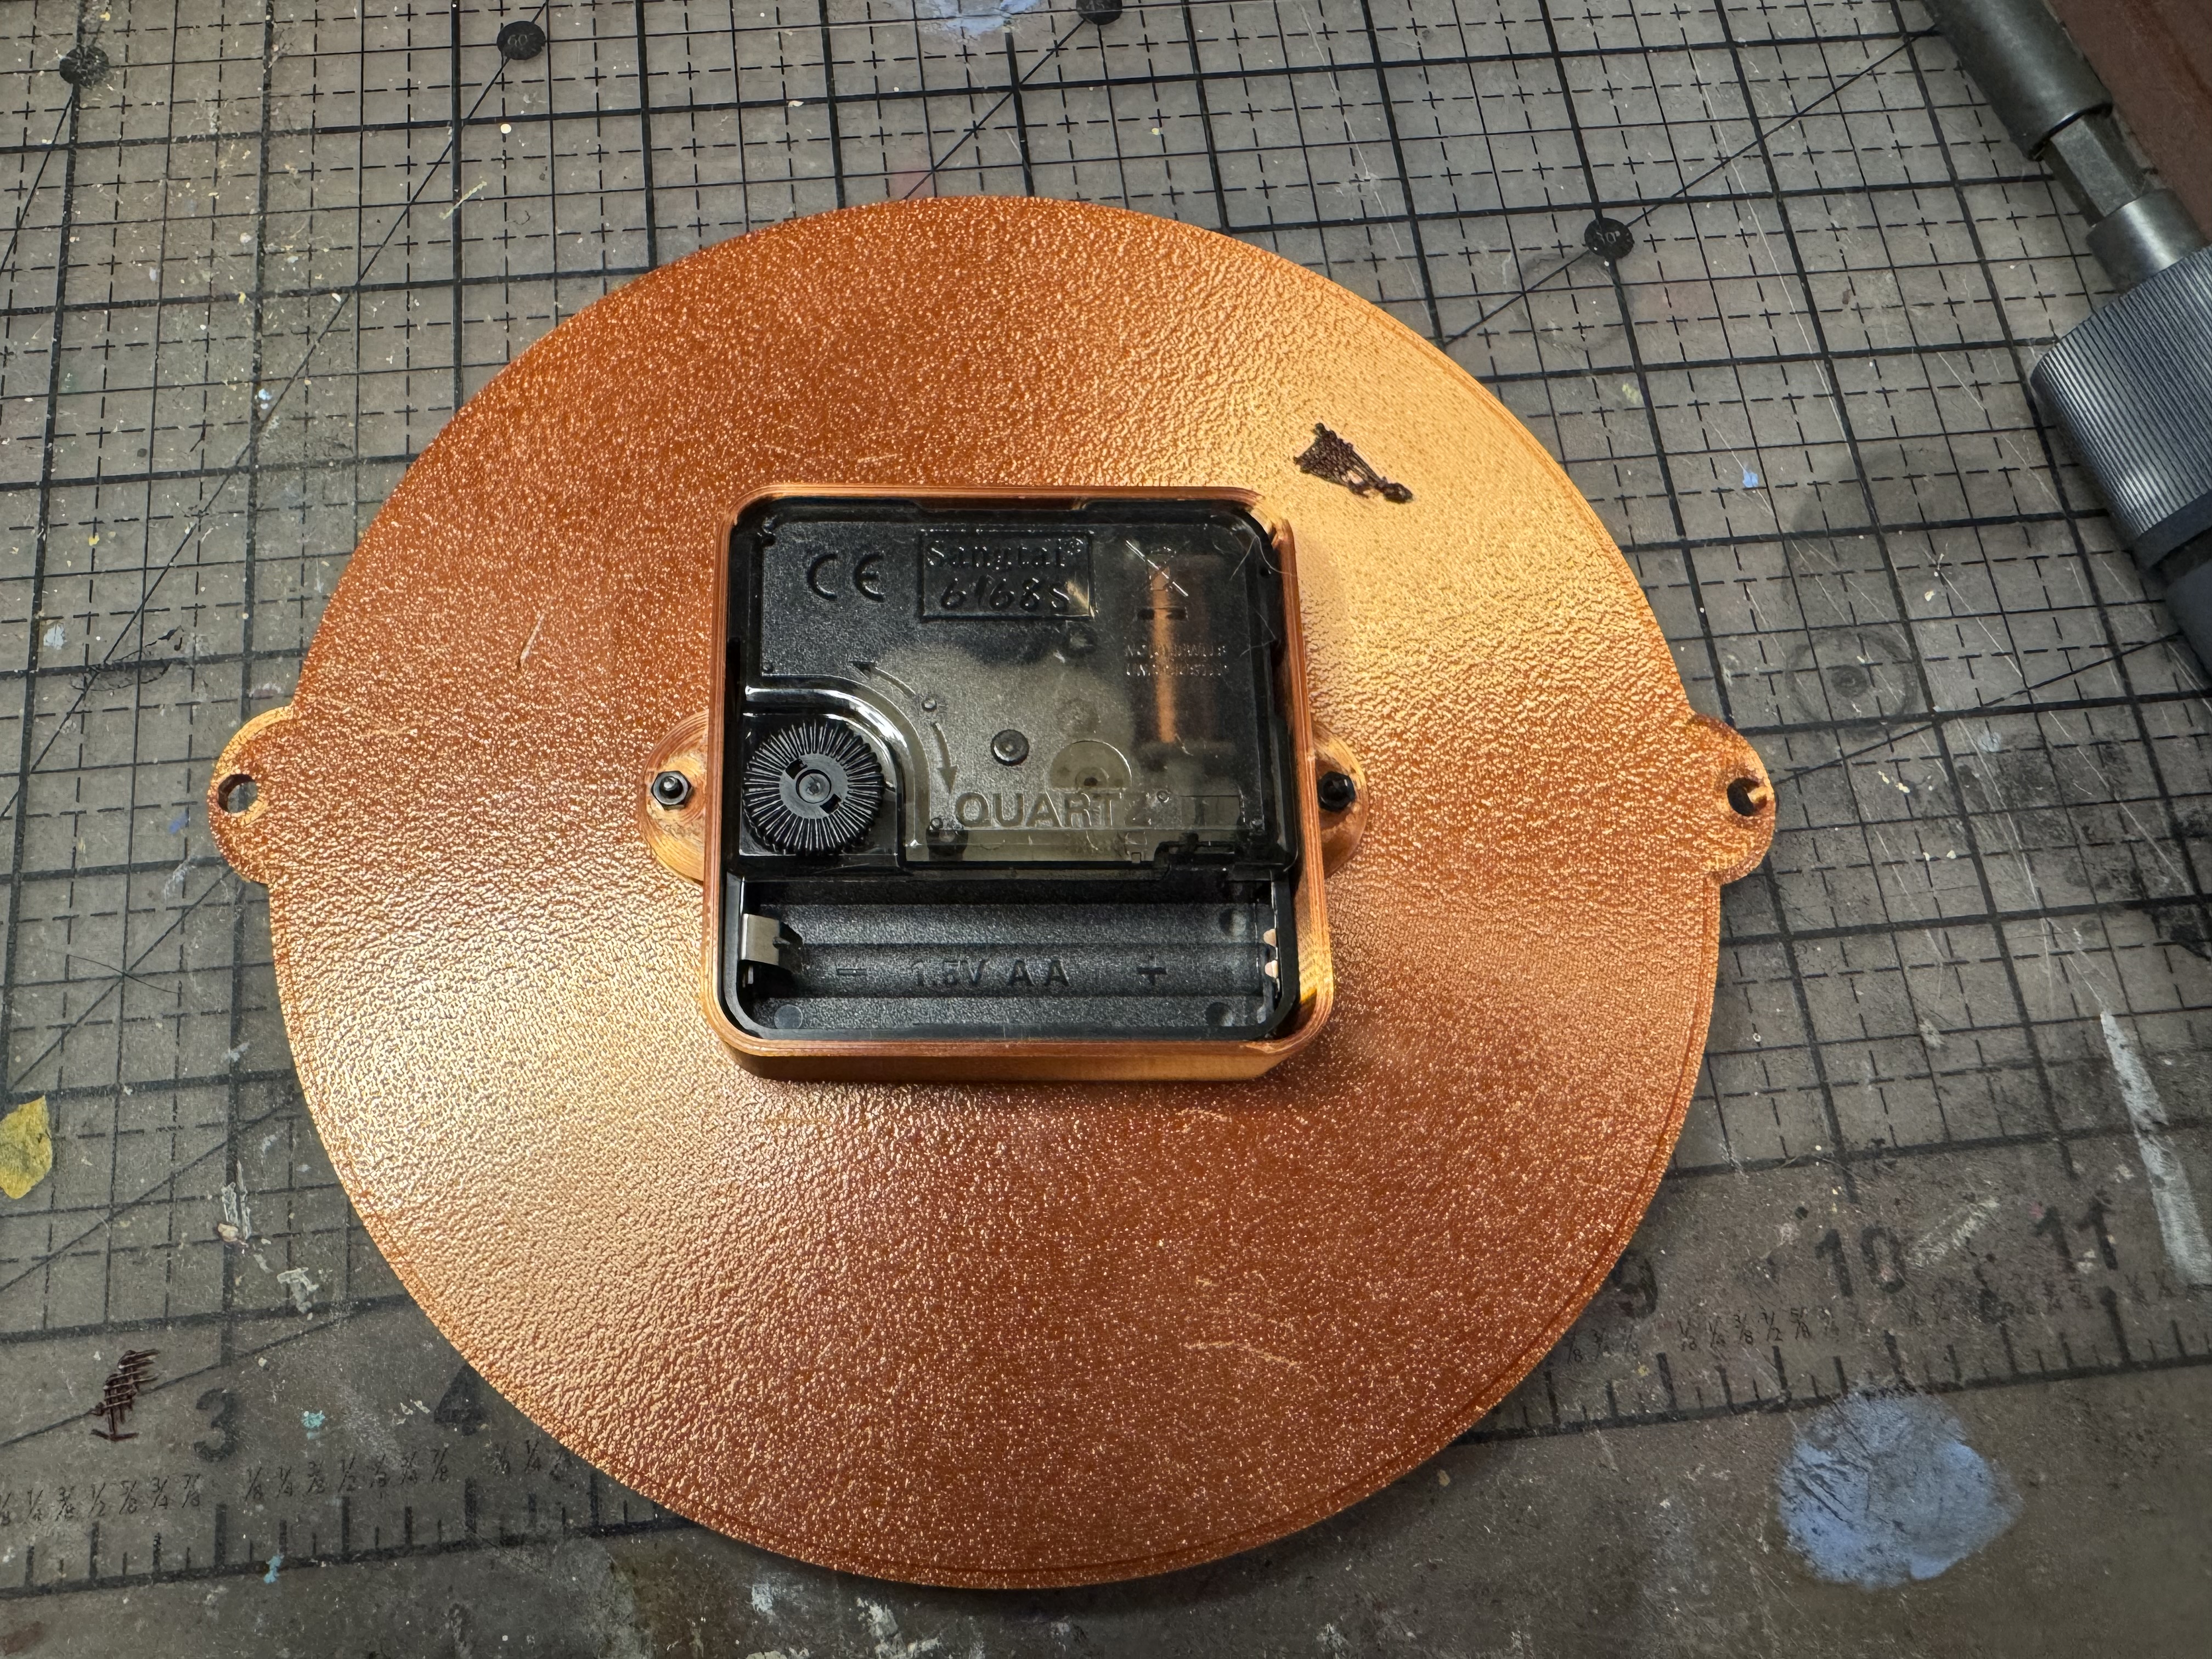 |
| Attach the Clock Face Frame assembly to the Clock Body by inserting two M4x12mm screws through the Clock Face Frame bolt holes and matching holes in the Clock Body. | 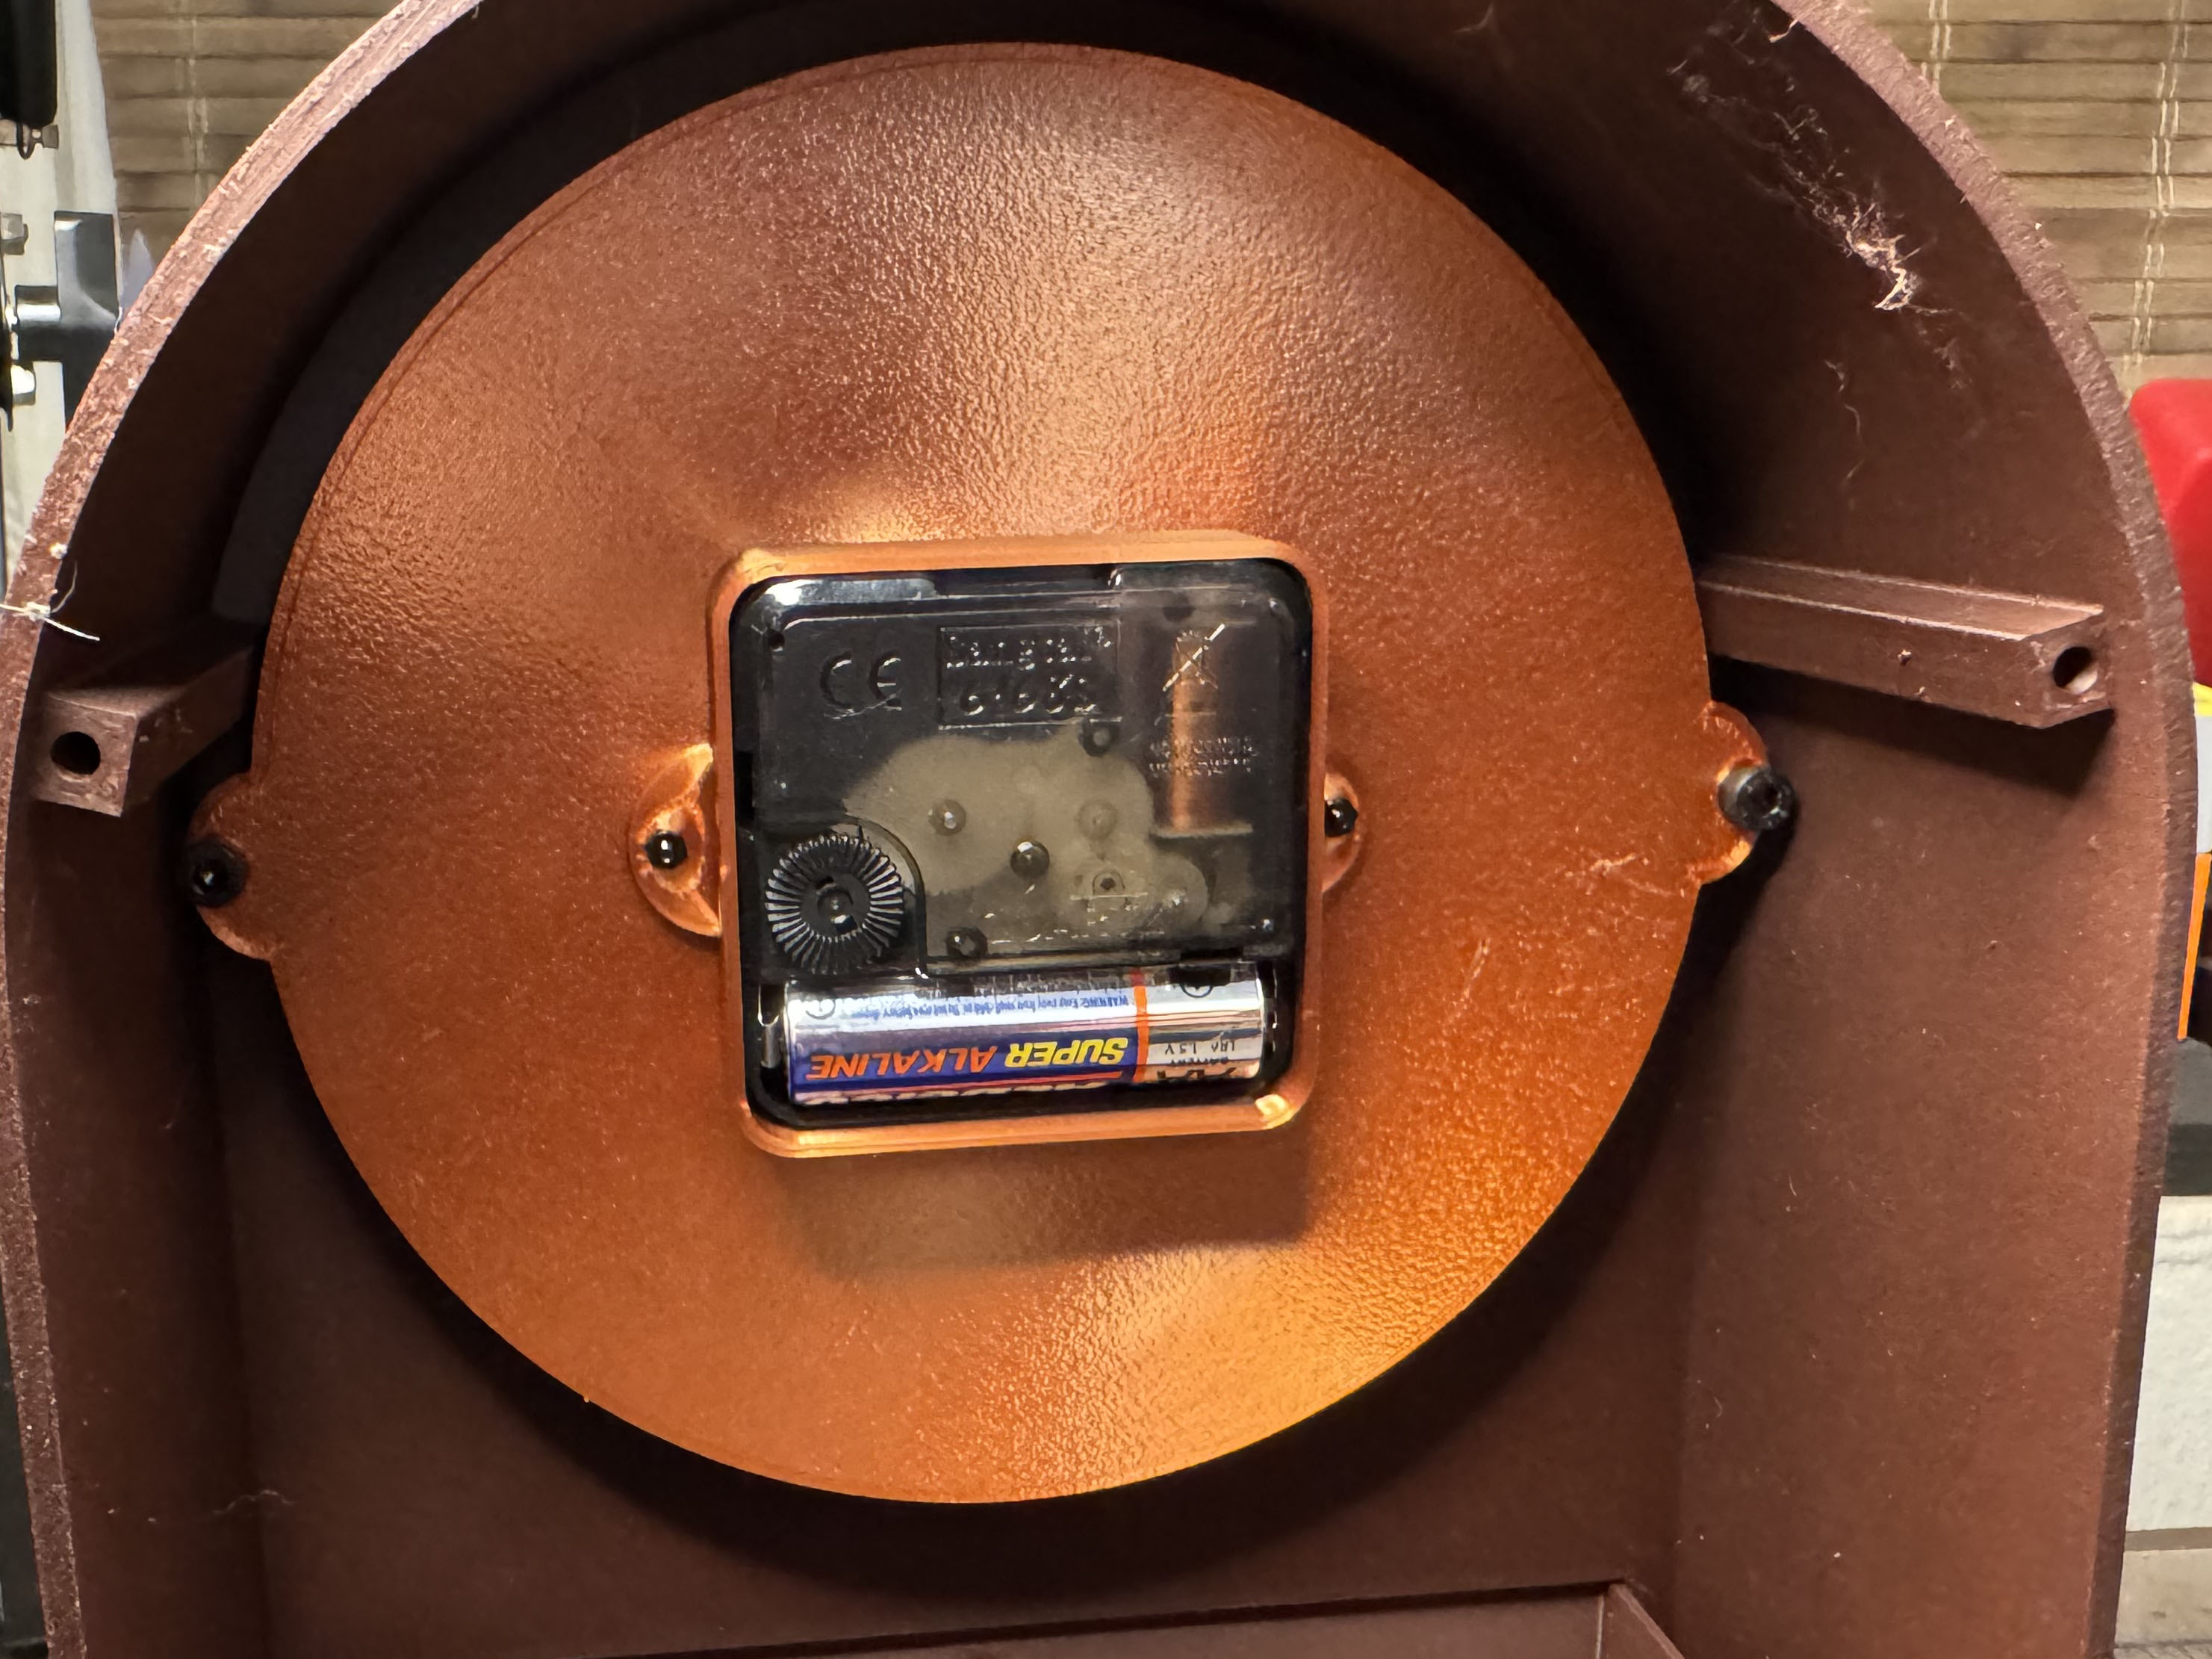 |
| For Bases with Feet (skip this step if you prefer your base without feet) Flip the base to the underside. Add a small amount of adhesive to each hole. Insert a foot in each hole. Allow the adhesive to dry. | 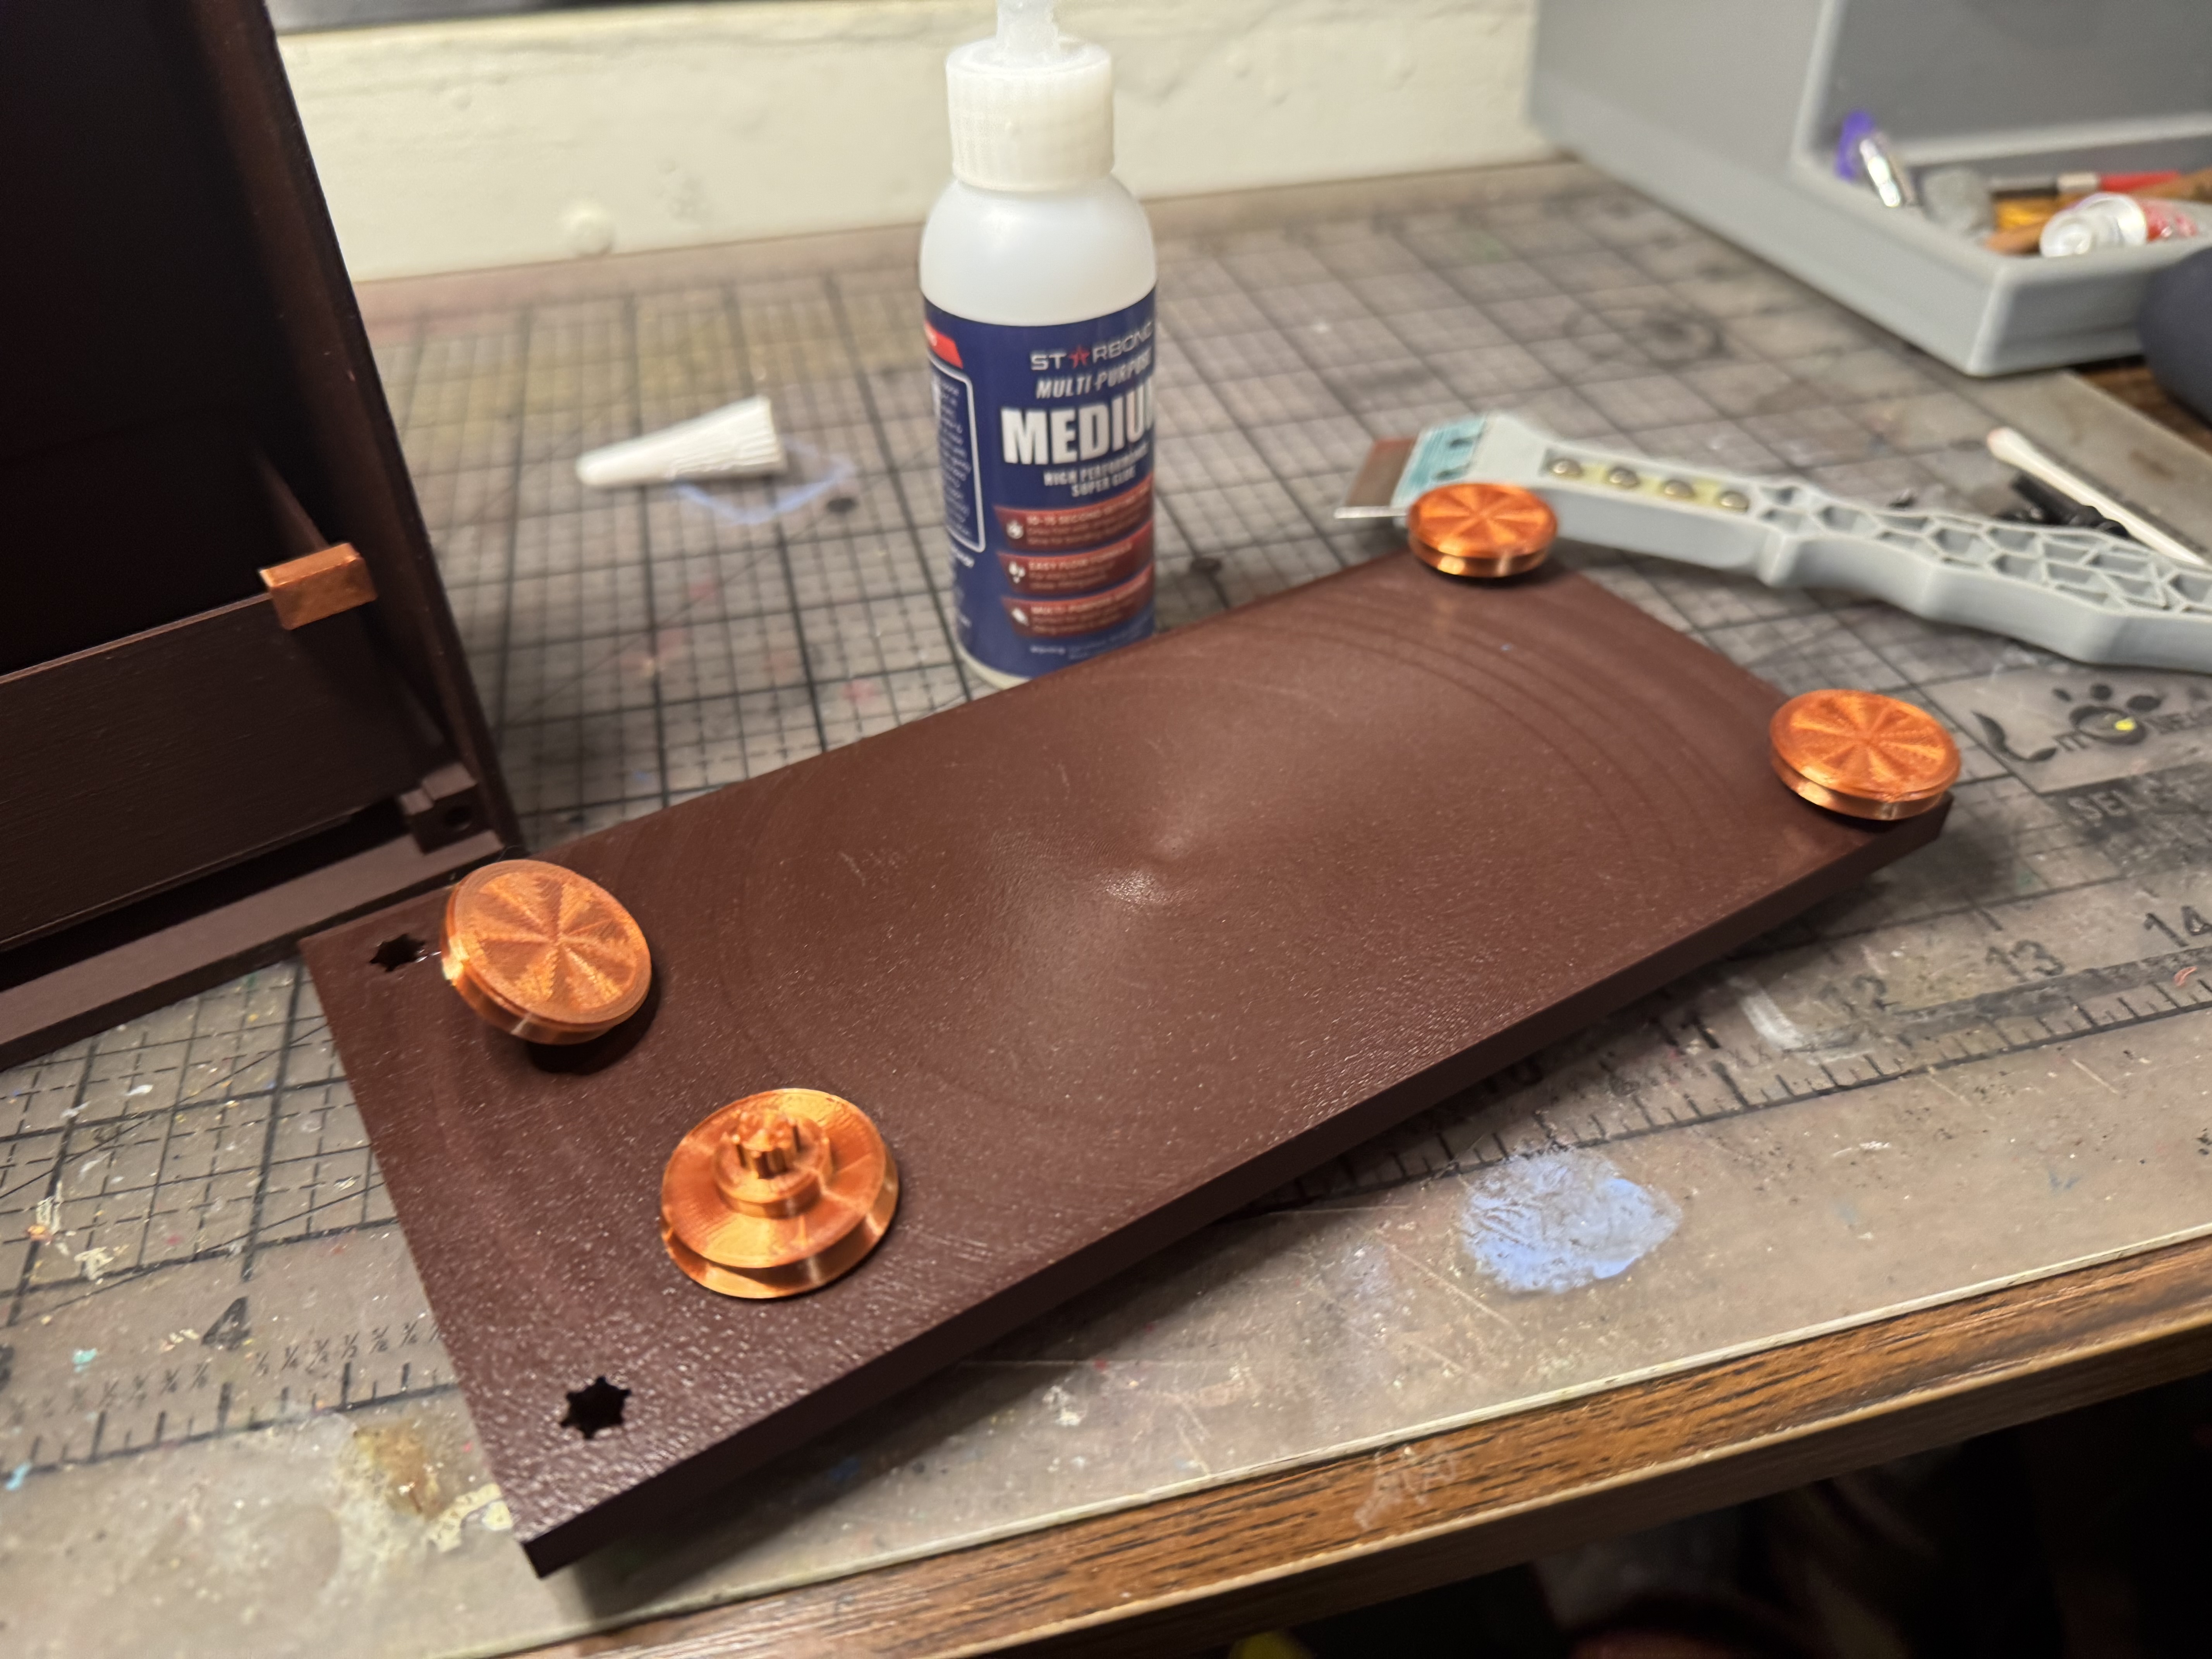 |
| Attach the Base to the Clock Body with adhesive. Set aside and allow the adhesive to cure. | 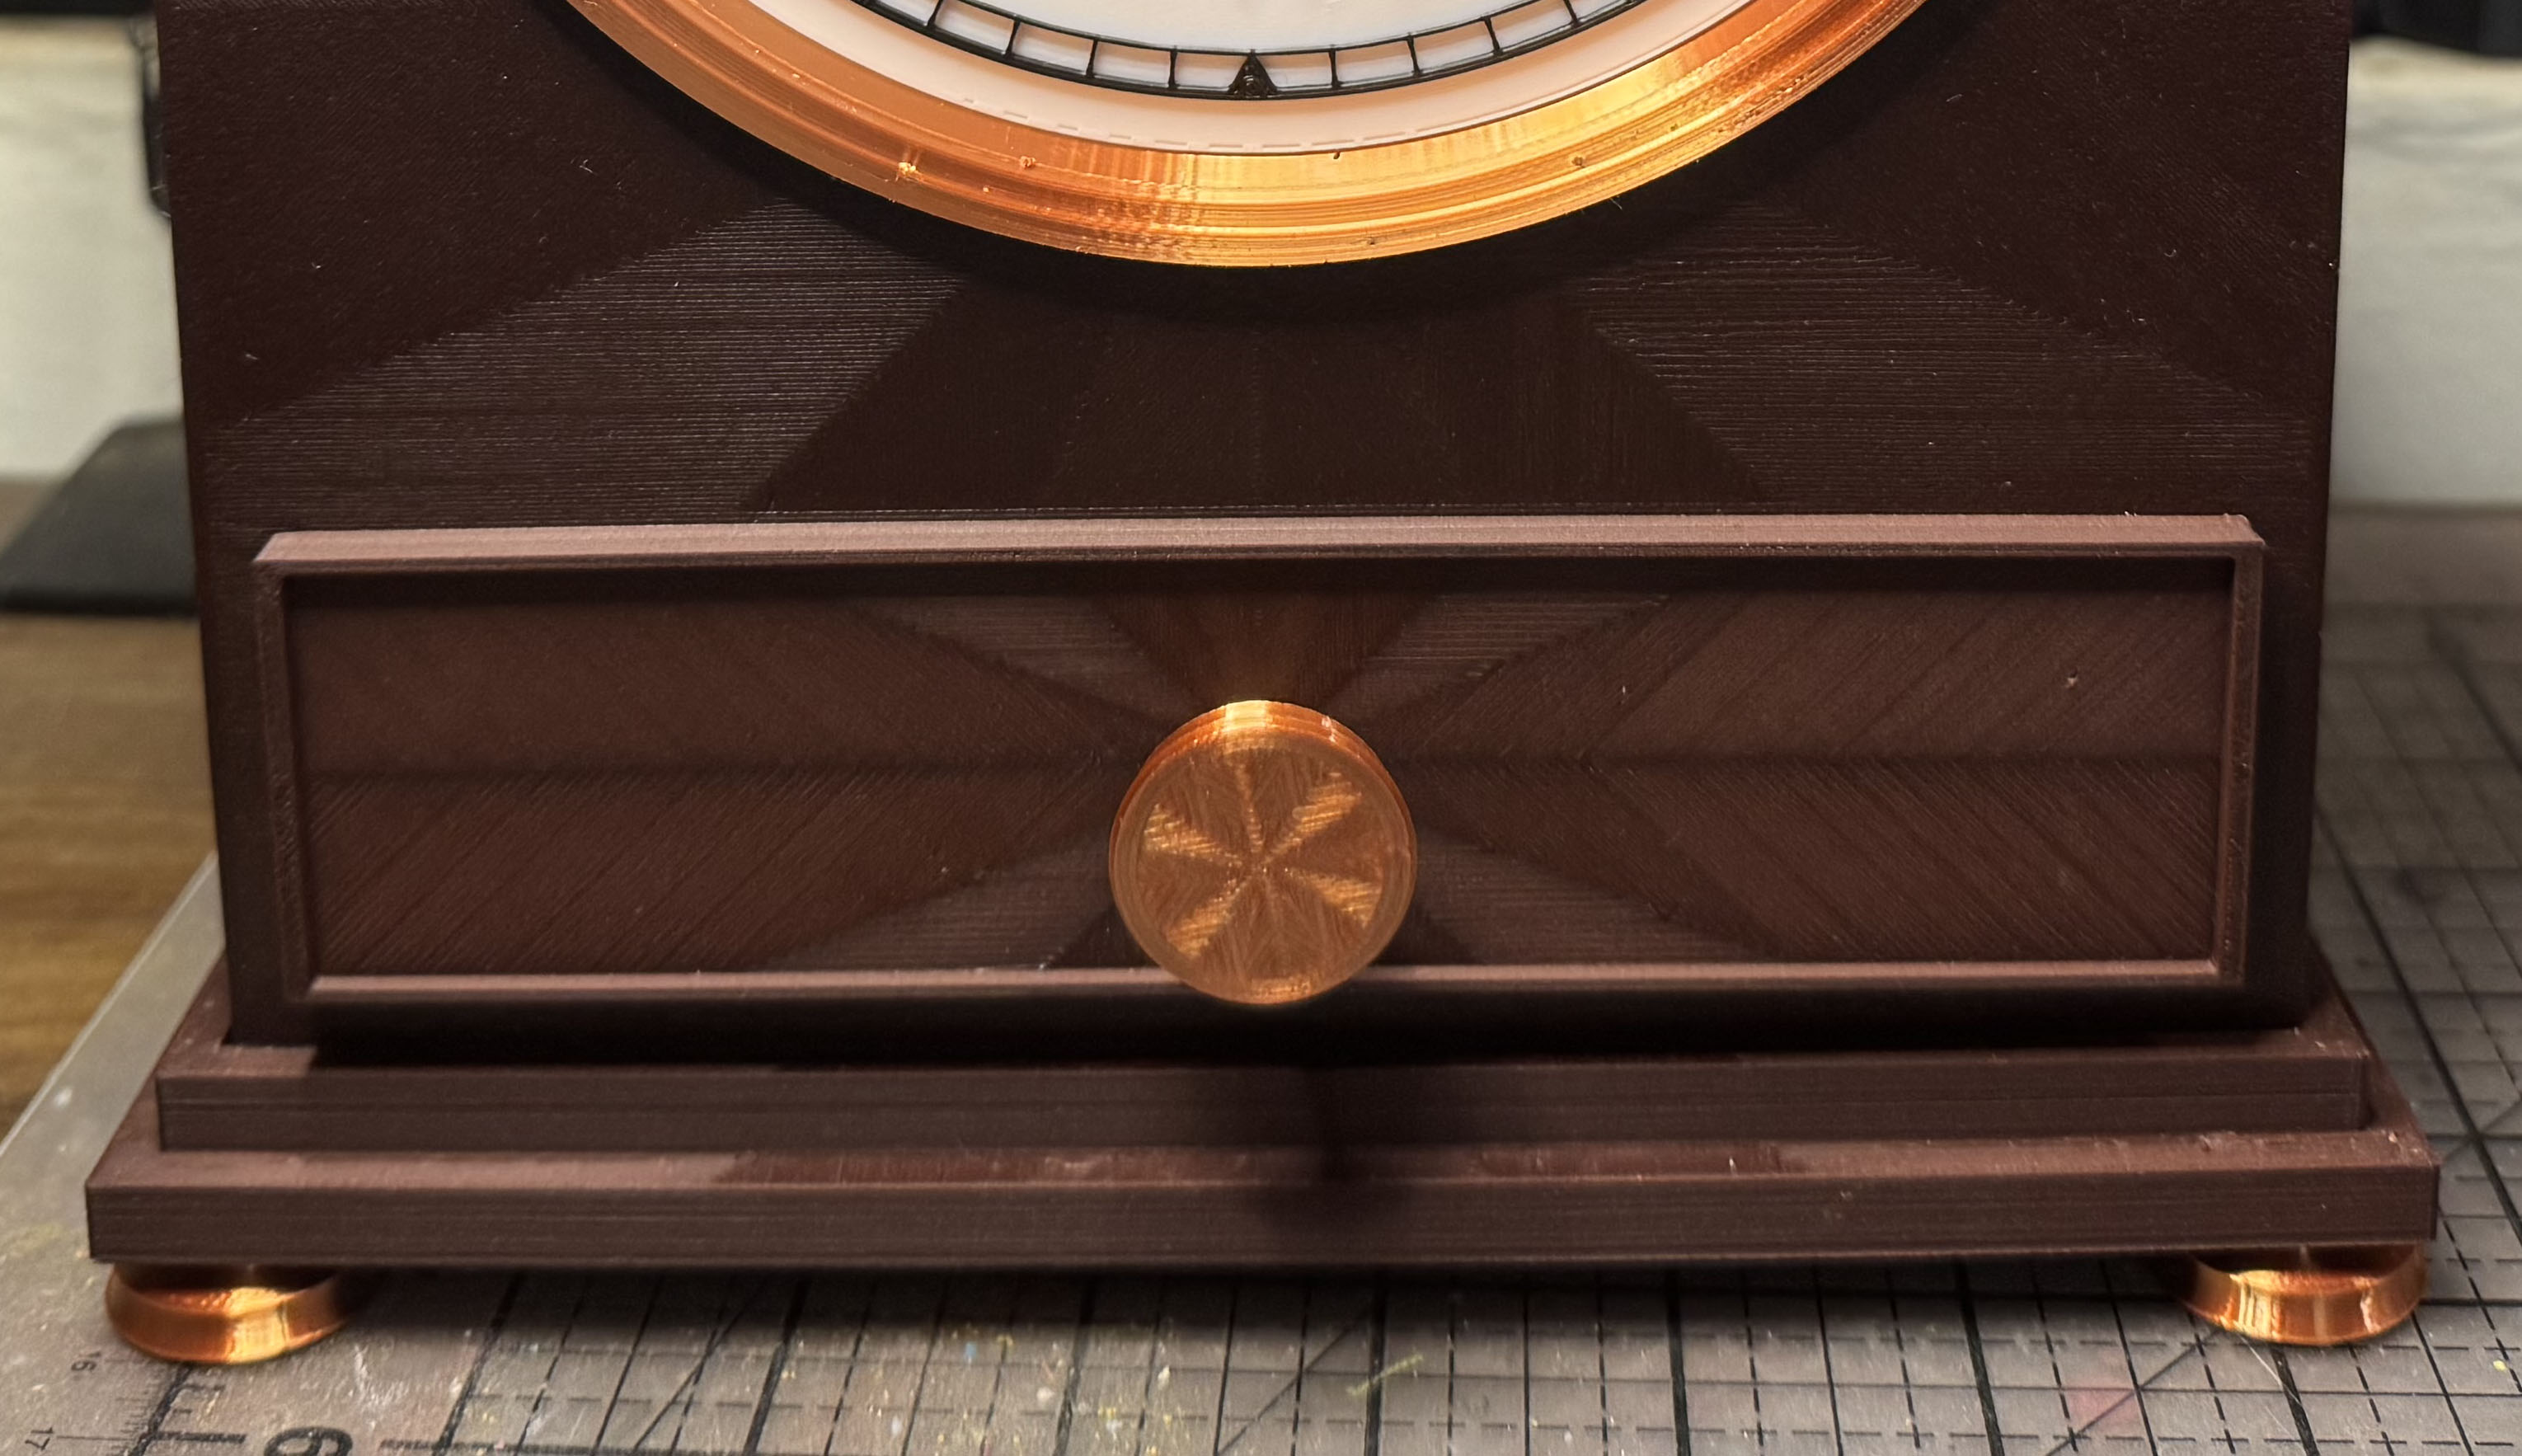 |
| For Clock Bodies with Drawer (skip if you're not building the drawer model) Remove the supports from the bottom of both the Drawer and the Drawer Front. | 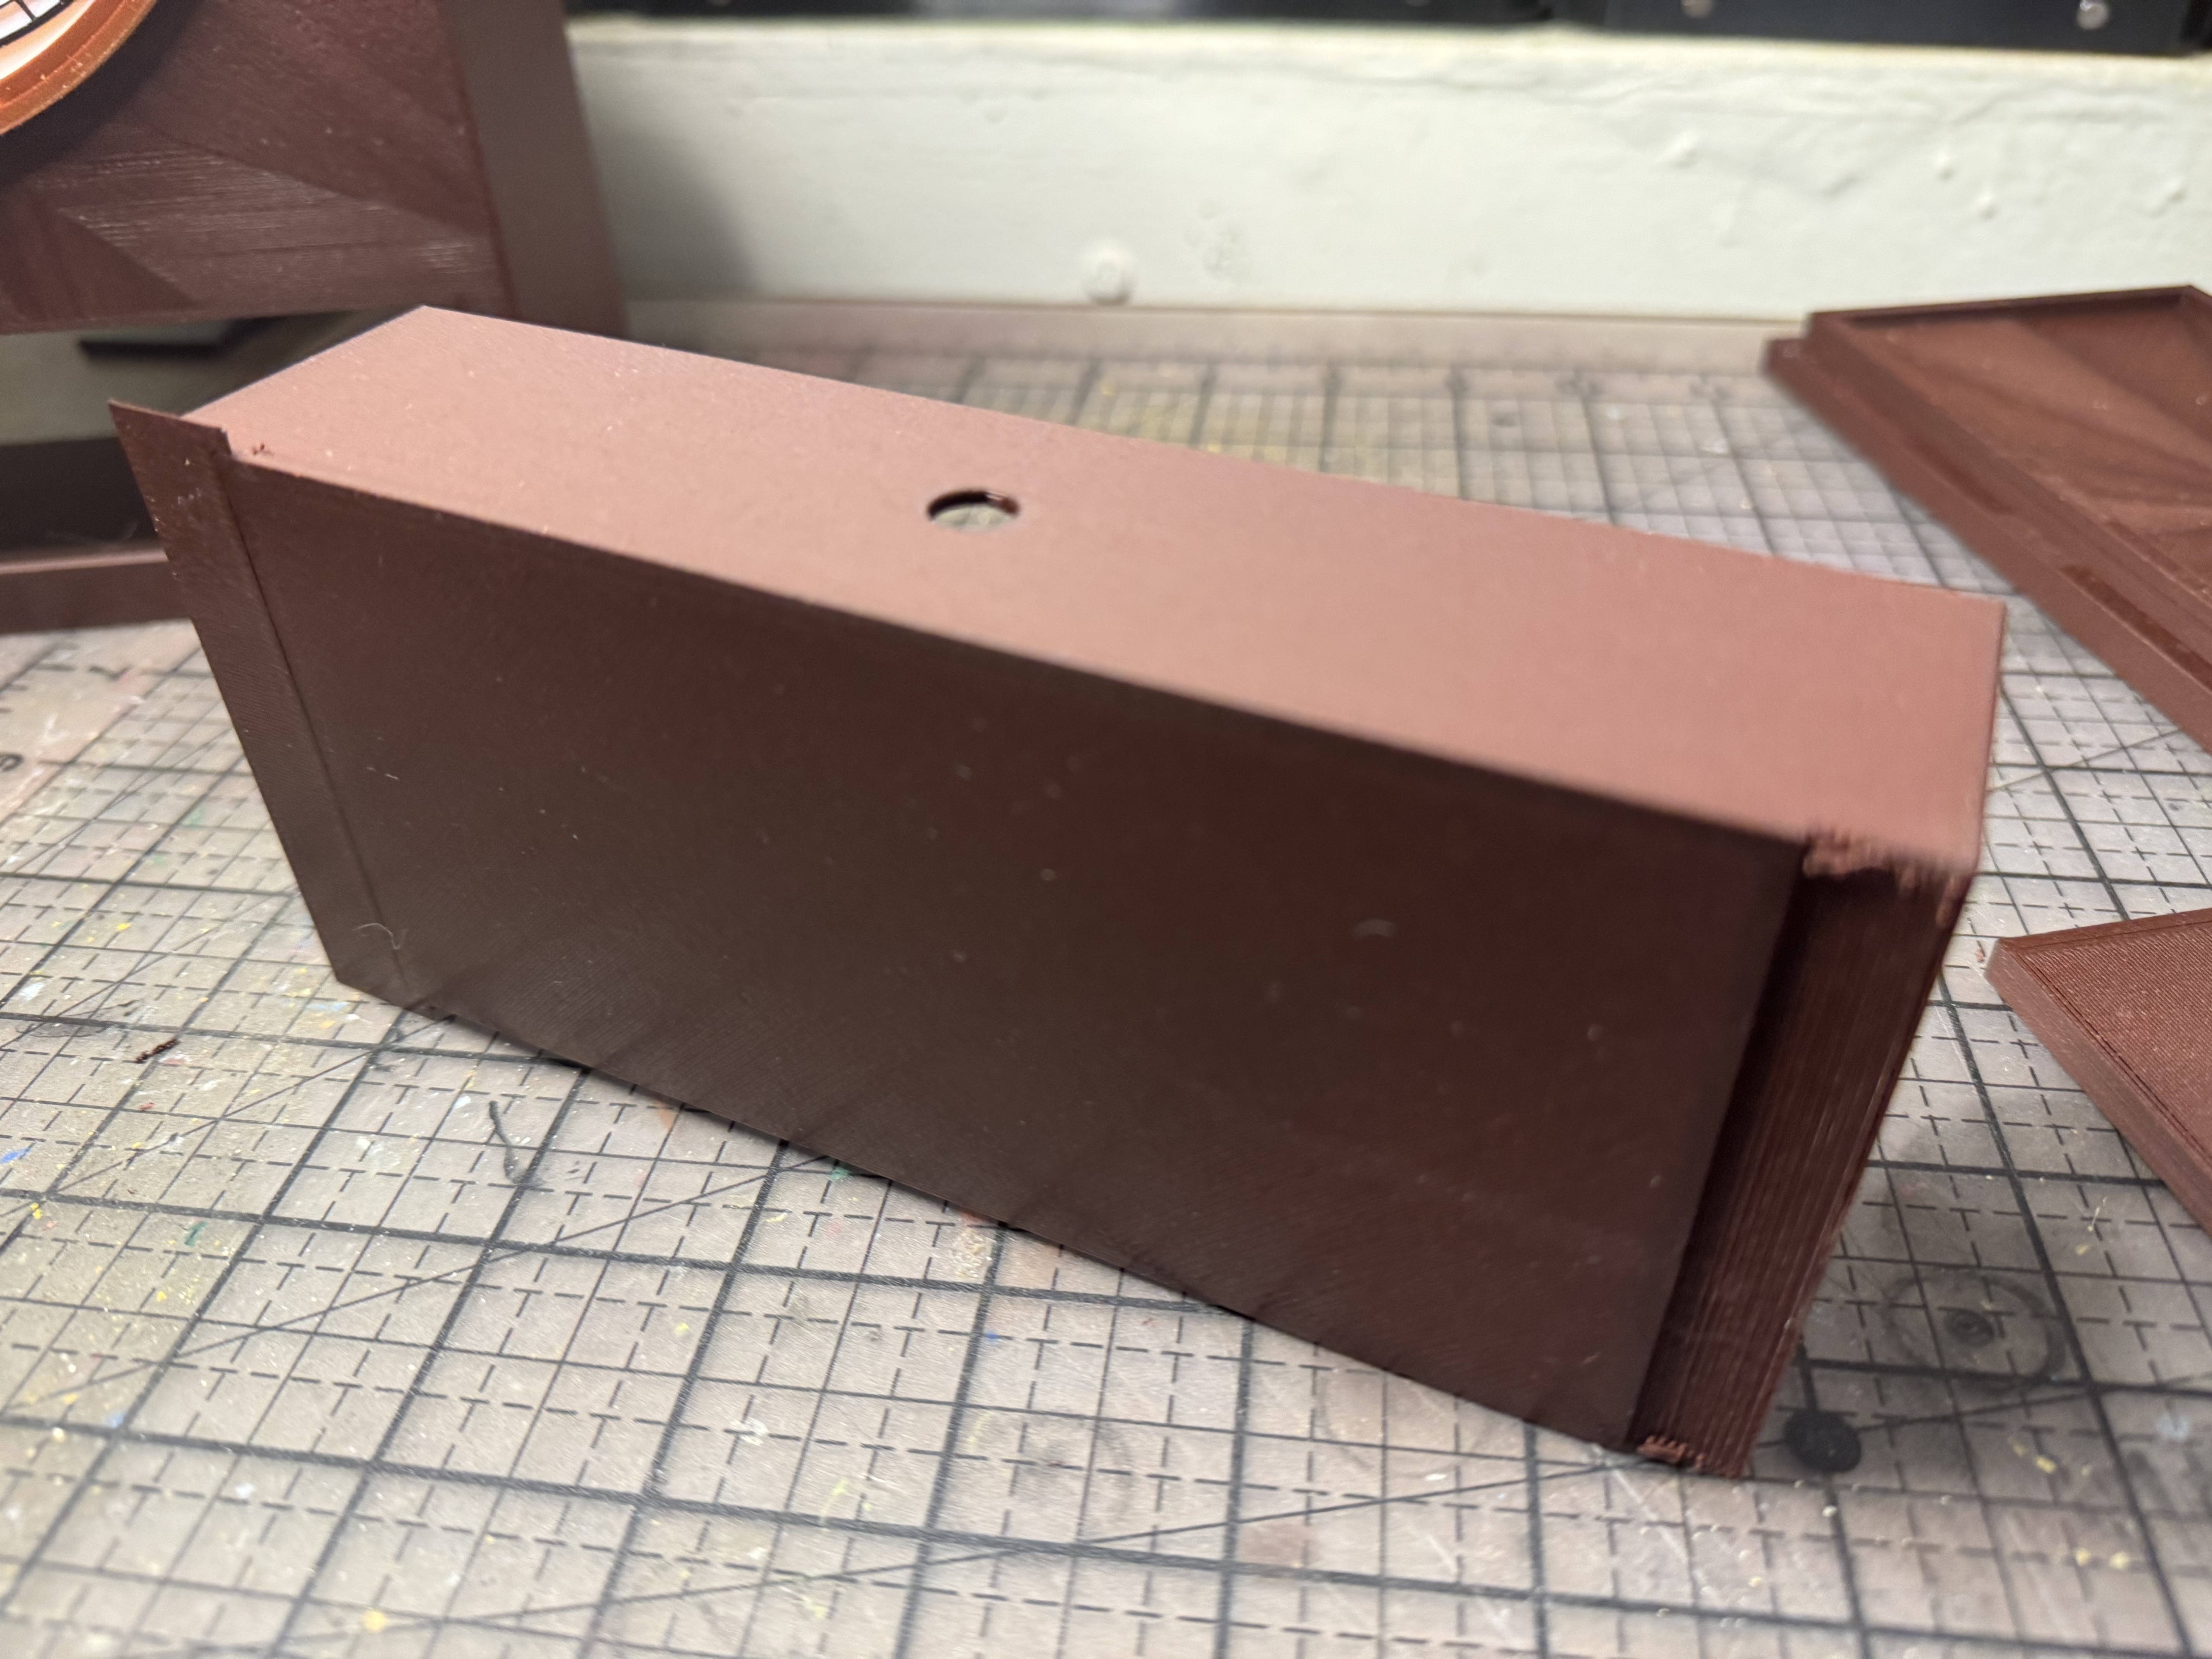 |
| Attach the Drawer Front to the Drawer with Cement or CA glue. | 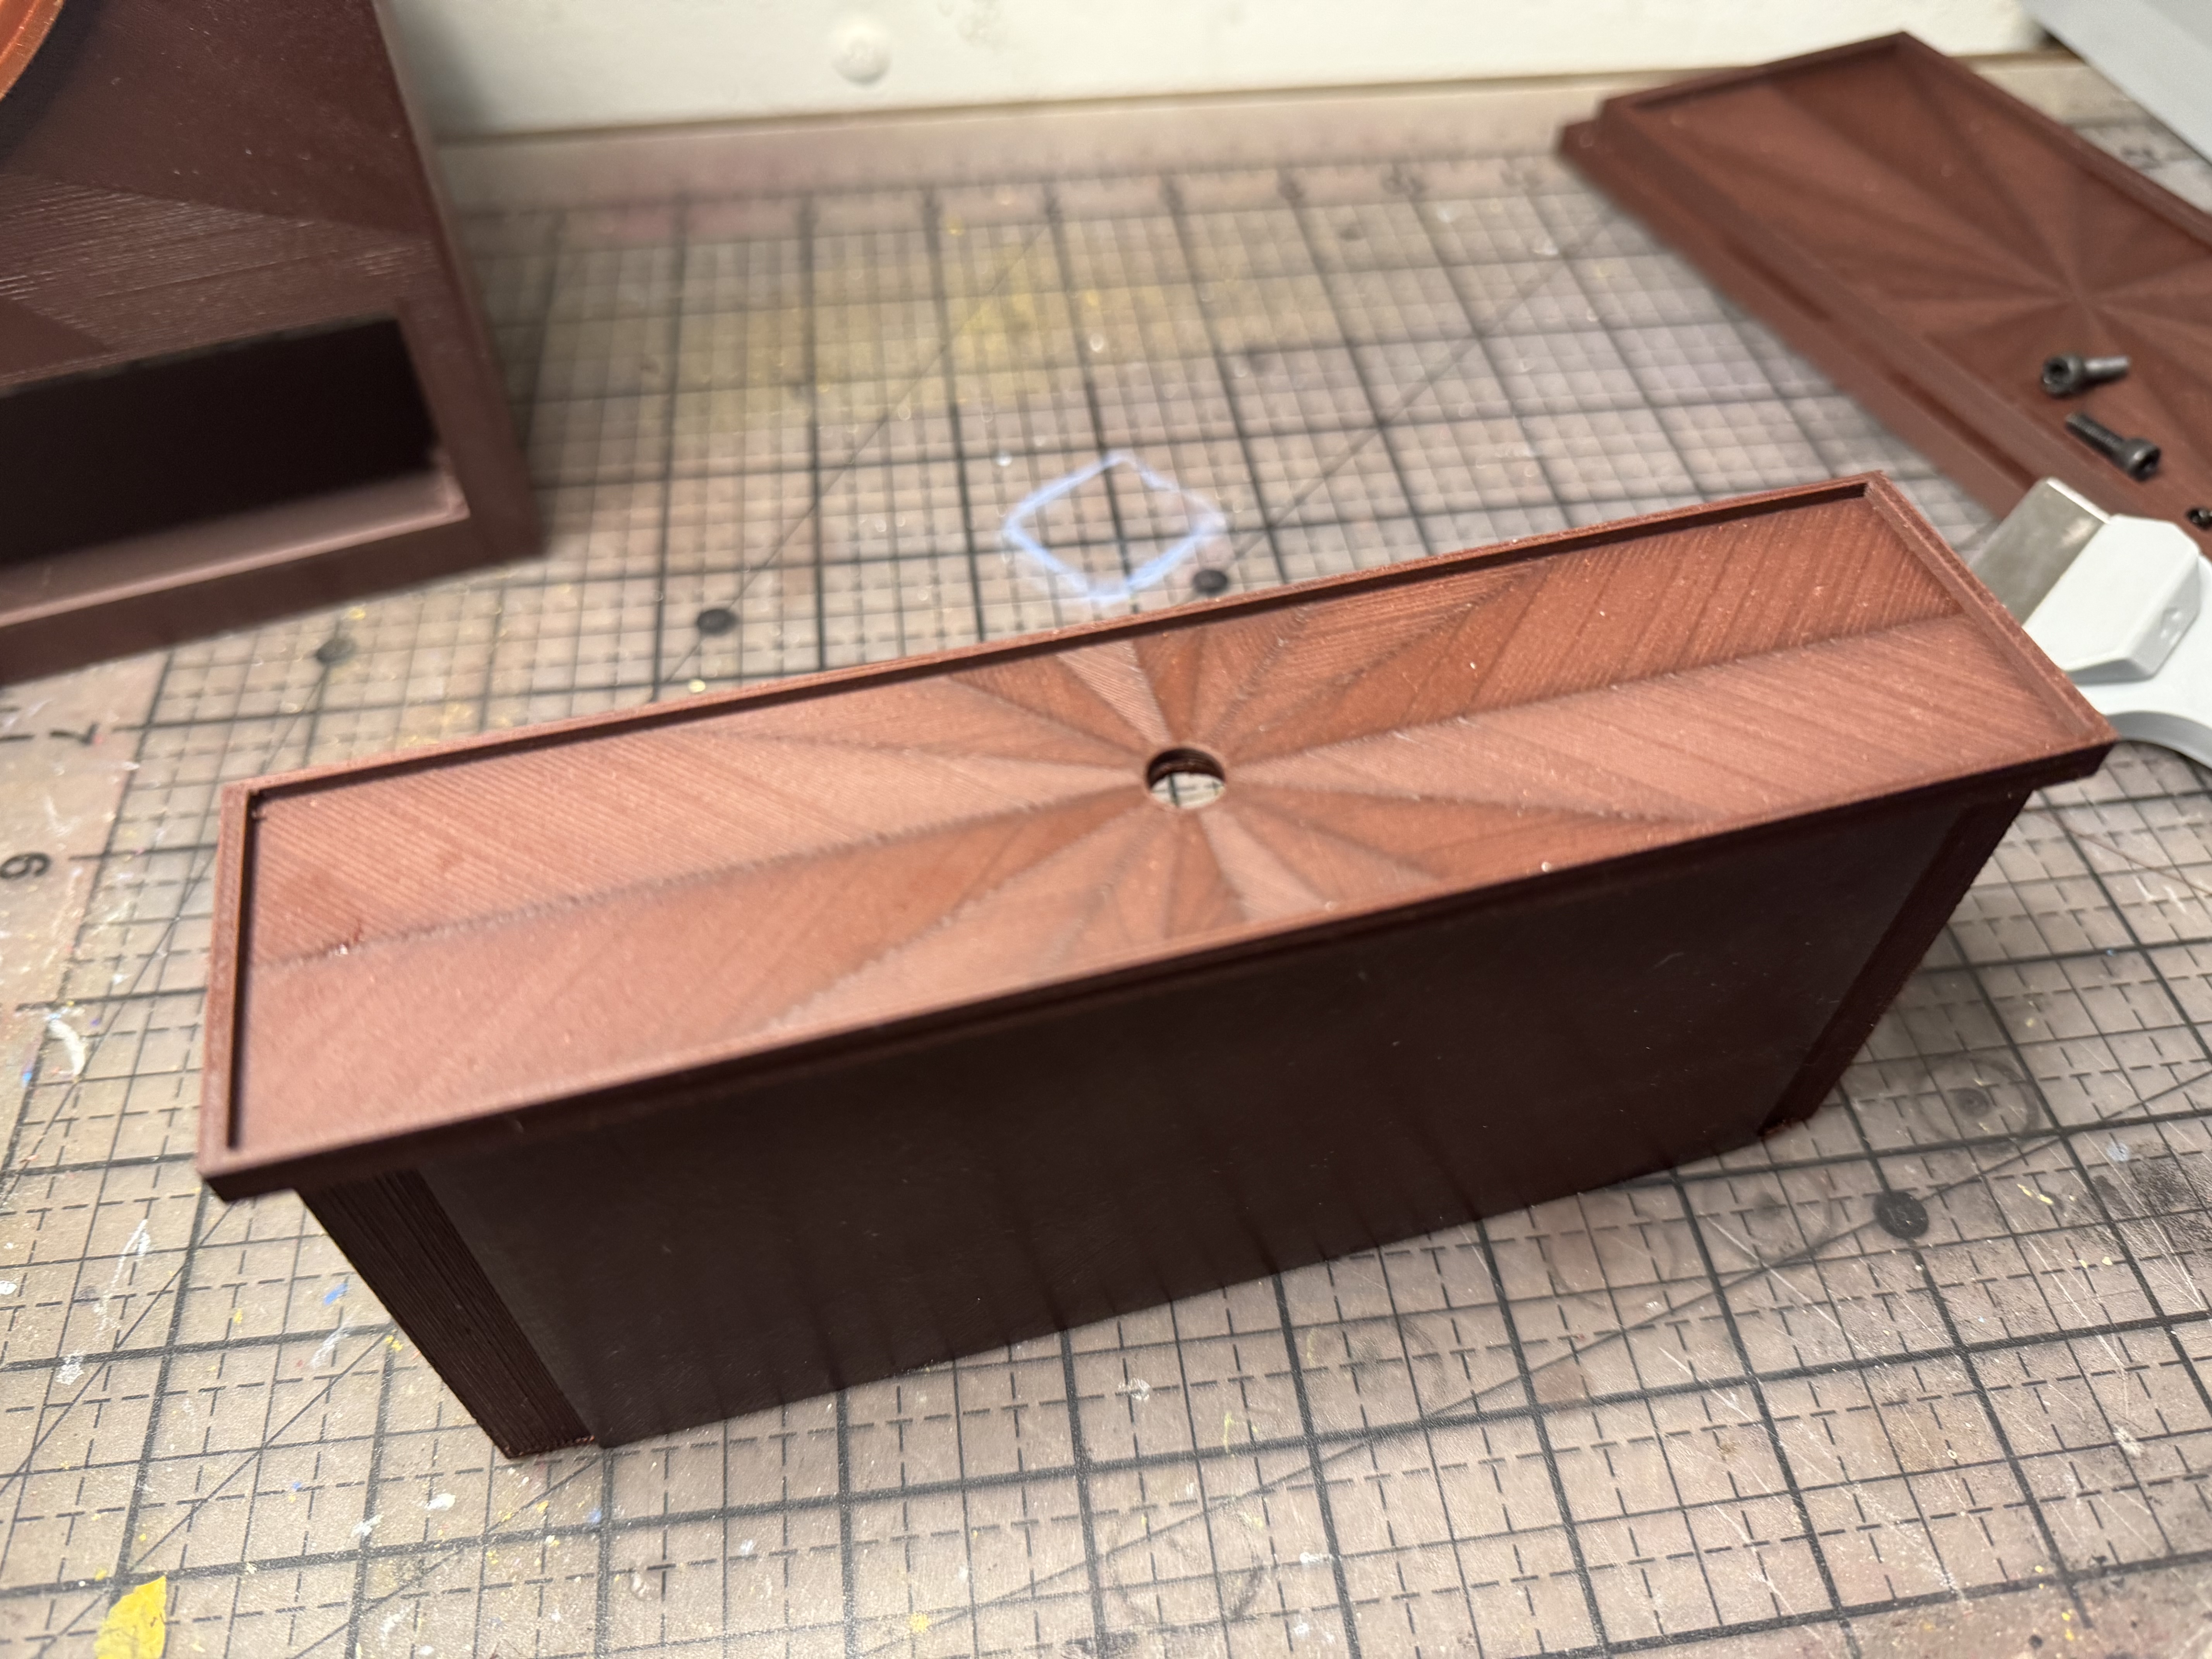 |
| Insert the Drawer Knob through the hole in the Drawer. Apply a small amount of adhesive to the inside of the Drawer Knob Nut and fit the Nut onto the shaft of the Knob. | 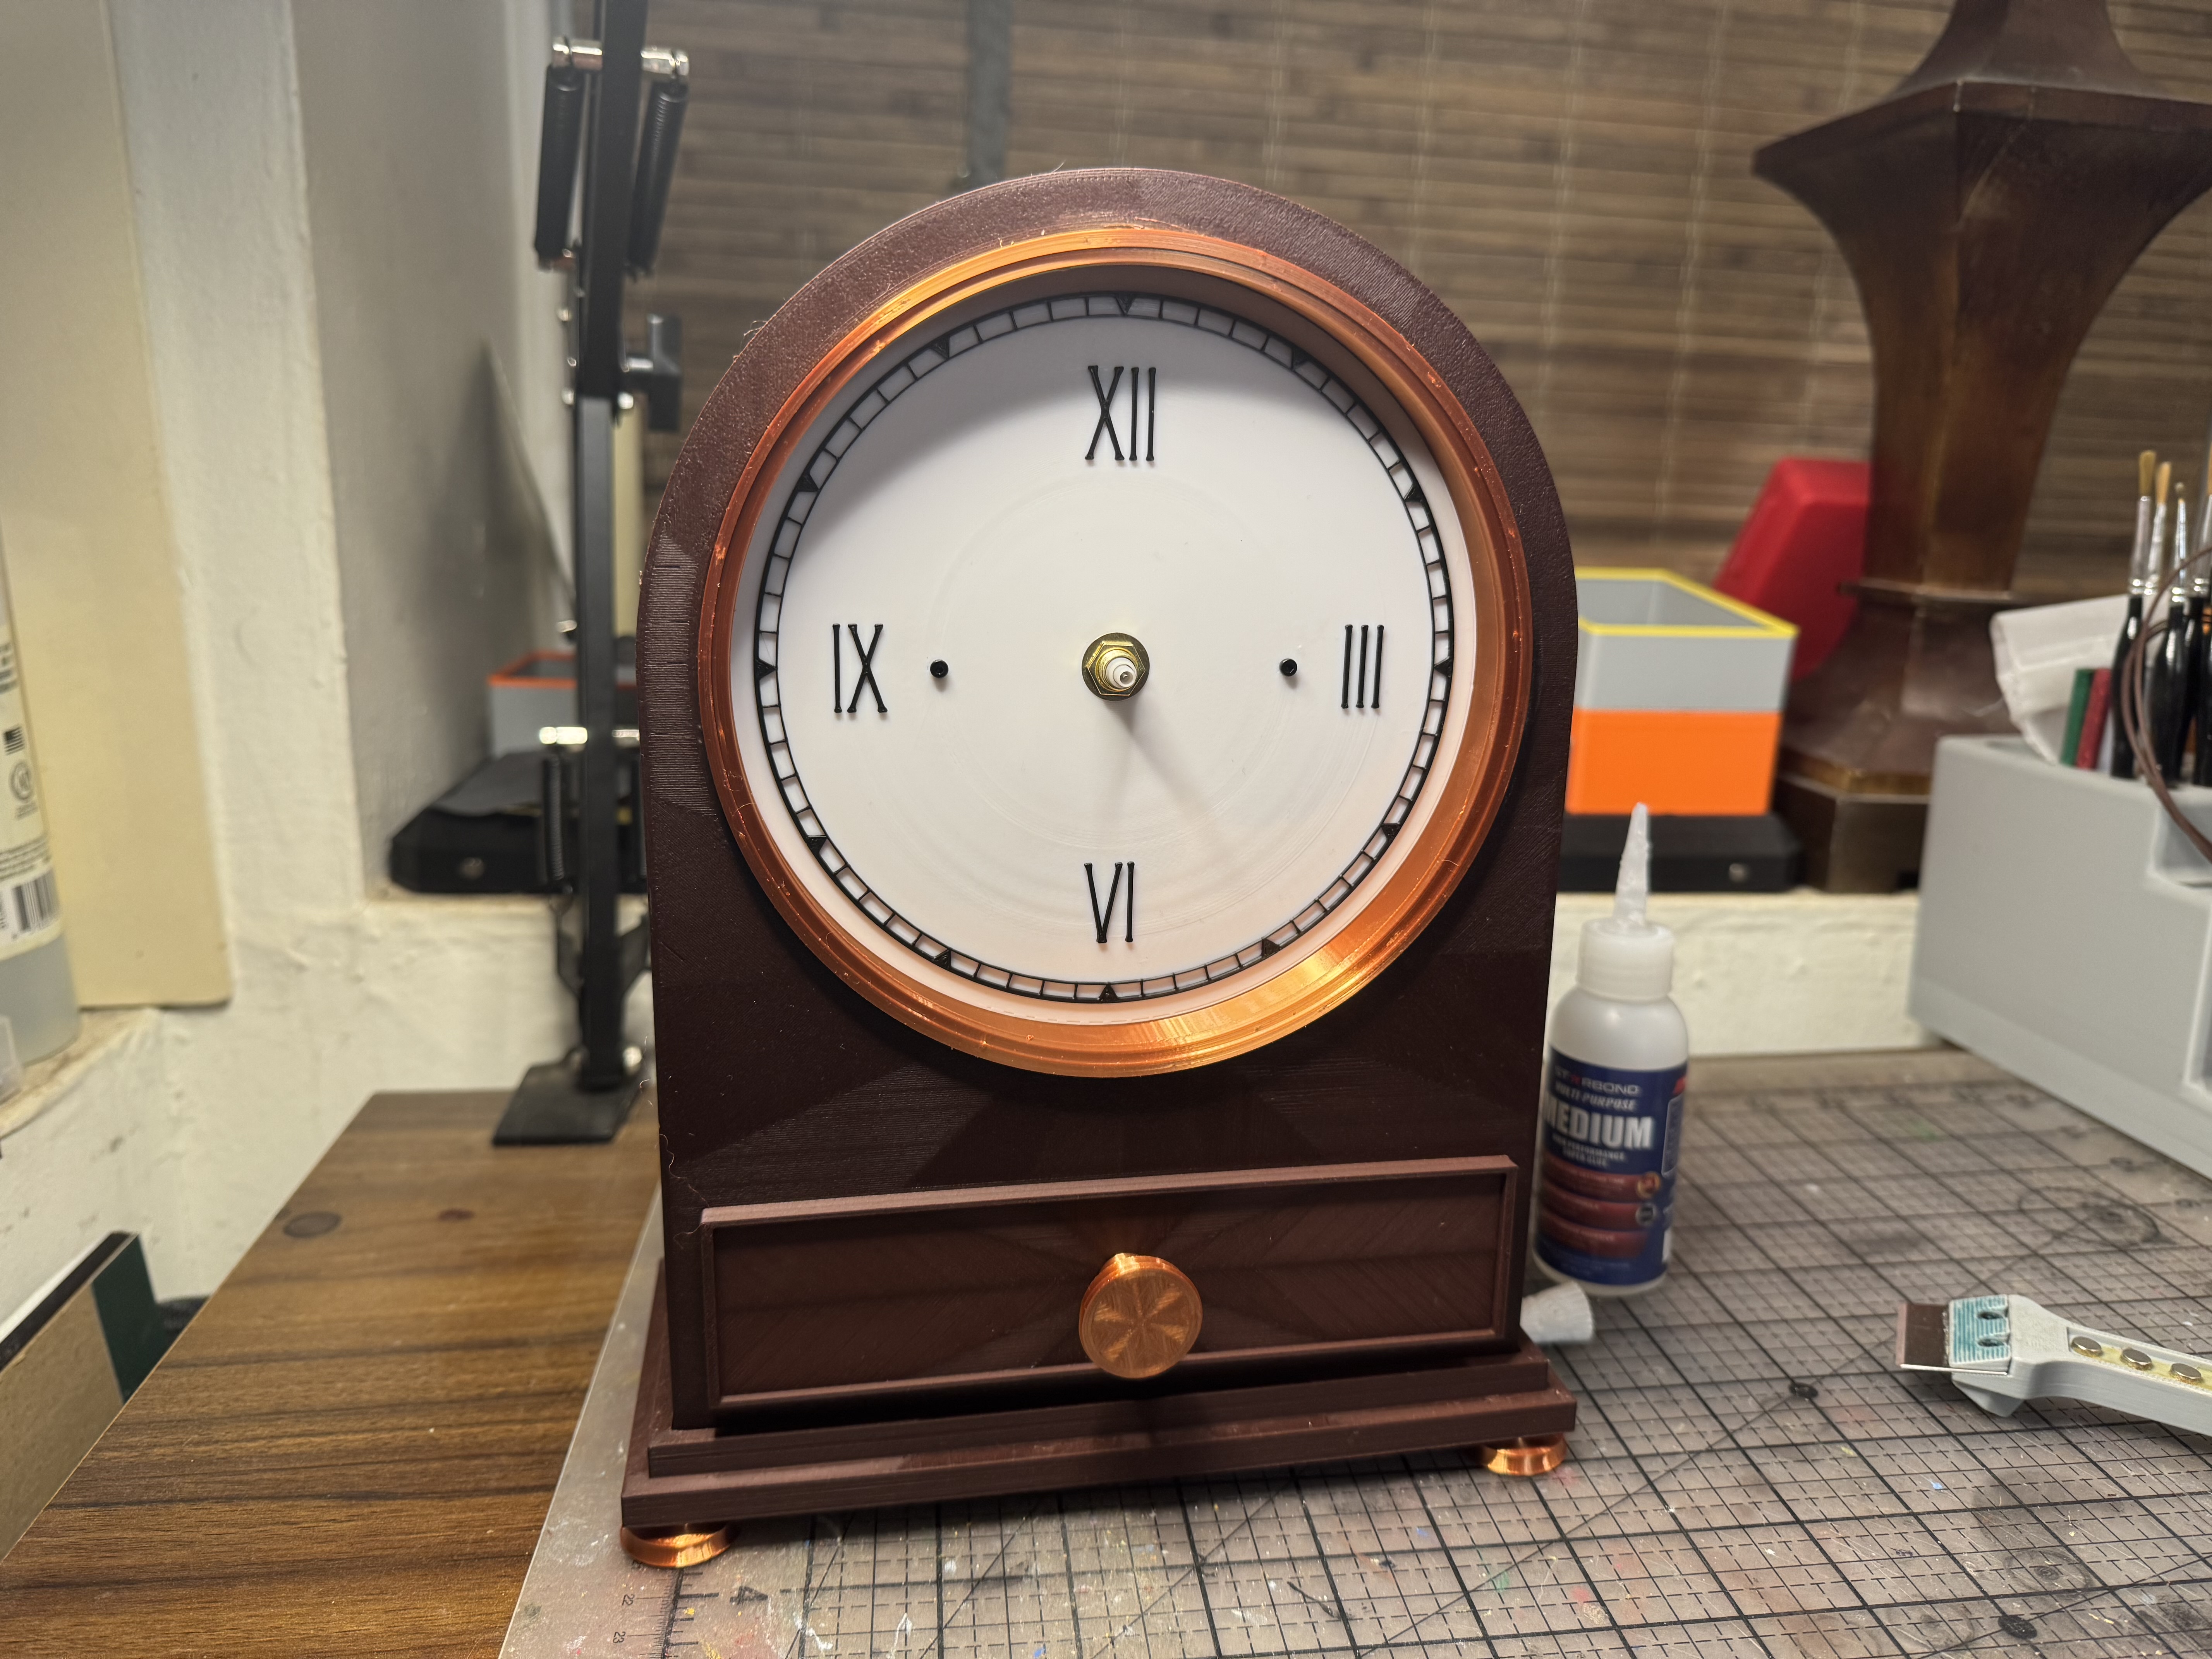 |
| Place the drawer in the Clock Body. Use a small amount of adhesive to attach the Drawer Stays to the top corners of the back of the Drawer. | 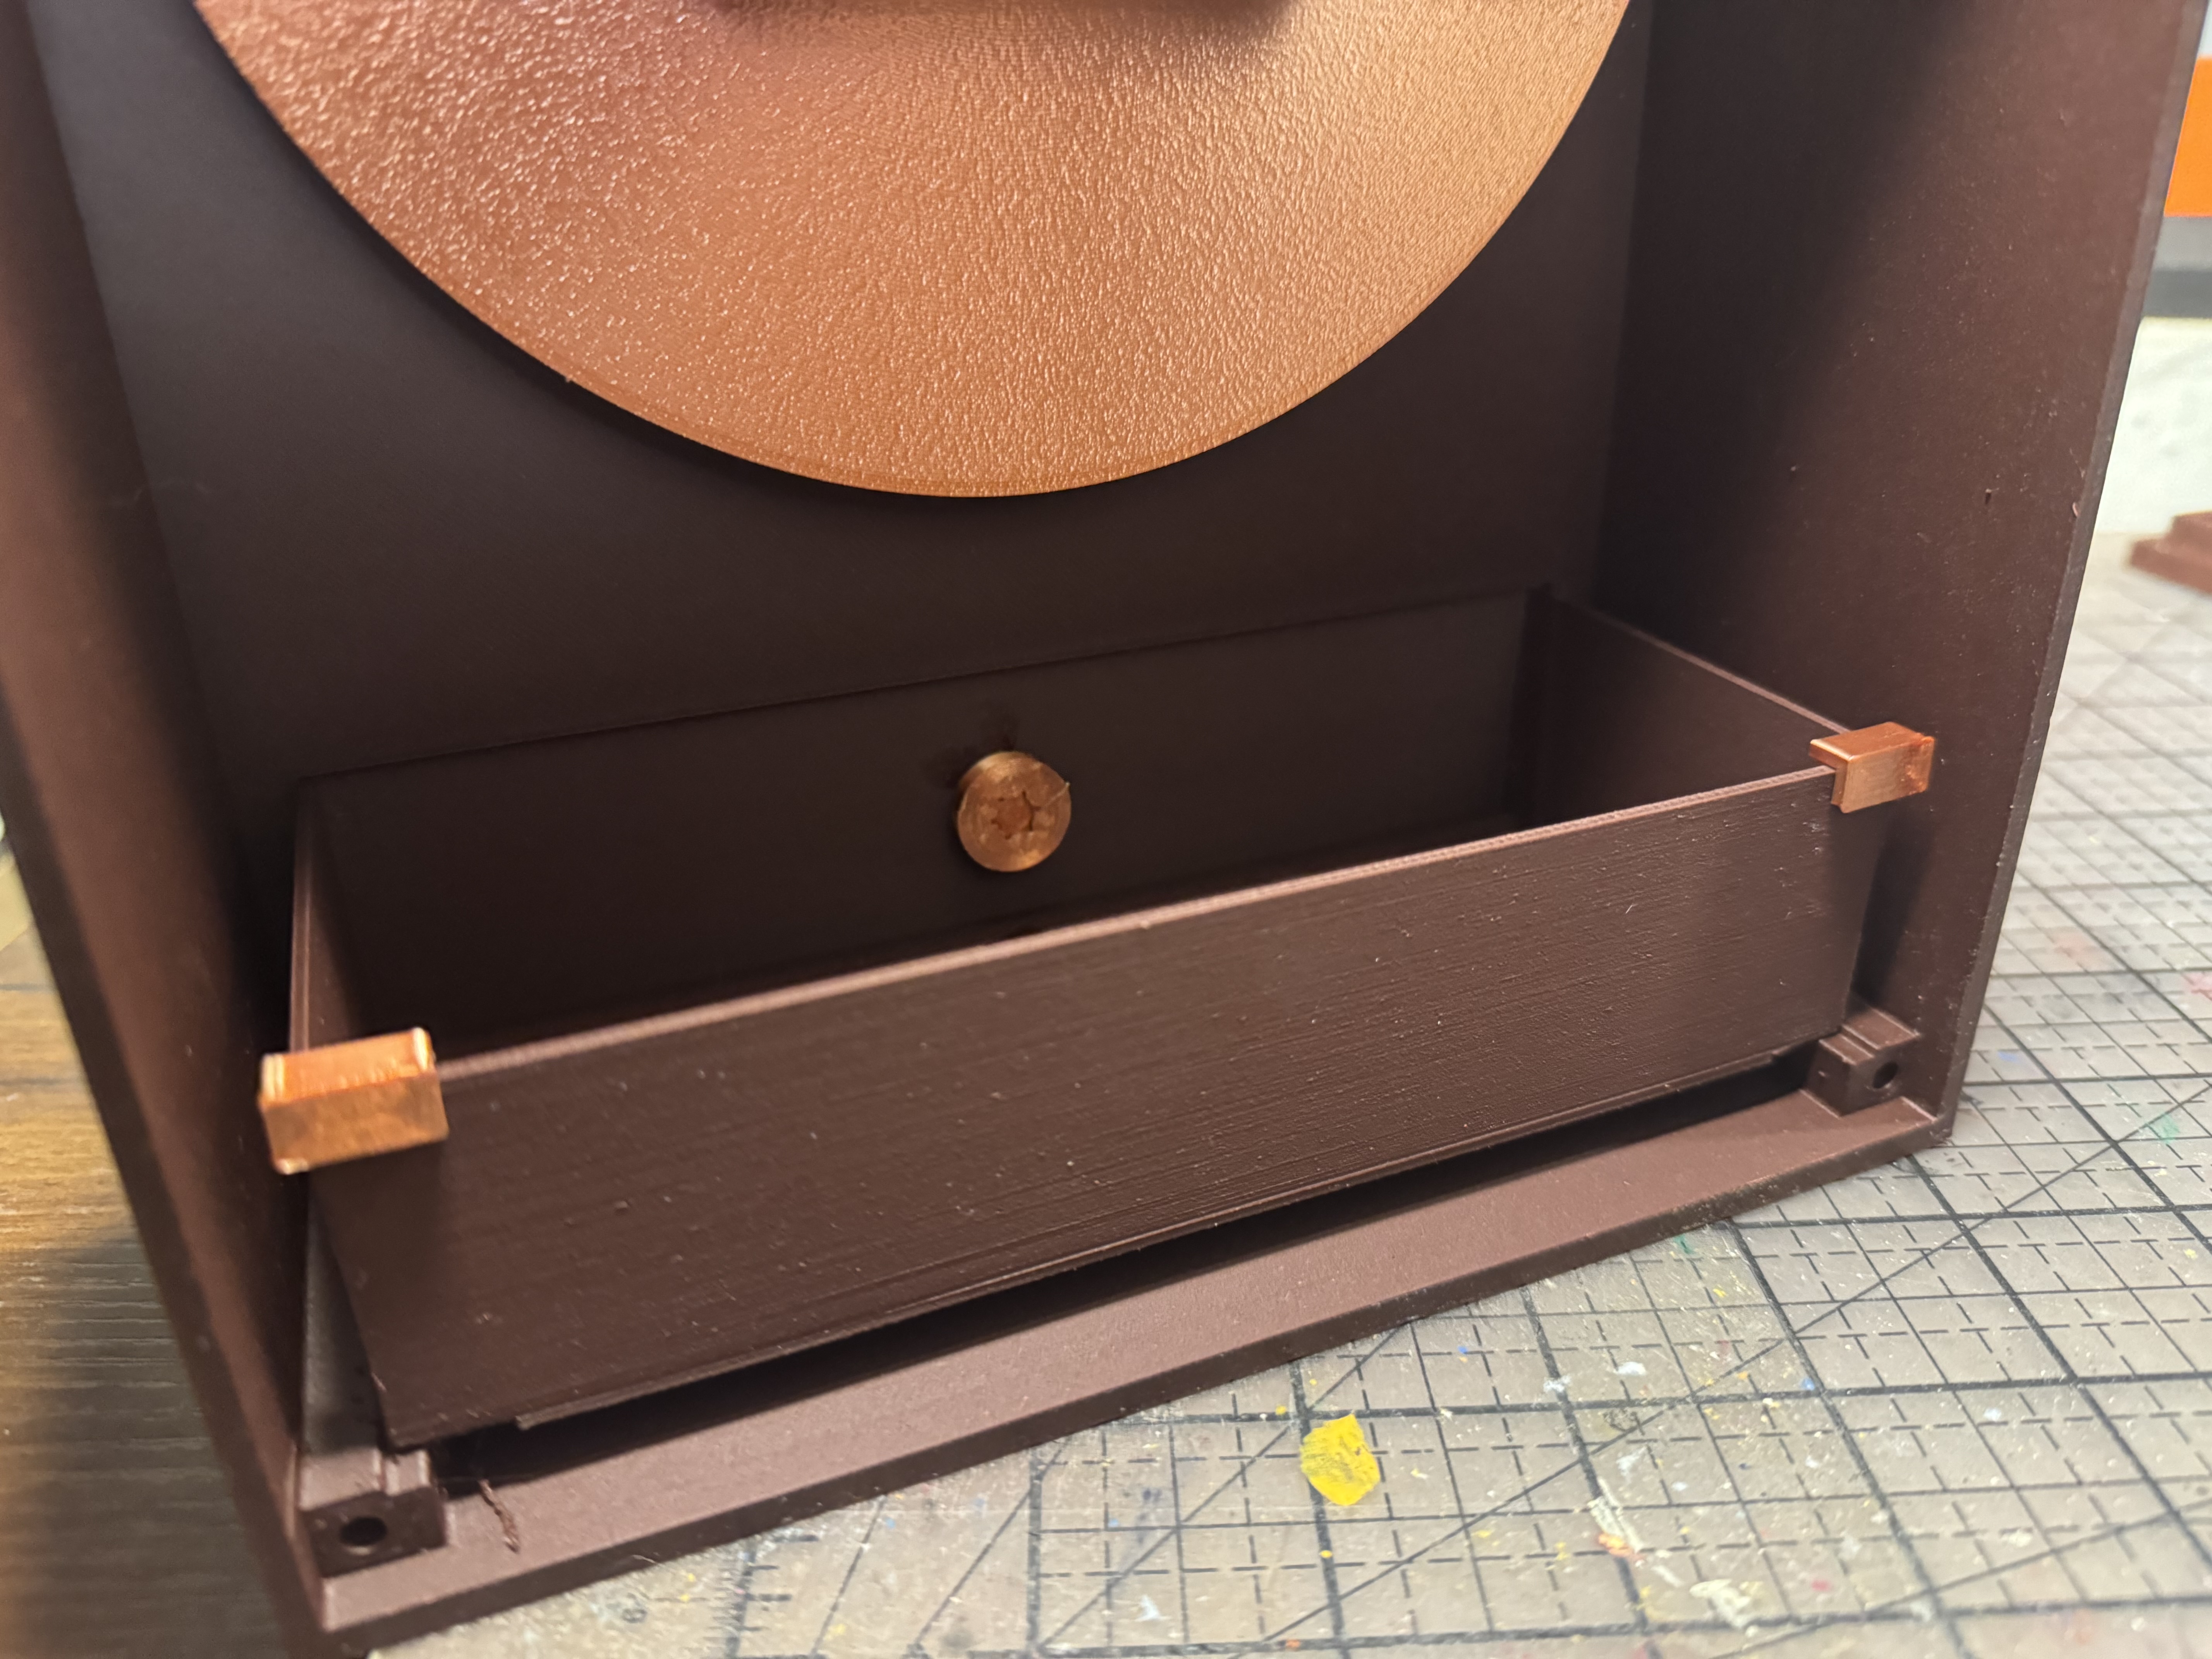 |
It's time to add the Clock Hands and Shaft End Cap to the Clock Face. There are 10 each of hour and minute hands sized for shafts of different widths. Test-fit to find the correct hands for your mechanism, then place them onto the shaft. Complete the assembly by placing the best-fitting End Cap to the end of the shaft. Put a battery into the mechanism and set the time using the dial on the mechanism.
You have a working clock! Now to the last steps. | 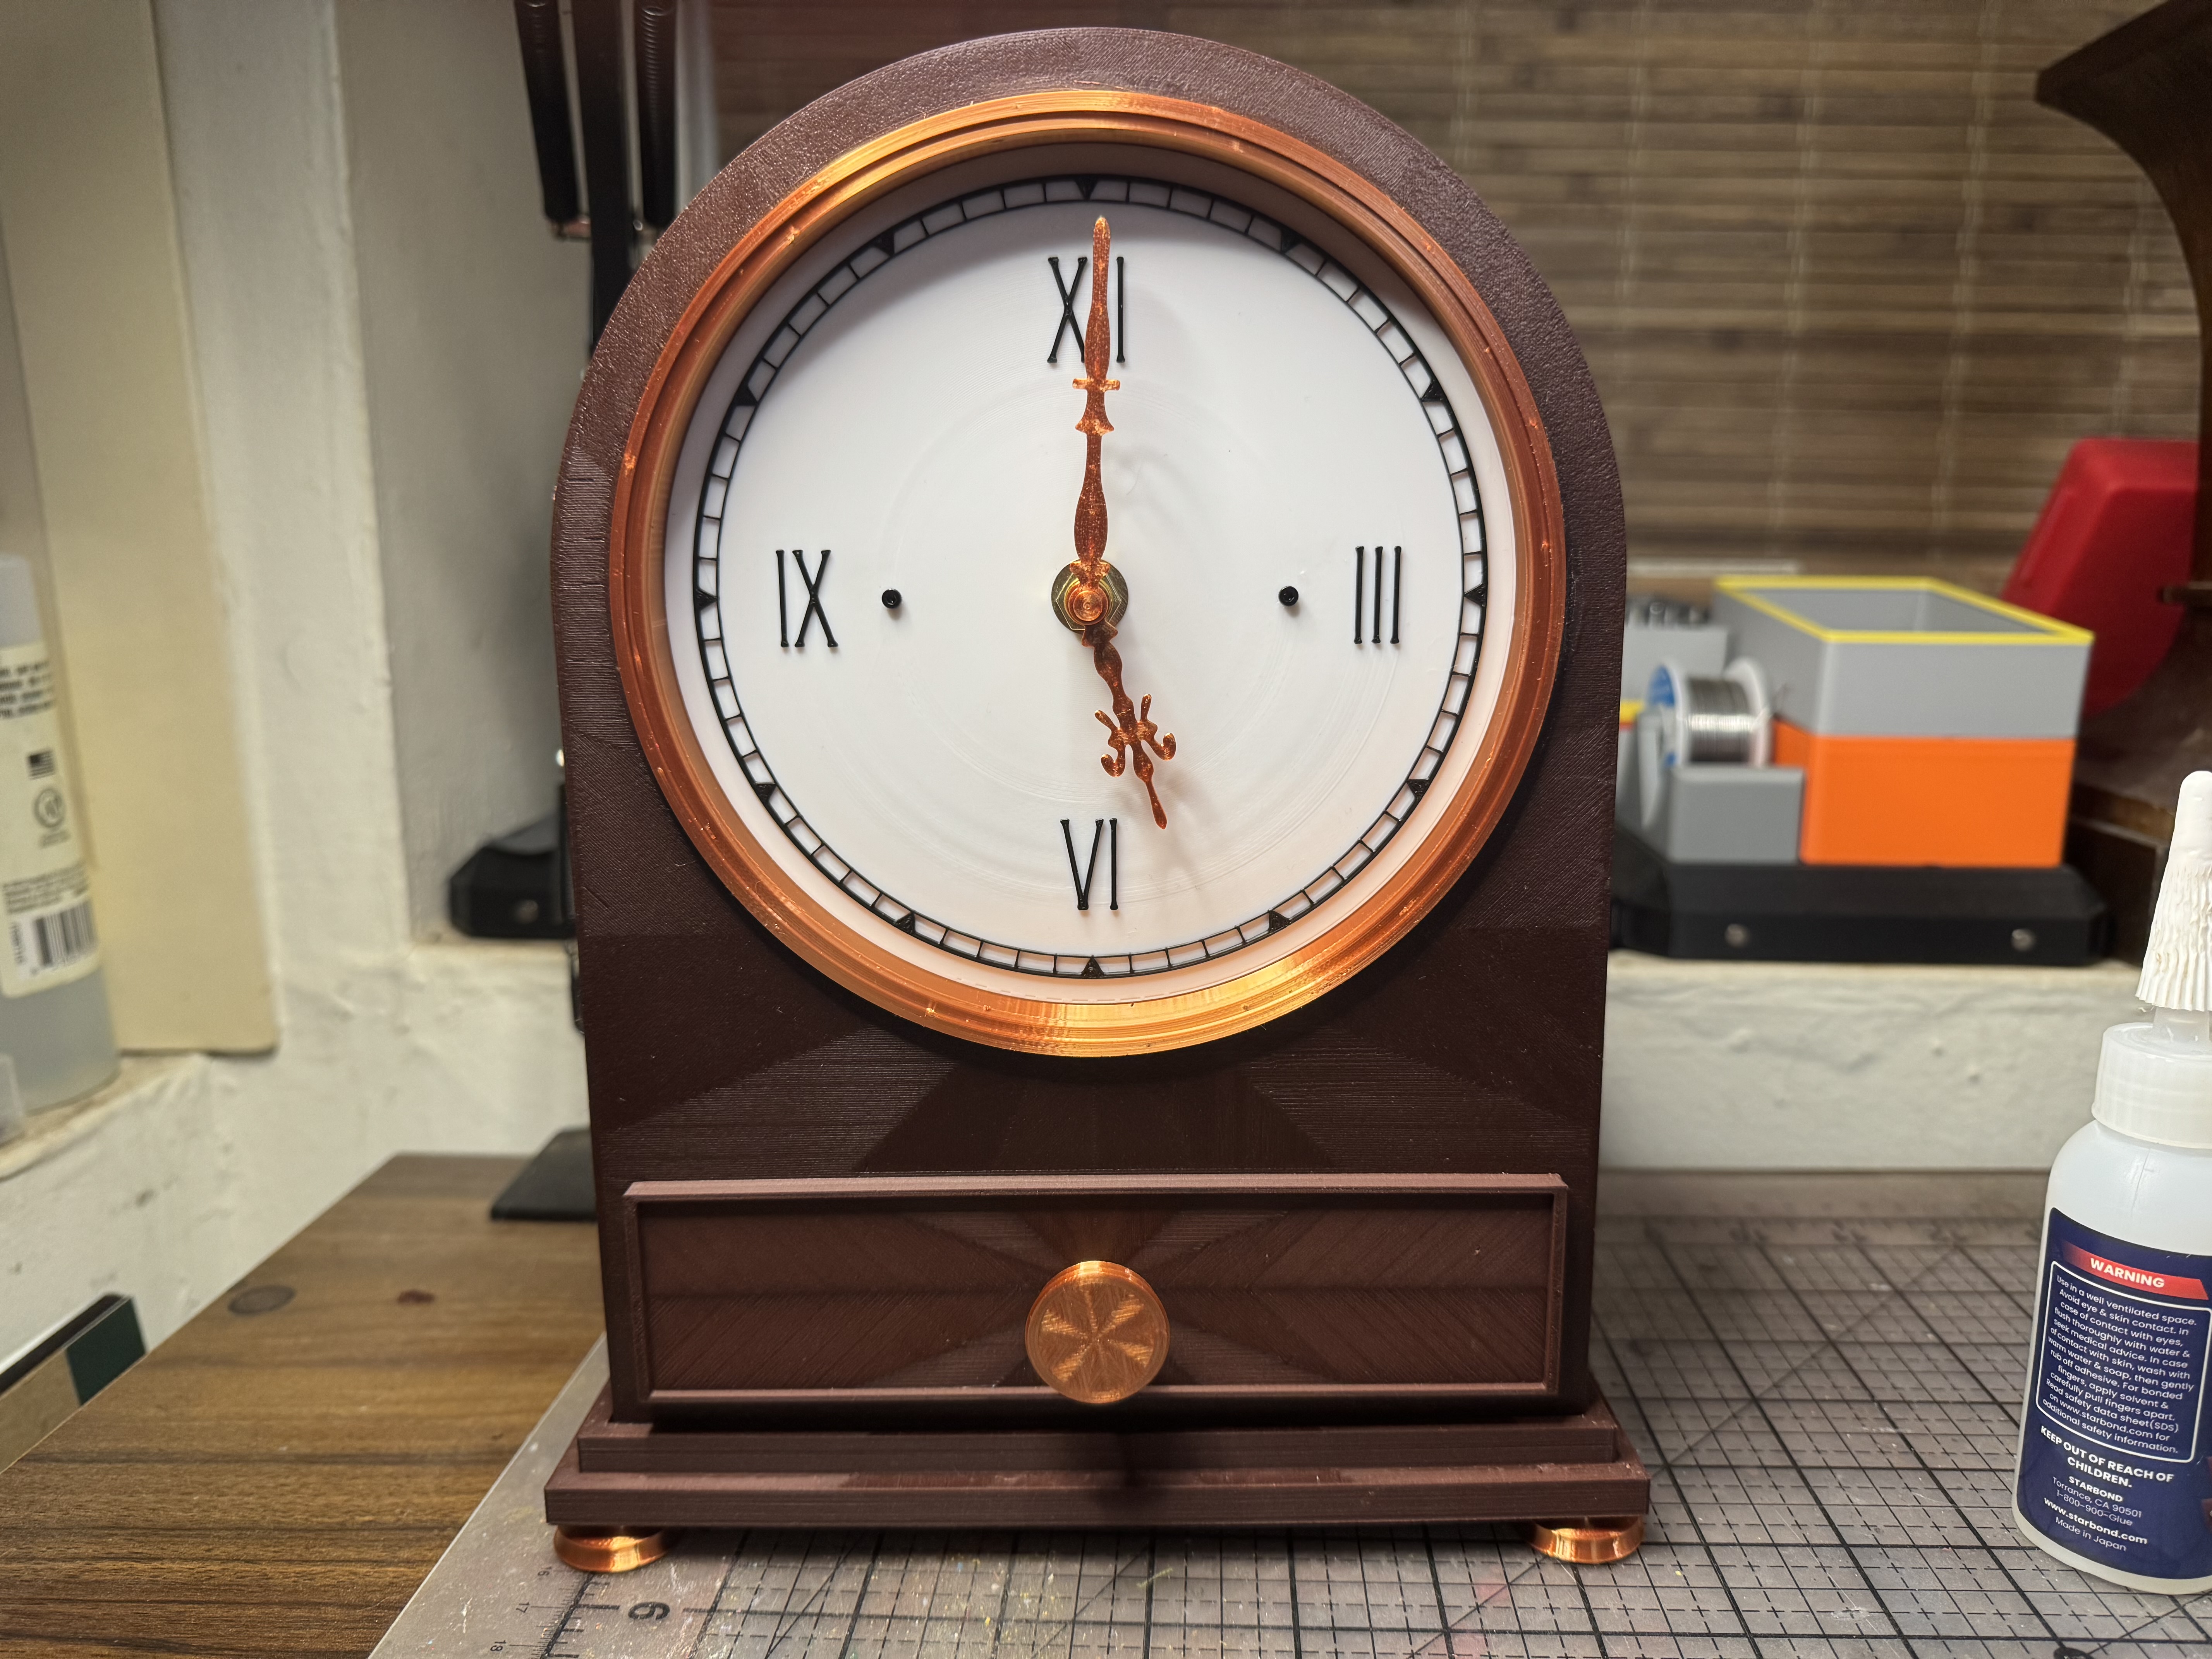 |
| Using a small amount of adhesive for a permanent joining, insert 4x Magnets into the receiving holes on the Clock Body. Do the same for the Backplane. Be sure that you insert the Magnets into the Backplane with the correct polarity for attraction! | 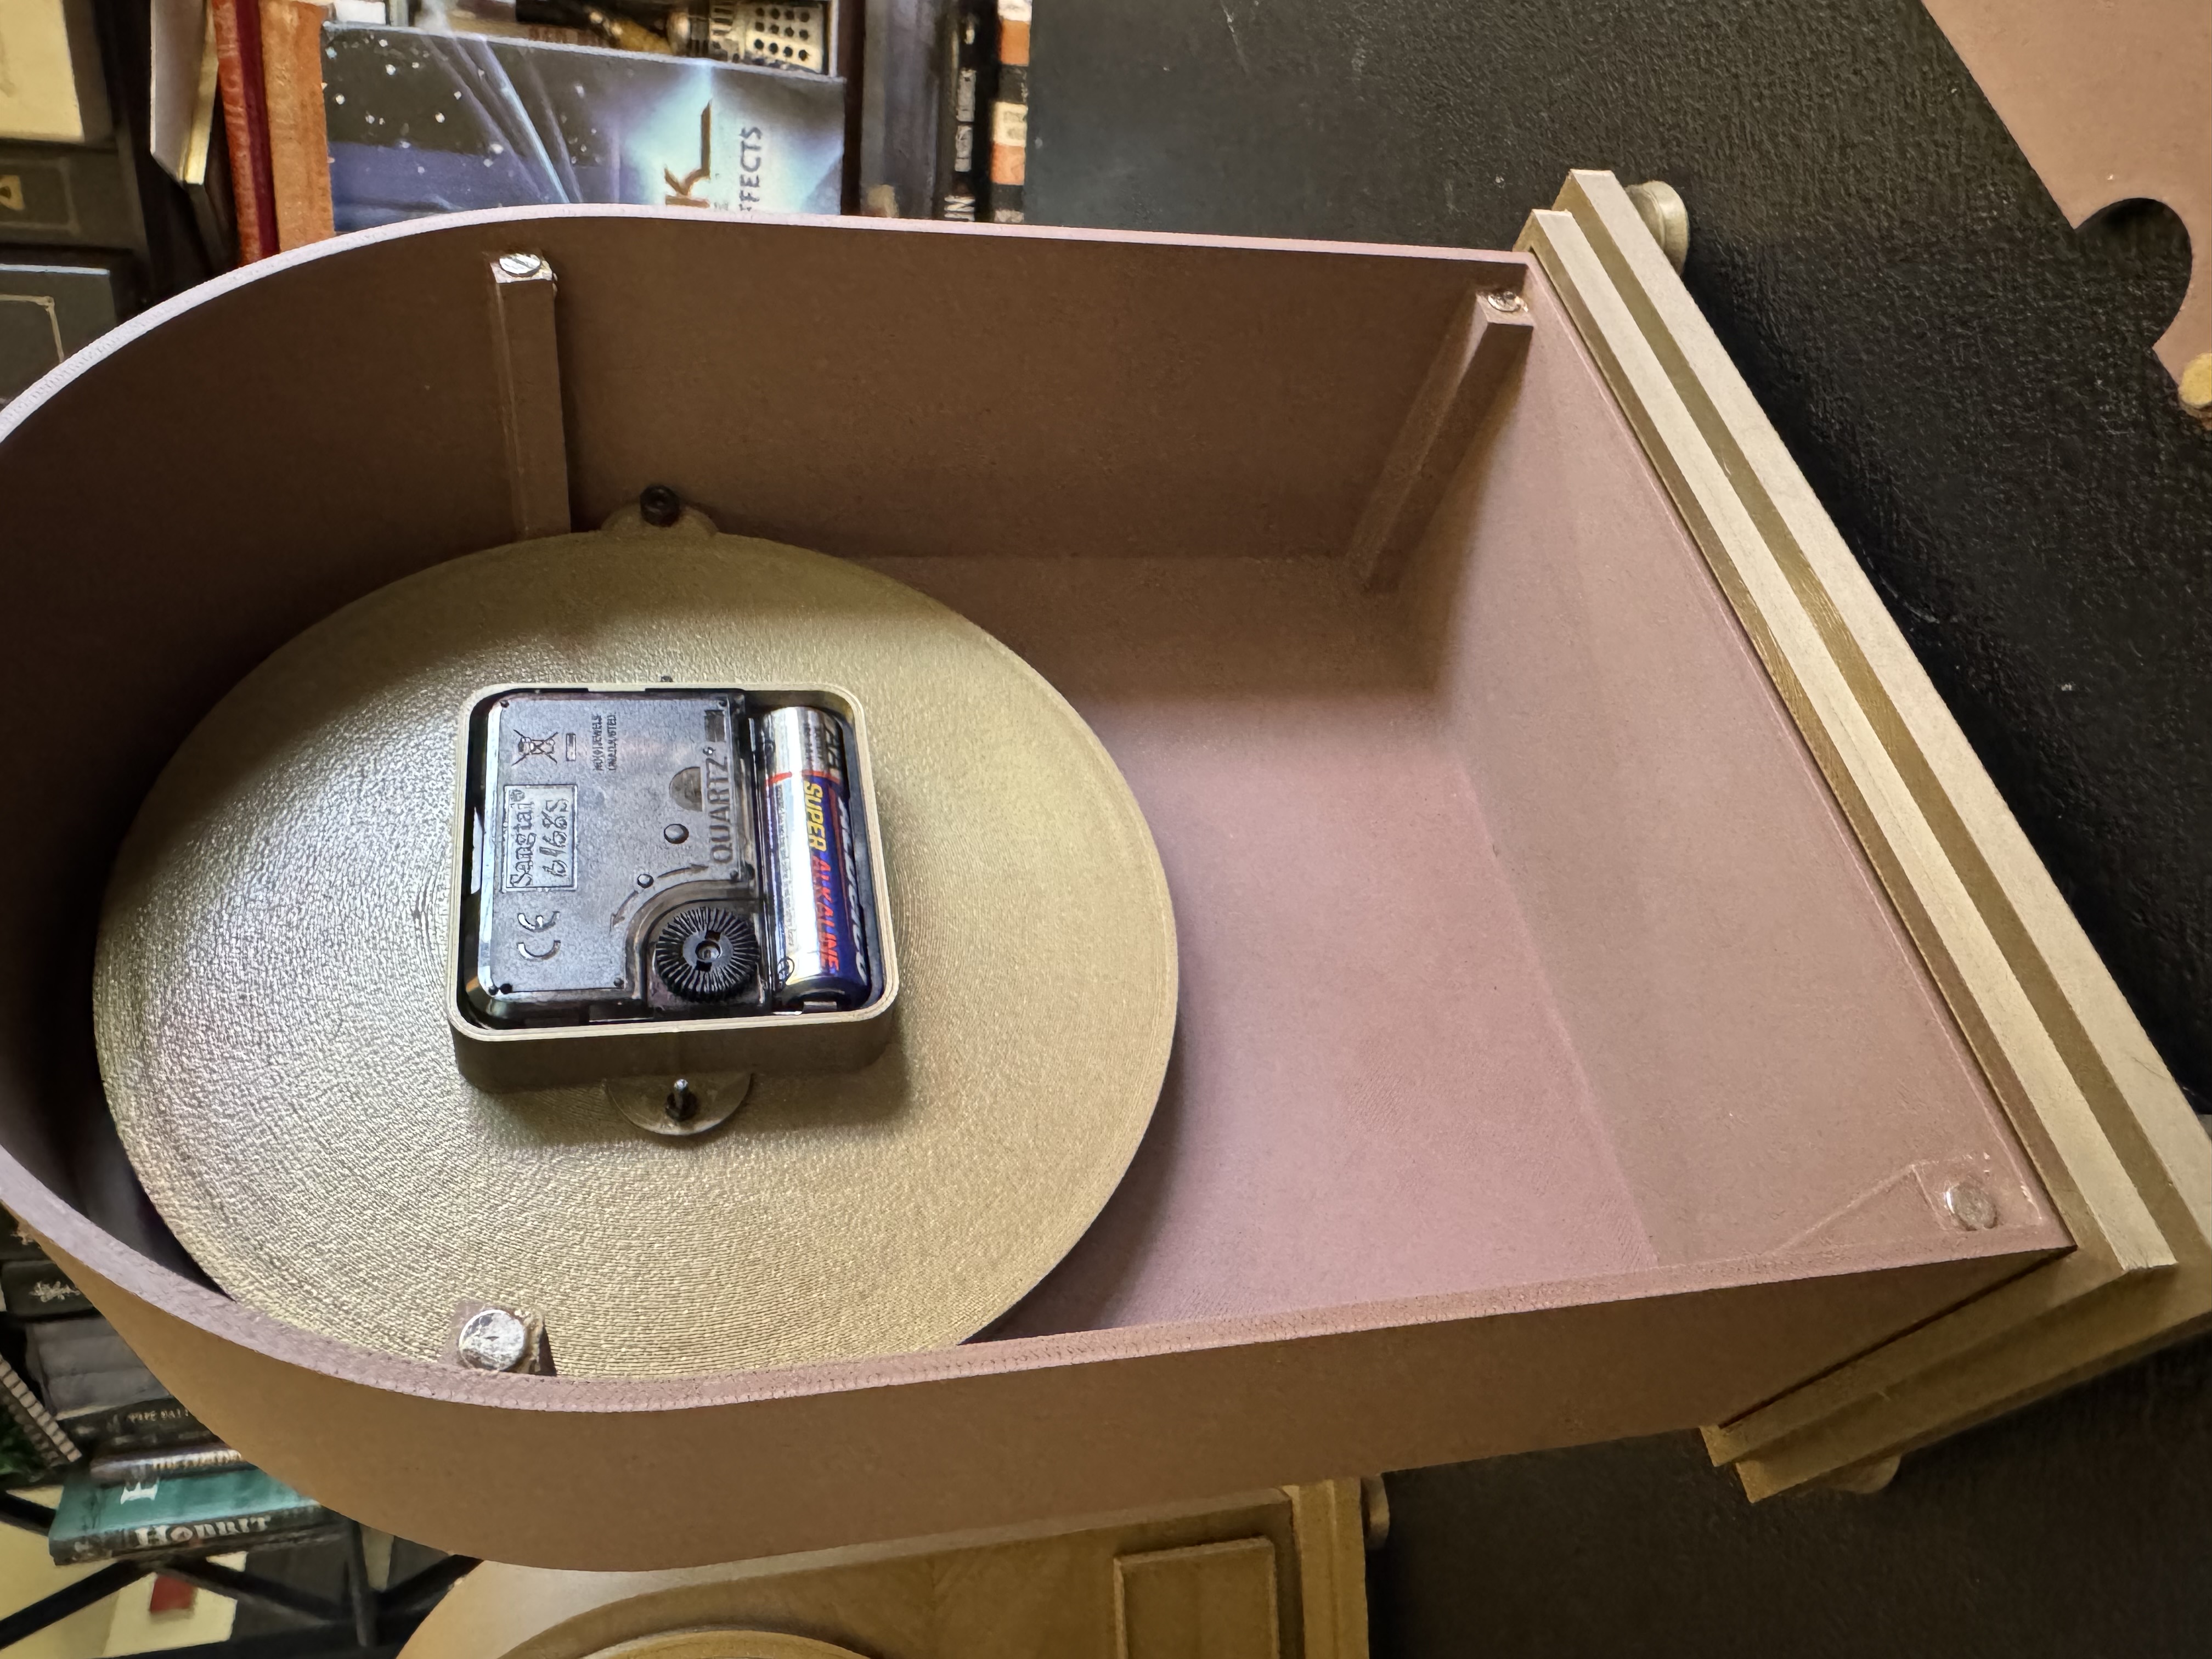 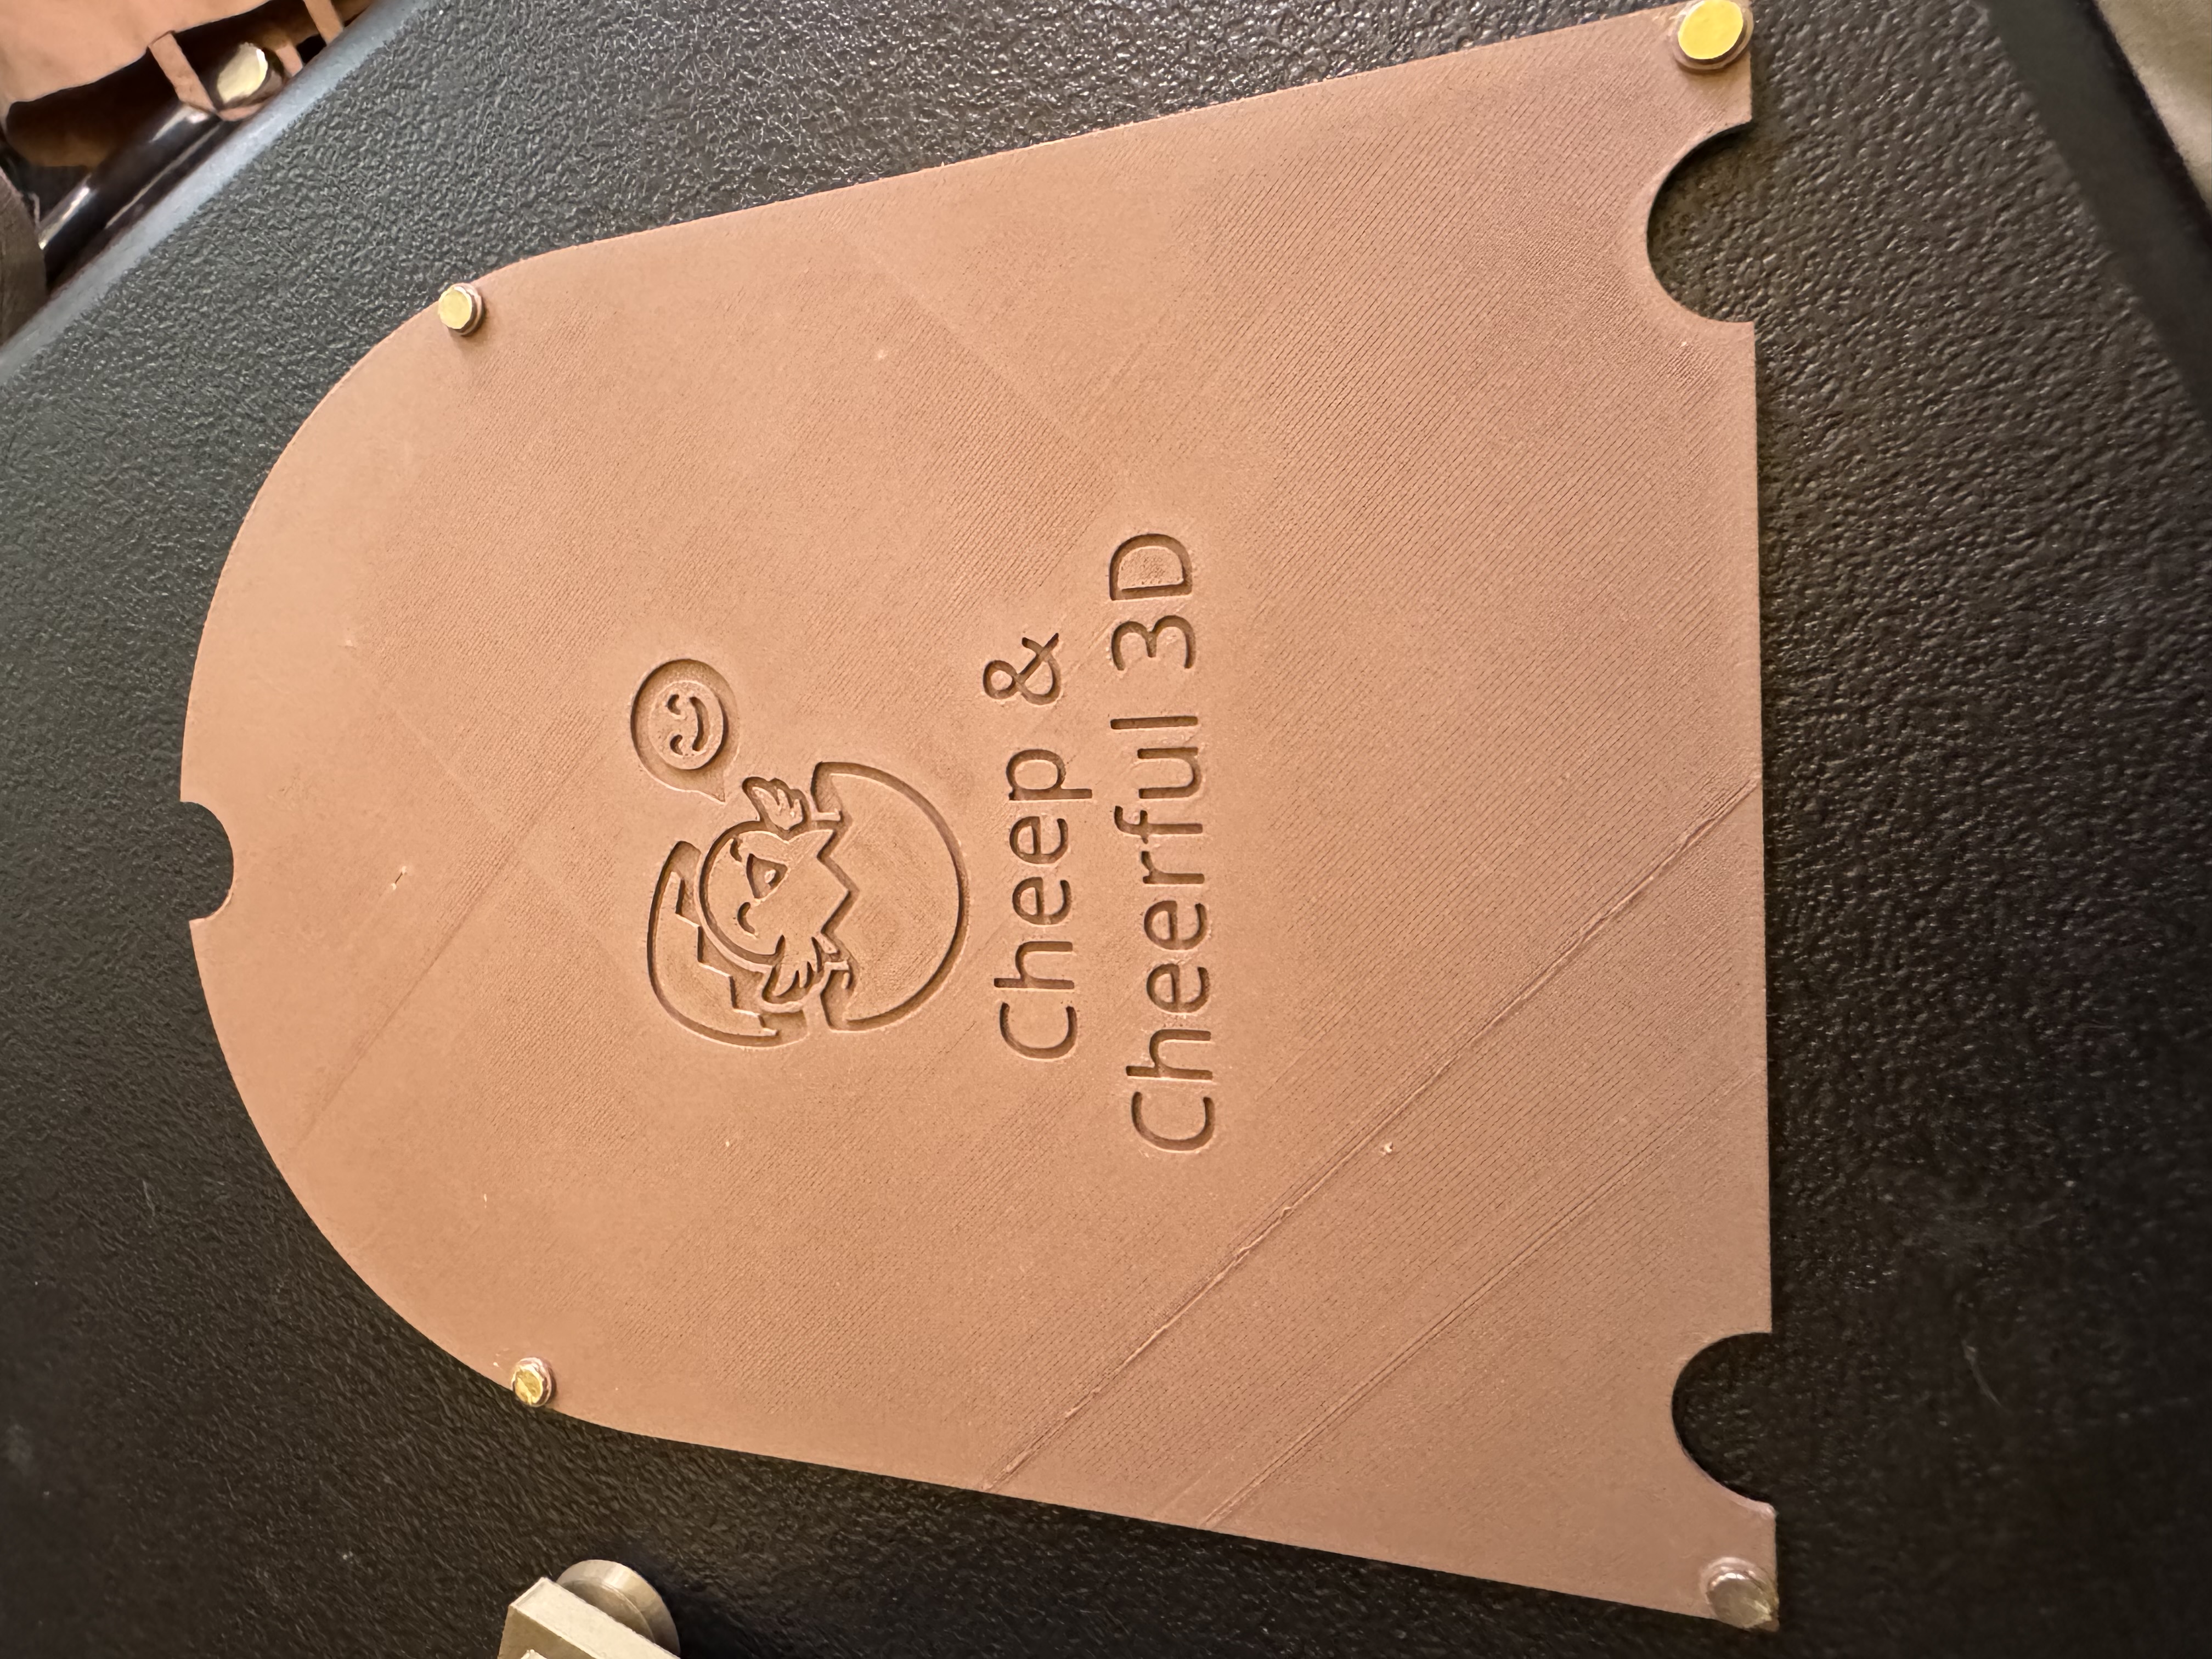 |
| Lay the Clock carefully on its back. Remove the protective plastic from the Acrylic Disc and place it into the depression in the Lens Ring. | 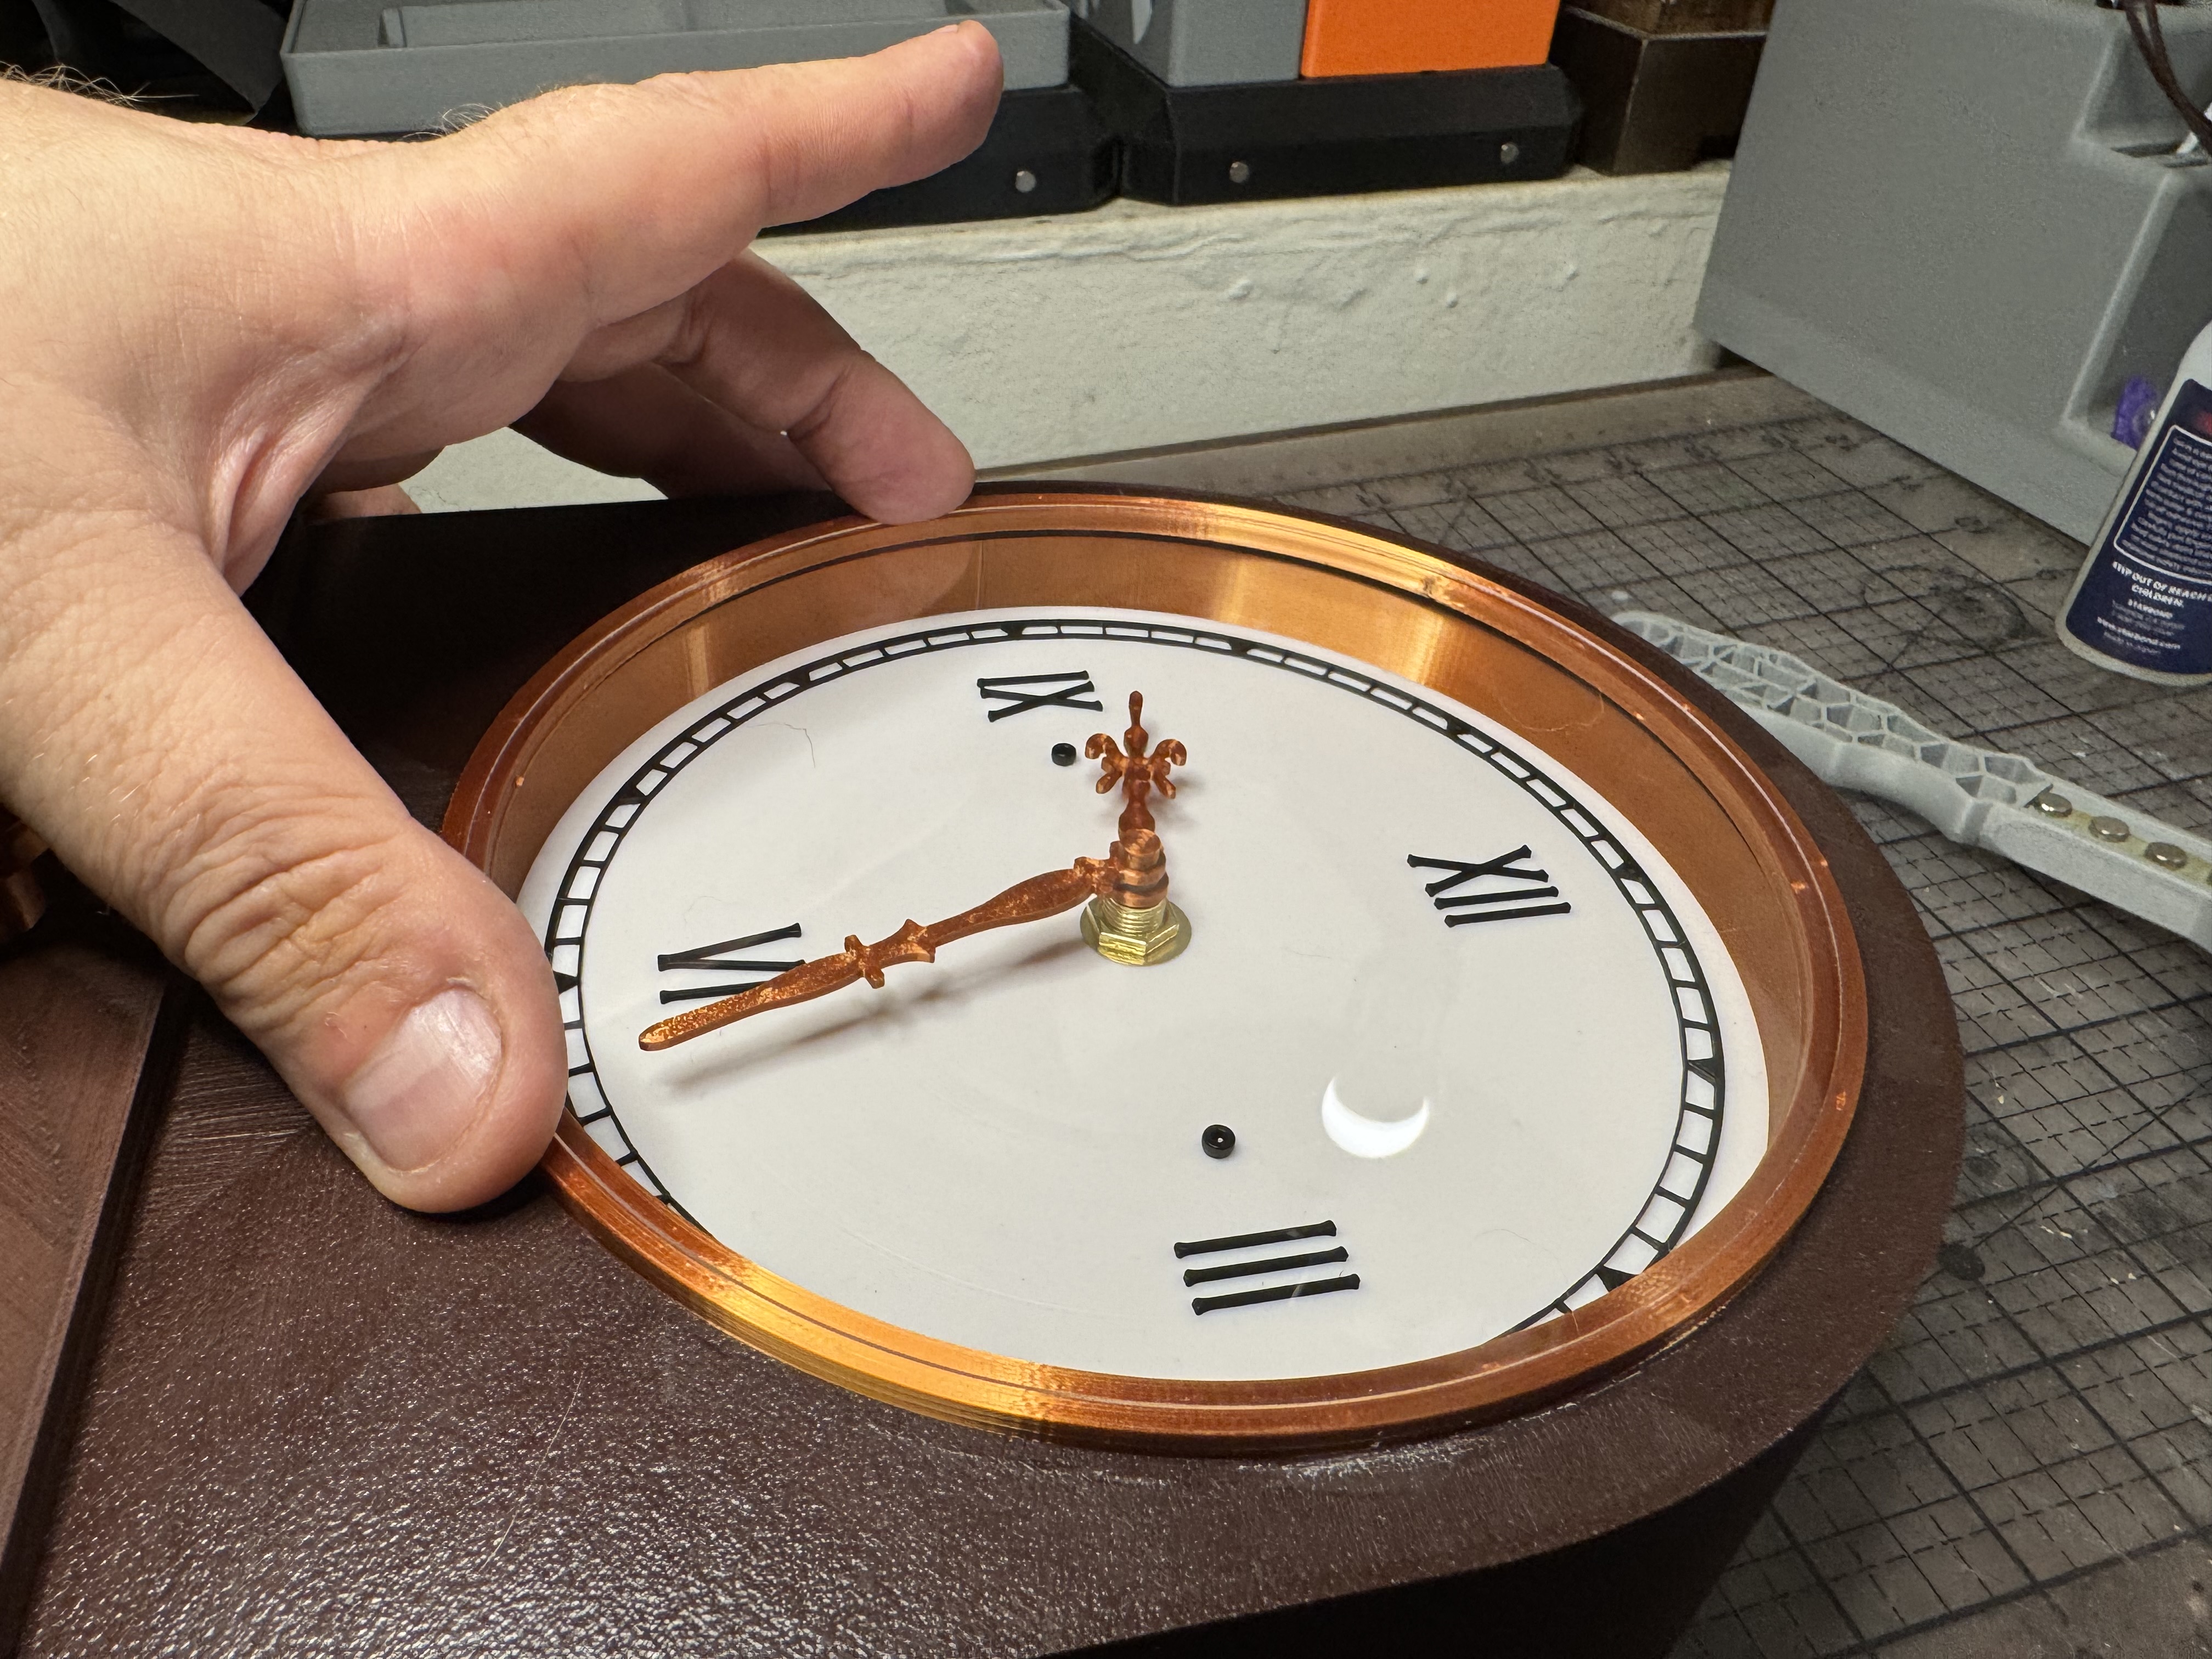 |
Place the Lens Retainer Ring Over the Disc and Lens Ring. The fit should be tight, but removable.
Your TEMPUS Arch Clock is complete! | 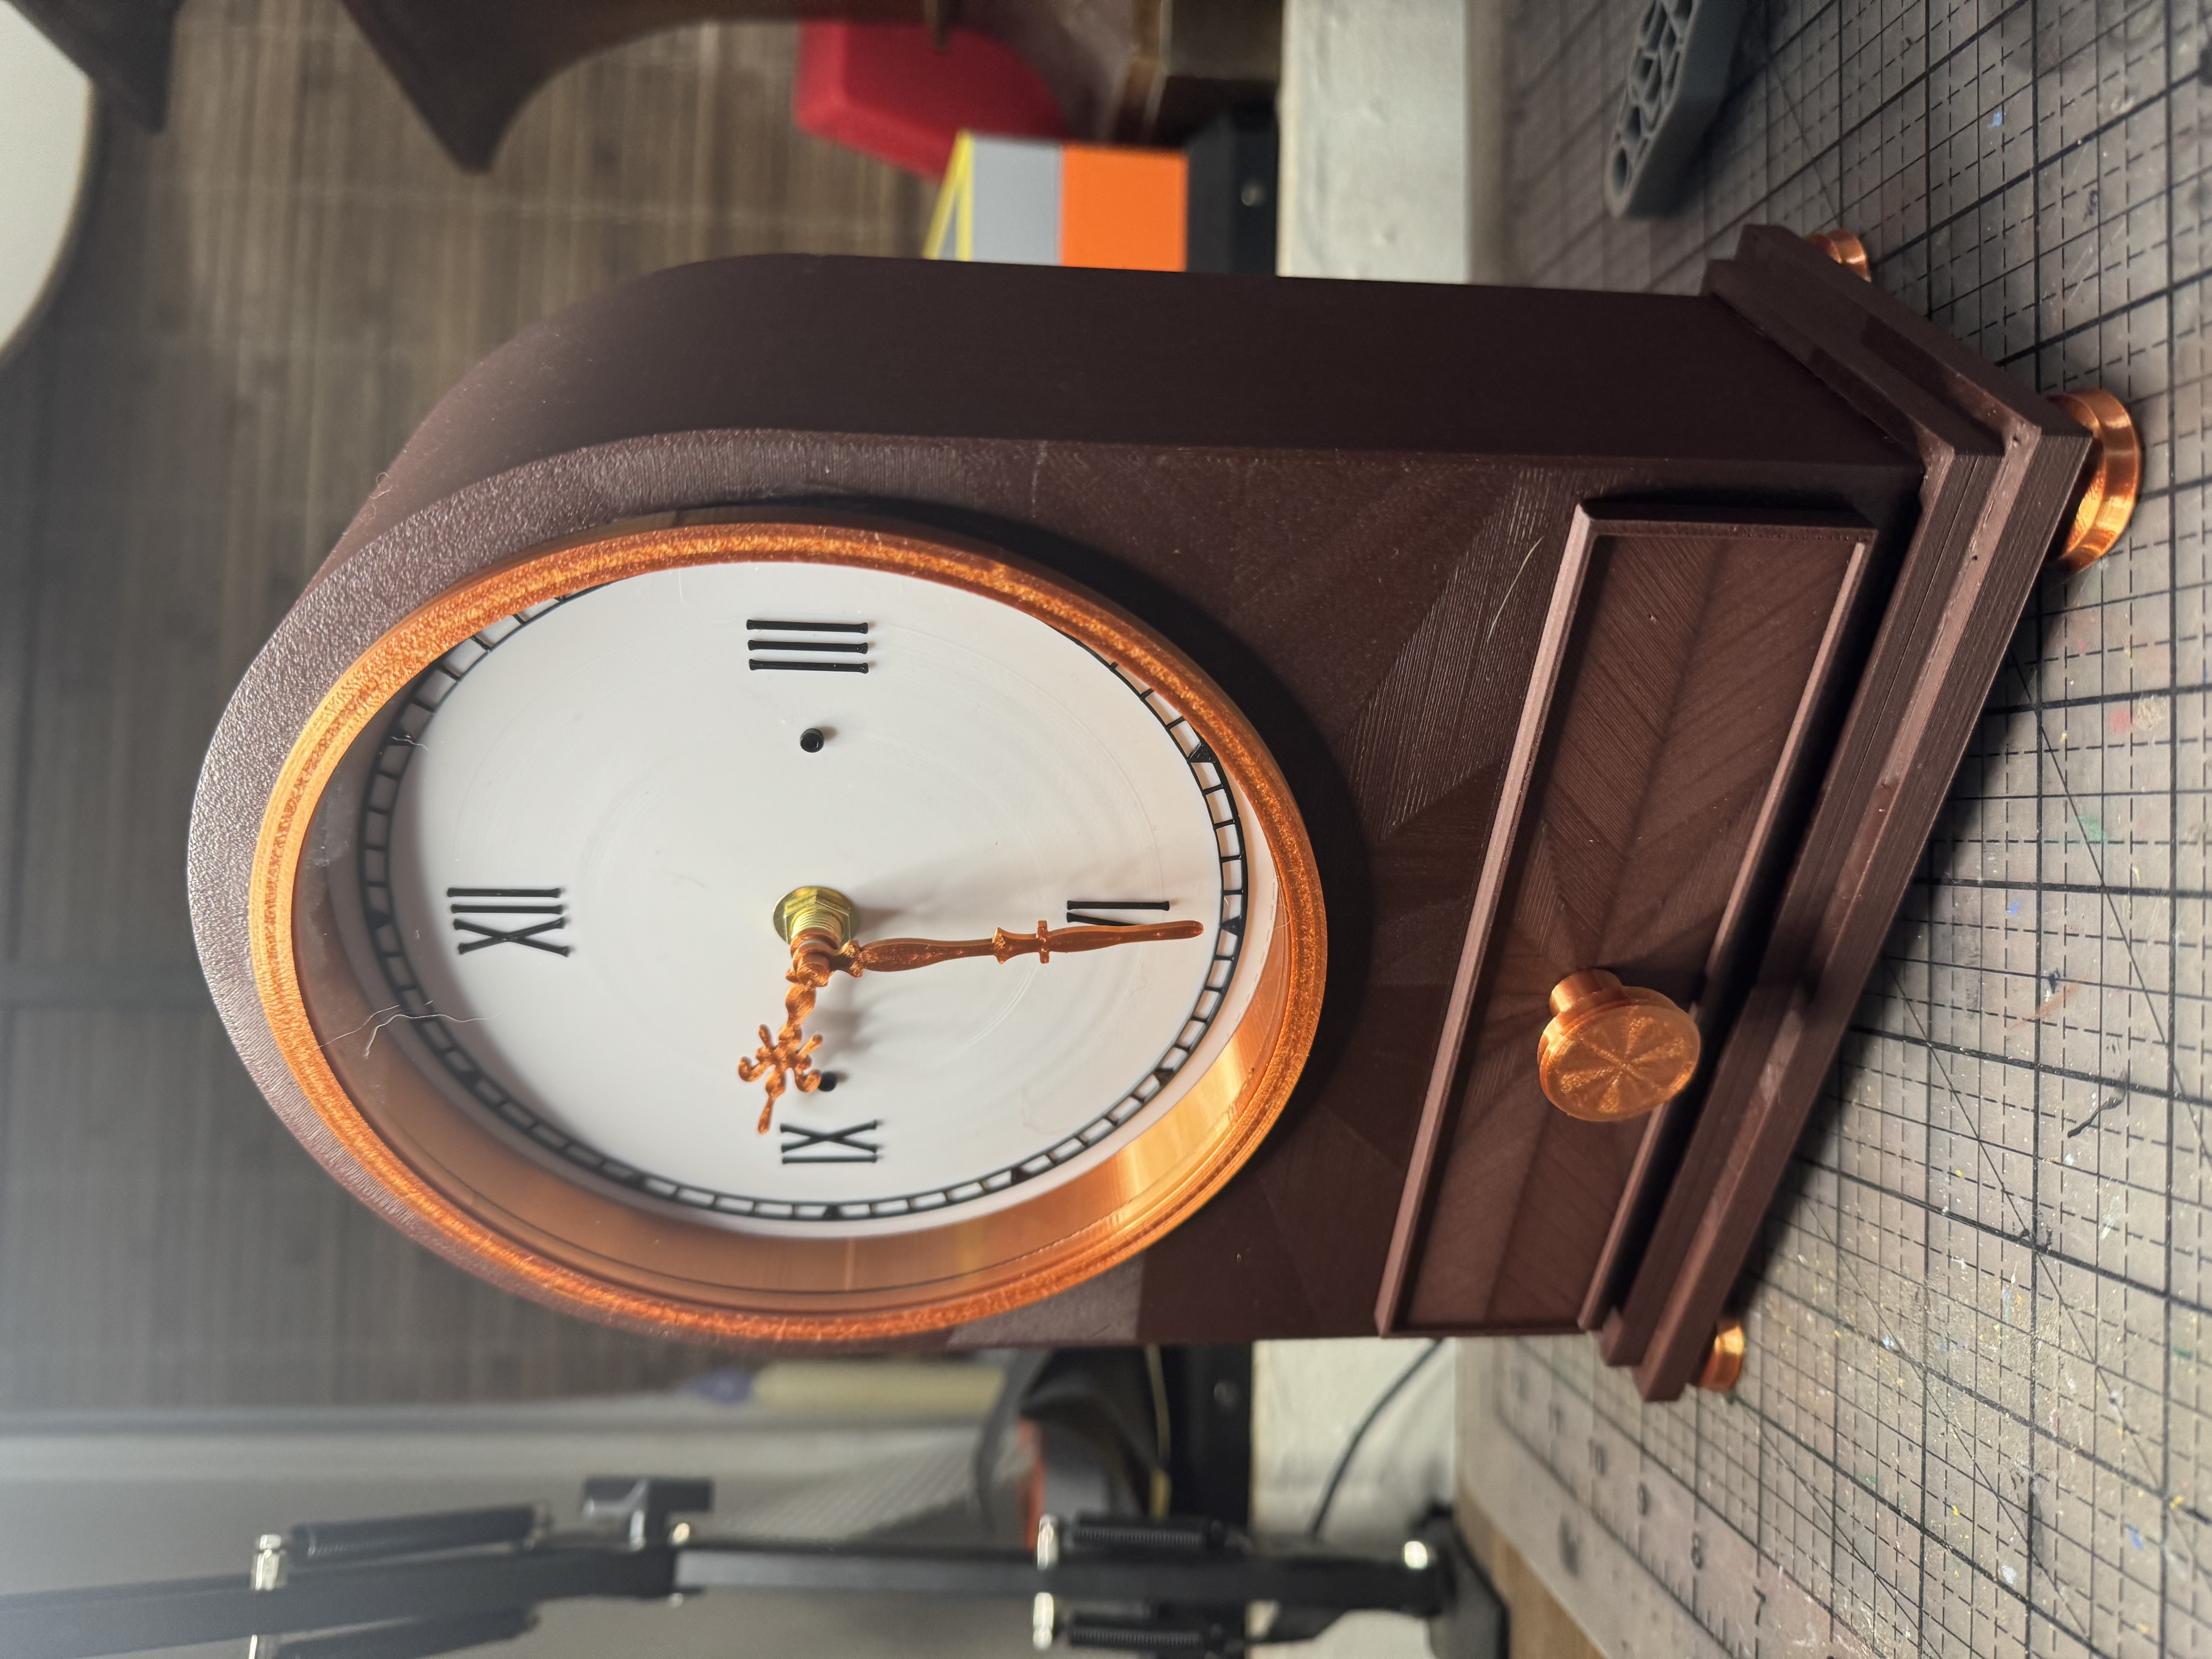 |
TEMPUS Arch v2 Customizable Clock Kit

Publicado em 2 de set de 2025
Gostou deste modelo? Crie uma conta grátis para salvar seus favoritos e voltar a eles depois.
Criar conta