Você está no 3DFinder
Buscamos em Thingiverse, MakerWorld e Printables ao mesmo tempo para te dar o melhor de cada uma.
Descrição
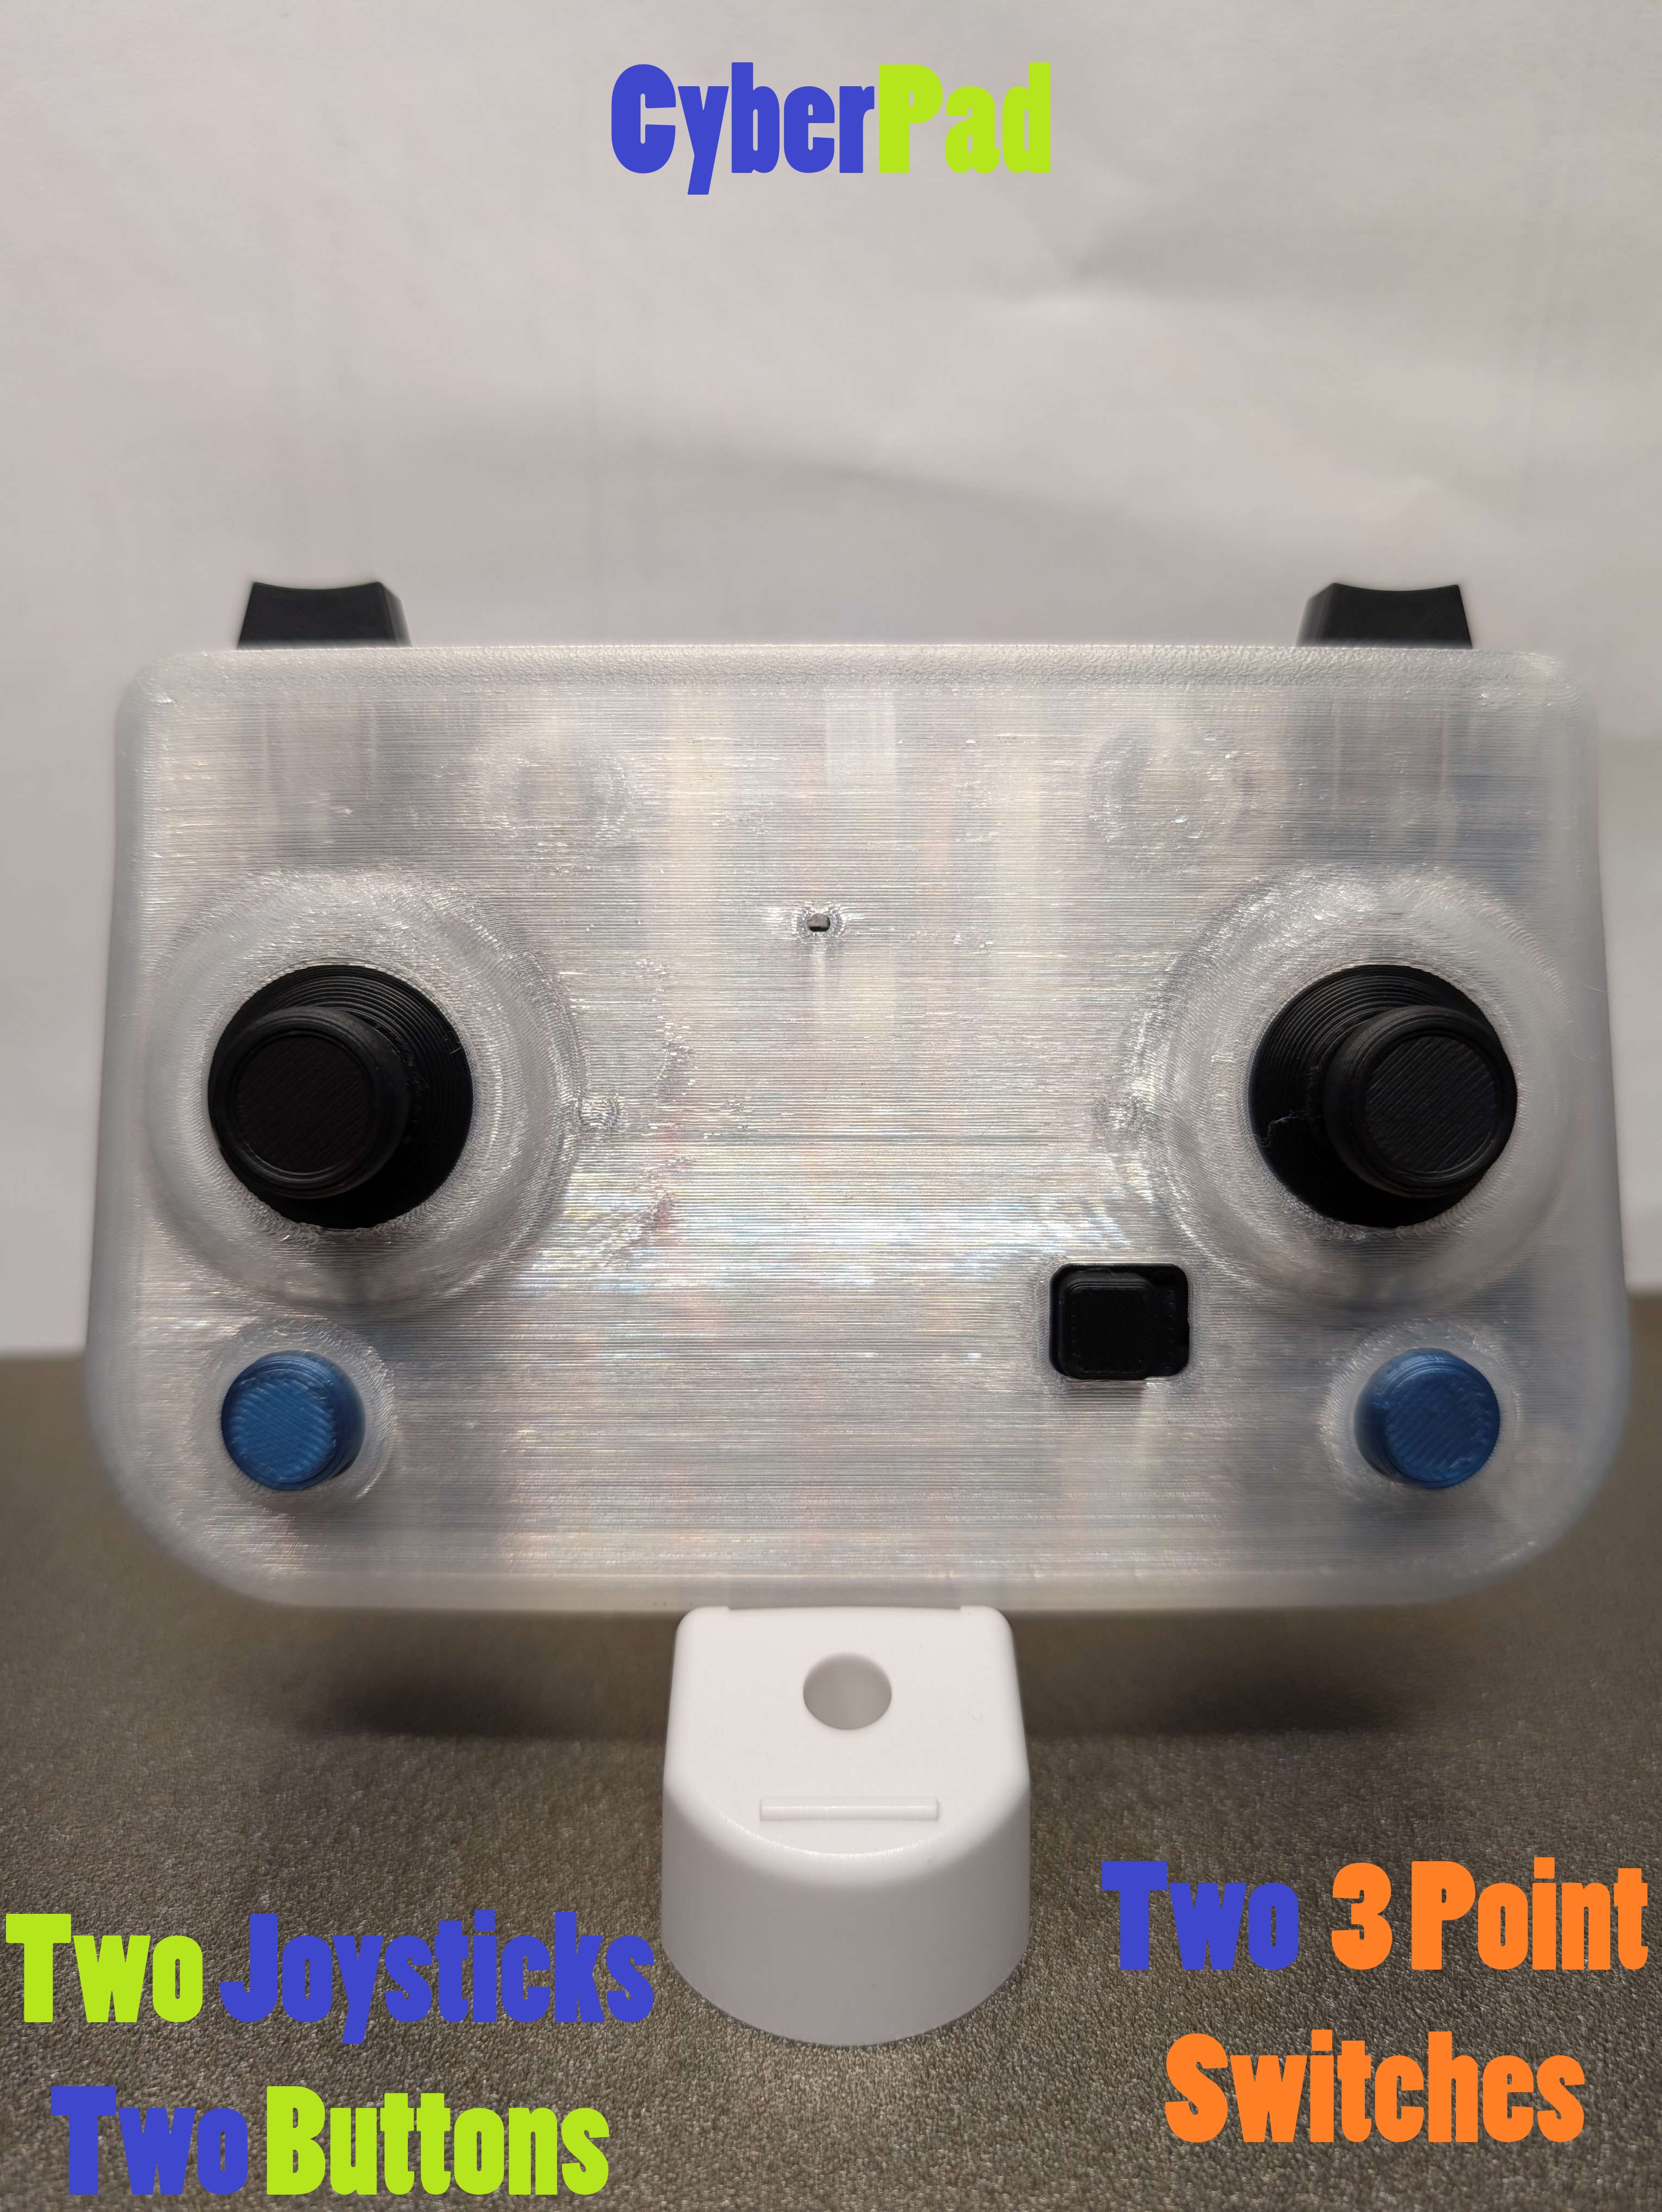
CyberPad
Originally created for a project I'm about to release, the CyberPad has all functionality of the official remote and more.
Update:
Added a second print profile for a 3 piece cover. This improves the surface quality of the print but adds another step.
About:
This is a fully redesigned remote with enough buttons, Switches, and Joysticks to work with most projects. It does all this while having a small comfortable footprint. Going forward this will be the default I will use for all my Cyberbricks projects. Feel free to use and reprogram this remote for all you're future and past projects.
Specs:
2 Dual-Axis Joystick Module with 3Pin SH1.0 Connectors
2 Momentary Button Module with 2Pin SH1.0 Connector
2 Three-Position Rocker Switch Module with 3Pin SH1.0 Connector
1 14500 7.4V 800mAh Li-ion Battery
1 Remote Control Transmitter Shield
1Power Switch Module with 2Pin XH2.54 Connector
Dimensions: L=92 W=138 H=52
All parts are included in the Cyberbricks ultimate hardware kit but, you will need to buy a second button or just not install it if you have the basic kit.
Additional Parts:
In addition to the parts listed above in the specs list you will need the 3D printed parts and the magnets and screws included in the cyberbrick kits.
- Super Glue: I use Gorilla glue pens :D
- All printed parts can be made out of PLA
Battery safety:
Li-ion battery's a are generally safer then there counterparts Li-po, they still can be dangerous if not used properly.
Proper Usage: Always use lithium-ion batteries according to the manufacturer's instructions. Avoid using chargers that are not compatible with the battery, as this can lead to overcharging and overheating.
Storage: Store batteries in a cool, dry place away from direct sunlight and heat sources. Avoid exposing them to extreme temperatures, which can increase the risk of thermal runaway (a condition where the battery overheats and can catch fire or explode).
Inspection: Regularly inspect batteries for signs of damage, such as swelling, leaks, or corrosion. Damaged batteries should be
disposed of properly and not used.
Template
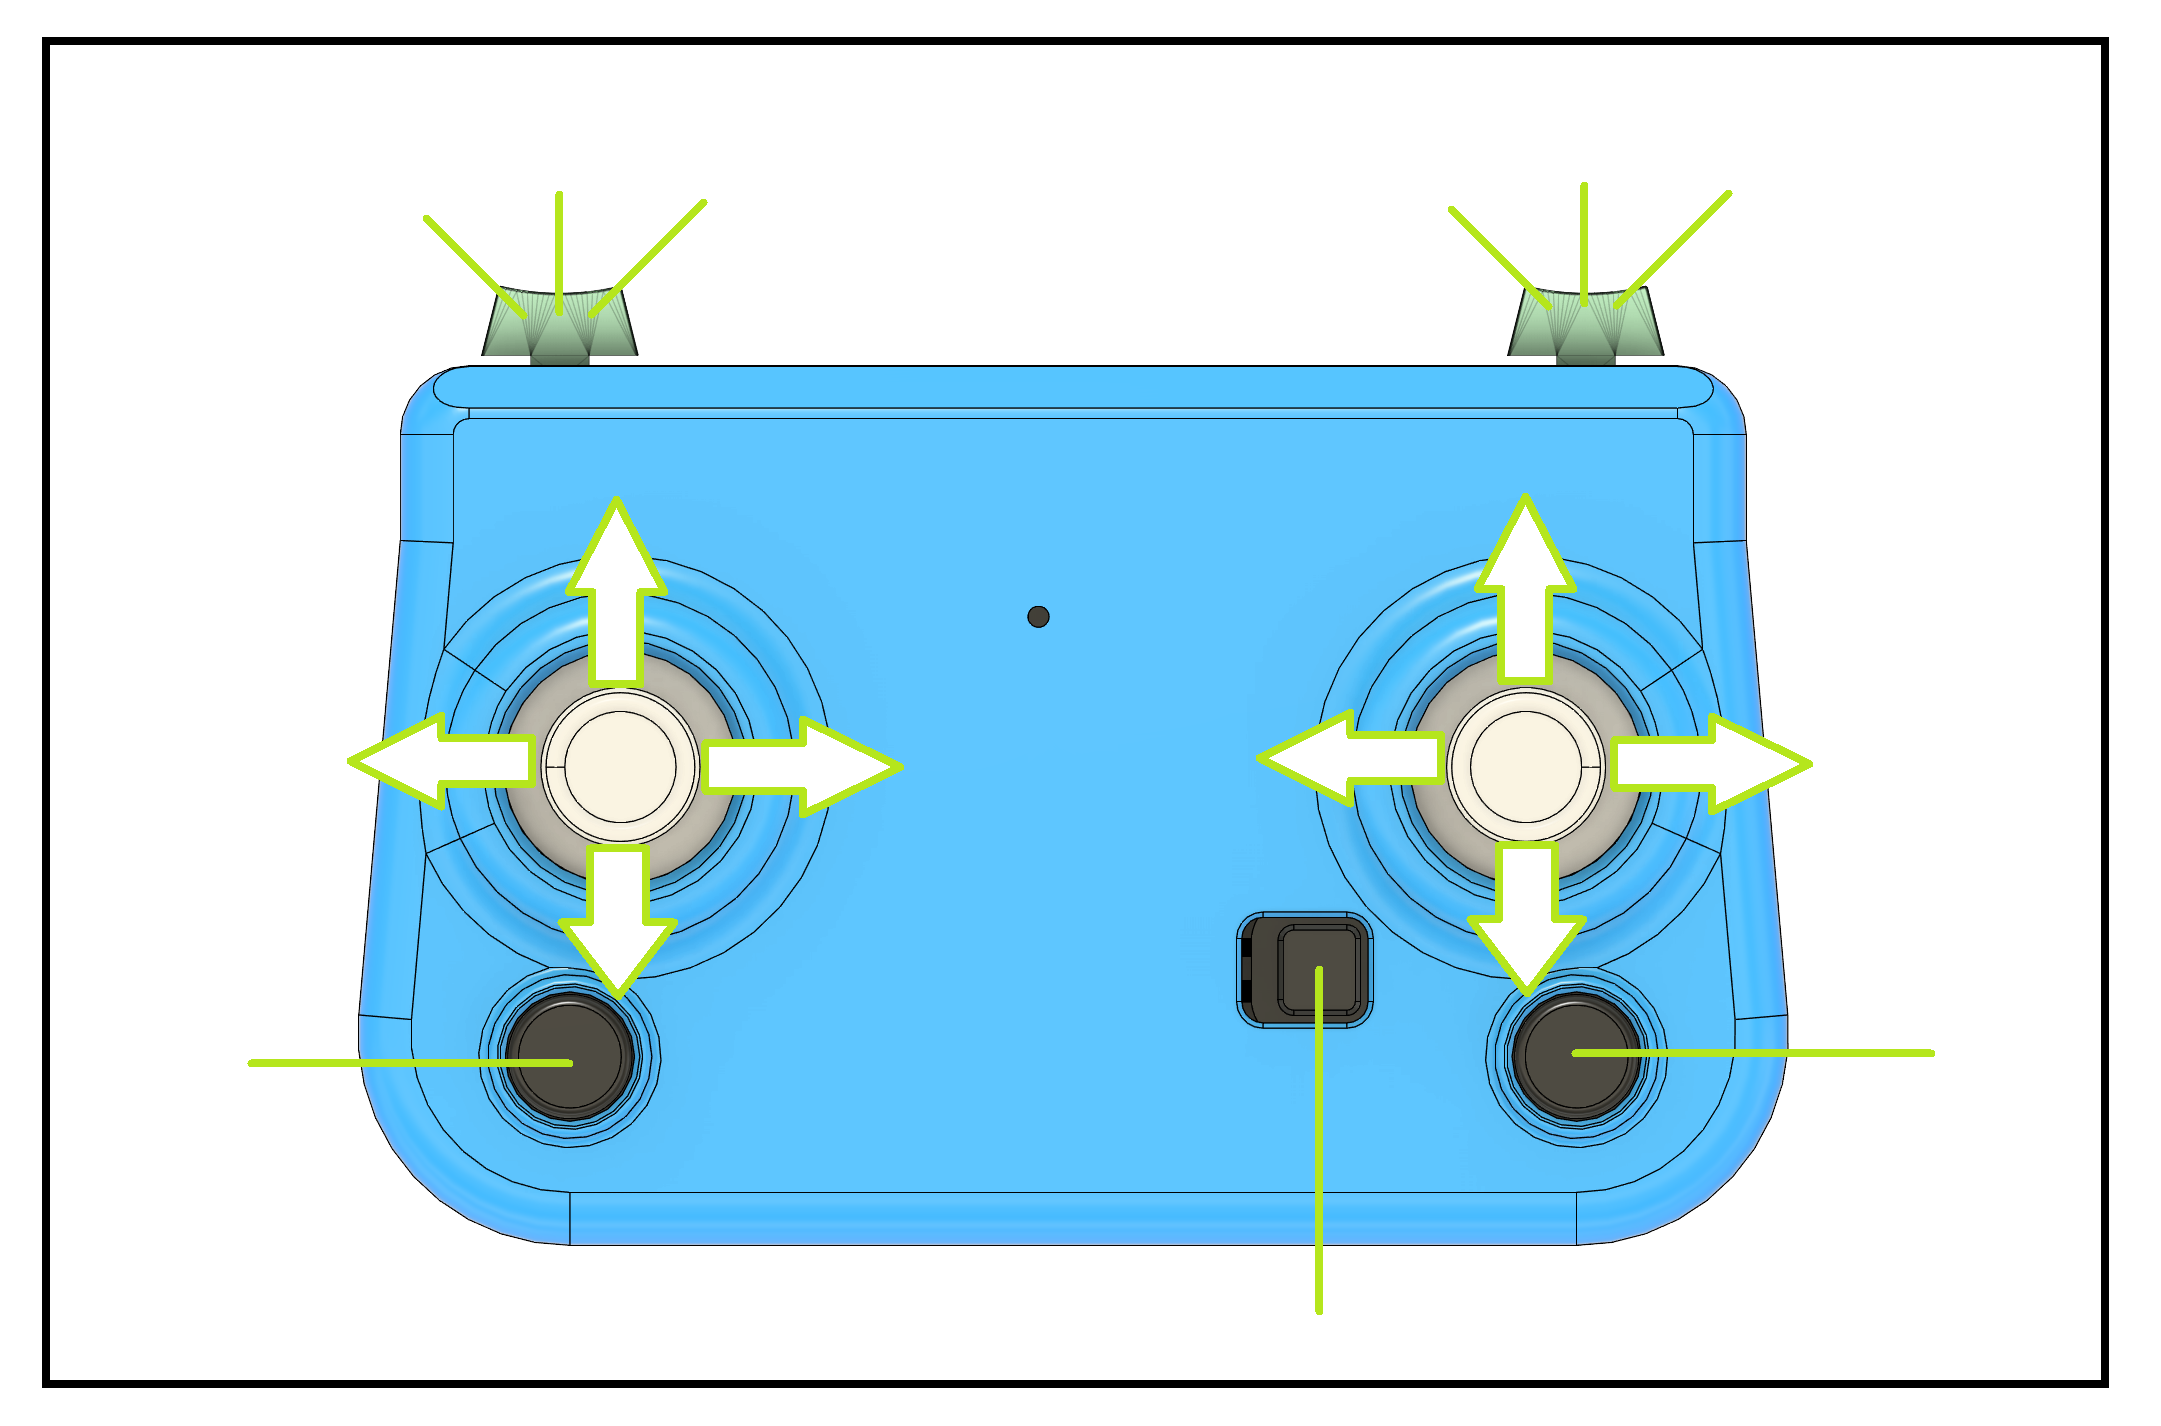
For help with the software and hardware CyberBrick Hardware Kit | Bambu Lab US Store
Assembly Instructions:
Intrusions will be in the description because PDF files don't support .GIF files
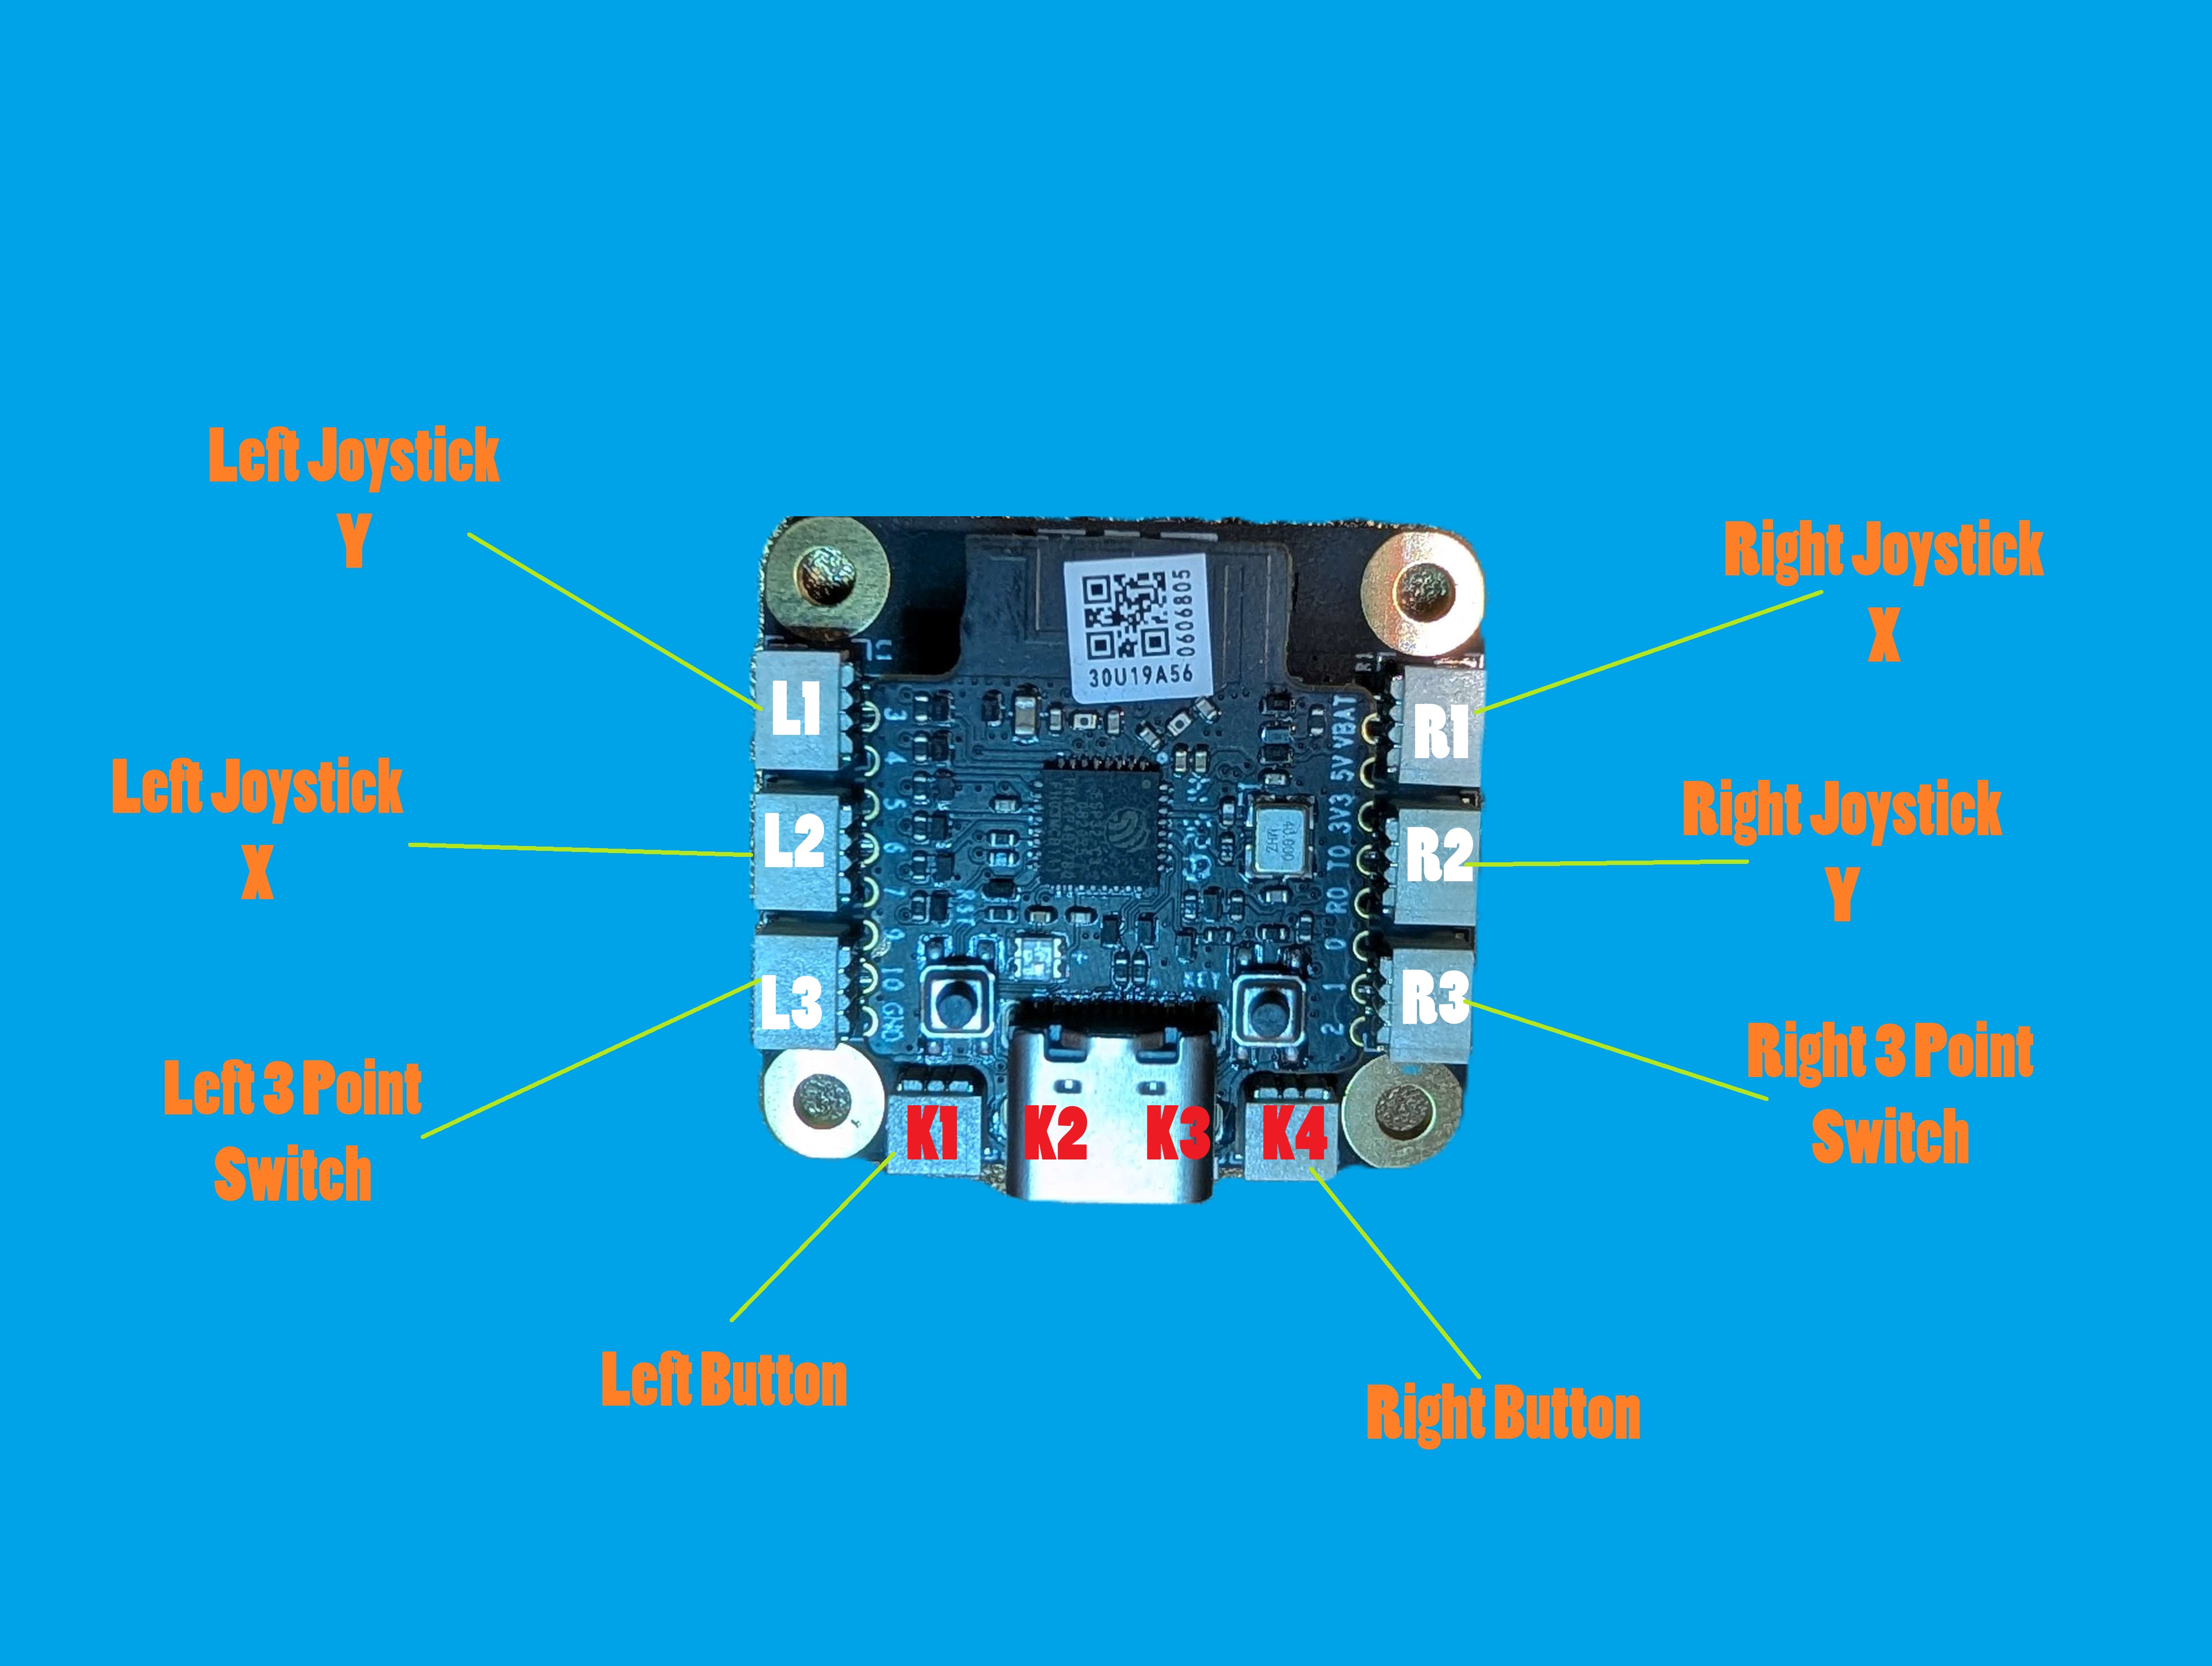
Transmitter Diagram
Step #1
Install all respective cables into Buttons, switches, and Joysticks.
step #2
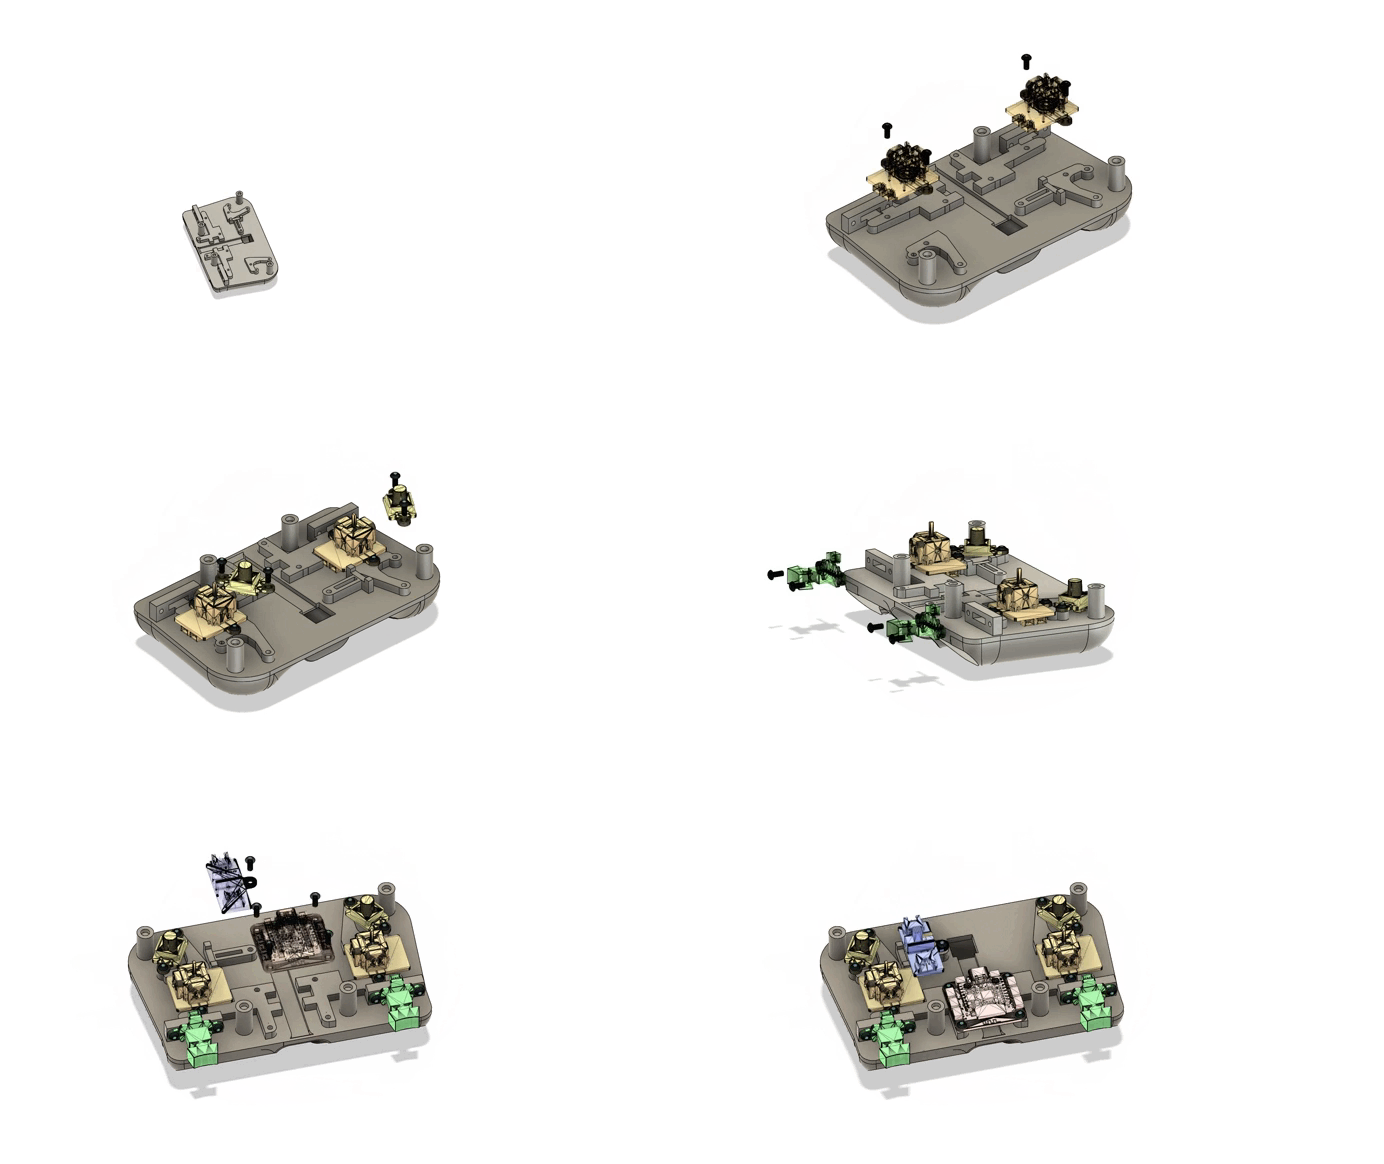
Install all Buttons, switches, and Joysticks on to the main body along with the transmitter.
Use the 2.5mm screws that come in the kit
Step #3
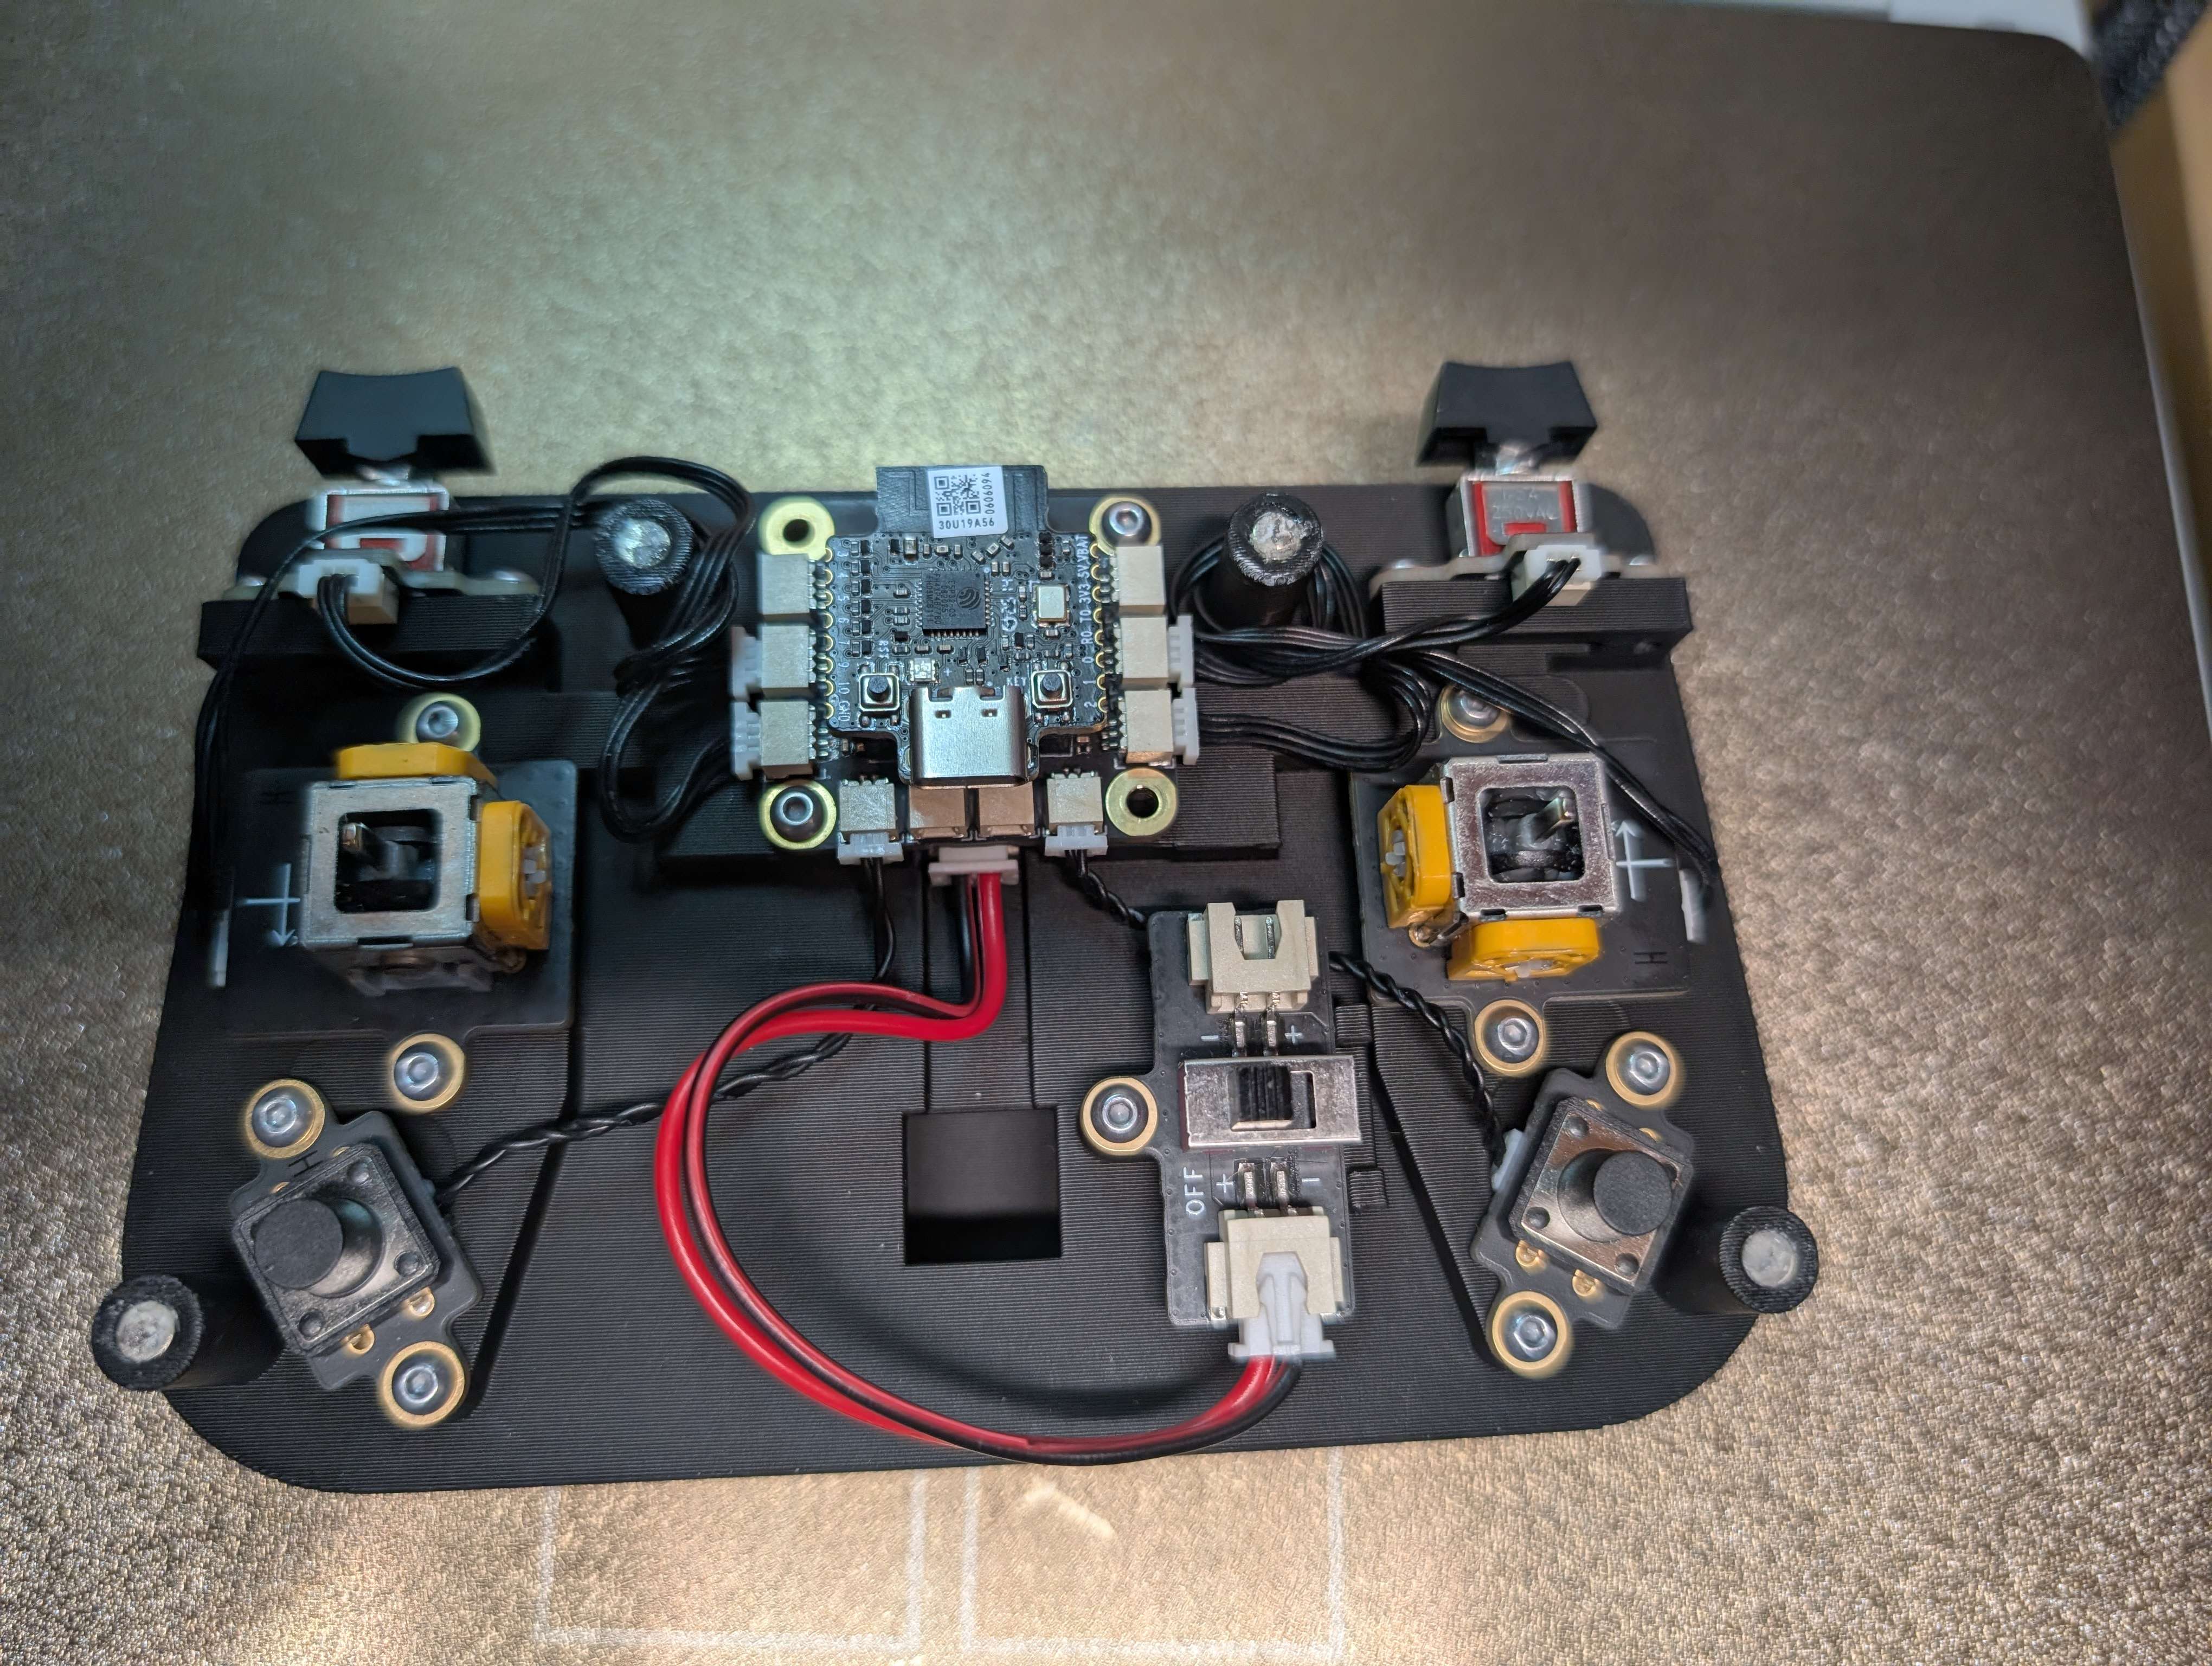
Connect all Buttons, switches, and Joysticks to the transmitter.
Use the photo above and the Transmitter Diagram for help
Step #4
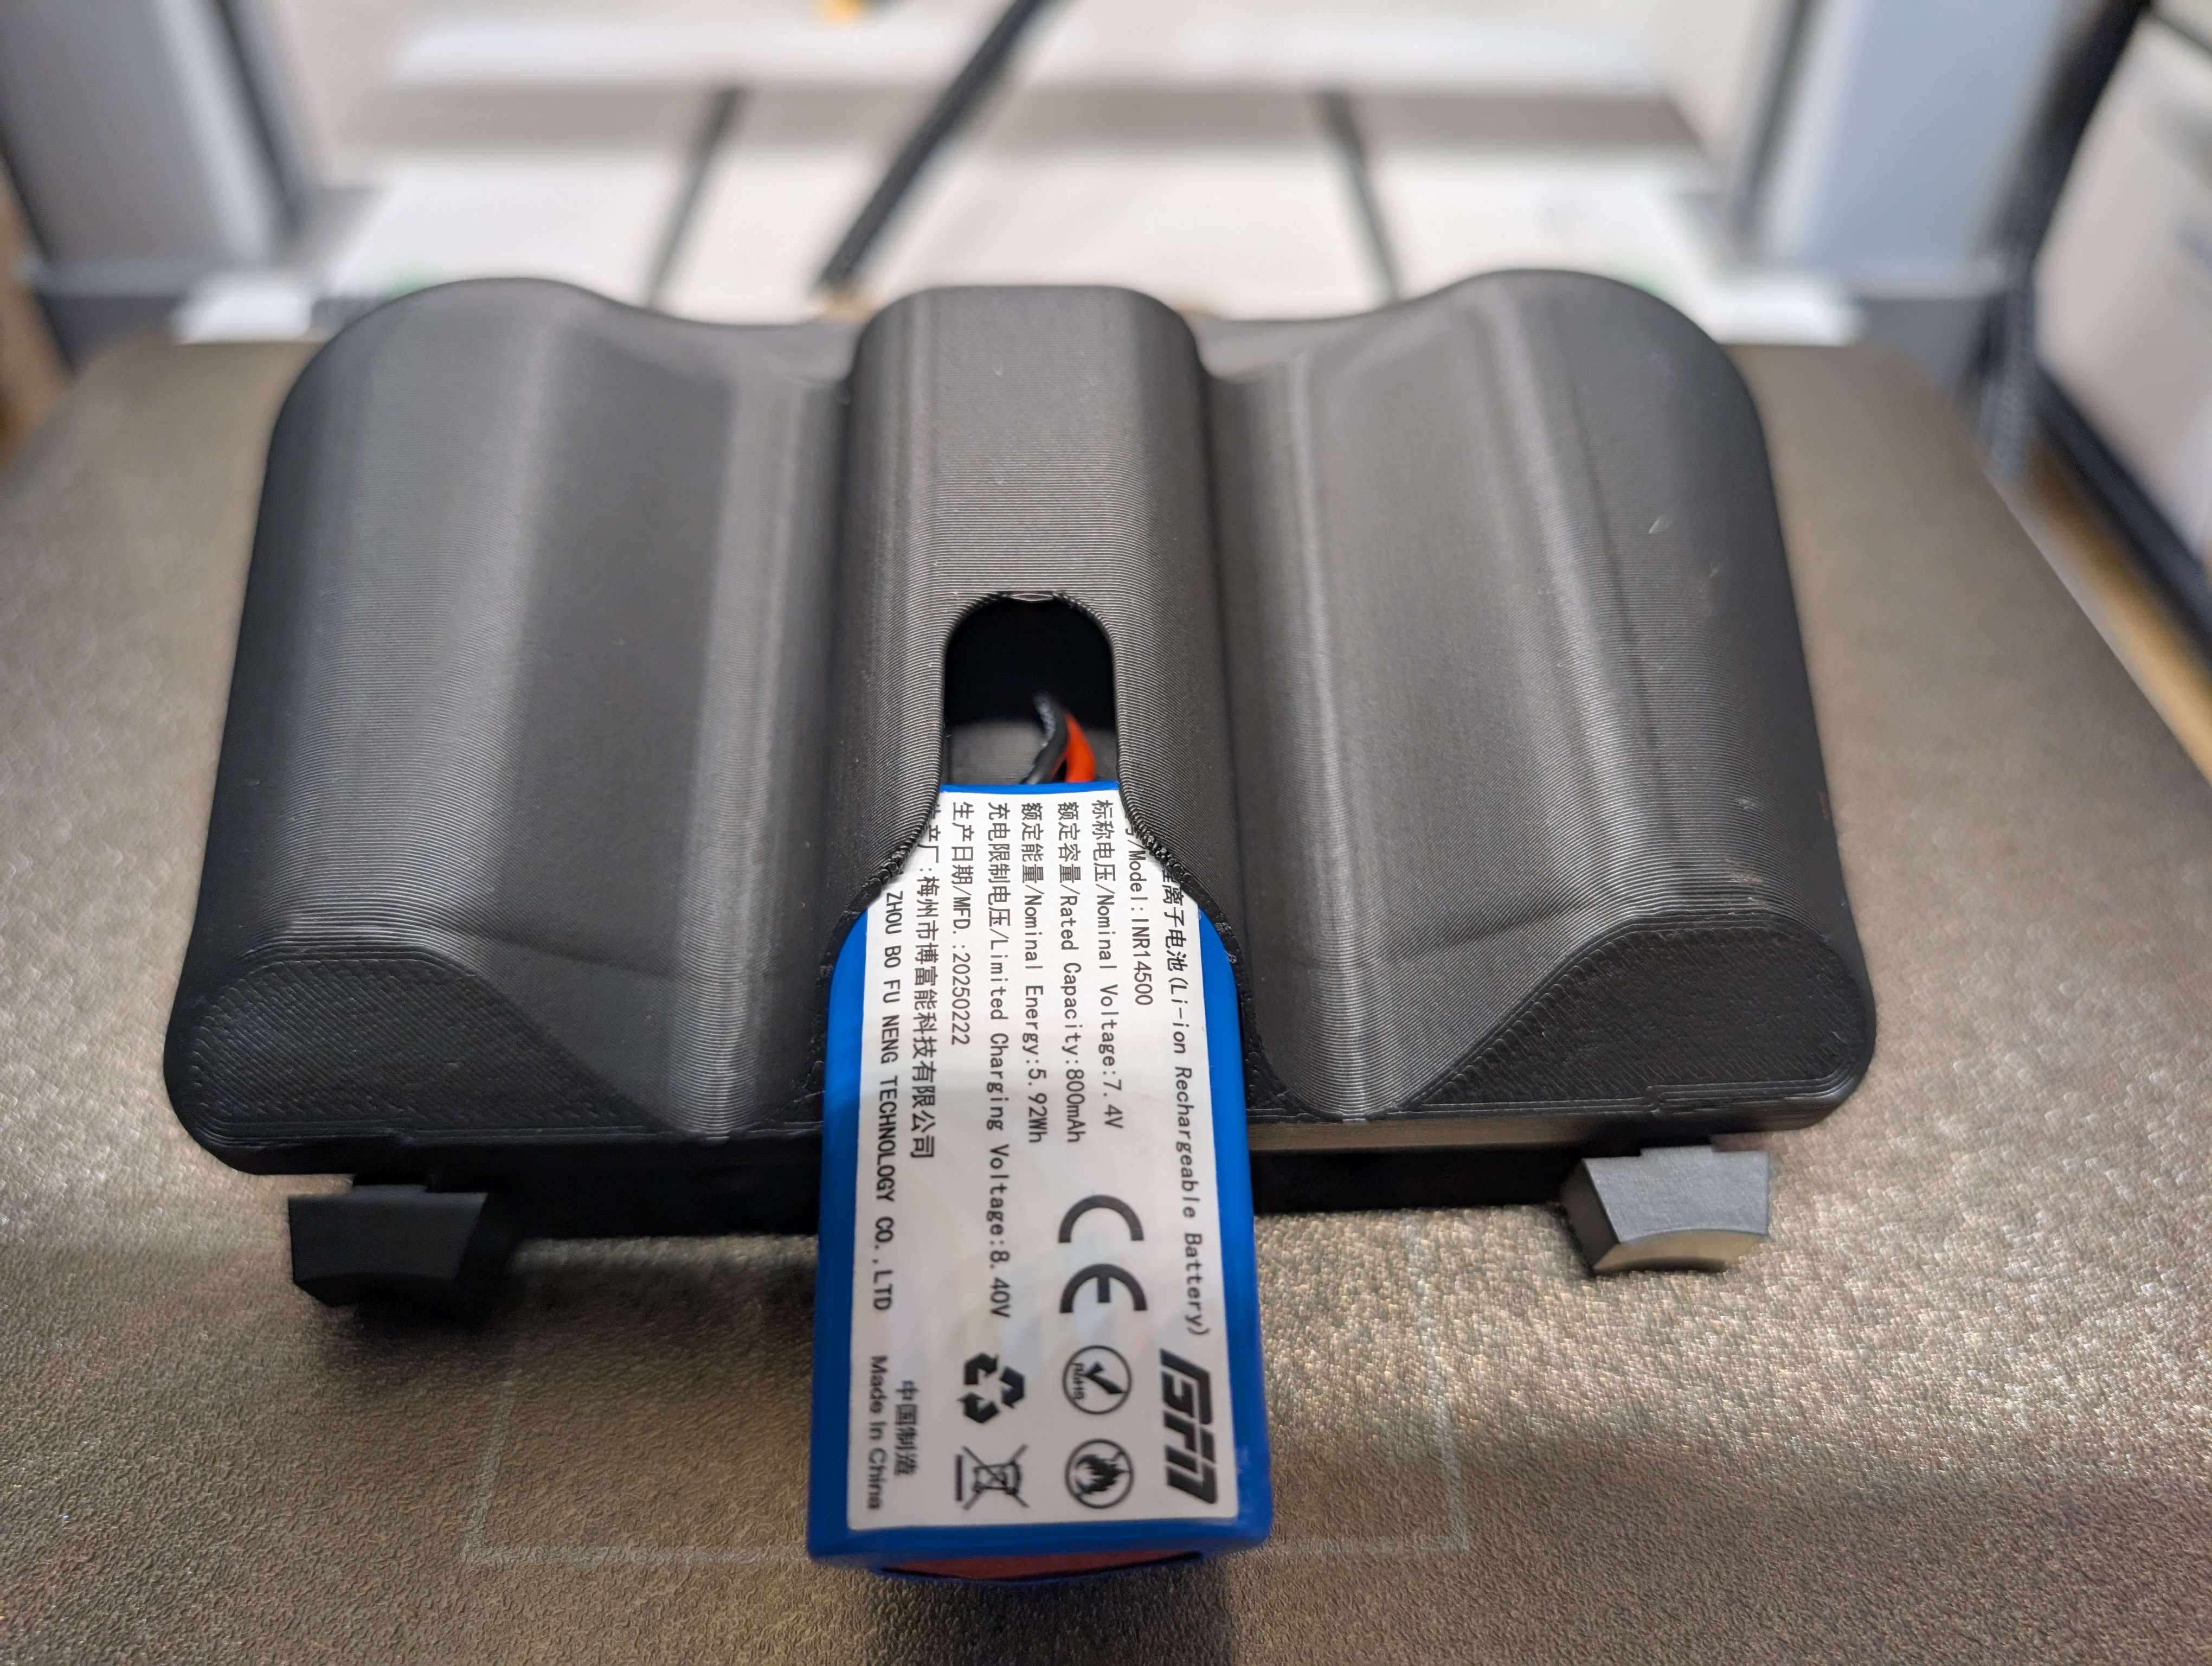
Guide the battery cables through the remote while pressing the battery in.
When the cable comes threw on the other side pull pressure on it while pushing the battery in to avoid kinking the cable.
Step #5
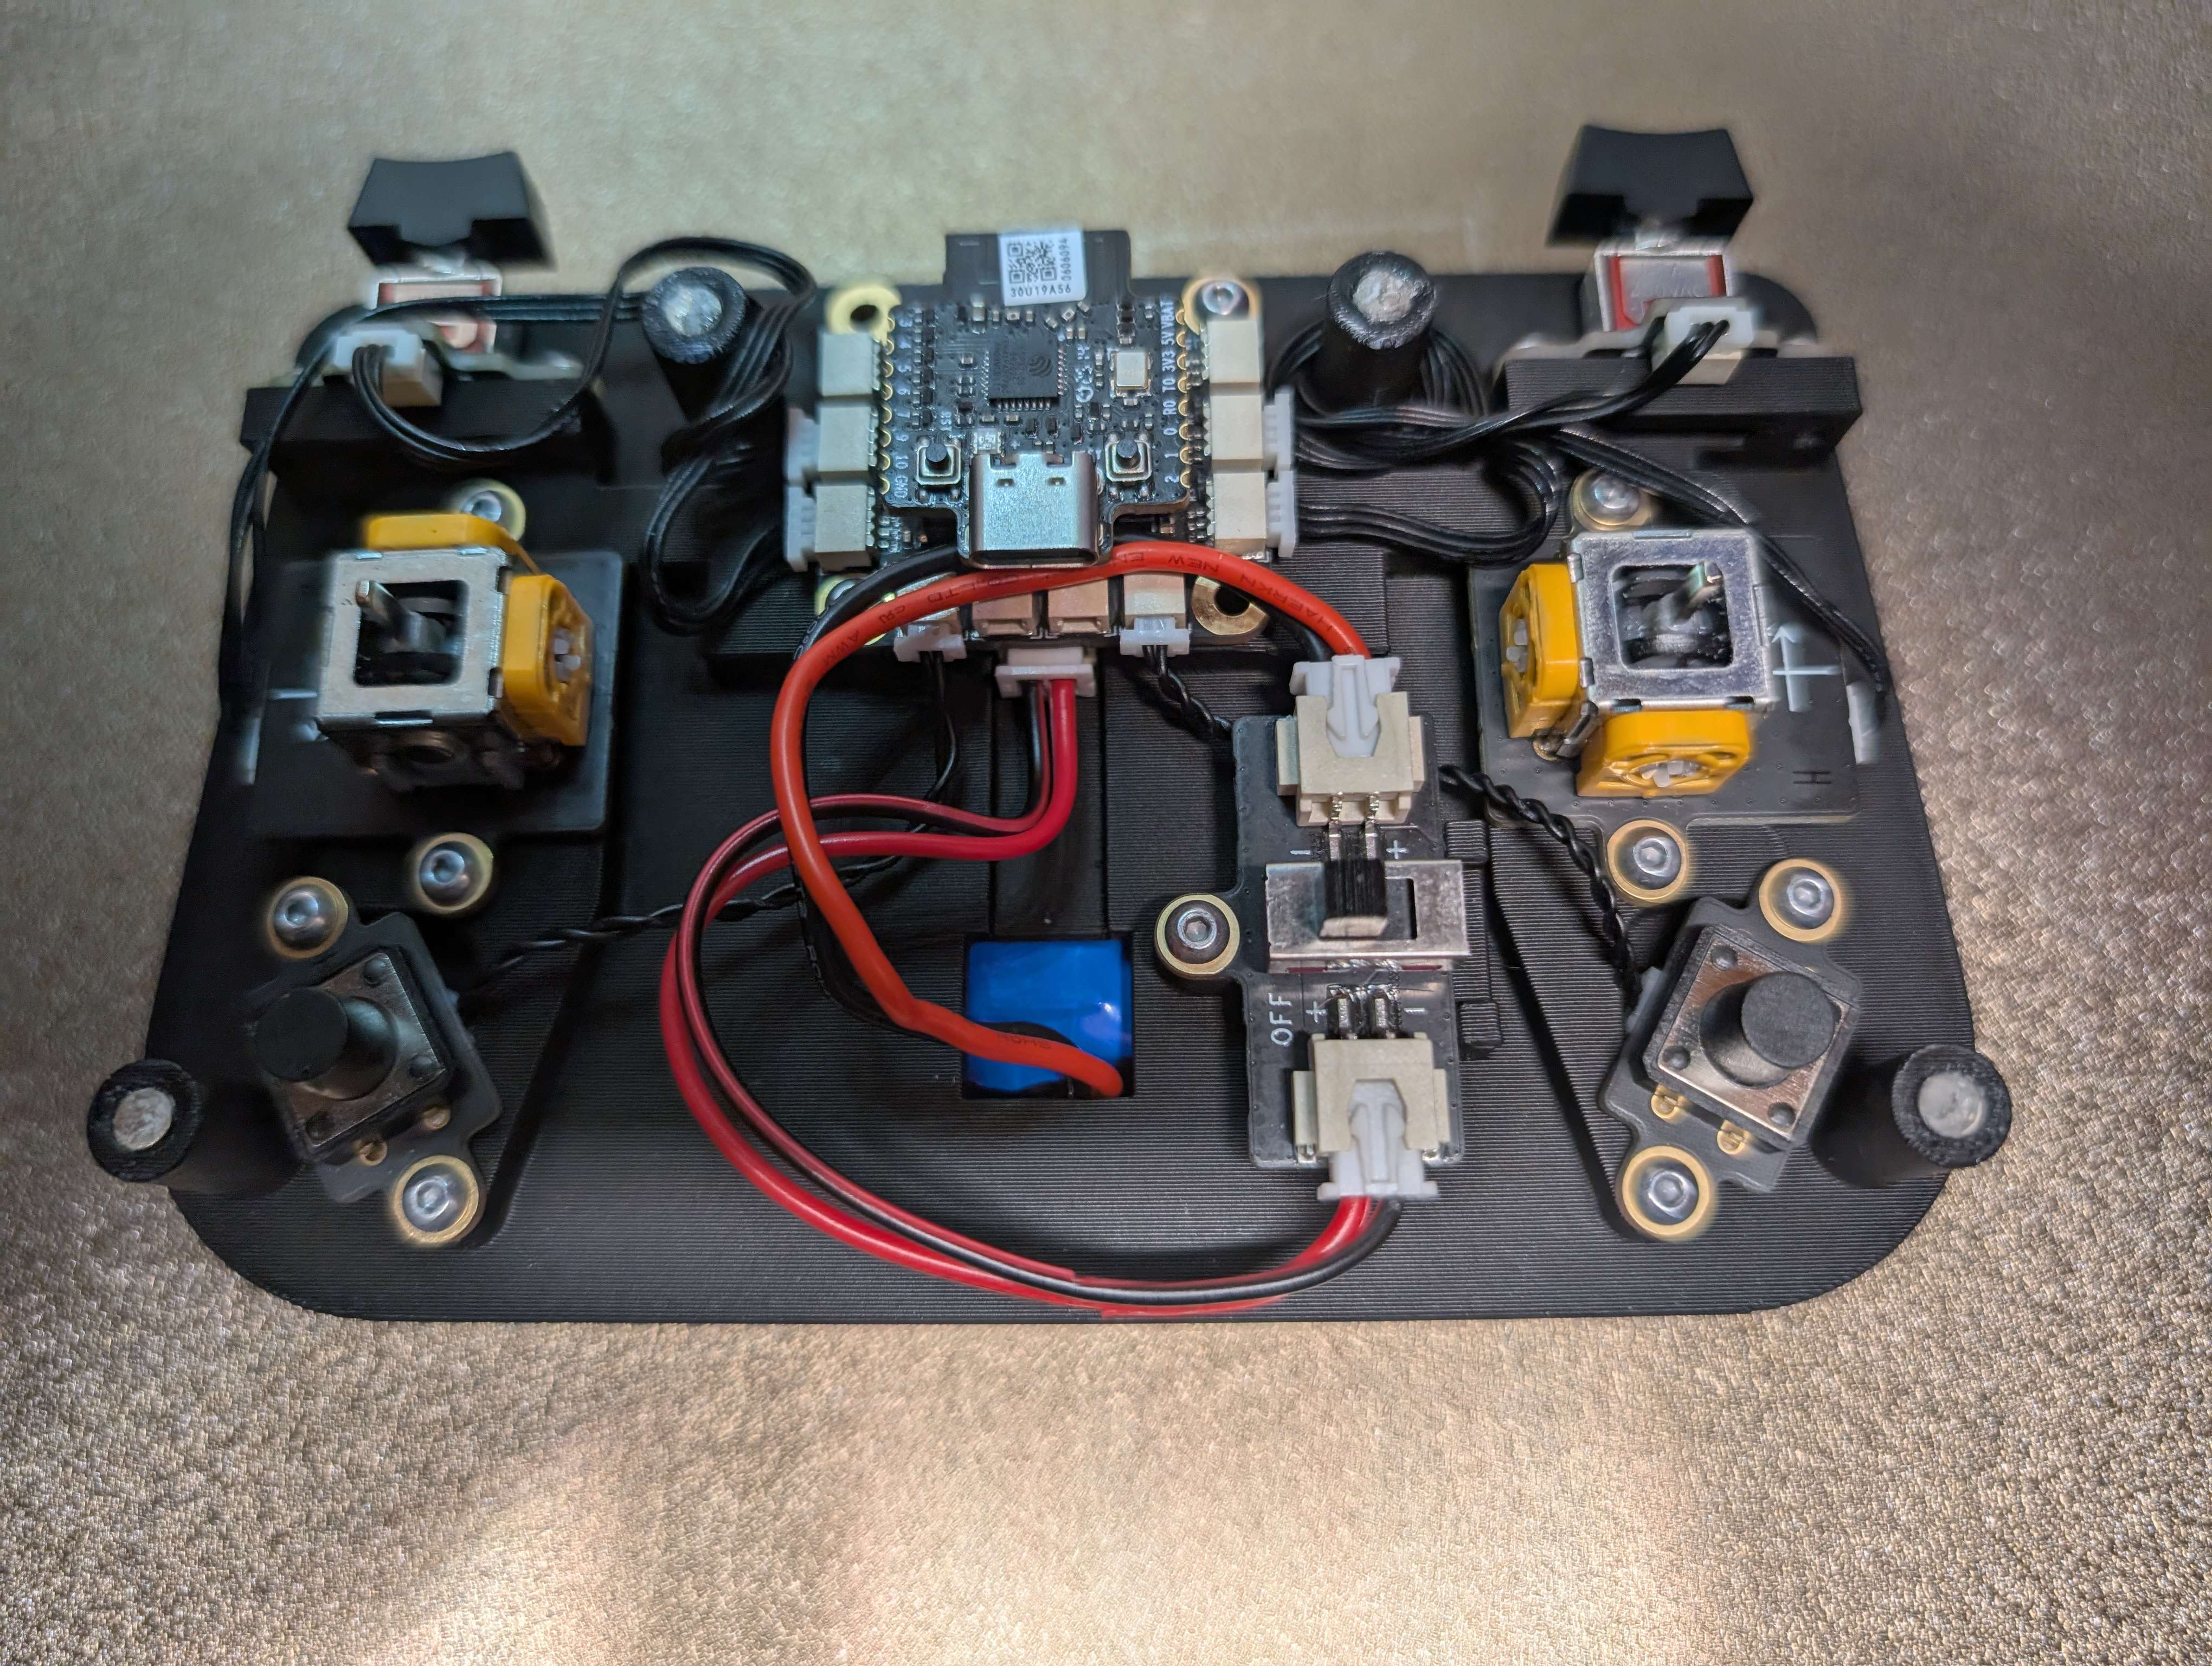
Plug in the battery cable to the switch.
Step #6
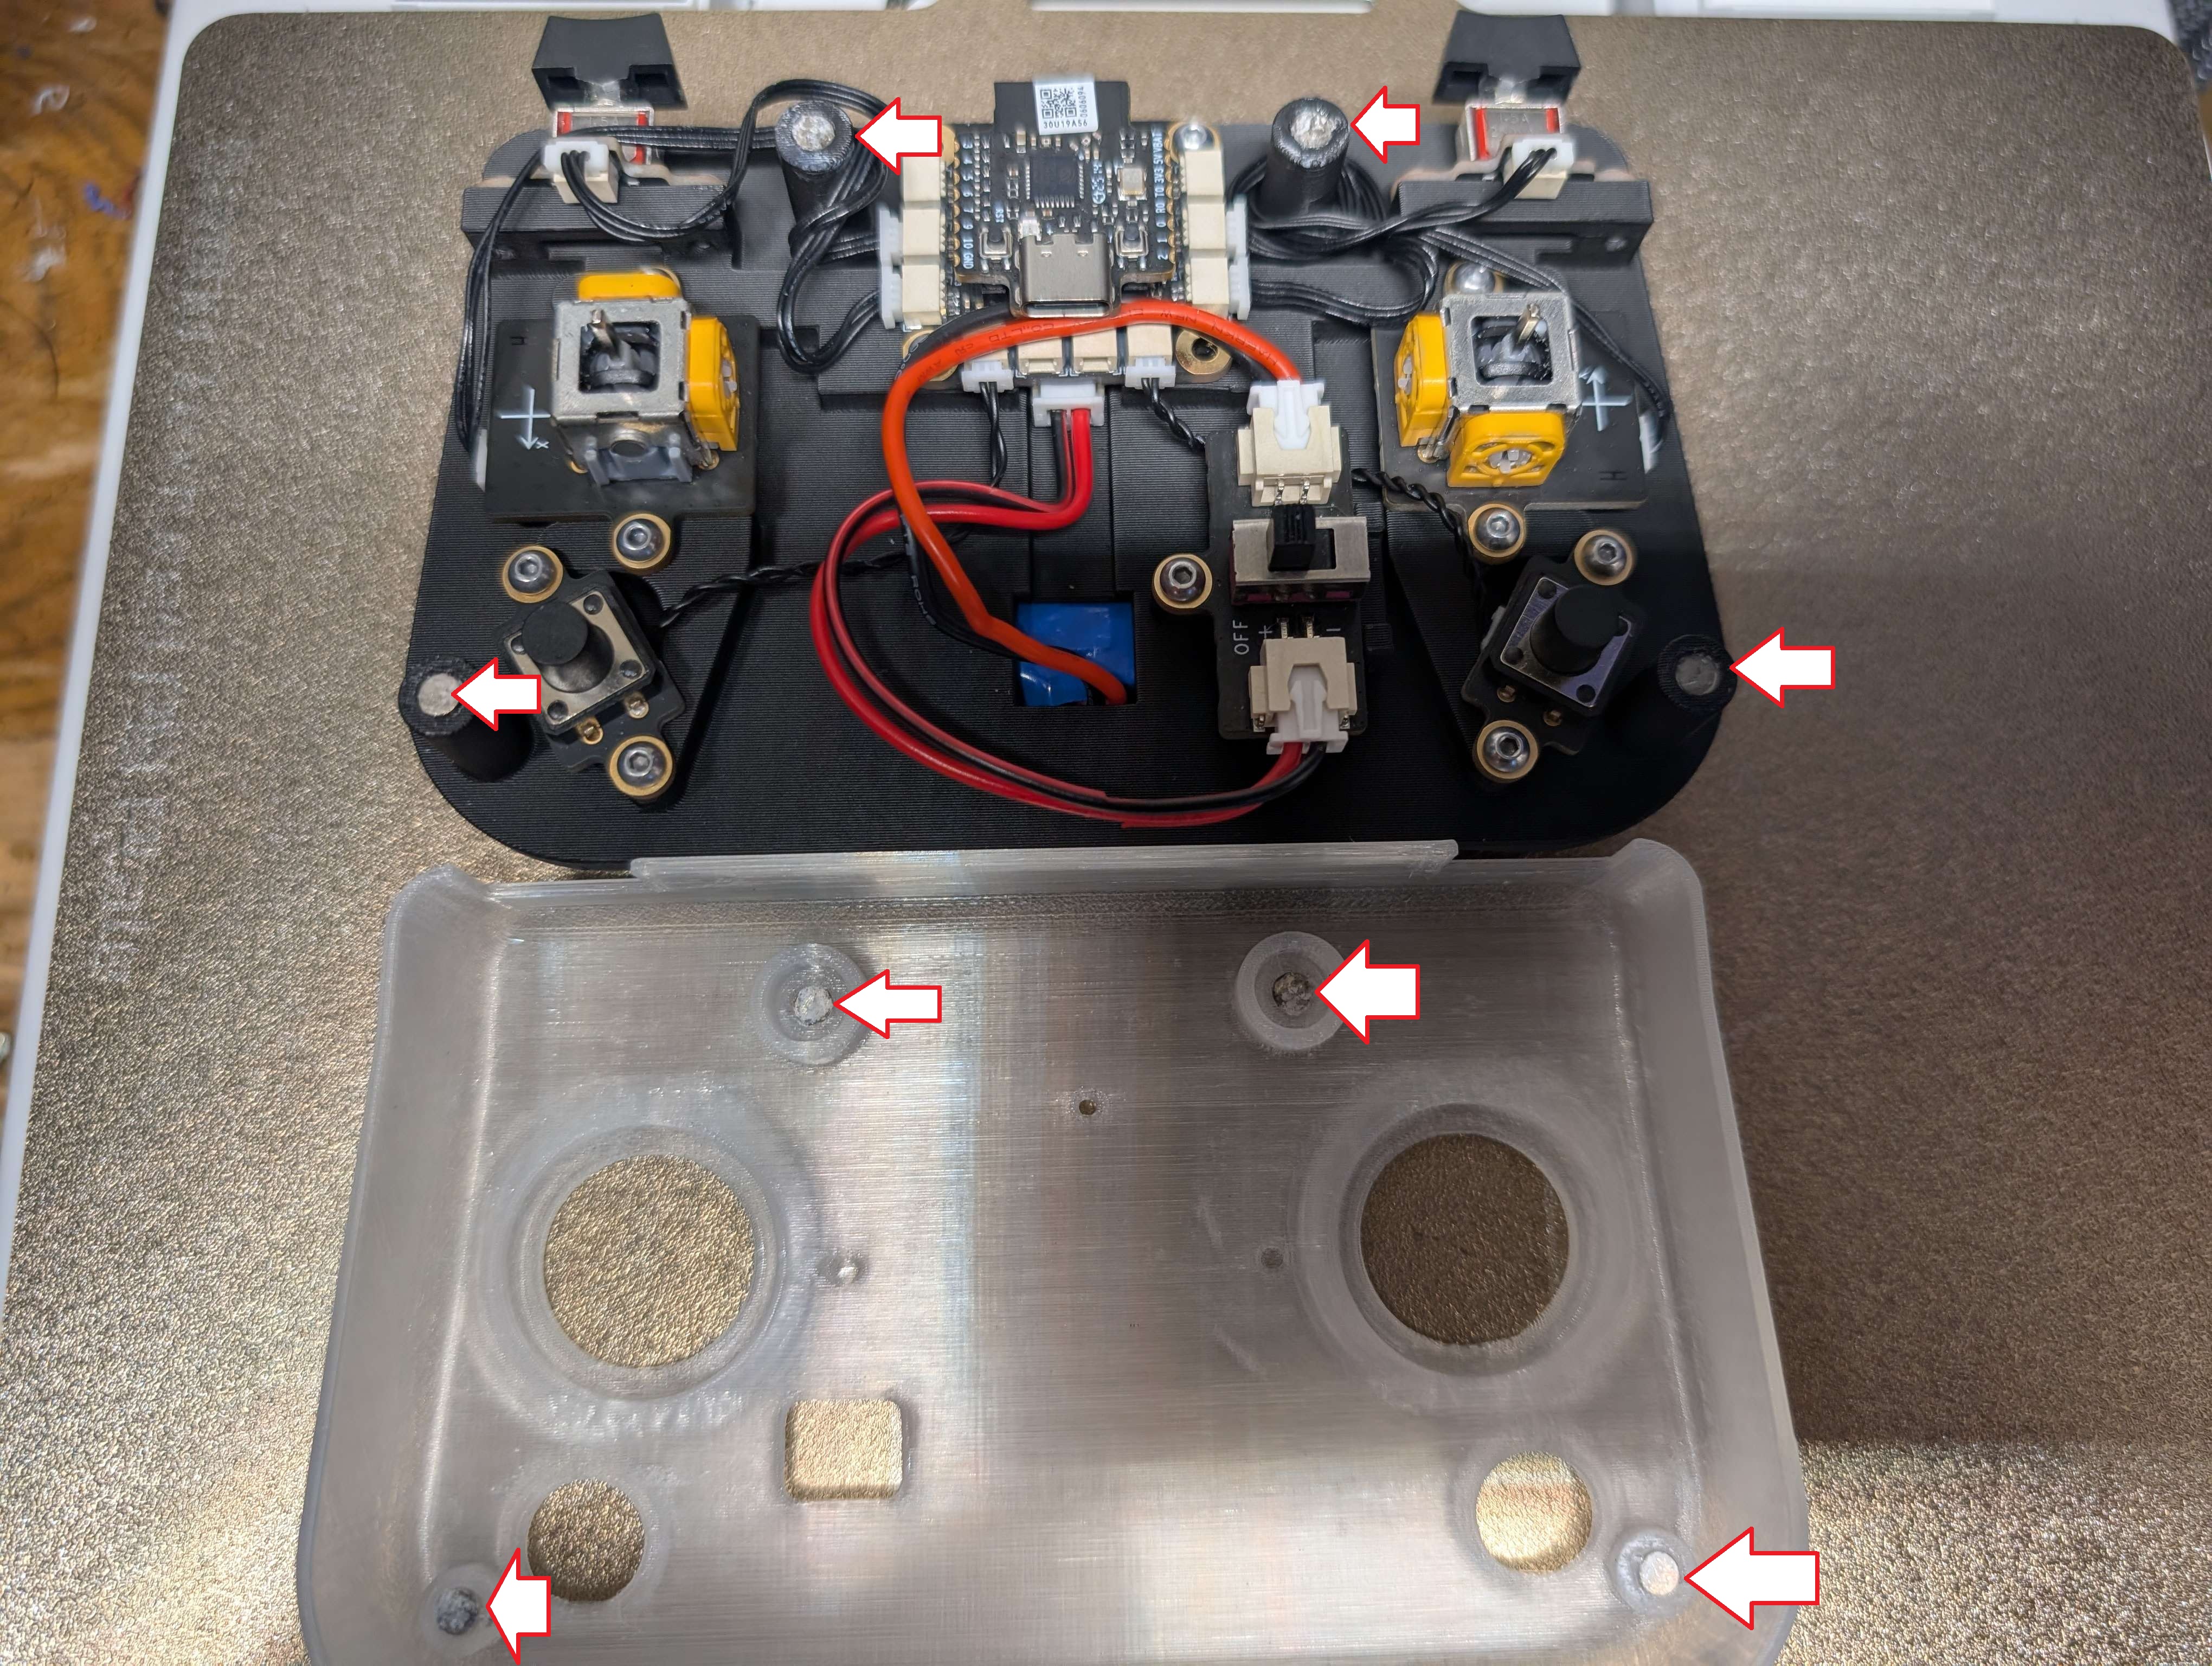
Using a small dab of super glue, Install magnets into the body and the cover.
Make sure magnets are installed in the right directions or you will have to reprint parts.
Step #7
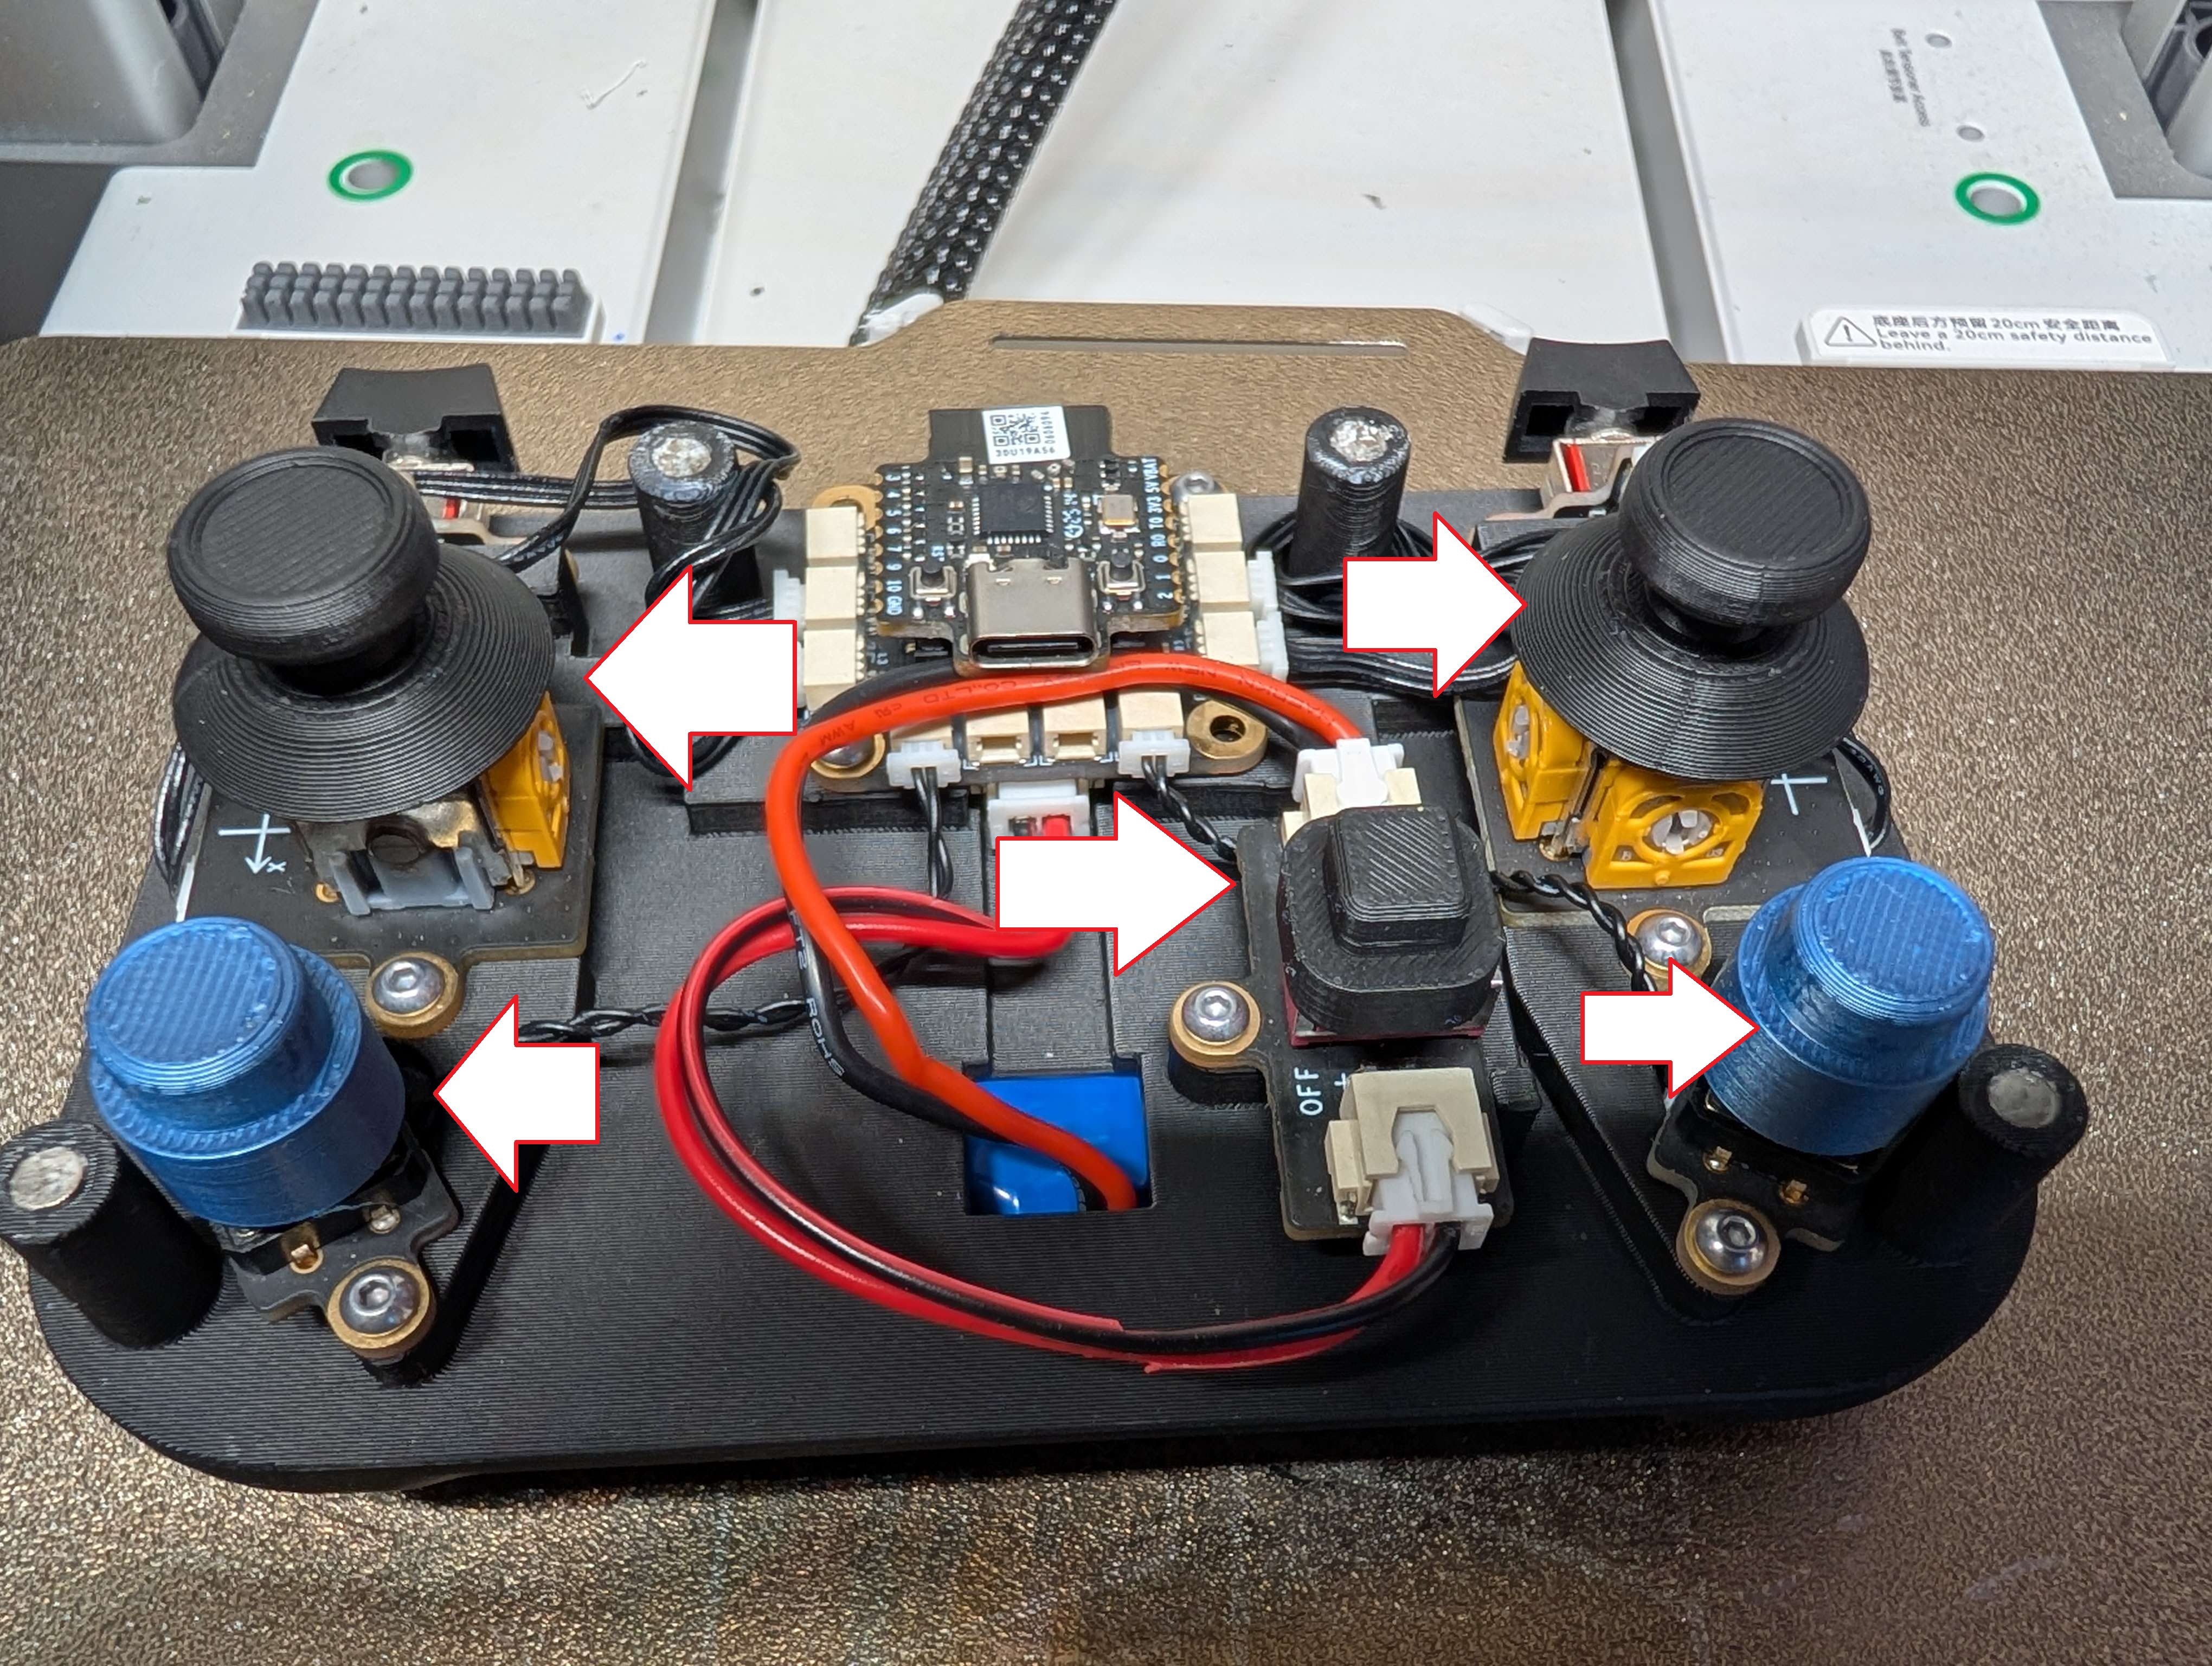
Press buttons and joysticks on there respective places.
Joysticks and power button press on while the two other buttons sit on top
Step #8
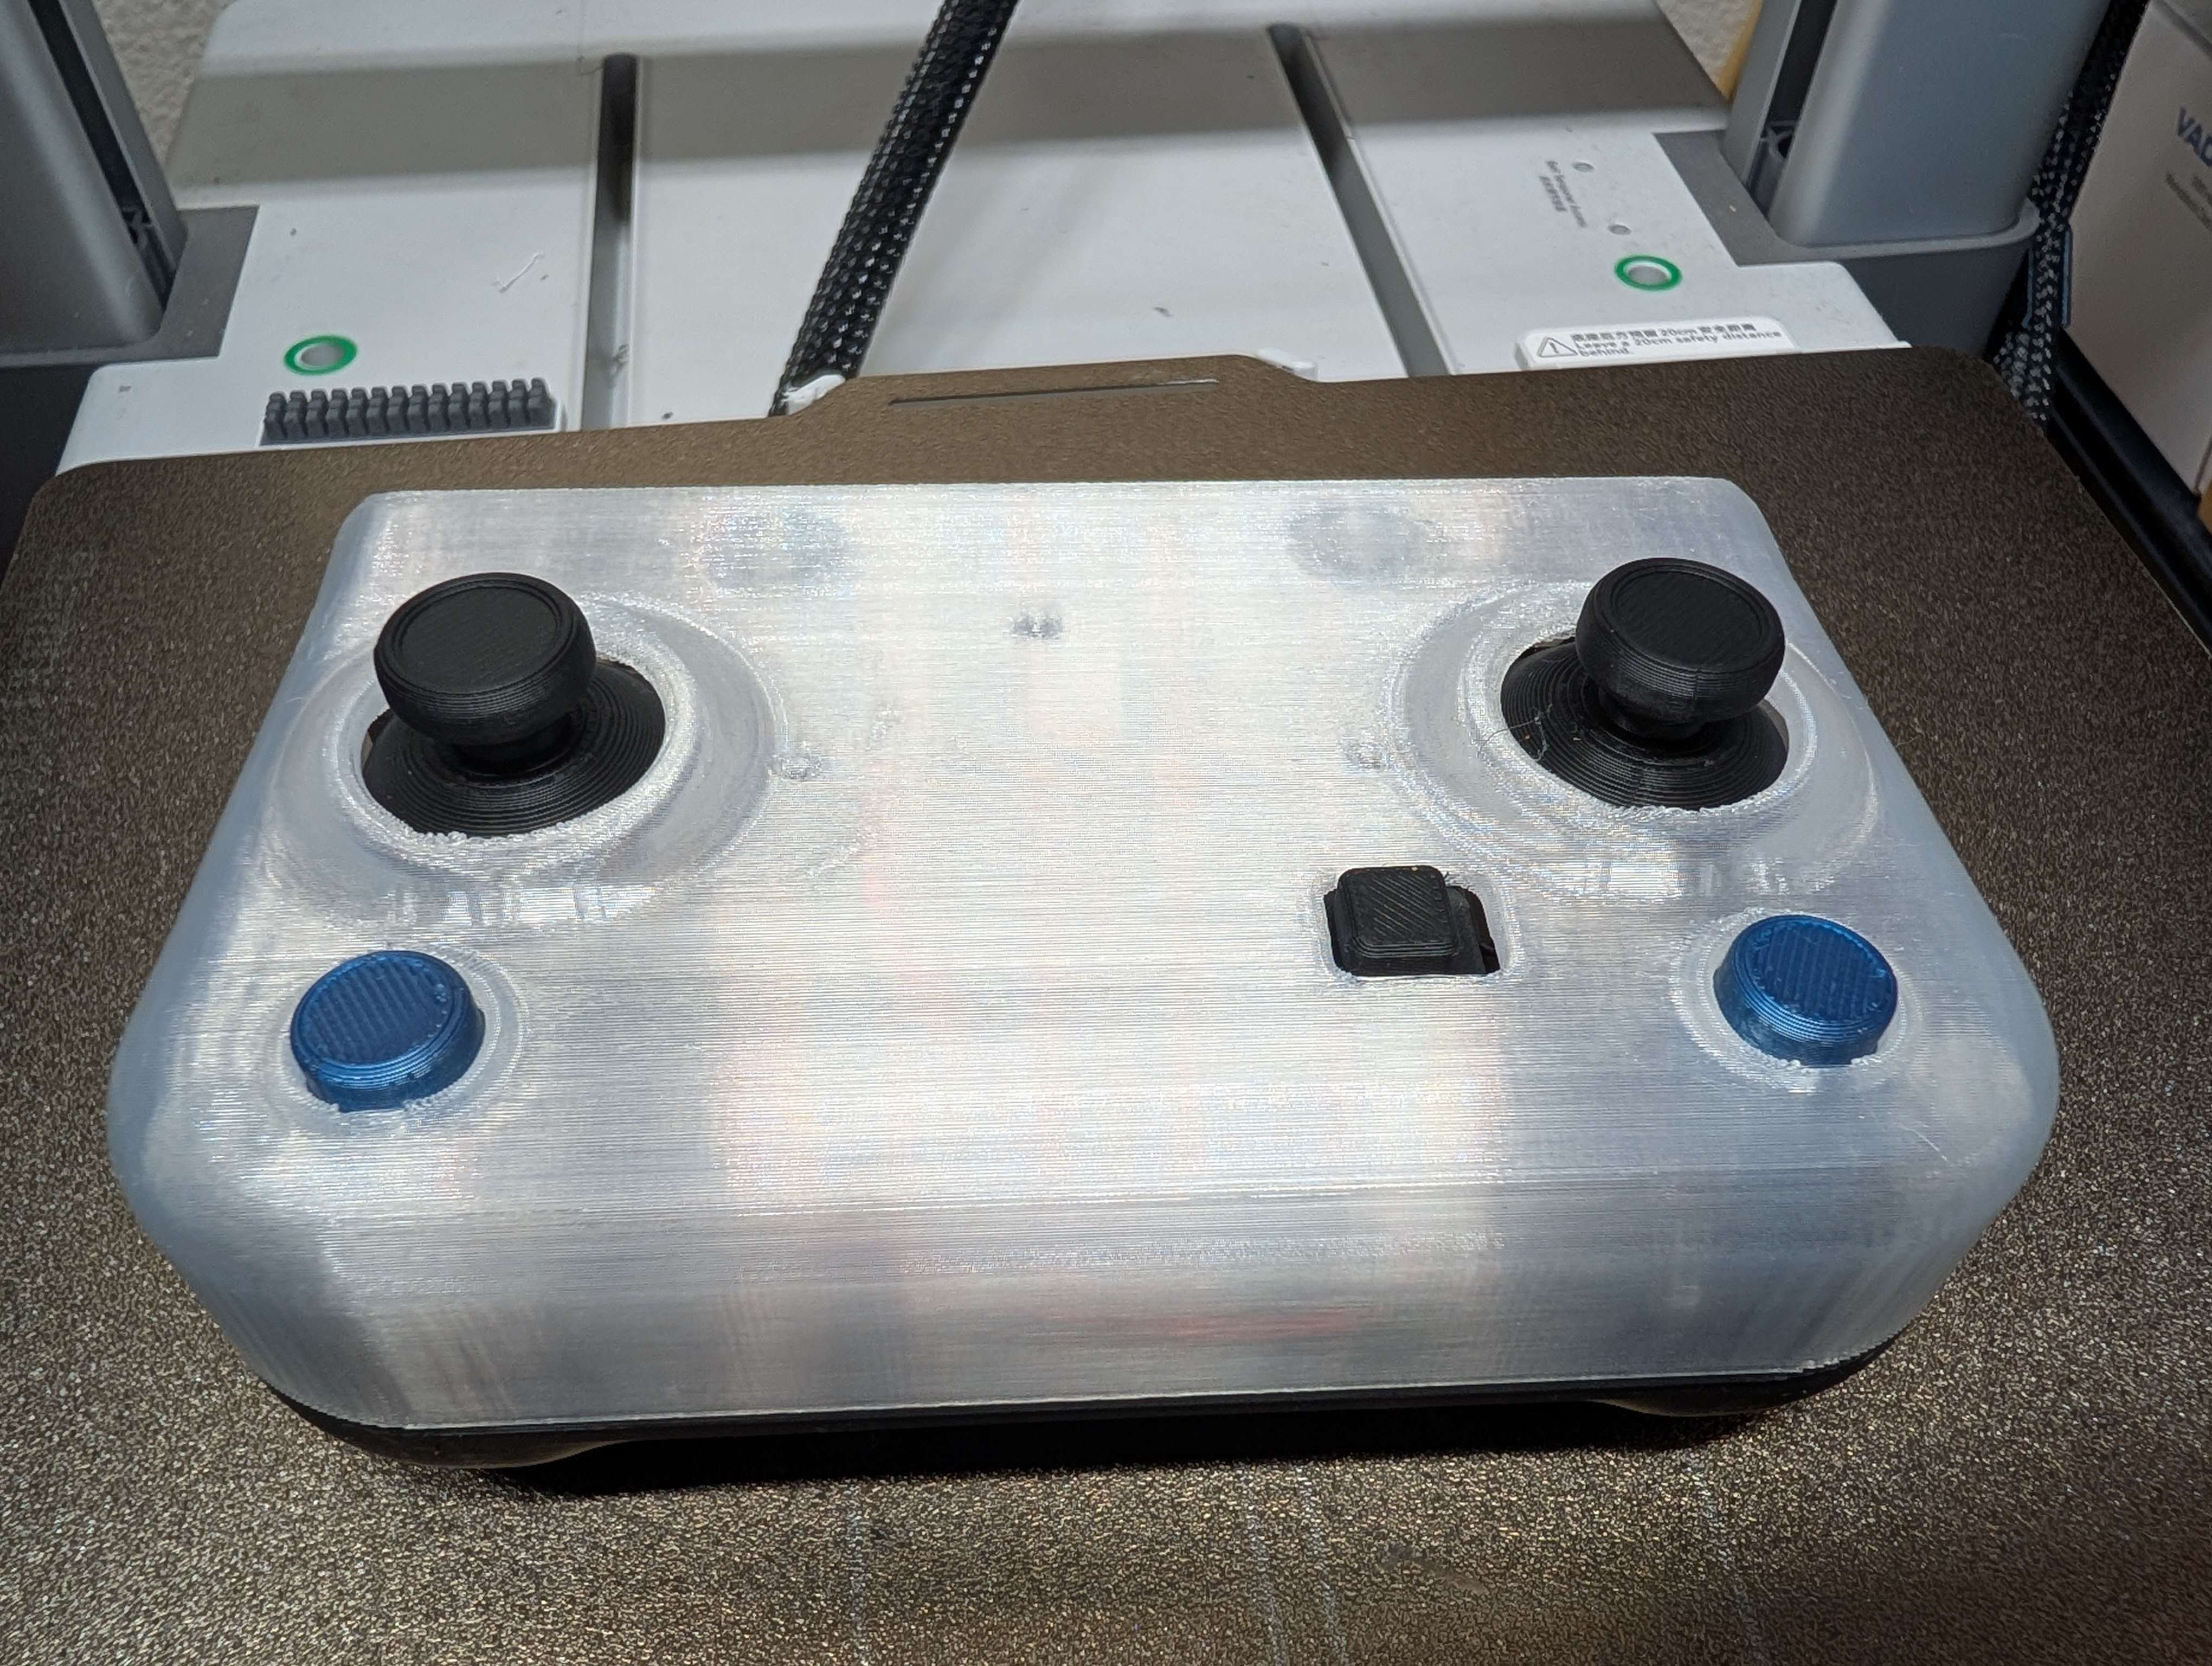
Do some cable management then lower the cover on to the main body and it should snap together.
3 Piece cover
Just glue the 2 joystick covers on the shell in there cutouts
Thank you for printing!!
Stay tuned for my next big project. coming soon!!


Gostou deste modelo? Crie uma conta grátis para salvar seus favoritos e voltar a eles depois.
Criar conta