Você está no 3DFinder
Buscamos em Thingiverse, MakerWorld e Printables ao mesmo tempo para te dar o melhor de cada uma.
Descrição
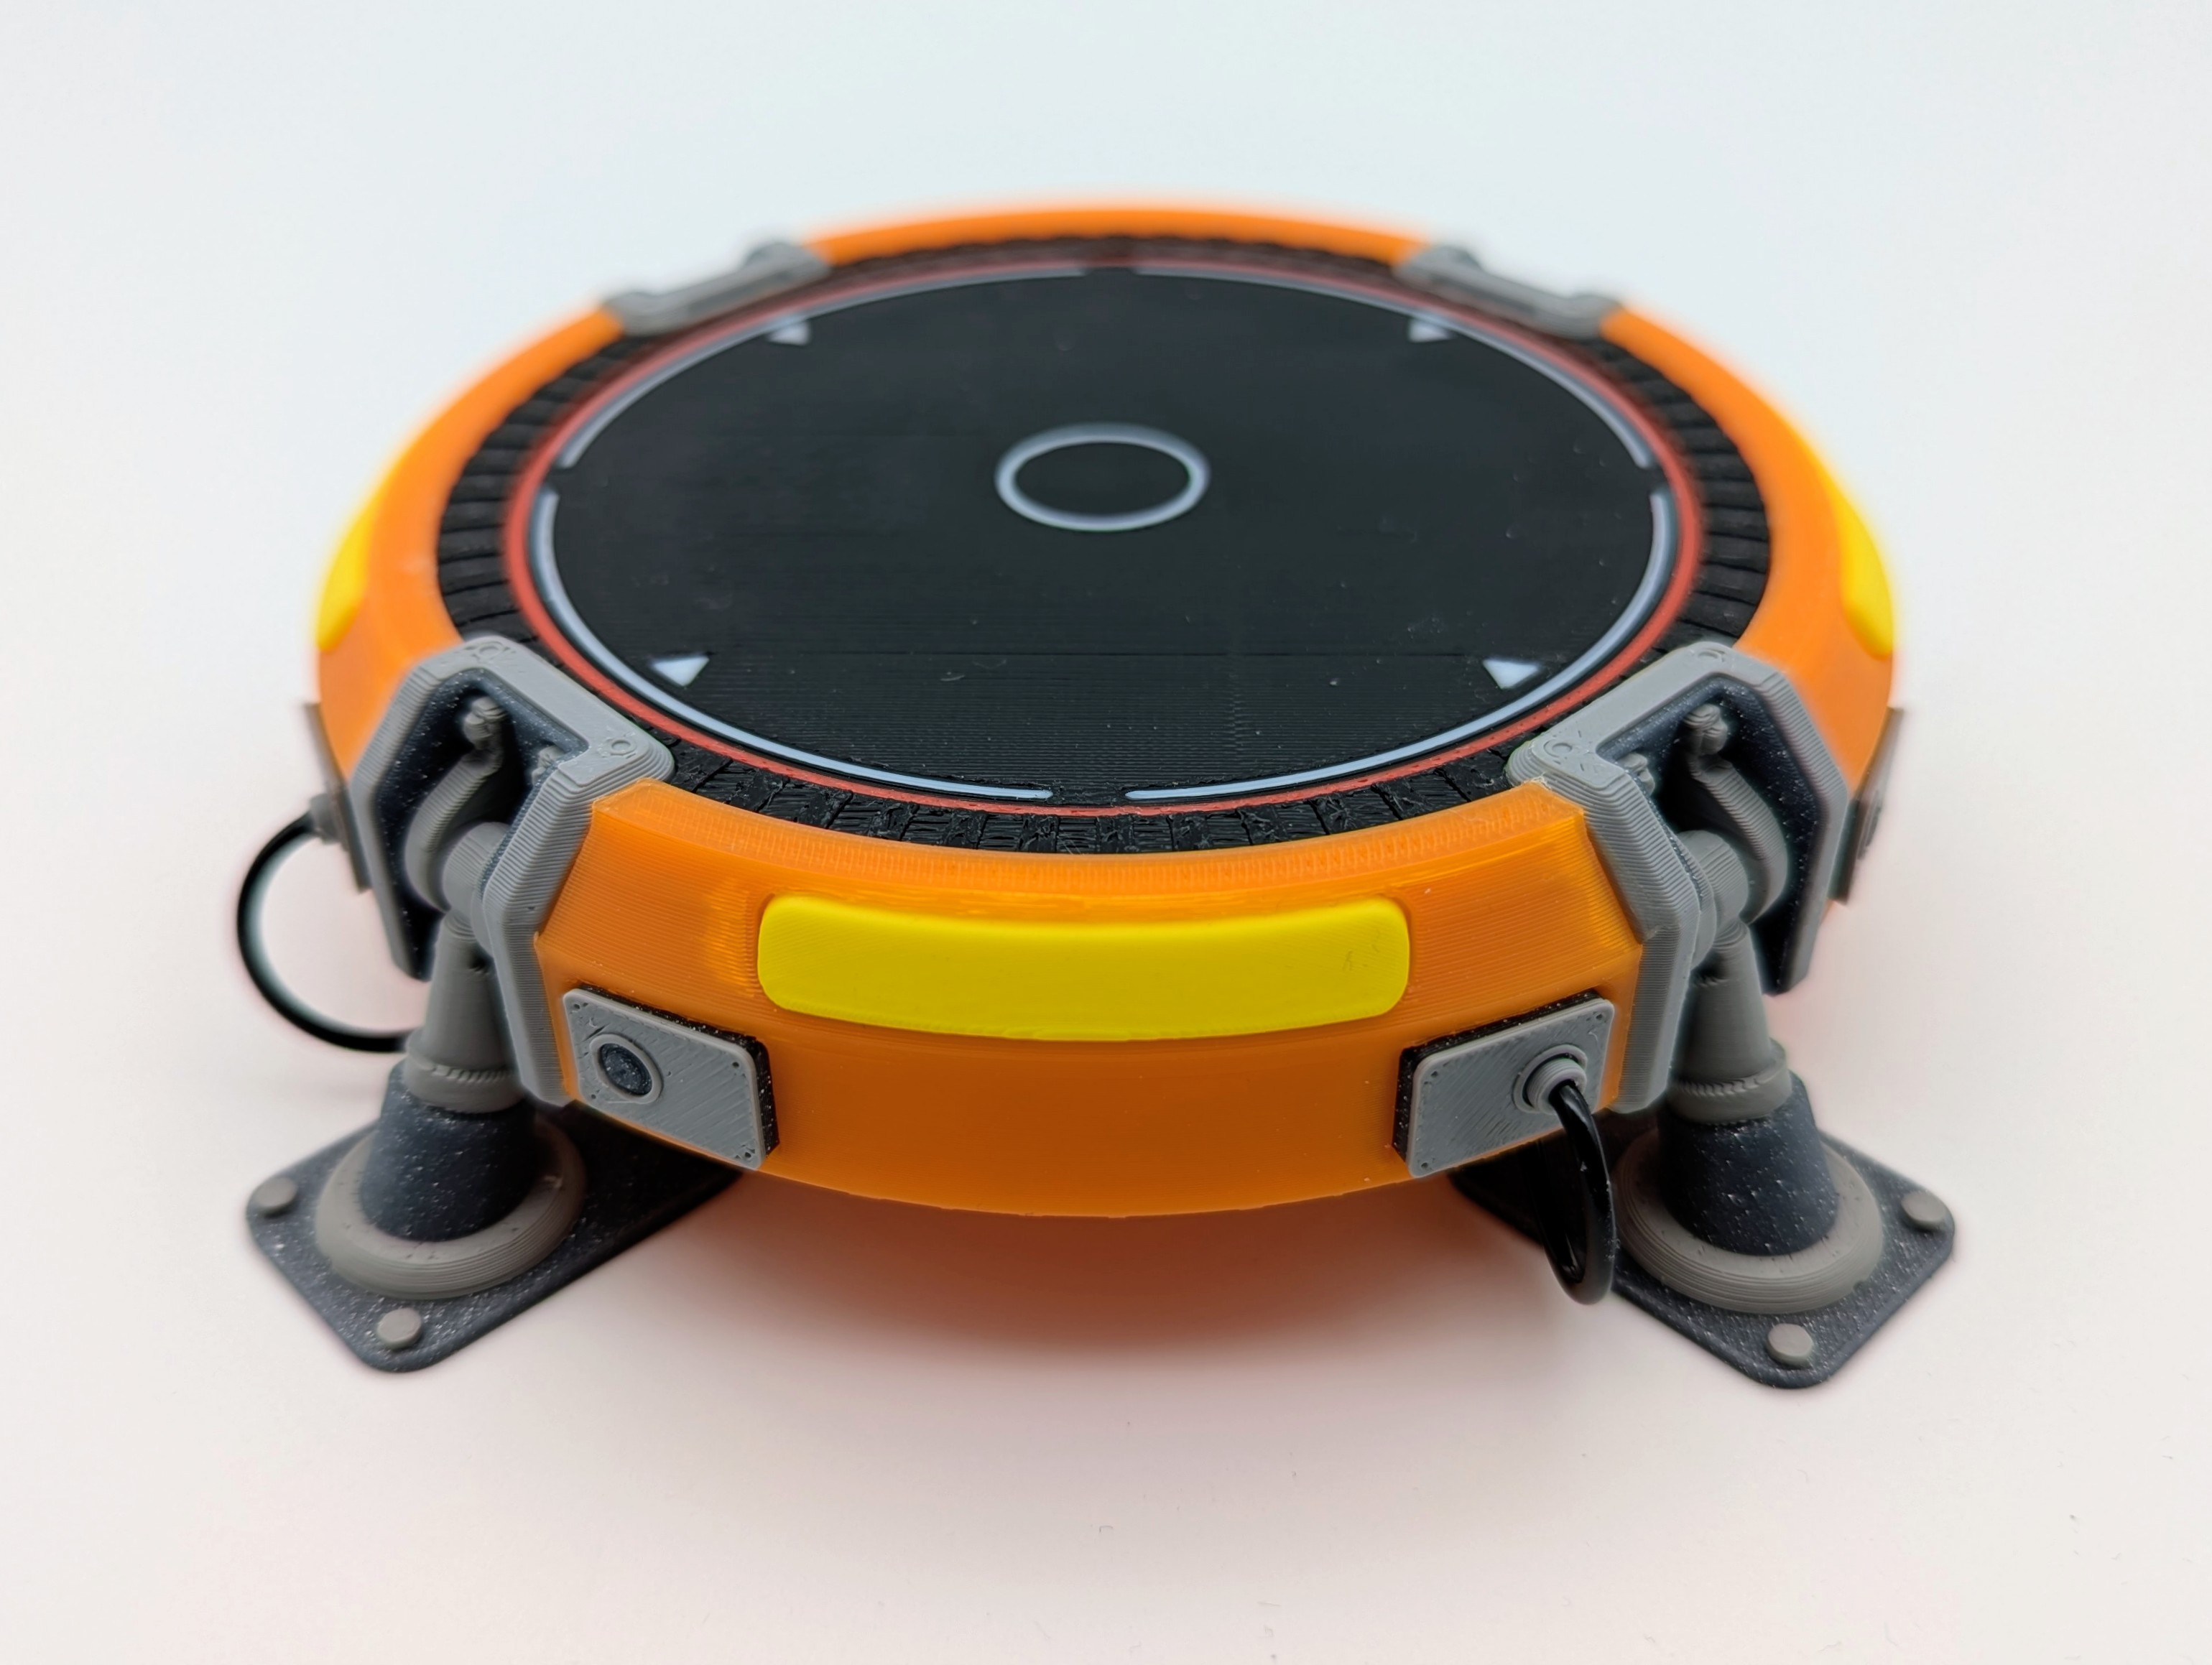
GGs Looper!
Got enough loot? And now you are running away from the storm? Stop running - start flying! Here, take this Launch Pad.
This is a model of the current Fortnite launch pad (Ch6S4). It is not only for decoration but it functions as a coaster, too. It can hold every mug, glass or bottle with a diameter of 86mm or smaller. Be aware that the assembly will take some time.
REMINDER: Be careful with hot drinks if you are using PLA…
Just to be clear - this is not a model ripped out of the game files. I designed every single bit according to some screenshots I took.
Print preparation:
Make sure that your print bed is clean and grease-free and use a quality brand, dry filament. If you are having bed adhesion issues try using printer-glue on your plate.
Print settings:
Use the 0.2mm standard settings for everything and change to the 0.12mm setting if you want more details. Some parts need support. It is simply too much to list every detail, so take a look at my 3mf print profile.
The print profile is initially for the P1, but can be used with any Bambu printer. I tested it with the P1S and H2D.
Assembly:
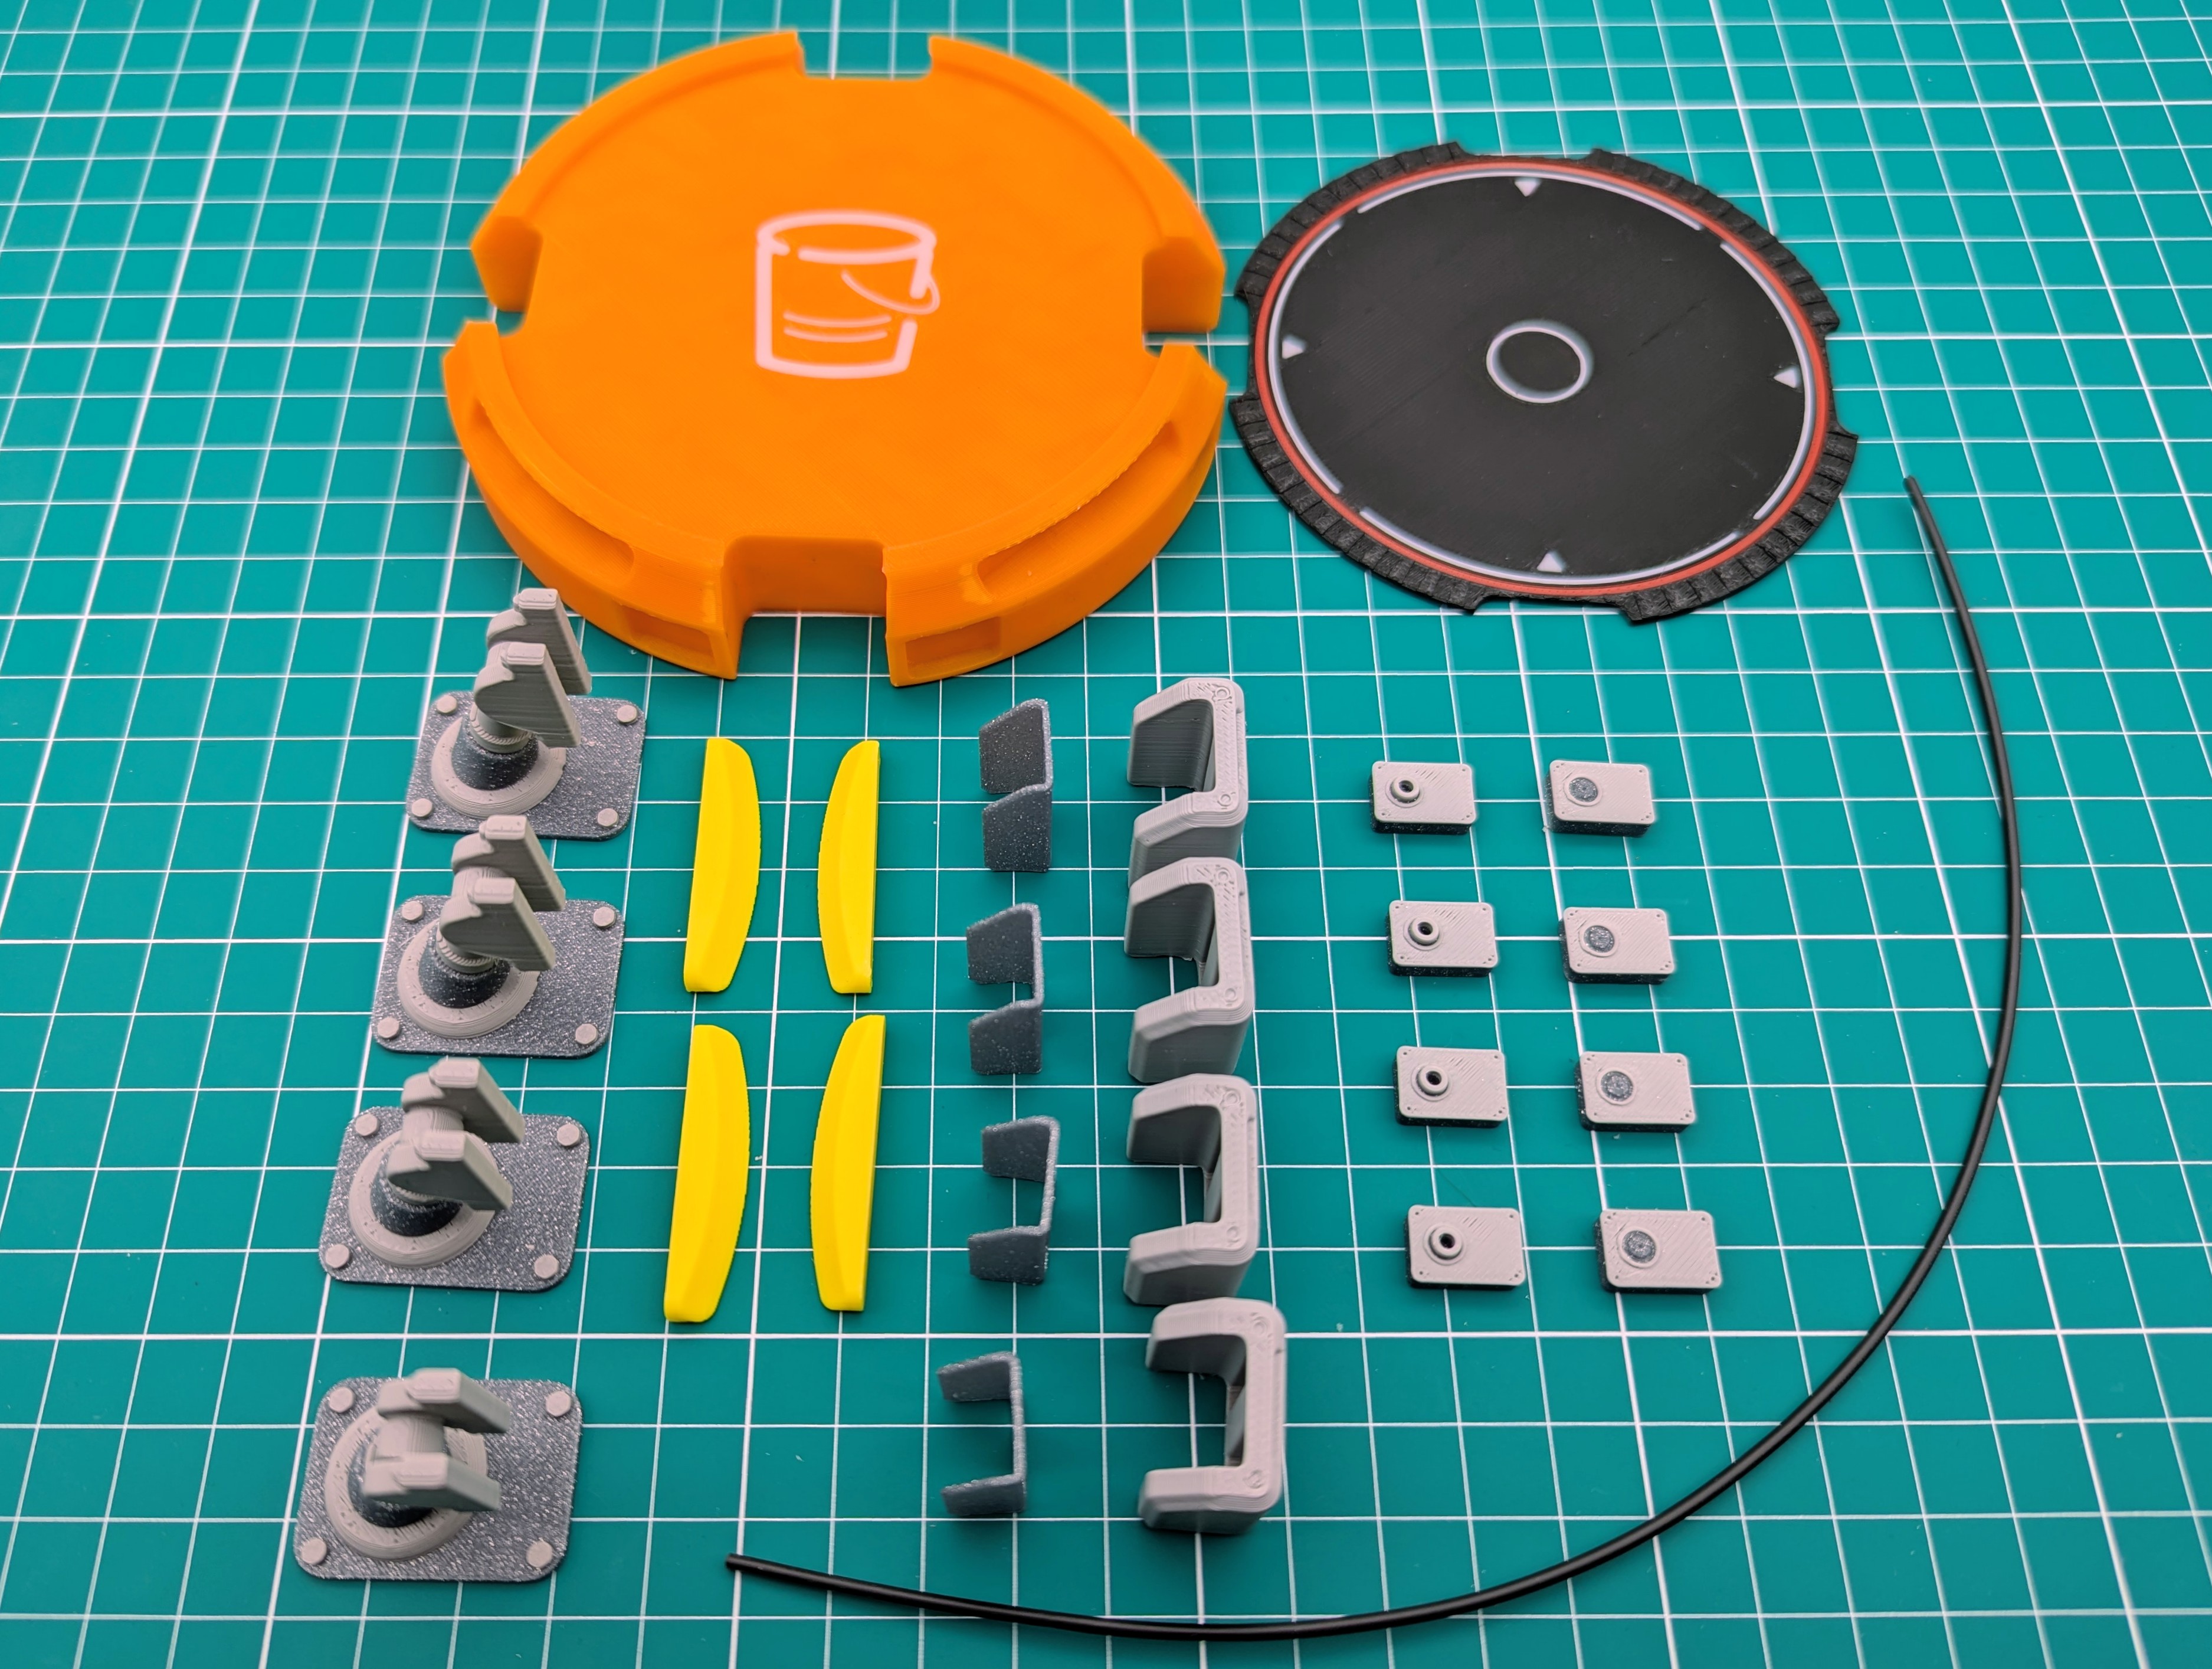
Remove all supports and brims thoroughly! Deburr and clean all parts.

Glue the deck to the frame.
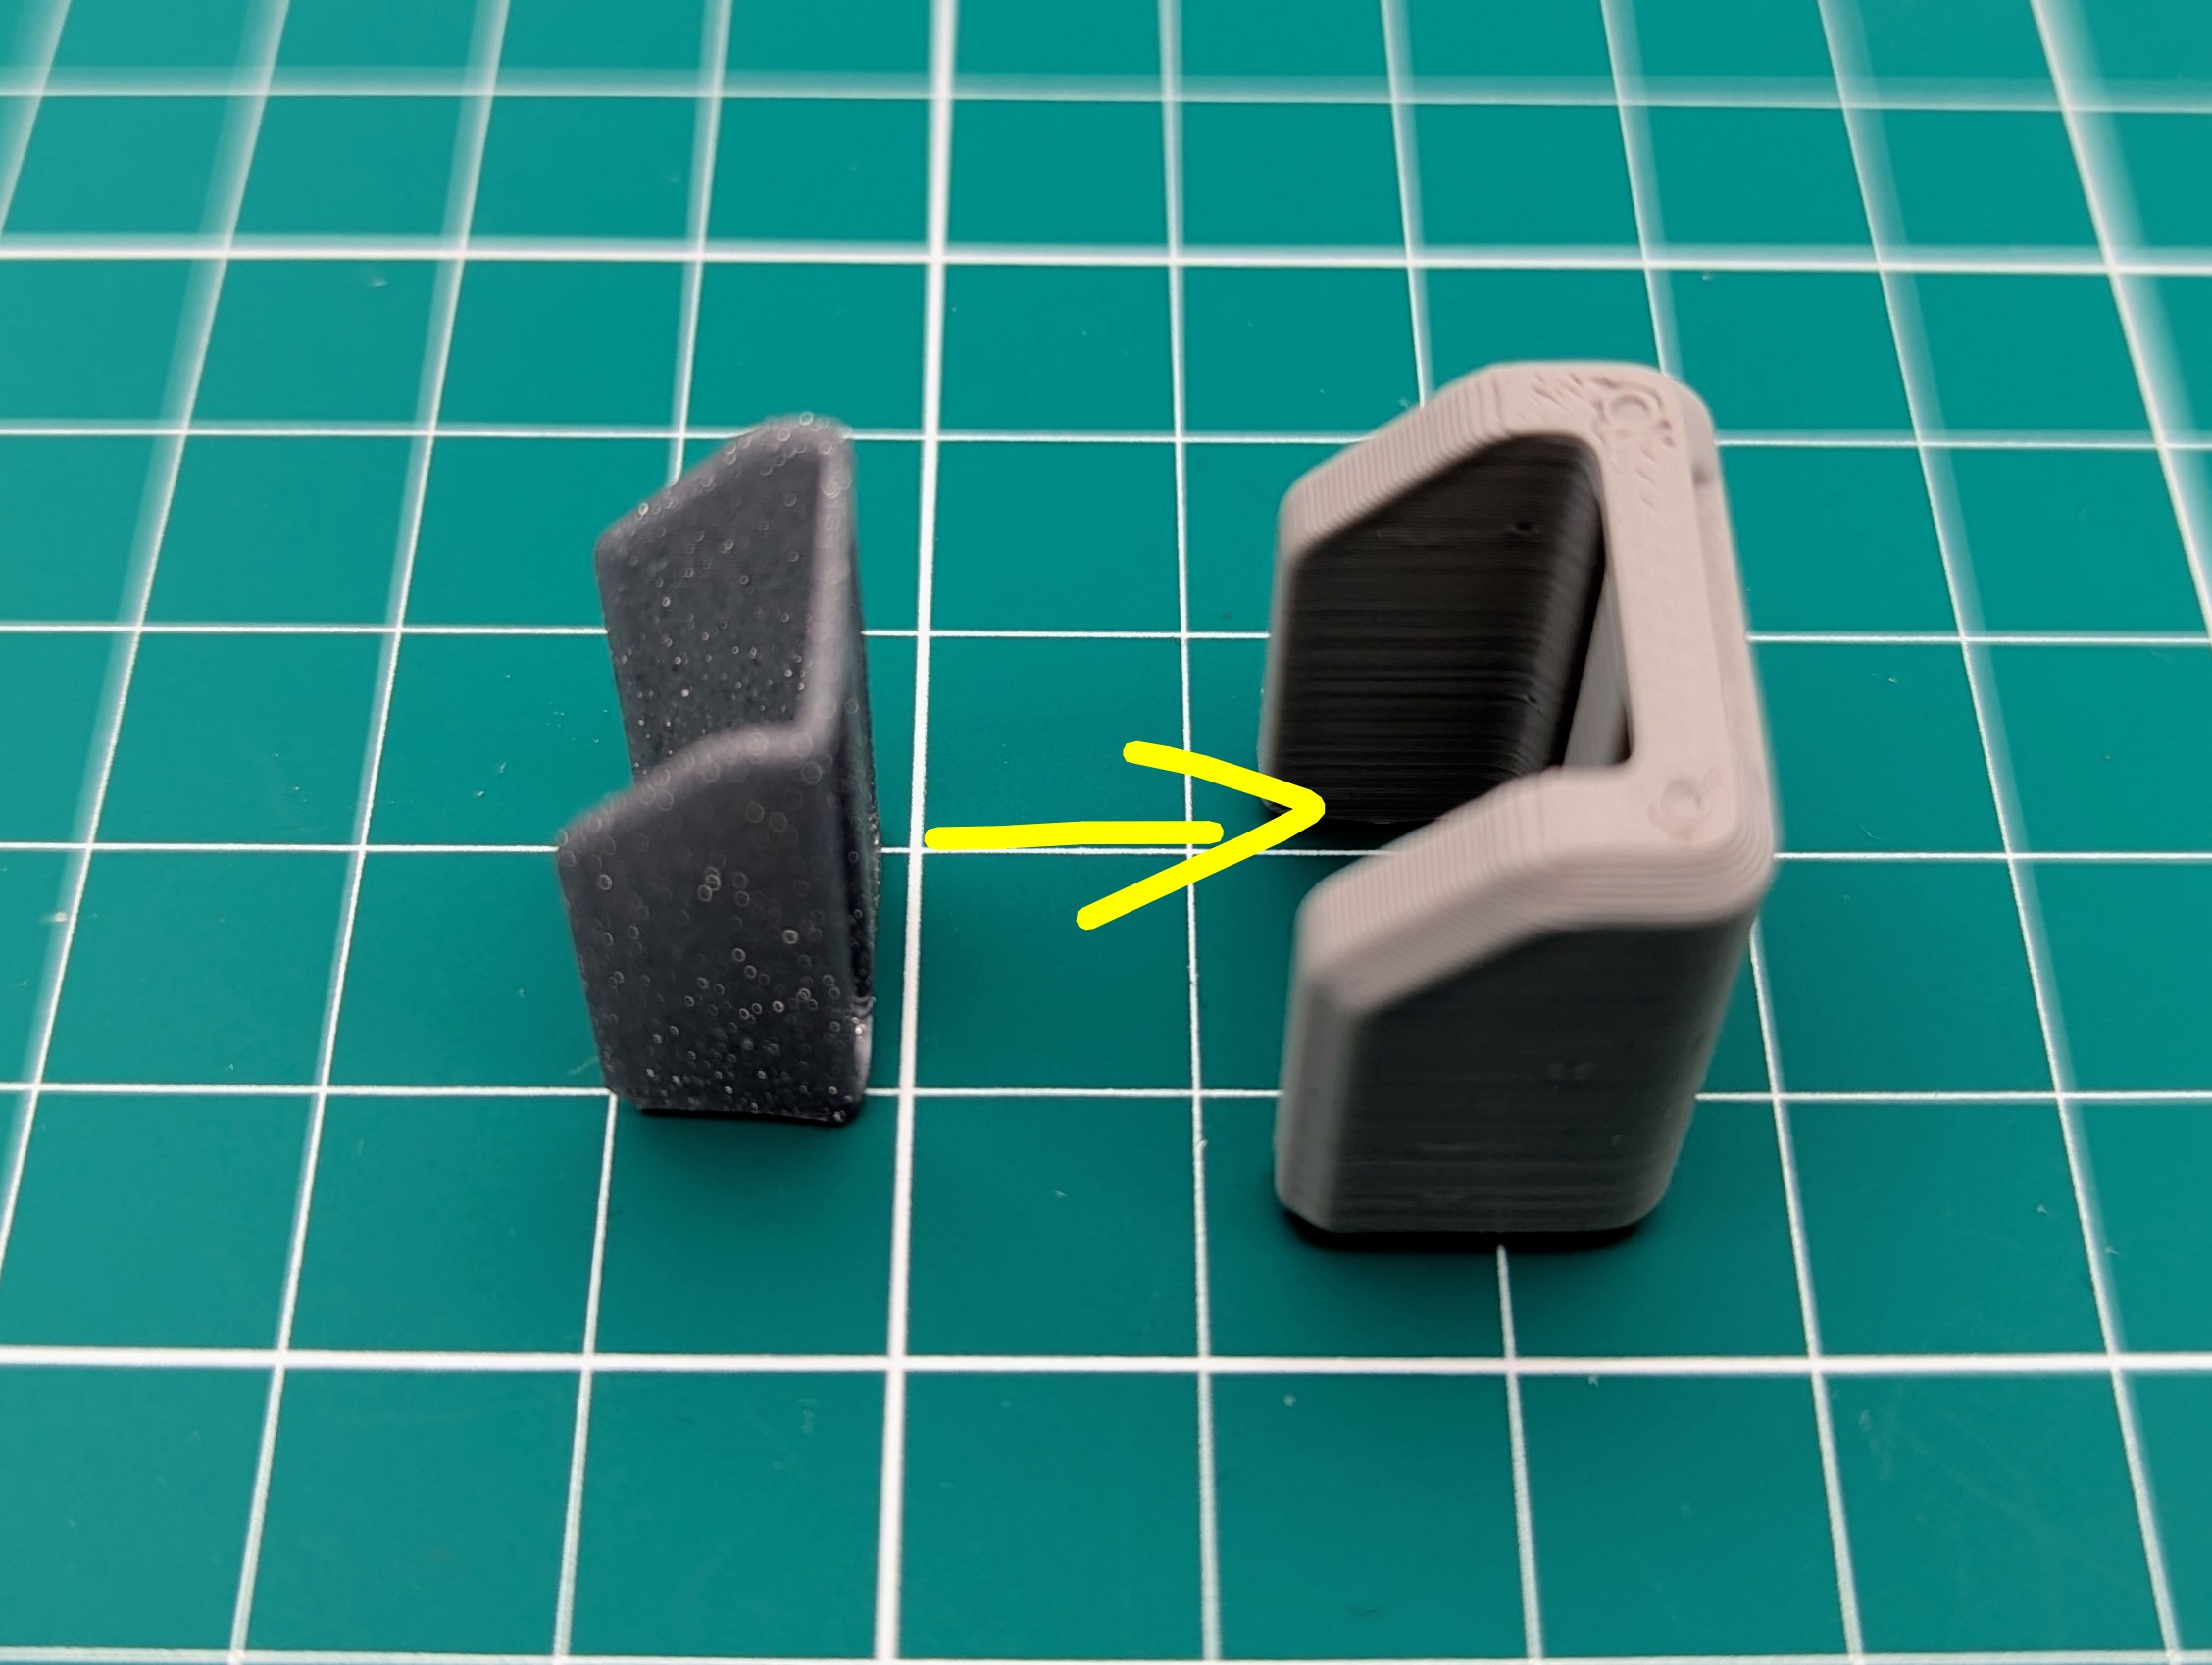
Glue the inner bracket to the outer bracket.
Make sure they are correctly aligned on the inside.
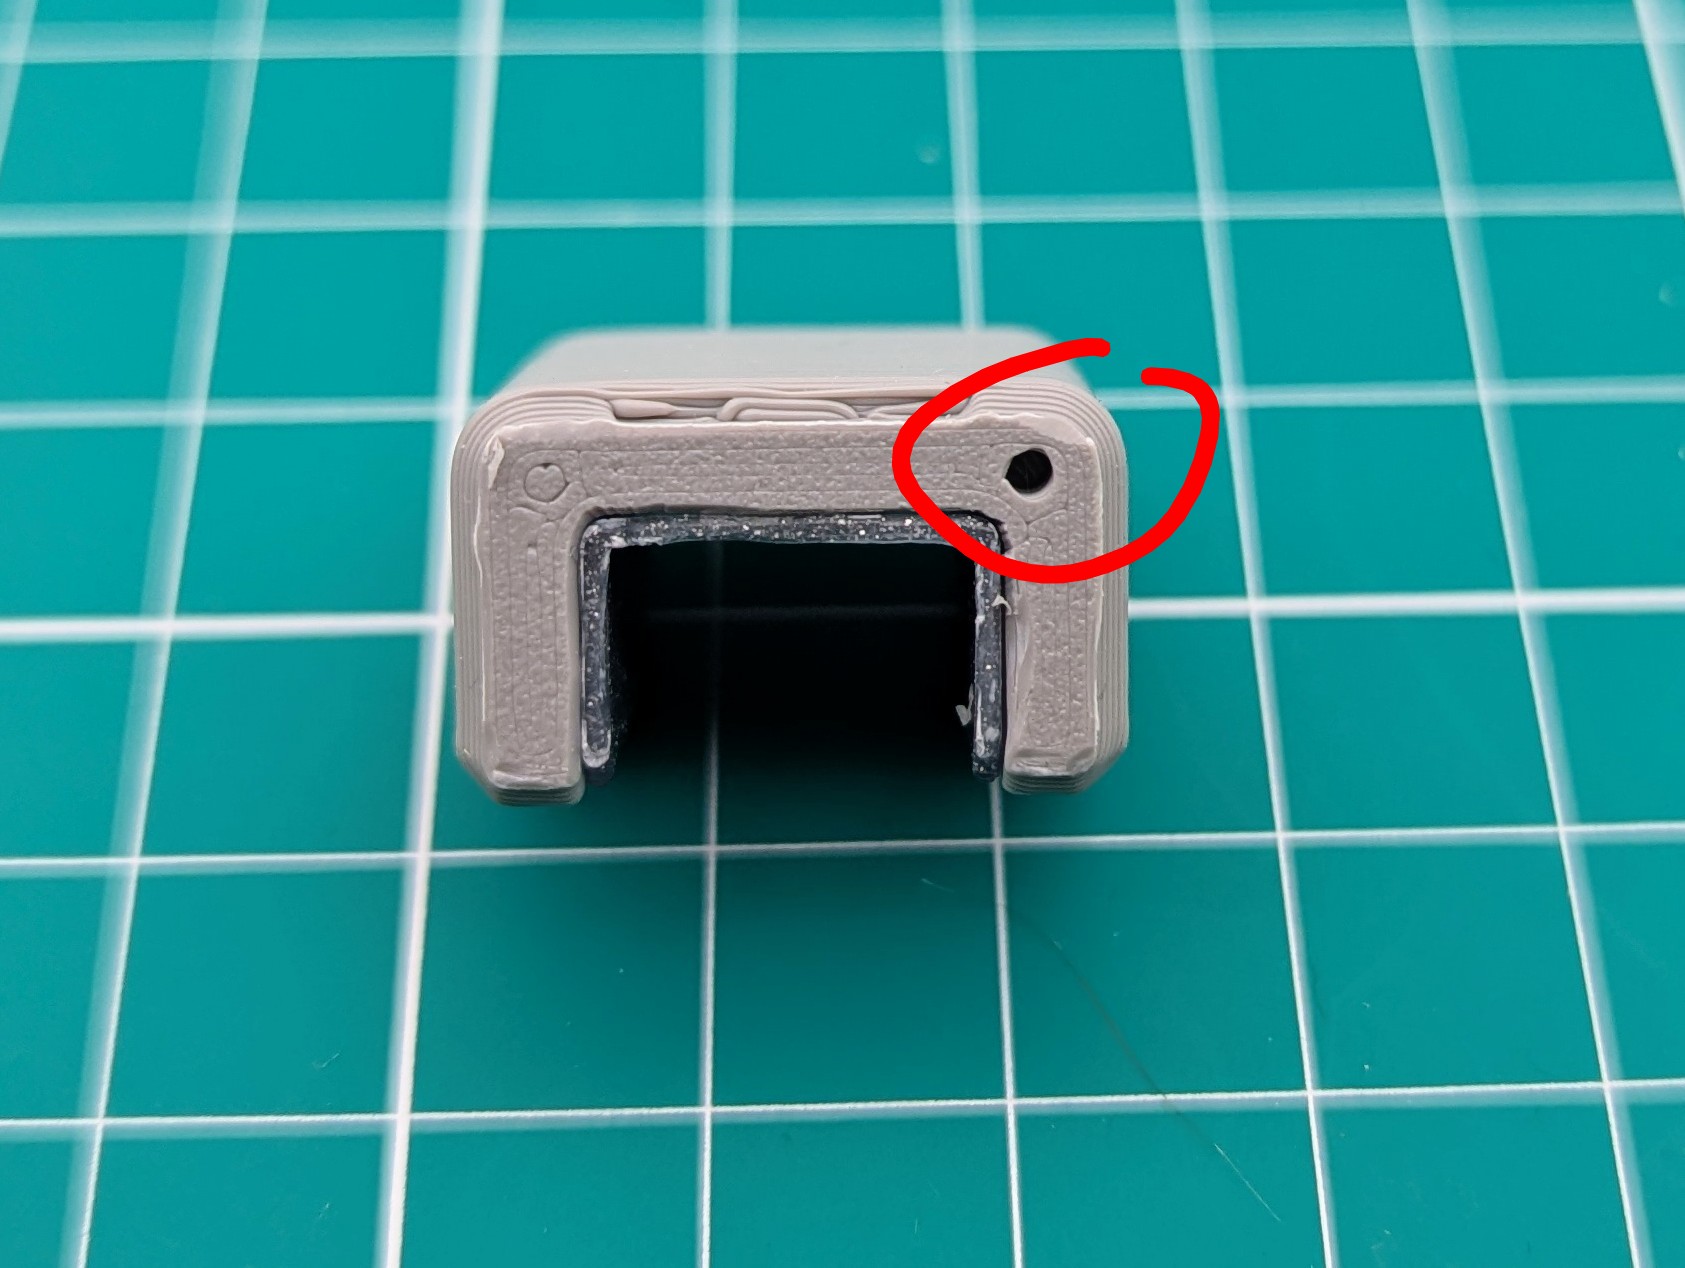
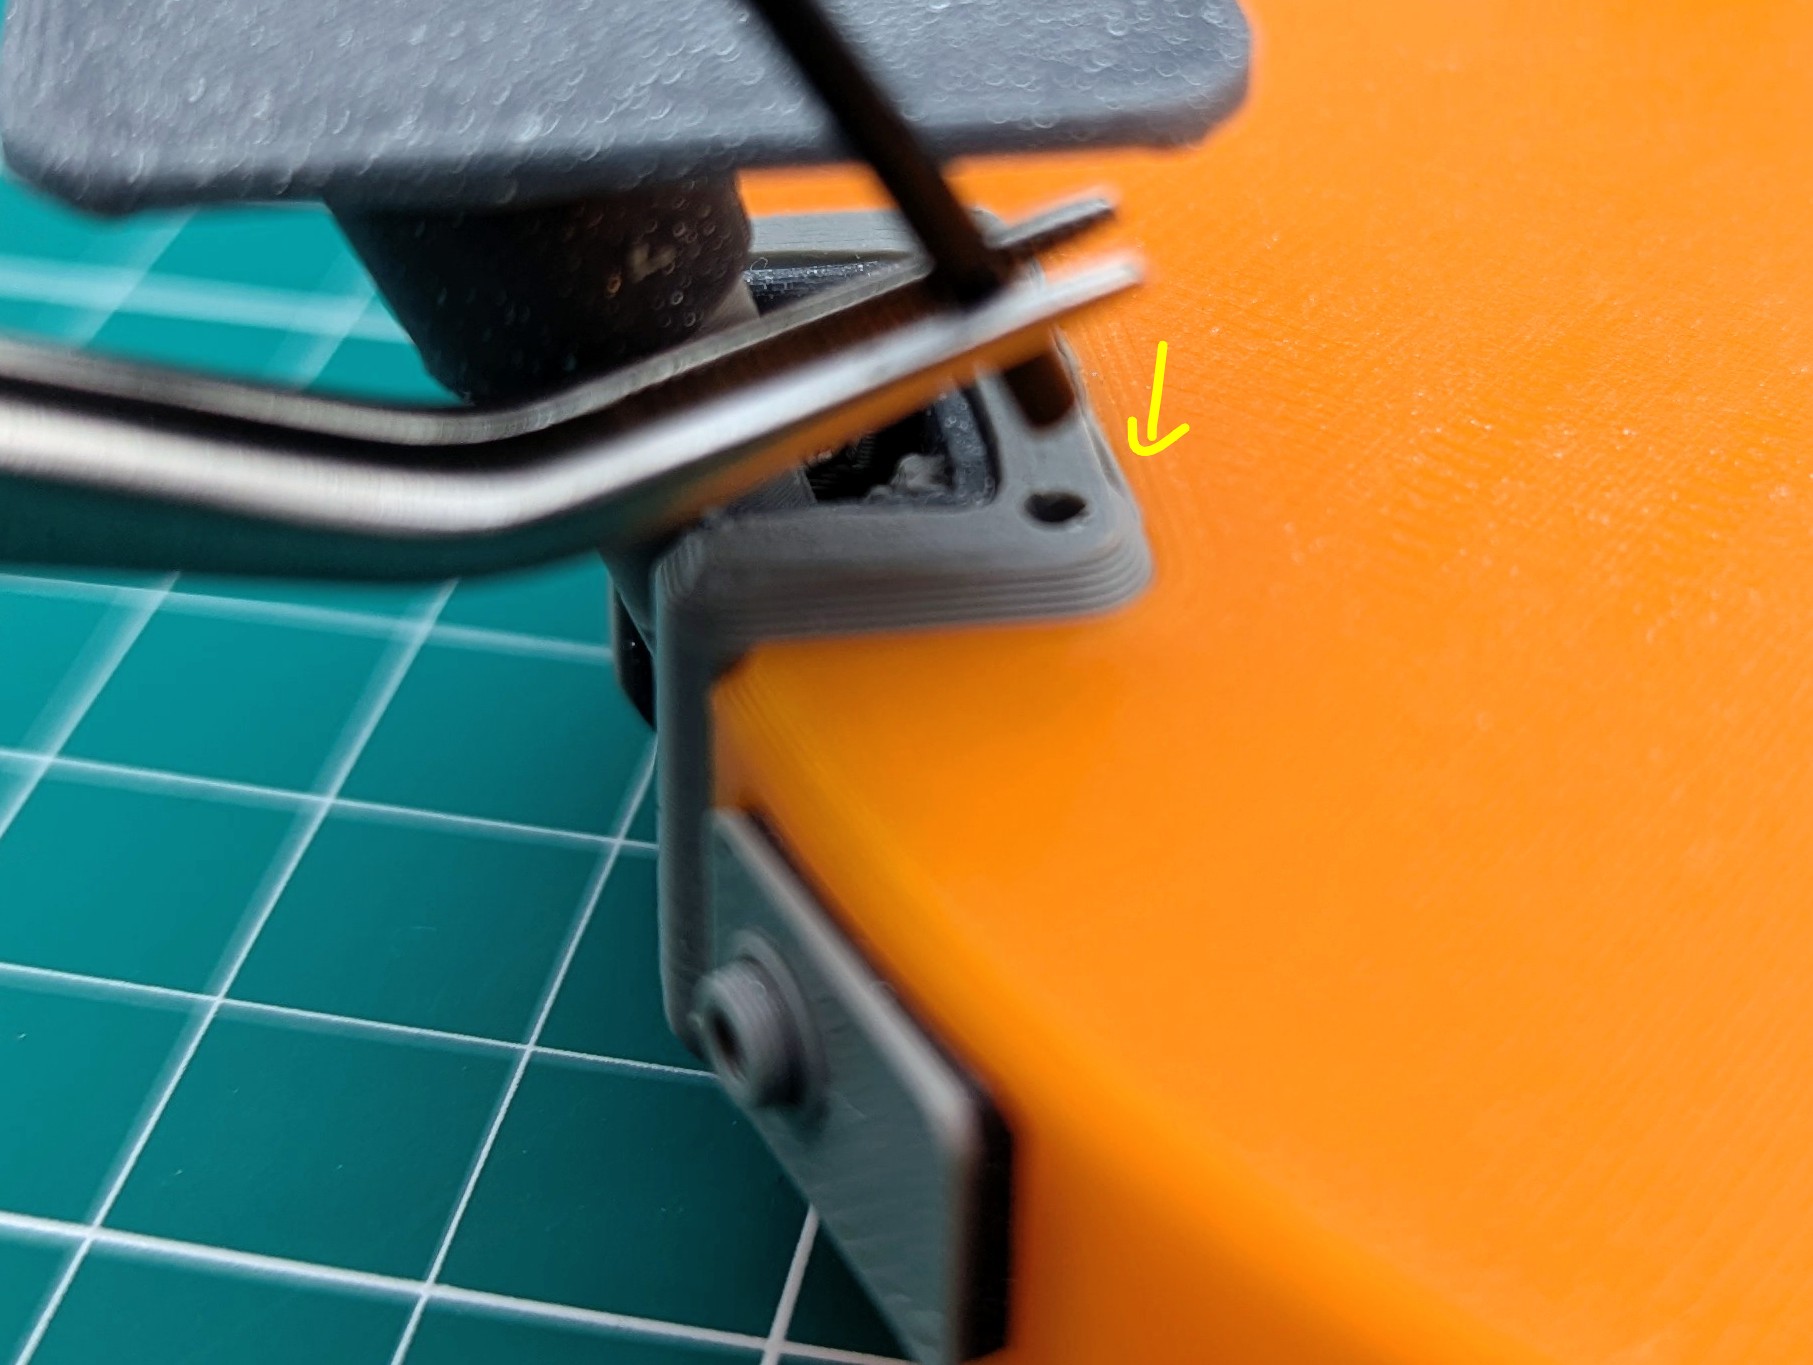
IMPORTANT: This hole on the bottom of the bracket must be clean
so that you can stick a piece of 1.75mm filament in it.
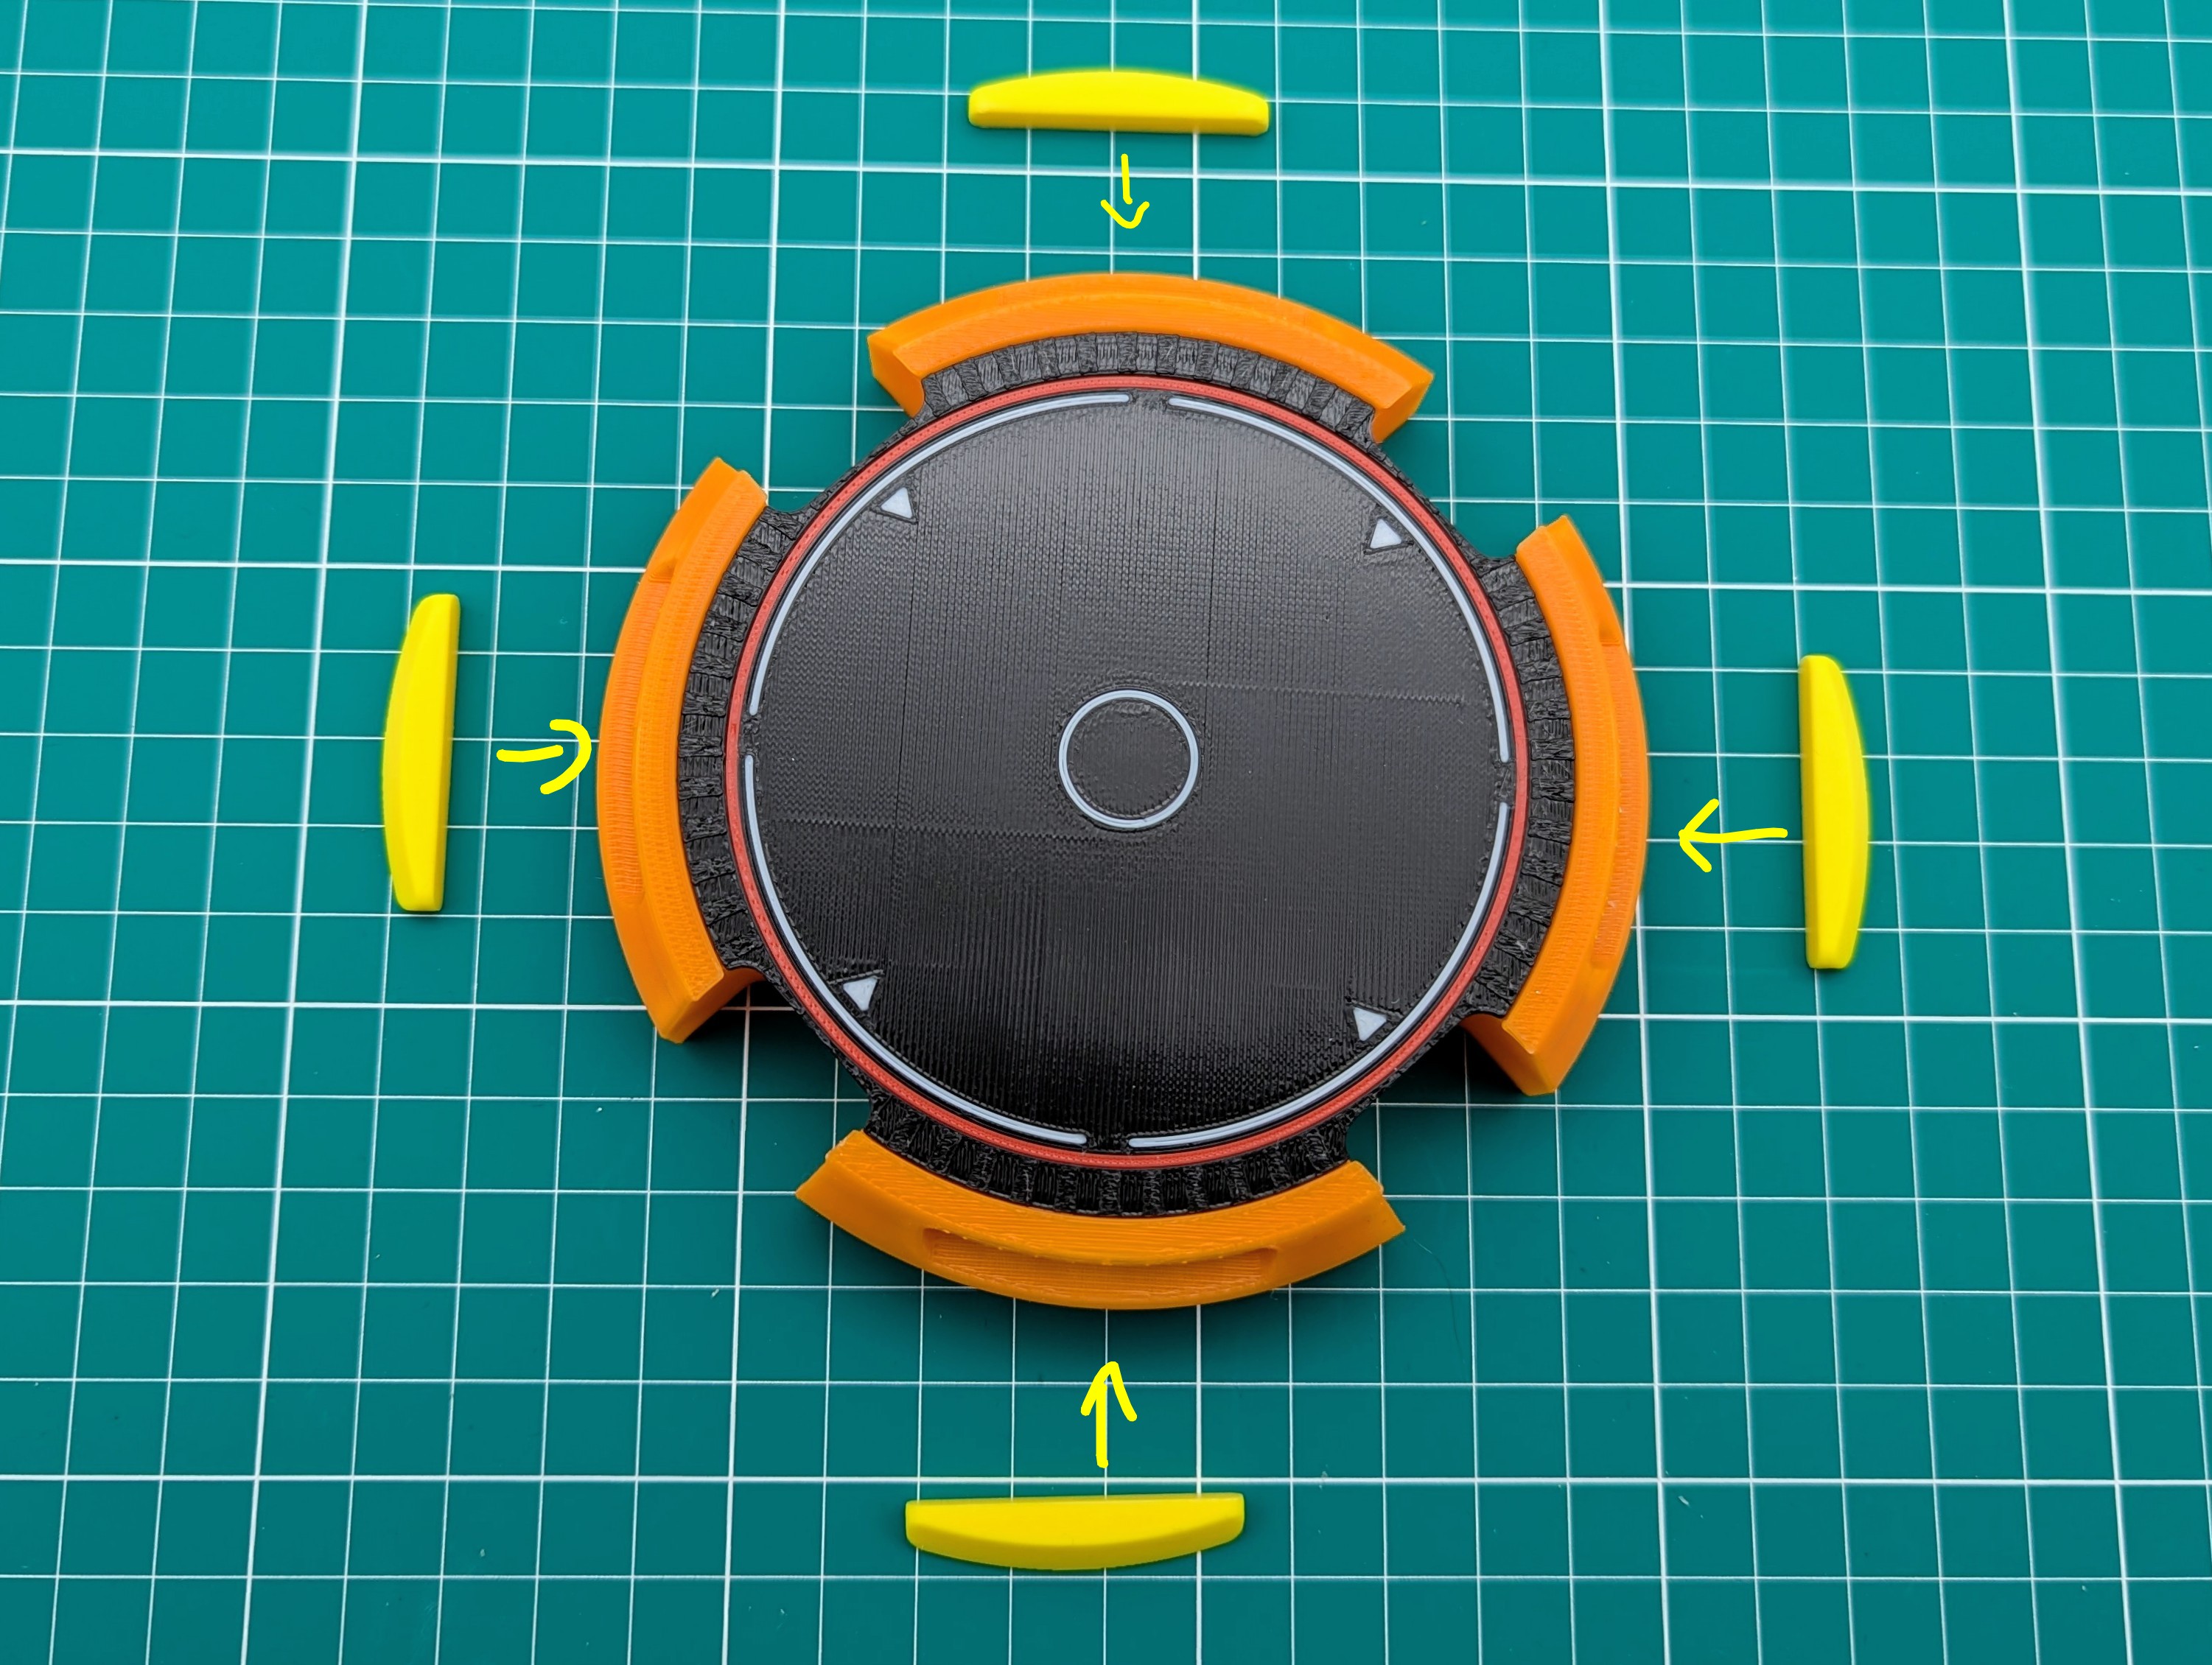
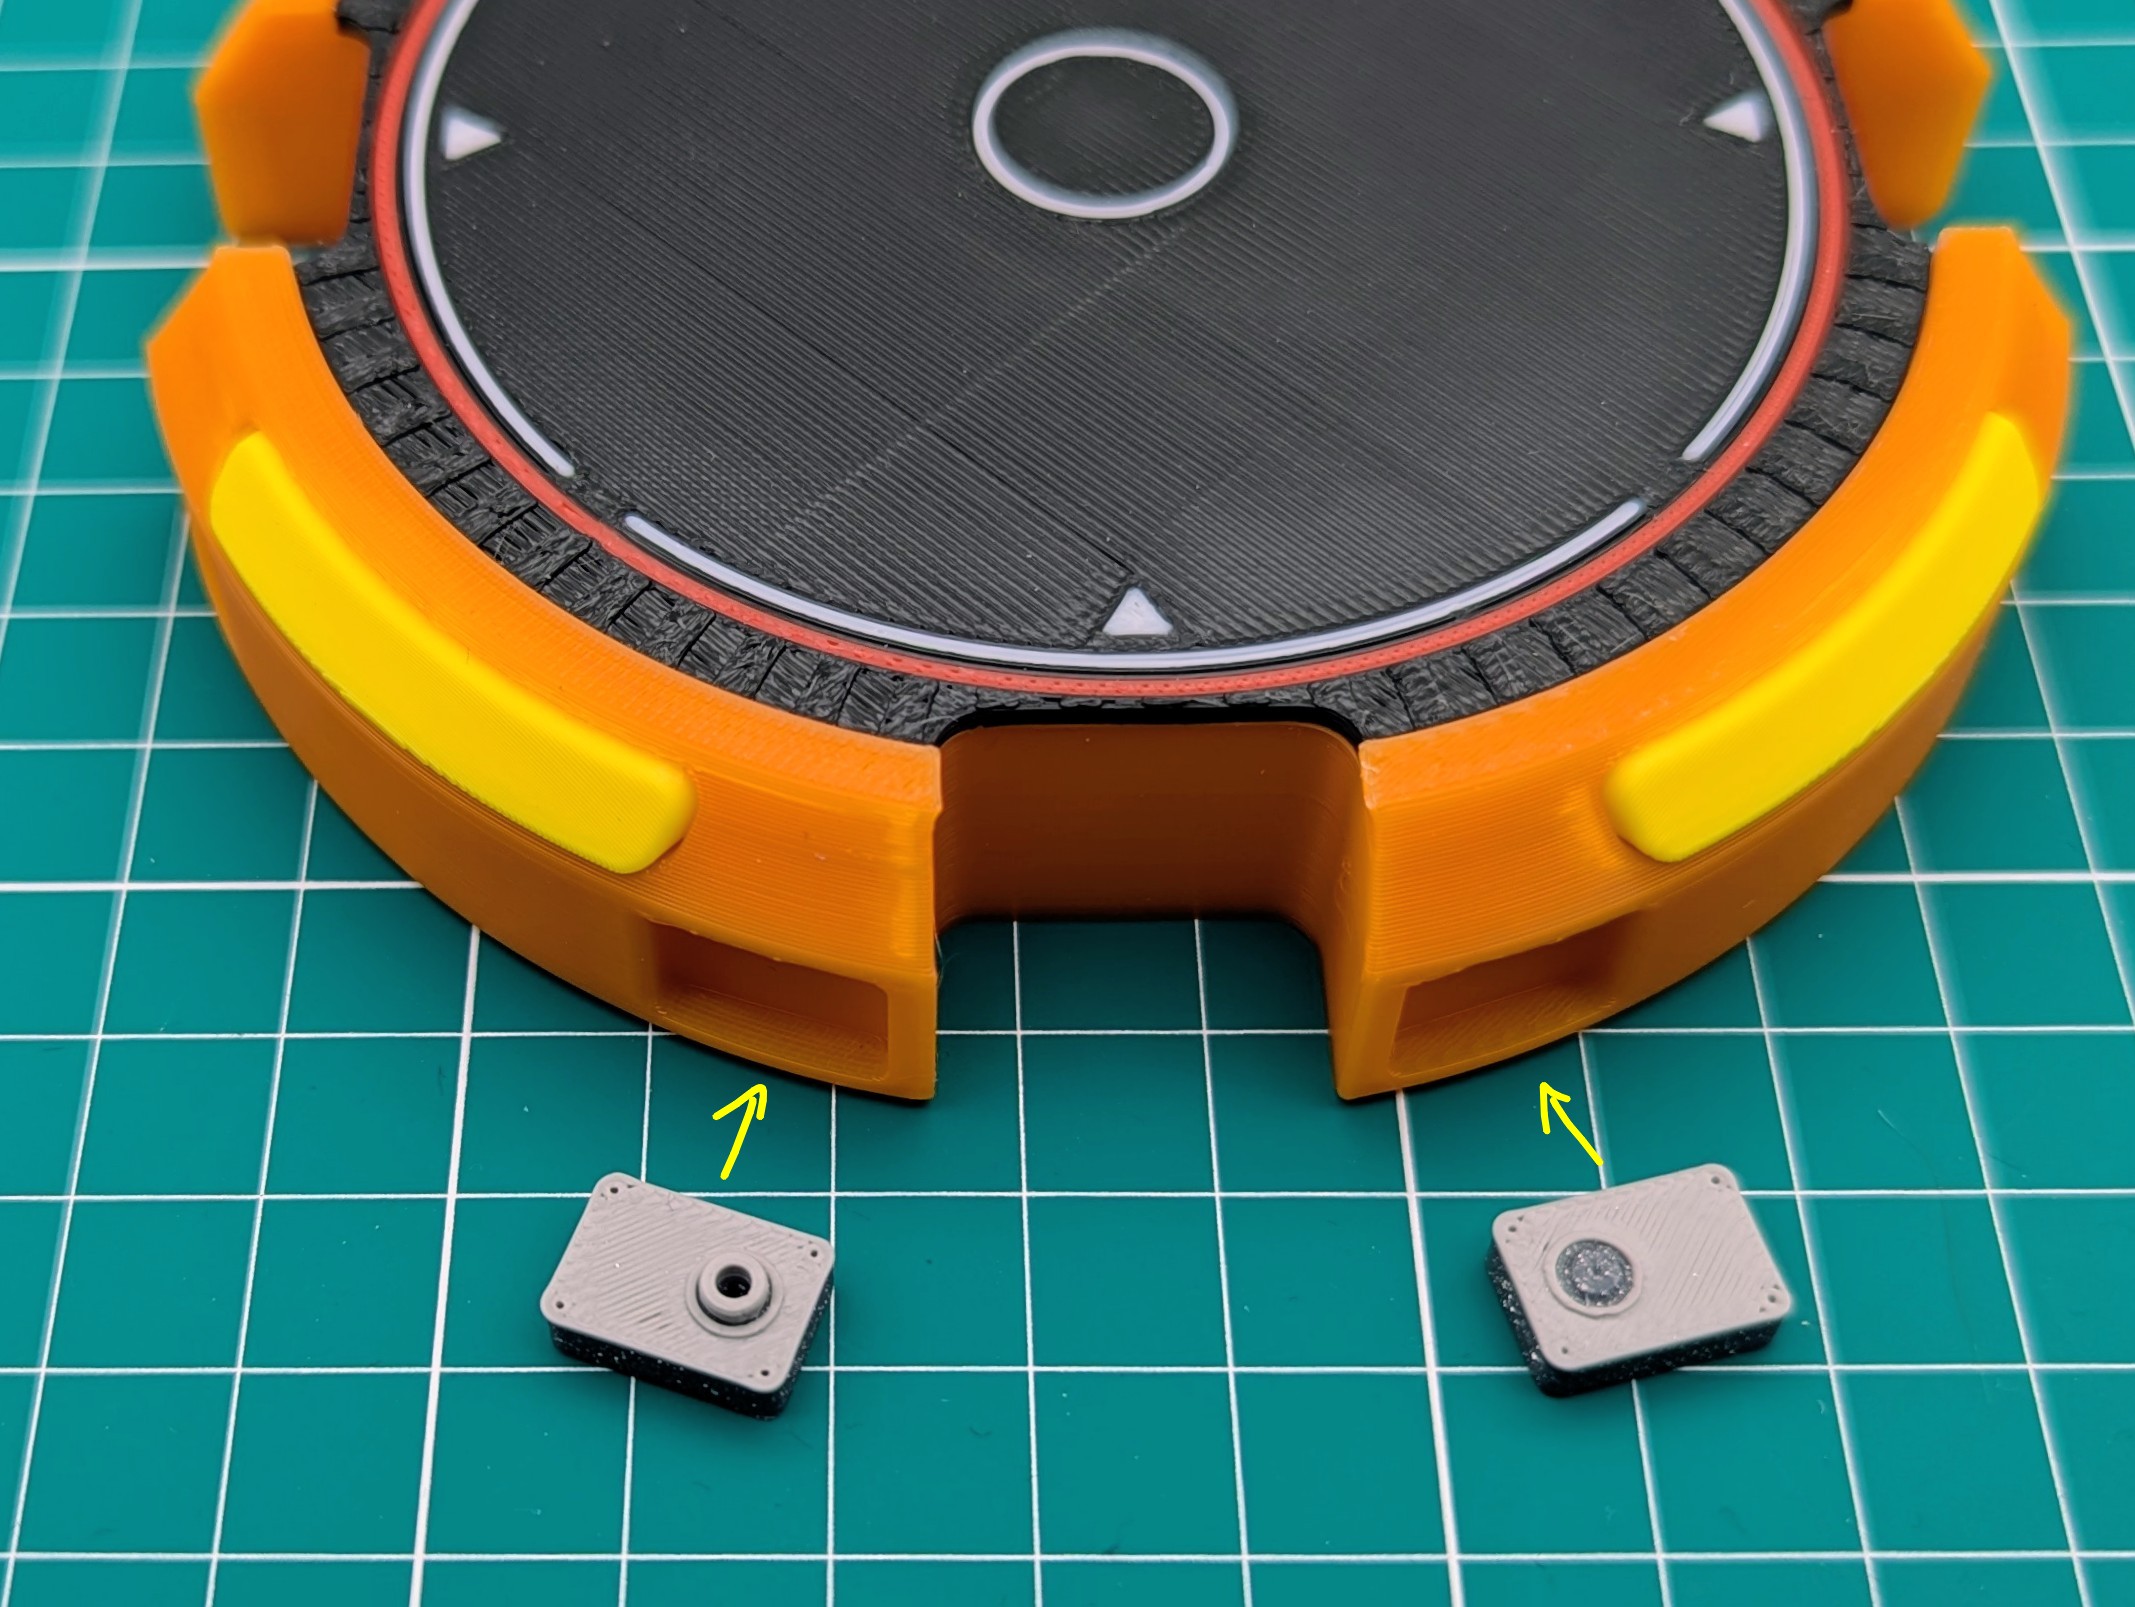
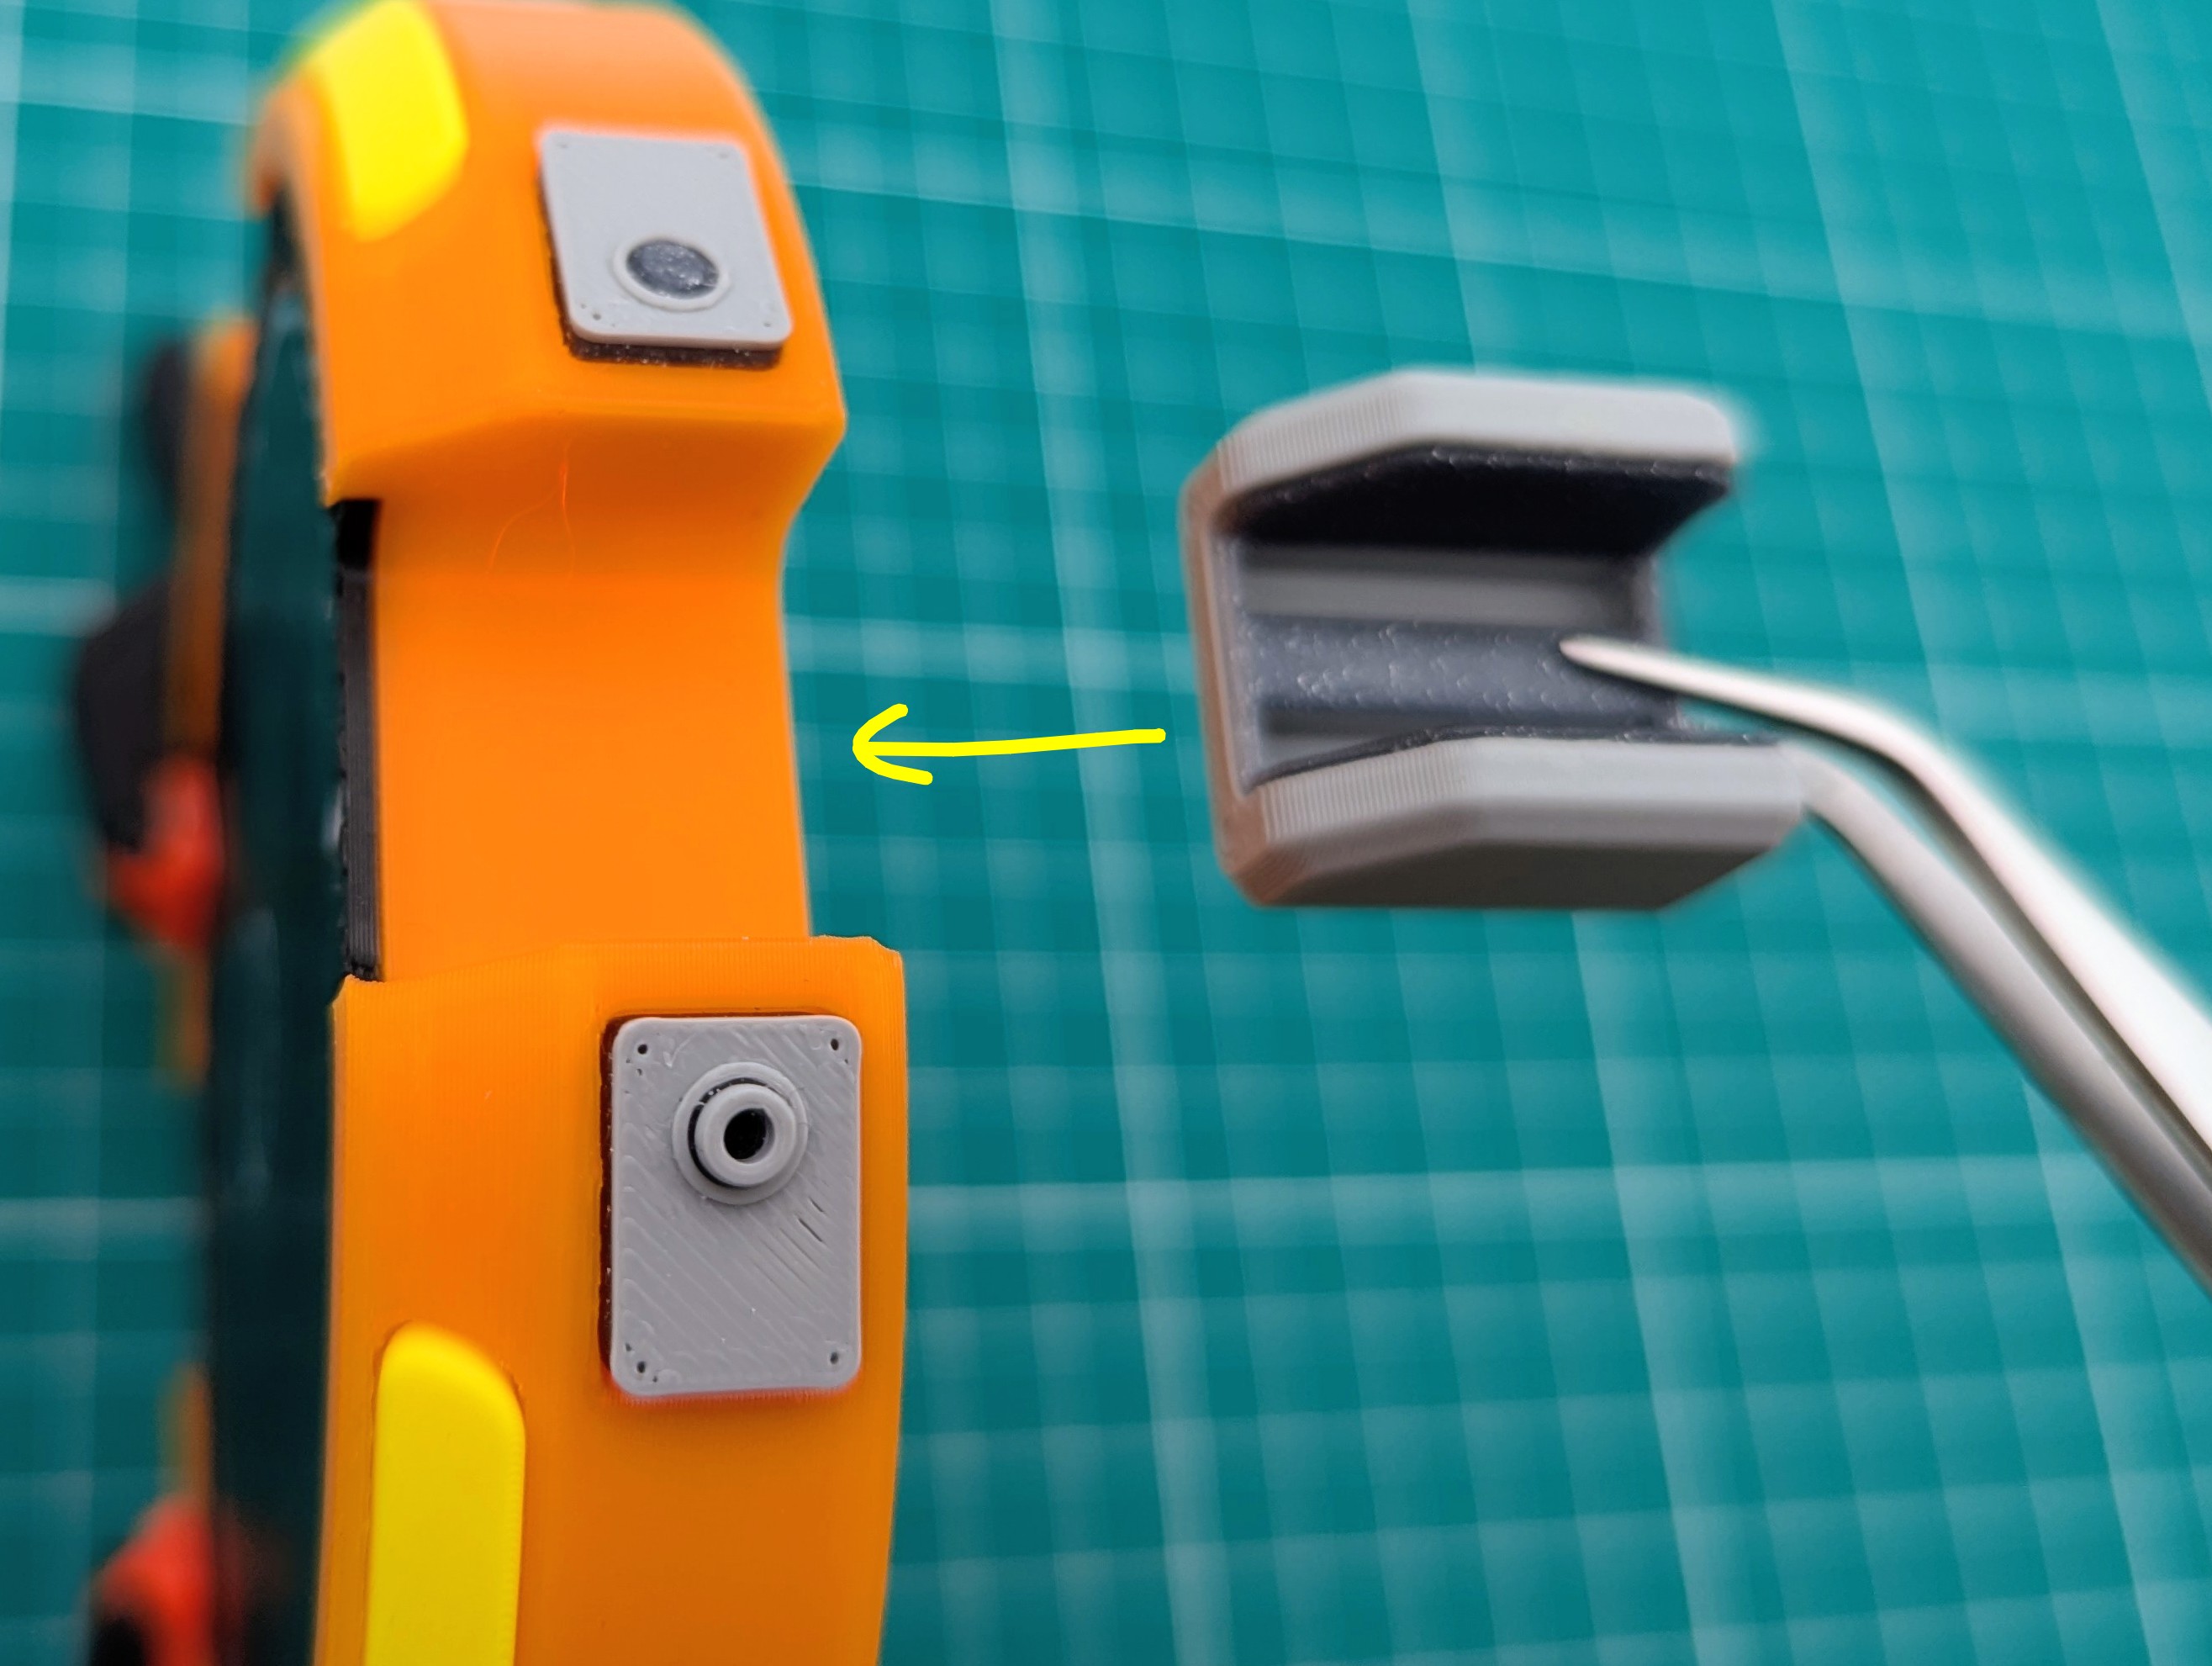
Glue the lights to the frame.
Now glue the two different covers to the frame .
Watch for the orientation and repeat this step for all covers.
Glue the four brackets to the frame.

Cut some TPU filament or some small black wire to 45mm length. You need four of them.
Now is a good time to glue the 45mm cable to the bottom of all brackets.
You can do this later, like I did. But then it is more difficult.
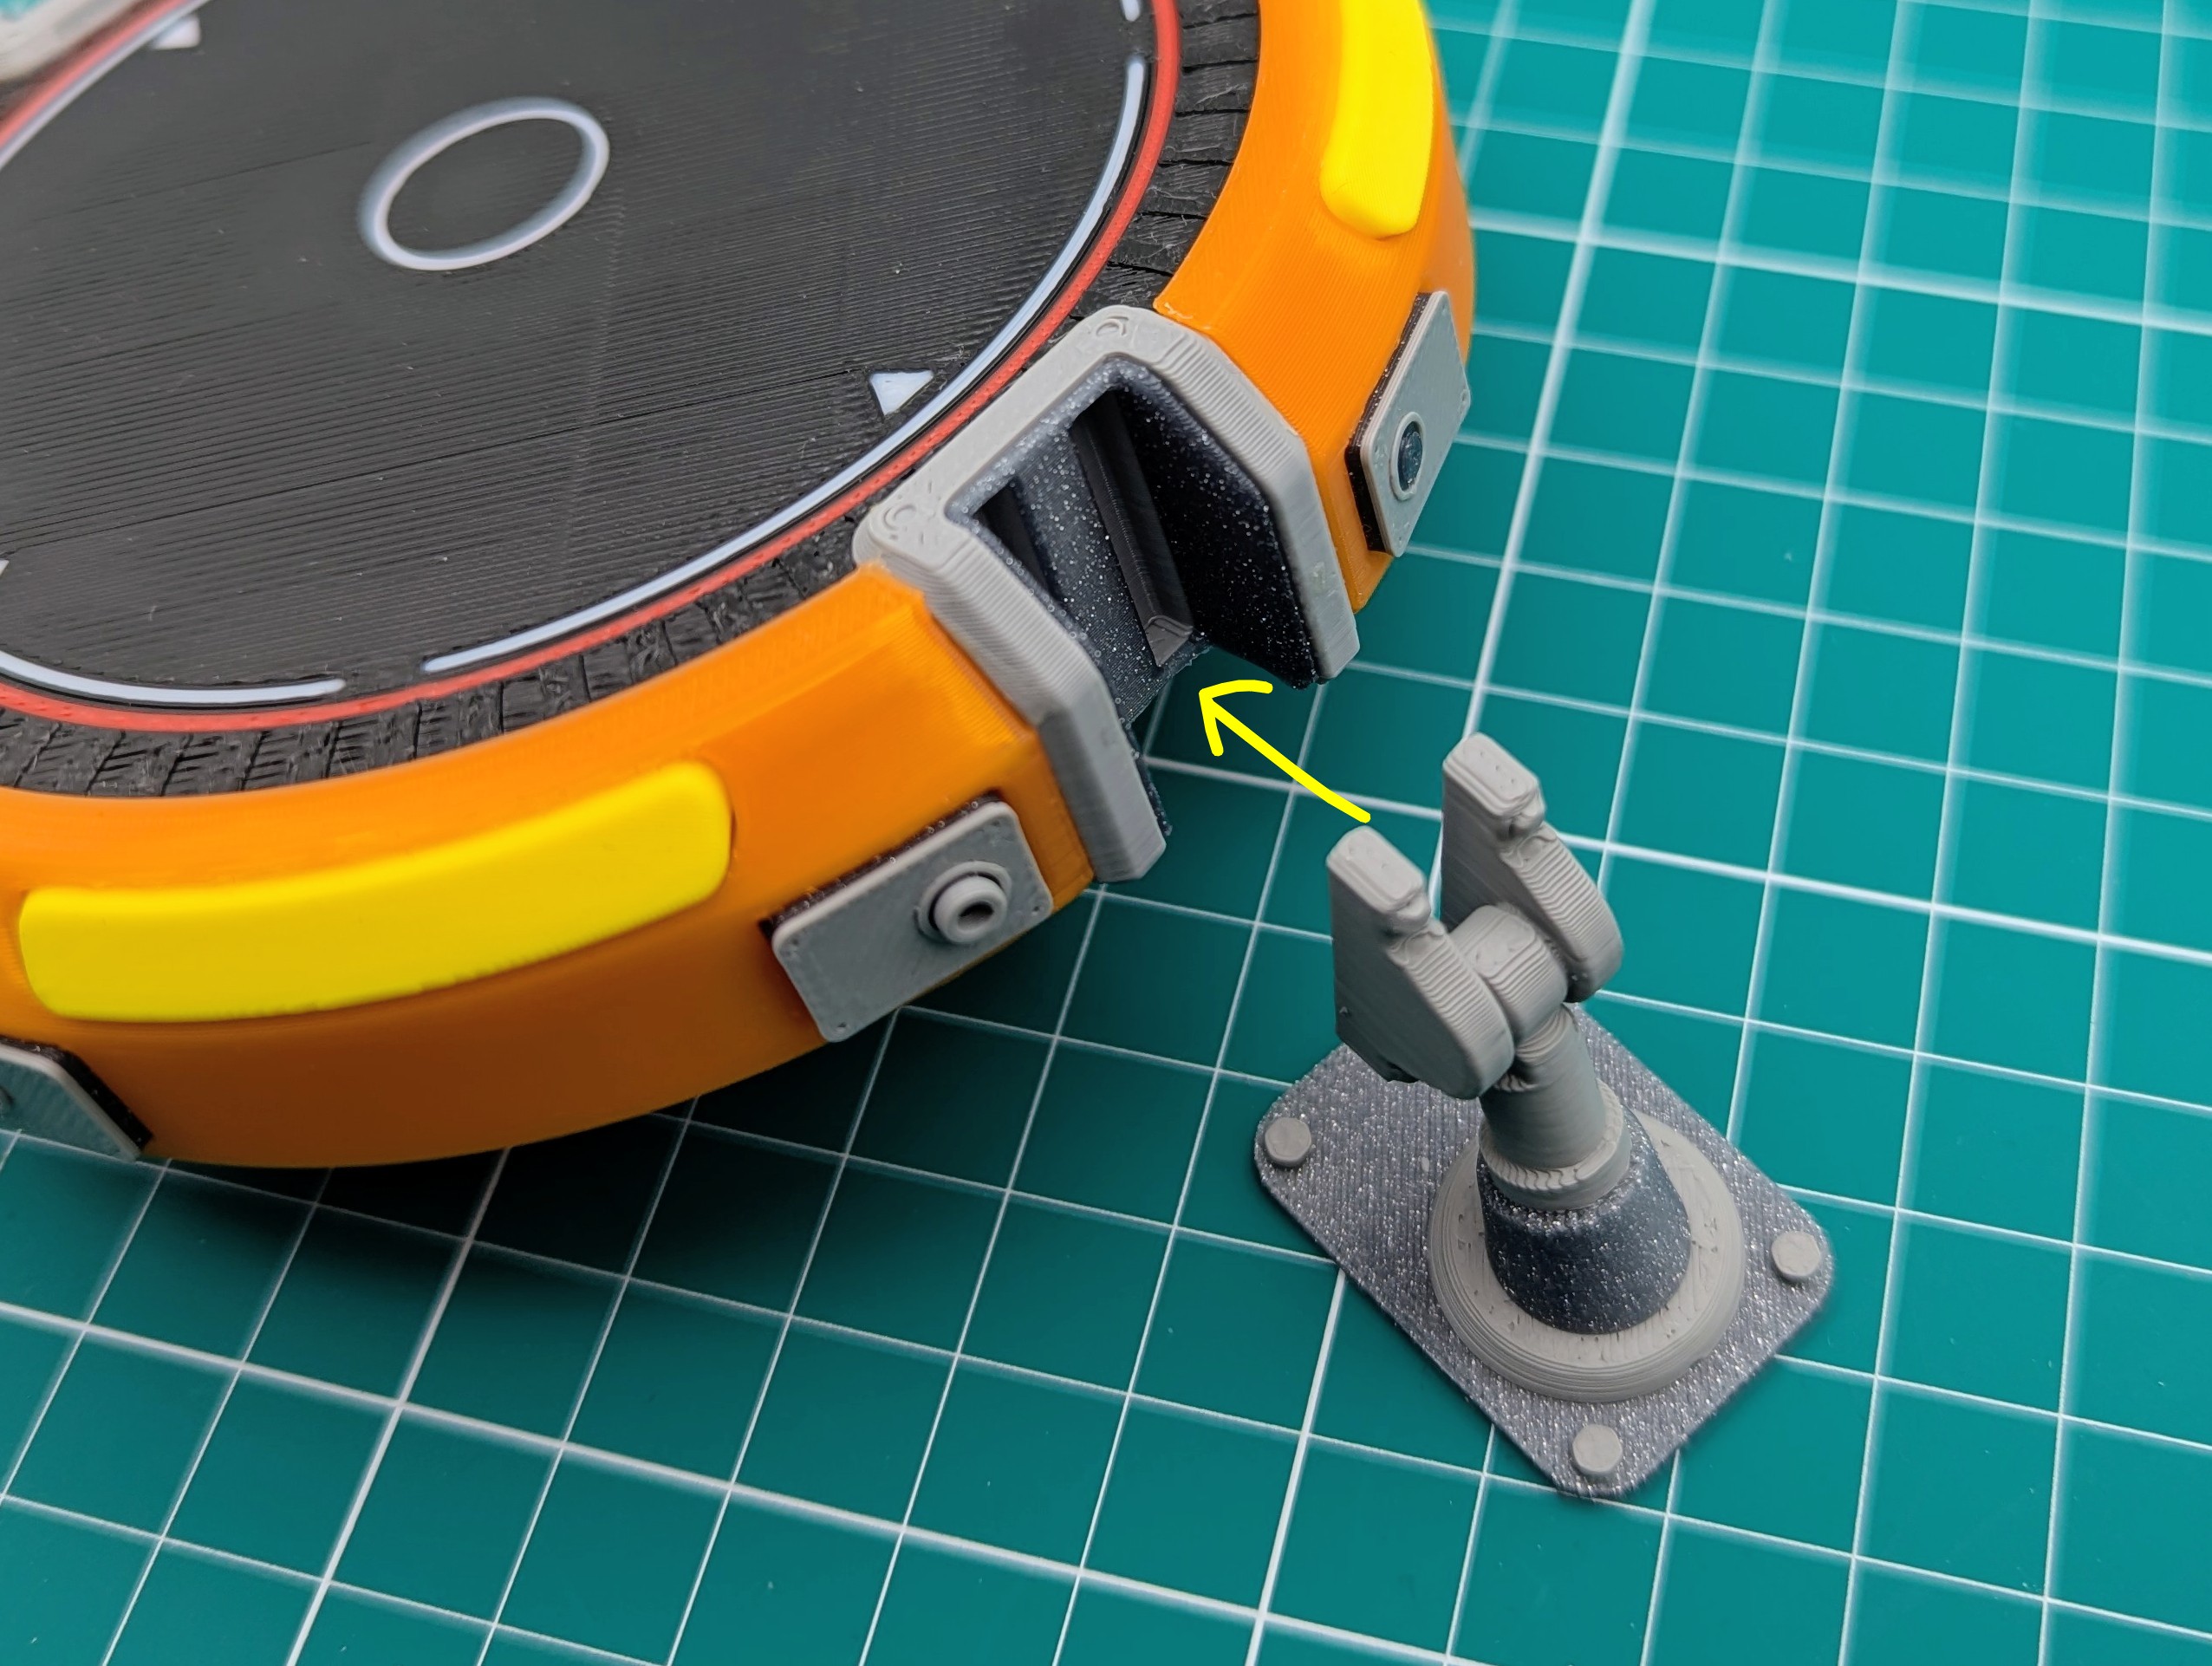
Glue the suspensions to the brackets. Do a test assembly first. If necessary sand down the hinges a little bit.
When it fits install the suspensions with glue.
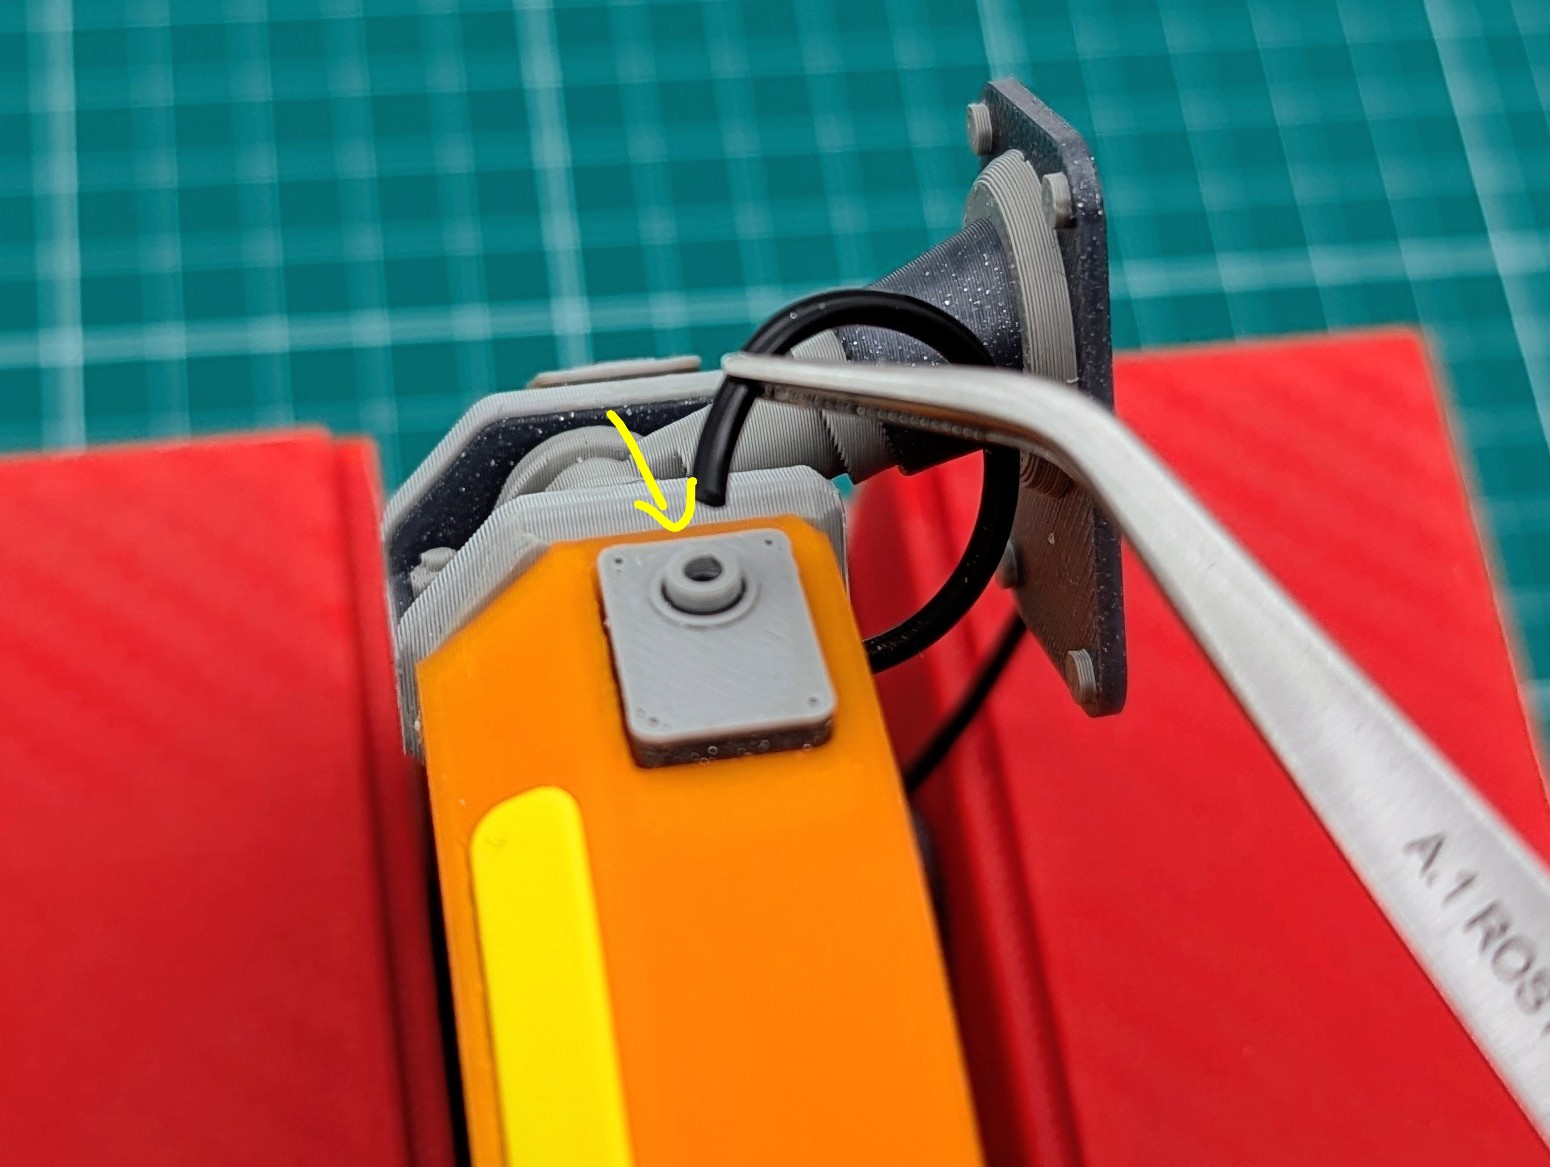
Insert the four cables into the holes on the covers. Use glue if necessary.
And now jump, looper!
If you want to support me you can leave a tip at ko-fi.com/blecheimer.
Disclaimer:
This work by blecheimer is licensed under CC-BY-NC-ND 4.0. The shown model is fanart and must not be used commercially.
Copying this model to other 3D printing websites is not allowed without my permission.
