Você está no 3DFinder
Buscamos em Thingiverse, MakerWorld e Printables ao mesmo tempo para te dar o melhor de cada uma.
Descrição
A fully modular, customizable, stackable Gridfinity drawer system that grows with your needs.
Table of Content
- Introduction
- Instructions (4-Step Guidance)
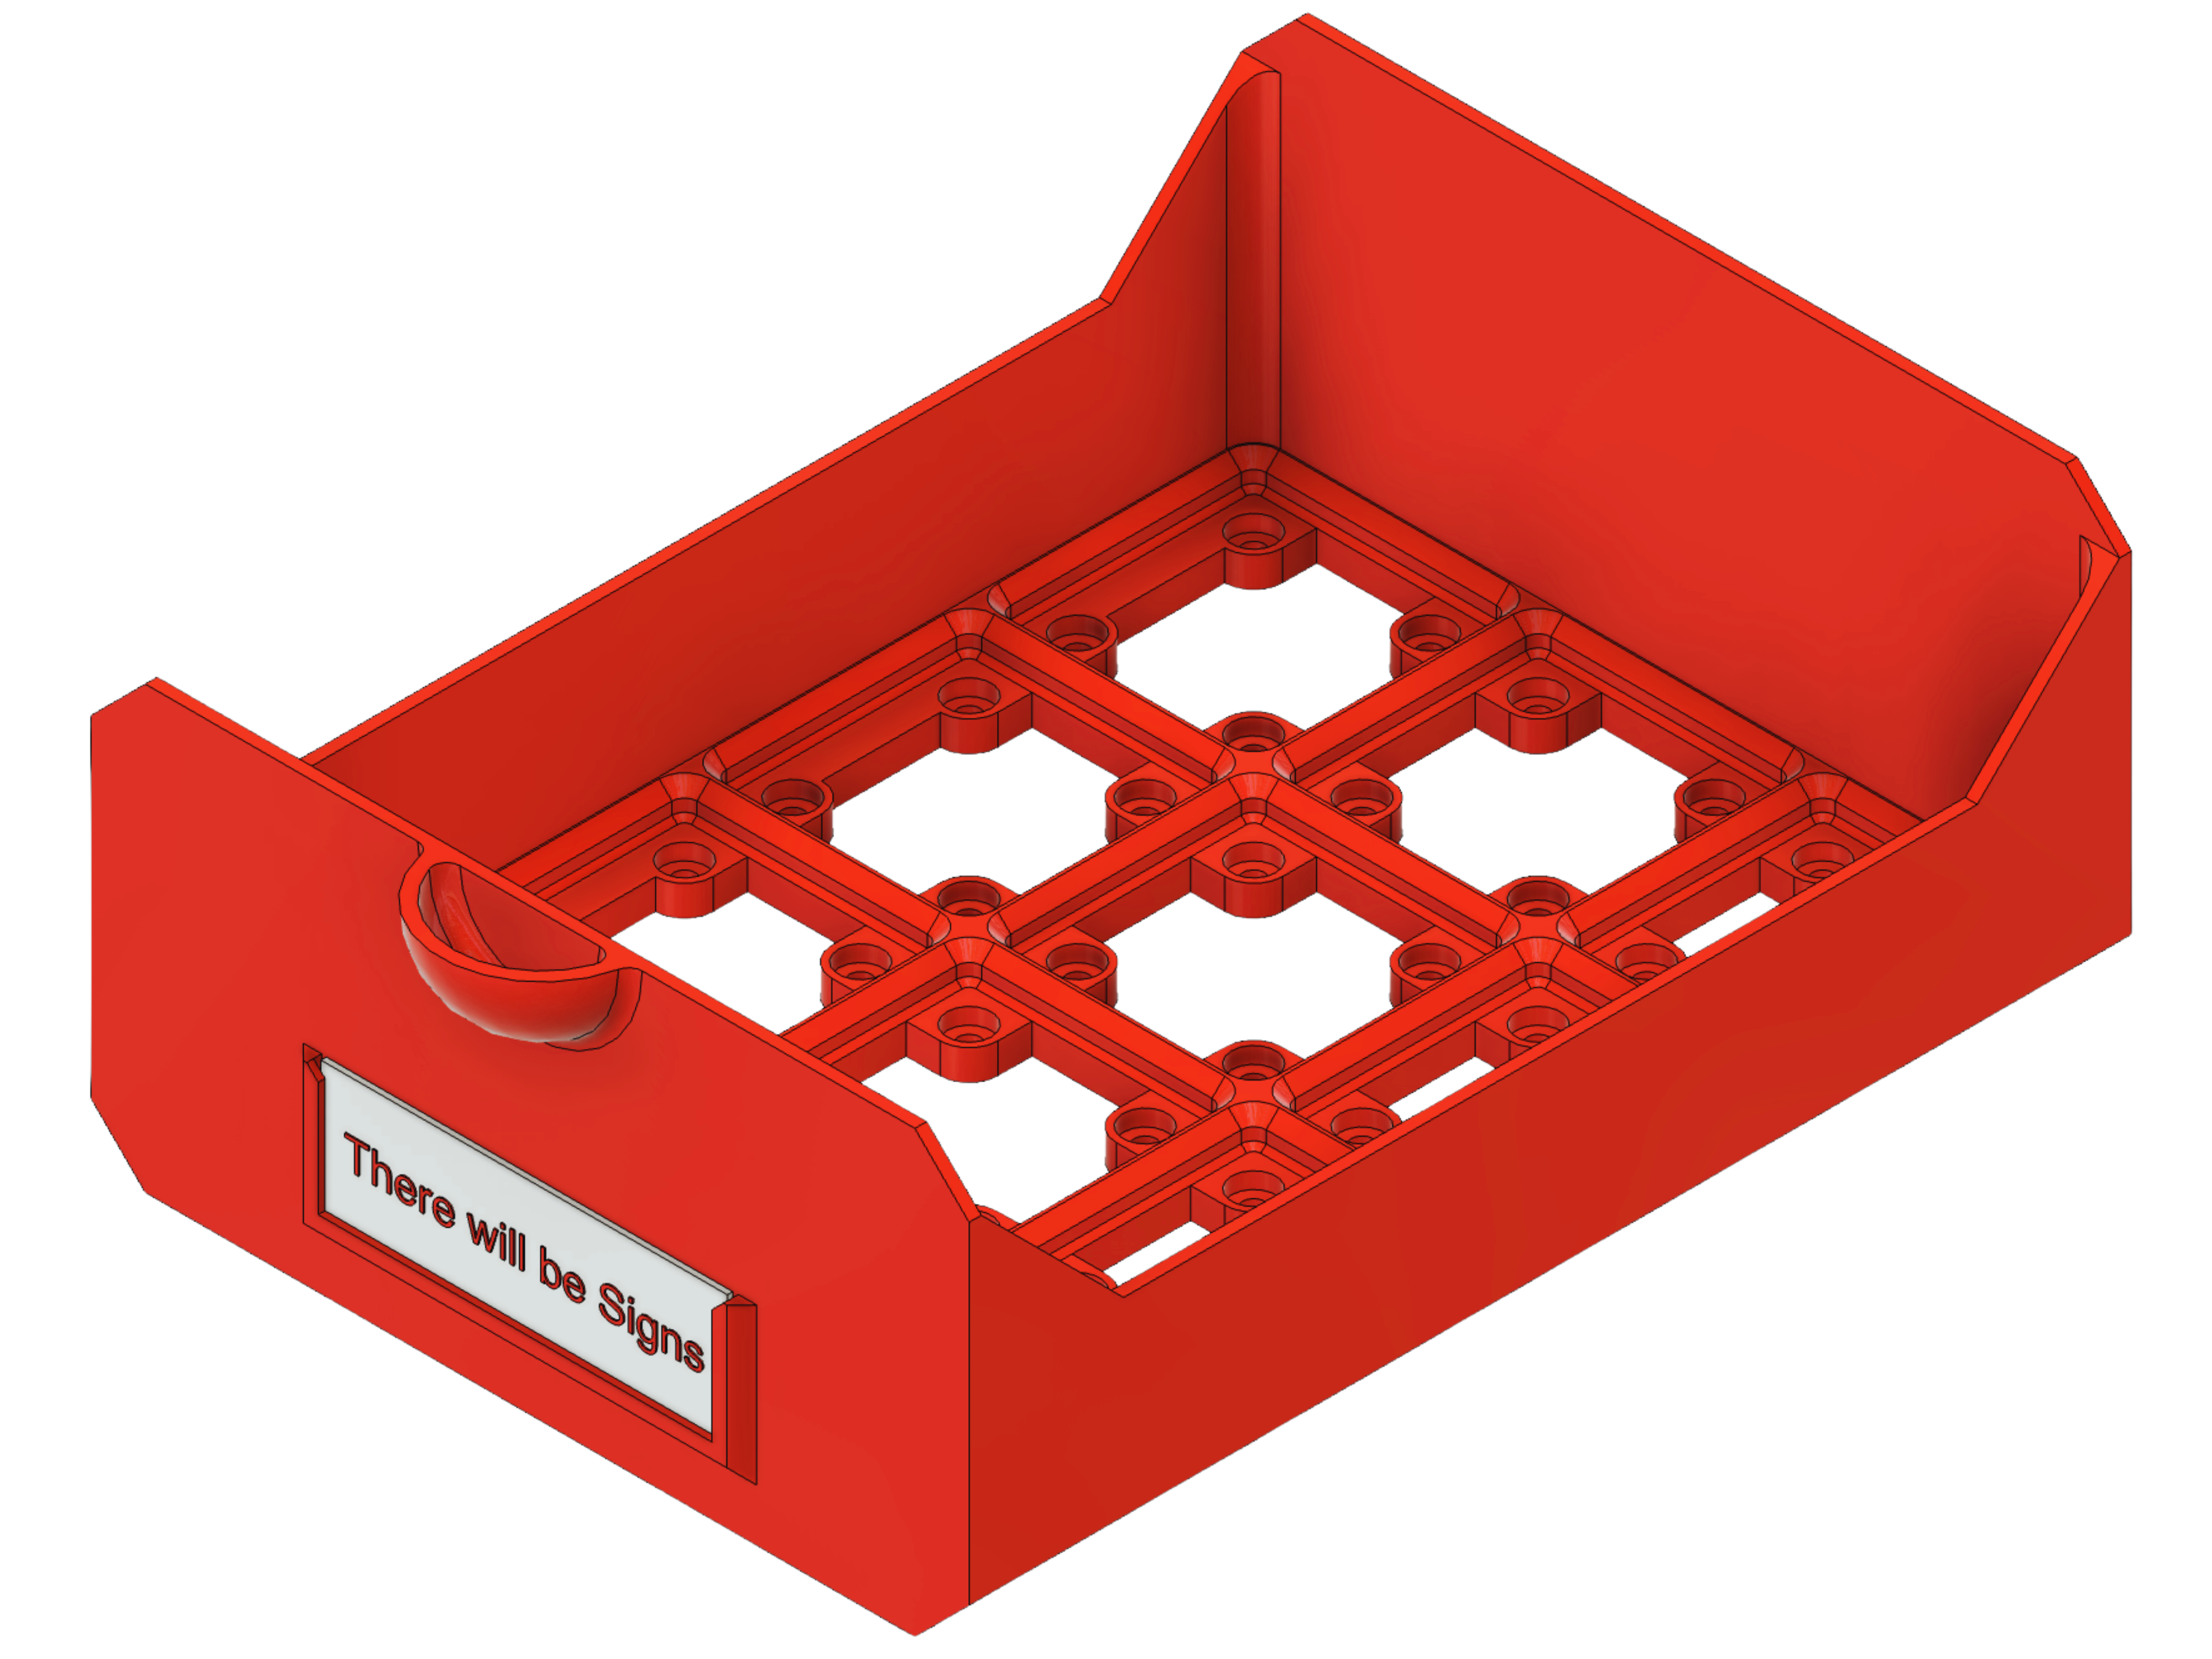
1. Drawer
2. Shell
3. Connectors
4. Signs + Extras - Updates
- Notes
__________________________________________________________________________________________________________
Introduction
This project is a redesign of the Gridfinity drawer system by Techgundam. I’ve always admired his work, and of course credit goes to Zach Freedman, the original creator of the whole Gridfinity standard. Without his idea, none of this would exist.
I loved the drawer concept, but I wanted to make it more flexible and practical. So I rebuilt the design completely from scratch: the unused side gaps are gone, a stopper now keeps drawers from sliding out, and the whole system is fully customizable. You’re no longer limited to a fixed size — instead, you can create anything from 1×1 up to 10×10 (though realistically, your printer size will decide where the limit really is).
To improve everyday usability, I added an optional Labelholder so drawers can be labeled and reorganized easily. For those who prefer lighter looks, I also designed a hexagon shell option (for all the hexagon lovers out there). And currently, I’m working on the Shellholder: a module that lets you hang drawers under your desk or mount them under a wall shelf.
And to keep things simple, I standardized all connectors: each is exactly one Gridfinity unit in length, so you can just combine them to match your shell depth without extra measuring.
This project took me well over 100 hours of design and testing, but I’m really happy with the result. I genuinely love the Gridfinity community, because it makes organization not only easier, but also more fun. Having your things sorted and accessible makes life feel less hectic, more minimalistic, and a lot more convenient. Sharing this design is my way of giving something back to a system and a community that has already improved my daily life so much.
Instructions (4-Step Guidance)
1. Drawer
The core of the system — fully customizable drawers in any size you need.
Thanks to full customization, you can now adjust width (columns), depth (rows), and height (Z), making it possible to build anything from a tiny 1×1×X to a theoretical 10×10×X (though printer size may be the real limit).
1.1 Drawer with Labelholder → clear labeling for every drawer
- The integrated labelholder is a simple but powerful feature that keeps your organization neat and easy to read. Labels can be swapped or reprinted anytime, and they now even fit on the smallest 1×1 drawer.
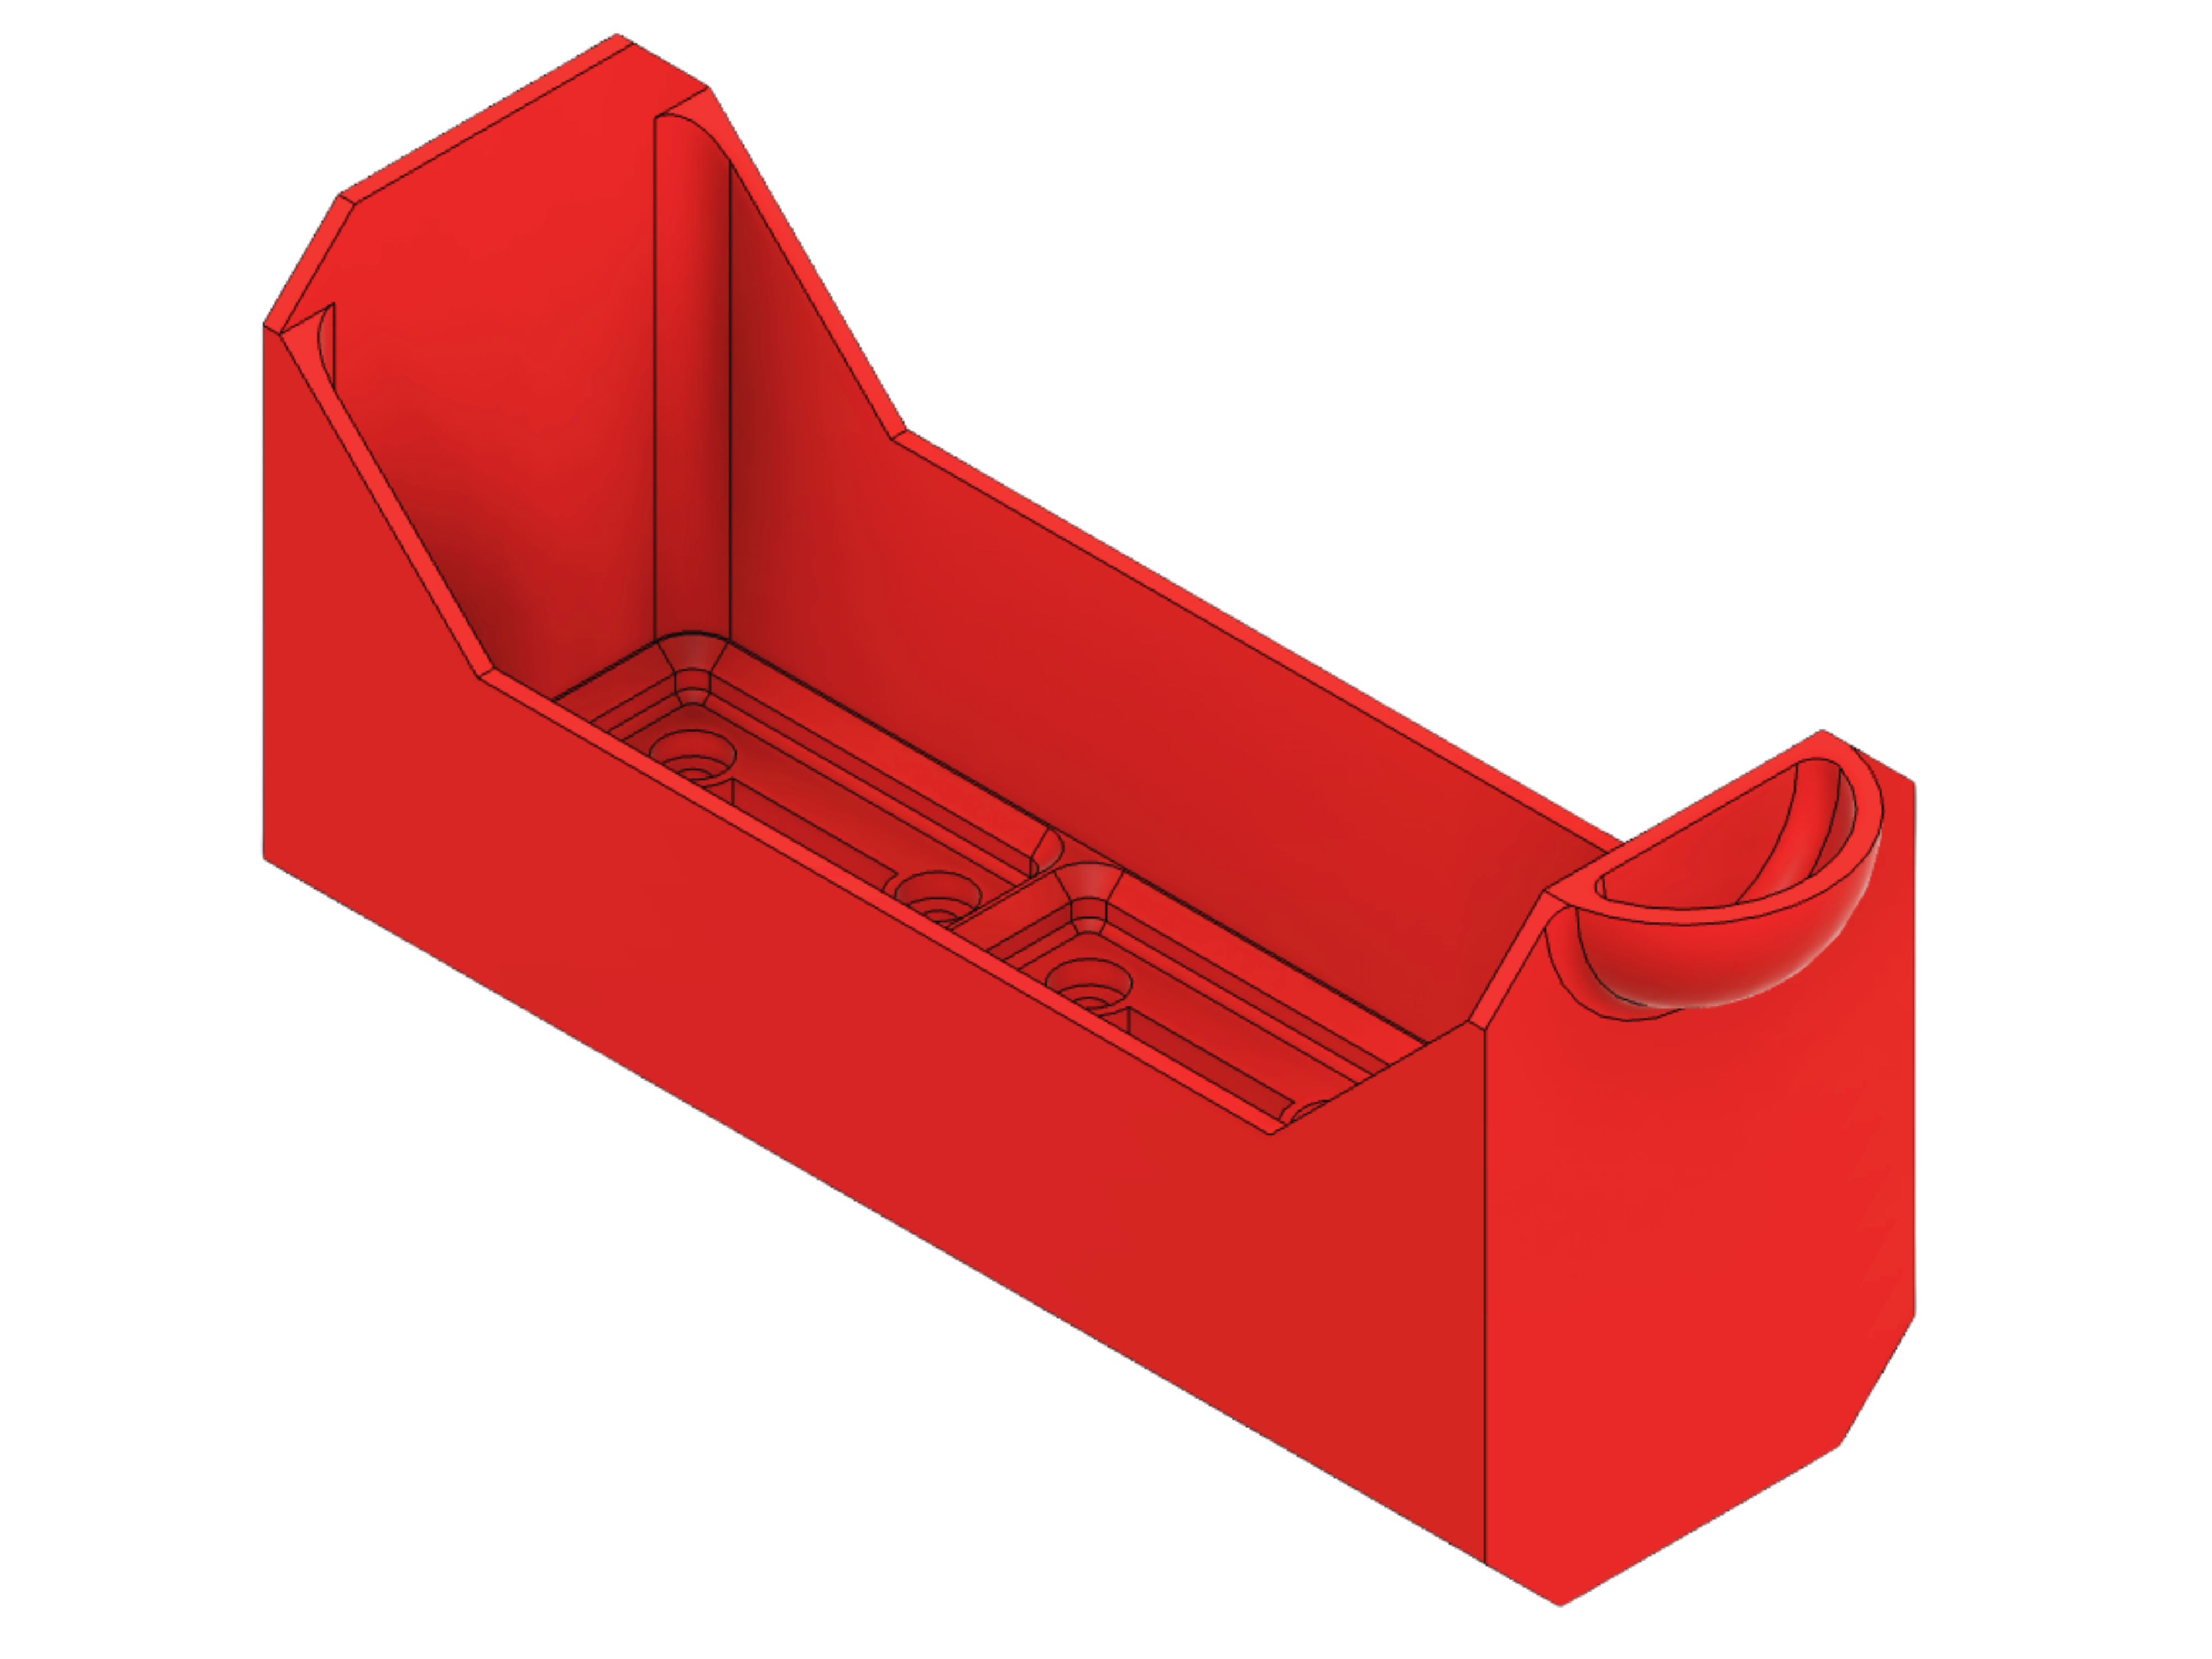
1.2 Drawer without Labelholder → for any drawer (>1 column)
- This version skips the labelholder for a simple, streamlined appearance. Perfect if you prefer a clean front.
__________________________________________________________________________________________________________
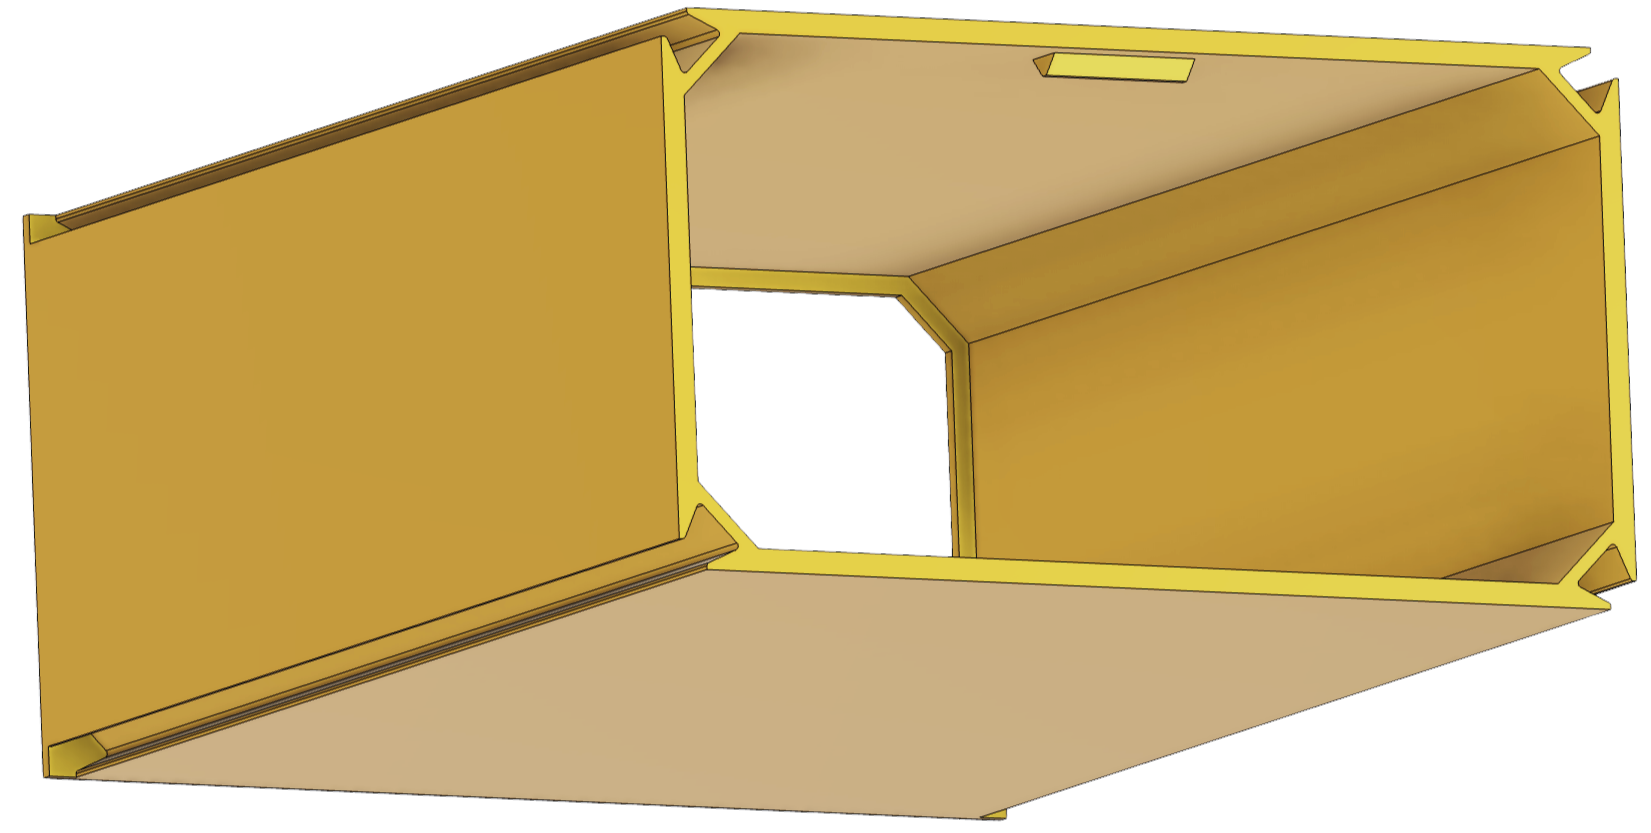
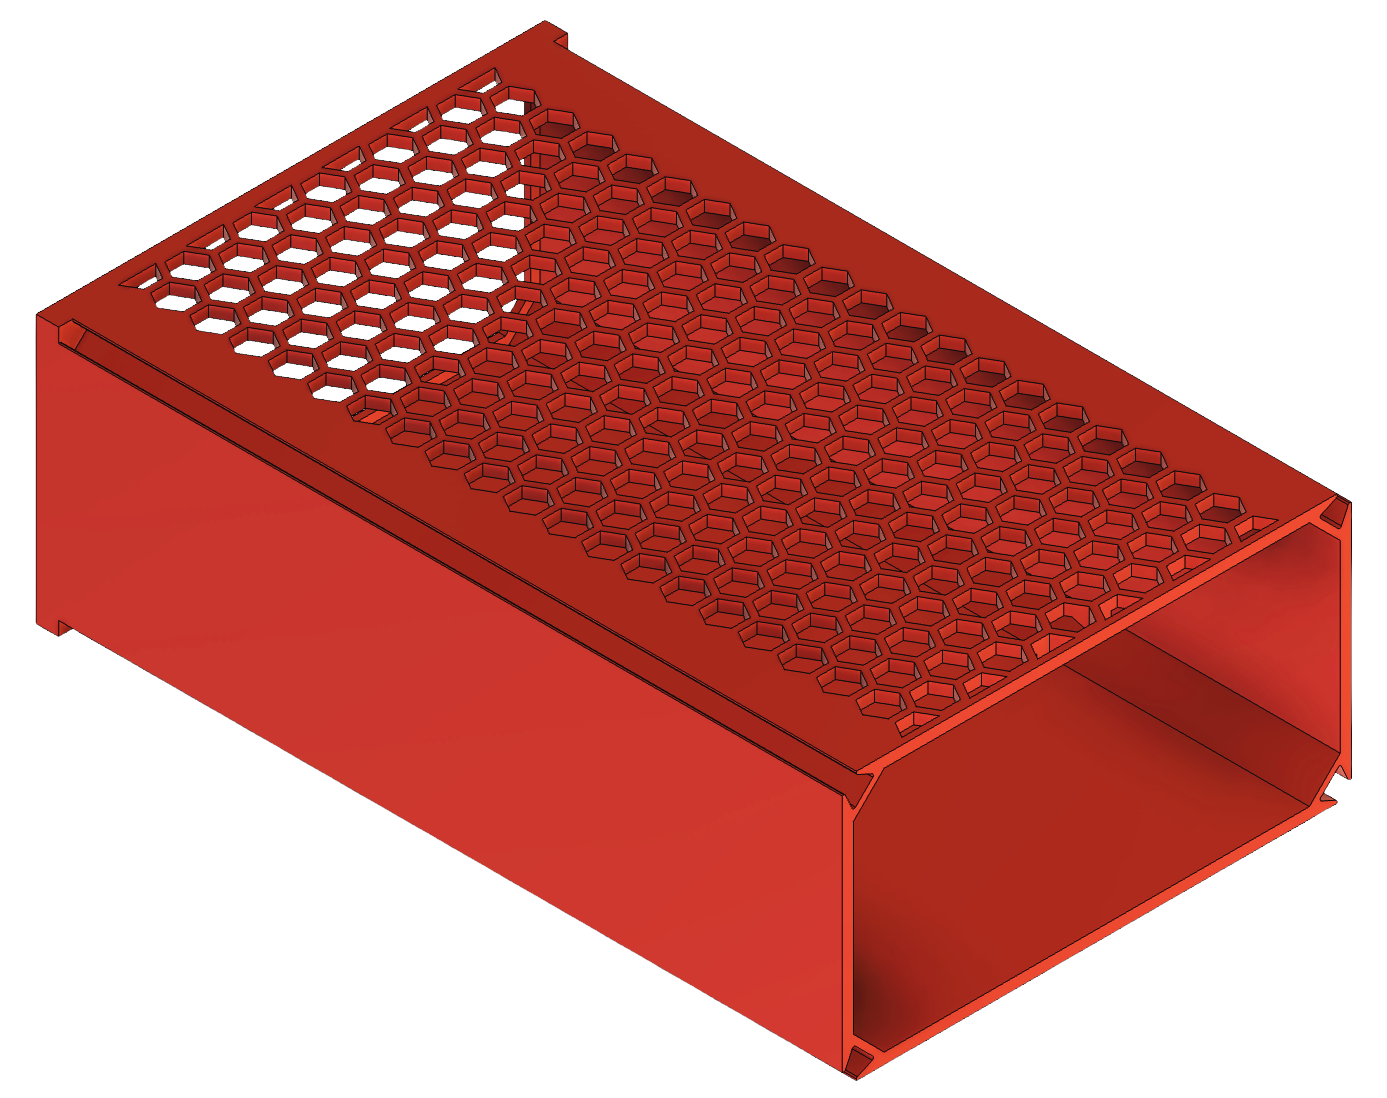
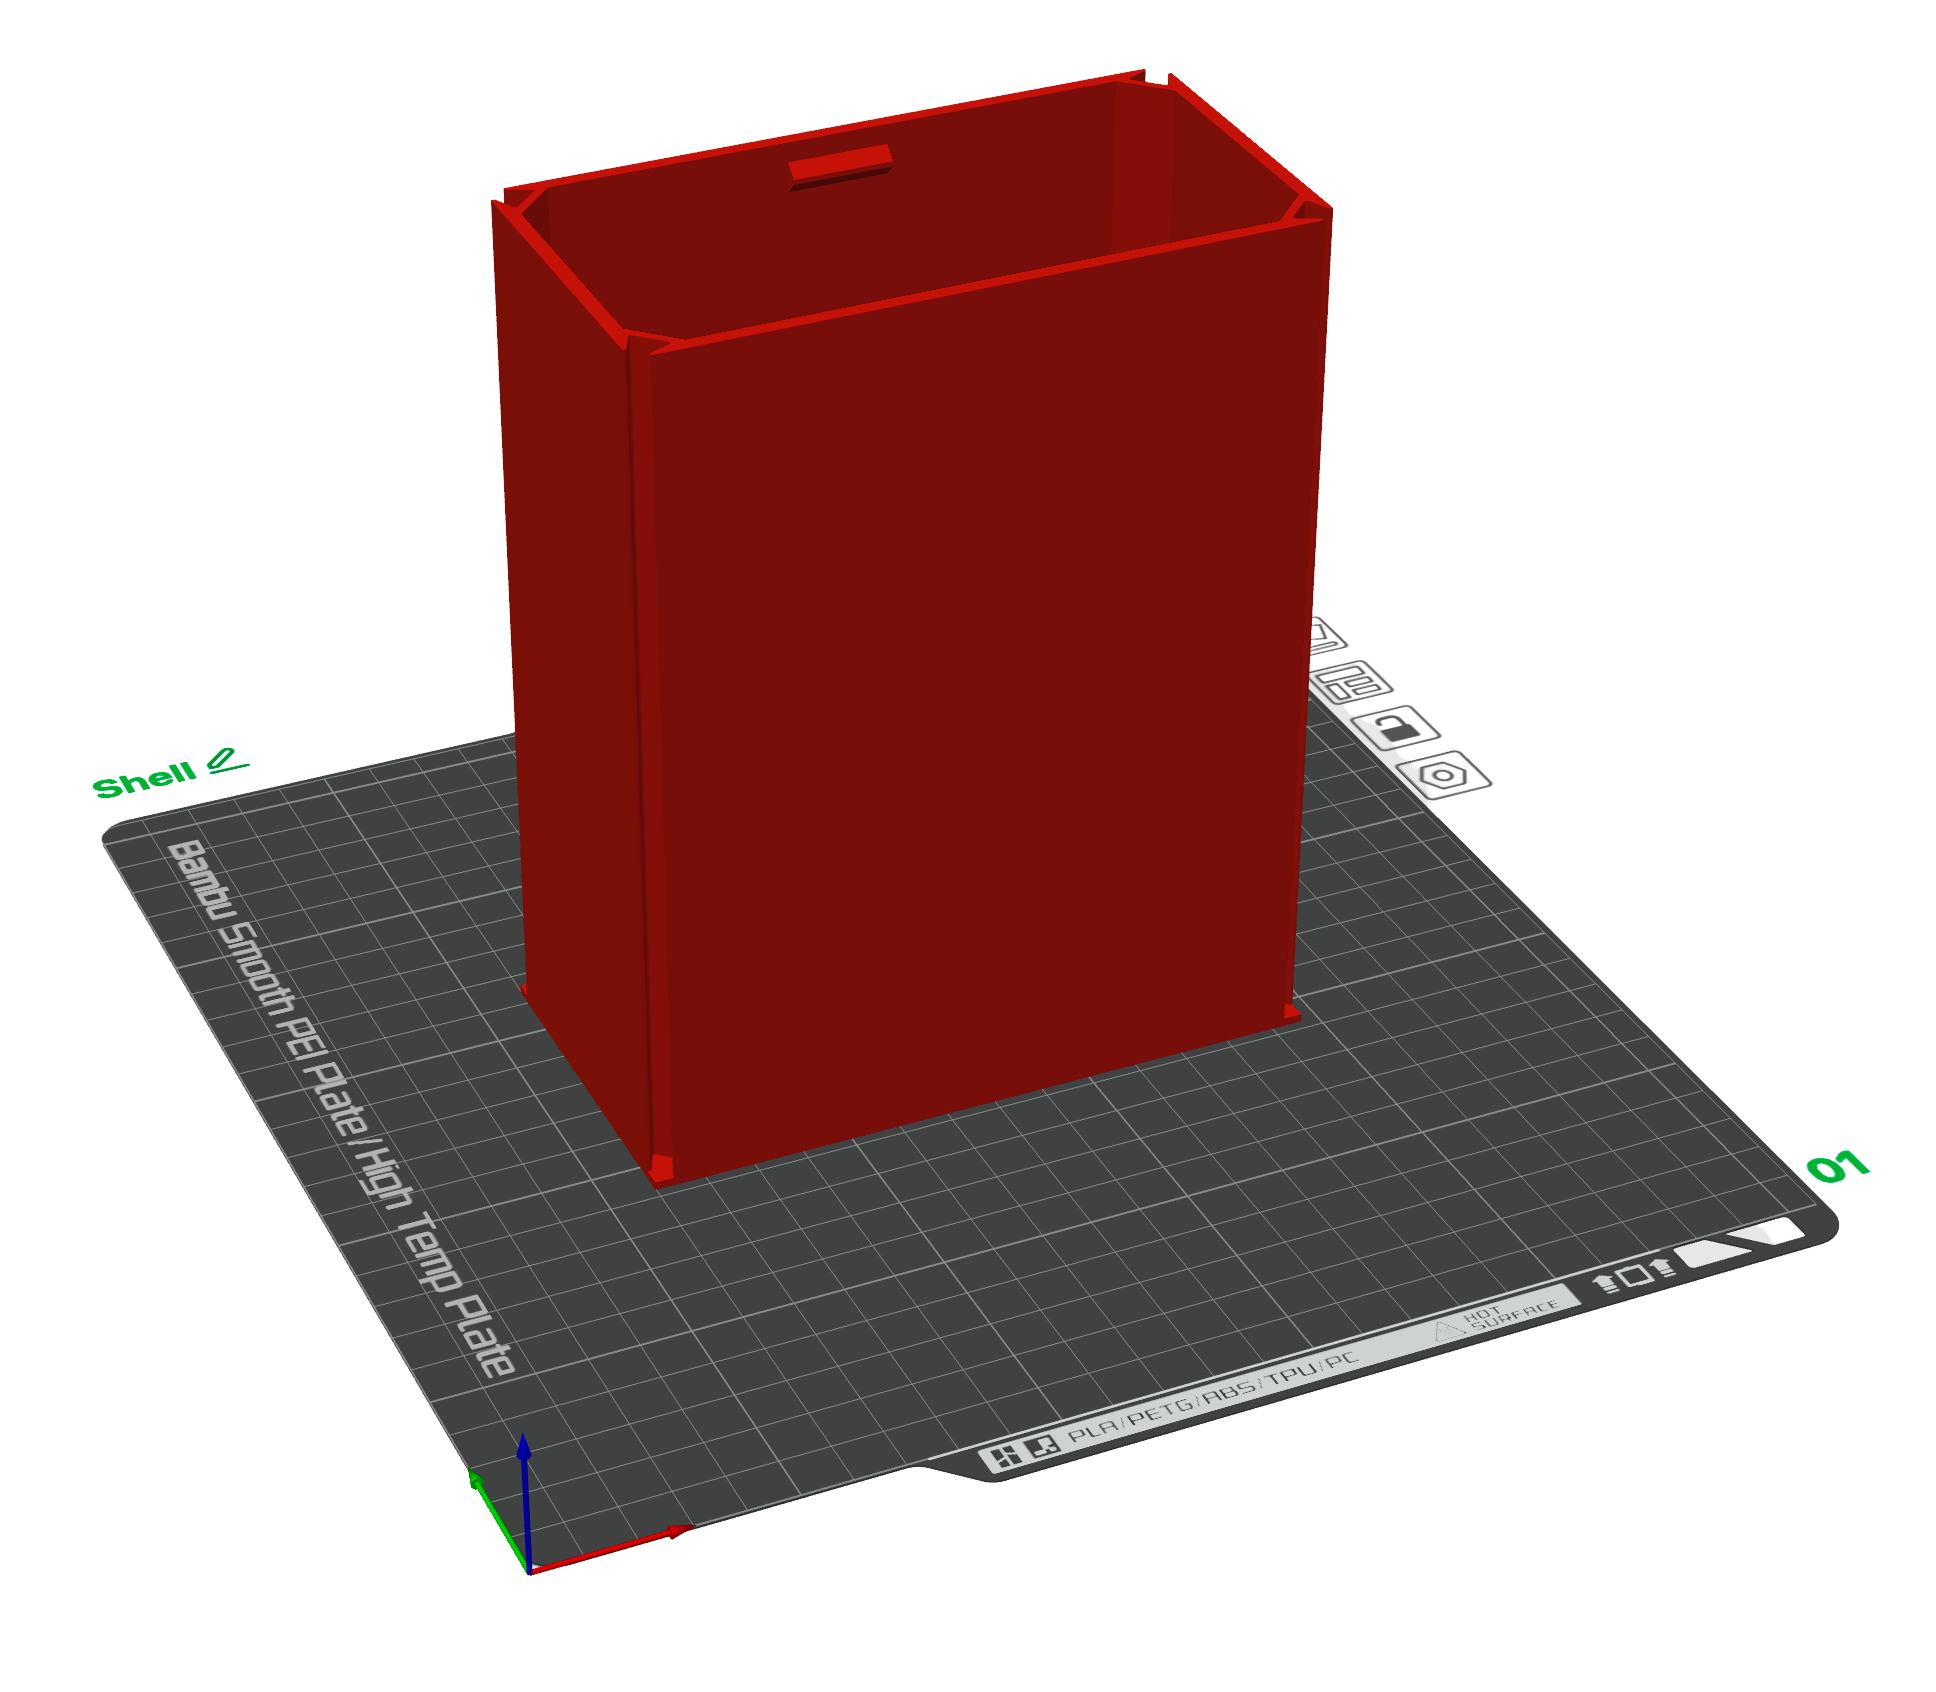
2. Shell
The walls that make your drawers feel at home.
2.1 Shell with closed walls → for maximum stability
- The closed-wall shell is the most practical option when printing multiple shells. It prints faster and only uses slightly more filament than the hexagon version. If you’re building a stack, I recommend using closed shells for the bulk of your setup and reserving a hexagon shell for the top layer, because the hexagon really looks awesome.
2.2 Shell with hexagon walls → lightweight design
The hexagon shell has a unique look that really stands out.
It’s lighter than the closed version and works especially well as the top shell in a stack for an eye-catching finish.
How to Print the Shells
You only need to watch out that you print the shell in this orientation. That´s it.
__________________________________________________________________________________________________________
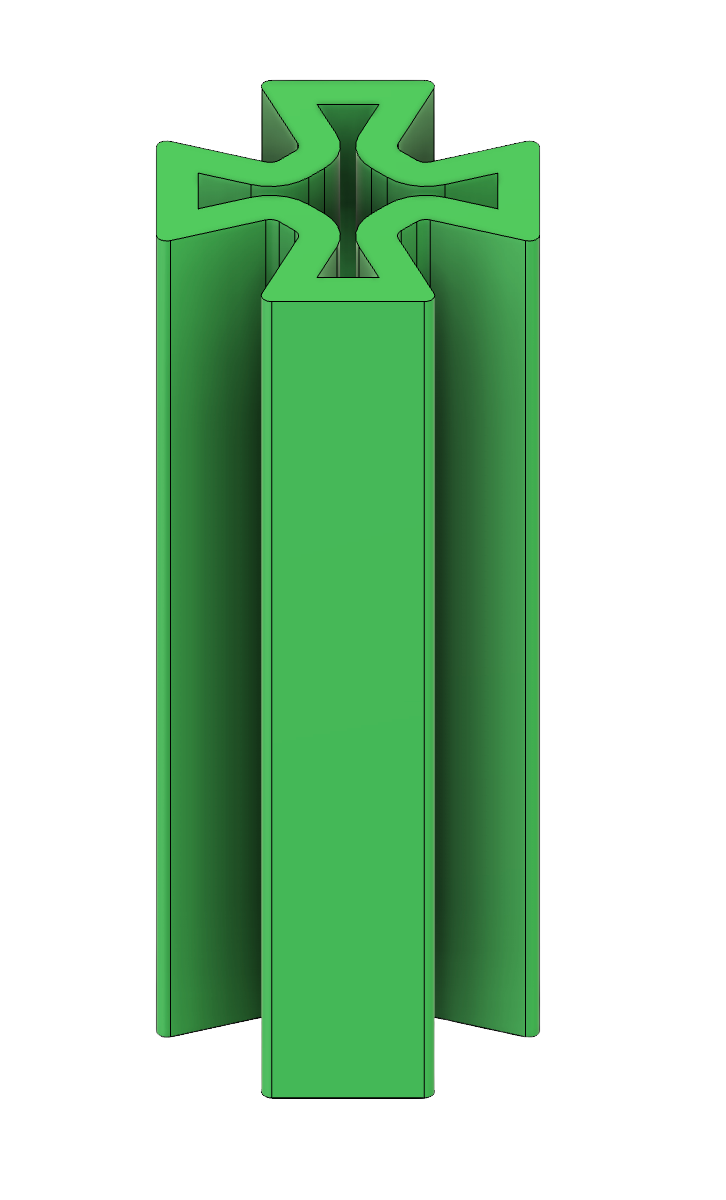
3. Connectors
Connect, stabilize, and expand your Drawers together with single, double, or multi-unit connectors.

3.1 Single Connector
3.2 Double Connector
3.3 Triple Connector
3.4 Multi-Connector
How to Print the Connectors
- Connectors are based on Gridfinity units (each = 1 row in depth).
- To know the total connector length you need, just check the “row” size of your shell/drawer.
If a “Brim” appears in the slicer, turn it OFF.
Example: If your shell is 5 “rows” deep, you need connectors with a total length of 5 units.
👉 You don’t have to print a single connector of length 5 — you can combine smaller ones (e.g. 2 + 3).
⚠️ Why do it this way?
Because connectors print standing vertically (Z-axis). Very tall and thin parts are more likely to fail. Printing in smaller segments makes them stronger, more reliable, and easier to print.
PS: When printing the Multi-Connector, only one unit length is needed. It gives enough strength, put one in front and one in the back of the connector slot. No need to make it super long.
⚠️ Printing Orientation
Always place the small chamfer at the bottom of the build plate.
This chamfer works as a “first-layer remover” — it trims away the tiny extra width from the printer’s first layer.
👉 If you don’t print it this way, the connectors will be too wide and won’t fit inside the shells.
Chamfer down = connectors fit, chamfer up = they don’t fit well.
__________________________________________________________________________________________________________
4. Labels and Extras
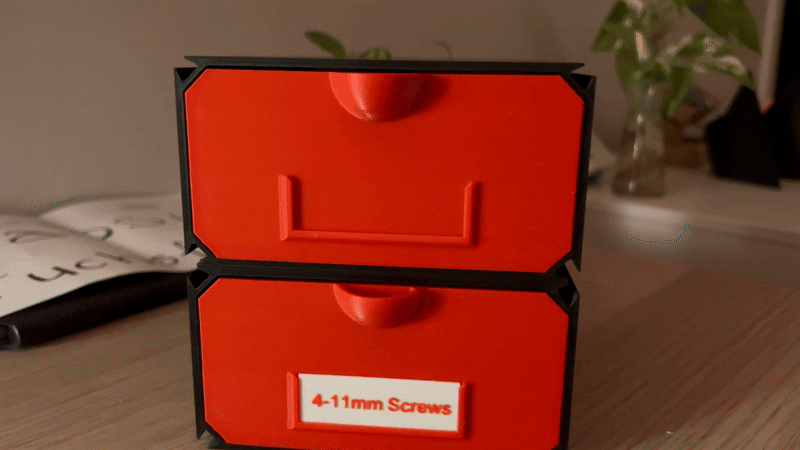
4.1 Label (20×60 mm) → for labeling your drawers
The labels come in two standardized sizes:
- 30.7 × 20 × 0.8 mm (small)
- 60 × 20 × 0.8 mm (large)
Both feature 2 mm bottom corner radii and are designed in OpenSCAD, making them fully customizable.
You can easily adapt the text to whatever you need.
To change the font style, simply copy and paste the font you like into the font parameter.
Examples of fonts you can copy-paste:
→ Arial → Noto Sans
→ Advent Pro:style=Bold → Open Sans
→ Advent Pro:style=ExtraBold → Open Sans Condensed:style=Bold
→ Advent Pro:style=SemiBold → Open Sans Condensed:style=ExtraBold
→ Big Shoulders Text:style=Black → Freehand:style=Regular
This way you can adjust the look of your labels exactly to your taste.
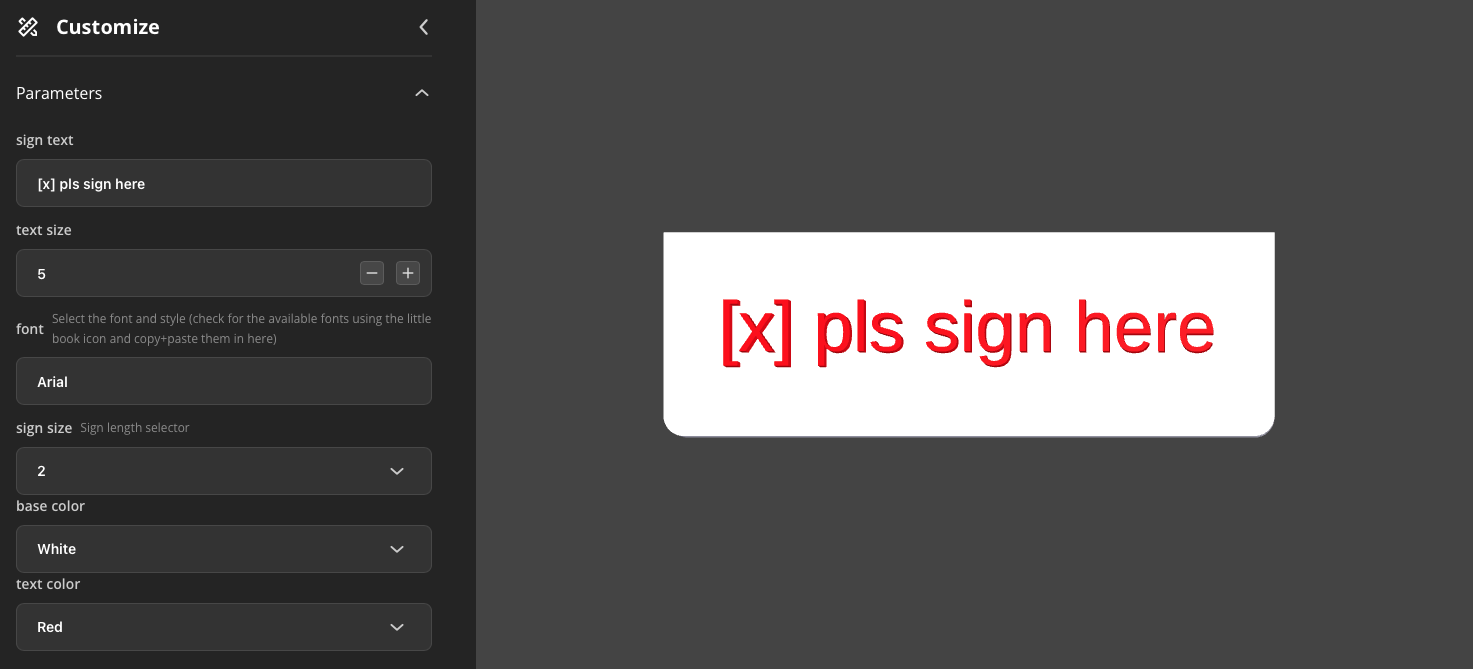
And to make experimenting even easier, I added a color dropdown menu into the code. This lets you immediately preview different color combinations and see what looks best together before printing.
PS.: The label only requires one filament change — no AMS needed.
4.2 Gridtopper {Coming Soon} → additional grids on top of your shells
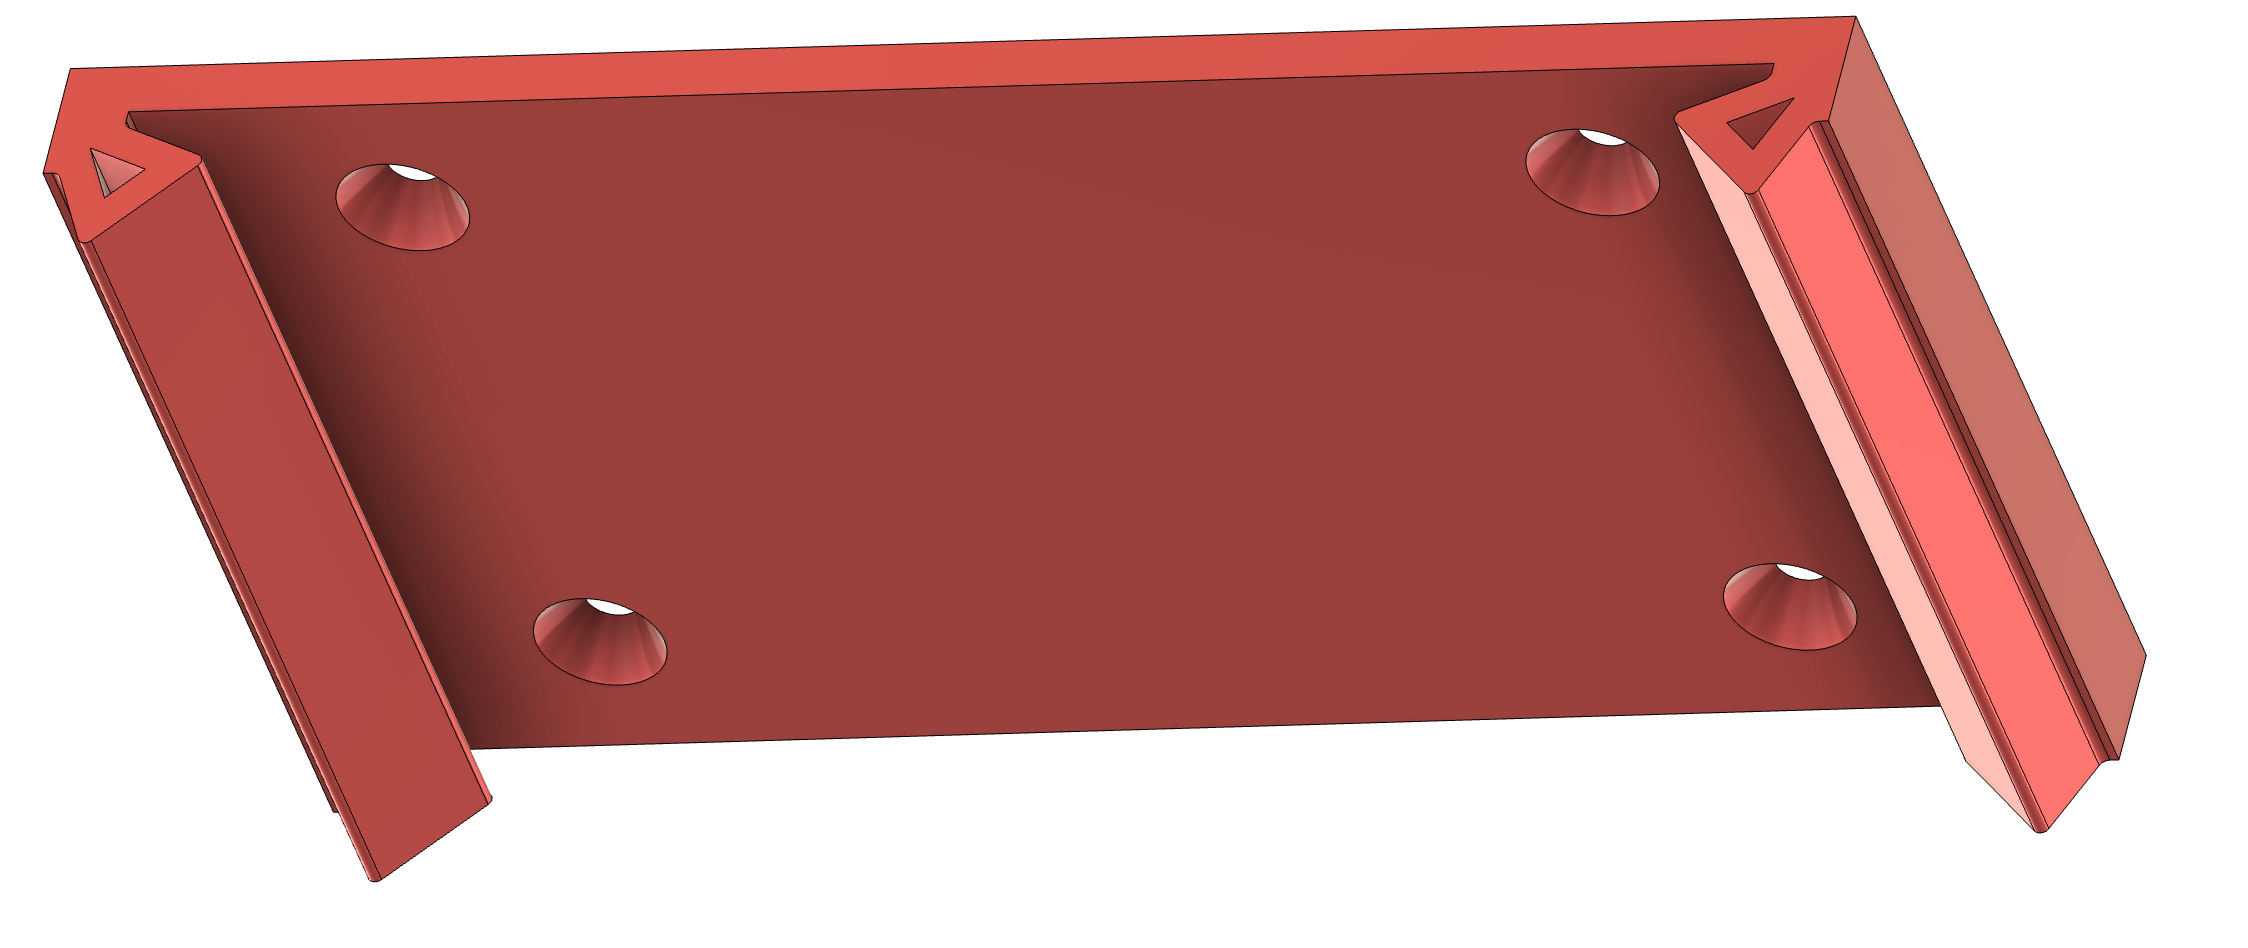
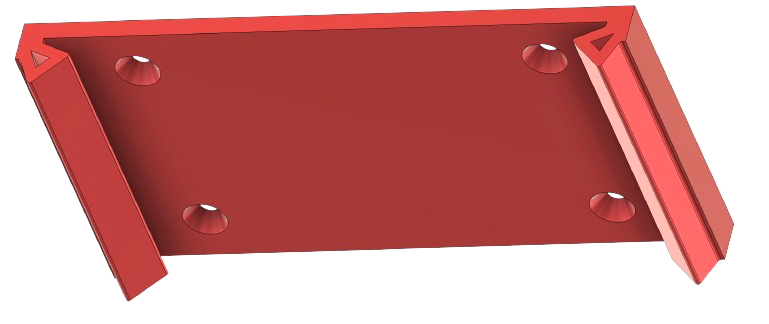
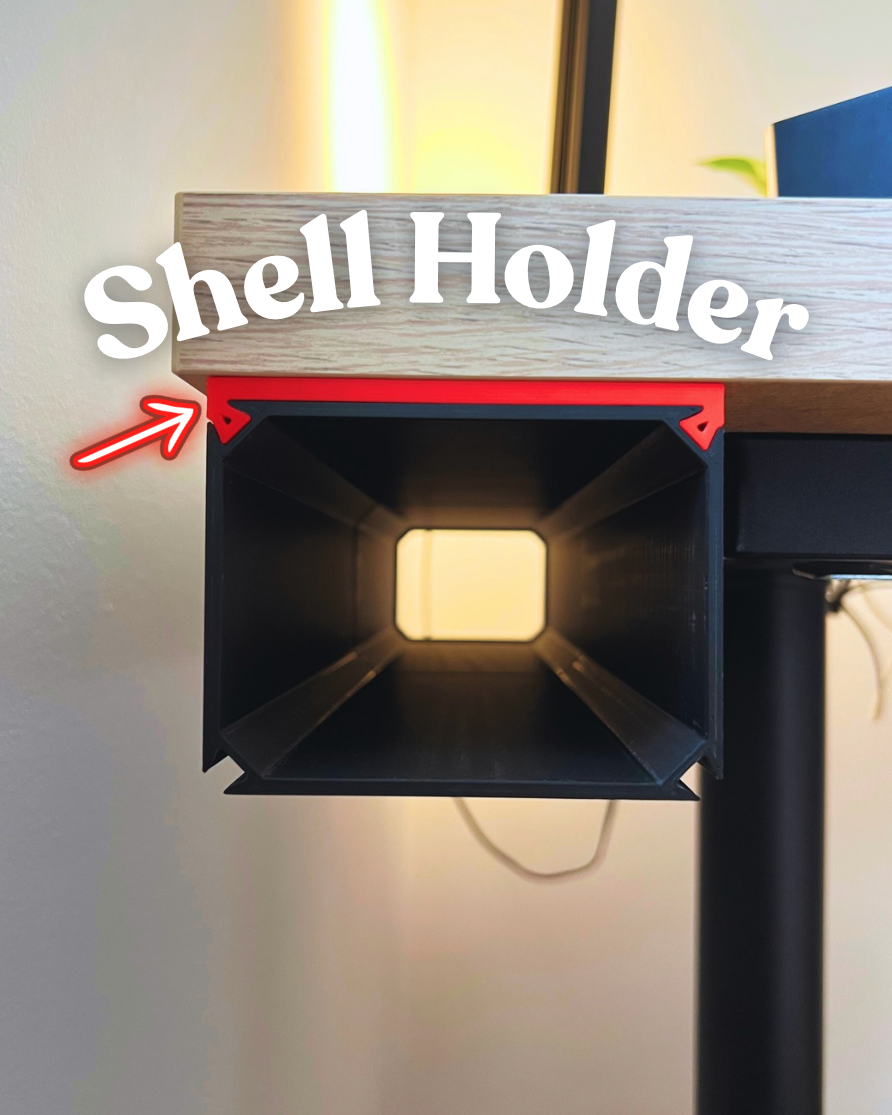
4.3 Shellholder → Underdesk/ Wallshelf hanger
The shell holder is a practical accessory that lets you hang drawers underneath almost any surface.
It makes it easy to expand your Gridfinity setup vertically as your storage needs grow. Since the file is customizable, you can choose how many holes you want and adjust their size to fit your needs.
__________________________________________________________________________________________________________
Updates
- 11.09.25 → 2 different Label sizes, sign now also fits 1 Column wide drawers (1.2 and 4.1)
- 10.09.25 → all Shells come with adjustable unit height (z), before only x and y (2.1)
- 02.09.25 → Shell with hexagon design (2.2)
- 22.08.25 → OpenScad customizer for your Labels (4.1)
- TBA → Drawers without gridfinity base (1.3)
- TBA → Gridtopper (4.2)
- 08.03.26 → Shellholder (4.3)
__________________________________________________________________________________________________________
📌 Notes
- Designed for Gridfinity standard (42 mm)
- Unfortunately not backwards compatible with TechGundam’s drawers (redesigned from scratch to be fully parametric)
- Fully parametric → customize widths, heights, modules and let them grow with your needs
- The gridfinity bins fit until the standardized Gridfinity-bin-height of 7. I included finished bins to download.
- Printed best in PLA or PETG, and i highly recommend to select “Line” infill, 15% infill
Customizable Modular Gridfinity Drawer

Publicado em 18 de ago de 2025