Você está no 3DFinder
Buscamos em Thingiverse, MakerWorld e Printables ao mesmo tempo para te dar o melhor de cada uma.
Descrição
Parametric Love Letter to Microlab
A while ago I stumbled upon the Microlab by CB4D -
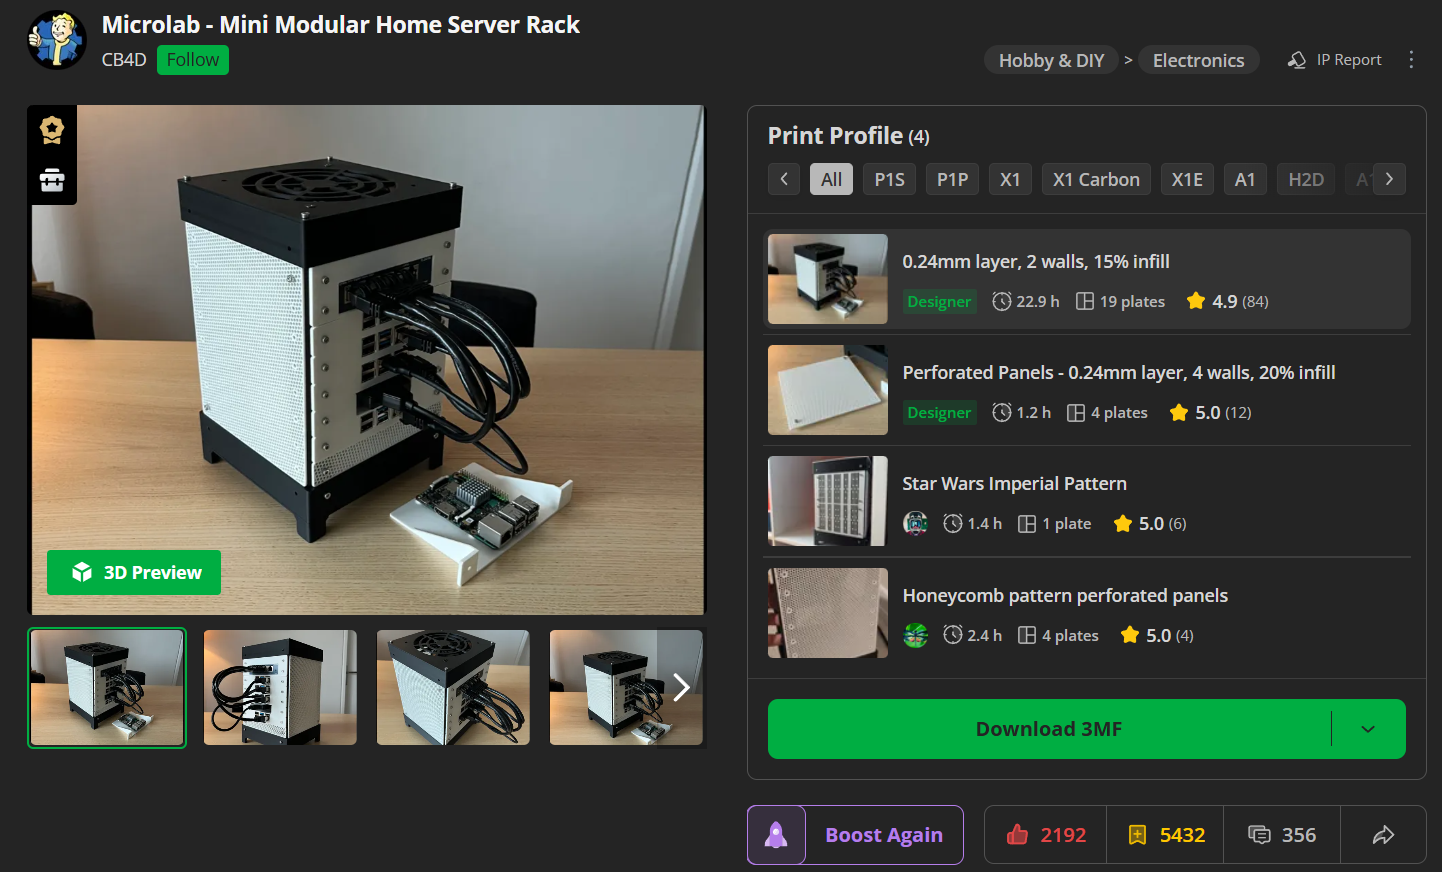
I thought it was a really great design but since my beelink mini PC was a bit too big for it, I needed it to have slightly different dimensions.
In a couple of days of manic modelling I knocked up this fully parametric version, which allows you to define the XY dimensions of the chassis by the size of the largest item that would need to fit inside.
I put off uploading the parametric version a bit because I felt the fusion file was a bit messy (I'm only just learning about components really!), but I think its usable enough so someone can make changes and print their custom Microlab.
If you get any use out of this model, I would ask that you direct a boost to the original model, before you consider giving one to me 😊
Introduction
I have uploaded a print profile containing most of the parts of the version that I made for myself, including:
- Module slot for a Beelink S12 mini pc
- Cap for Phillips Hue Bridge
- Module for Netgear GS305E
- Base for integrated power strip
But the main reason for this post is to share the parametric fusion360 file! You can access the file by clicking Download STL/CAD Files
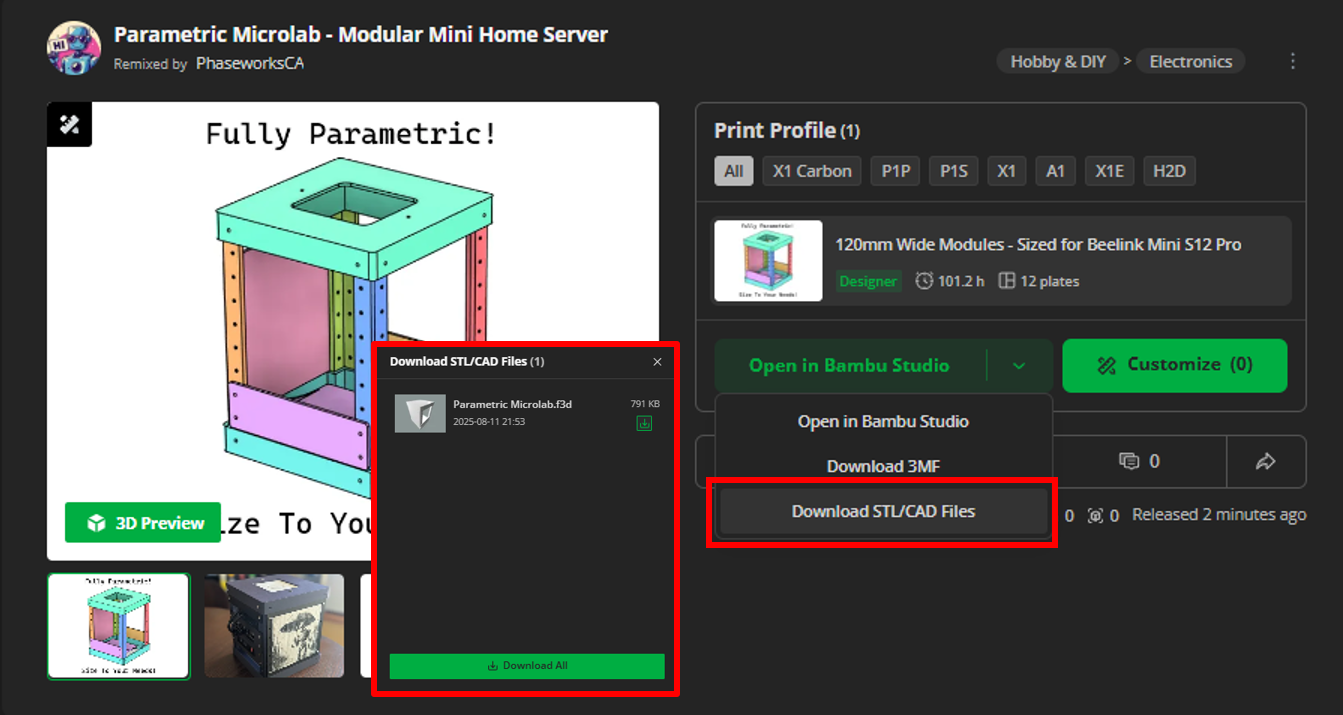
At Present I would not recommend use of the makerworld customize feature, since the file wasn't really designed for it, and you cant create your own modules anyway.
Modifying Base Dimensions
The main dimensions to change in Fusion360 are Global_Widest_Tray & Global_Deepest_Tray
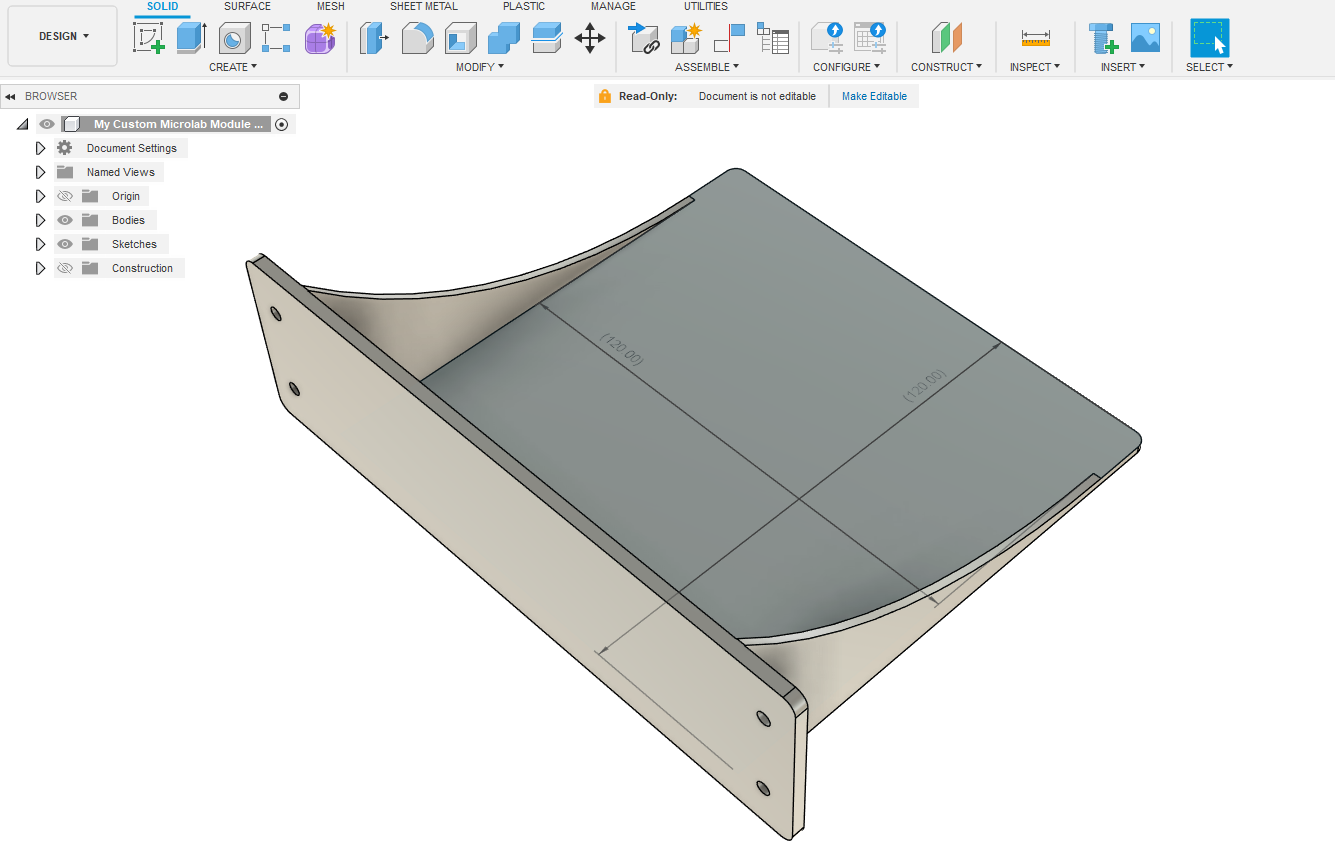
These parameters modify the dimensions of the module template shown below, and the rest of the design scales appropriately around that.
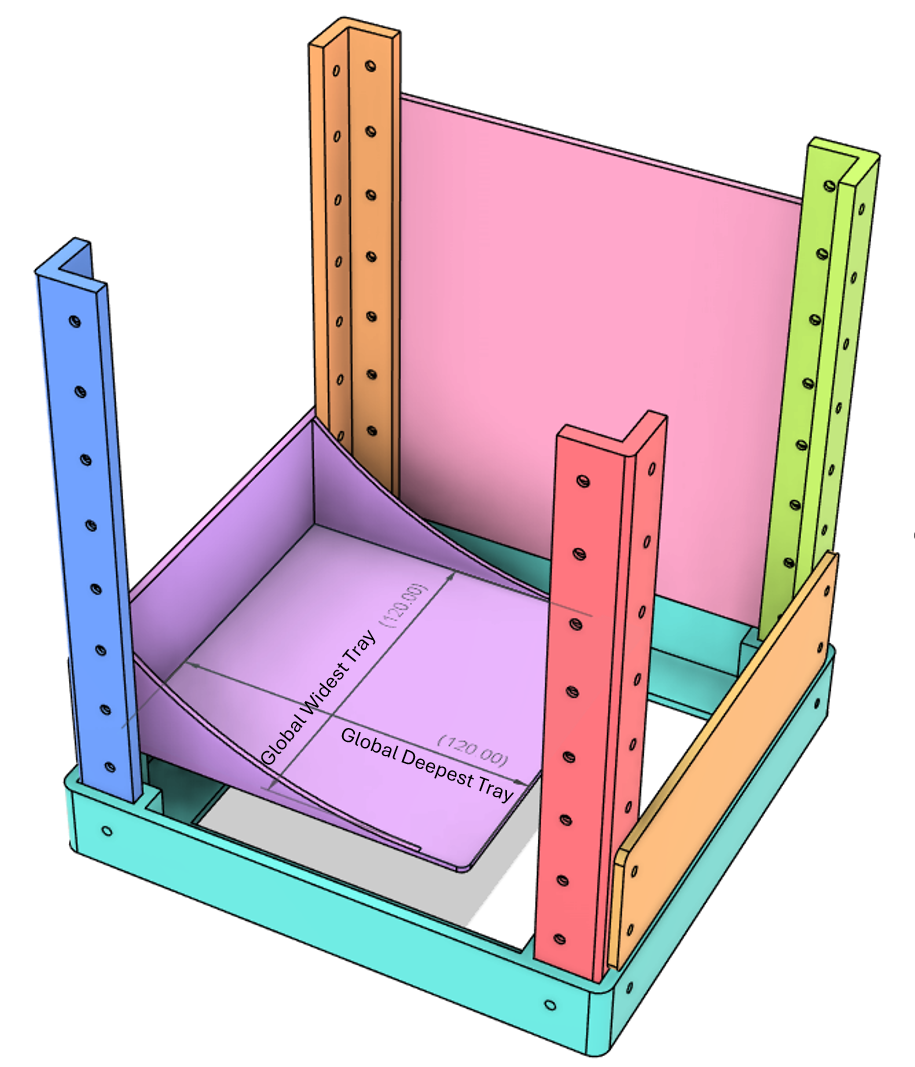
By design there is additional space behind the tray to allow for cables, and this is defined by the parameter Cable_Space Which has a default value of 50mm.
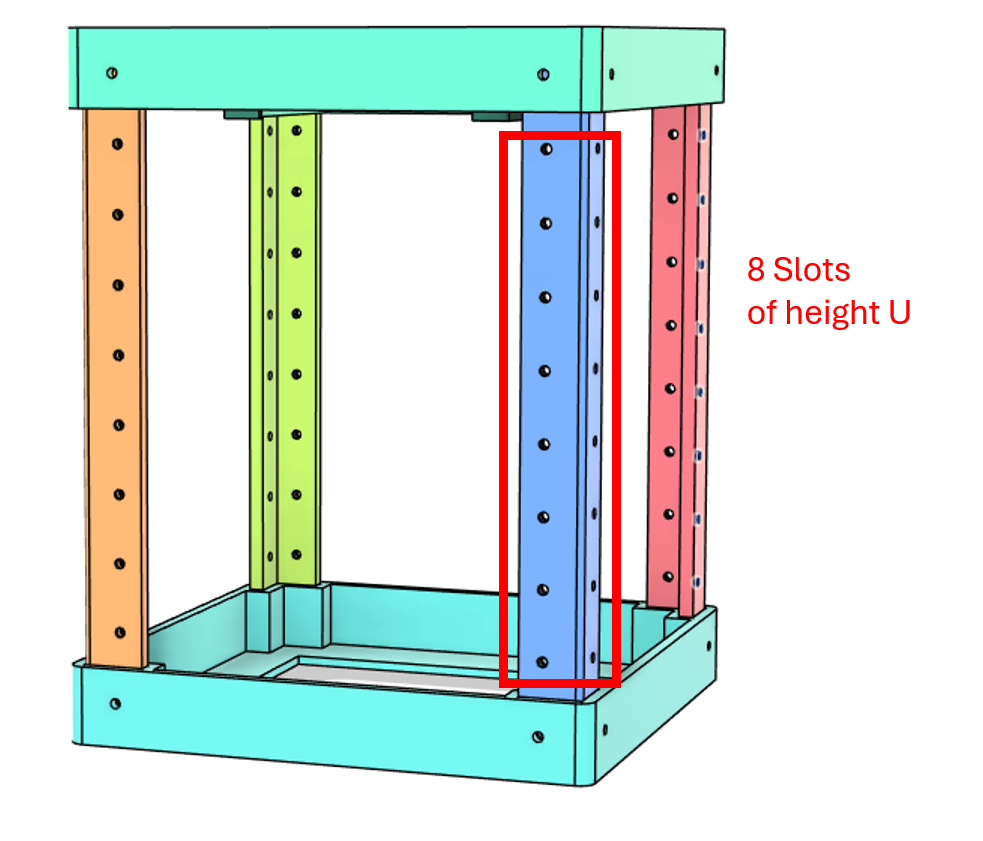
The height of the chassis is defined by the height unit, U (22.225mm) and Global_Num_Slots
The calculations implemented define the lengths of the corner pillars, allowing an extra bolt hole on either end to attach the base and cap.
In the example below, Global_Num_Slots = 8, and you can count 8 bolt holes between the base and the cap where modules can be inserted.
Almost everything else you can think of in this design is parameterized, but you shouldn't need to change many others in order to get your desired dimensions.
Creating Custom Modules
To create a module template for your own customization. The best thing to do would be to size it parametrically by modifying the main design. After that you can save a copy to modify it in a separate file while maintaining the template.
You can right click on the appropriate component and select Save Copy As
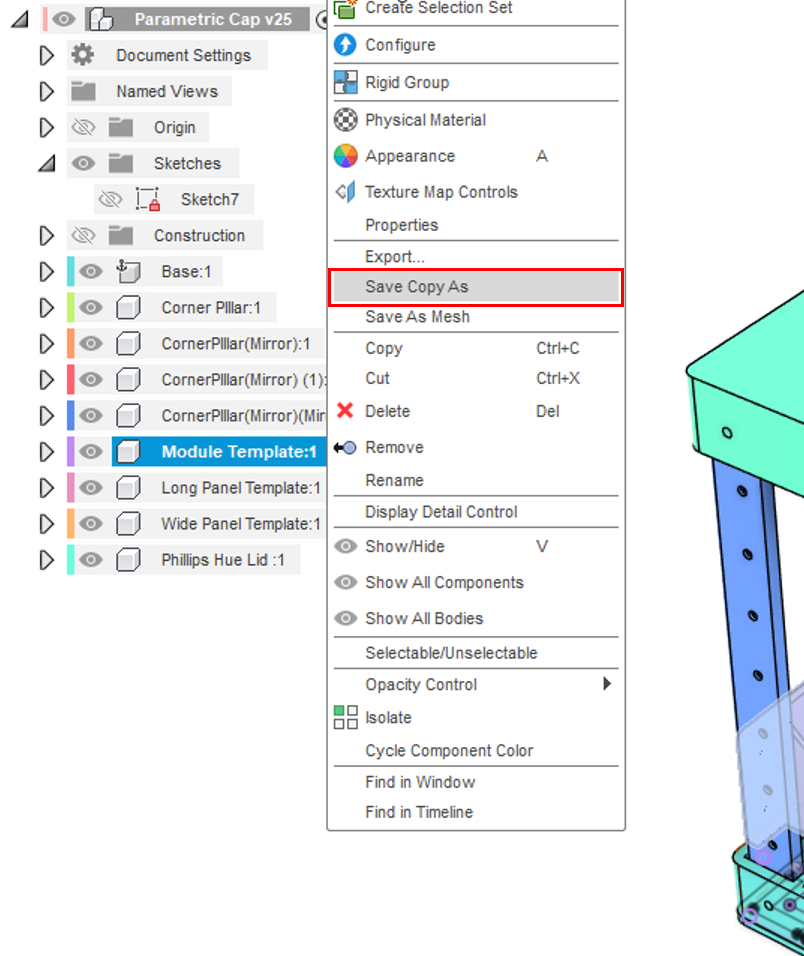
Now you can create your custom module in the separate file you have created. I would not recommend editing the pre existing parameters in your separate module file from this point onwards, since you may cause your module to no longer fit into the main chassis.
Creating Custom Side Panels
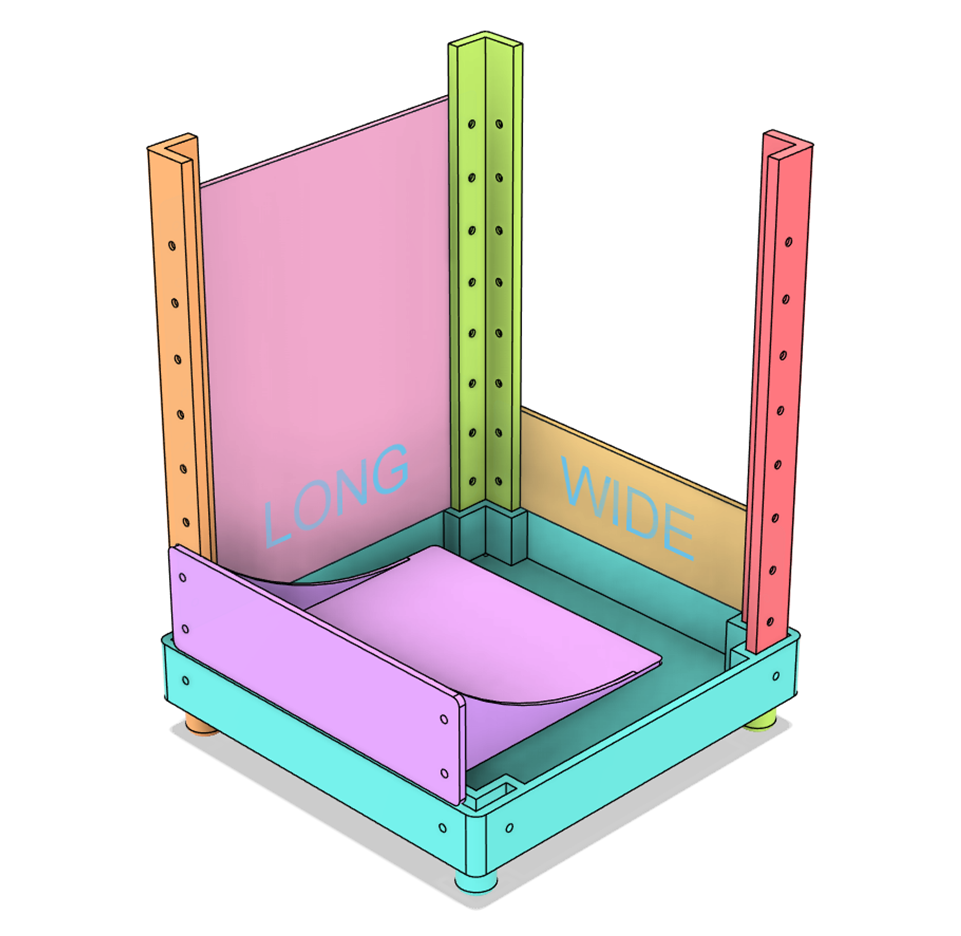
The only thing to change about panels is the number of vertical units they occupy, as the rest is defined parametrically. The parameters to modify are Wide_Panel_Units and Long_Panel_Units
Wide_Panel_Units refers to panels that will fit on the same face as the modules, and span the width.
Long_Panel_Units refers to panels that fit on the sides of the chassis, and span the length.
Nut Placement
One major change I made in how I handled the construction is that instead of press fitting hexagonal nuts, I pause and insert square nuts part way through the print, so that the nuts are inside the frame, won't fall out, and don't require glue. All screws and nuts are M3, and the size of square nuts I used were 5.4 x 5.4 x 2.35 mm. If you have slightly different sized square nuts you can change the appropriate parameter to adjust the model.
here are some links (affiliate) to appropriate square nuts for the default settings.
Canada [https://amzn.to/410MT74](https://amzn.to/410MT74)
US [https://amzn.to/46RPT9J](https://amzn.to/46RPT9J)
I may update later with the press fit version for hexagonal nuts. I need to check but the corner pillar dimensions may be the same as the original design, in which case you could reuse the press fit corner pillars.
When printing the corner pillars for square nuts, you will need to pause the print in two places to insert the nuts. The appropriate layer to pause can be determined by the point where the print starts bridging over the square hole, as shown below.
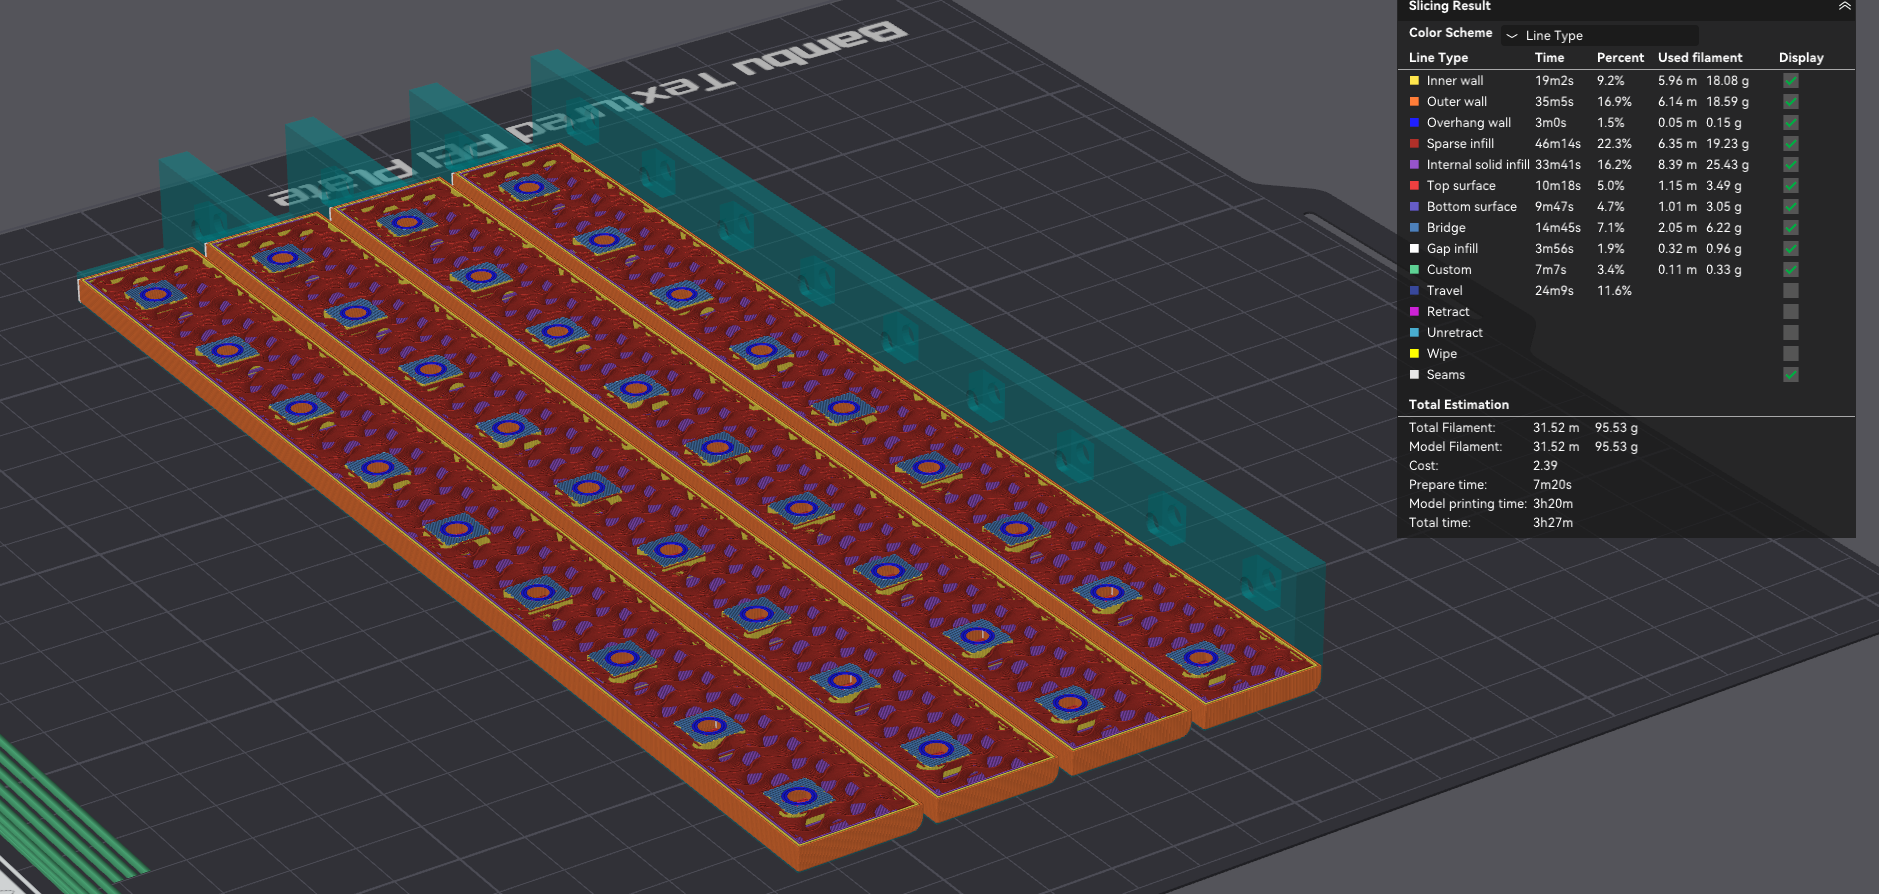
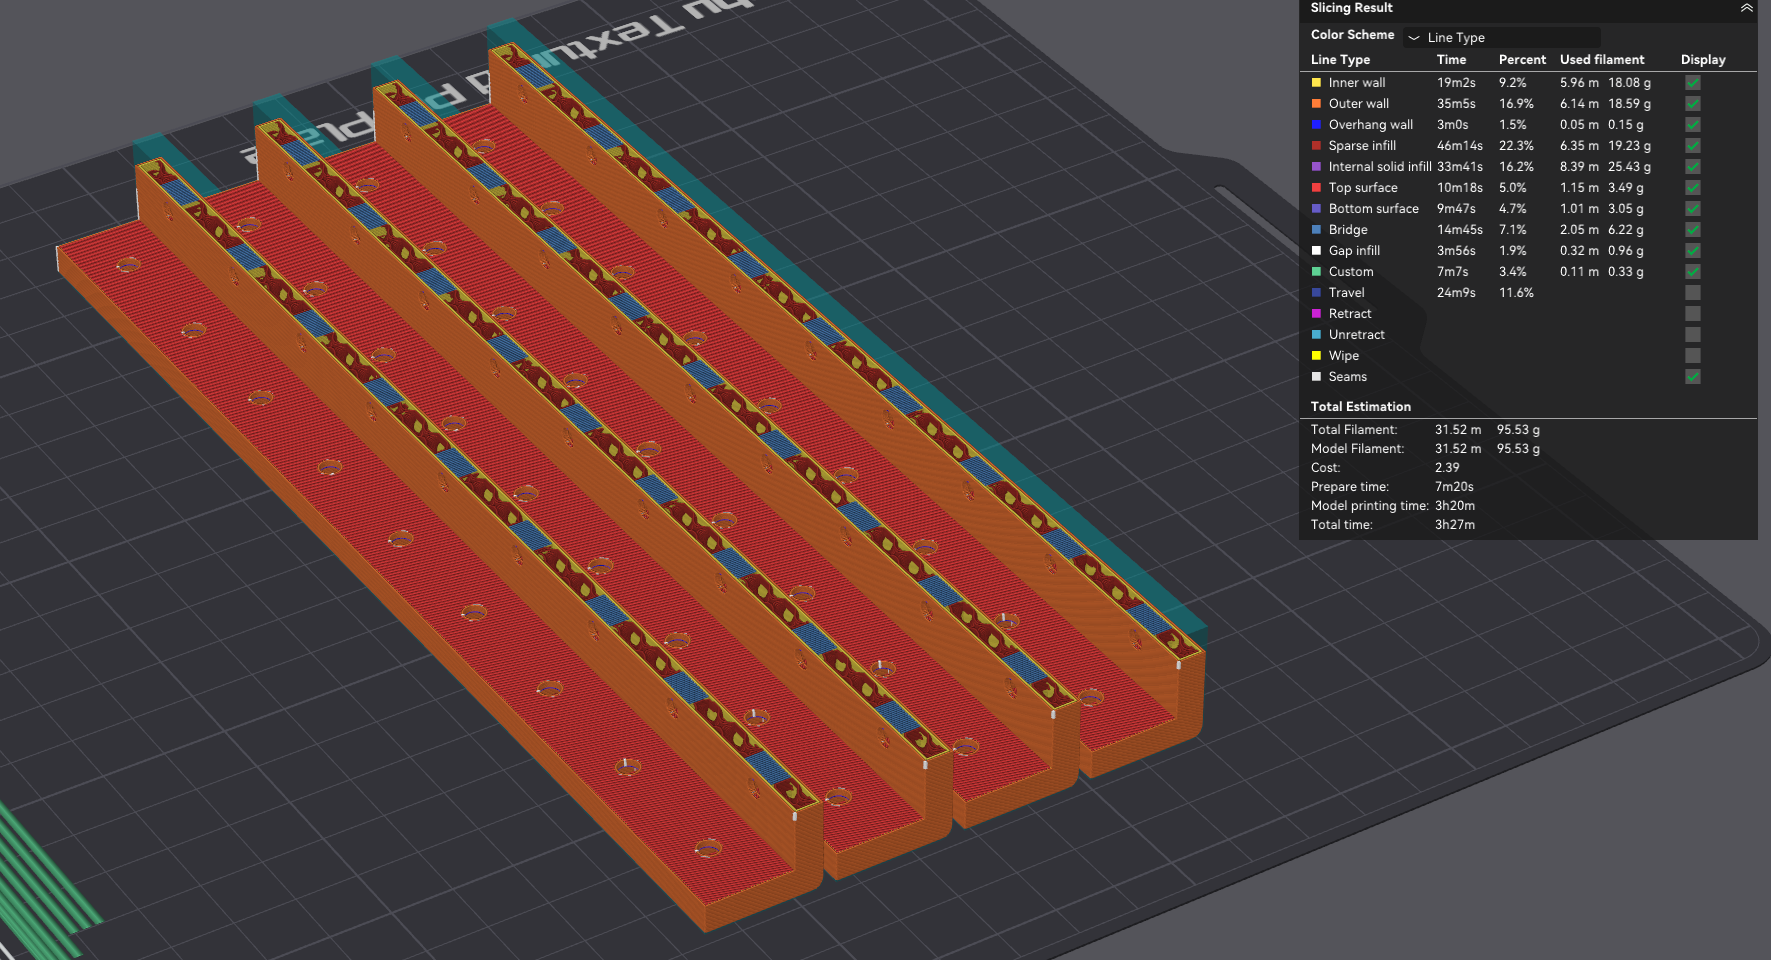
This must also be done in the base, which has four square nuts to insert for attaching the feet.
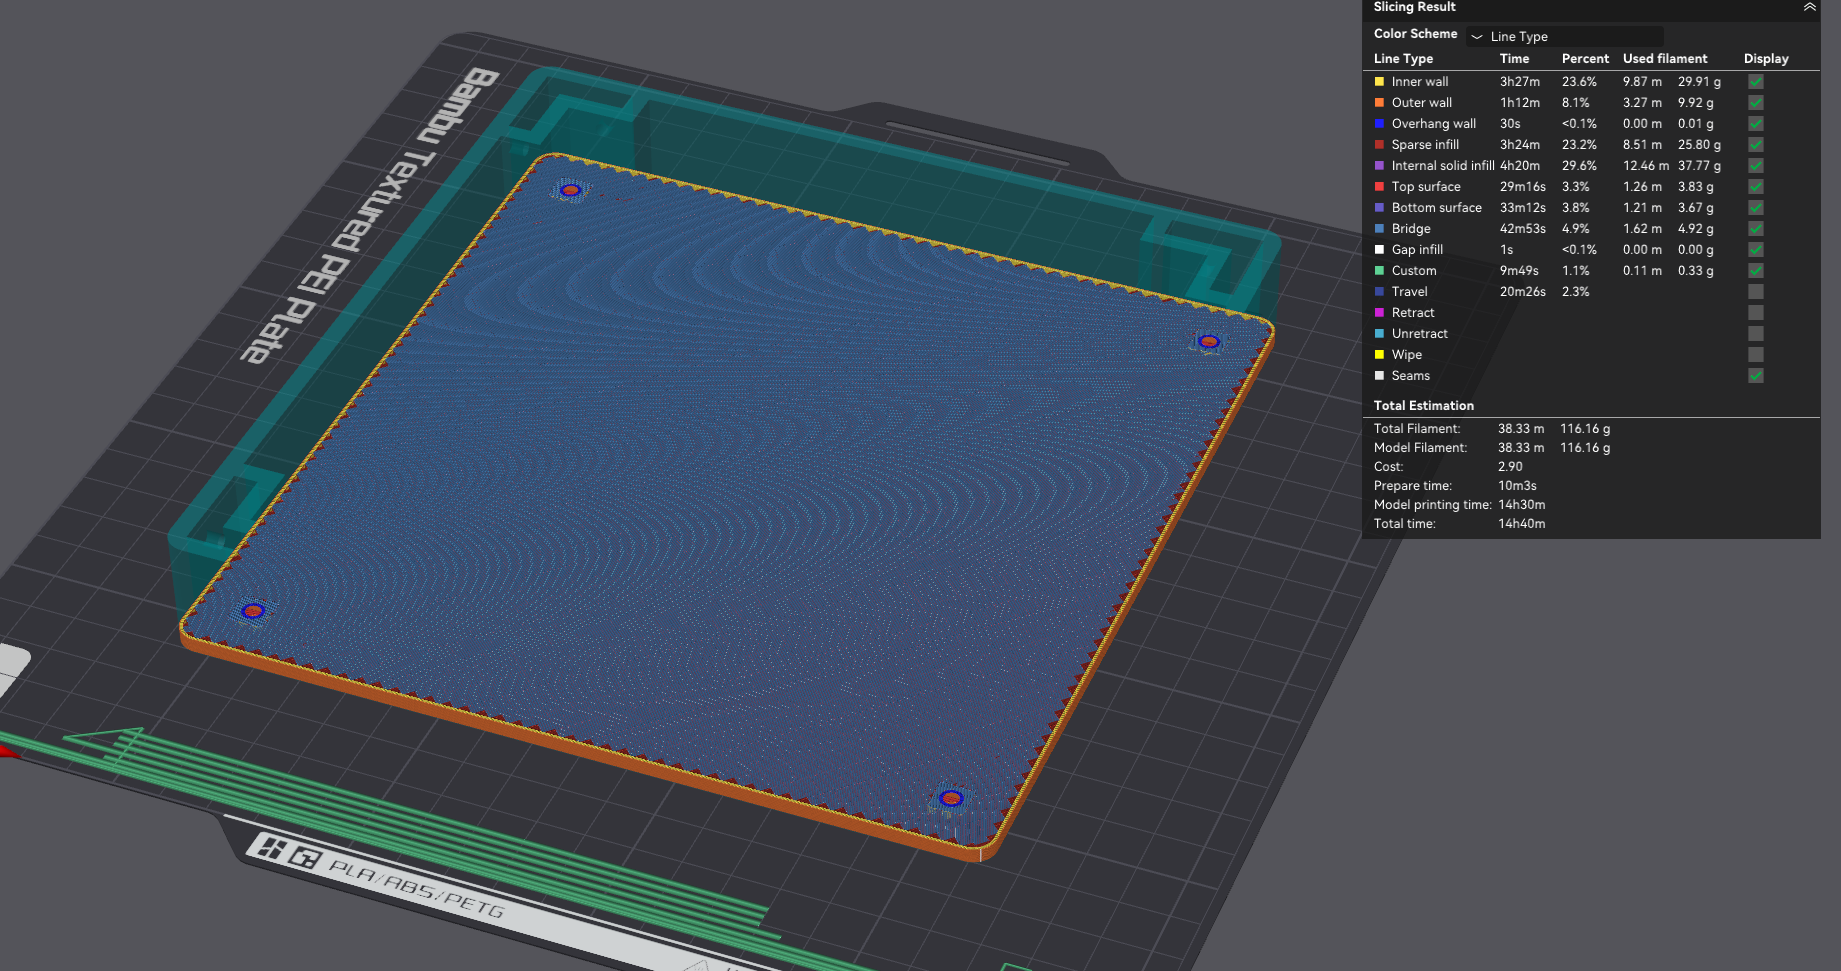
Work in progress! To do list:
- Create cleaner individual templates for the following, where you just need to enter a couple of dimensions from the main design.
- Modules
- Corner Pillars
- Panels
More
- Upload parametric versions of some of my custom modules
- Compact power strip holding base
- Phillips hue lid
Fan panels
Upload templates for multiple preset sizes
- Upload version with press fit hexagonal nuts
Parametric Microlab - Modular Mini Home Server

Publicado em 12 de ago de 2025
Gostou deste modelo? Crie uma conta grátis para salvar seus favoritos e voltar a eles depois.
Criar conta