Você está no 3DFinder
Buscamos em Thingiverse, MakerWorld e Printables ao mesmo tempo para te dar o melhor de cada uma.
Descrição
HexaMaze RC is an innovative, remote-controlled marble maze in a modern hexagonal design.
Assembly instructions can be found below
The playfield is operated via the original Makerworld RC controller, allowing precise tilting in all directions. With skill and quick reflexes, the marble can be guided safely to the goal.
The special feature: The entire maze, mechanics, and housing are fully 3D printed. Thanks to the standardized Makerworld controller, assembly is straightforward, and the game is ready to play right after setup.
Whether as a skill game, a 3D printer showcase, or an interactive display piece – HexaMaze RC combines design, engineering, and fun, making it a real highlight for makers and tech enthusiasts.
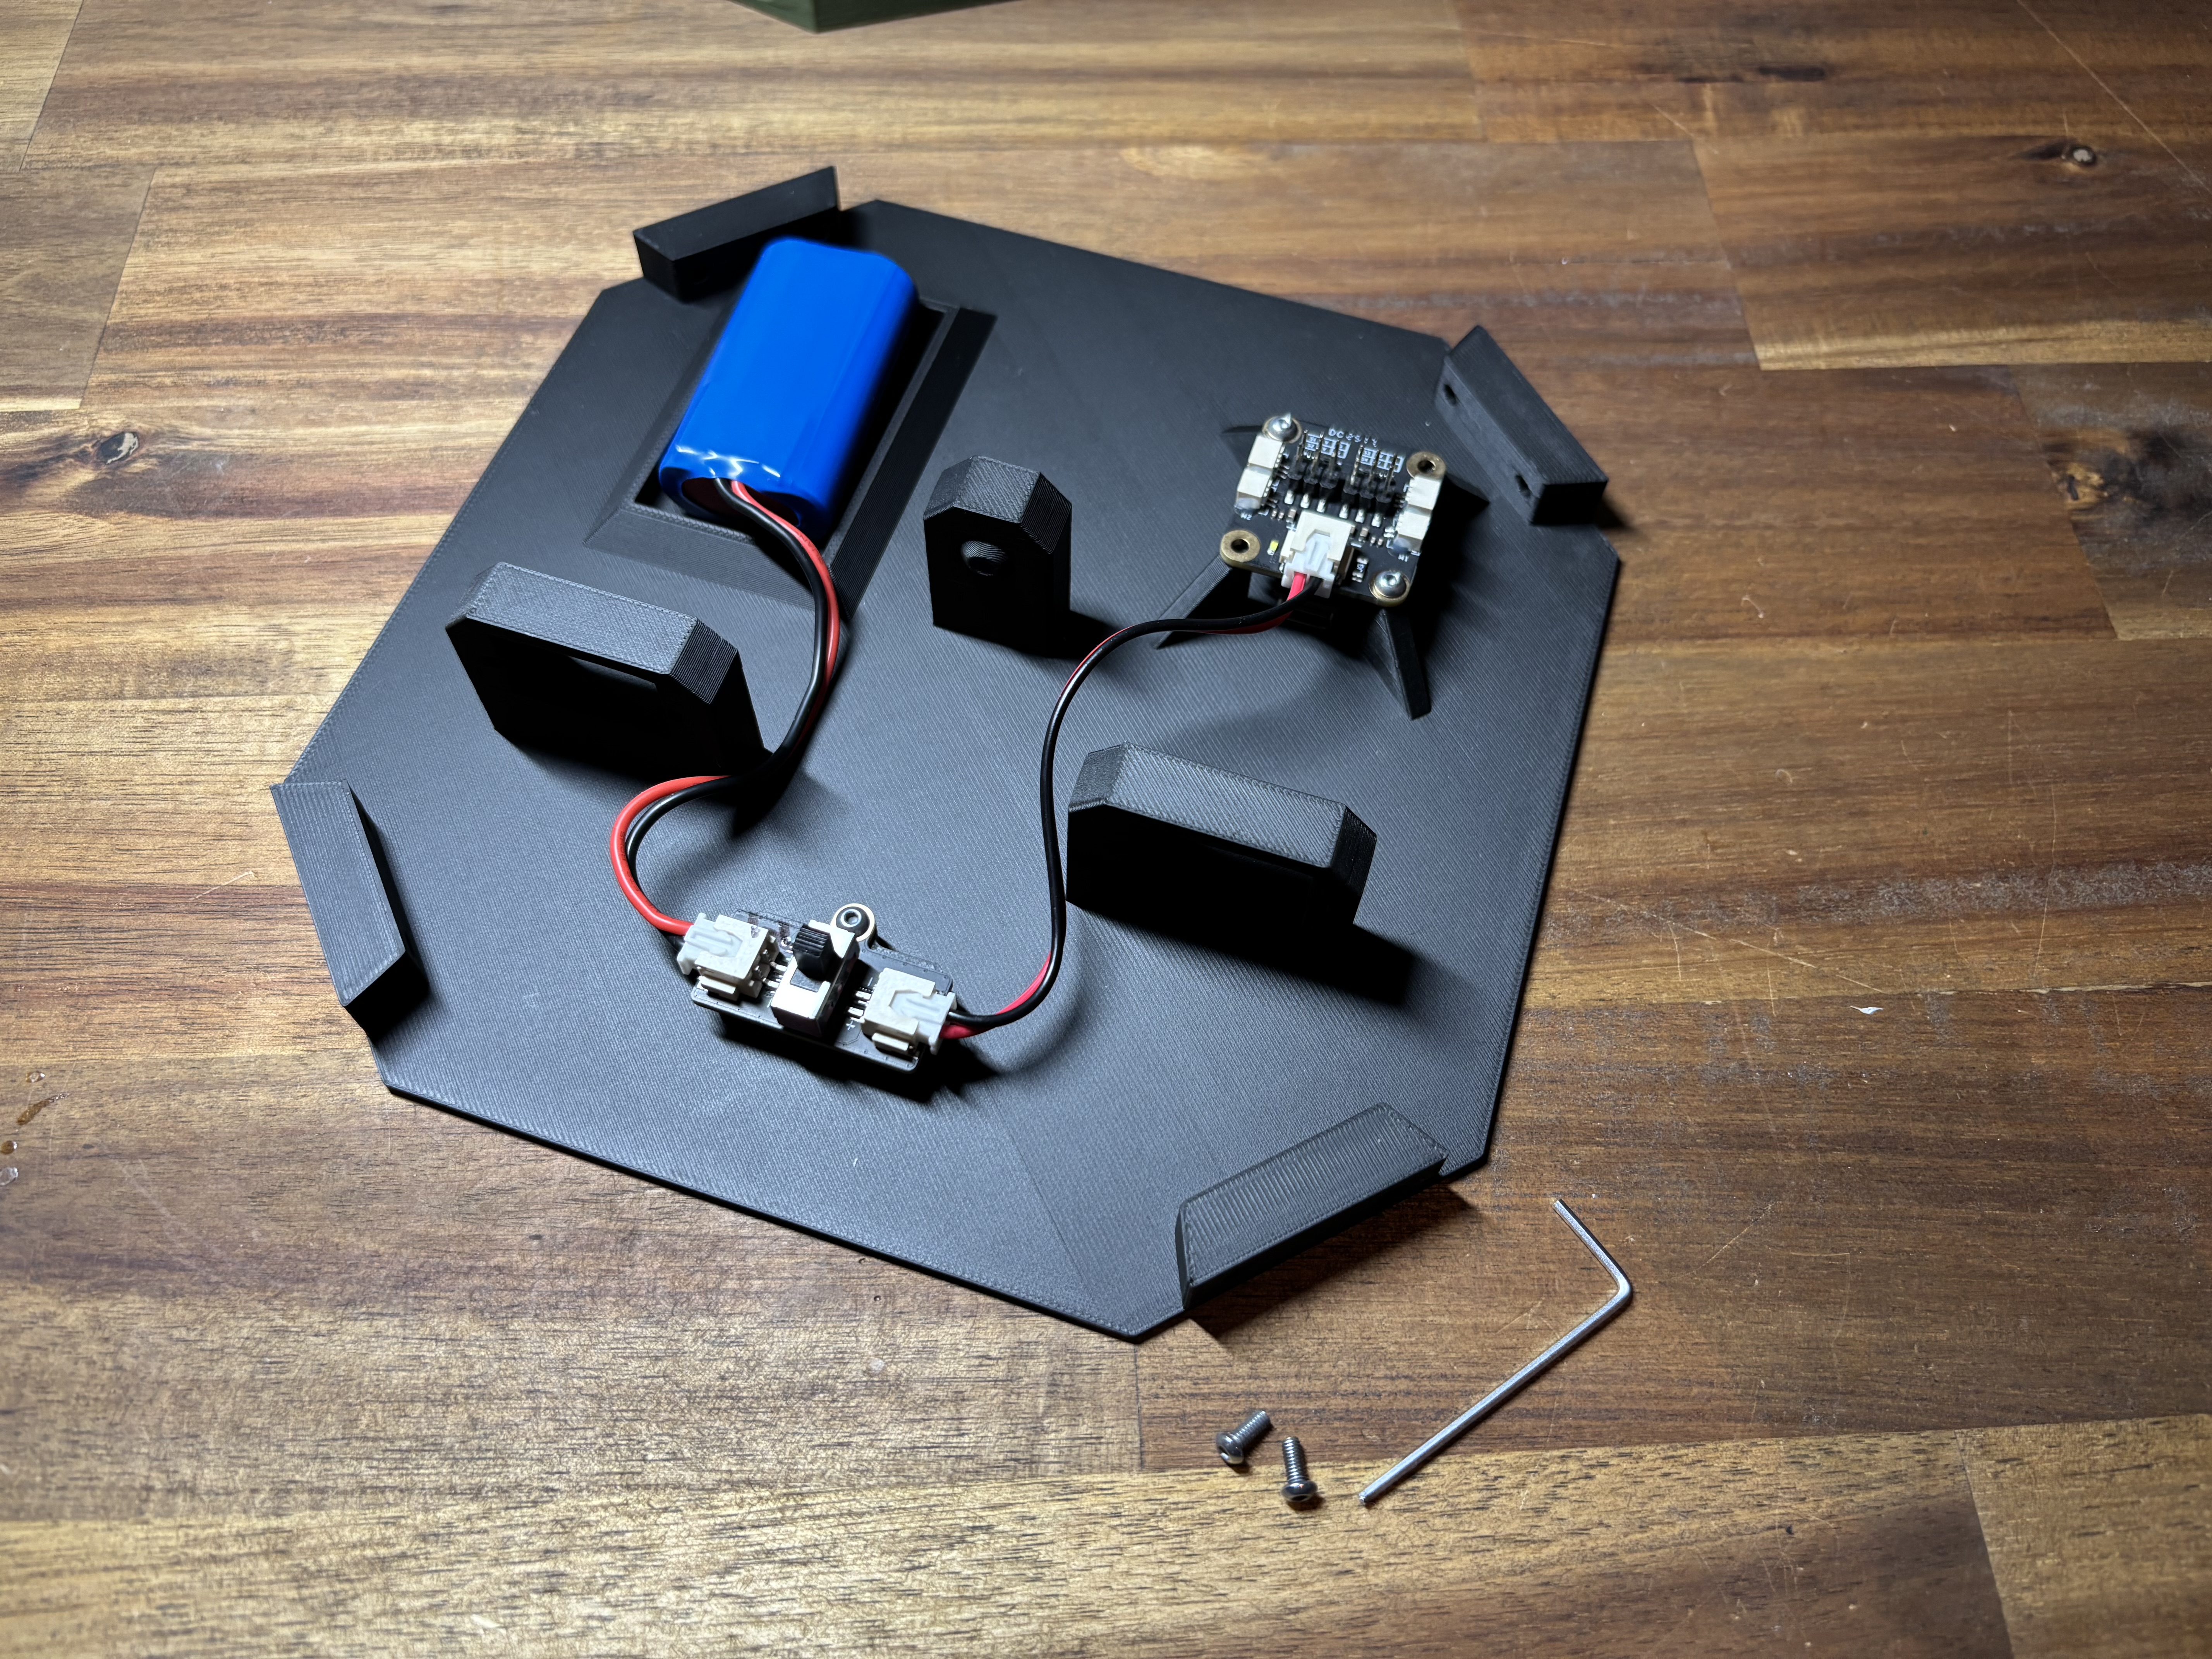
First, use the included screws from the Cyberbrick system to fasten the individual parts together. Then simply place the battery into the compartment.
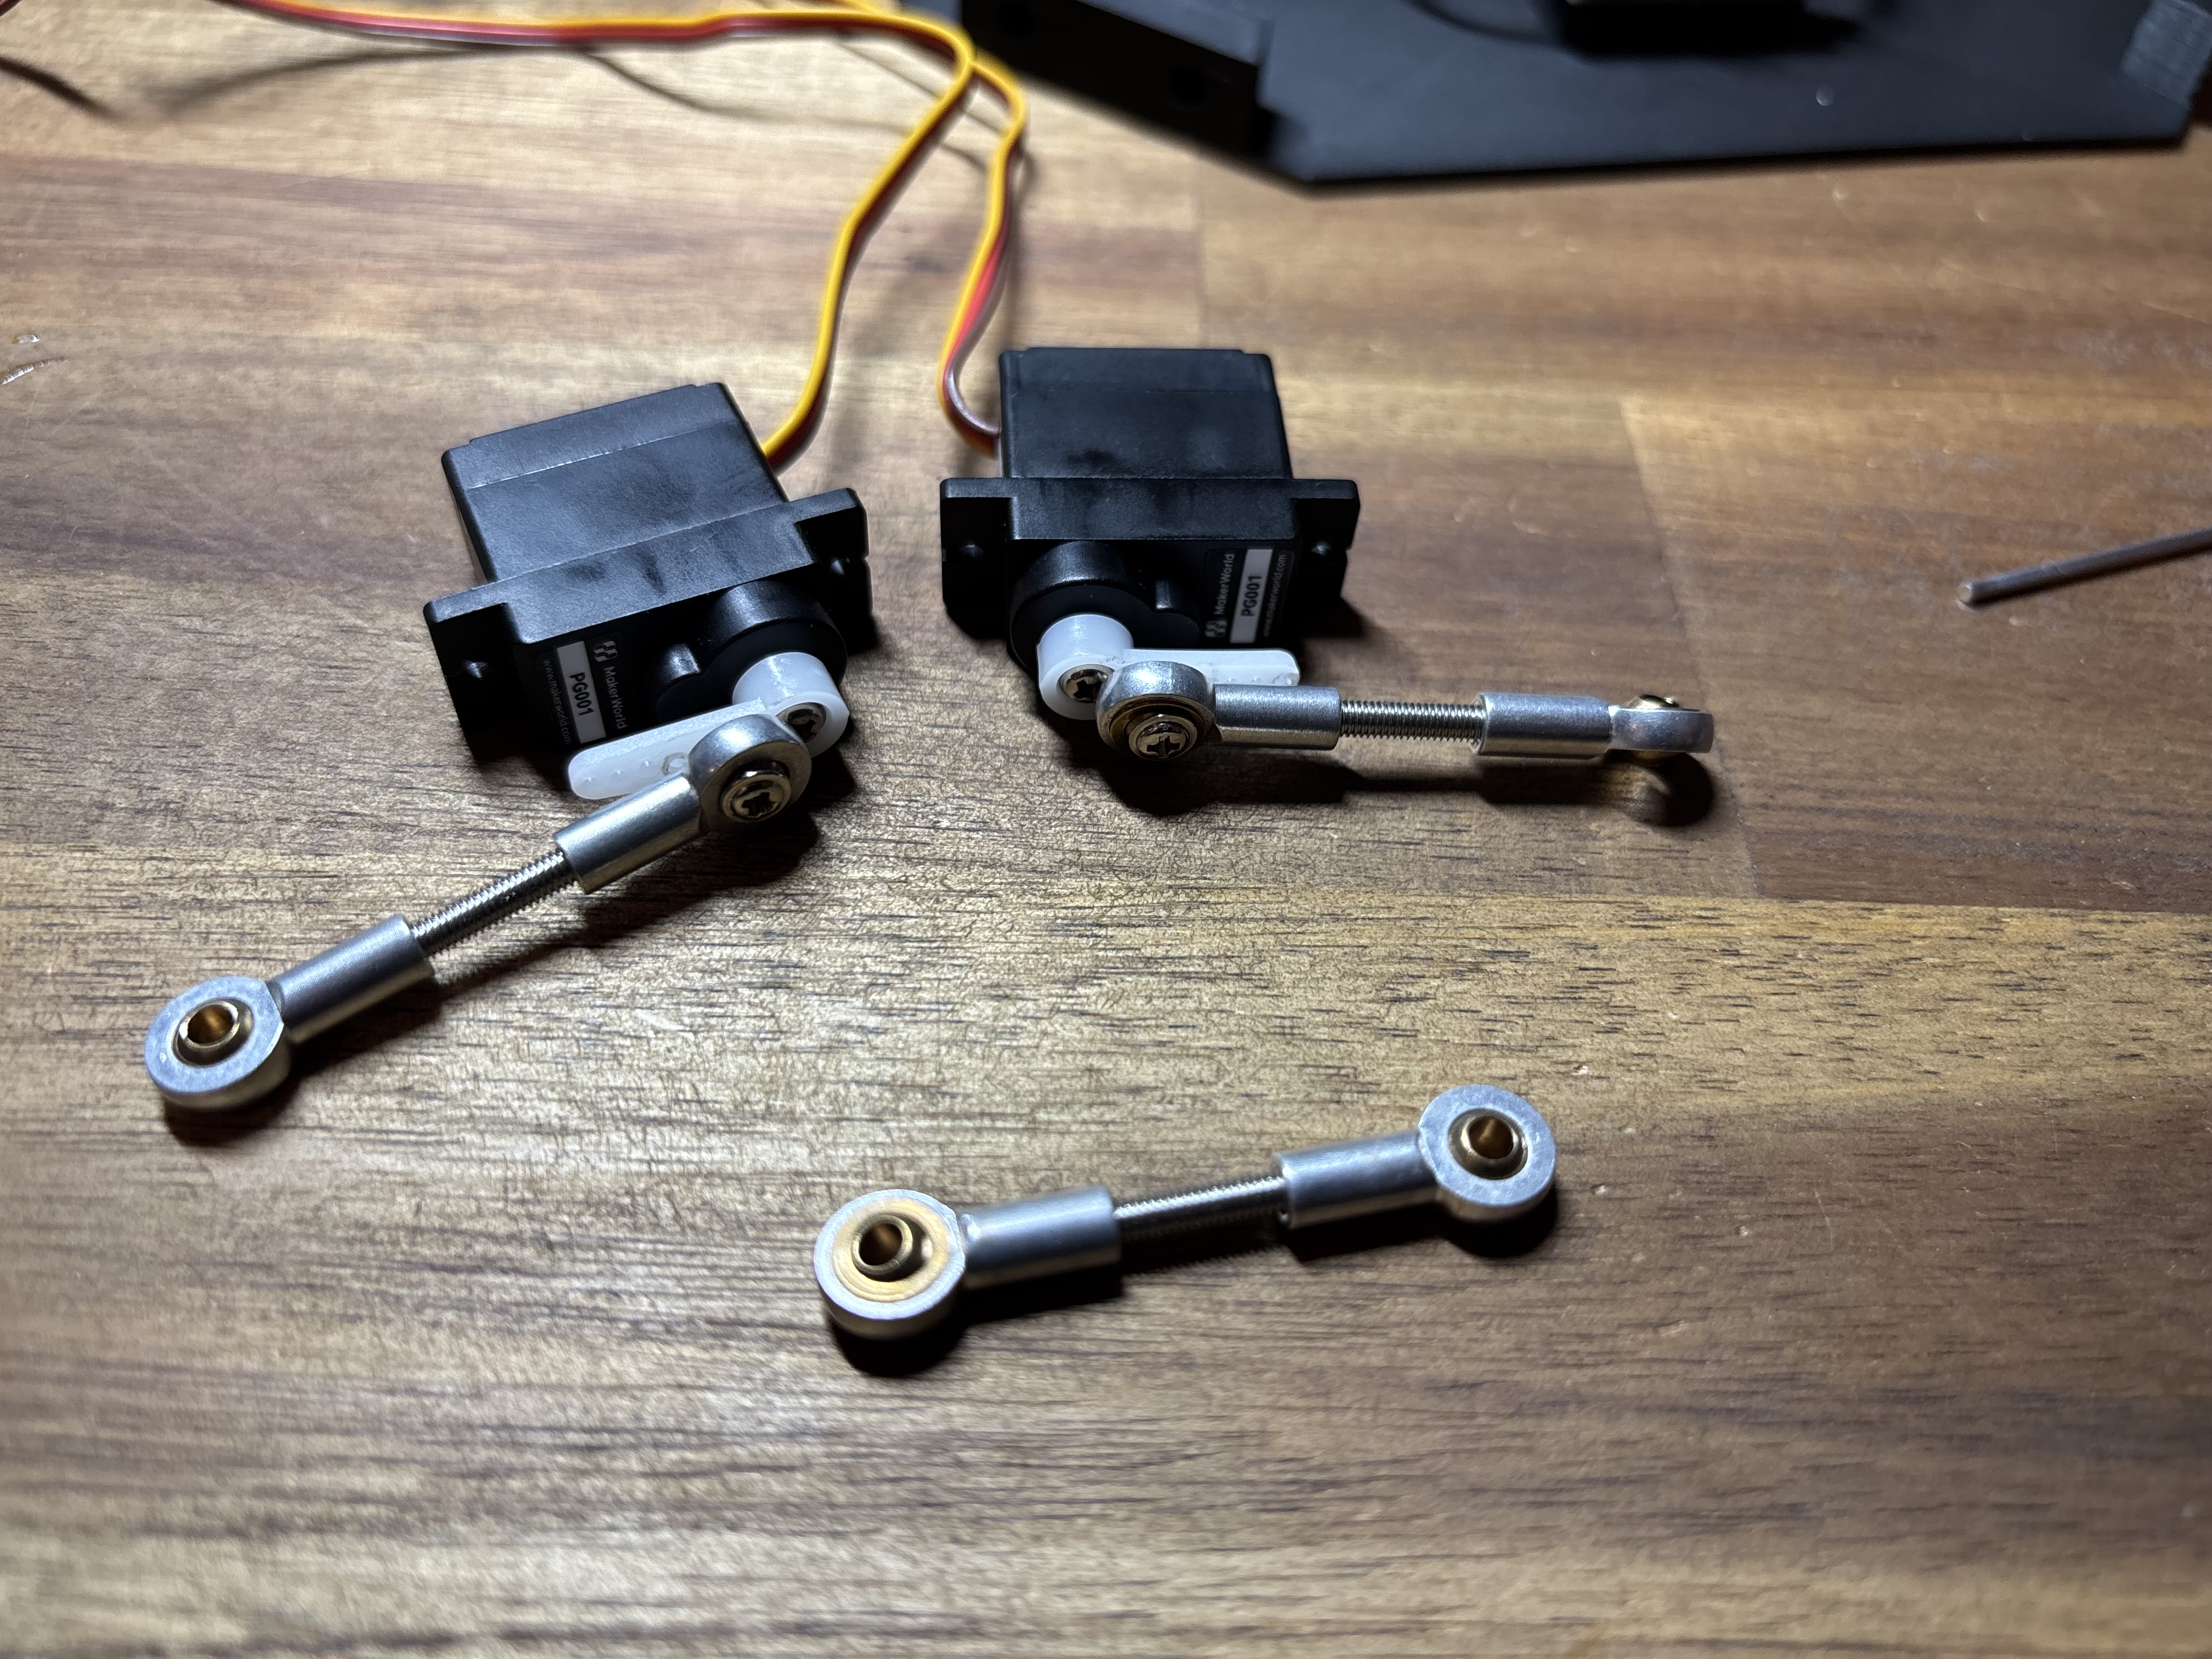
First, connect the servos to the RC controller and move them into the correct position. Make sure both servo arms are set to 90 degrees, as shown in the picture.
Next, attach the servo horns (the white plastic parts that come with the servos) to each servo output shaft.
When mounting the horns, insert the screws into the first hole closest to the servo shaft.
Then install the linkage rods with ball joints on both ends. The threaded rod in the middle allows you to fine-tune the length and alignment. Make sure the ball joints are securely fastened on both sides for smooth movement.
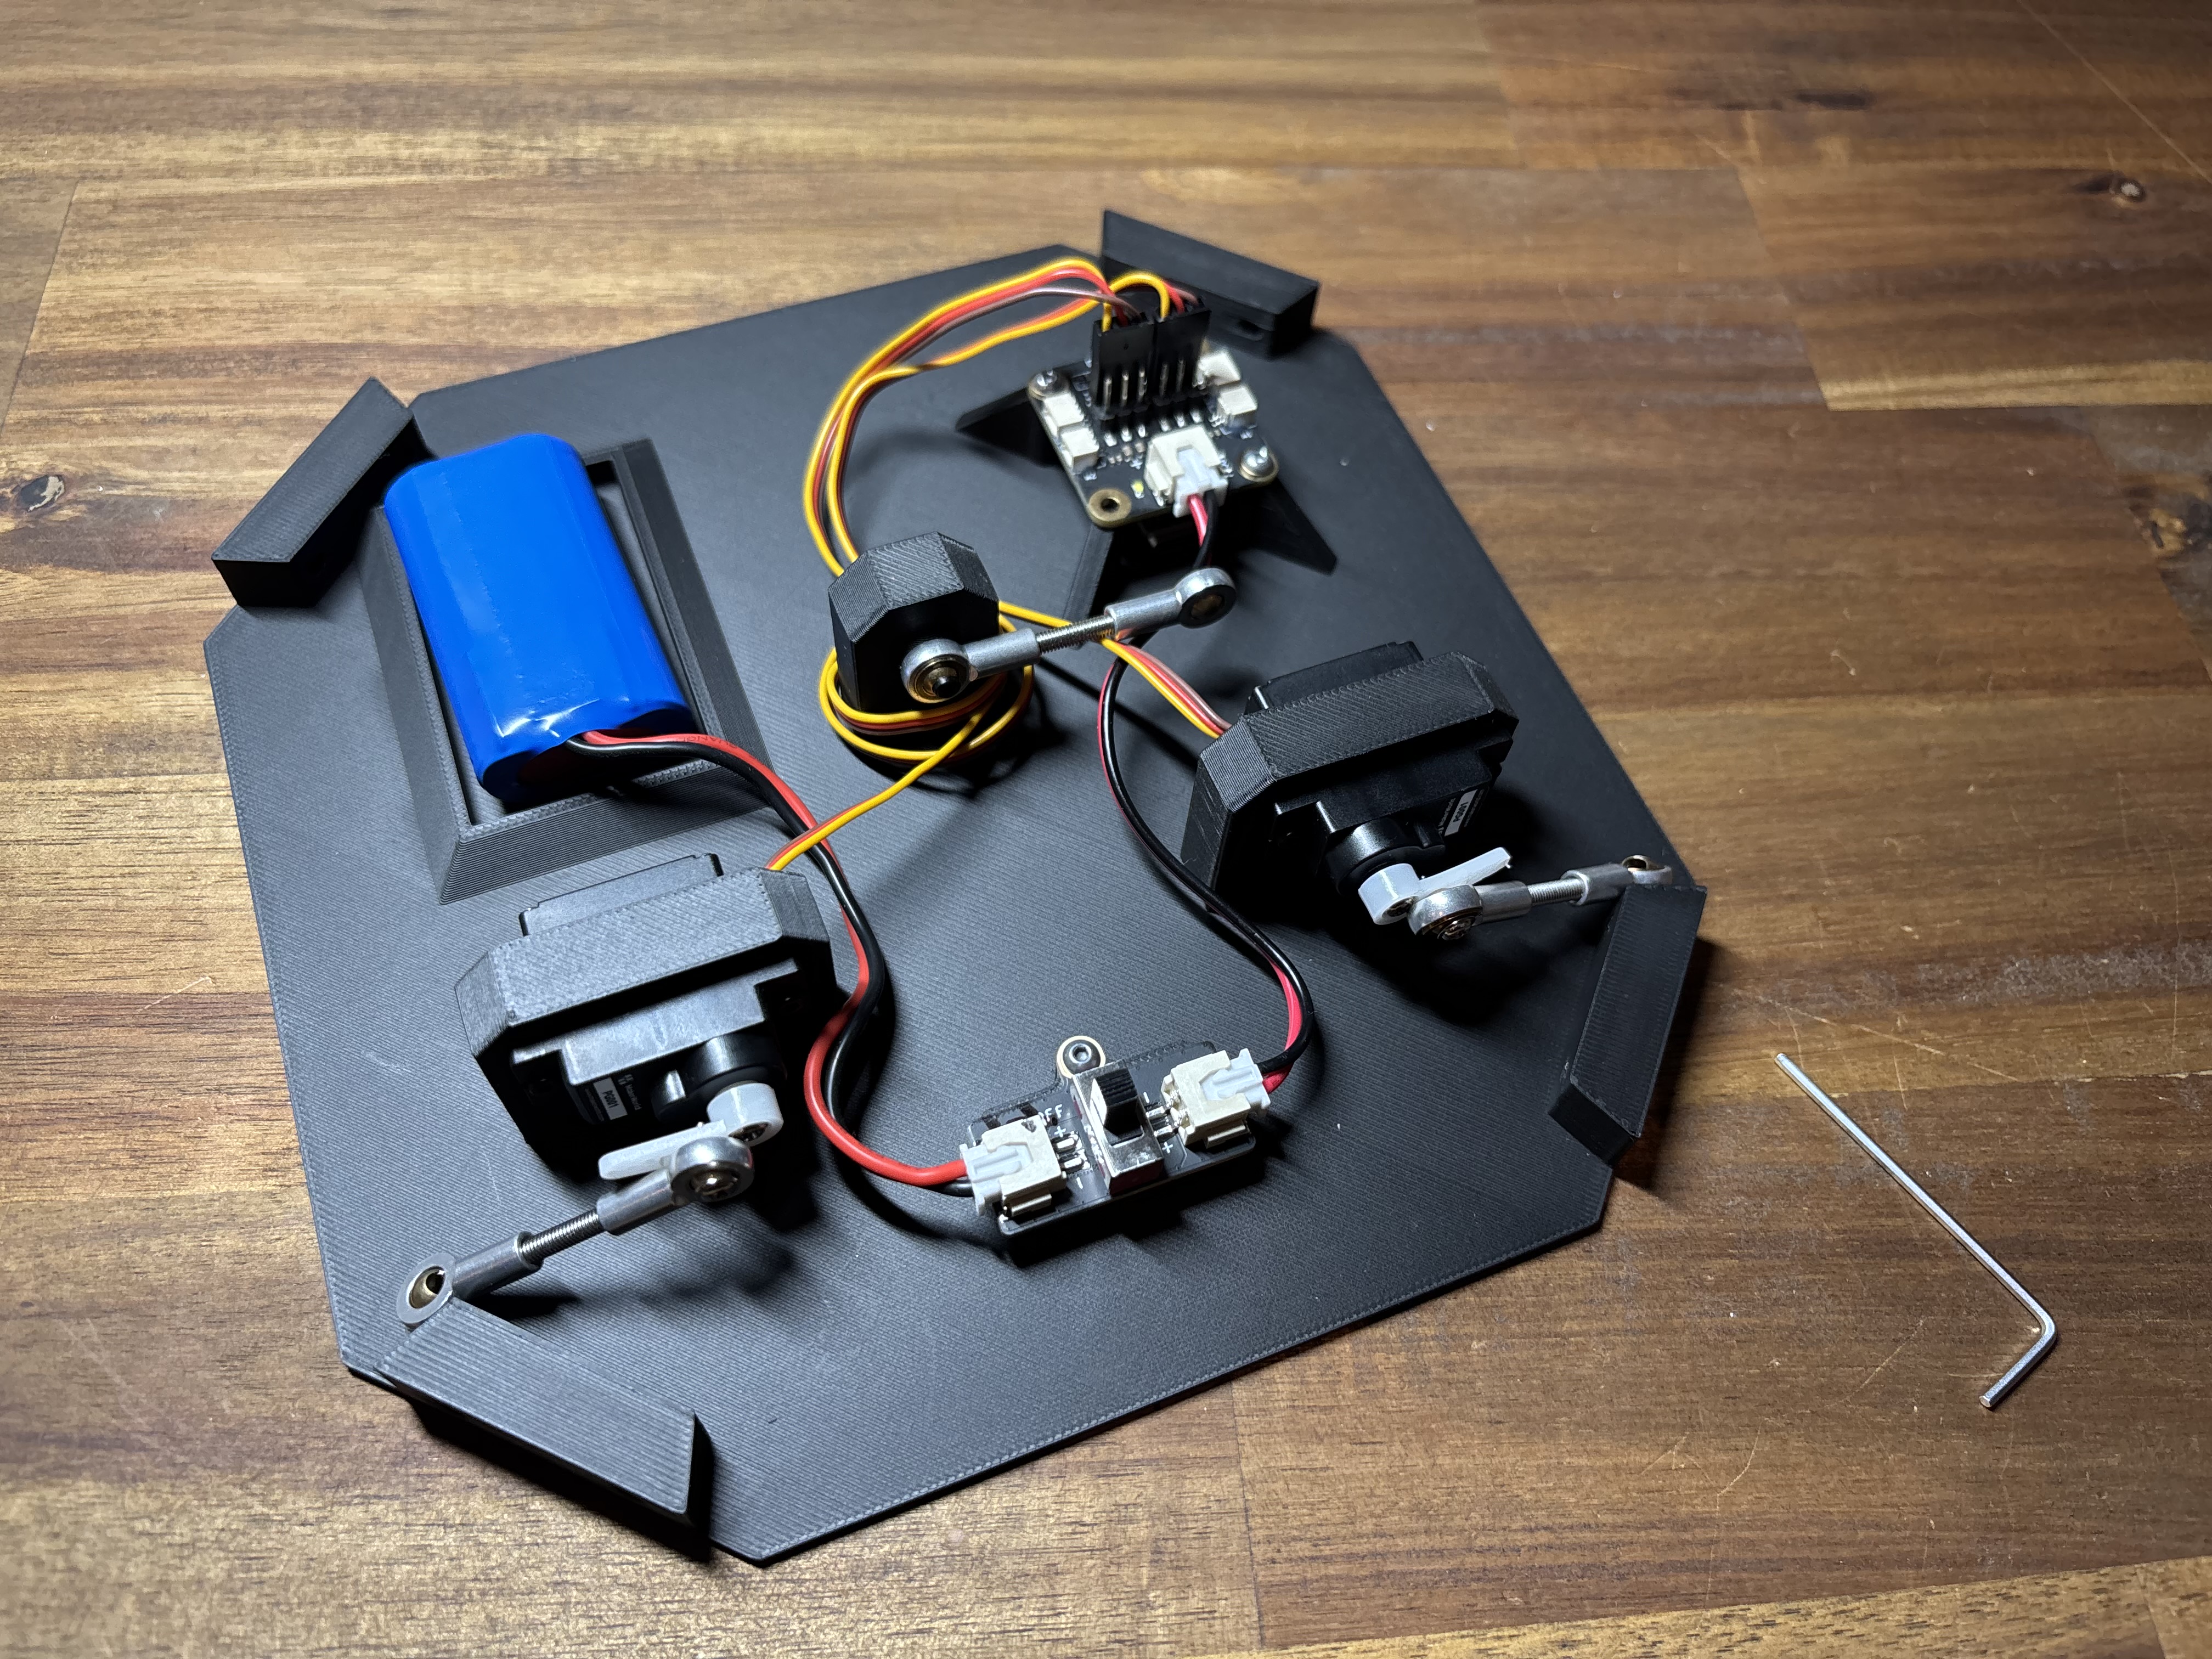
Route the wires as shown in the picture, making sure they are neatly positioned and free from tension.
Then fasten the components in place as shown, using M2×10 mm screws.
The right motor is connected on the right side, the left motor on the left side.
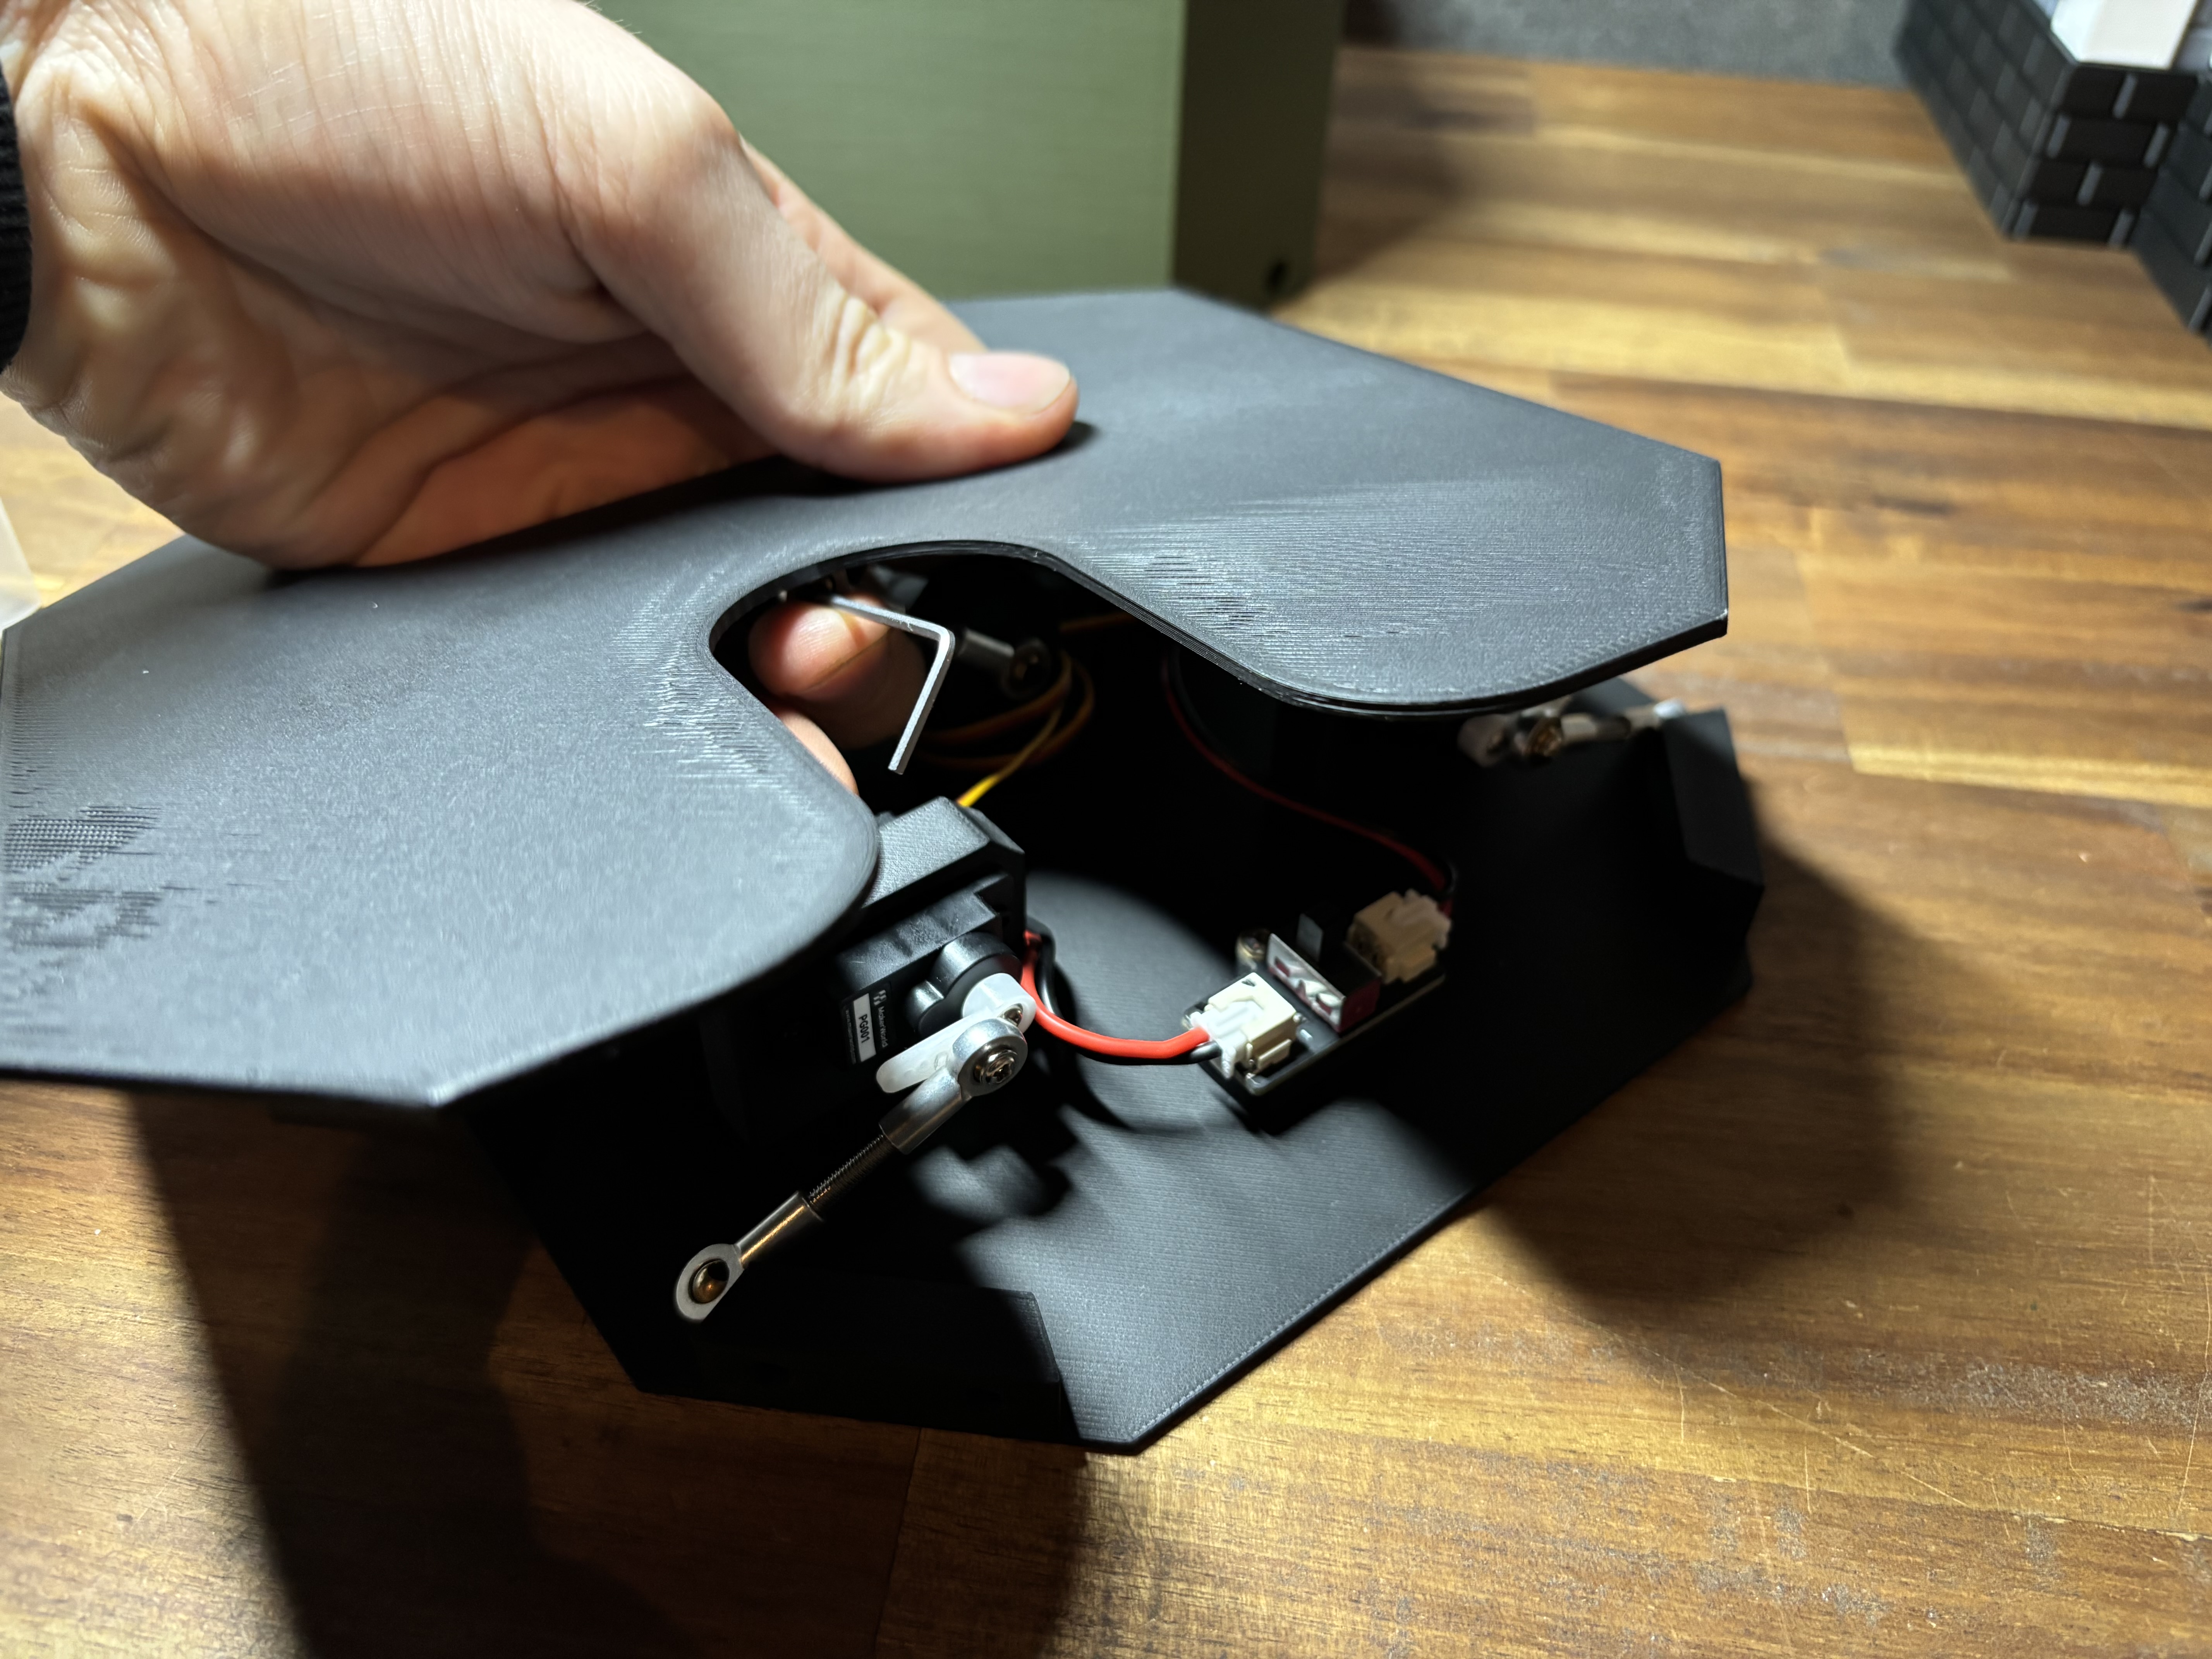
Mounting the top plate can be a bit tricky, but you’ll manage 😉. The space is a bit tight because I wanted to keep the design as compact as possible.
However, I’ve left the gap wide enough so you can still reach the screws without much trouble.
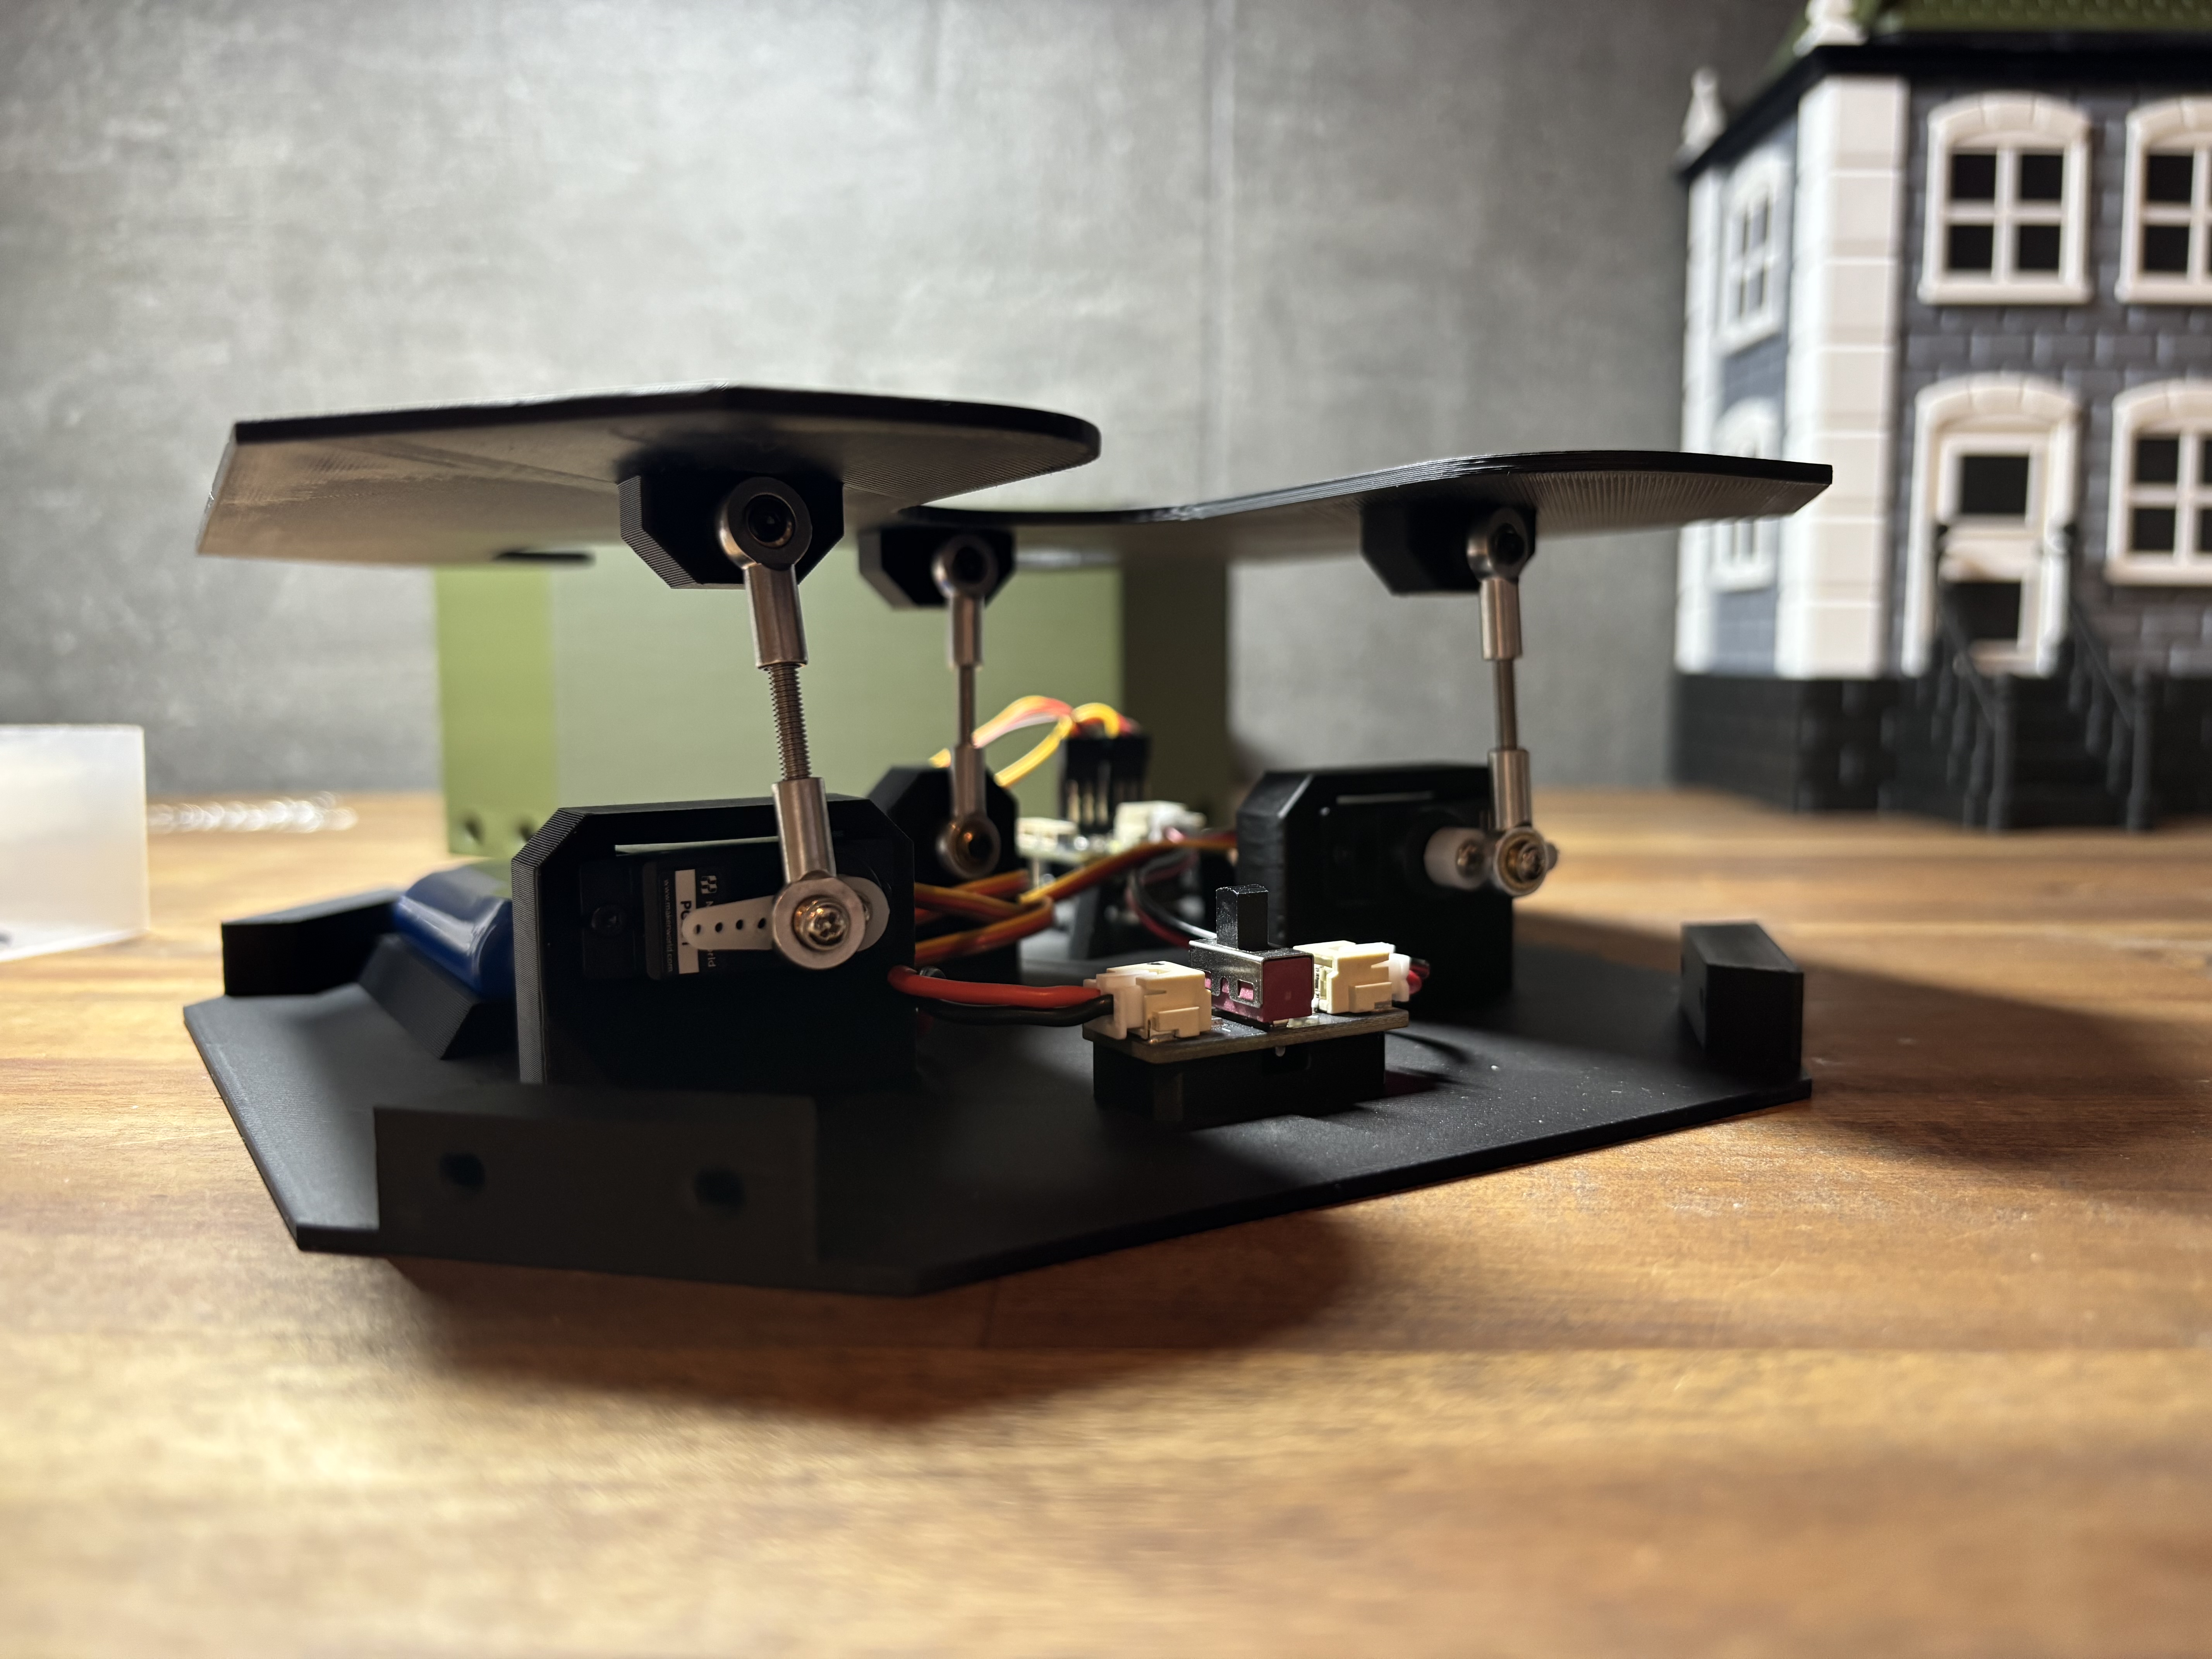
In the end, it should look like this.
Without the entire assembly being in its final base form, it will wobble quite a bit — but don’t worry, that’s completely normal.
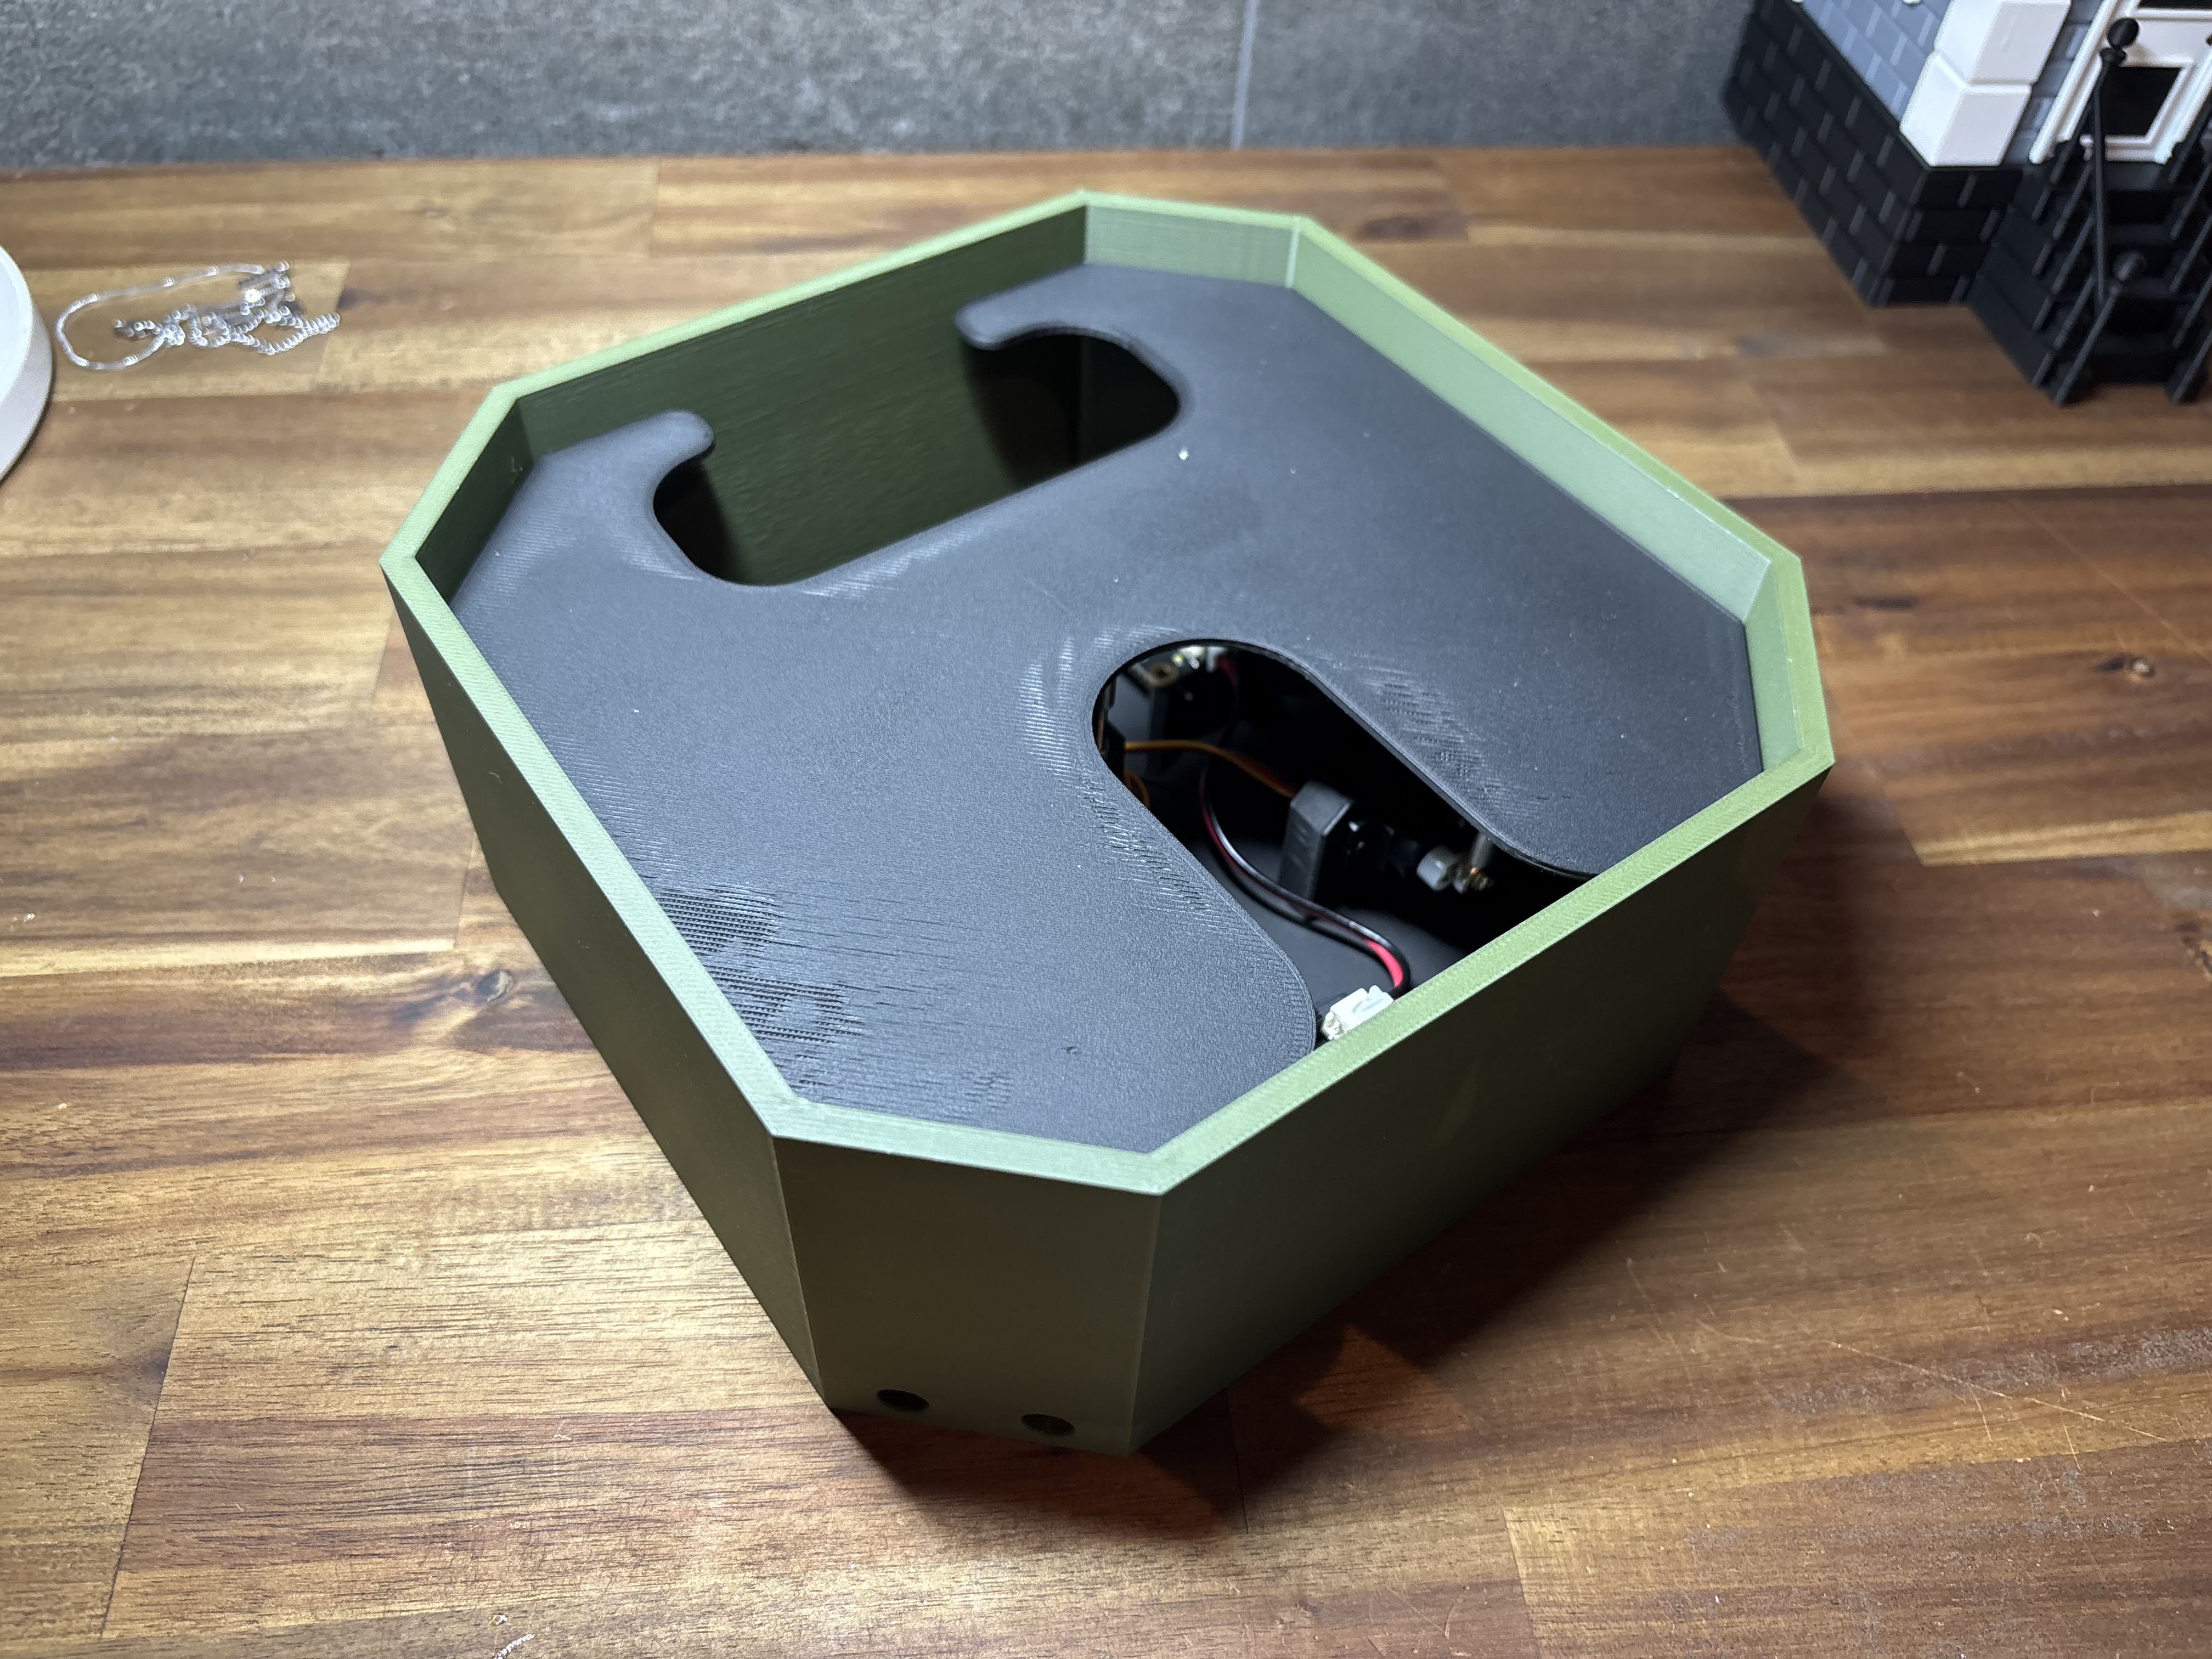
Then simply press it into the base frame, making sure all four corners are fully seated at the bottom.
There’s no need to glue it — it will hold in place by itself.
Through the holes, you can later switch the HexaMaze RC on and off and also access the battery.
Finally, just insert the maze design of your choice — and your HexaMaze RC is ready to play!

Gostou deste modelo? Crie uma conta grátis para salvar seus favoritos e voltar a eles depois.
Criar conta