Você está no 3DFinder
Buscamos em Thingiverse, MakerWorld e Printables ao mesmo tempo para te dar o melhor de cada uma.
Descrição
Rackartyget's Little Helper - Macropad with support for VIAL
I have been obsessed with everything keyboard/IoT/ergonomics related for a few years now, and this is my first time creating one from basically nothing. My friend, Rackartyget, does a lot of work in Photoshop and was looking for ways to streamline their workflow, so I designed RLH with them in mind. In essence, it's a medium sized macropad with an OLED display and two rotary encoders, so nothing super fancy. I've had a blast learning how to write firmware, plan builds, and iterate on the design (this one is the 9th iteration of the second major revision sooo yeah it took a while lol). I'm hoping this will be as fun for you to make your own RLH as it was for me.
Precompiled firmware is found in the provided rlh.zip. Drag and drop rlh-vial.u2f into the MCU storage (more on that further down on this page).
Who is this for?
This is a great first project for anyone who wants to learn how to make keyboards from scratch, even if you don't know anything about coding or firmware. The soldering is straightforward, but you can still expect to learn a lot from assembling the macropad if it's your first ever soldering experience.
Bill of Materials (BoM)
Besides the printed case itself, you're going to need to get the components to actually build the keyboard. My RLH uses MX cherry red switches that I scavenged from a donated broken keyboard, and I can recommend this approach if you're a bit strapped for cash. The switches are probably the most expensive thing on this list (3D printers notwithstanding of course); the switches listed in the BoM are good value Gateron linear switches.
Besides the listed components, you also need soldering equipment.
| qty | thing | link |
|---|---|---|
| 1 | Generic RP2040 pro micro MCU OR | AliExpress |
| 1 | Frood RP2040 (highly recommended) | 42Keebs |
| 14 | 1N4148 through-hole diodes | AliExpress |
| 12 | MX key switches | AliExpress |
| 2 | EC11 Rotary encoders (5 pin) | AliExpress |
| 1 | OLED screen module | AliExpress |
| 4 | M2x6mm screws | AliExpress |
| 4 | M2 heat-sink inserts | AliExpress |
| 1 | USB-C female breakout module (4 pin) | AliExpress |
| 1 | USB-C male breakout module* | AliExpres |
| 28-24 AWG wire | AliExpress | |
| 20-16 AWG solid core wire | AliExpress |
here's a google sheet with the same list as above
Assembling and wiring
| The wiring schematics look as follows, and it's assumed that you're using an rp2040 MCU. | 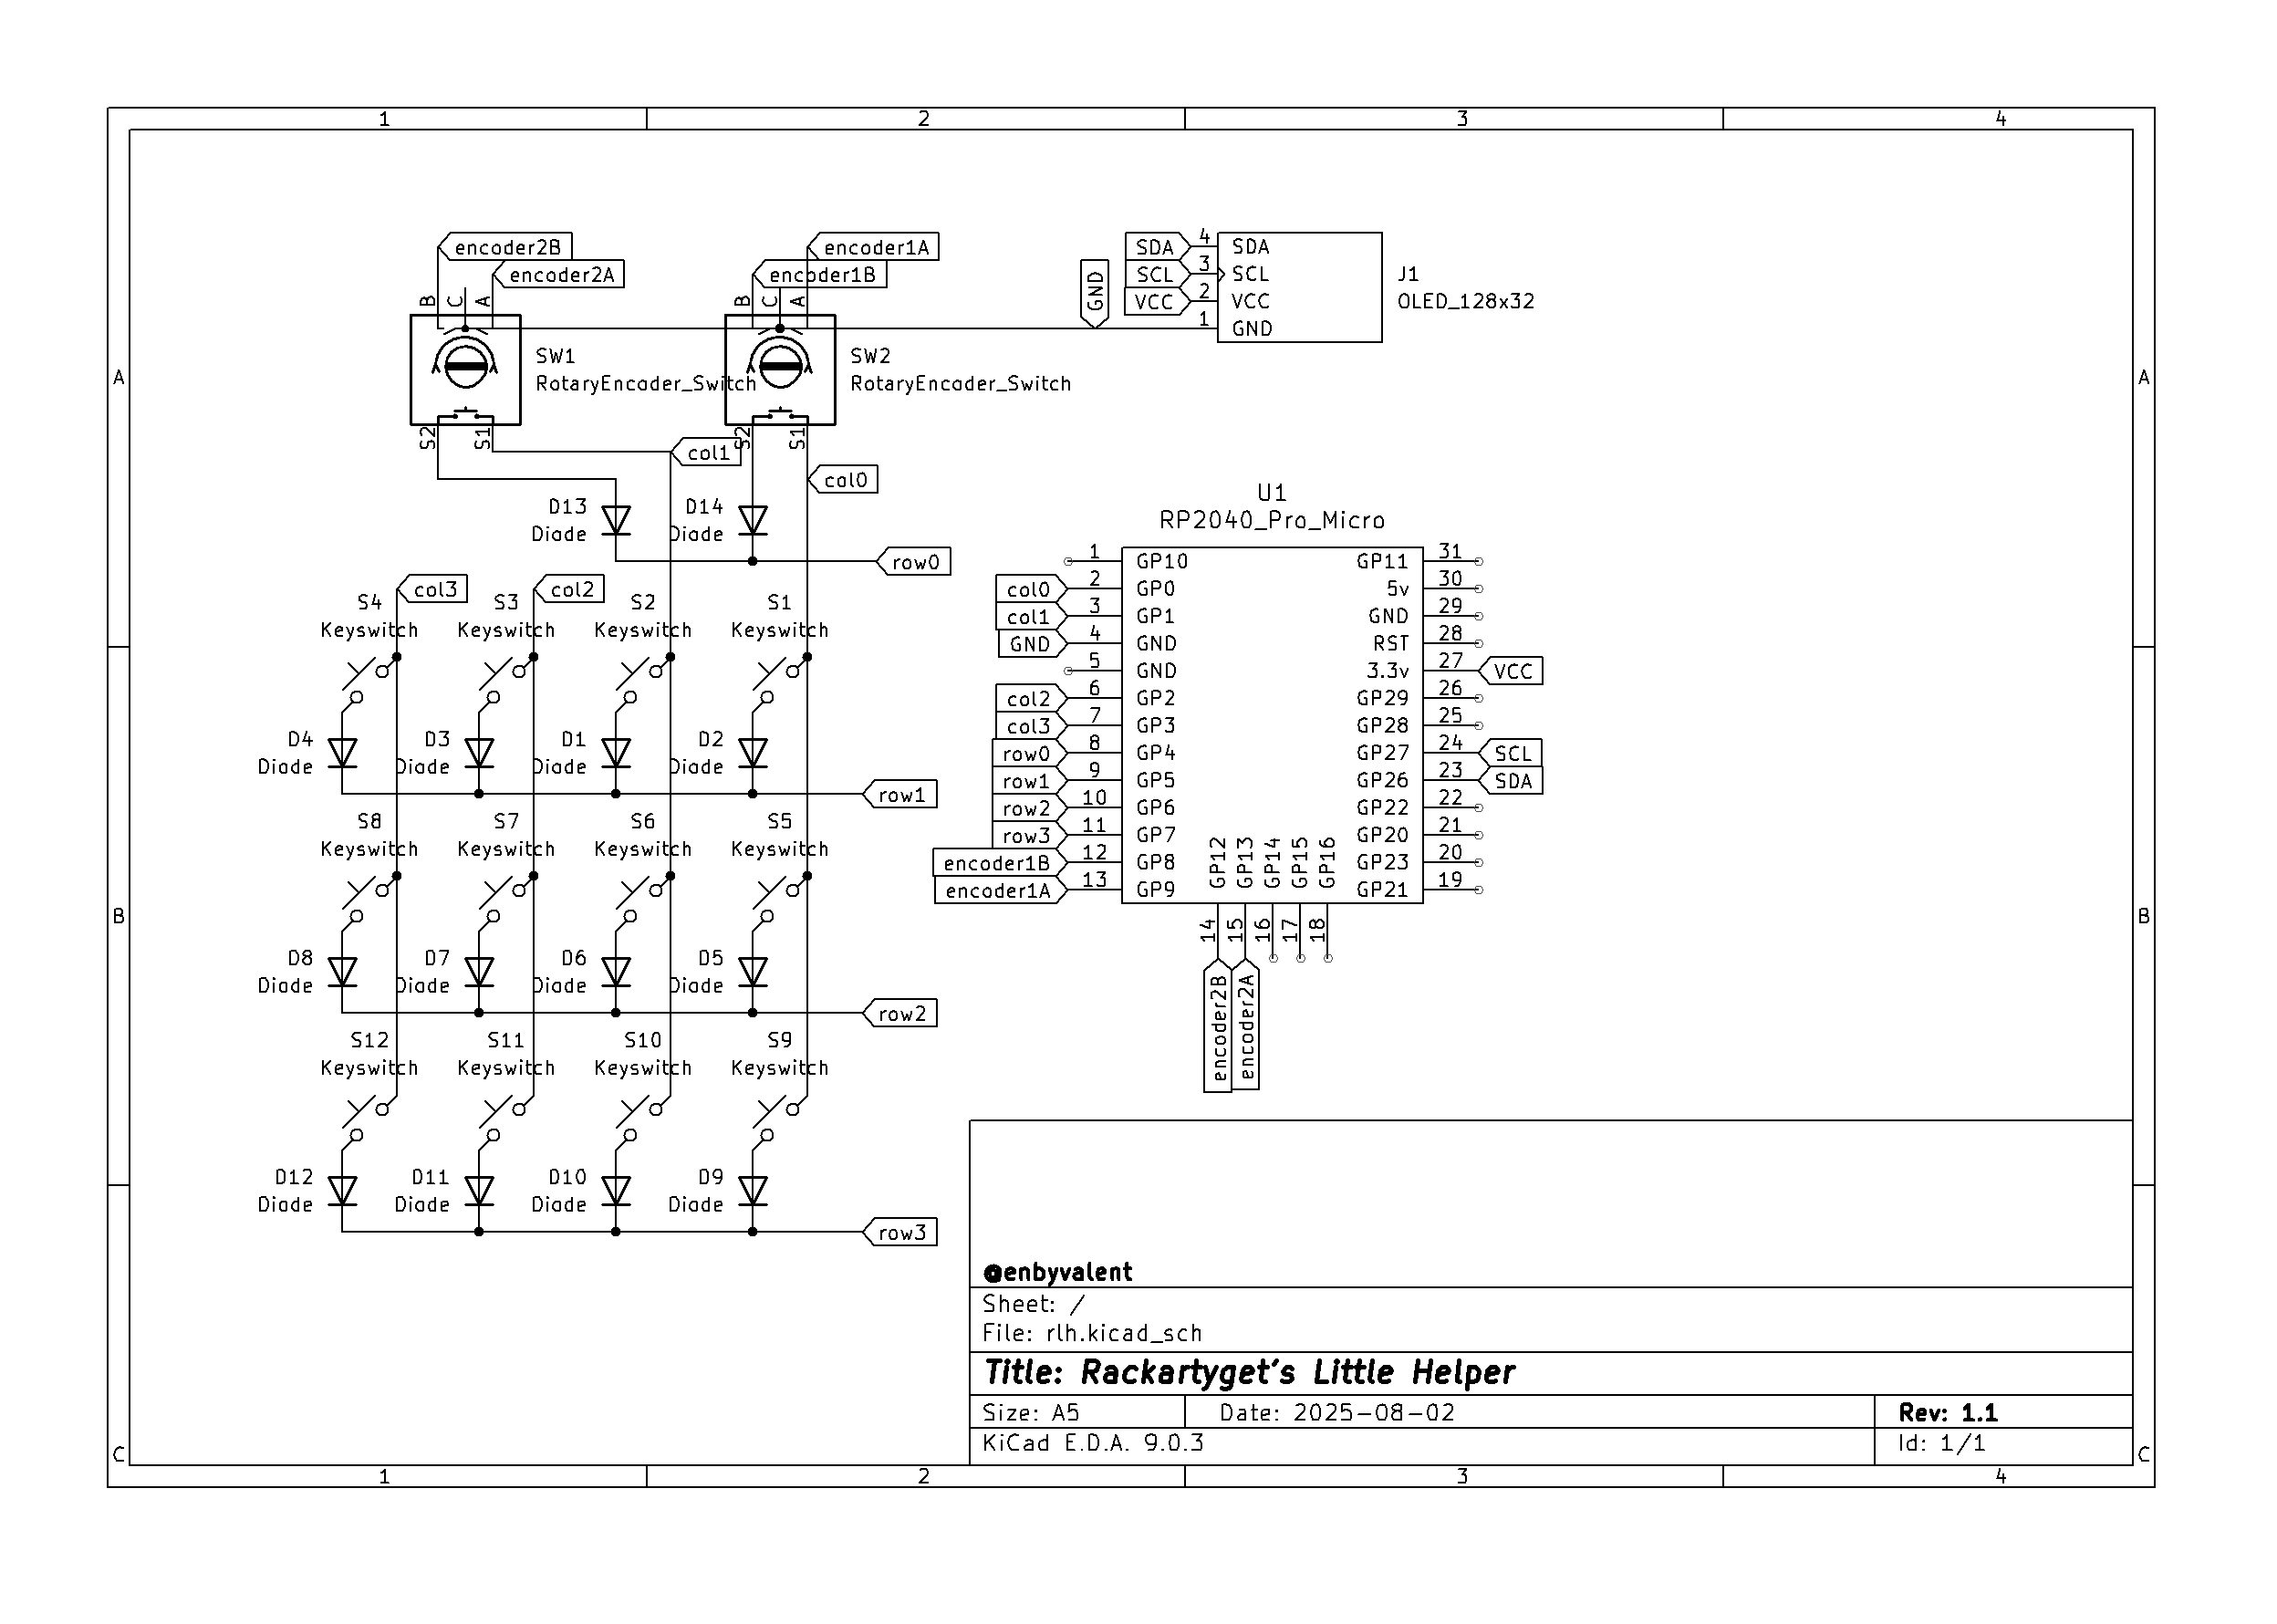 |
There are loads of great guides on how to handwire (3D printed) keyboards online, so I'm not going to do a whole writeup on it. Refer to the following sources if you need help
- A modern handwiring guide
- Joe Scotto - How to Build a Handwired Keyboard
- A Complete Guide To Building a Hand-Wired Keyboard
In short, you need to connect all the switches (including the encoders) in a key matrix, with diodes between each key and their respective row. Diode orientation is column -> row. Make sure that the main column/row wires don't short each other (i.e. leave enough isolation for where the wires intersect).
| 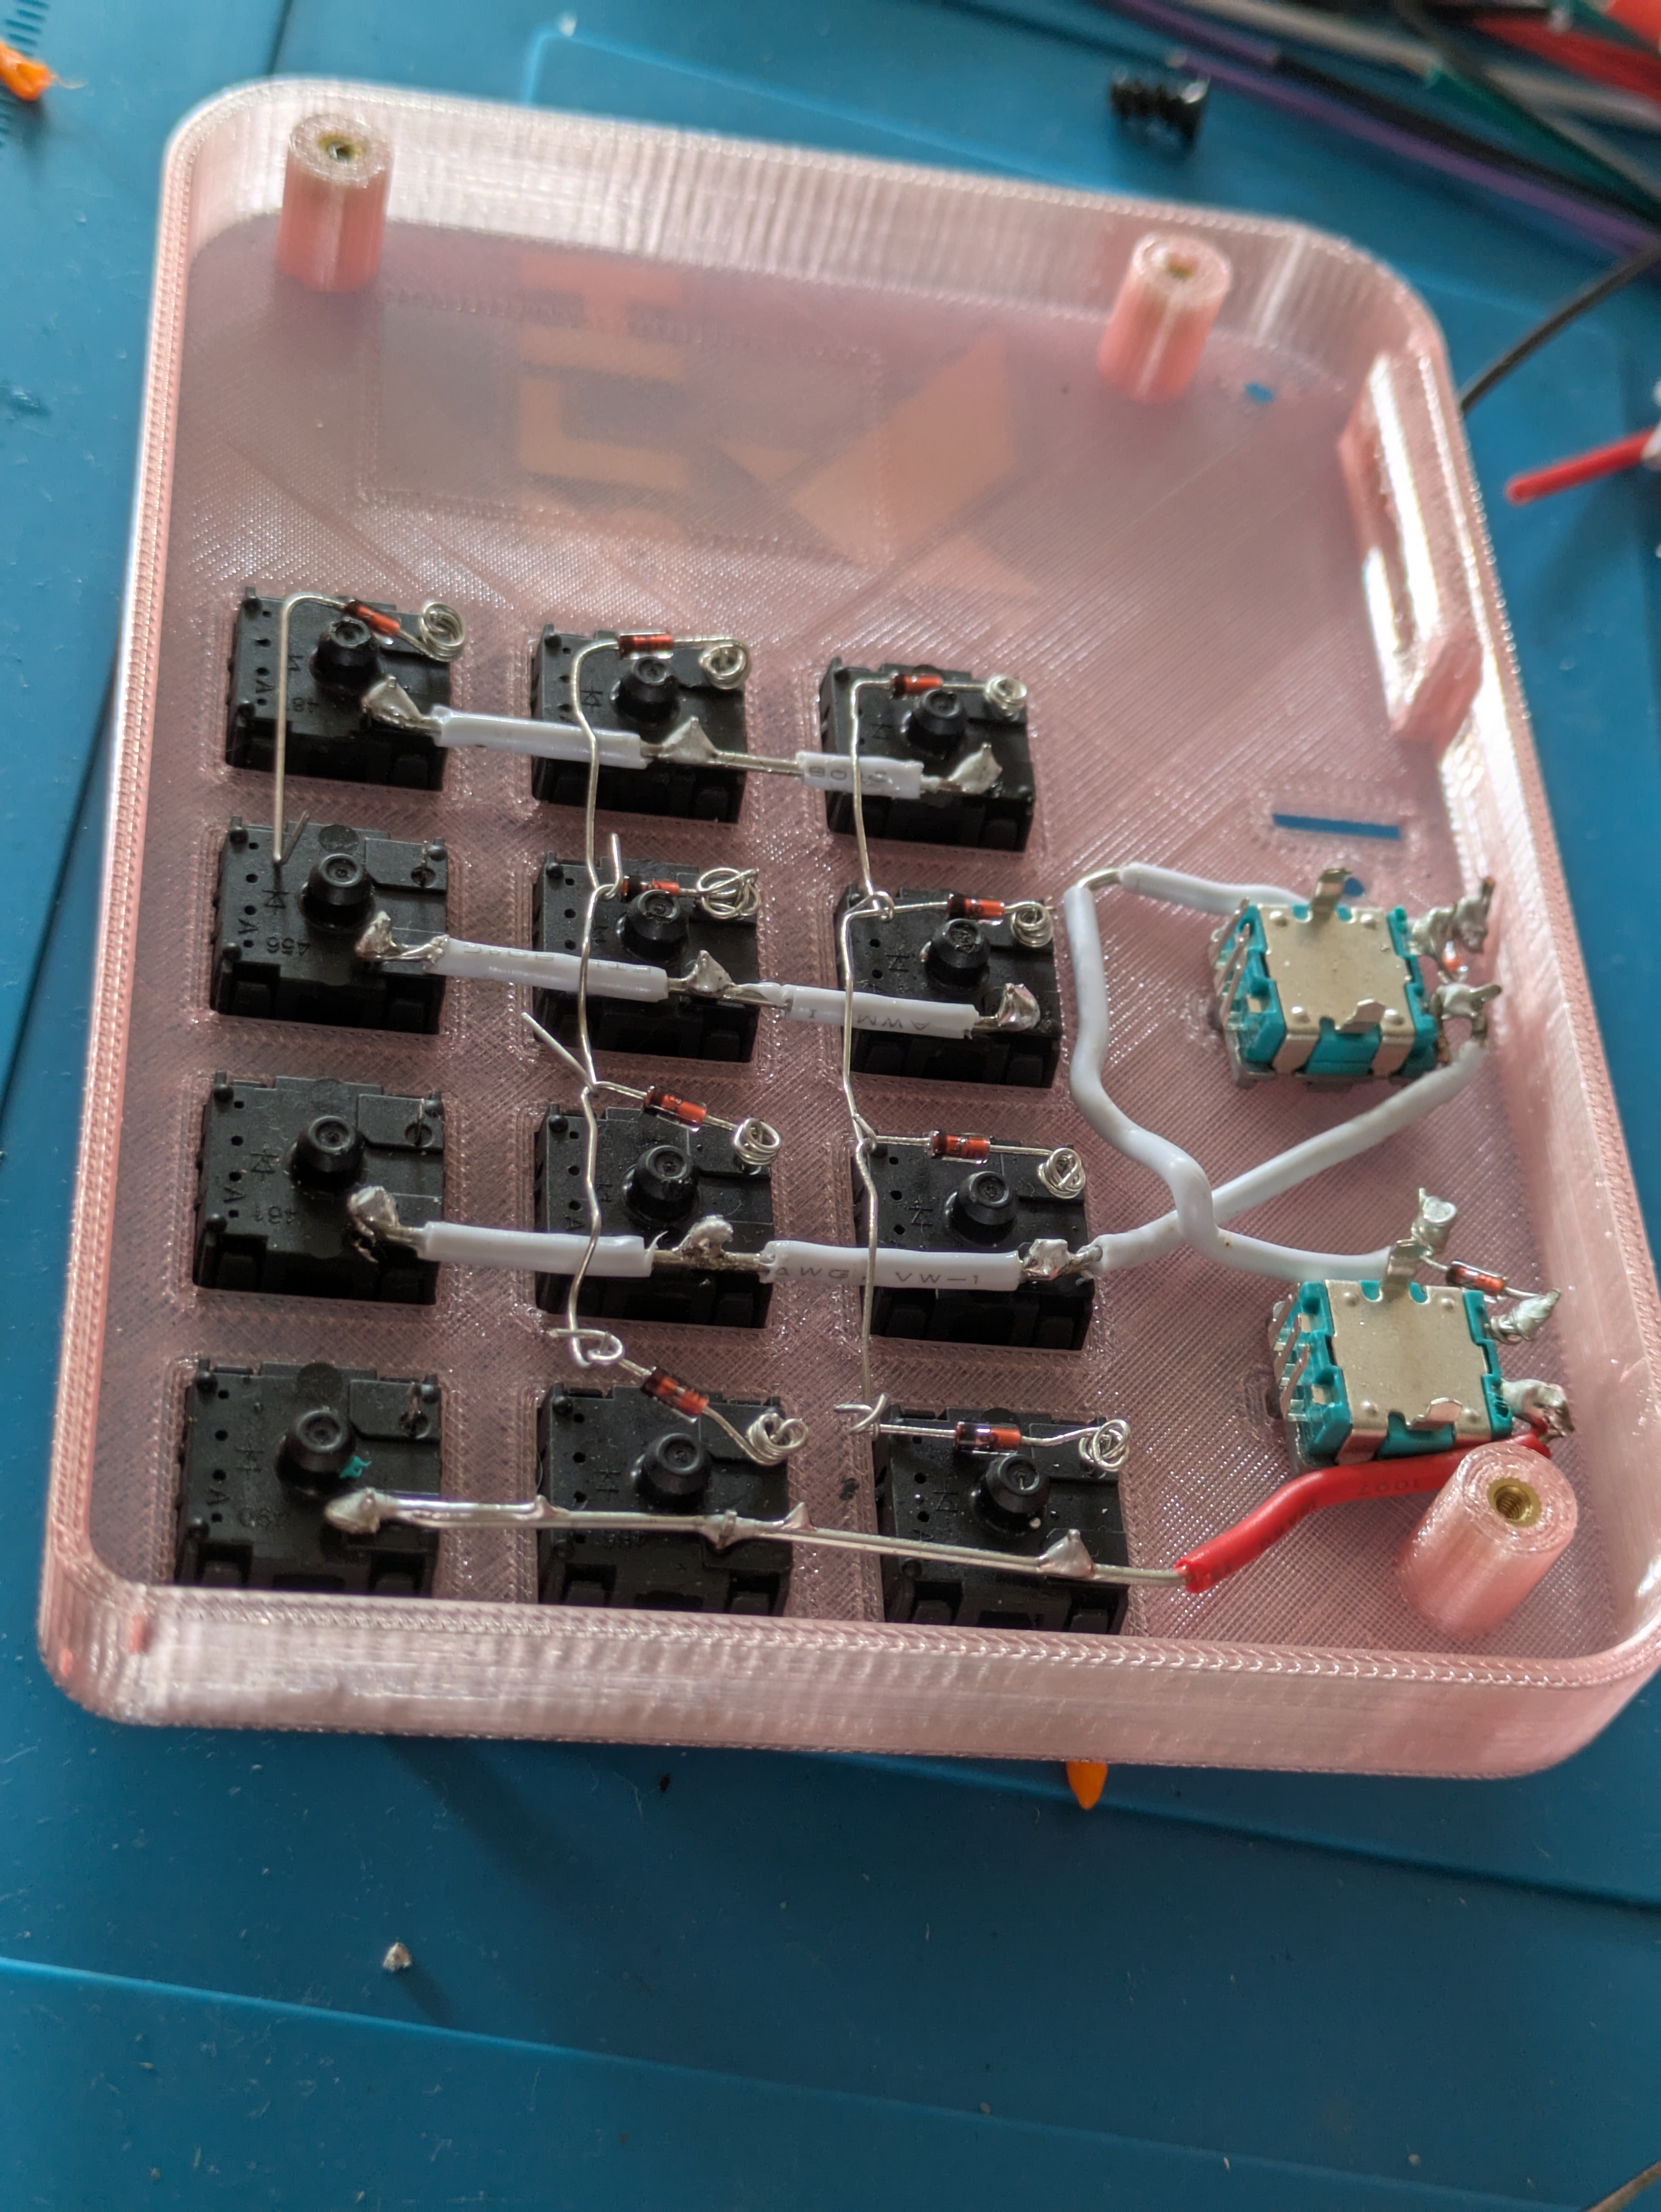 |
|
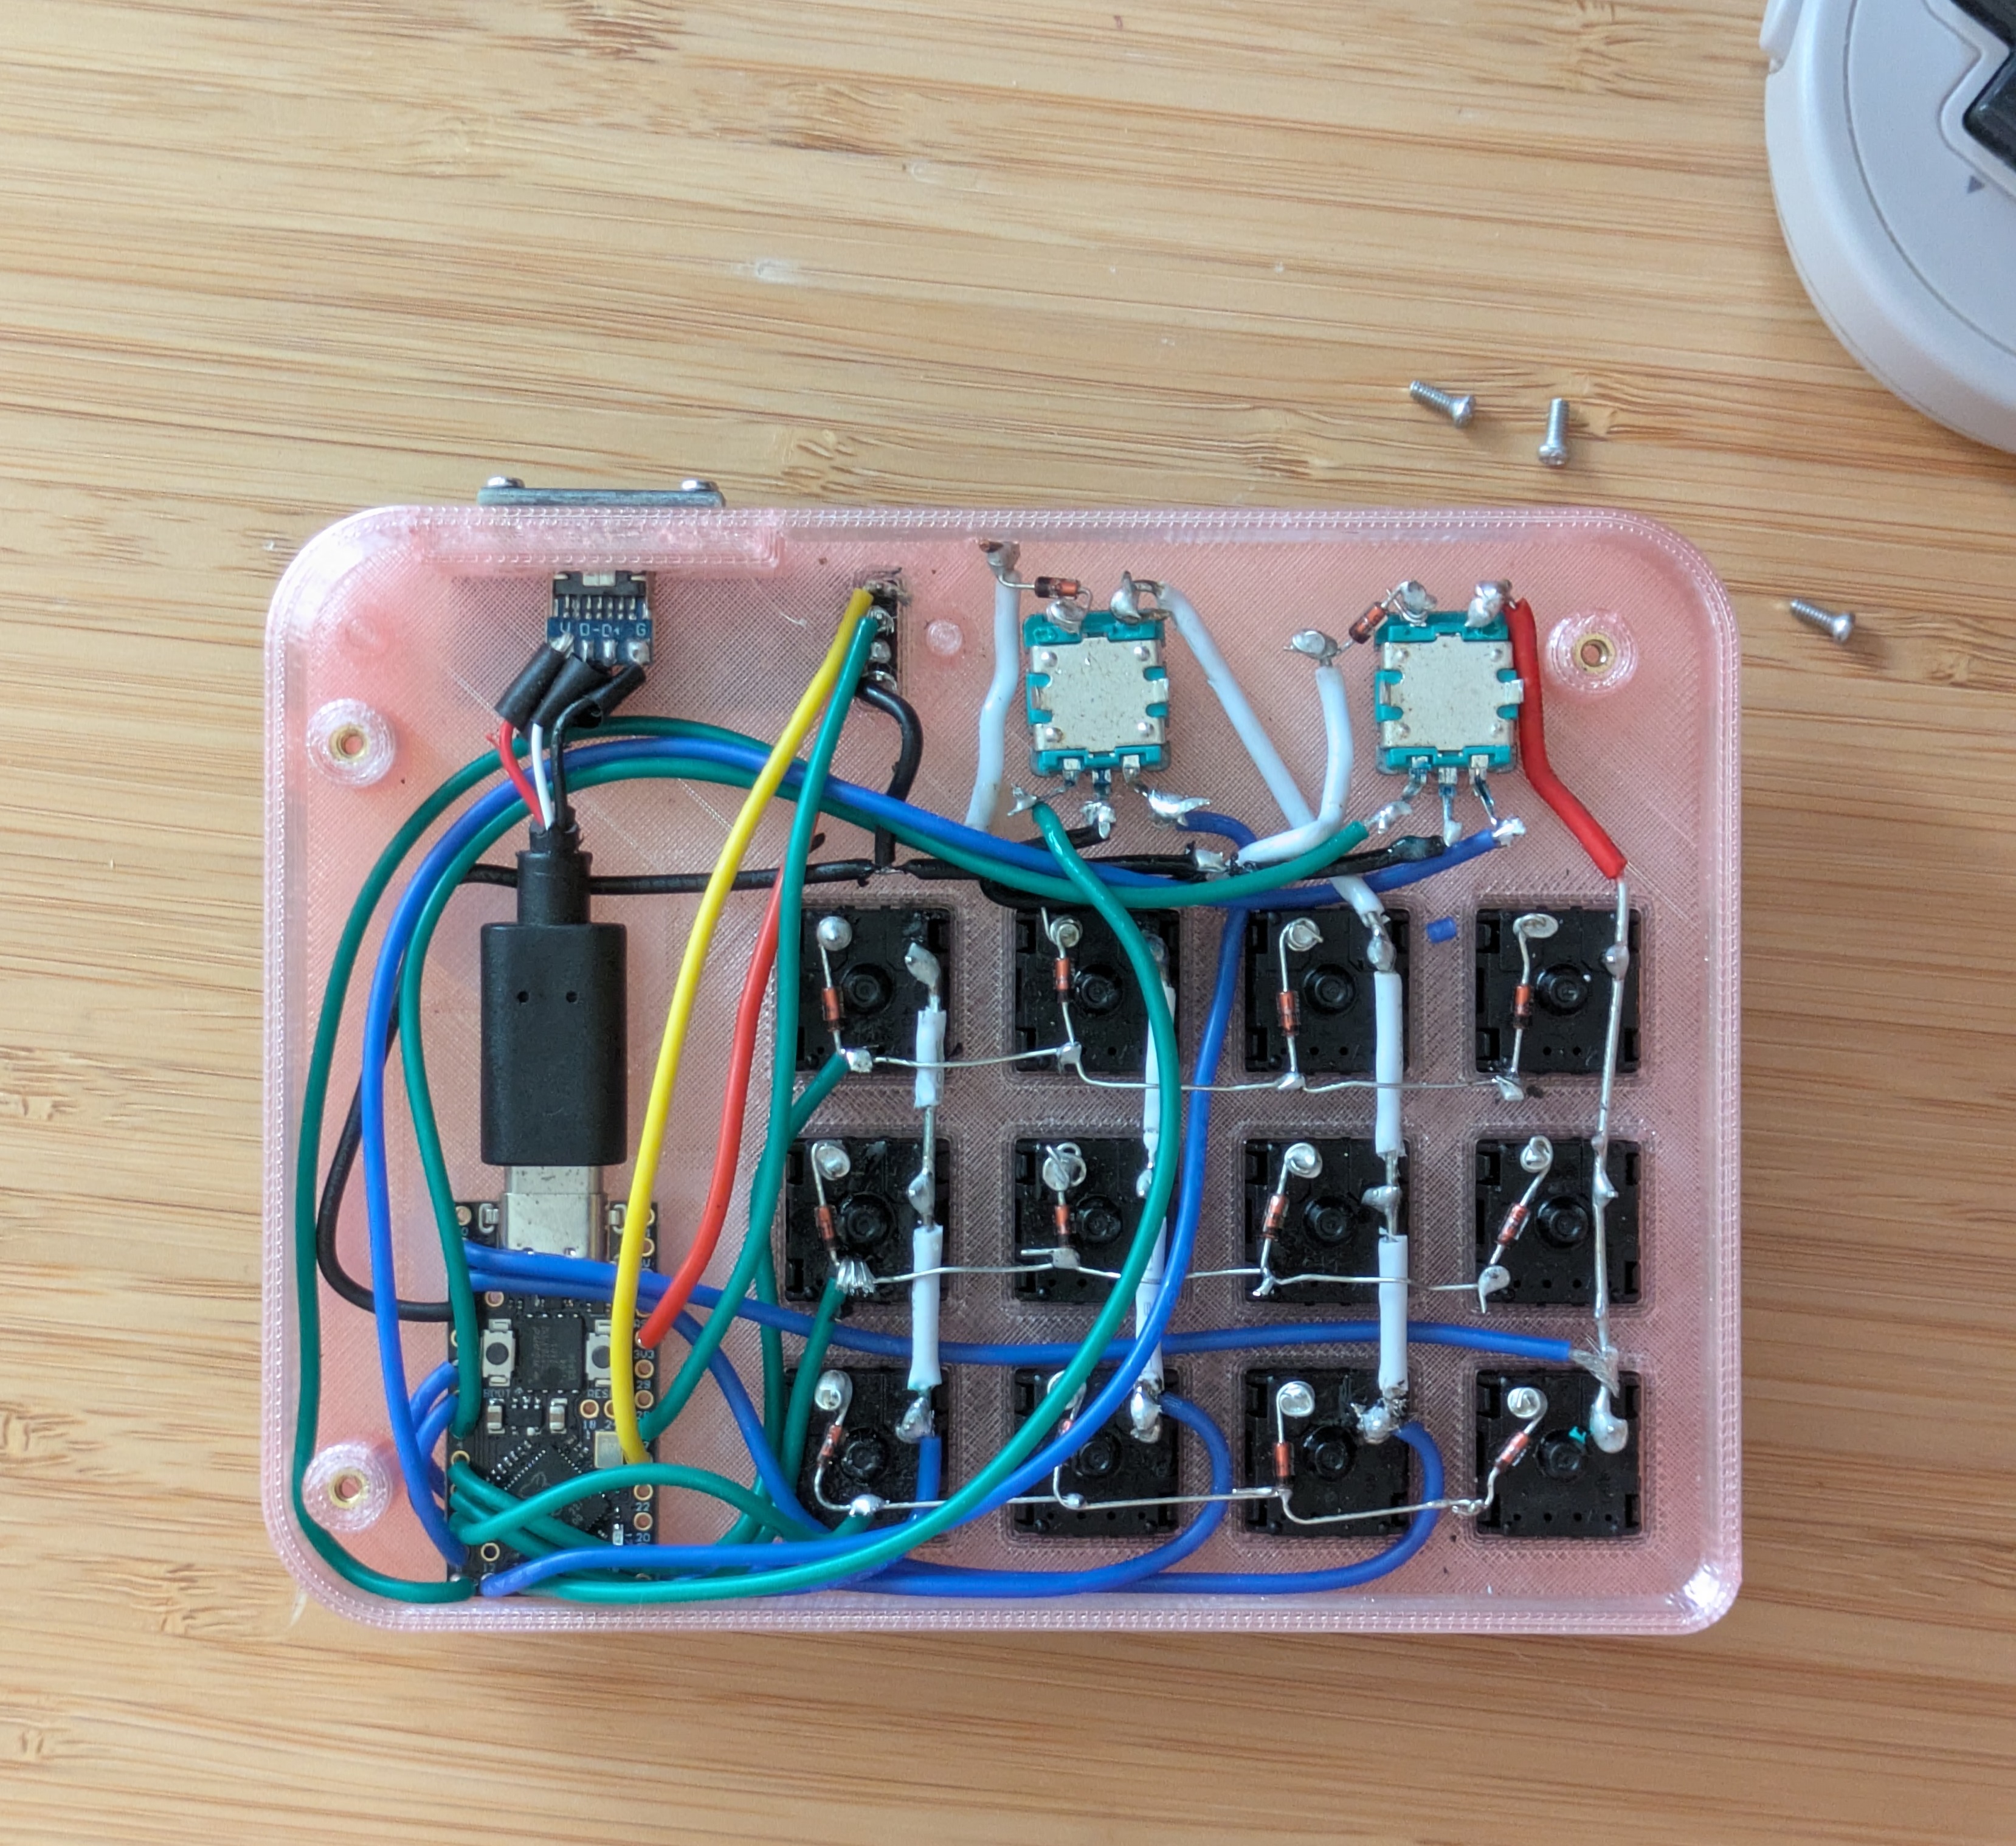 |
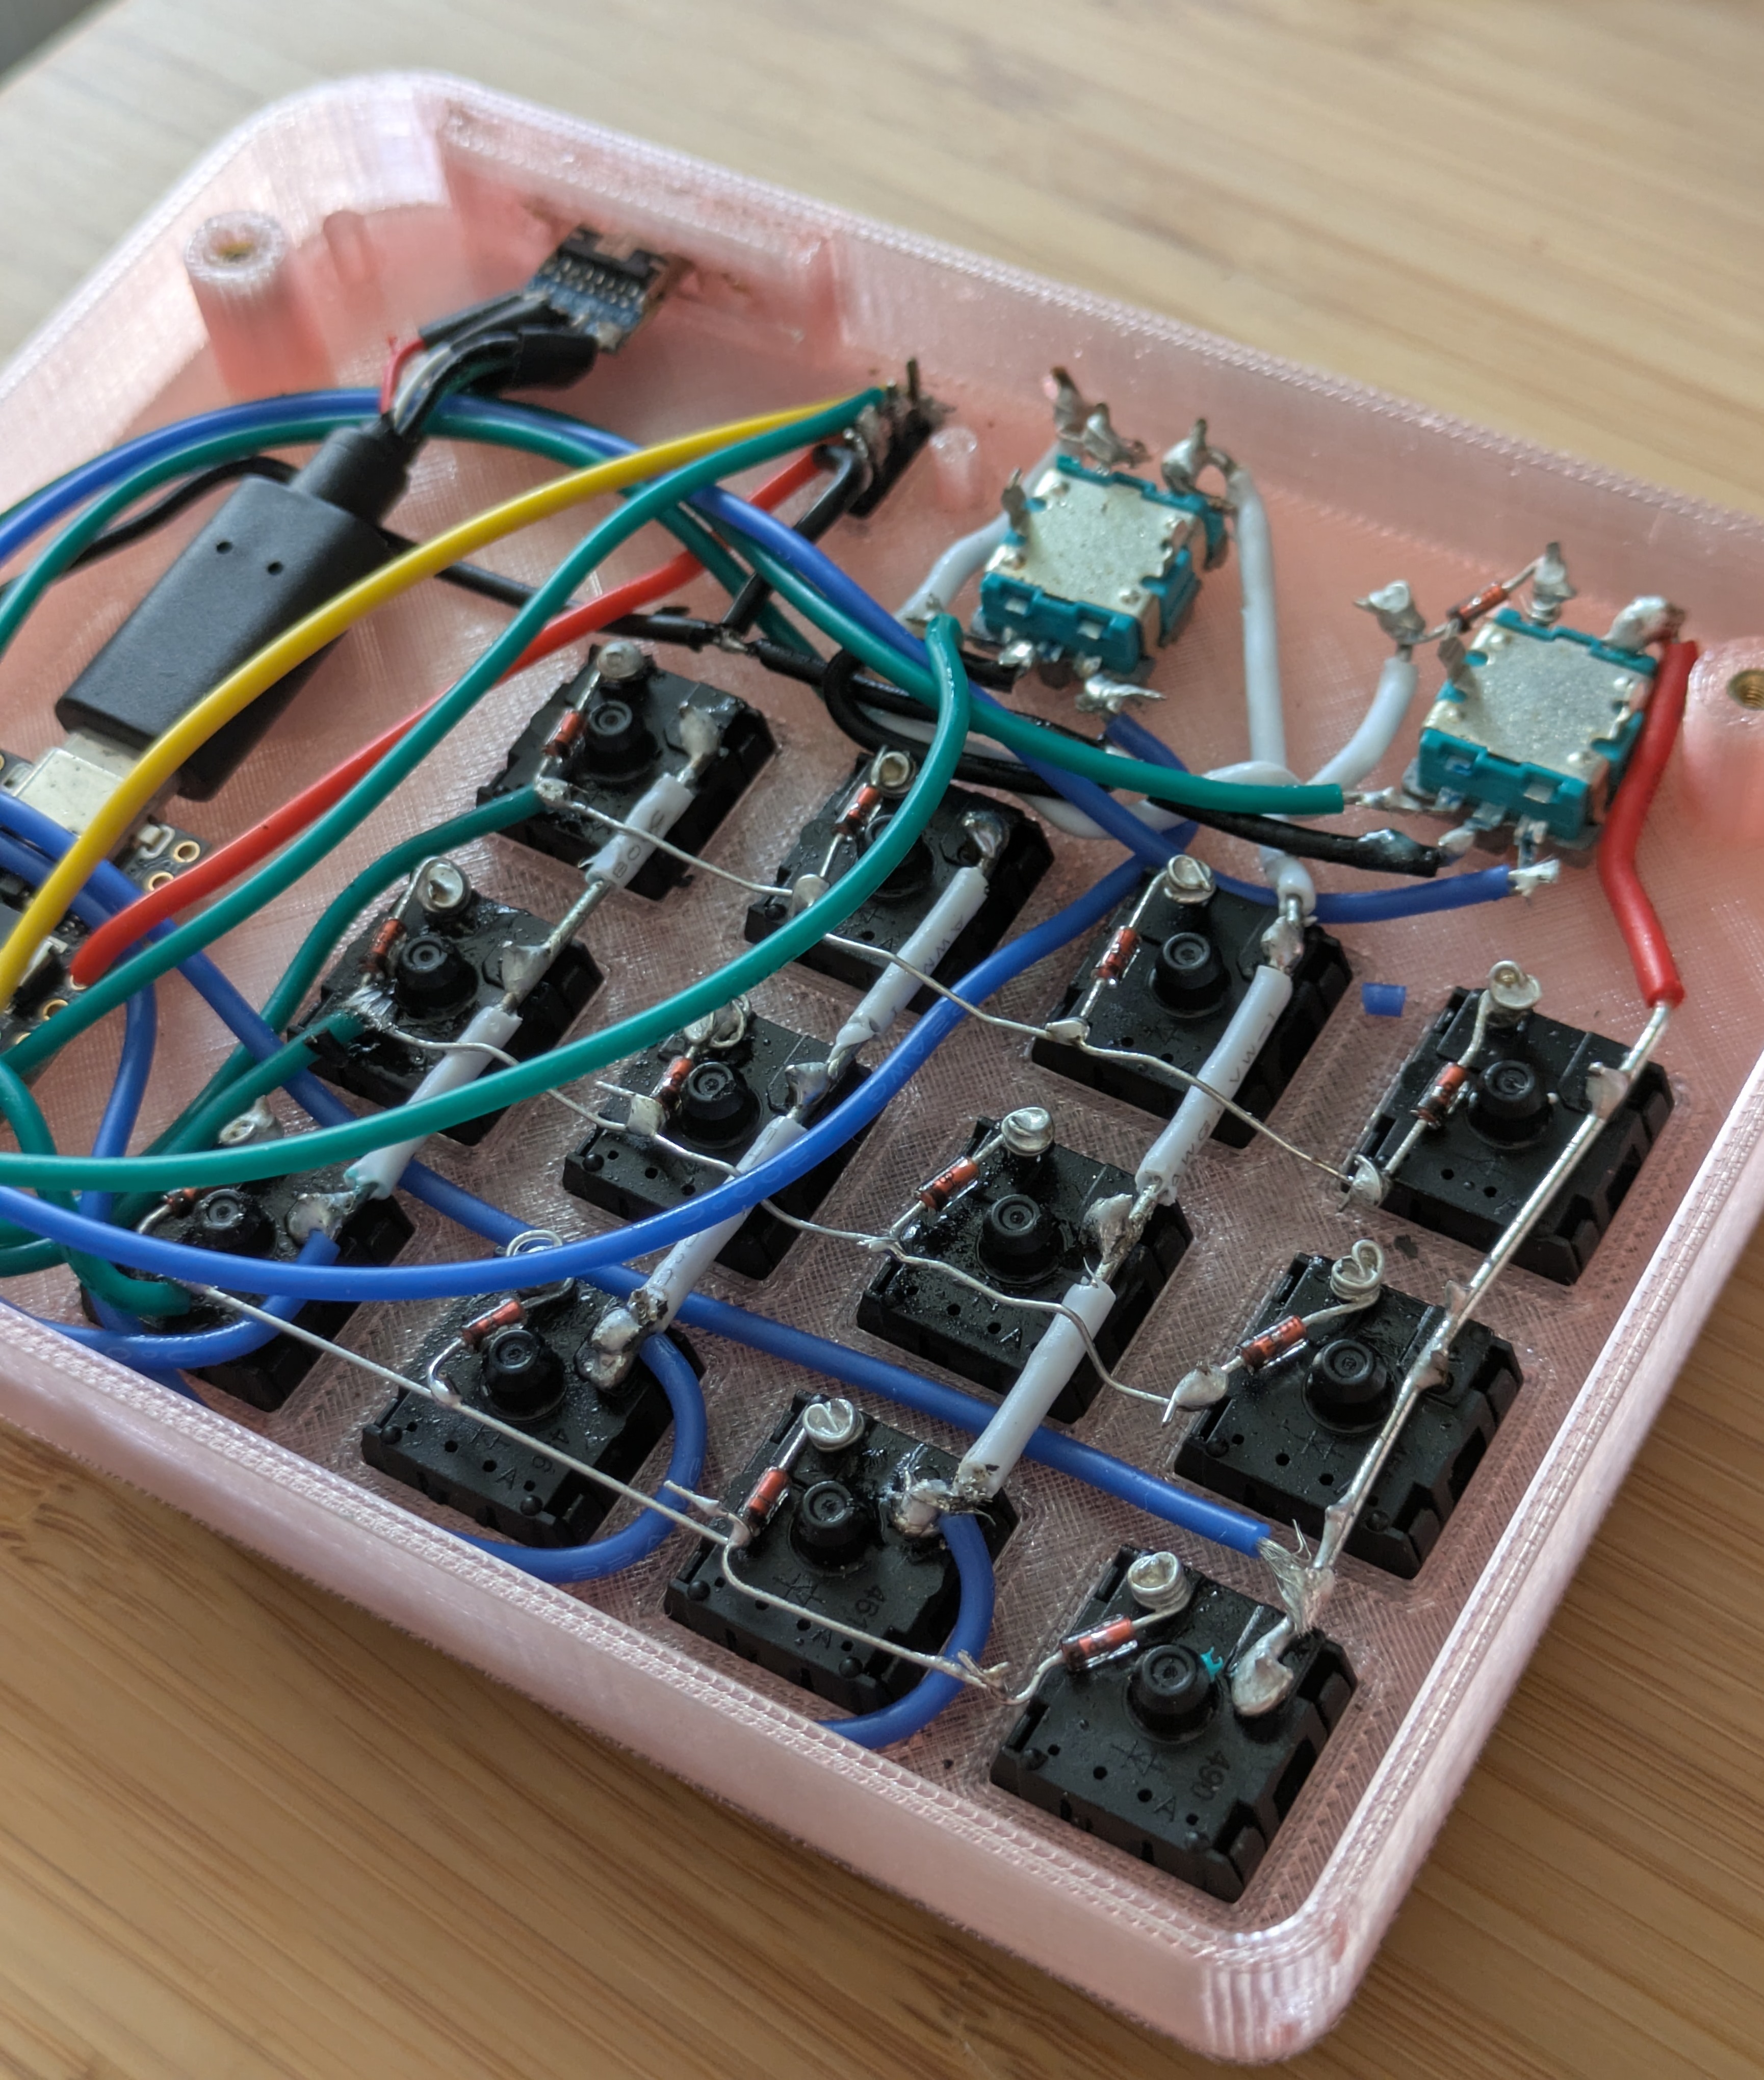
| To make the wiring more robust and easier to use day-to-day, a USB breakout module is inserted into the slot on the side of the RLH. Fix it in place with threaded heat inserts and regular M2 screws. | 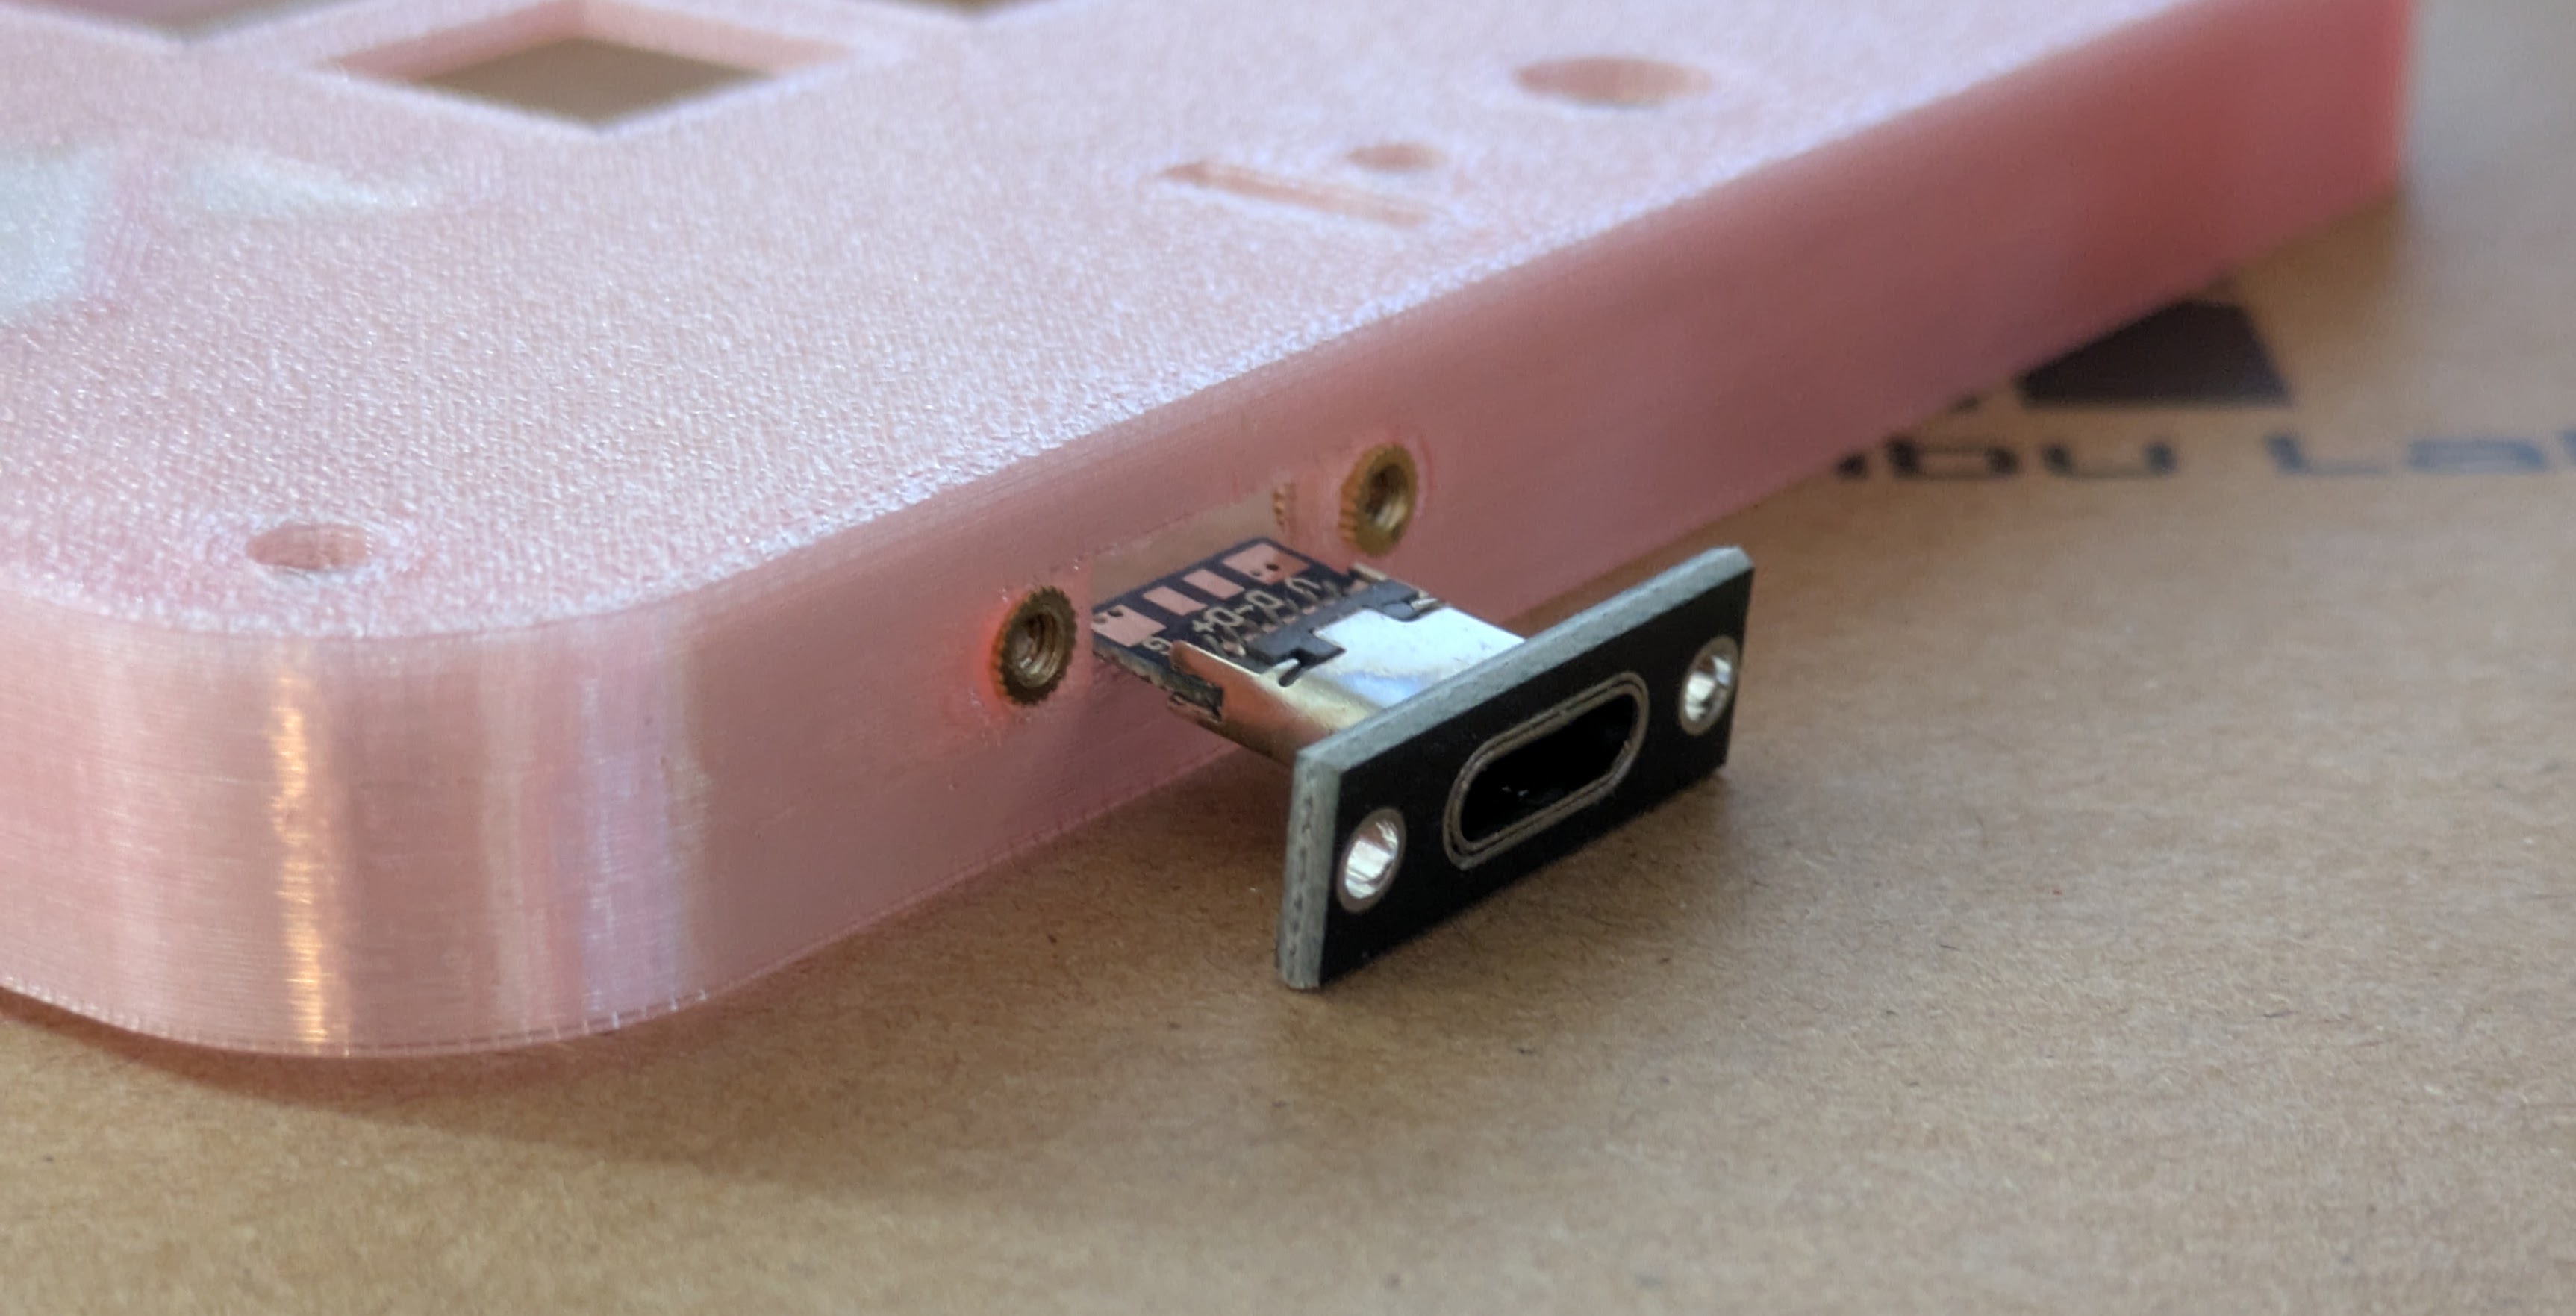 |
| In this picture, you can see that I had to use the end of a USB cable to connect the breakout connector to the MCU. I didn't have any male USB C boards on hand, but I highly recommend you to either get the ones listed in the BoM, or get a McU where the D+ and D- pins have been exposed. Piit over at 42Keebs makes the Frood microcontroller, which I highly recommend. It's cheap, has the right pins exposed, and is of super quality (I'm not affiliated with 42Keebs at all, I'm just a fan). |
 |
Customising the layout
Once printed, assembled, and soldered, it's time to start using your fancy new macropad. RLH runs on the Vial fork of QMK. If you're comfortable with QMK, you can use the provided folder to compile your own firmware. If this is your first custom keyboard, you should flash (install) the firmware provided by me. The process is super easy:
- Connect your rp2040 microcontroller to your PC via USB. It should appear for you as a USB storage device.
- Drag and drop the file rlh_vial.uf2 to the microcontroller's storage (the folder that popped up as you plugged in the controller)
- That's it! Well done! It should now be recognised by Vial.
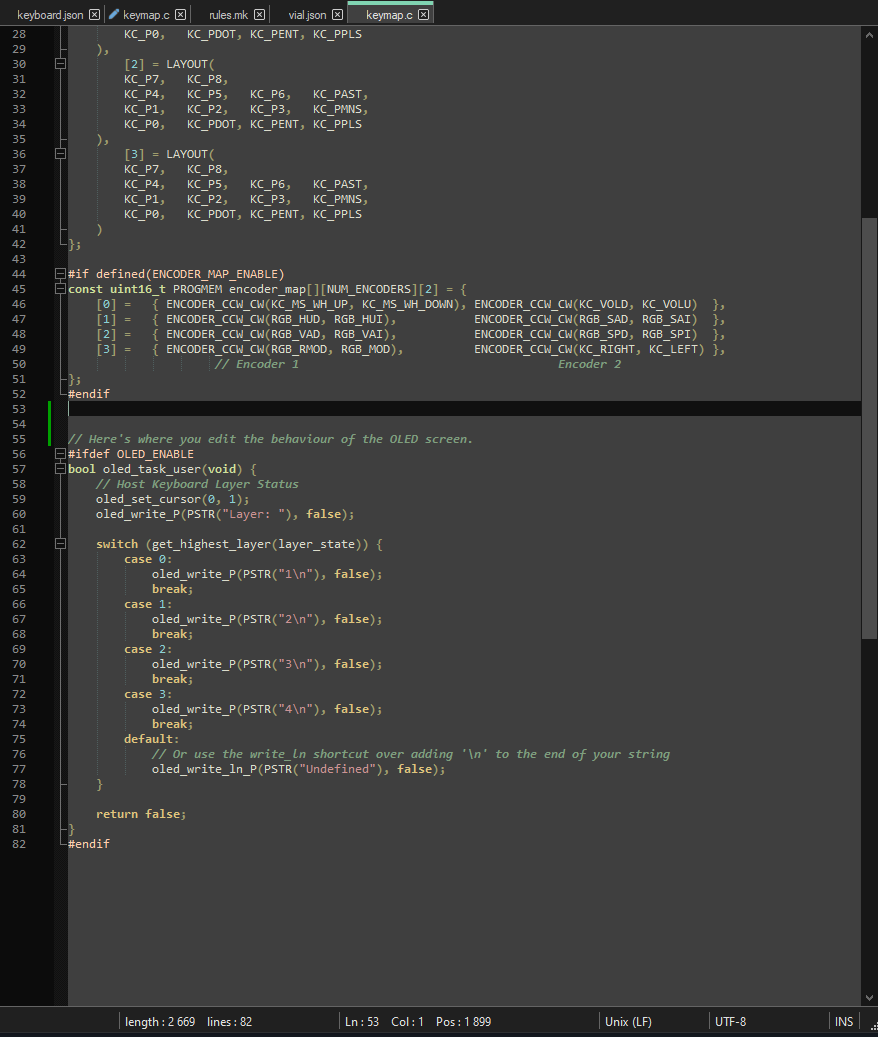
(note: you can only change the behaviour of the OLED display from keymaps/vial/keymap.c).
|  |
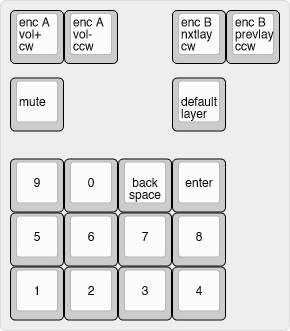
The default keymap in the provided firmware looks like this.
It is just a placeholder that you can use to check that you have wired everything correctly. To make your own layout, use Vial. Vial is a graphical interface for reprogramming keyboards in real time. The changes you make to RLH in Vial take effect instantly; no need to flash any new firmware. By default, the OLED display shows which layer is currently active. You can make the screen do cool and useful things, but that's beyond the scope of this project.
I hope you give this project a try, and I hope it's as fun for you as it has been for me!
Note: the keycaps used in one of the photos comes from @Riskable over on Printables
RLH - Handwired customizeable macropad

Publicado em 4 de ago de 2025
Gostou deste modelo? Crie uma conta grátis para salvar seus favoritos e voltar a eles depois.
Criar conta