Você está no 3DFinder
Buscamos em Thingiverse, MakerWorld e Printables ao mesmo tempo para te dar o melhor de cada uma.
Descrição
Specification
Herb/Plant/Leaf Dryer for drying your favorite plants without having to worry about the wind blowing them away.
It has place for two drying plates (~180mm x 224mm) with 50mm distance between them.
In total the enclosure requires 205mm x 240mm x 120mm space.
Customization (OPTIONAL)
The hole patterns present on each object (left/right/front/back inserts, drying plates, top) are customizable in the print profile by the following method:
In the ‘Process’ tab switch to ‘Objects' view:

Select any object that you'd like to change the pattern for, example: HorizontalInsert_v2.step:
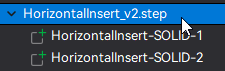
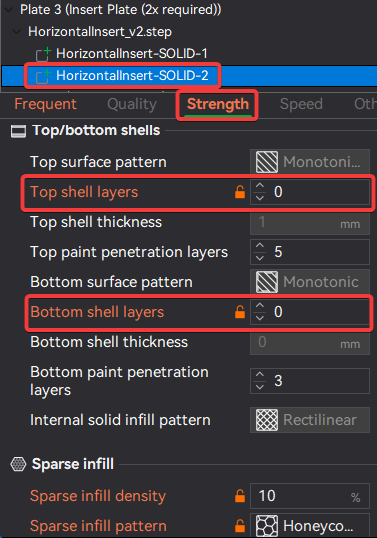
Select the part of the object that has 0 Top and Bottom Shell Layers in the Strength tab:
Update either the ‘Sparse infill density’ or/and the ‘Sparse infill pattern’ to your liking, for example:
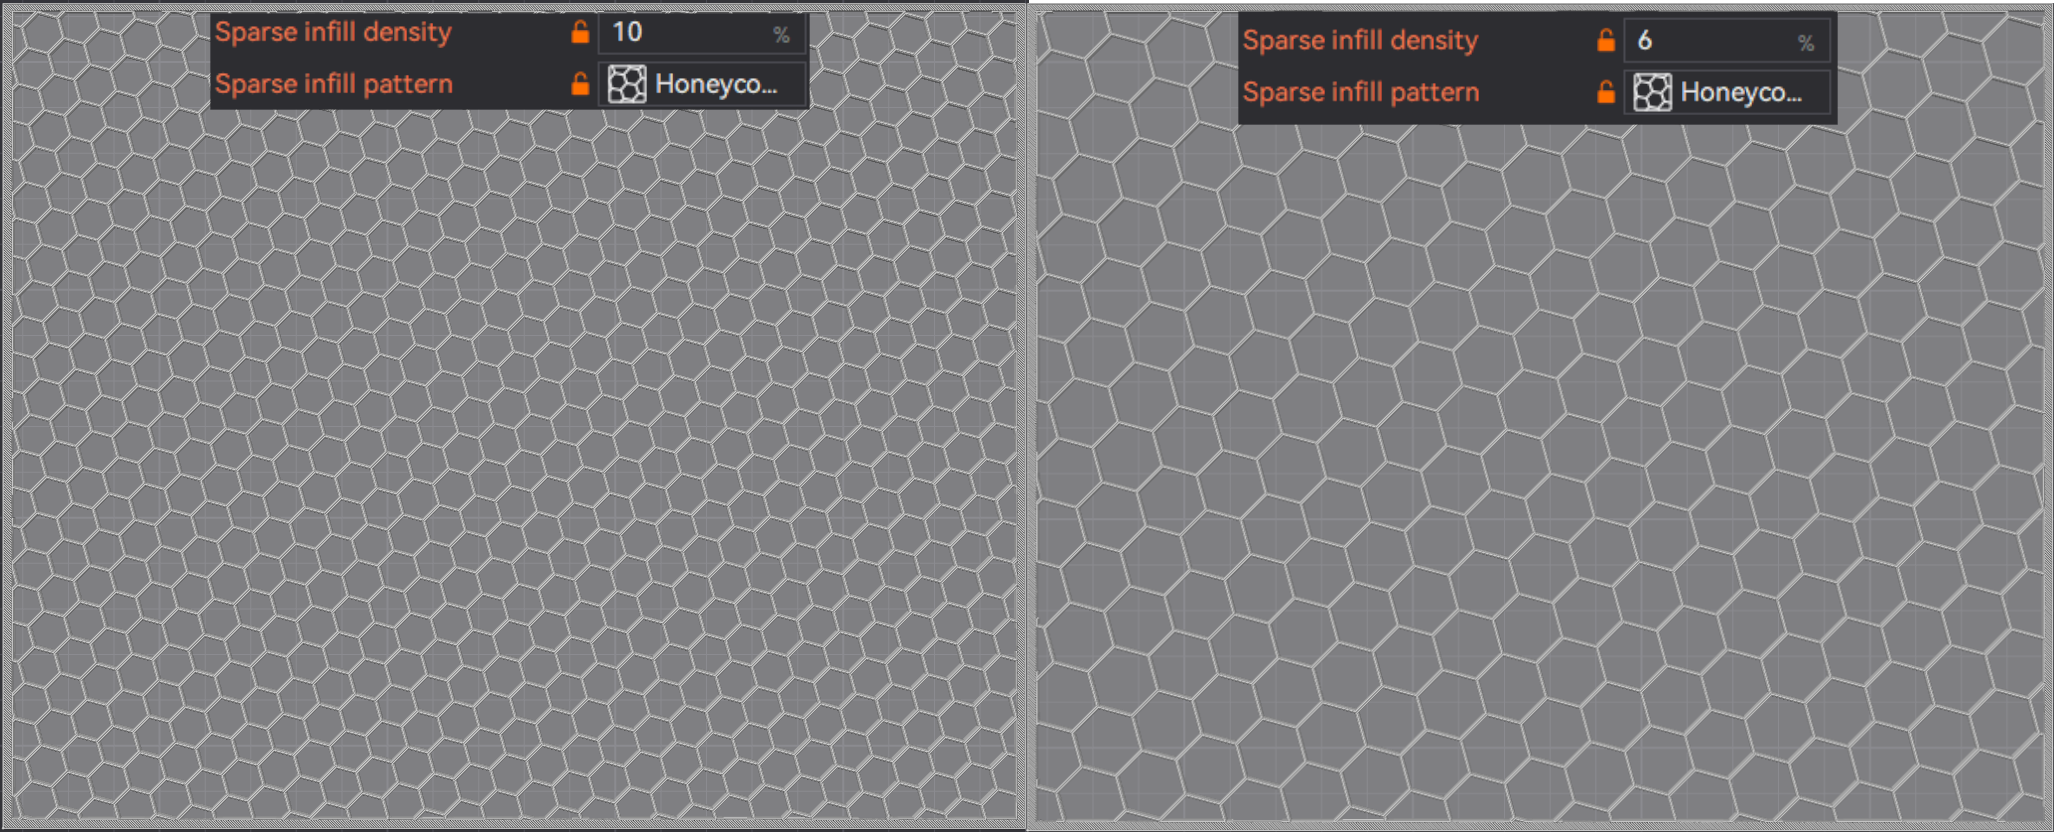
Honeycomb 10% and 6% infill
You can try other sparse infill patterns, but make sure enough light can get through, no part of the infill is floating (like an island, which would detach when removing from plate), and the infill offers enough strength.
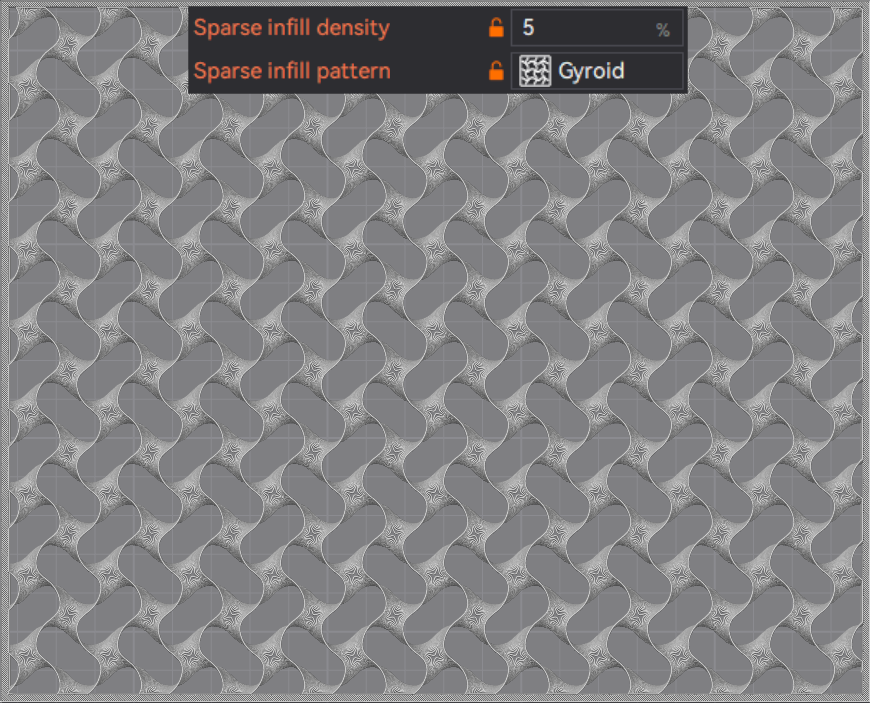
If you find some nice patterns that work well, feel free to upload a print profile.
Printing and assembly
If you're planning to use this outdoors, please consider using UV and temperature resistant filament. I used BASF Ultrafuse PET, but any PETG/ASA or other material should work fine.
Assembly:
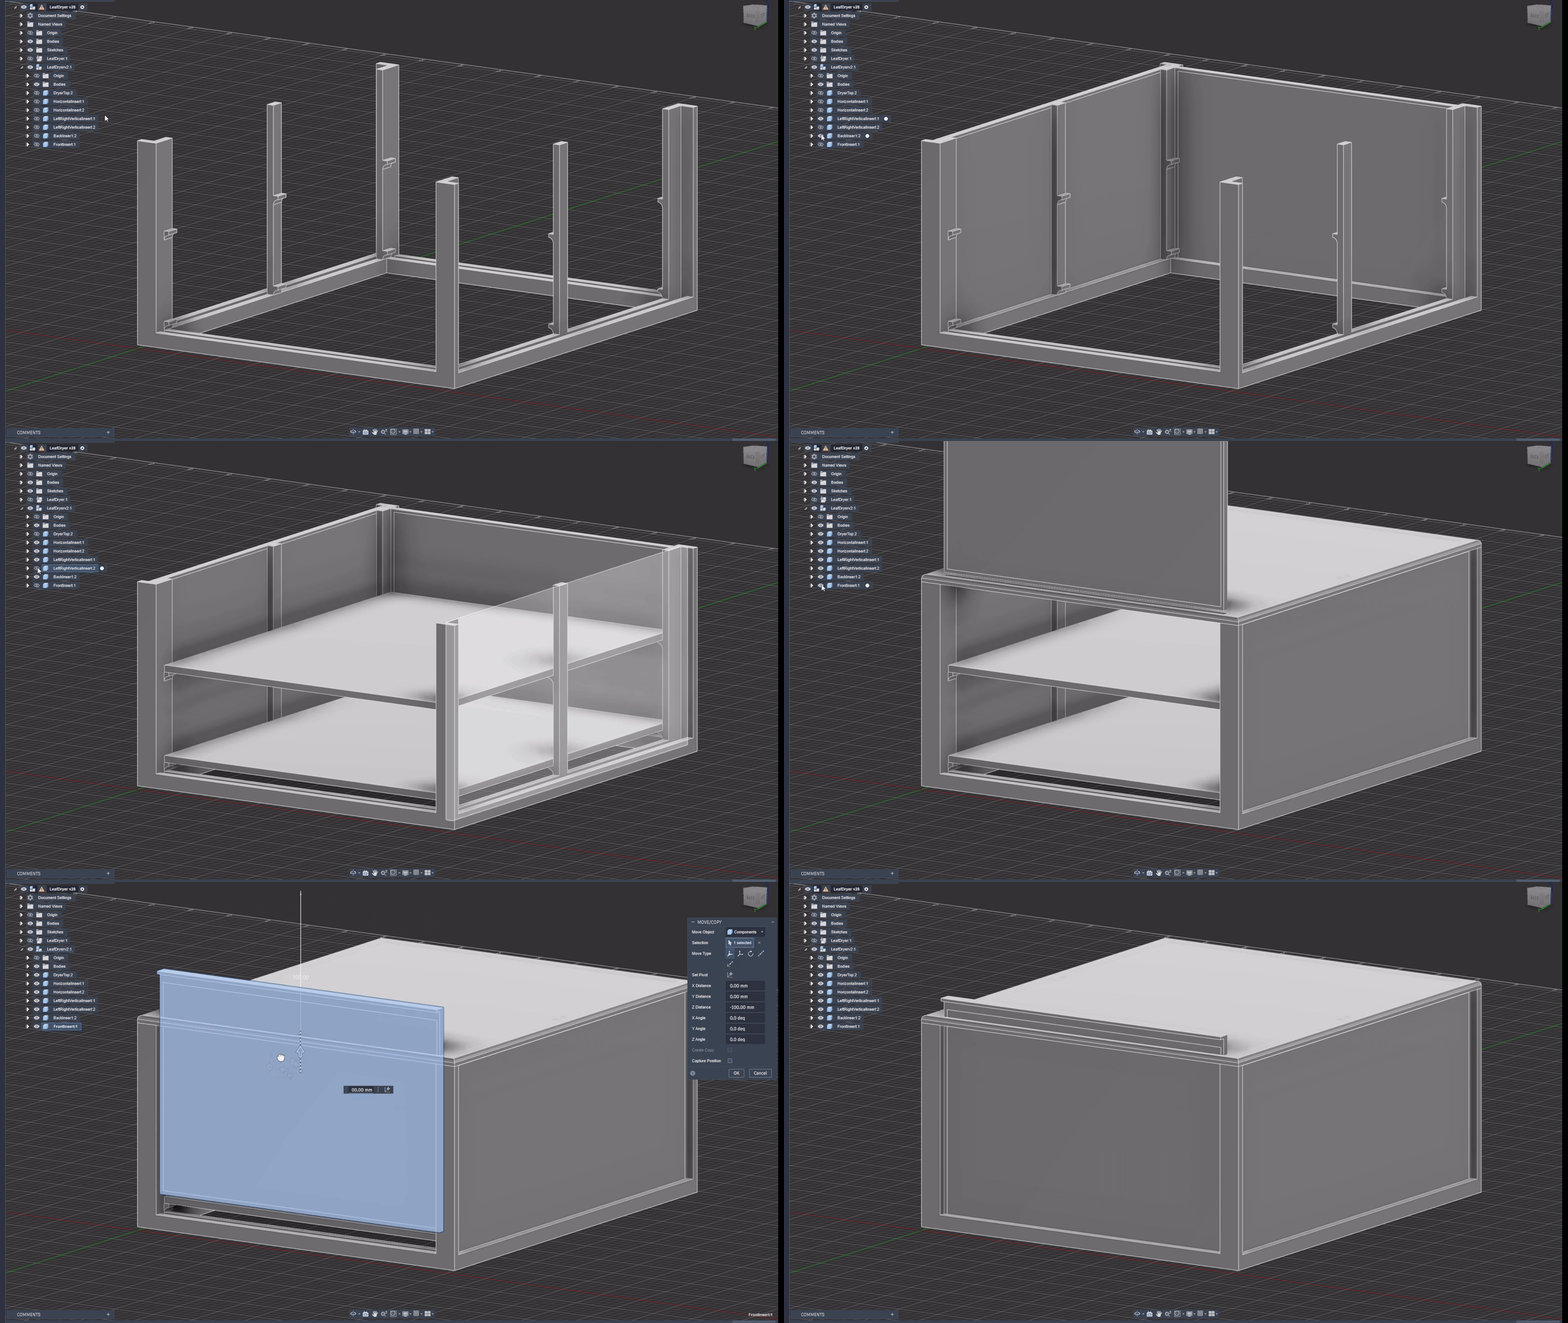
- Slide the left, right and back insert plates into the skeleton.
- Add super glue (or anything that works with your filament) to the top of the skeleton where it connects with the top, attach the top and wait for it to dry.
- Slide in the drying plates (make sure they go all the way back, here you may have to lift the back part of the plate when inserting).
- Slide in your herbs.
- Complete the enclosure by sliding in the front insert plate until it clicks into place.
Known problems / Possible improvements
Avoiding superglue:
- You can cut the SkeletonAndTopJoined_ForCuttingInSlicer.step (see uploaded files) model in your slicer and add your preferred connectors, I had problems with the Plug→Prizm connectors breaking (they were a little tight, and broke of because of the print orientation), that's why I went with Plug→Frustum connectors for the uploaded version (which may be too lose).
- If you're happy with the connectors, please feel to upload it as a print profile, so others can use it too.
Plant/Herb Drying Rack (Box)

Publicado em 29 de jul de 2025
Gostou deste modelo? Crie uma conta grátis para salvar seus favoritos e voltar a eles depois.
Criar conta