Você está no 3DFinder
Buscamos em Thingiverse, MakerWorld e Printables ao mesmo tempo para te dar o melhor de cada uma.
Descrição
MODEL IS DEPRECATED
New BreezeBuddy Max available here: BreezeBuddy Max
Breeze Buddy Pro
Are you tired of endless sweating, or do you need to cool down your hot soup?
If that's the case, the Breeze Buddy Pro is your buddy!
After discovering several flaws in the original Breeze Buddy, I have decided to revolutionize the world with the Breeze Buddy Pro.
Breeze Buddy Pro comes with several new features, including improved airflow:
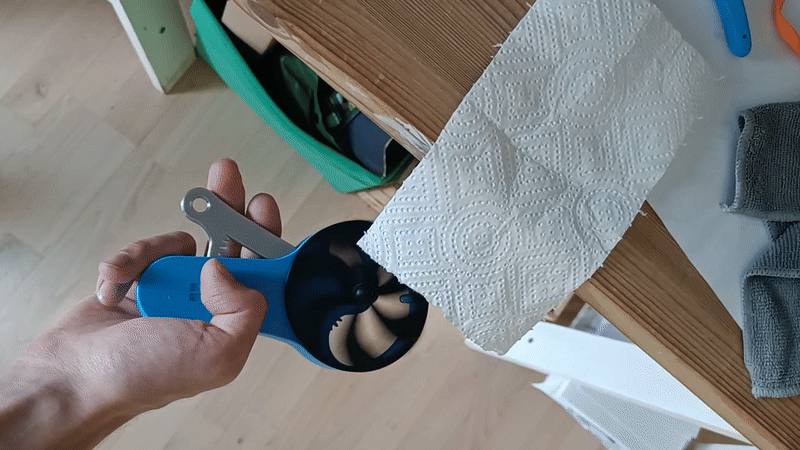
Breeze Buddy Pro also comes with a spring and clutch mechanism, enabling it to spin freely while not pressing the handle.
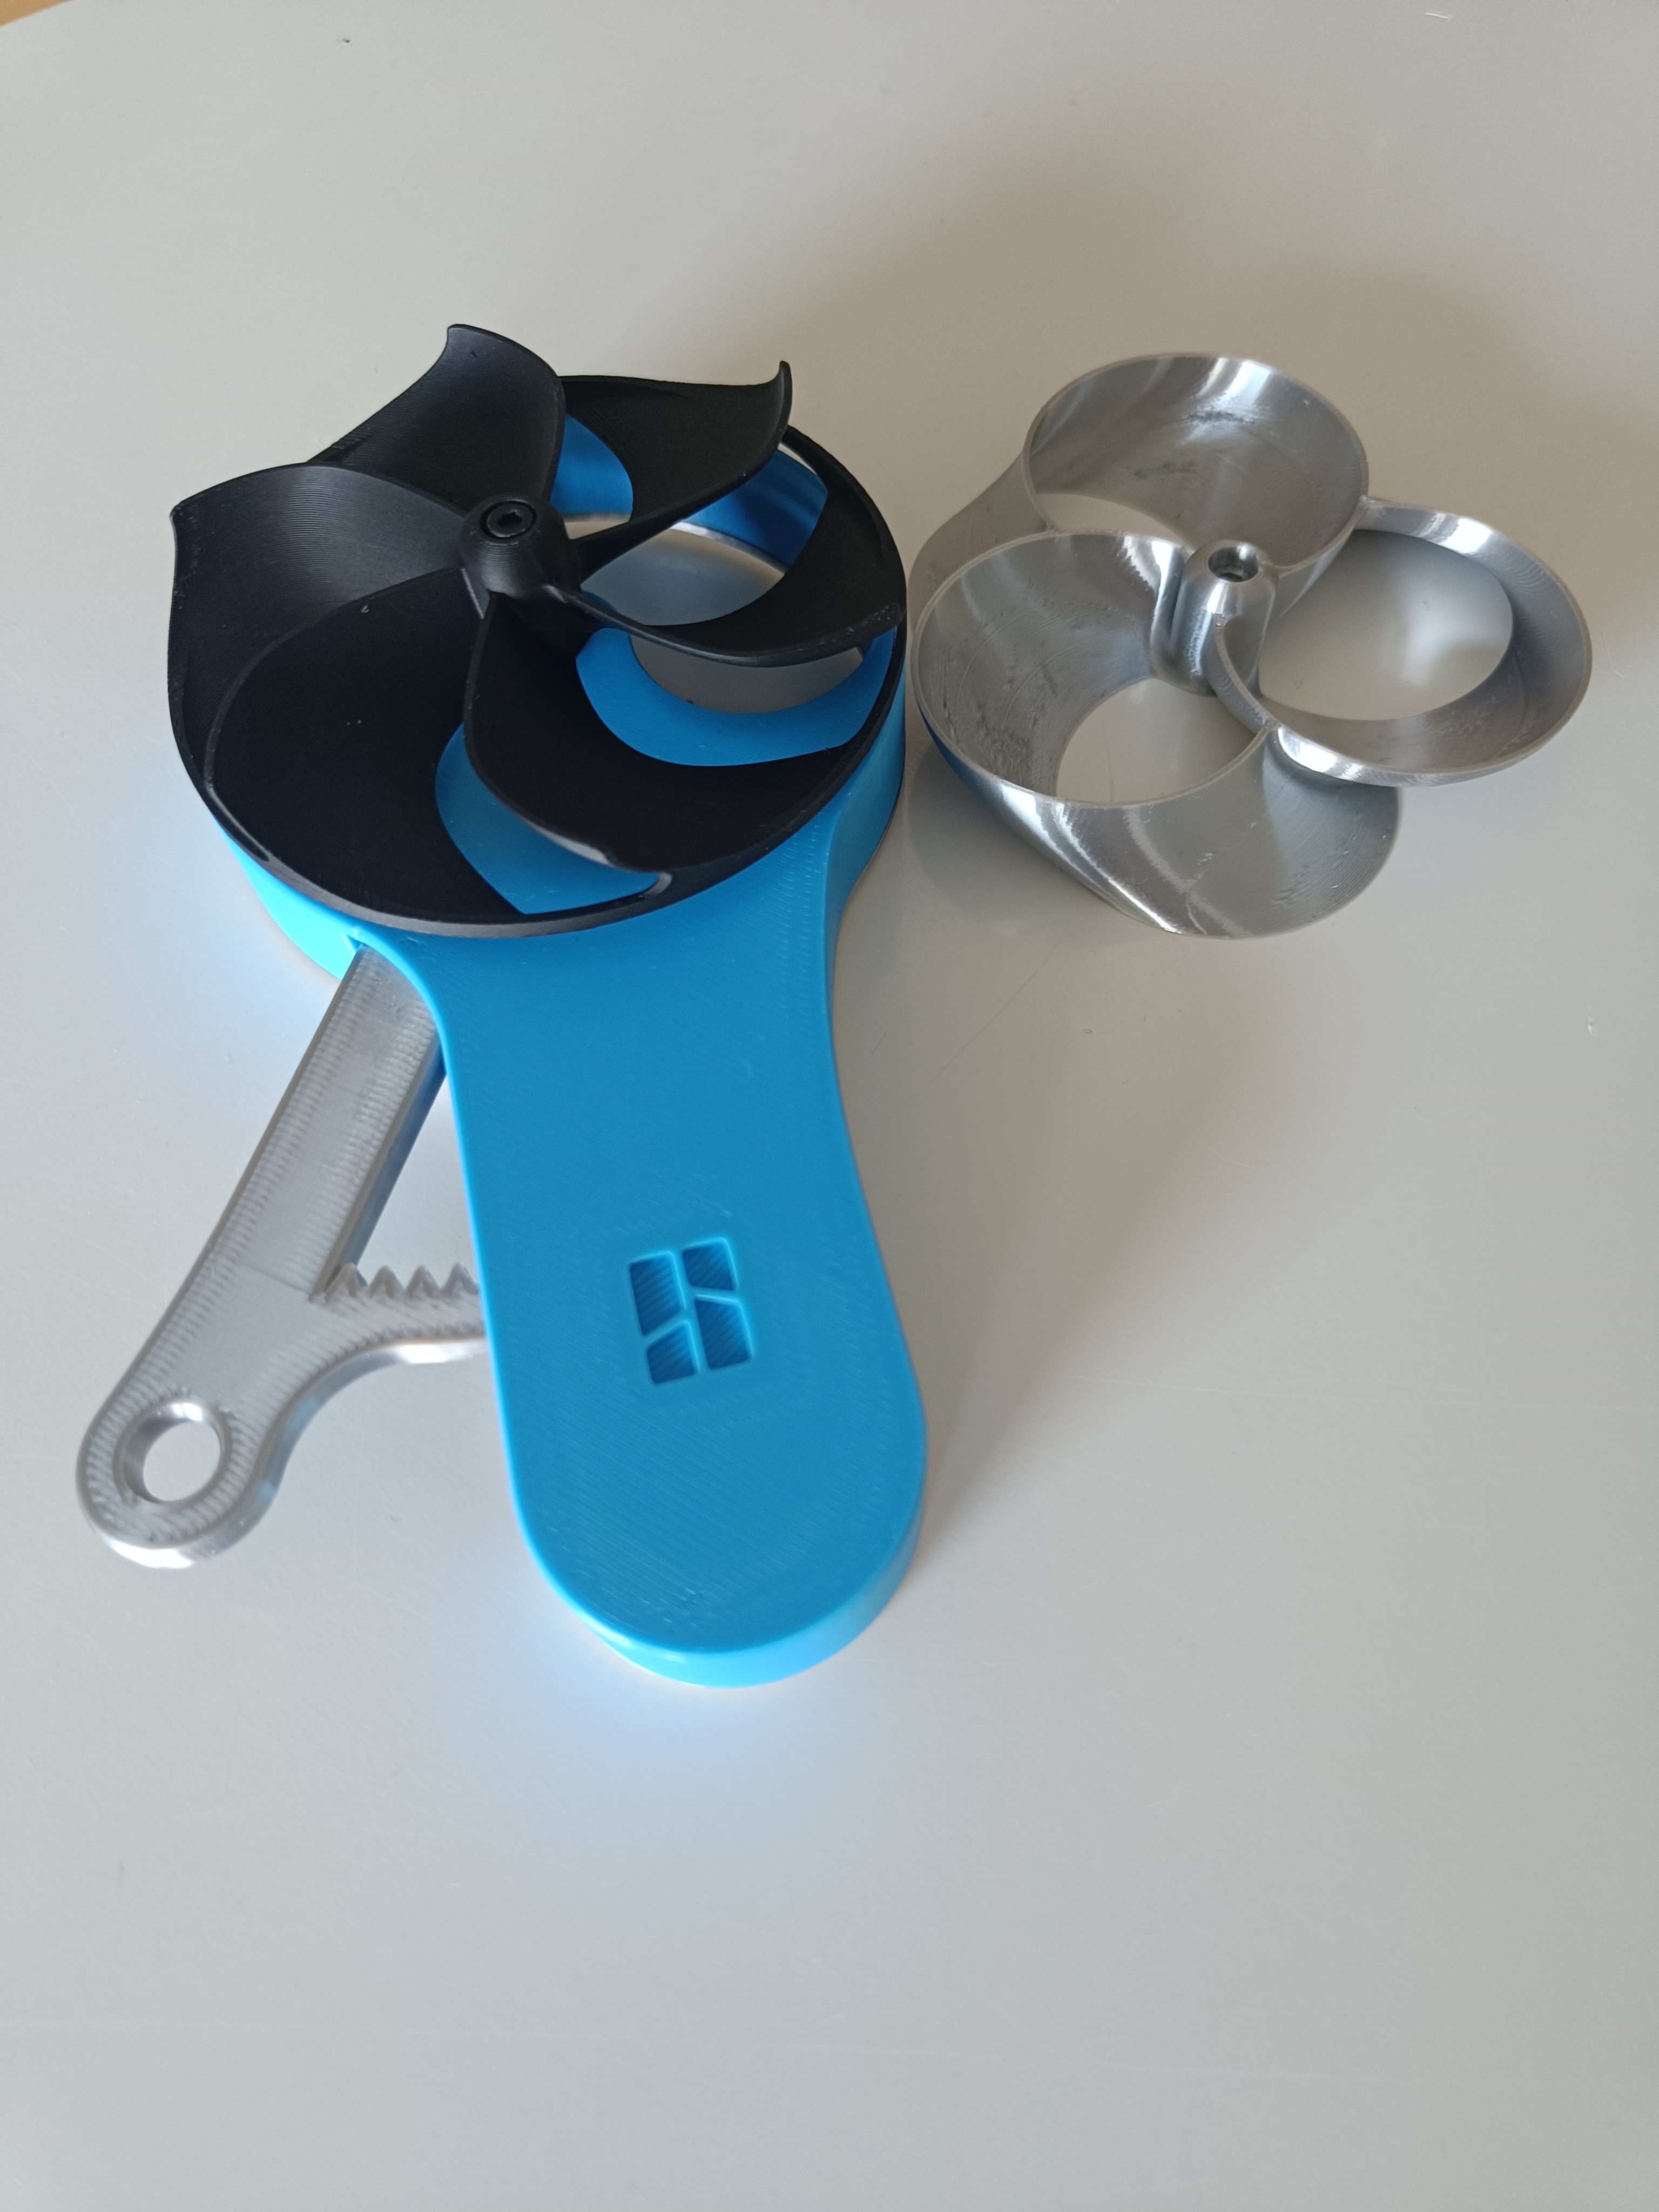
You can switch out the propeller with the compatible Toroidal Propeller if you want to switch up the looks.
At last, the Breeze Buddy Pro is tested with hours of usage and 15 minutes of continuous pressing, making it durable for everyday use.
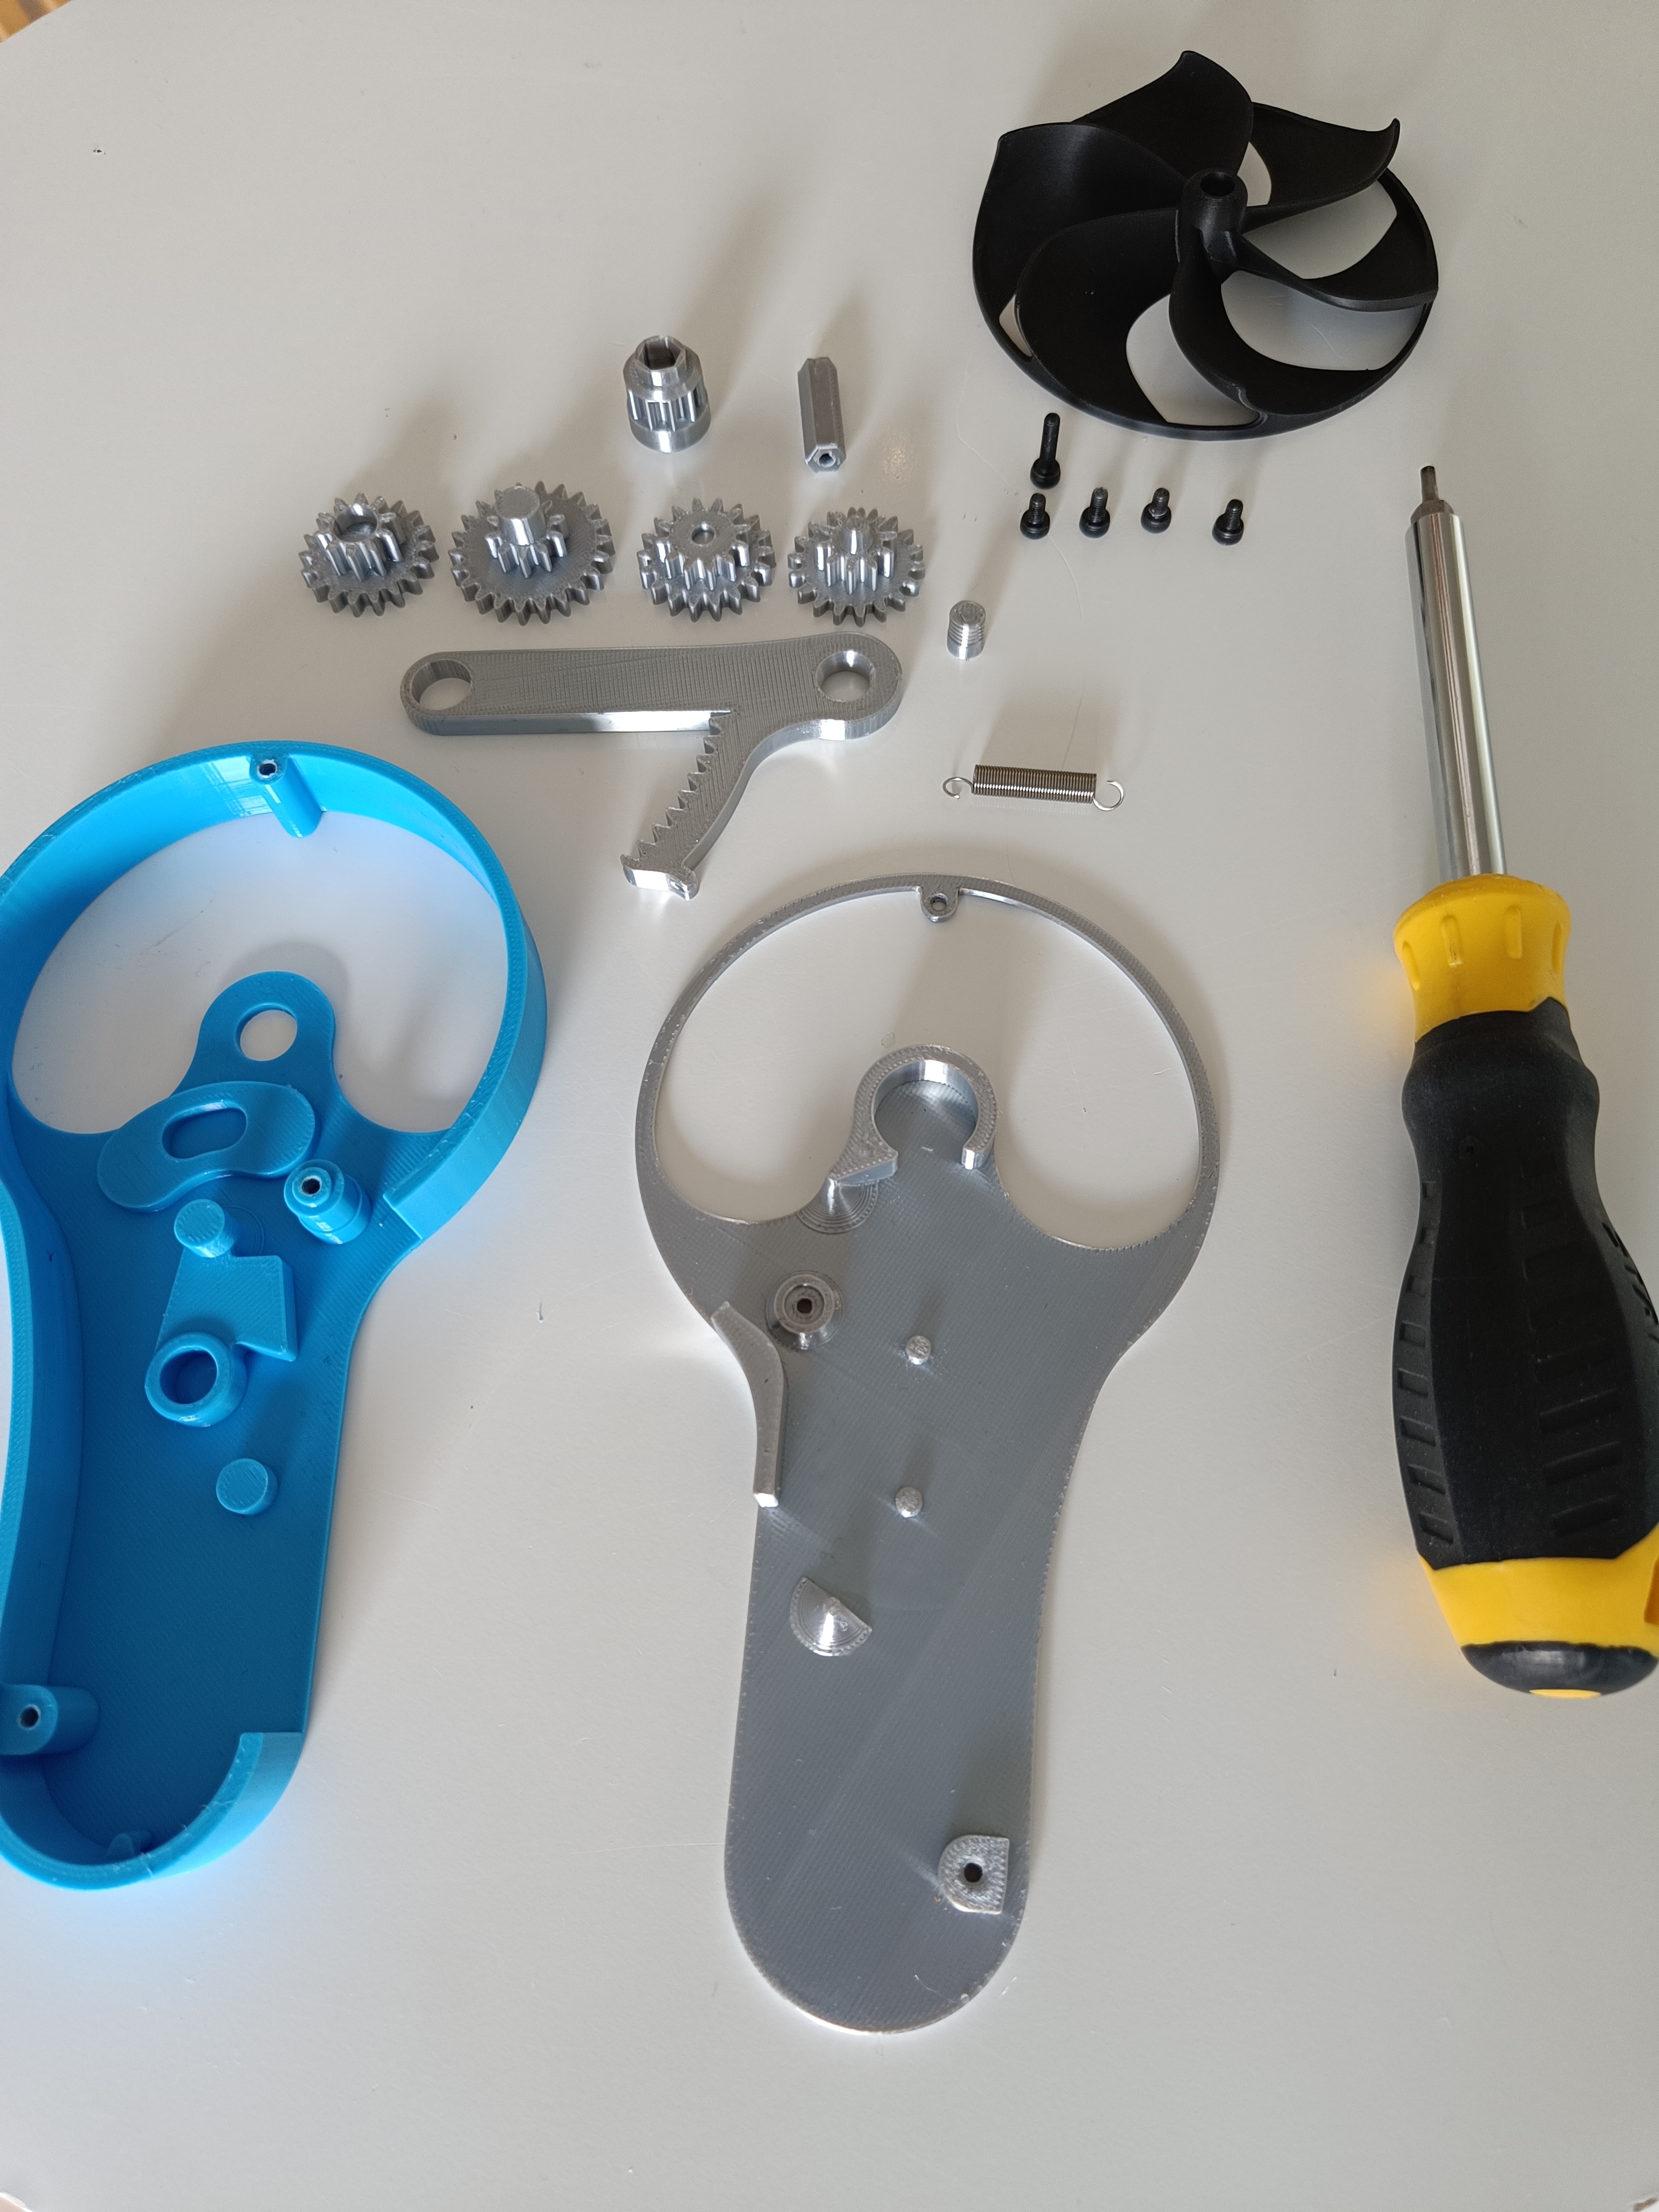
Assembly Guide
You need all these parts to assemble the Breeze Buddy Pro
- 5 x M3 Bolts ( around 8 mm long )
- 1 x 0.5X5X20 mm Extension Spring - BA006
- 1 x Rubber Band ( If you don't have a spring )
- Screw Driver
- Lubricant for the gears ( Optional )
- Everything from the print profile
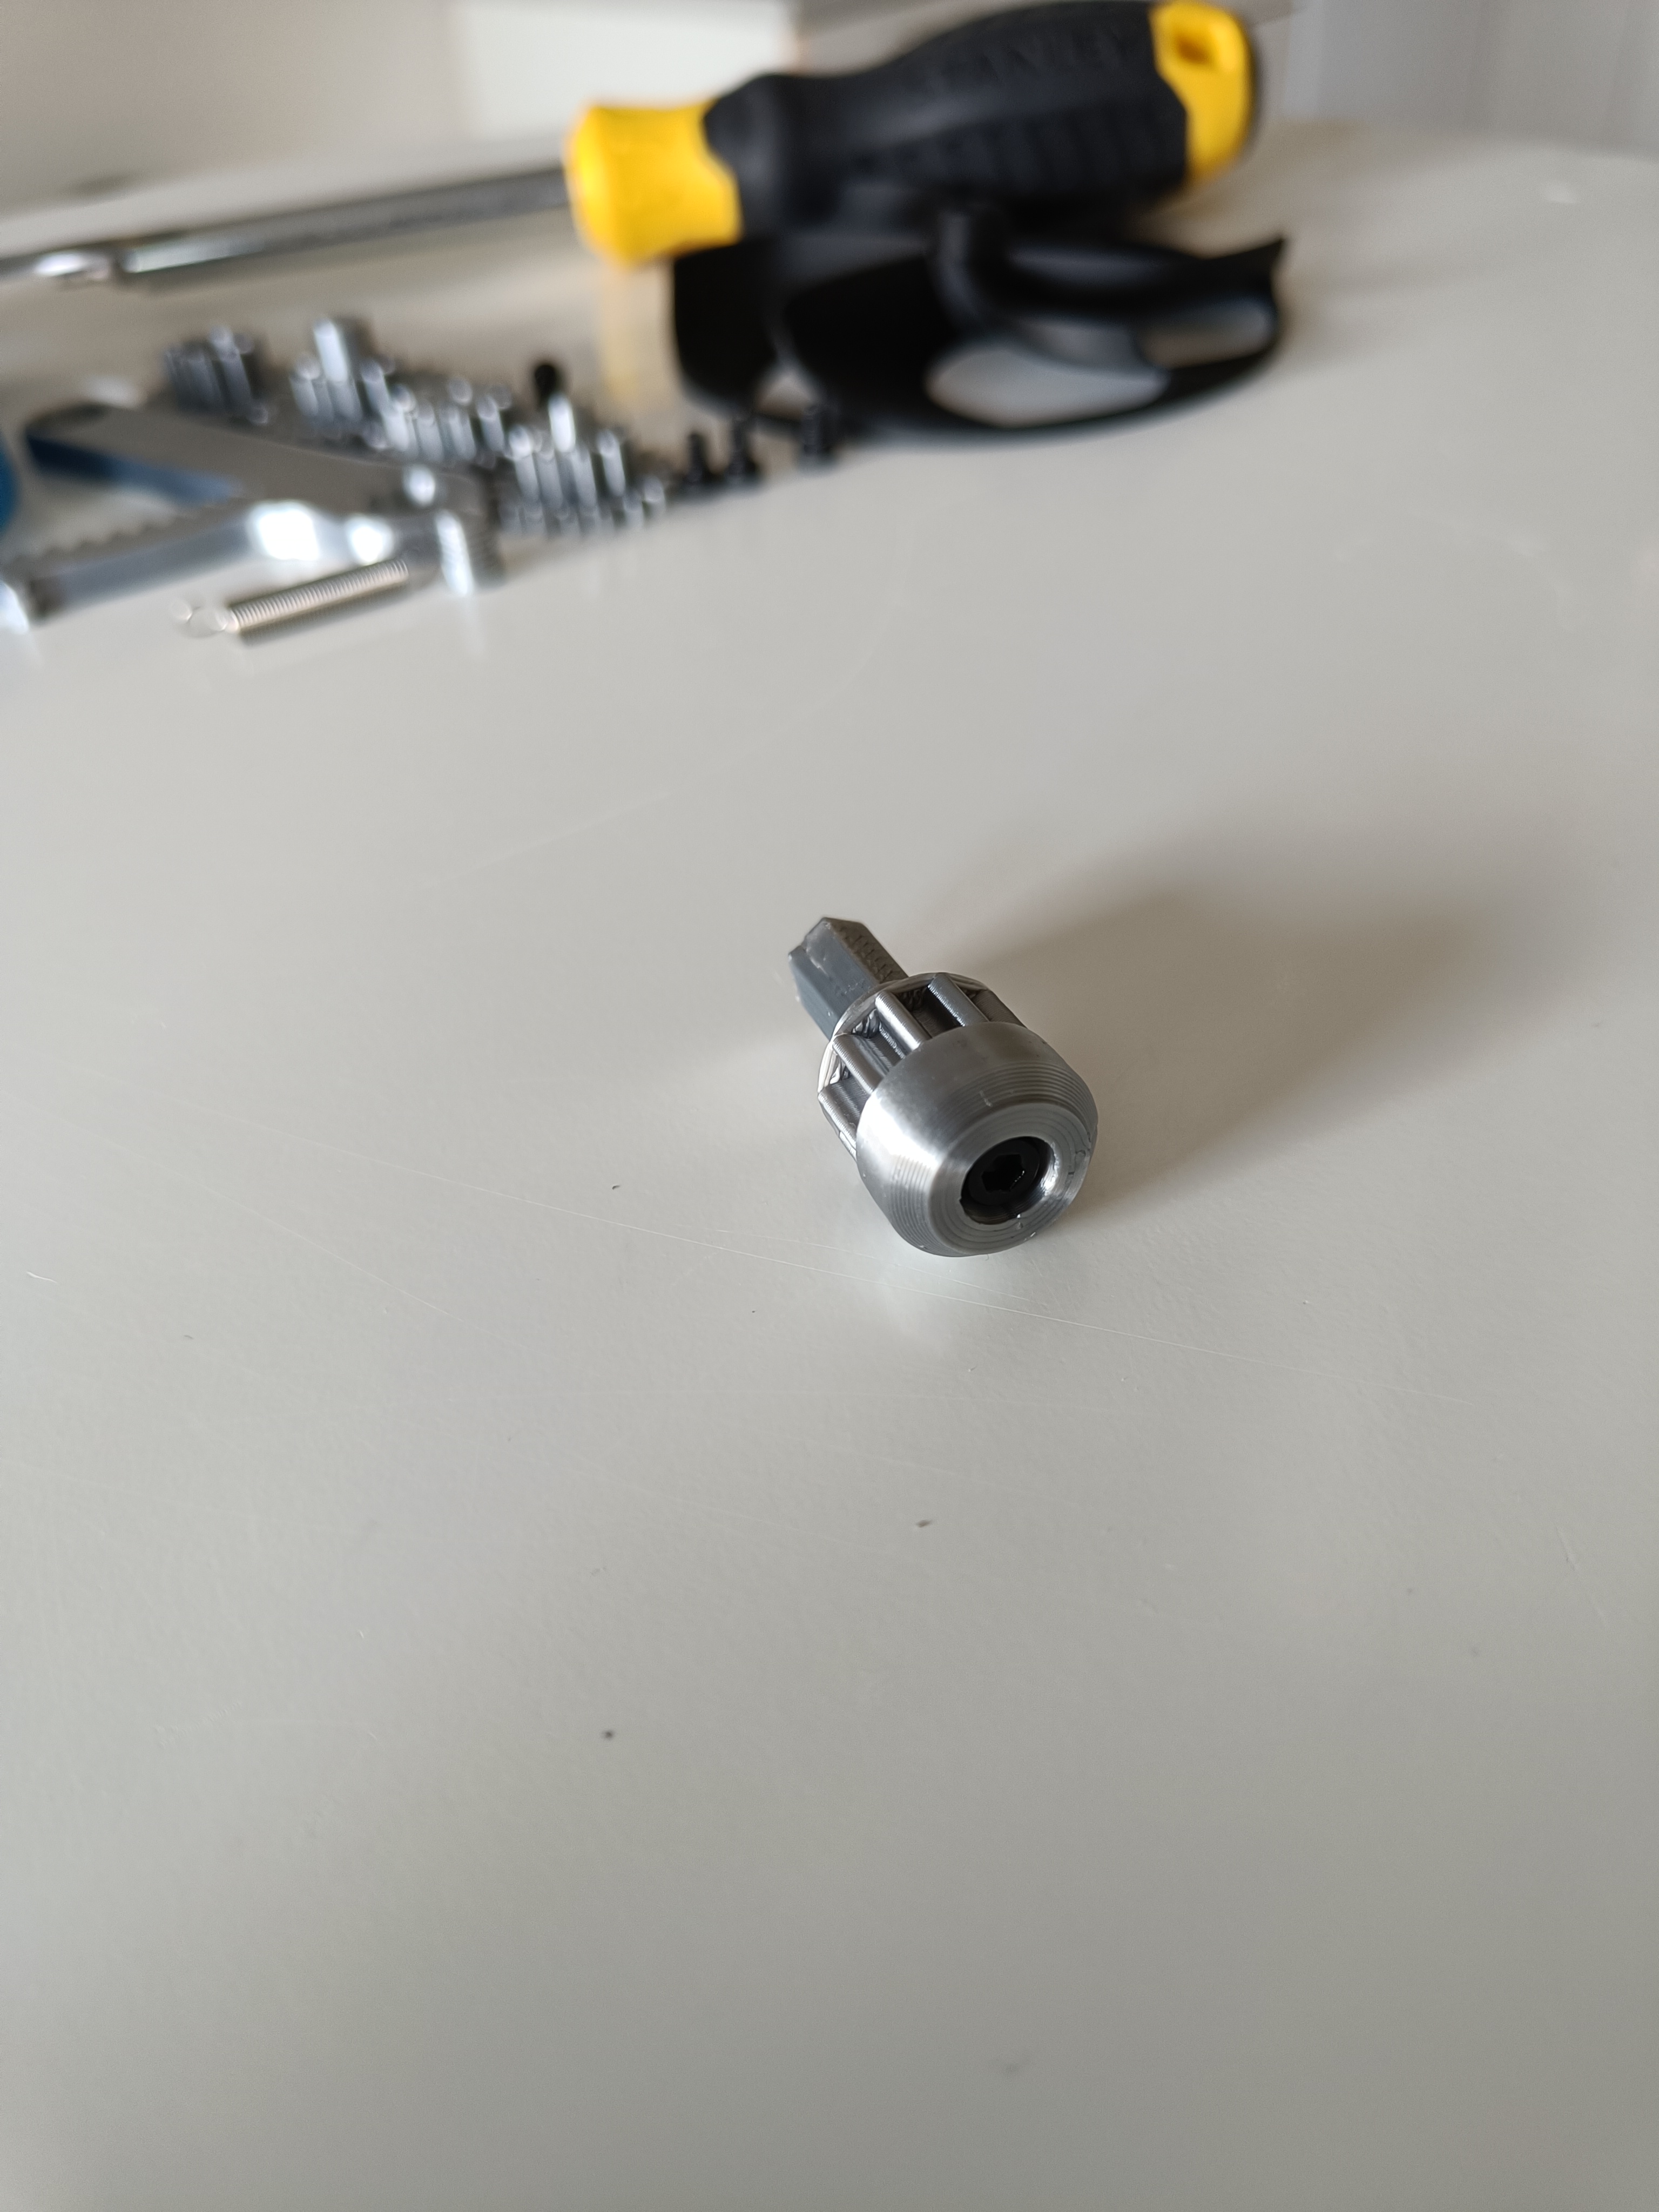
Step 1
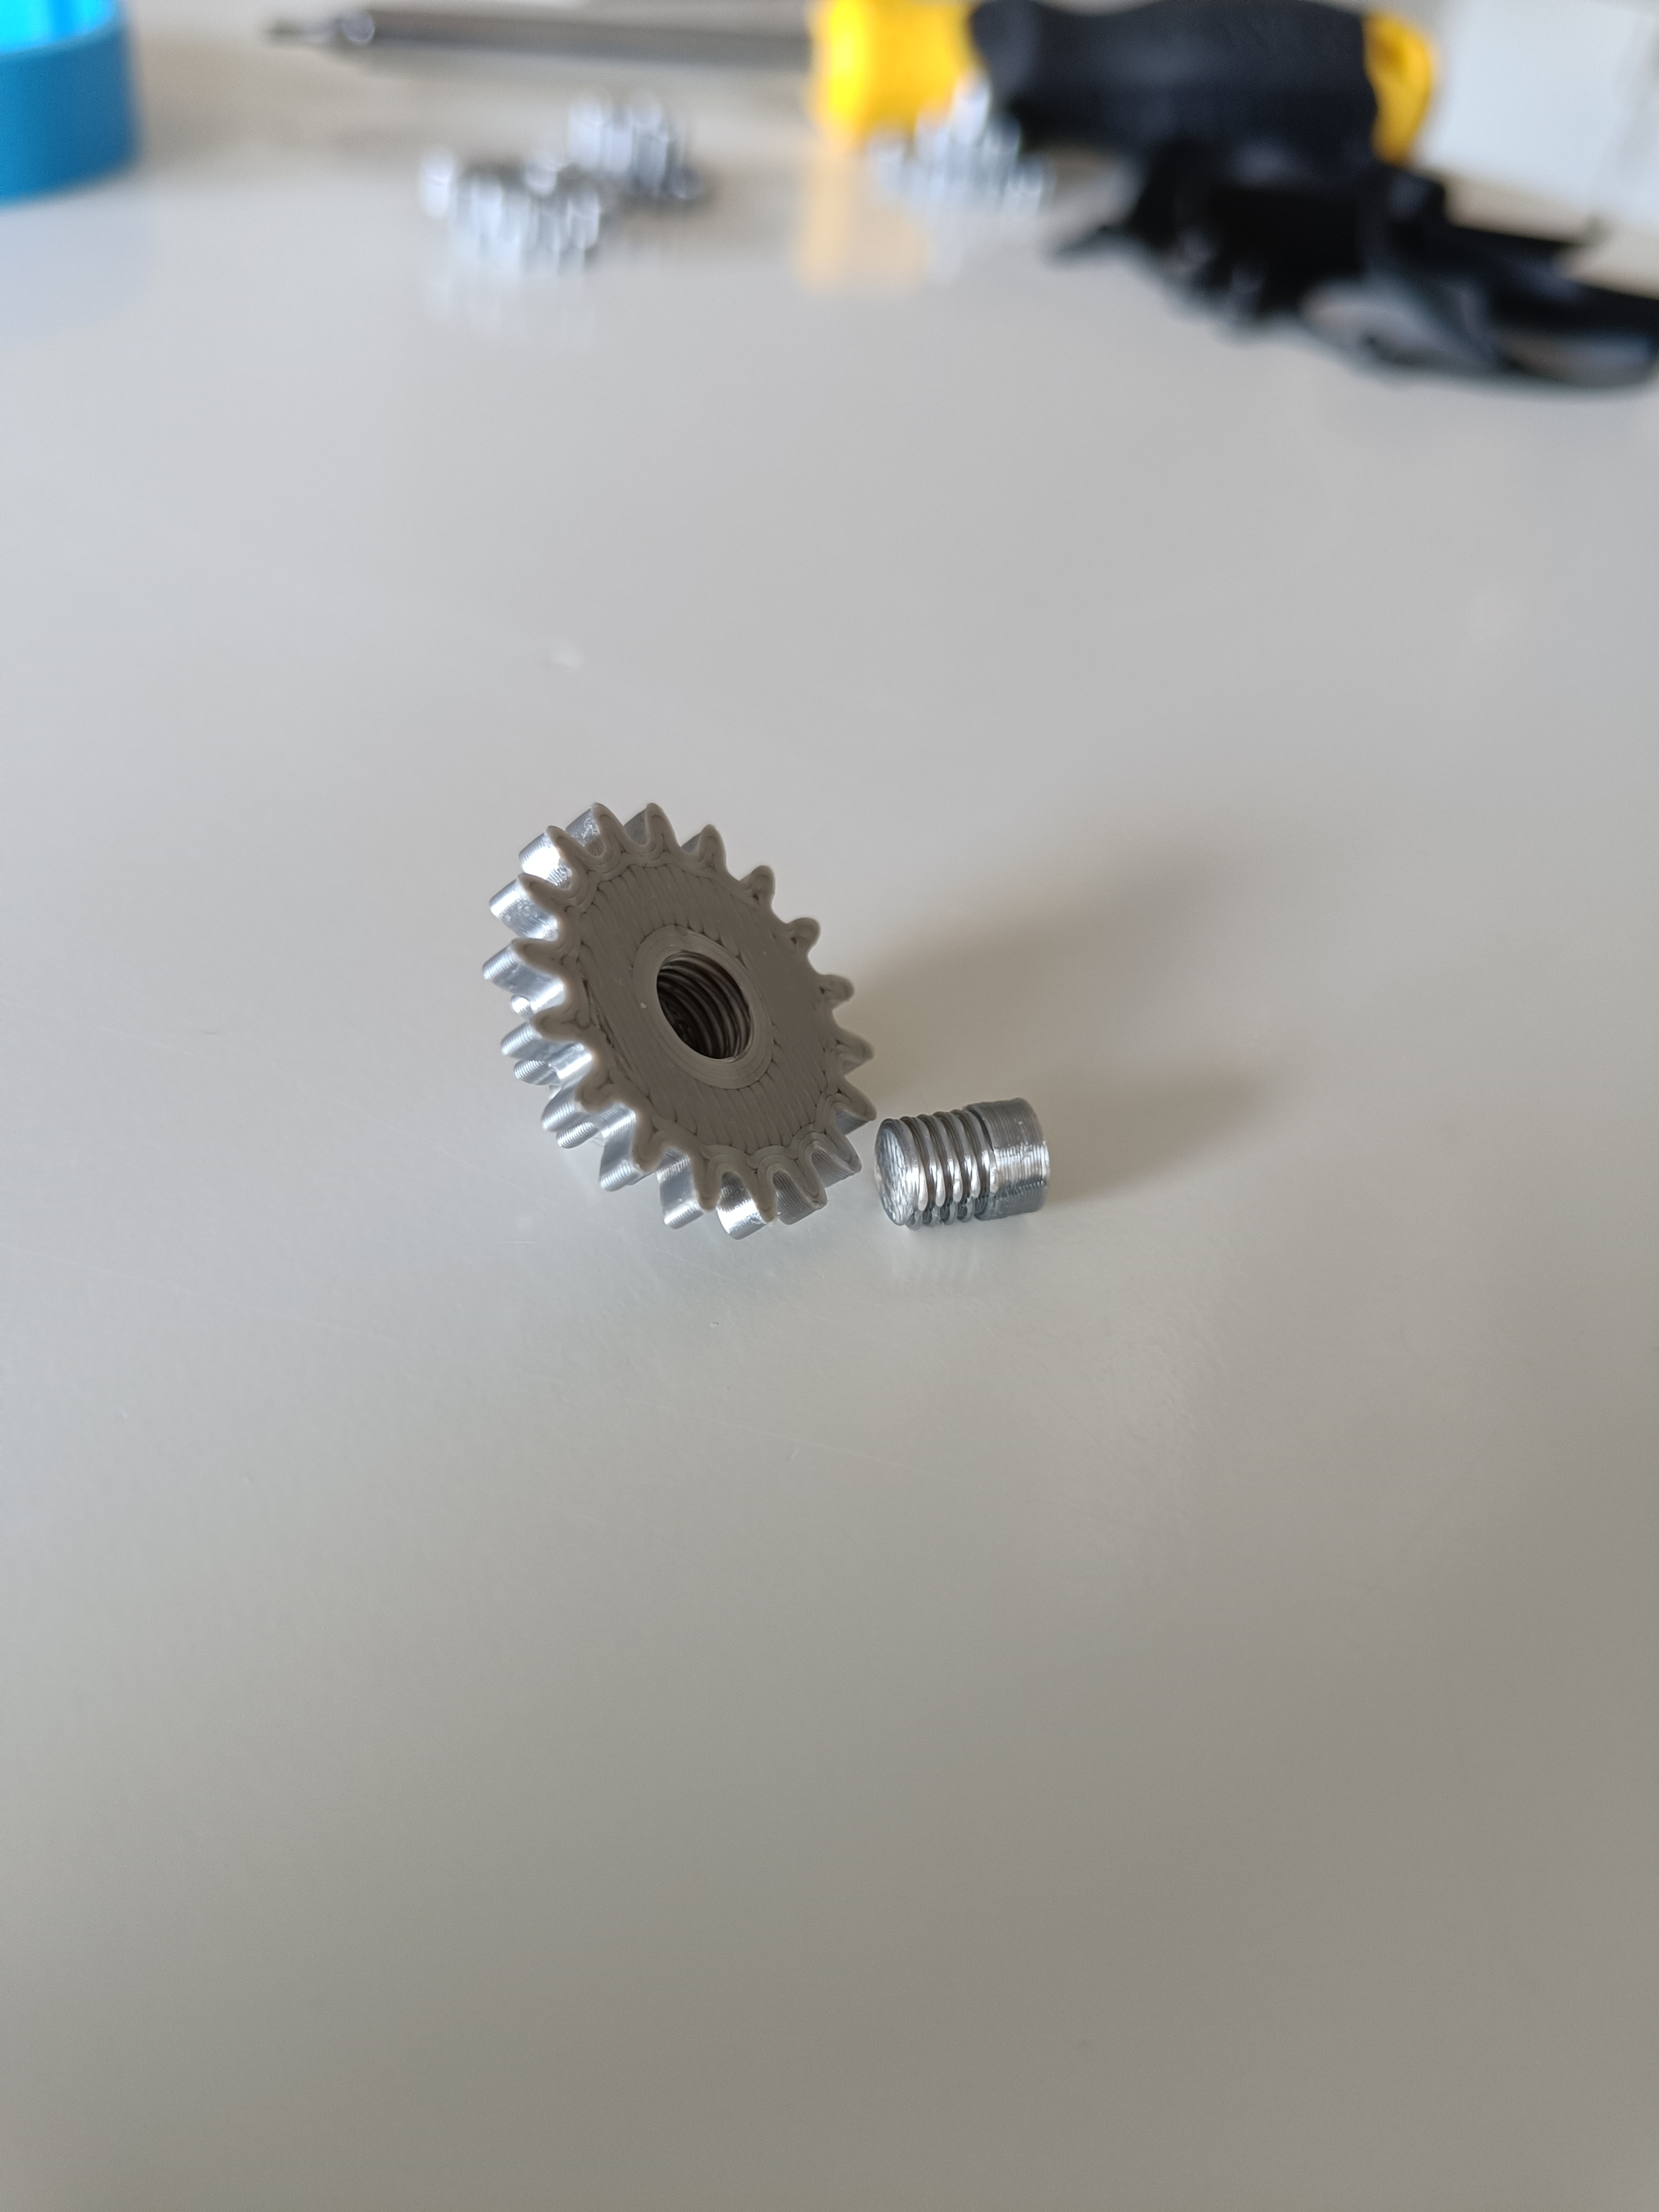
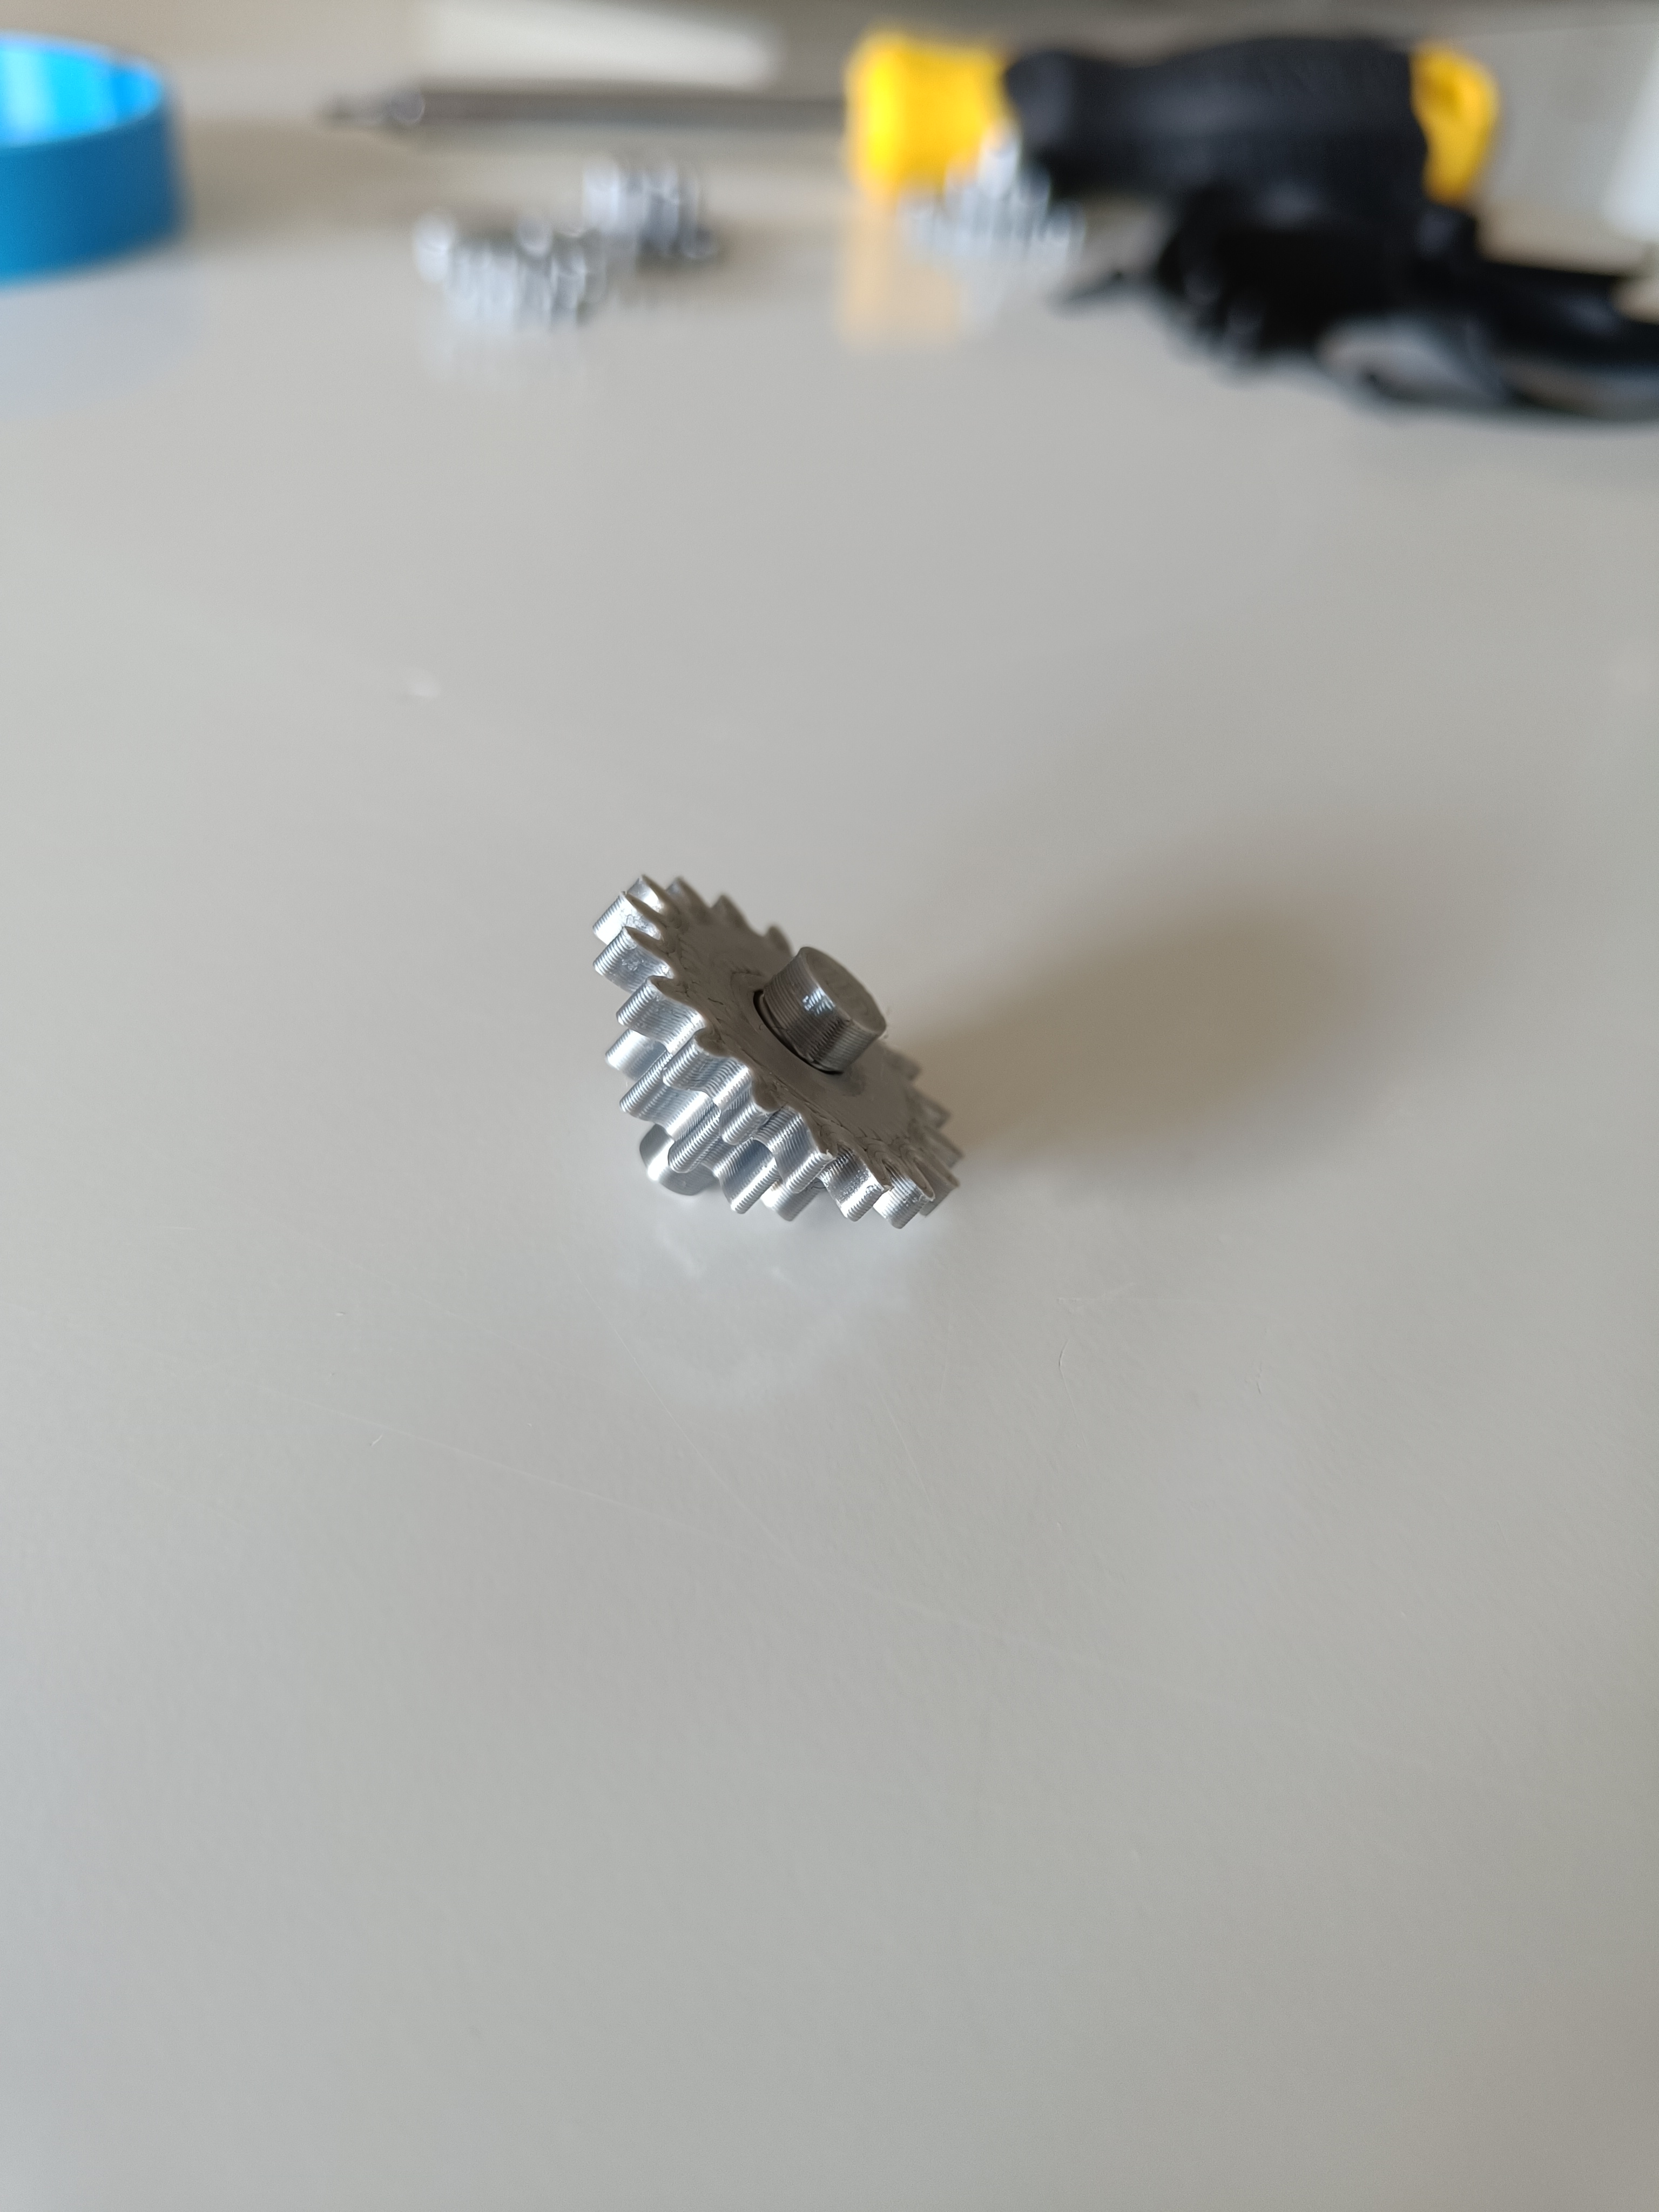
You start by screwing the shaft and driving gear together.
Step 2
Then you assemble the moving gear and the little stud by screwing them together.
Step 3
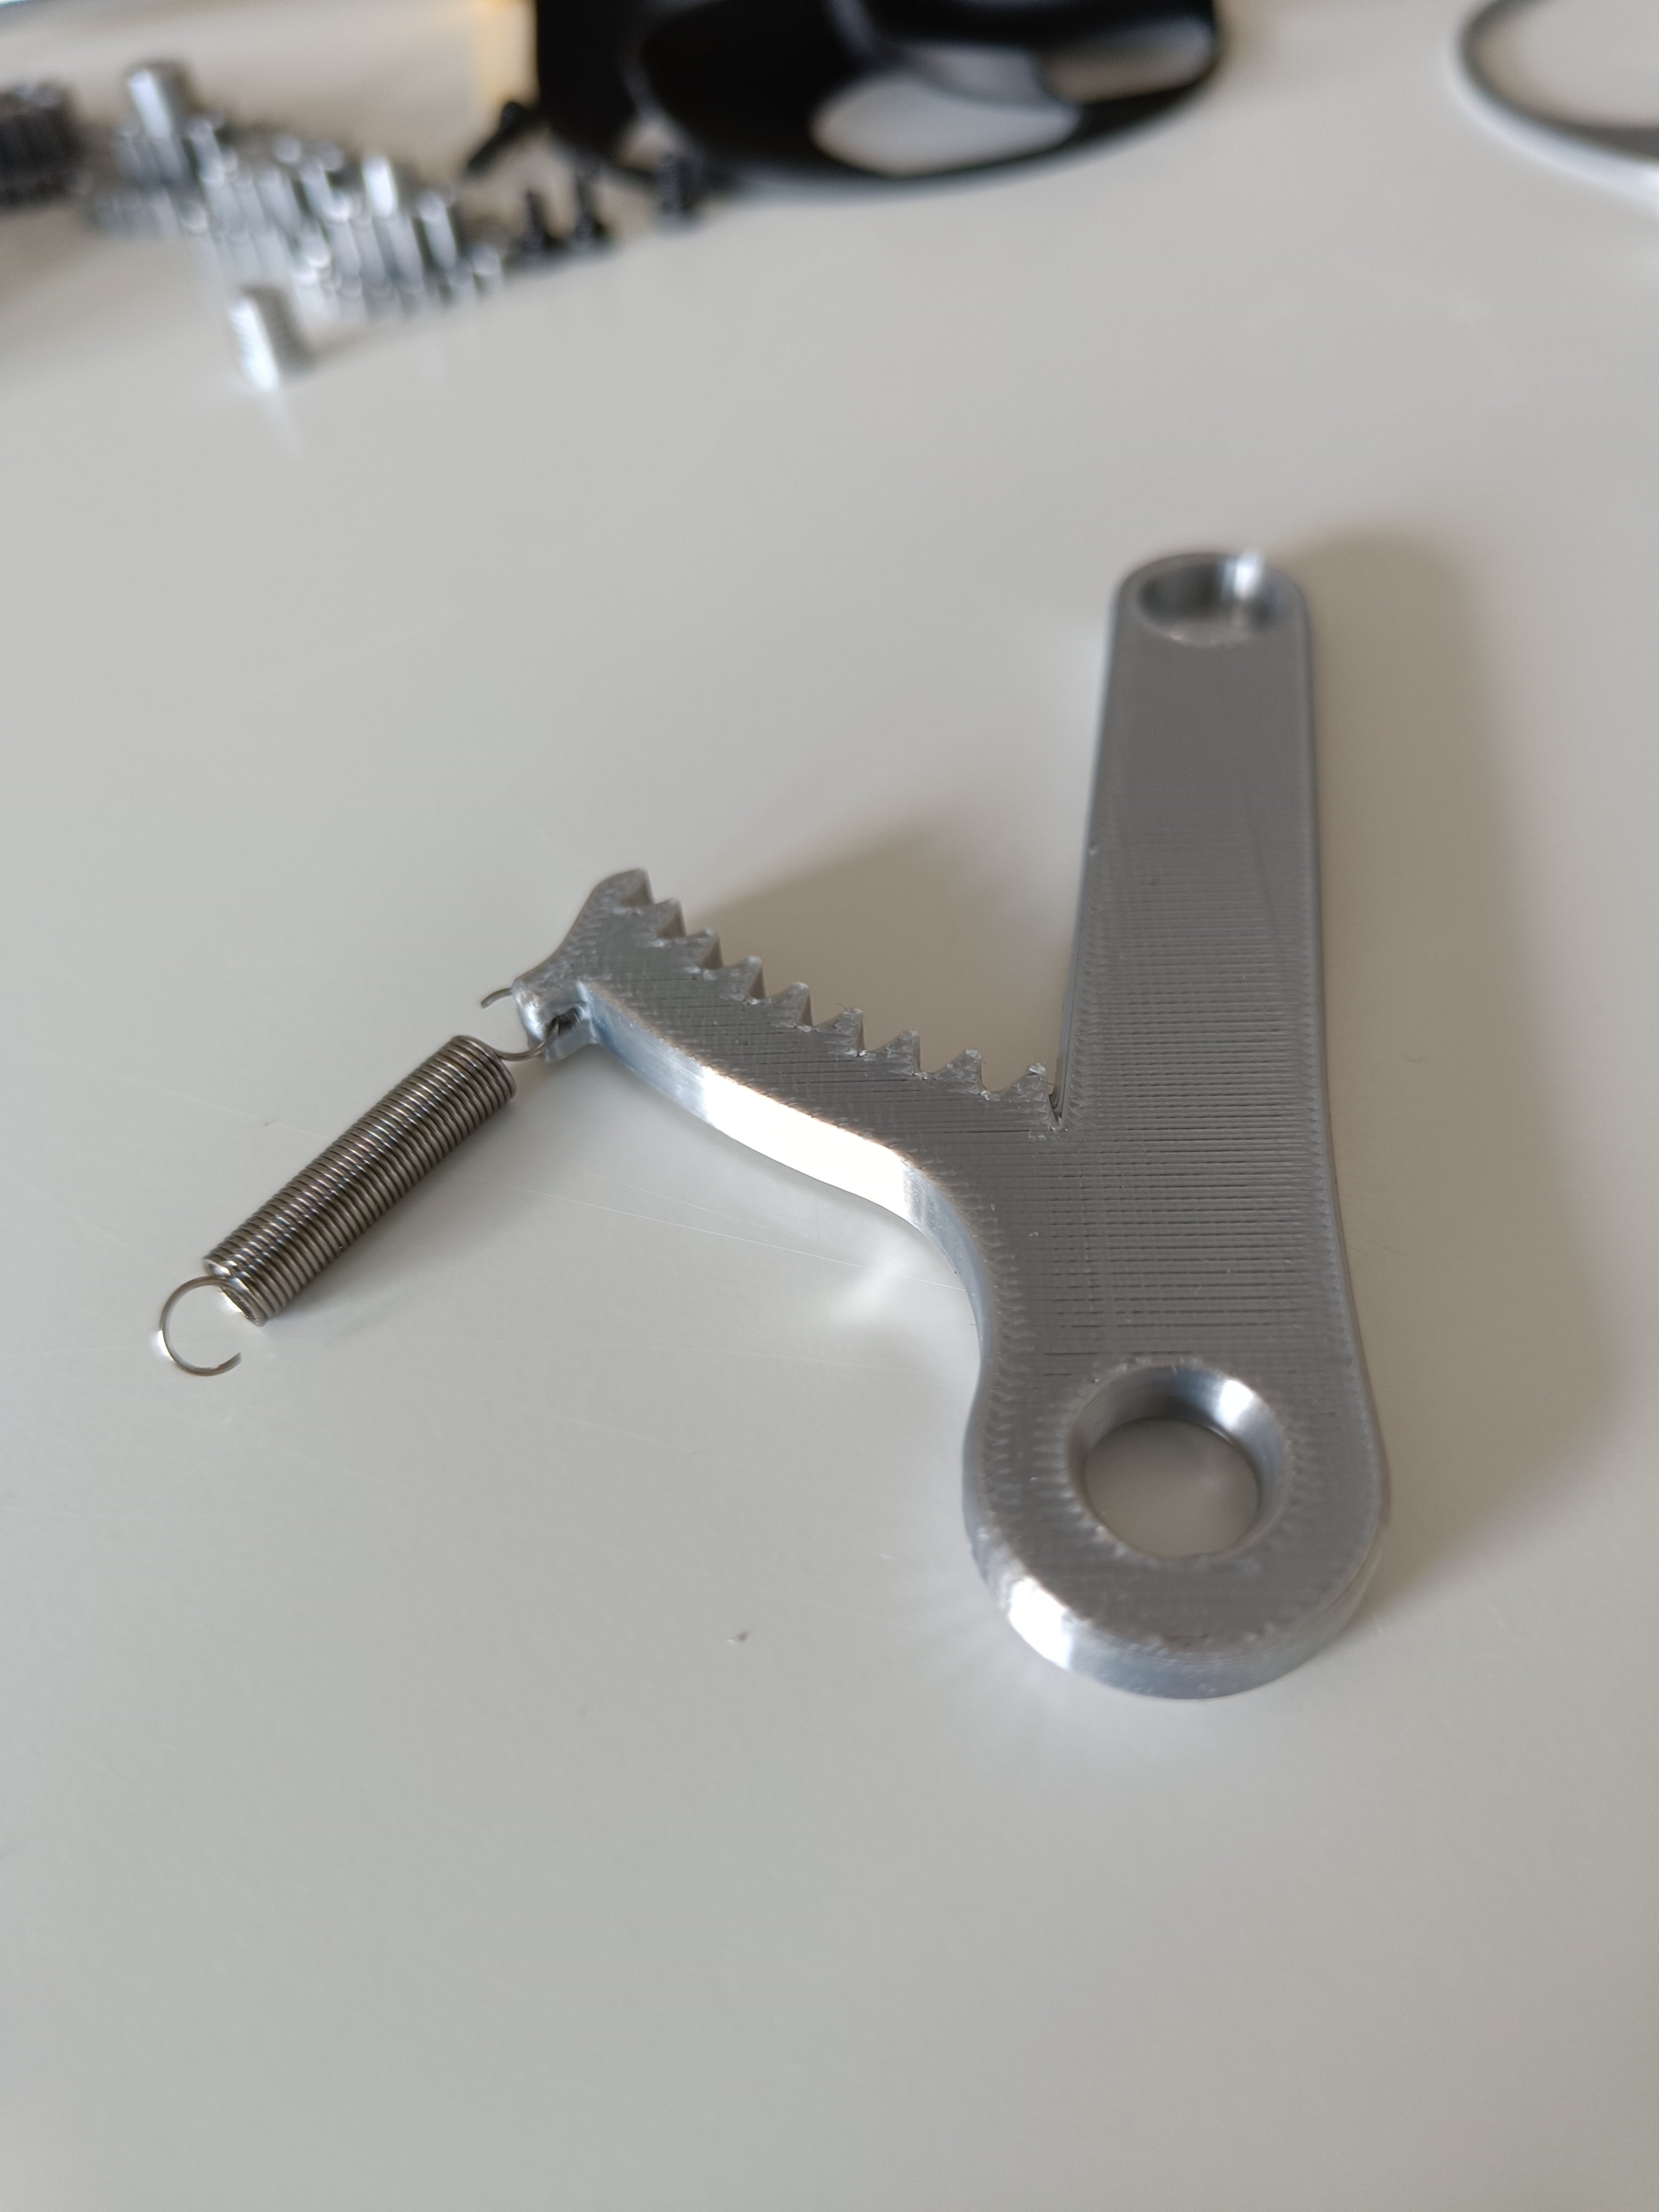
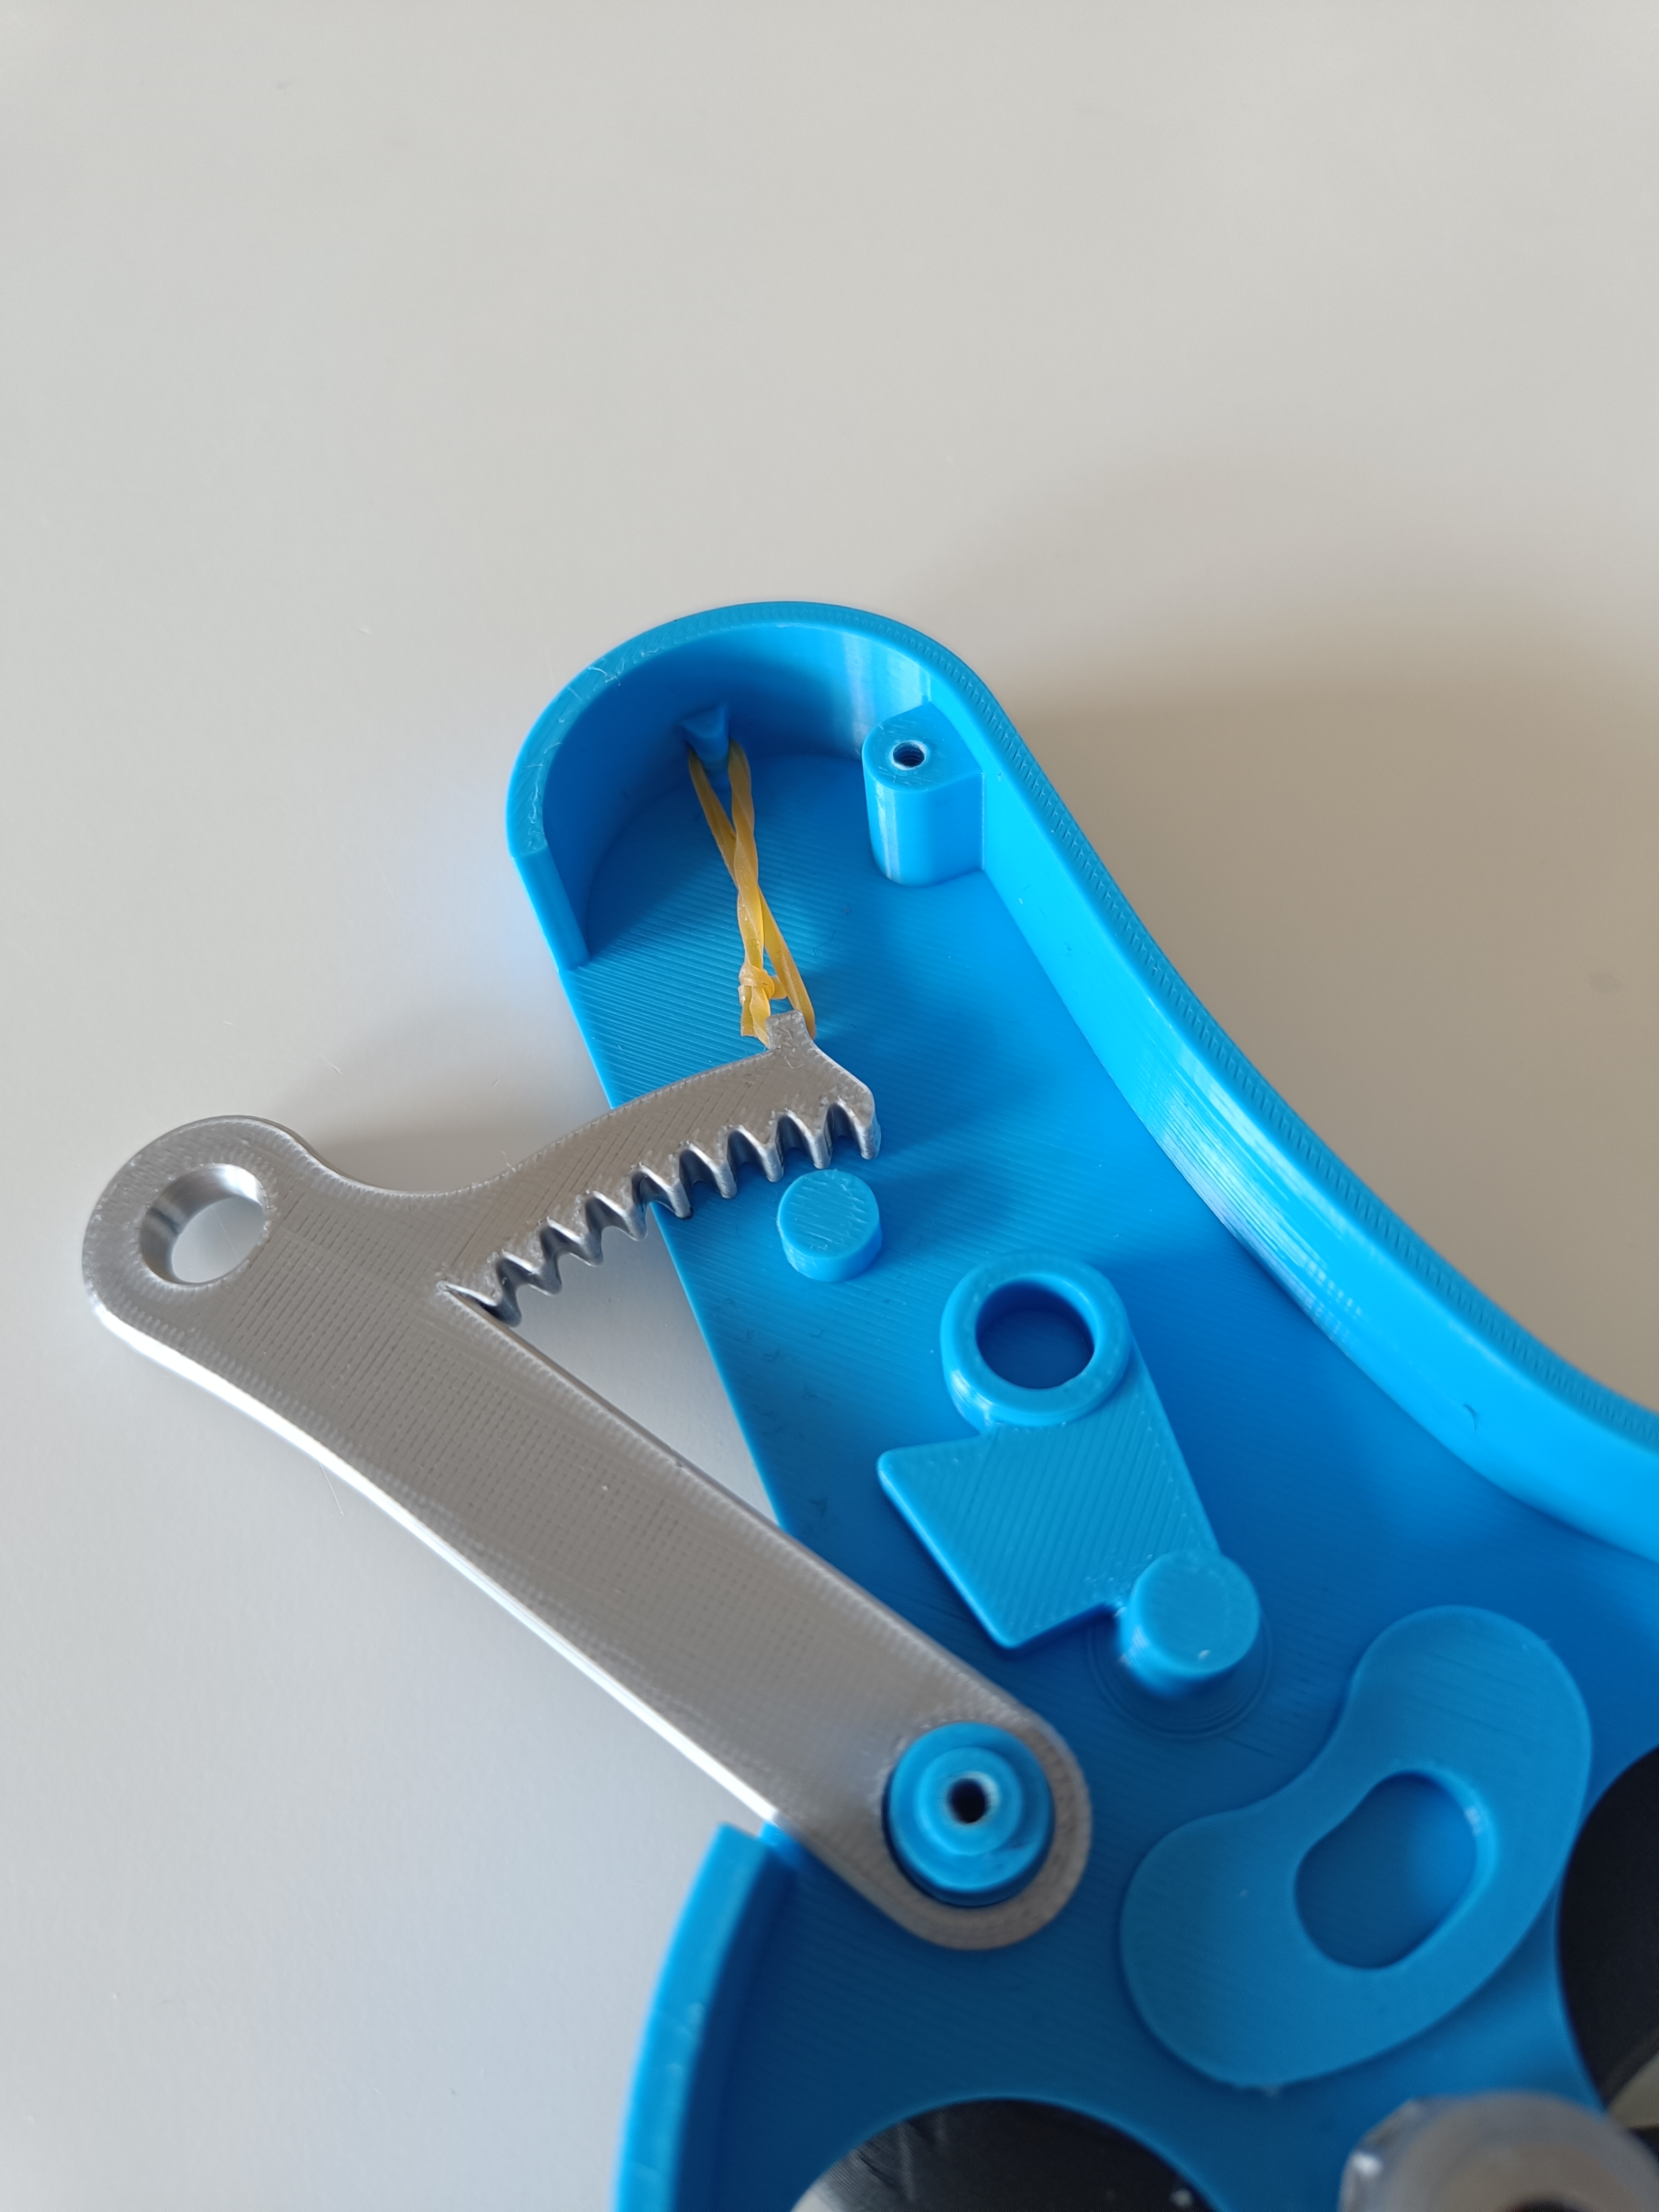
If you don't have a spring, you can also use a rubber band as shown in step 4.
Then you put the spring onto the handle.
Step 4
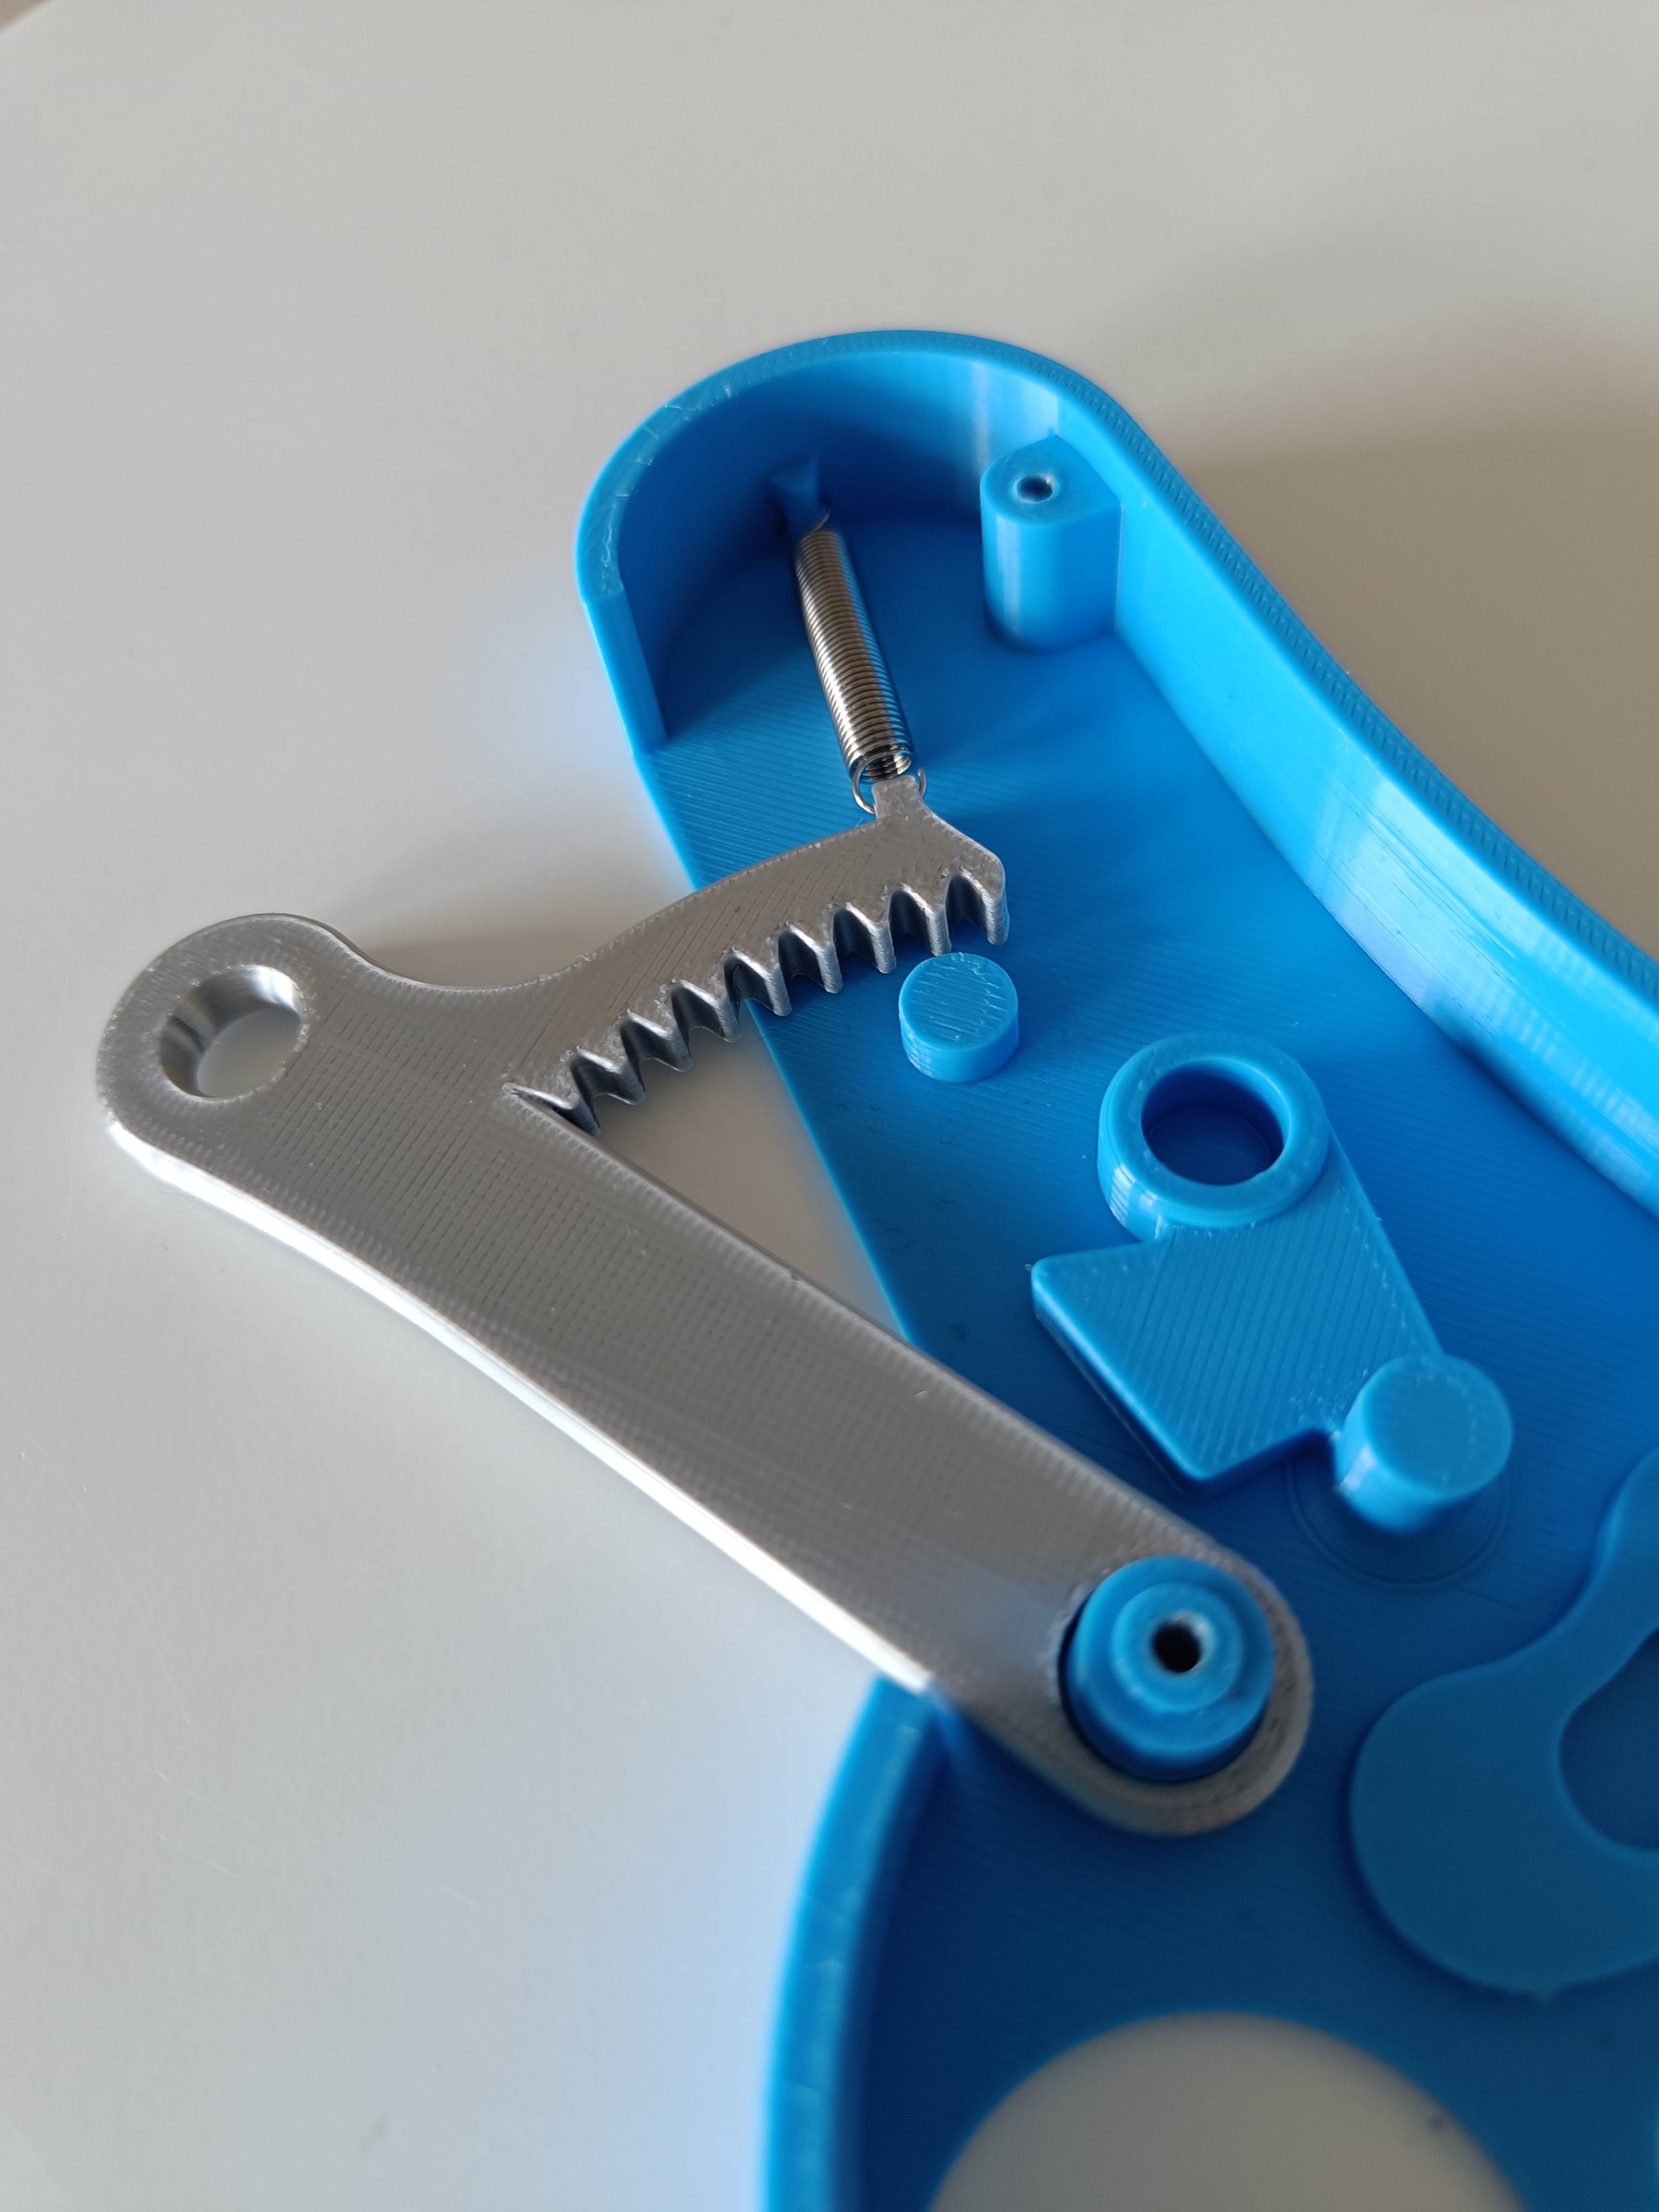
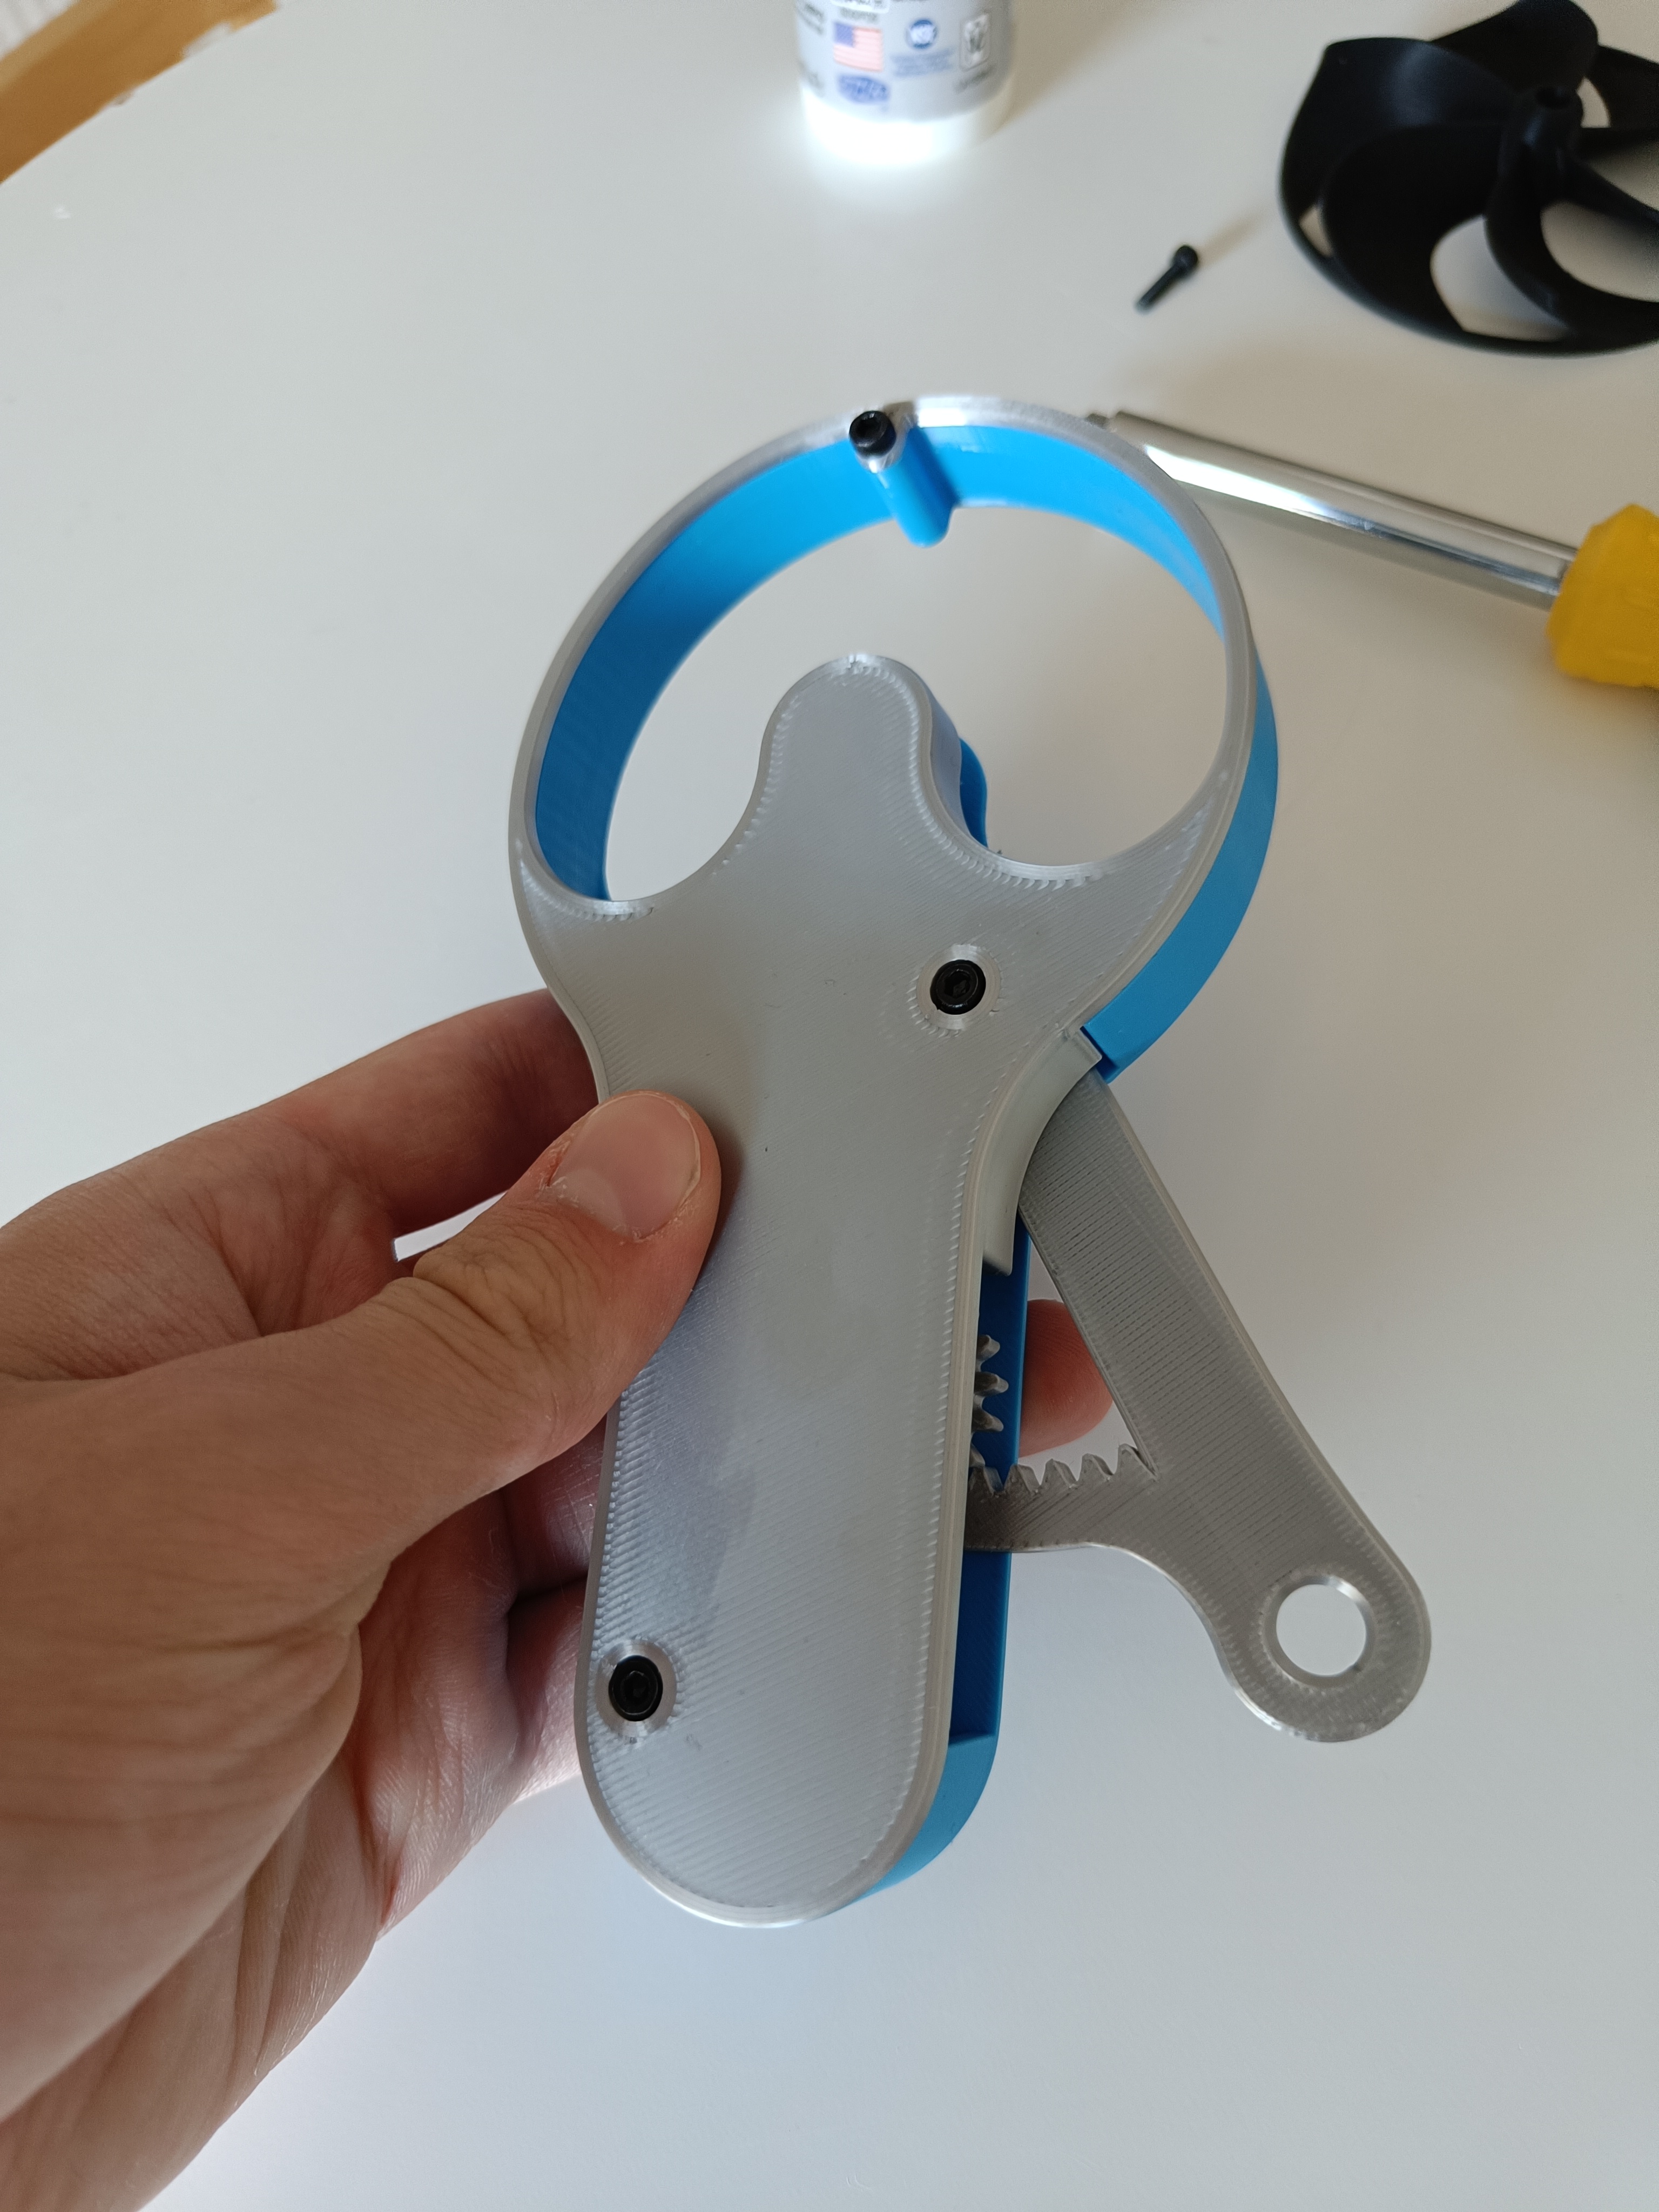
Now, place the handle into the body.
You can also use a rubber band.
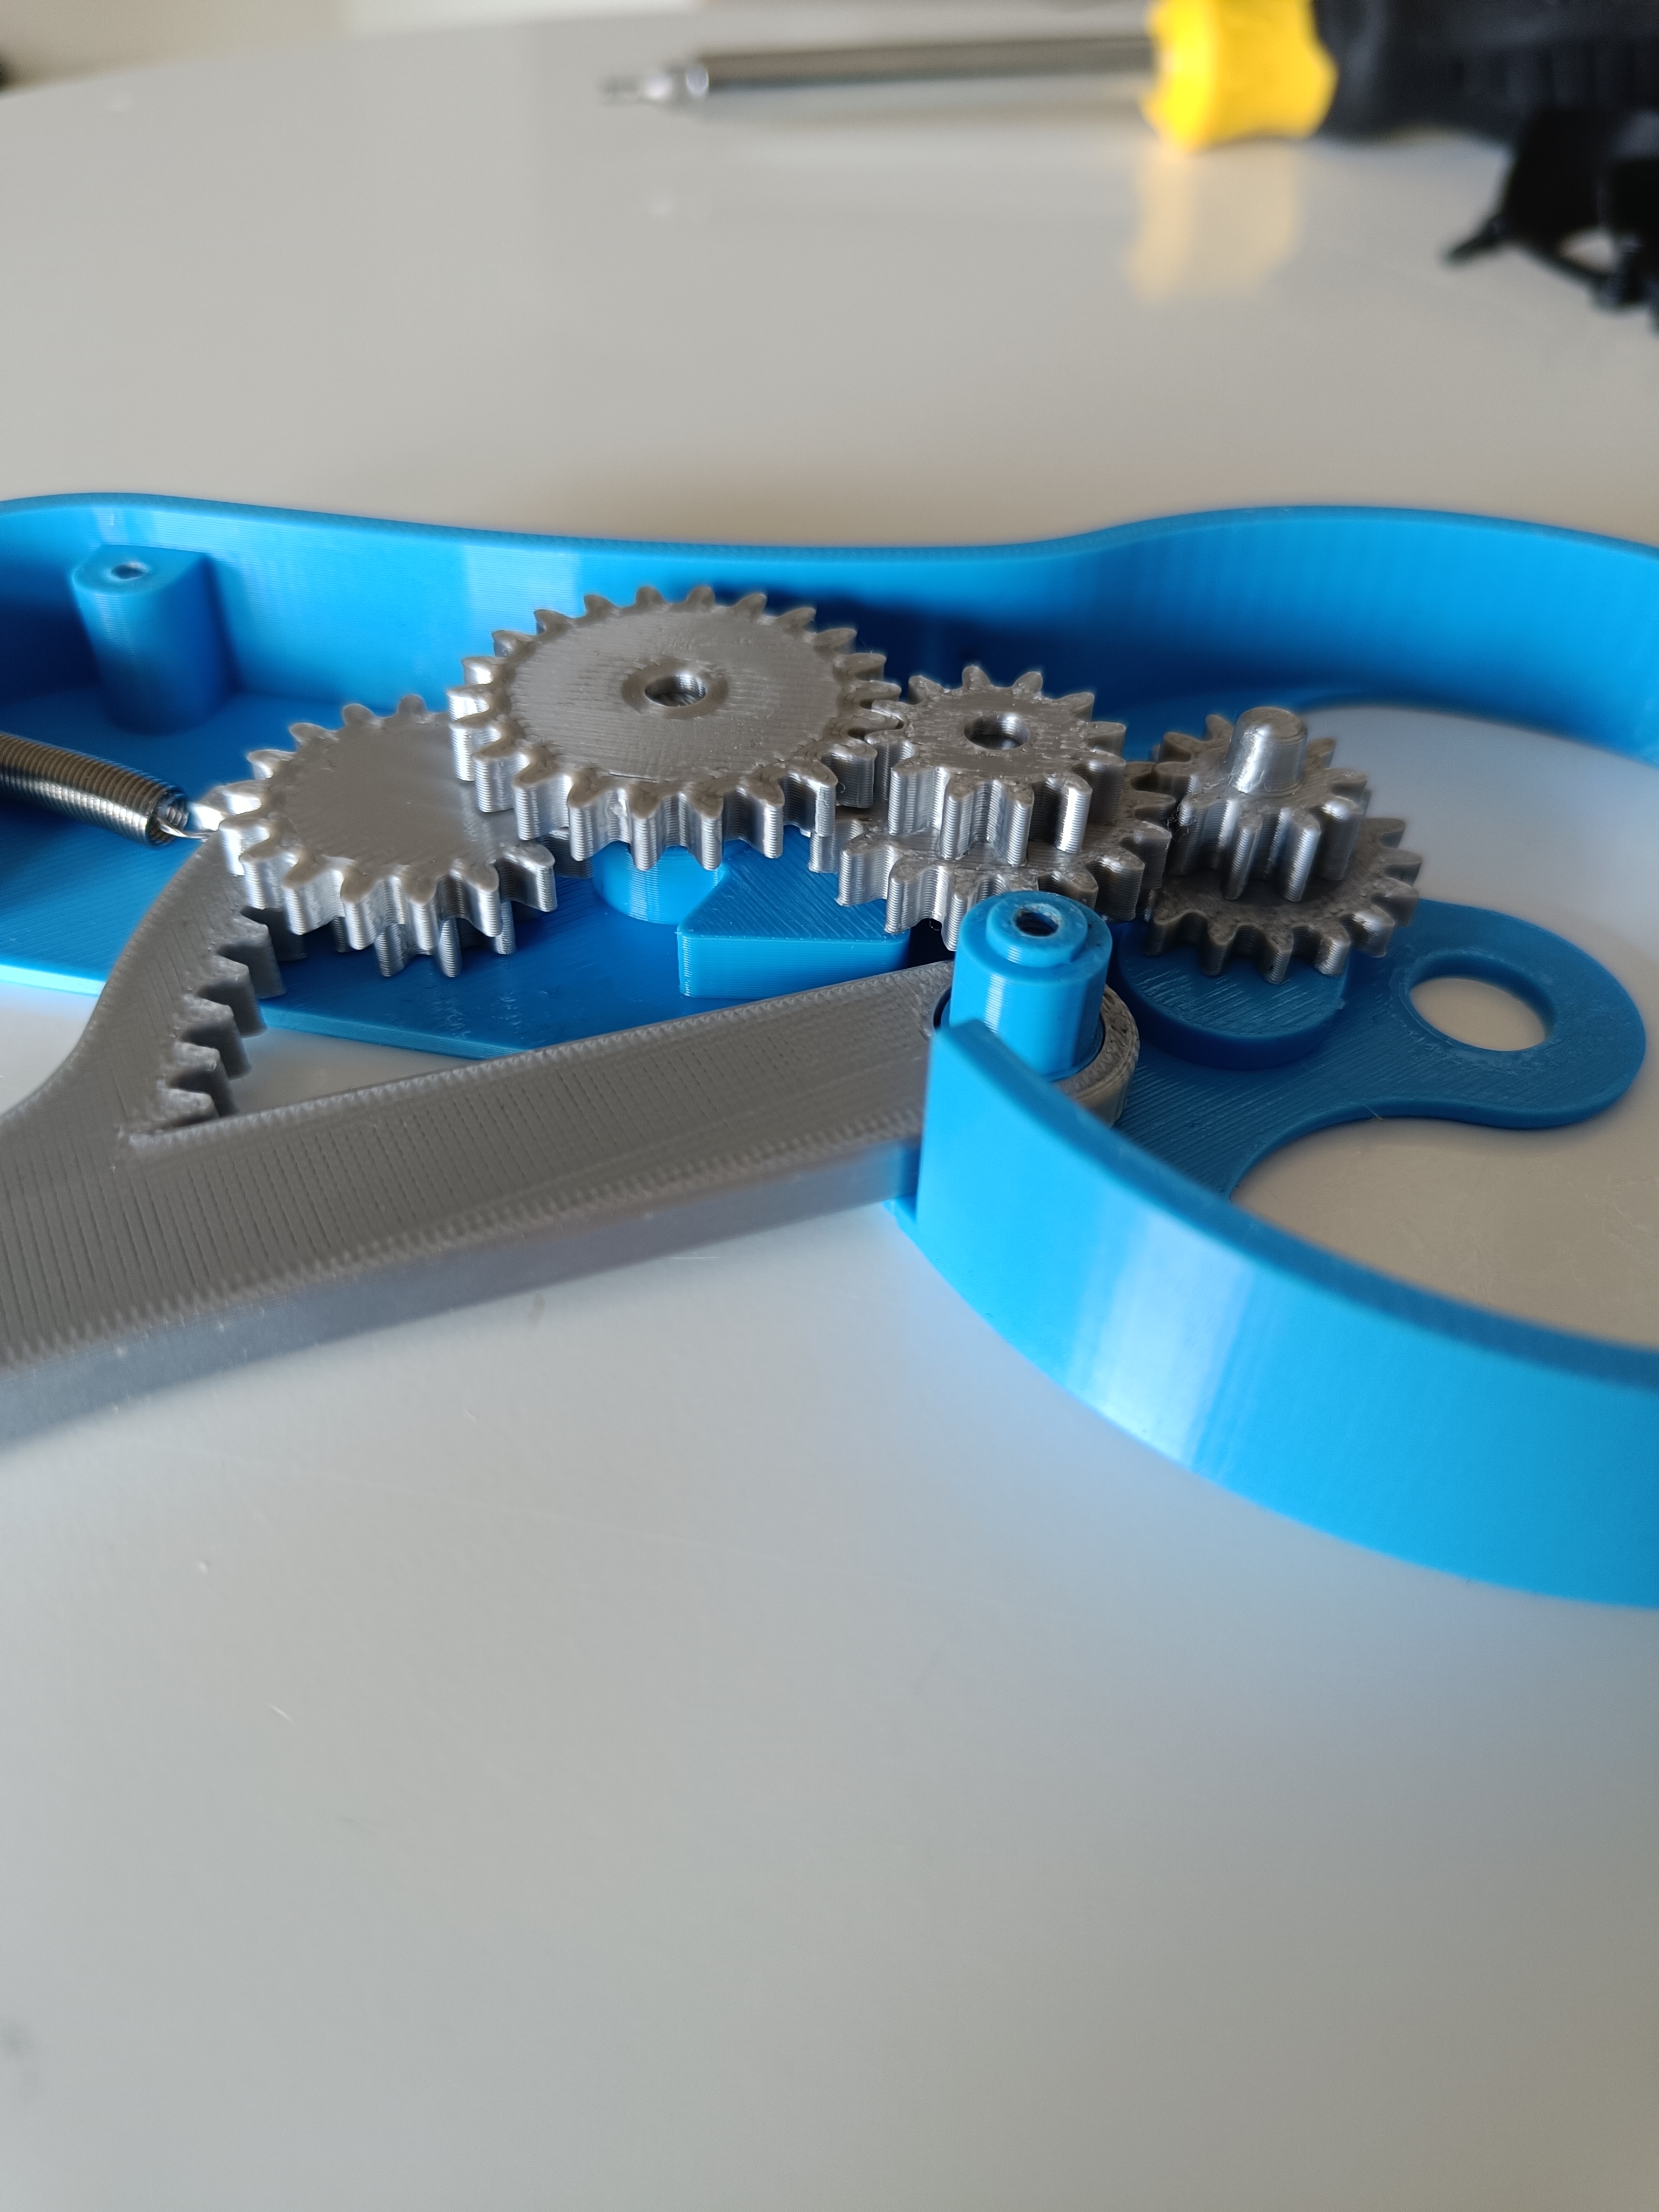
Step 5
Now, put all the gears into the body.
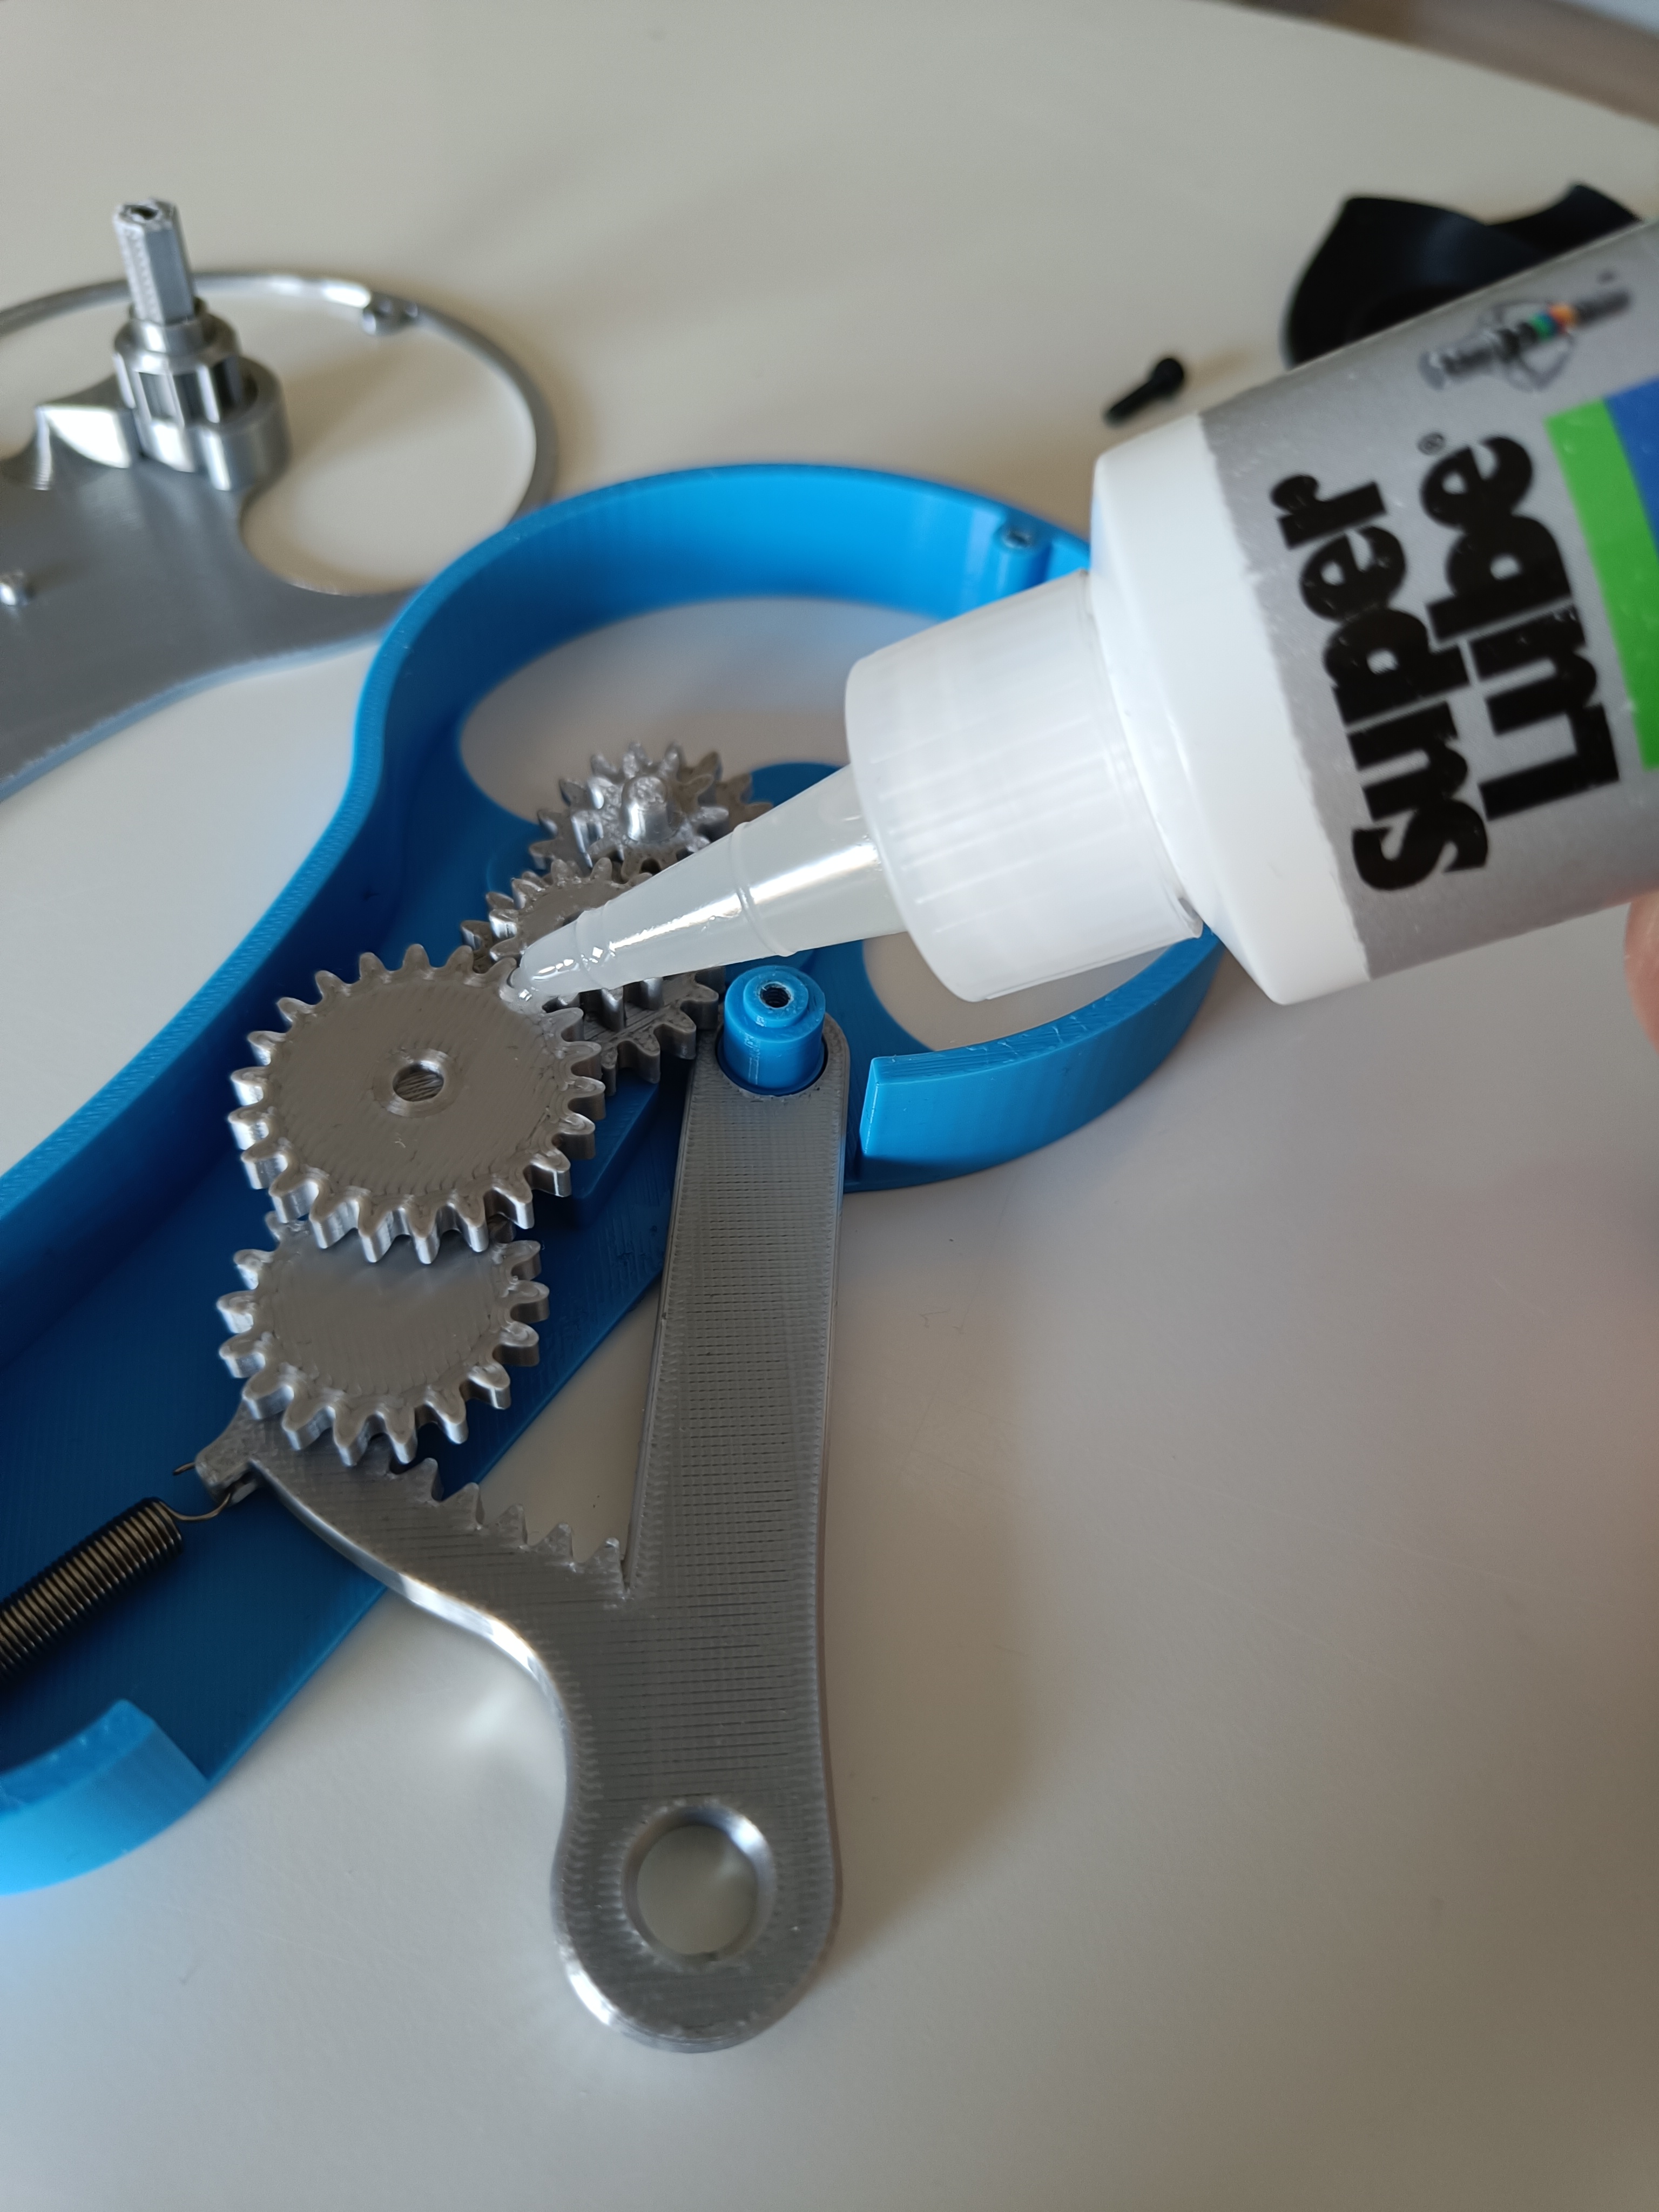
Step 6
You can lubricate the gears to make them run smoother.
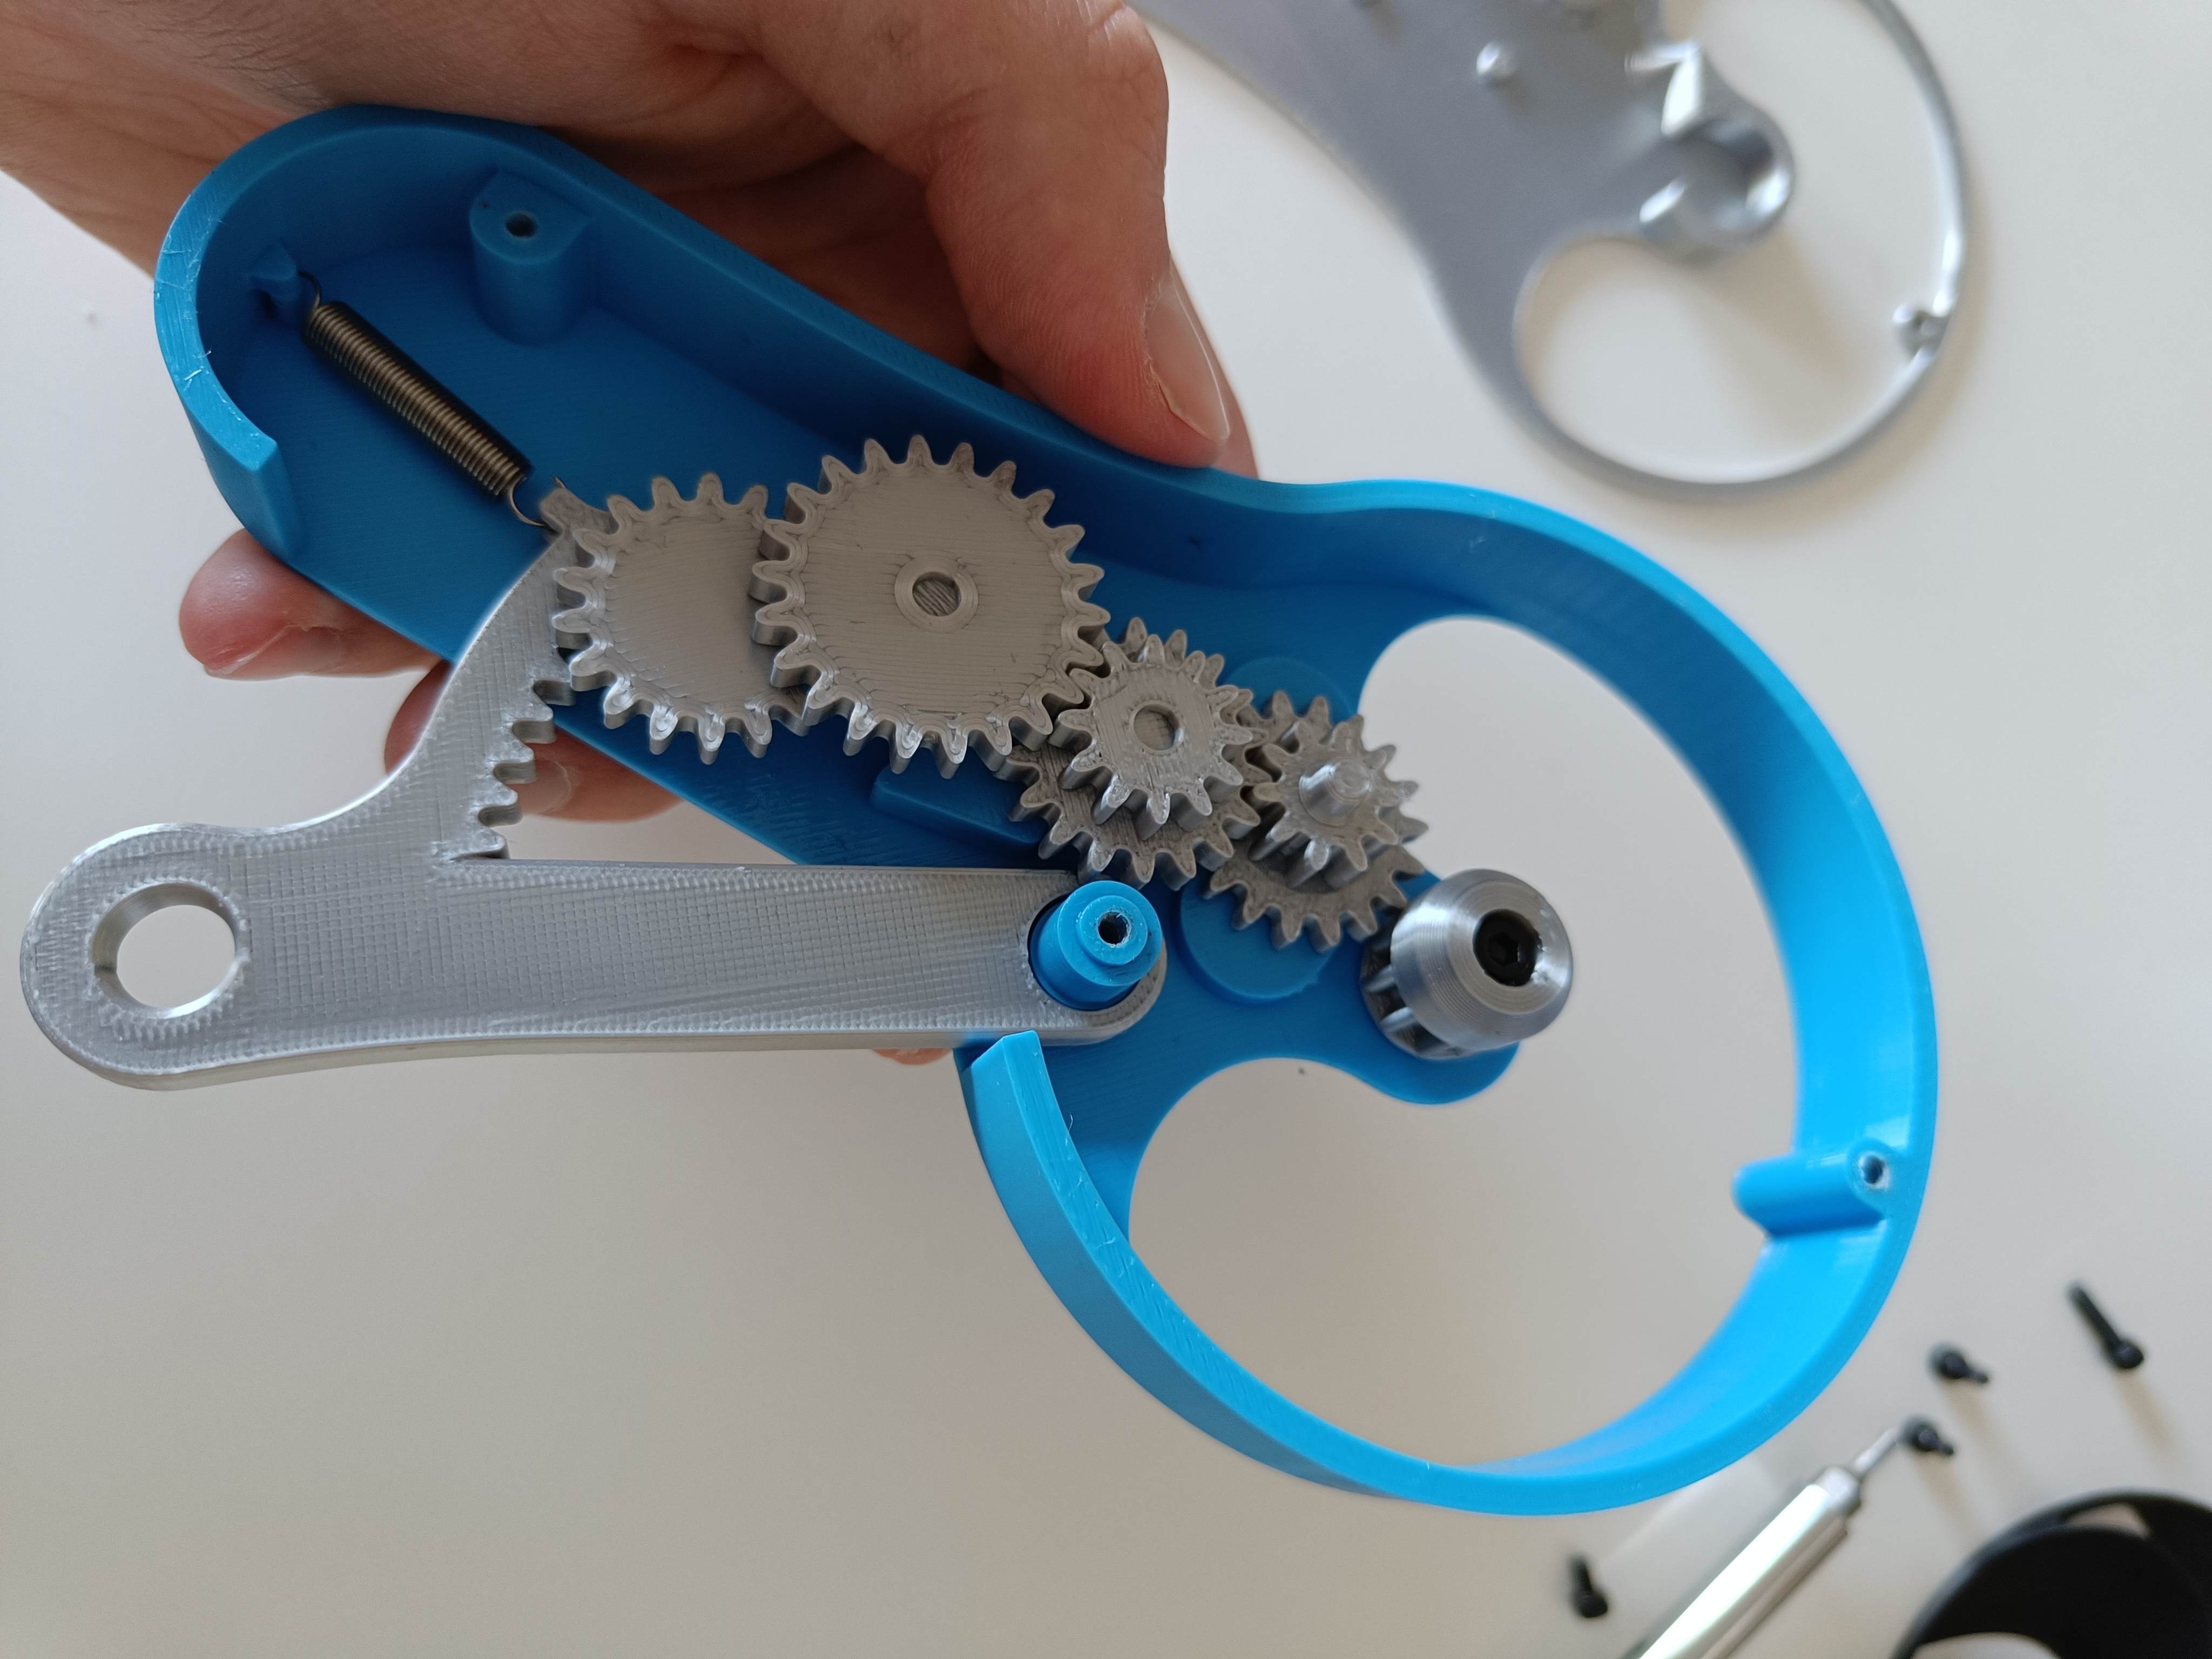
Step 7
Now, pick it up and put the driving gear into the hole.
Step 8
Put the lid on and screw it onto the body.
Step 9
Put the propeller onto the shaft and screw it together.

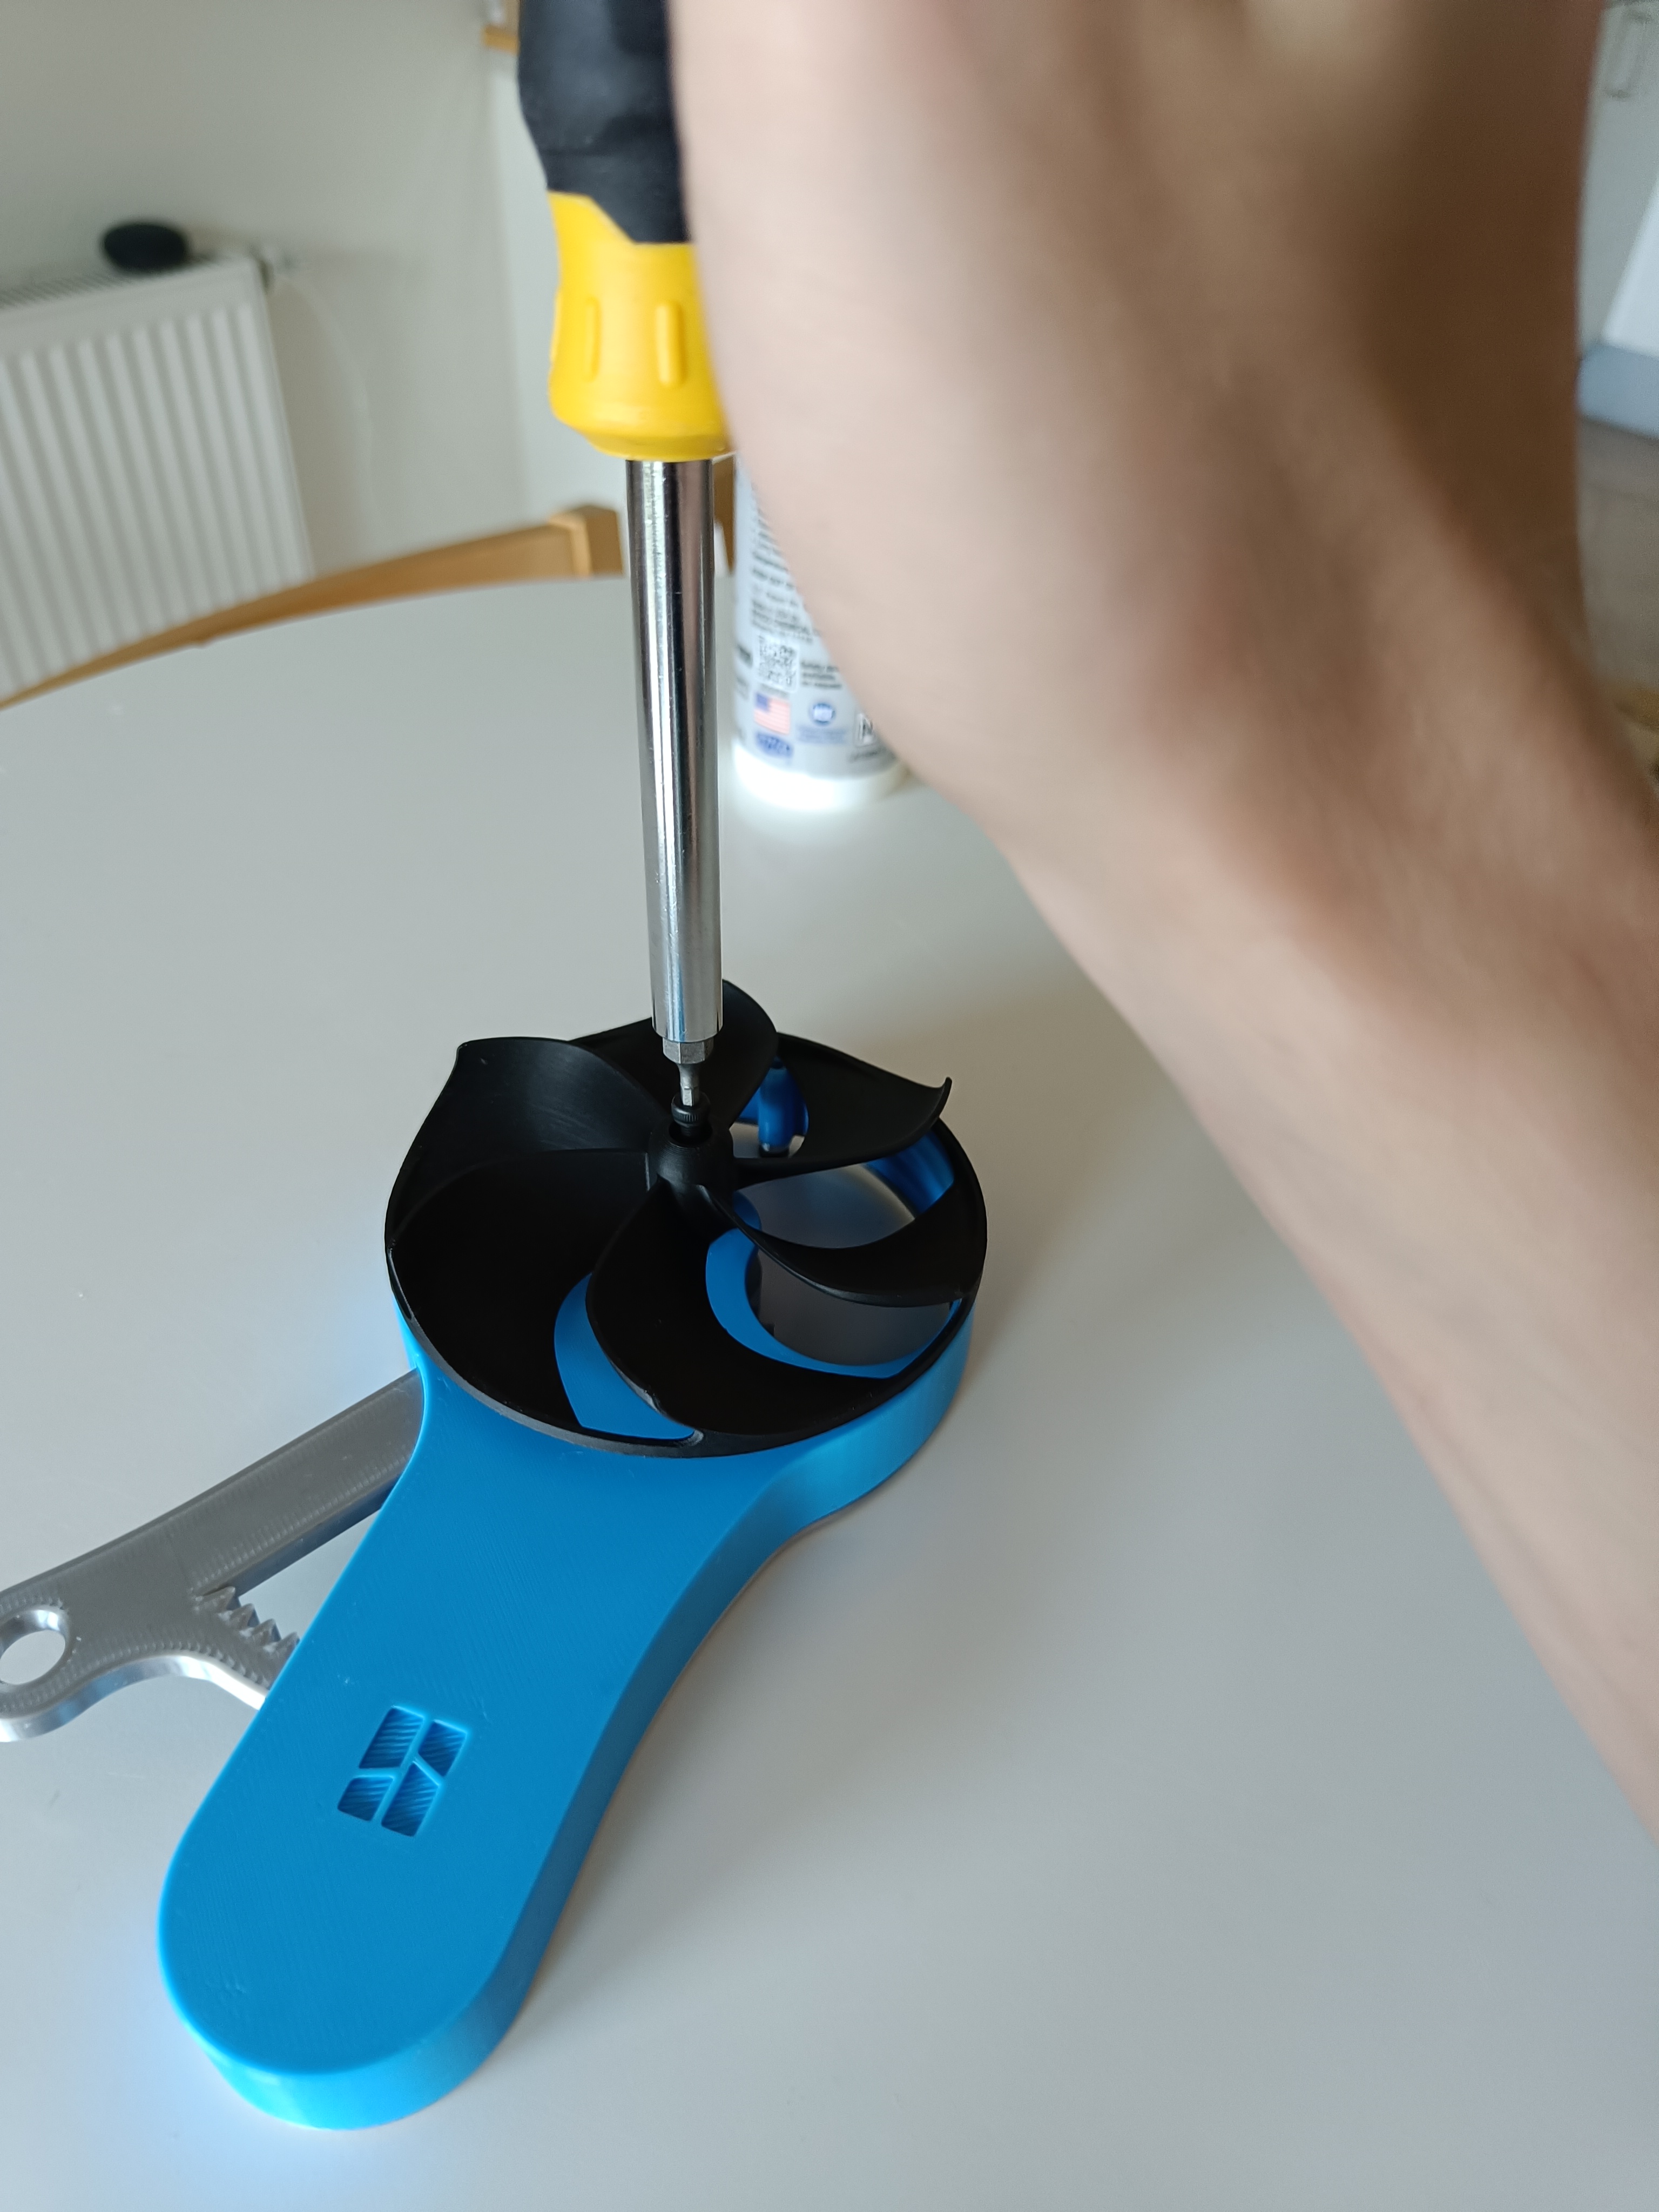
And that's it, you're done :)
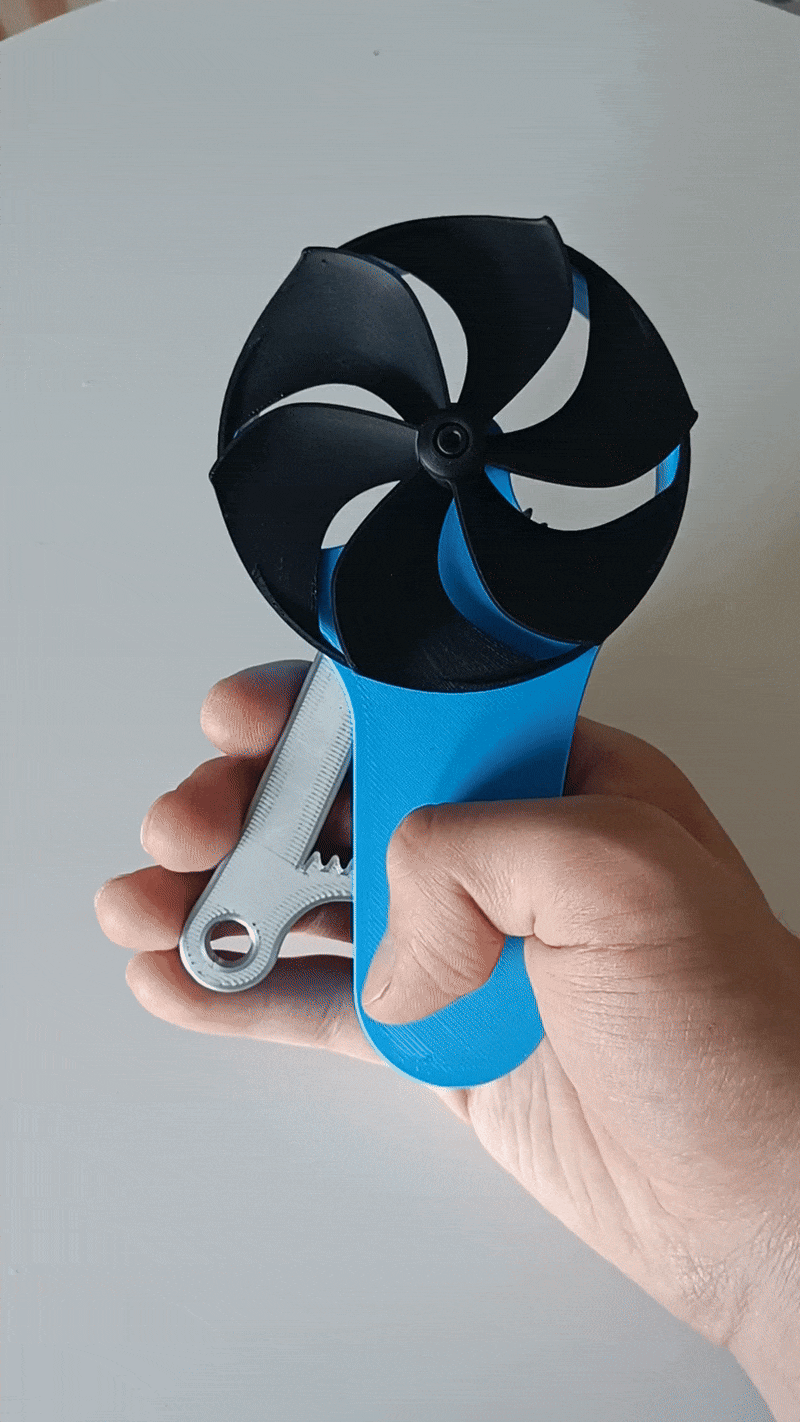
Have fun using Breeze Buddy Pro!