Você está no 3DFinder
Buscamos em Thingiverse, MakerWorld e Printables ao mesmo tempo para te dar o melhor de cada uma.
Descrição
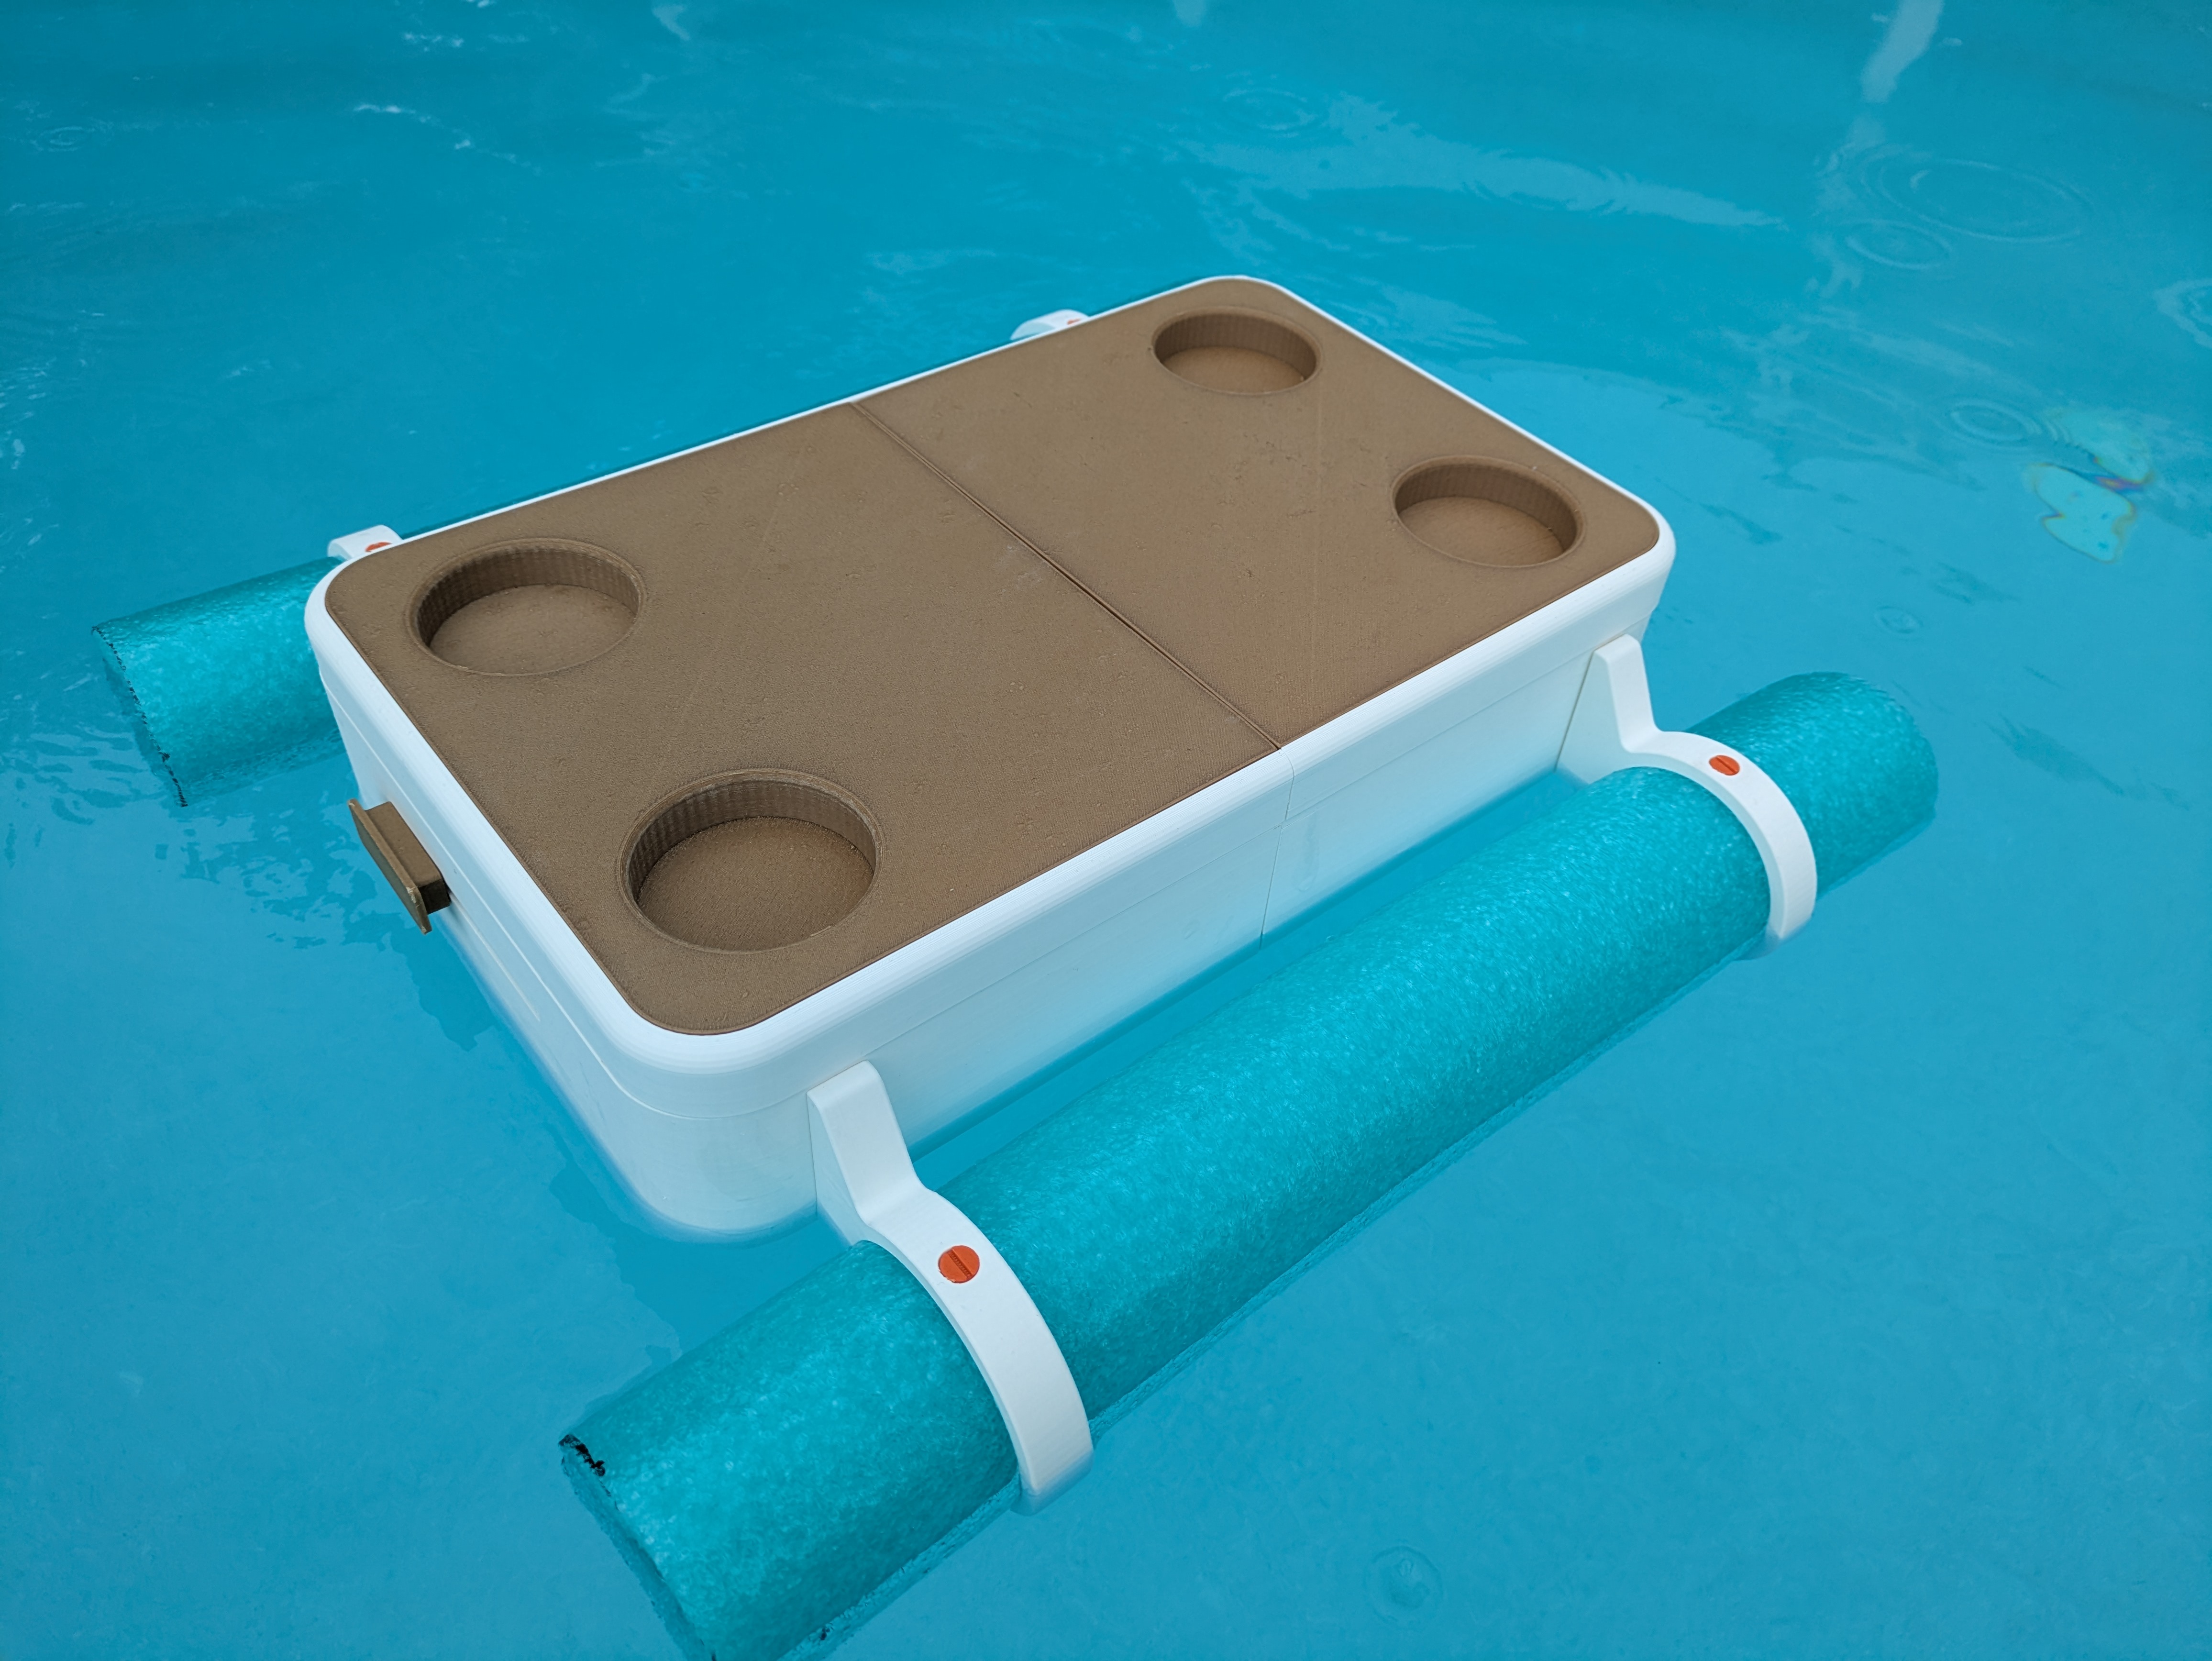
Do you love to relax at the pool with a nice drink in hand while drifting aimlessly on your big pool floaty or even hanging out with friends in the shallow end talking days away. Then suddenly, out of nowhere, a ball comes flying at you! You turn to react, but your hands are preoccupied with the drink you are carrying. Now you face the moral dilemma, spill the drink or get pummeled in the face, which do you choose?
Well now you don't have to choose any introducing the amazing POOL TABLE!
See what I did there… you get it… Ok I'll shut up now…
🎱 Description
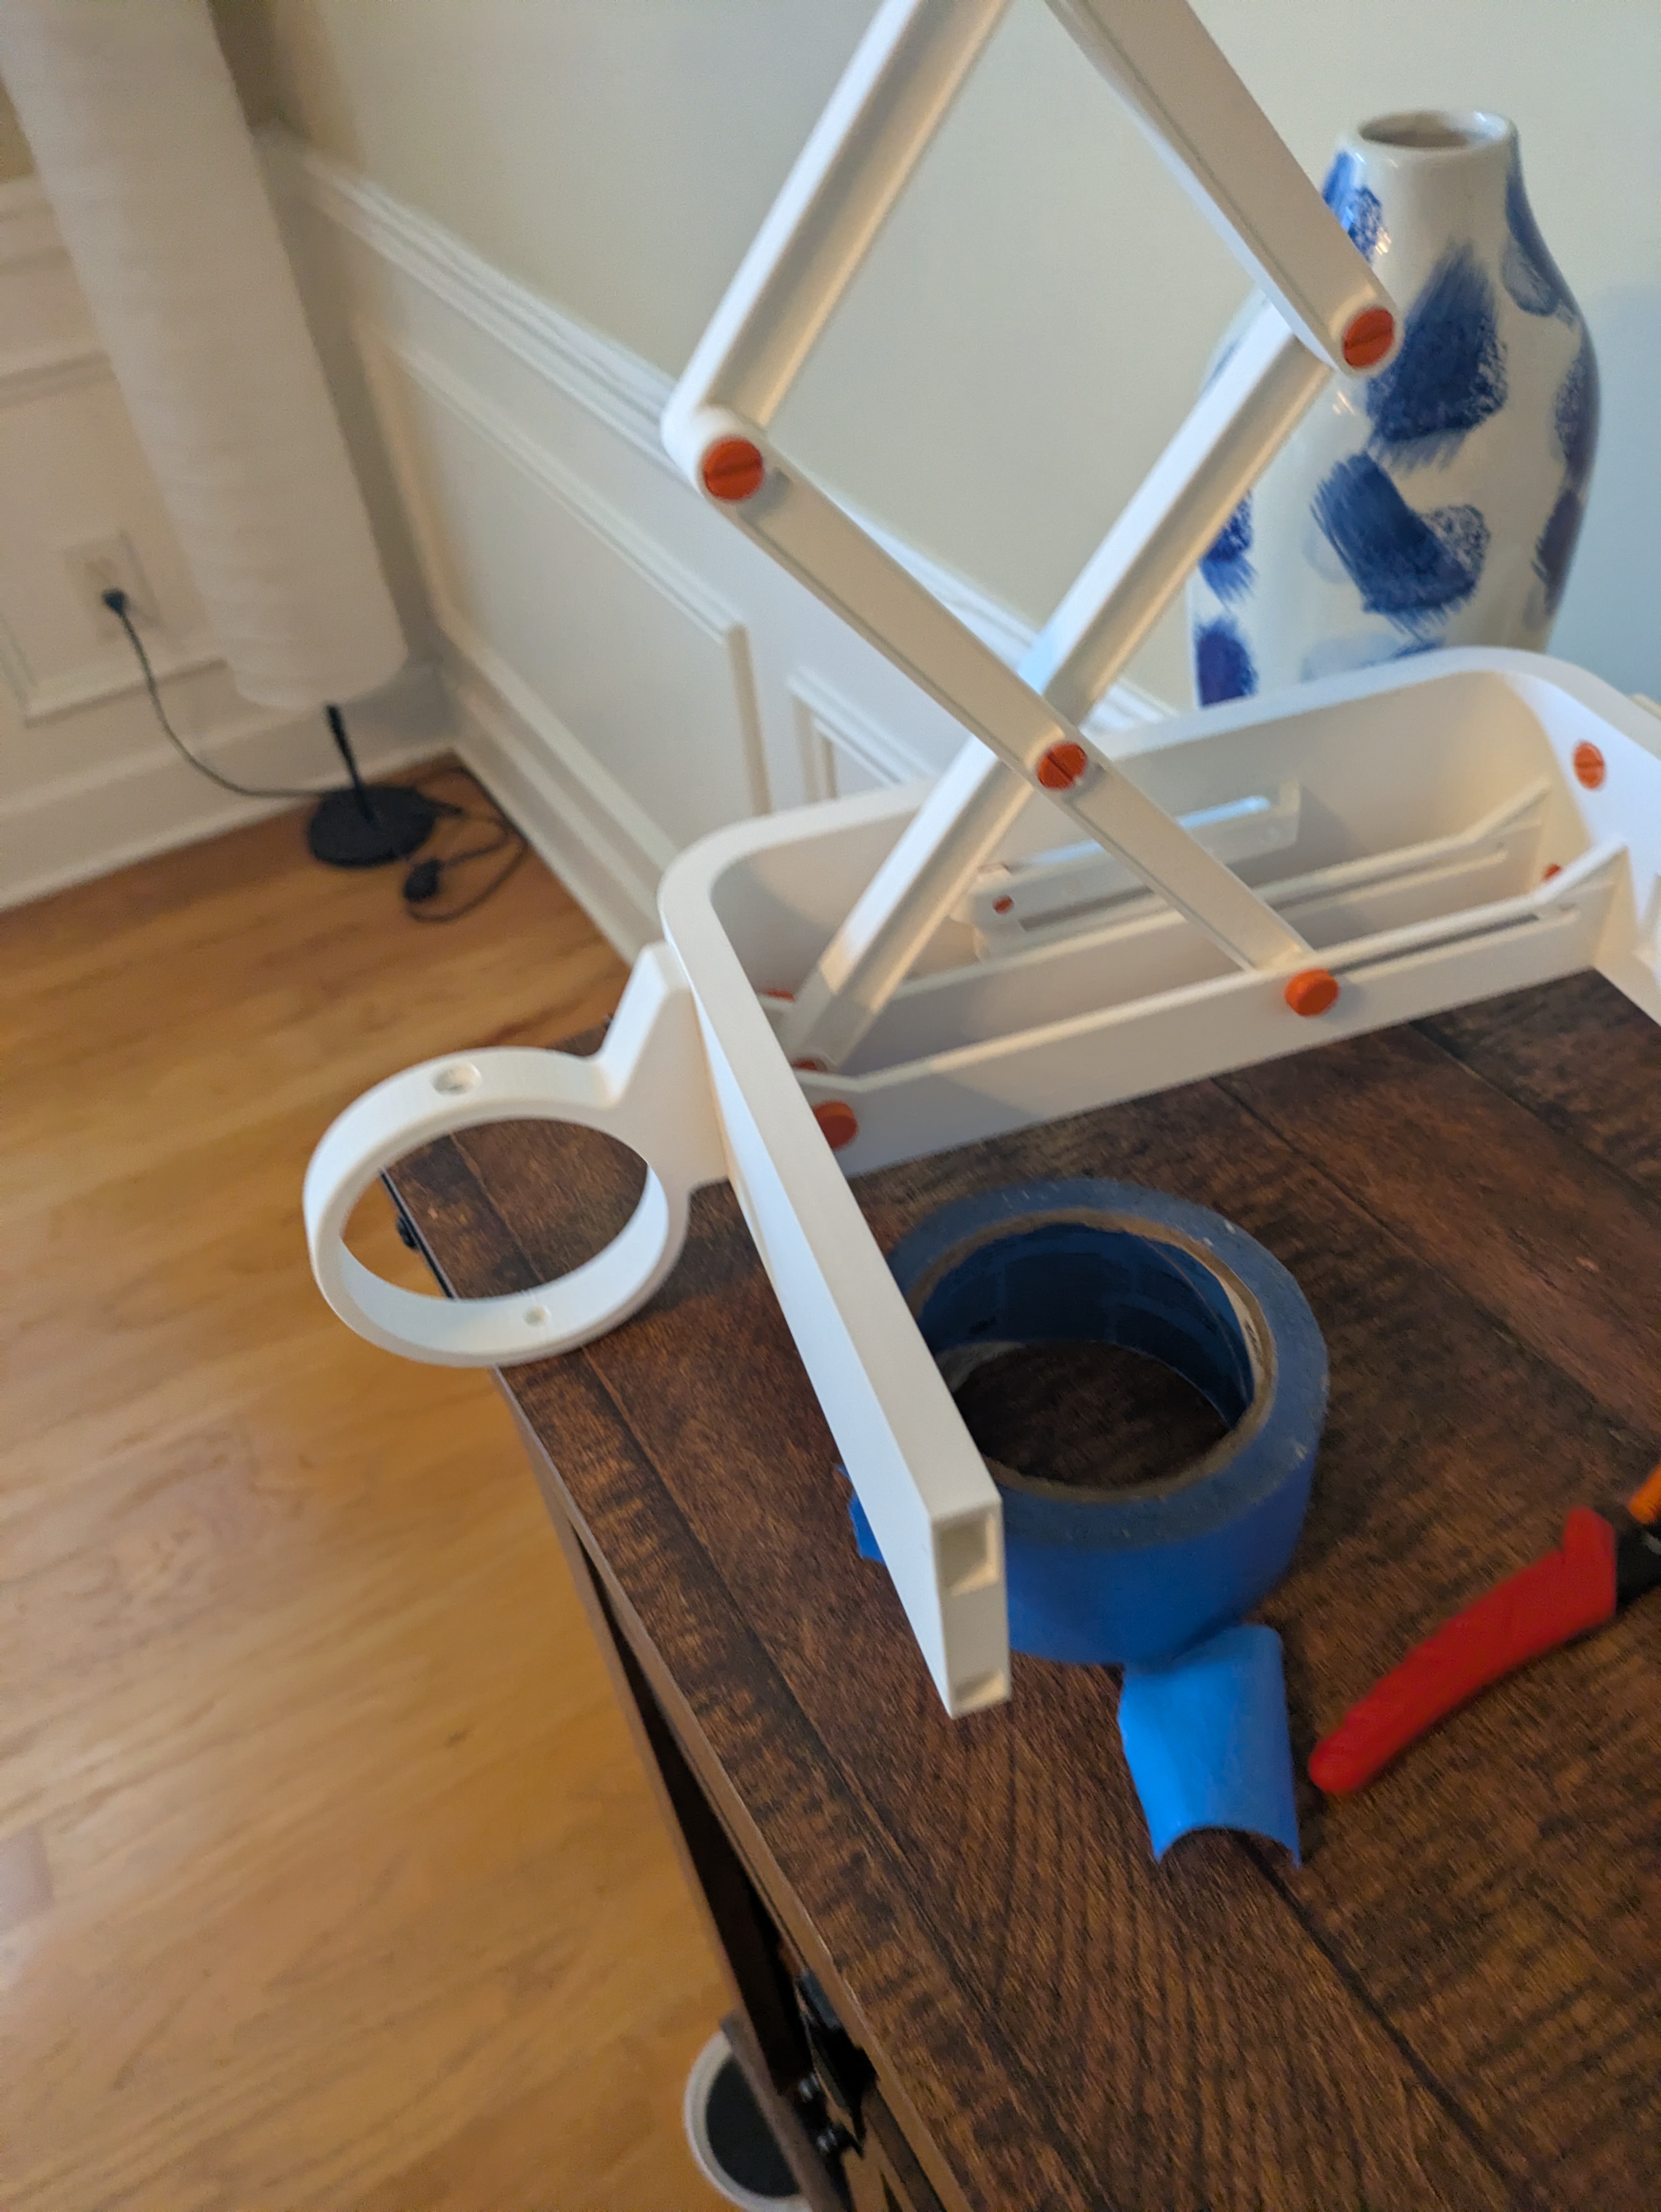
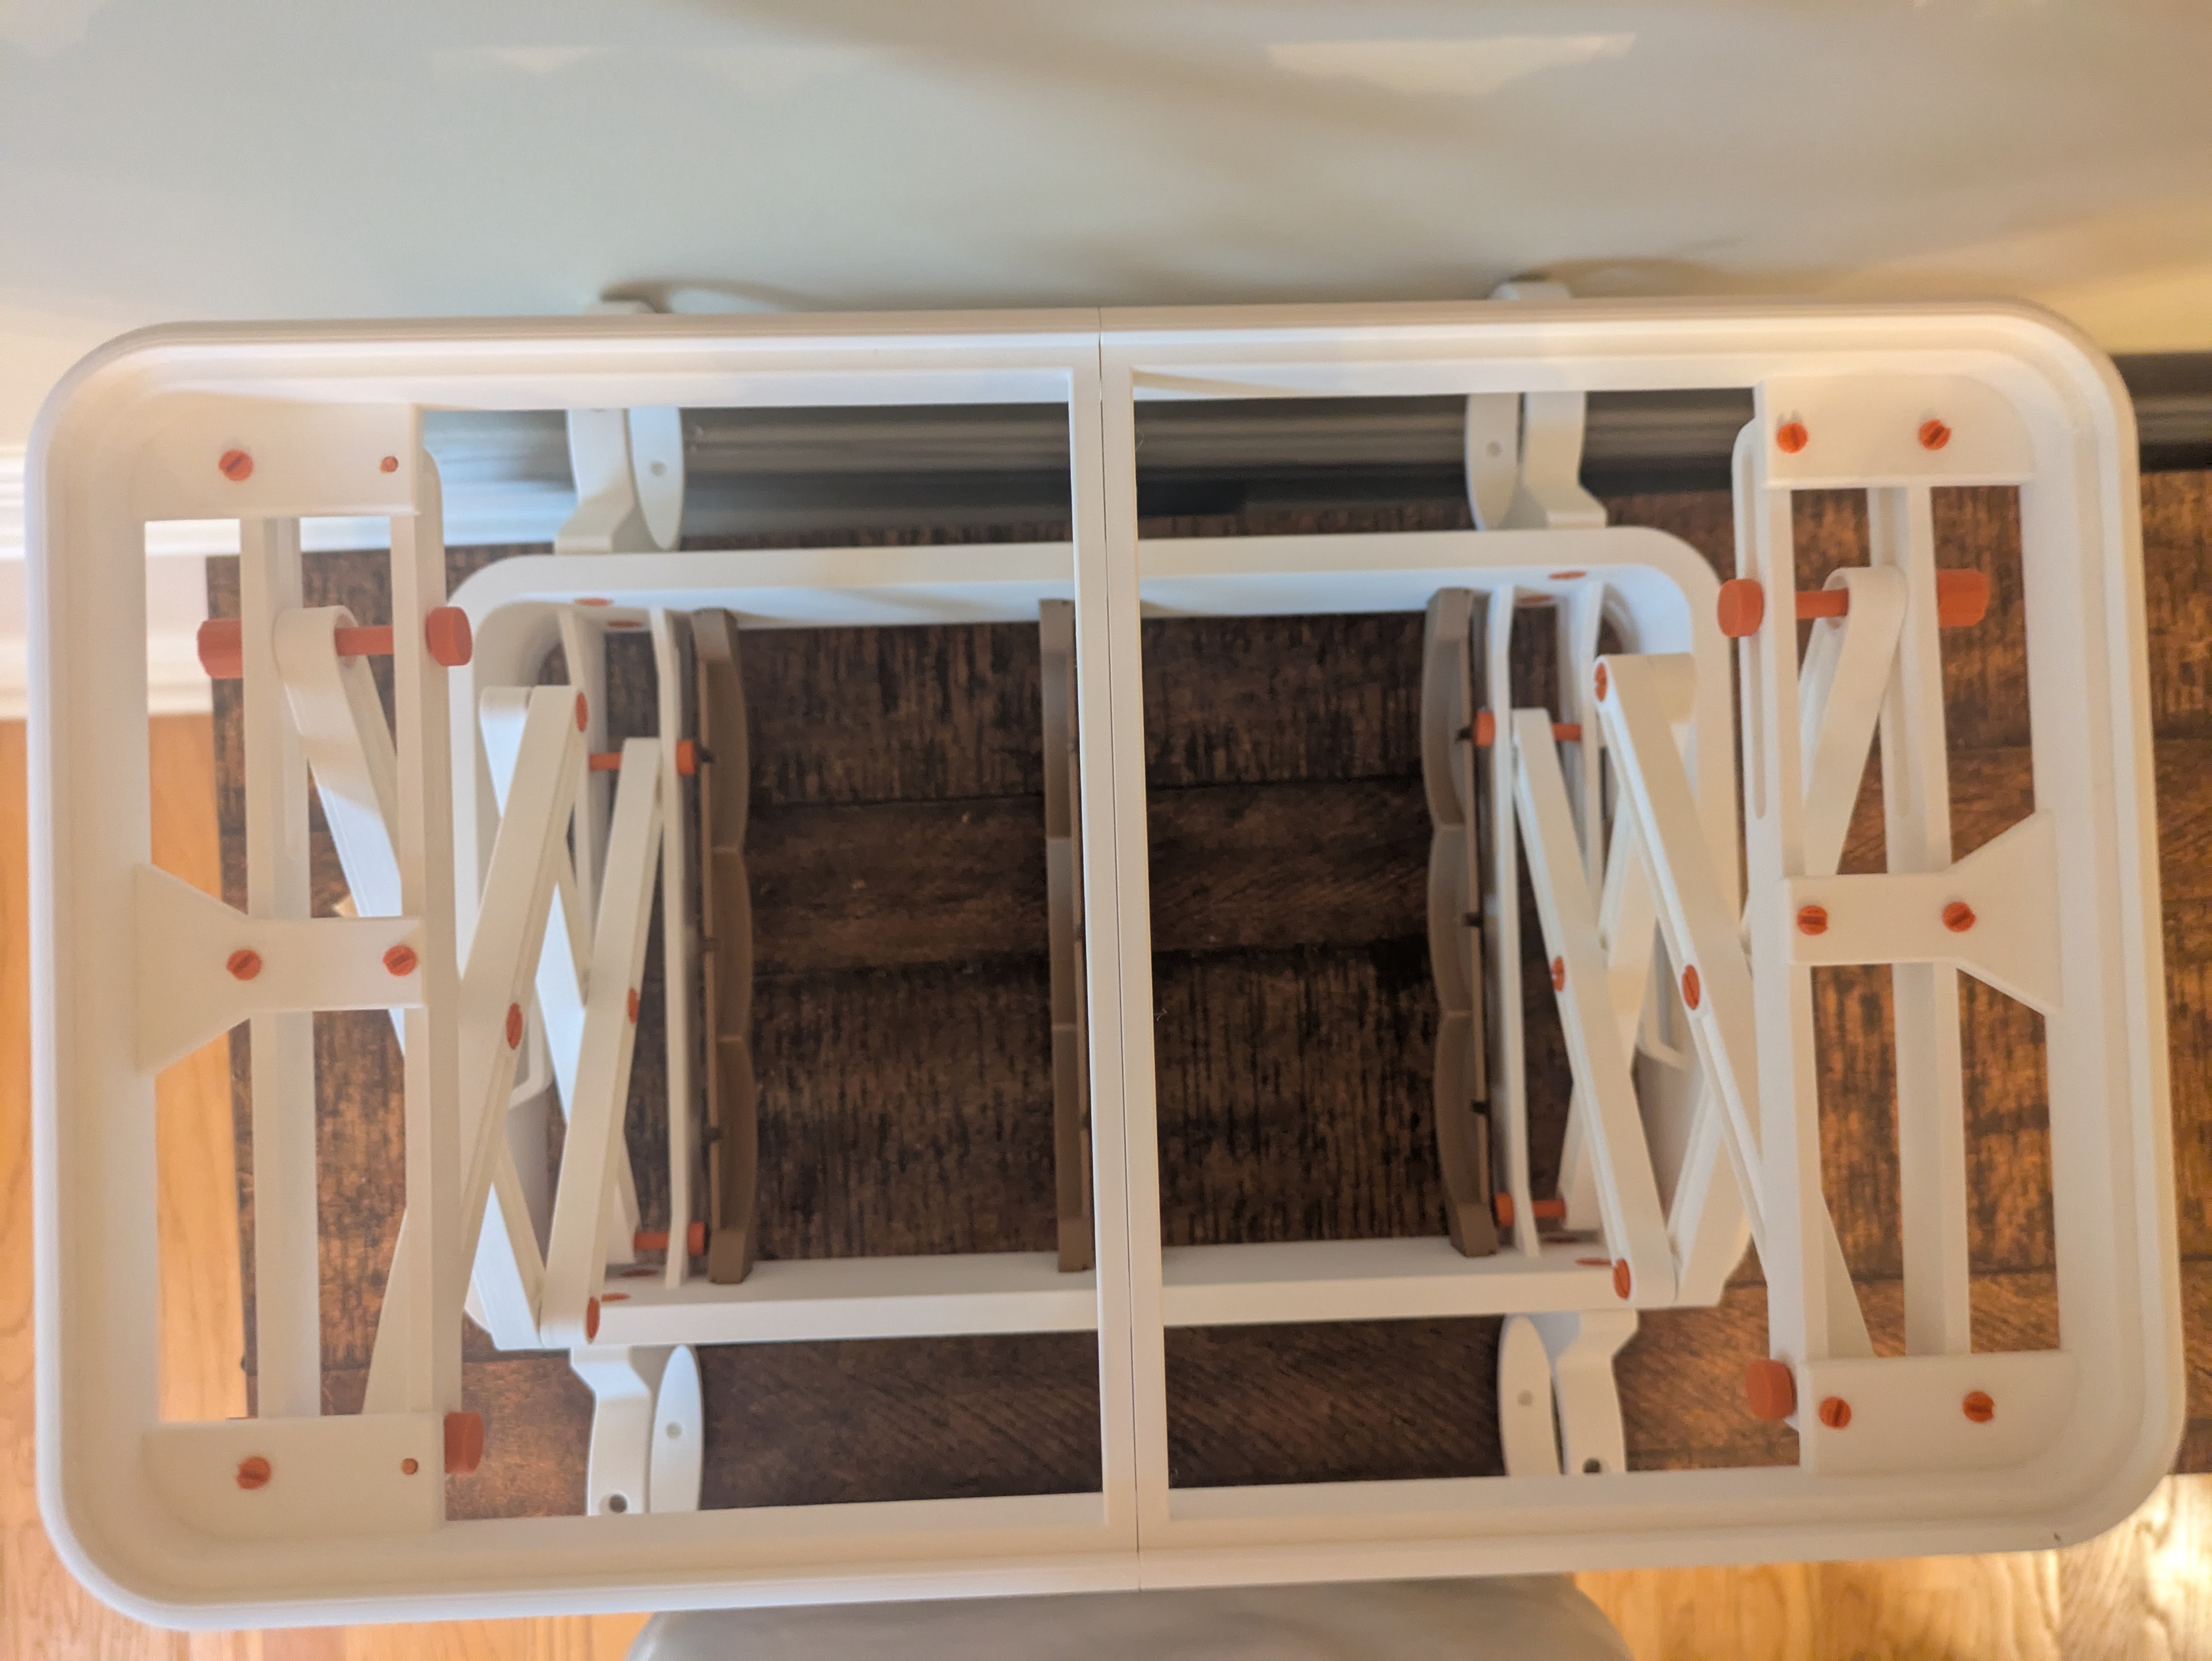
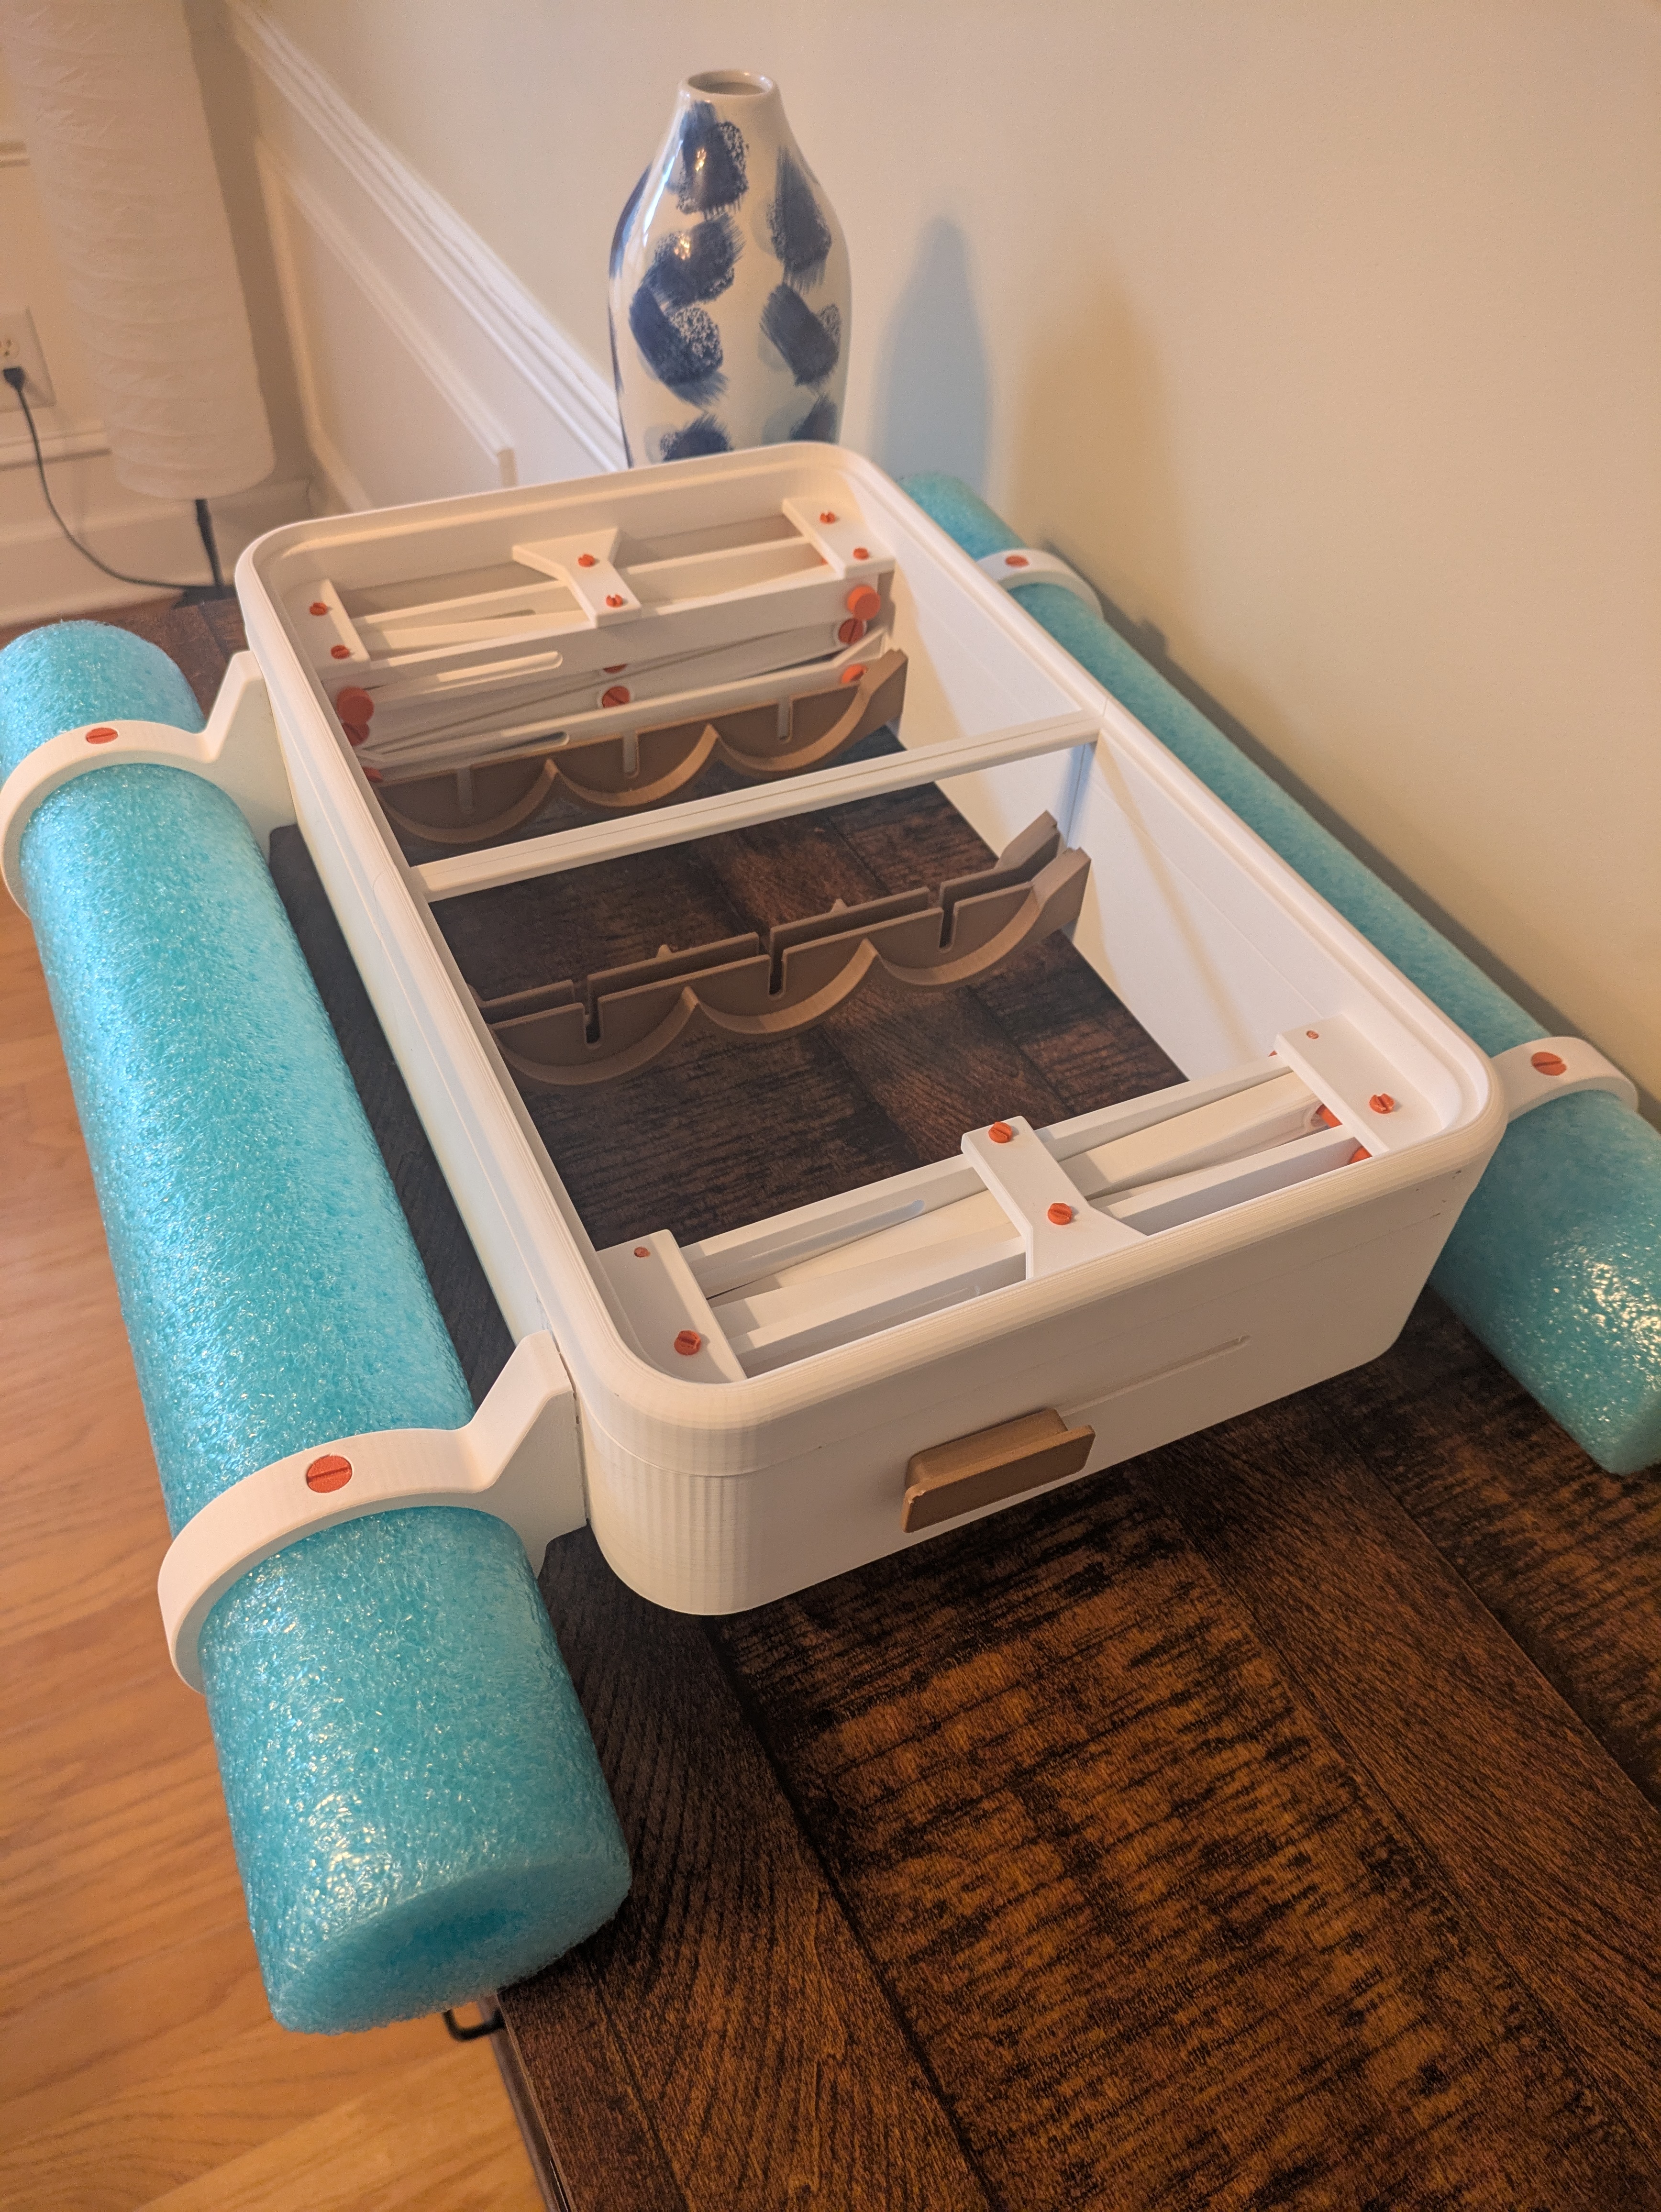
The Pool Table is a 5-tier adjustable floating table, and drink rack making it the perfect companion on a hot summer day at the pool. It sports a multilevel scissor lift mechanism allowing it to raise to 5 different heights making it perfect for when you are on a pool tube or raised above the water in other ways. The pool table has lots of places to keep you drinks including a large 9.4" by 15.9" table with 4 cup holders, as well as a drink rack stored inside the table being able to store up to 6 drinks at a time! And the best part of all the tabletop is actually fully customizable. Let's say you want to store 4 cans and a speaker well you can do that! All you have to do is create a cutout in the CAD model and print.
I am going to continue making improves to my design and add more features as well, so be on the lookout for new additions to the model!
🏖️ How to Use
- To raise the table all you have to do is grab the top and pull up and the rubber bands should do most of the work for you.
- Once you are at one of the 5 height levels grab the handles on the side. Readjust accordingly and then pust in. You should feel little resistance and the table won't move after that.
- Once you are done using the table to lower it you just need to pull the handles out again and then lower it by either pushing down on the top or using the handles on the side to slide it back to the bottom.
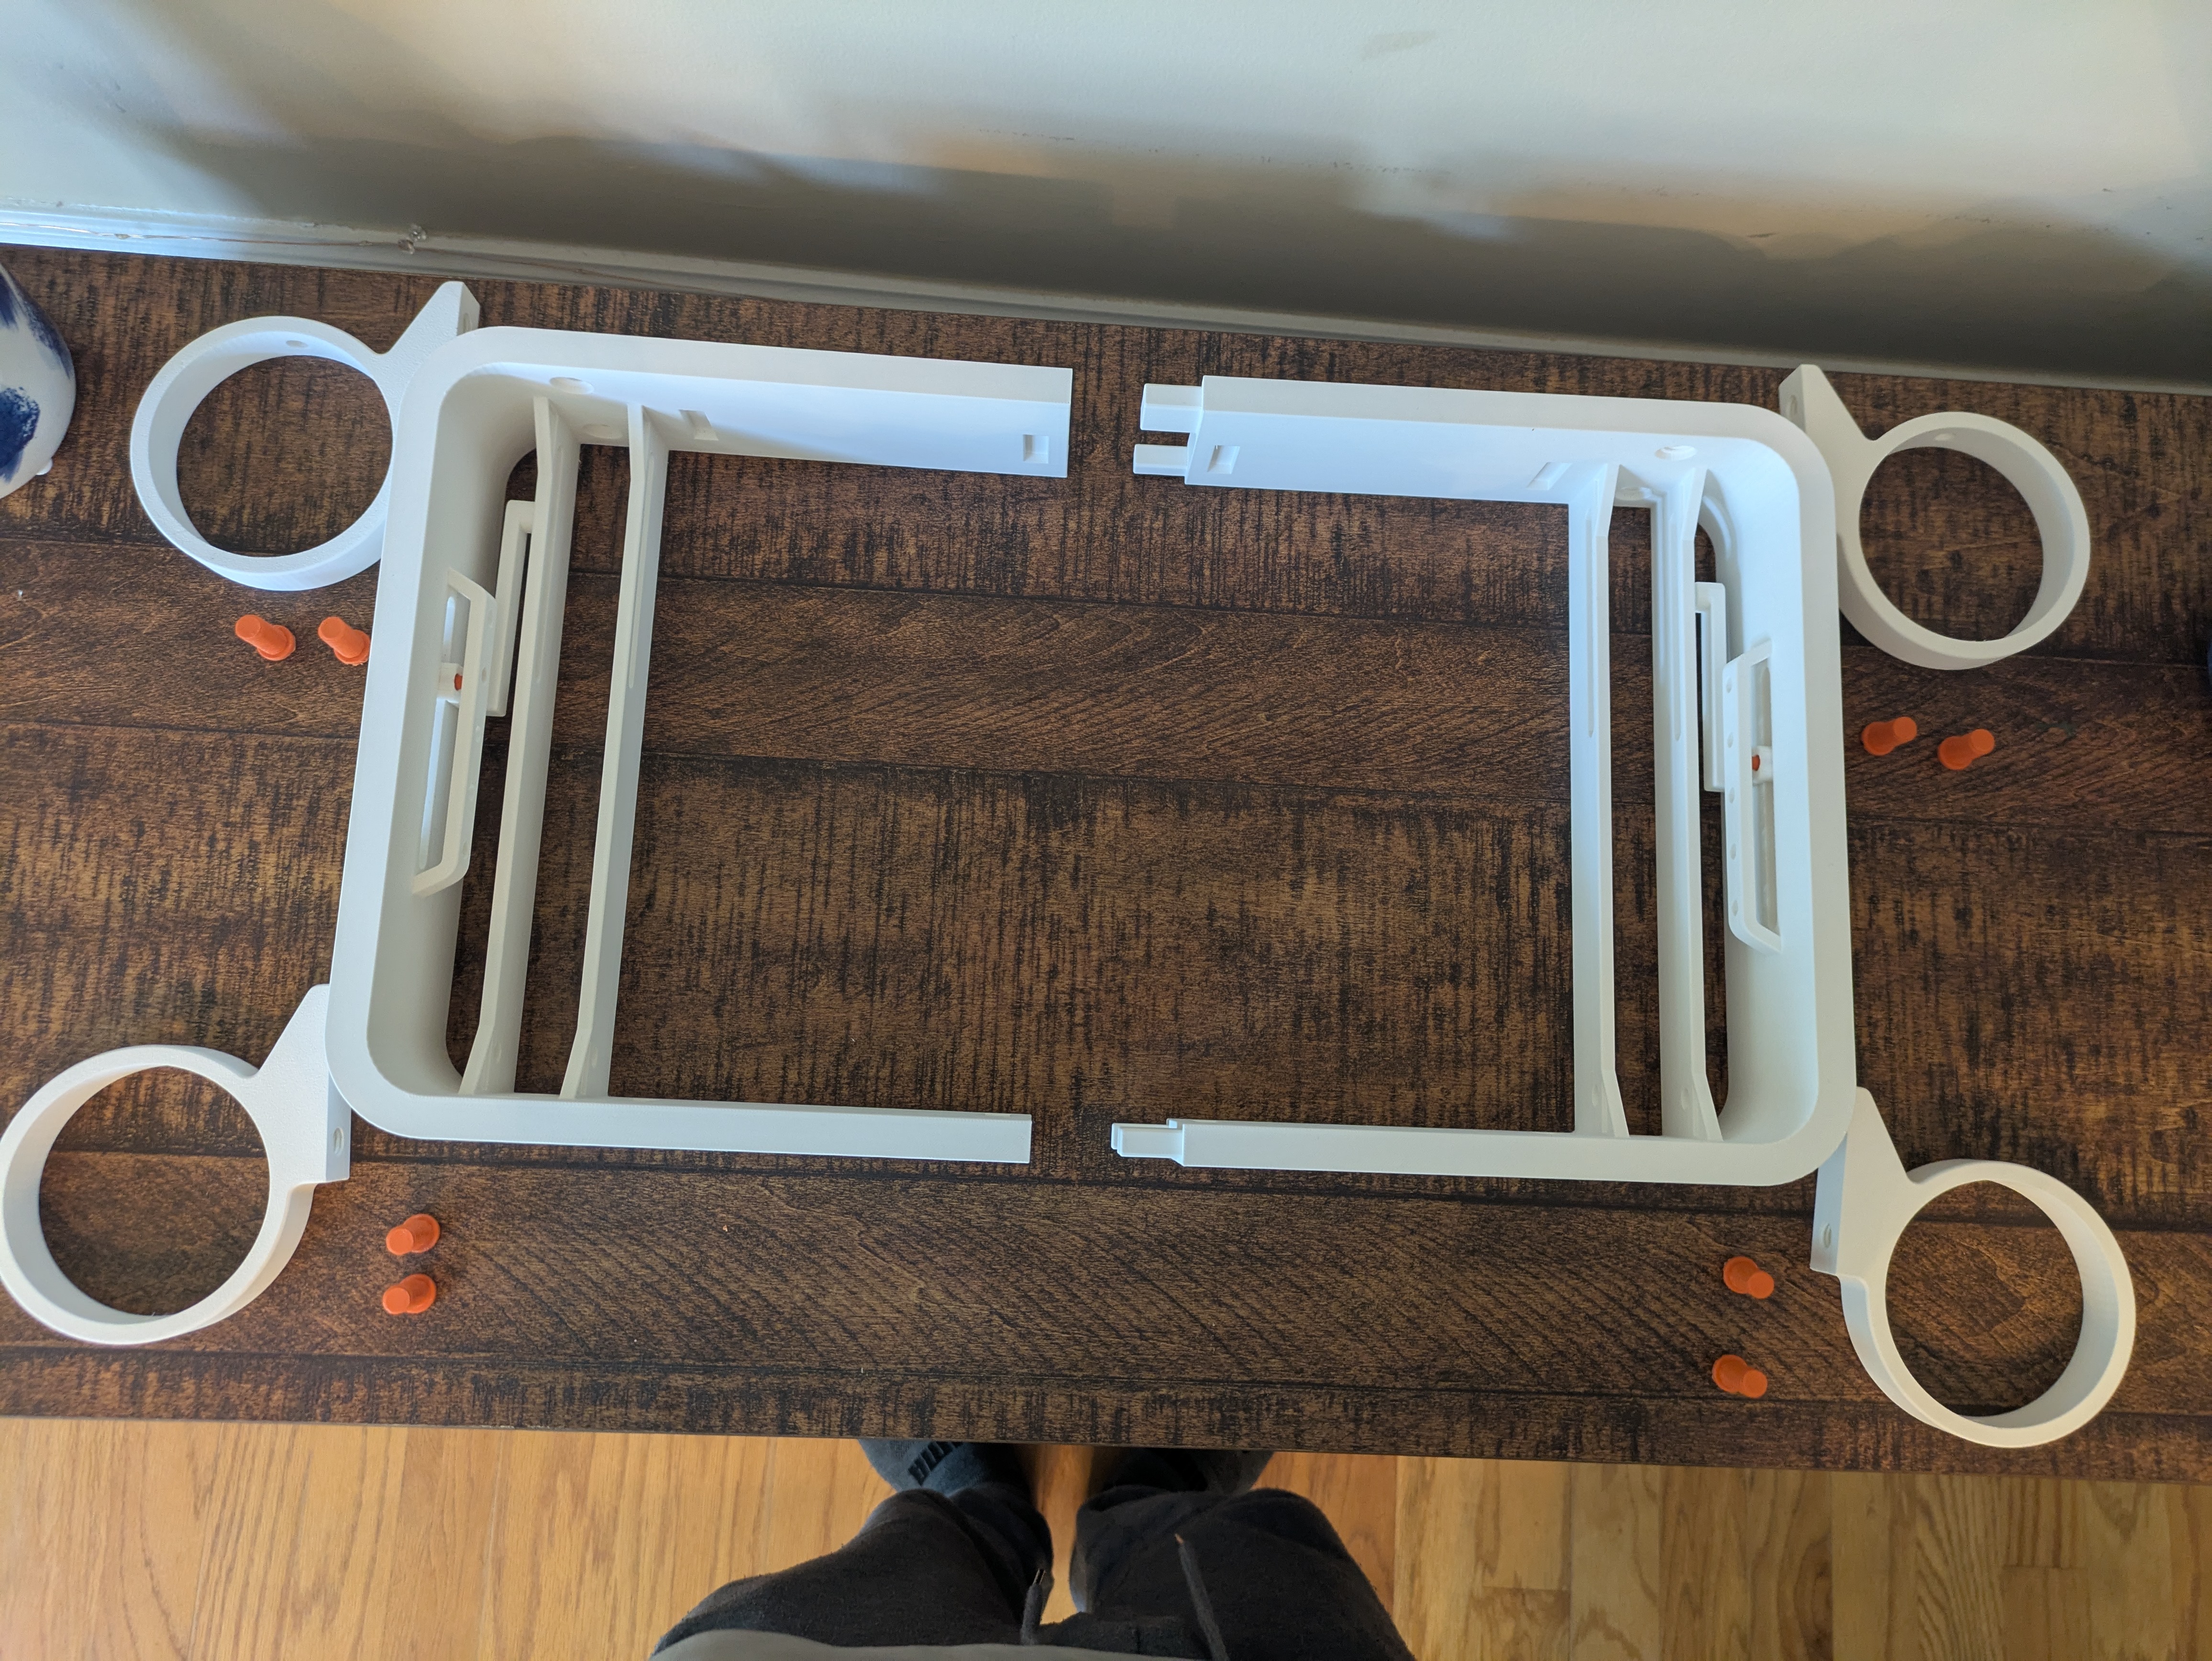
📝 List of Materials
- 1x Base #1
- 1x Base #2
- 1x Table Holder #1
- 1x Table Holder #2
- 1x Slider Linkage #1
- 1x Slider Linkage #2
- 2x Slider Linkage Stabilizer
- 2x Tabletop
- 2x Handle
- 2x Lock Pin
- 4x Top Scissor Lift Bar
- 4x Pool Noodle Clamp
- 4x Pool Noodle Lock Screw
- 6x Scissor Lift Mounting Screw Cap
- 8x Rubber Bands
- 8x Scissor Lift Bars
- 8x Scissor Lift Mounting Screws
- 8x Scissor Lift Flush Screw #1
- 8x Scissor Lift Flush Screw #2
- 8x Pool Noodle Clamp Screw
- 12x Table Mounting Screw
🛠️ Assembly Instructions
Some Parts are easy to snap during the assembly process. It took me a few tries myself and multiple extra screws to get everything assembled. I did, in fact forget, to increase the infill for them so that would probably be the reason for the problem, but I would still suggest printing a few extras in advance in case you do brake anything.
- Needed Assembly Materials
- Coin with a 0.06" (1.52 mm) thickness. (Penny/Dime) or a screwdriver with the same thickness
- Adhesive (Super Glue)
- Sharp thin item (Skewer)
- 8x Rubber Bands
- Flush Cut Pliers (Filament Cutters)
- Sandpaper (Depends)
- Instructions
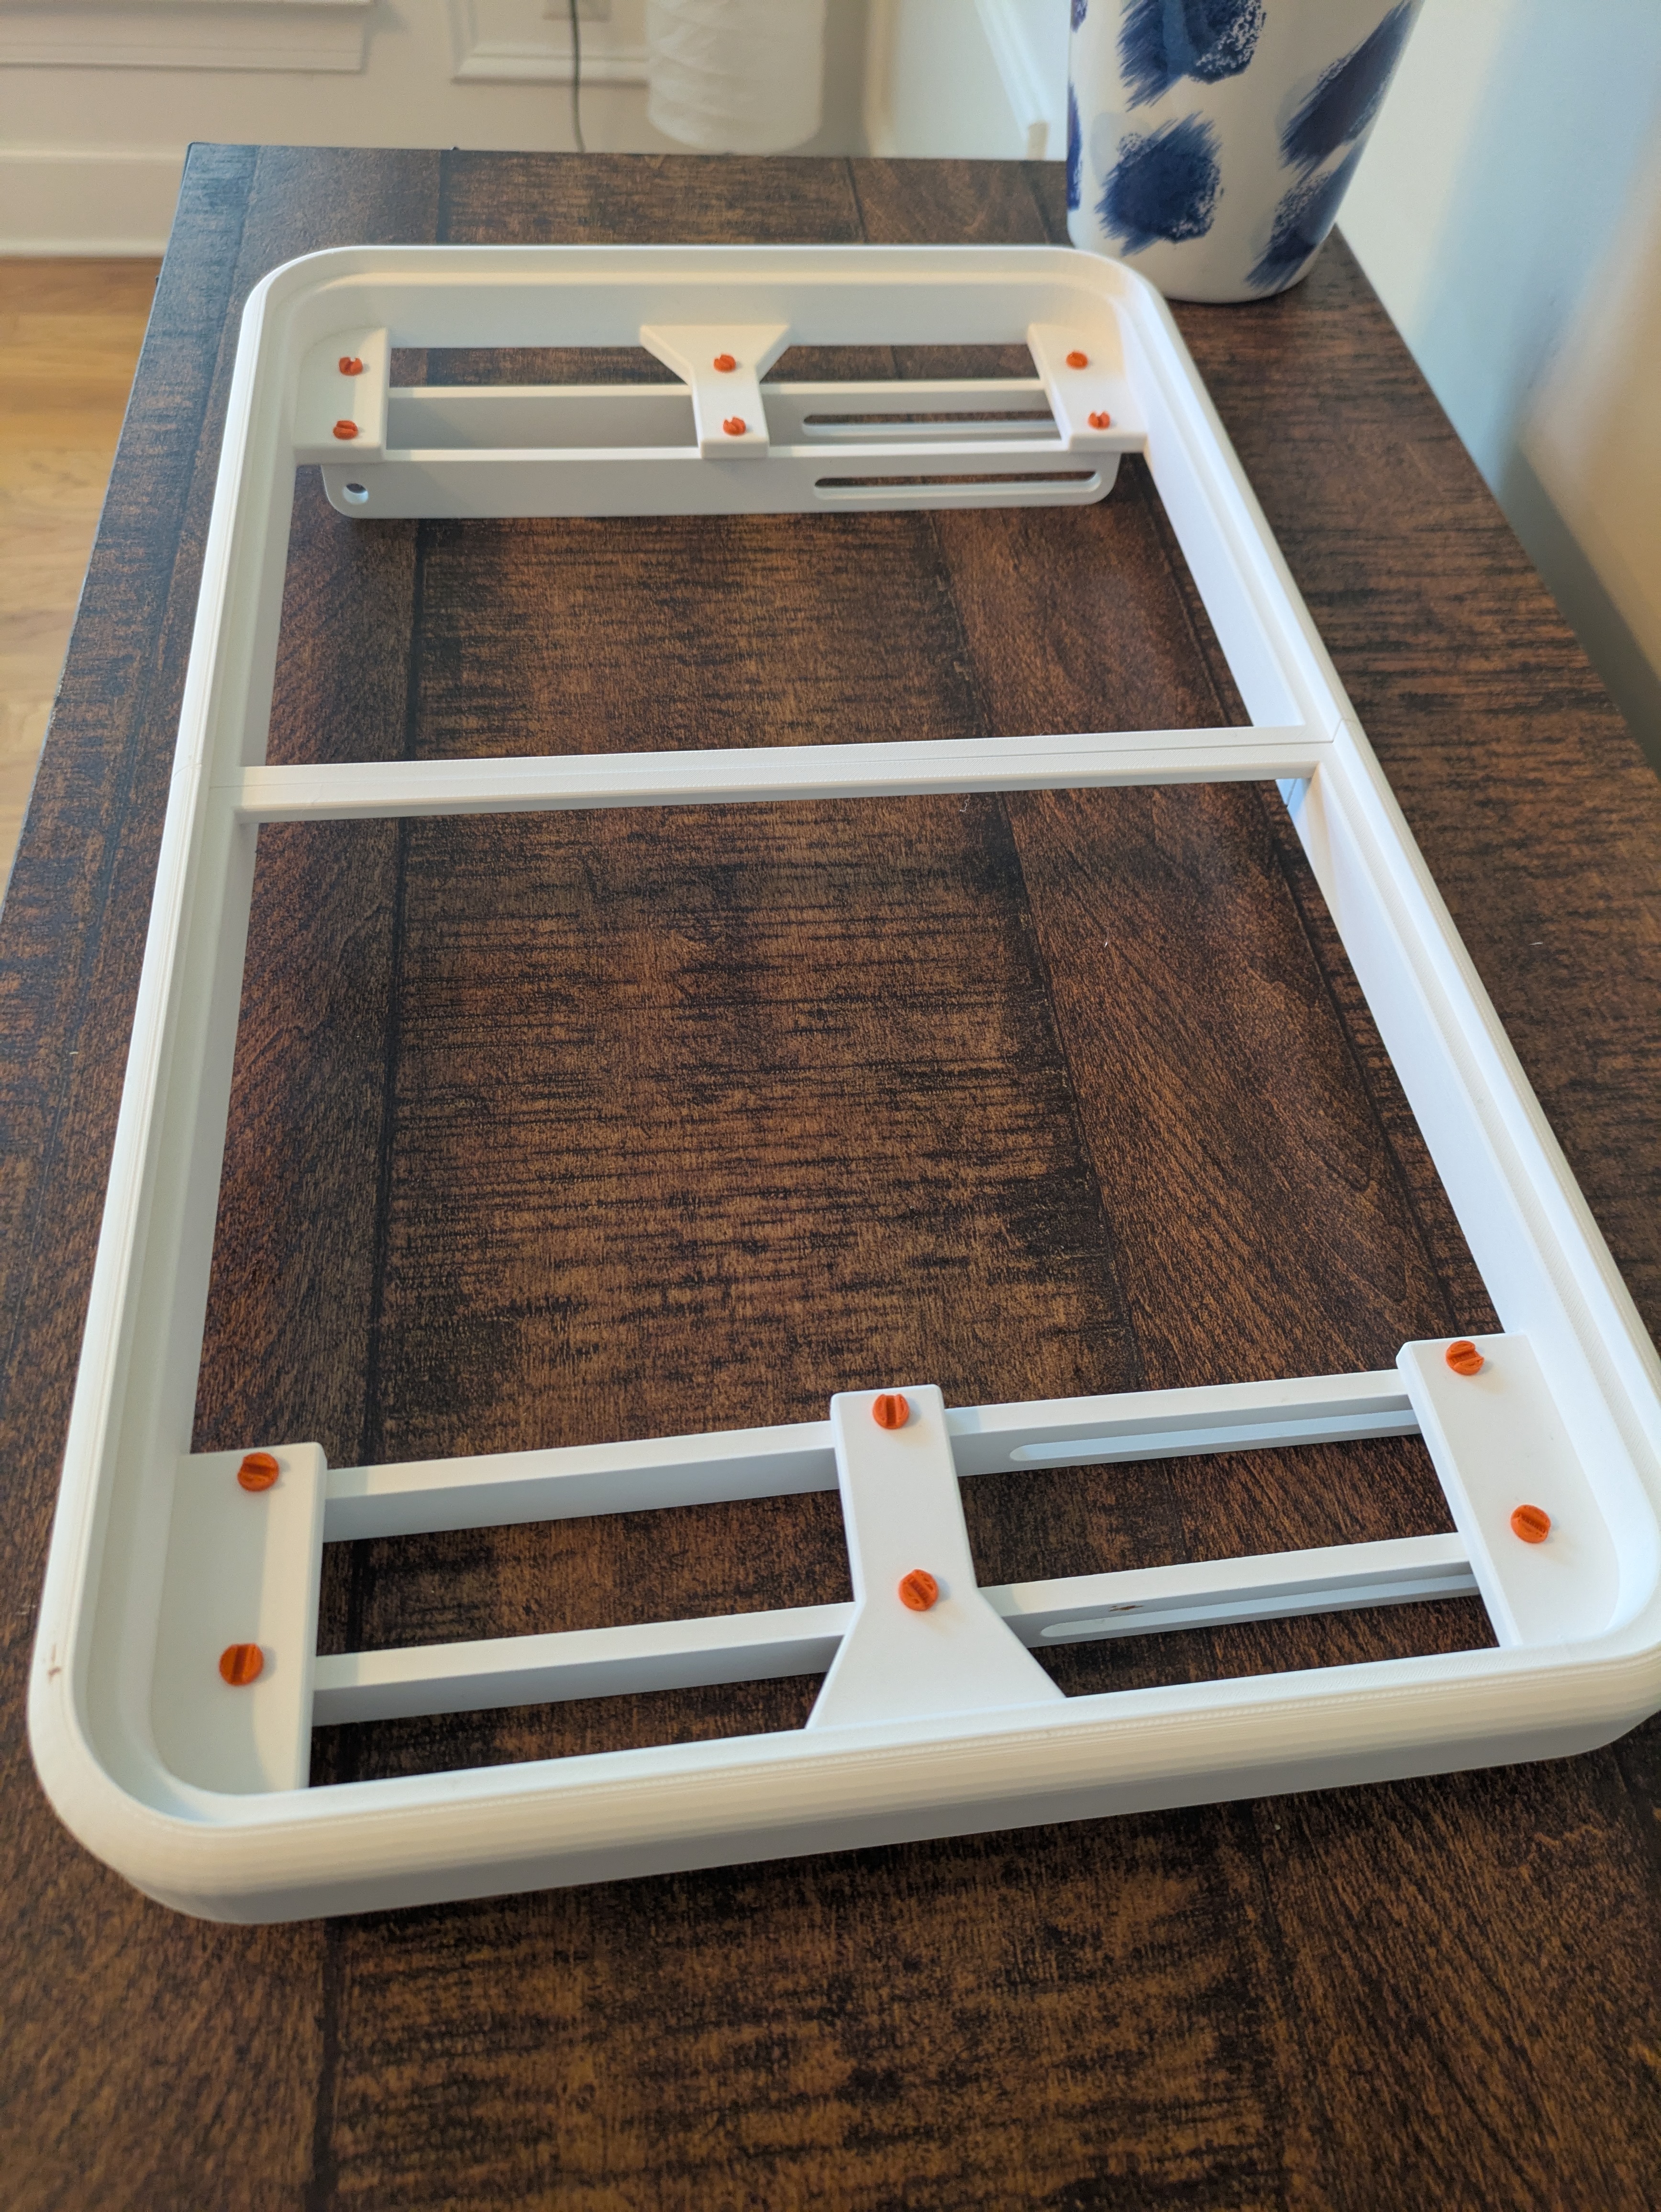
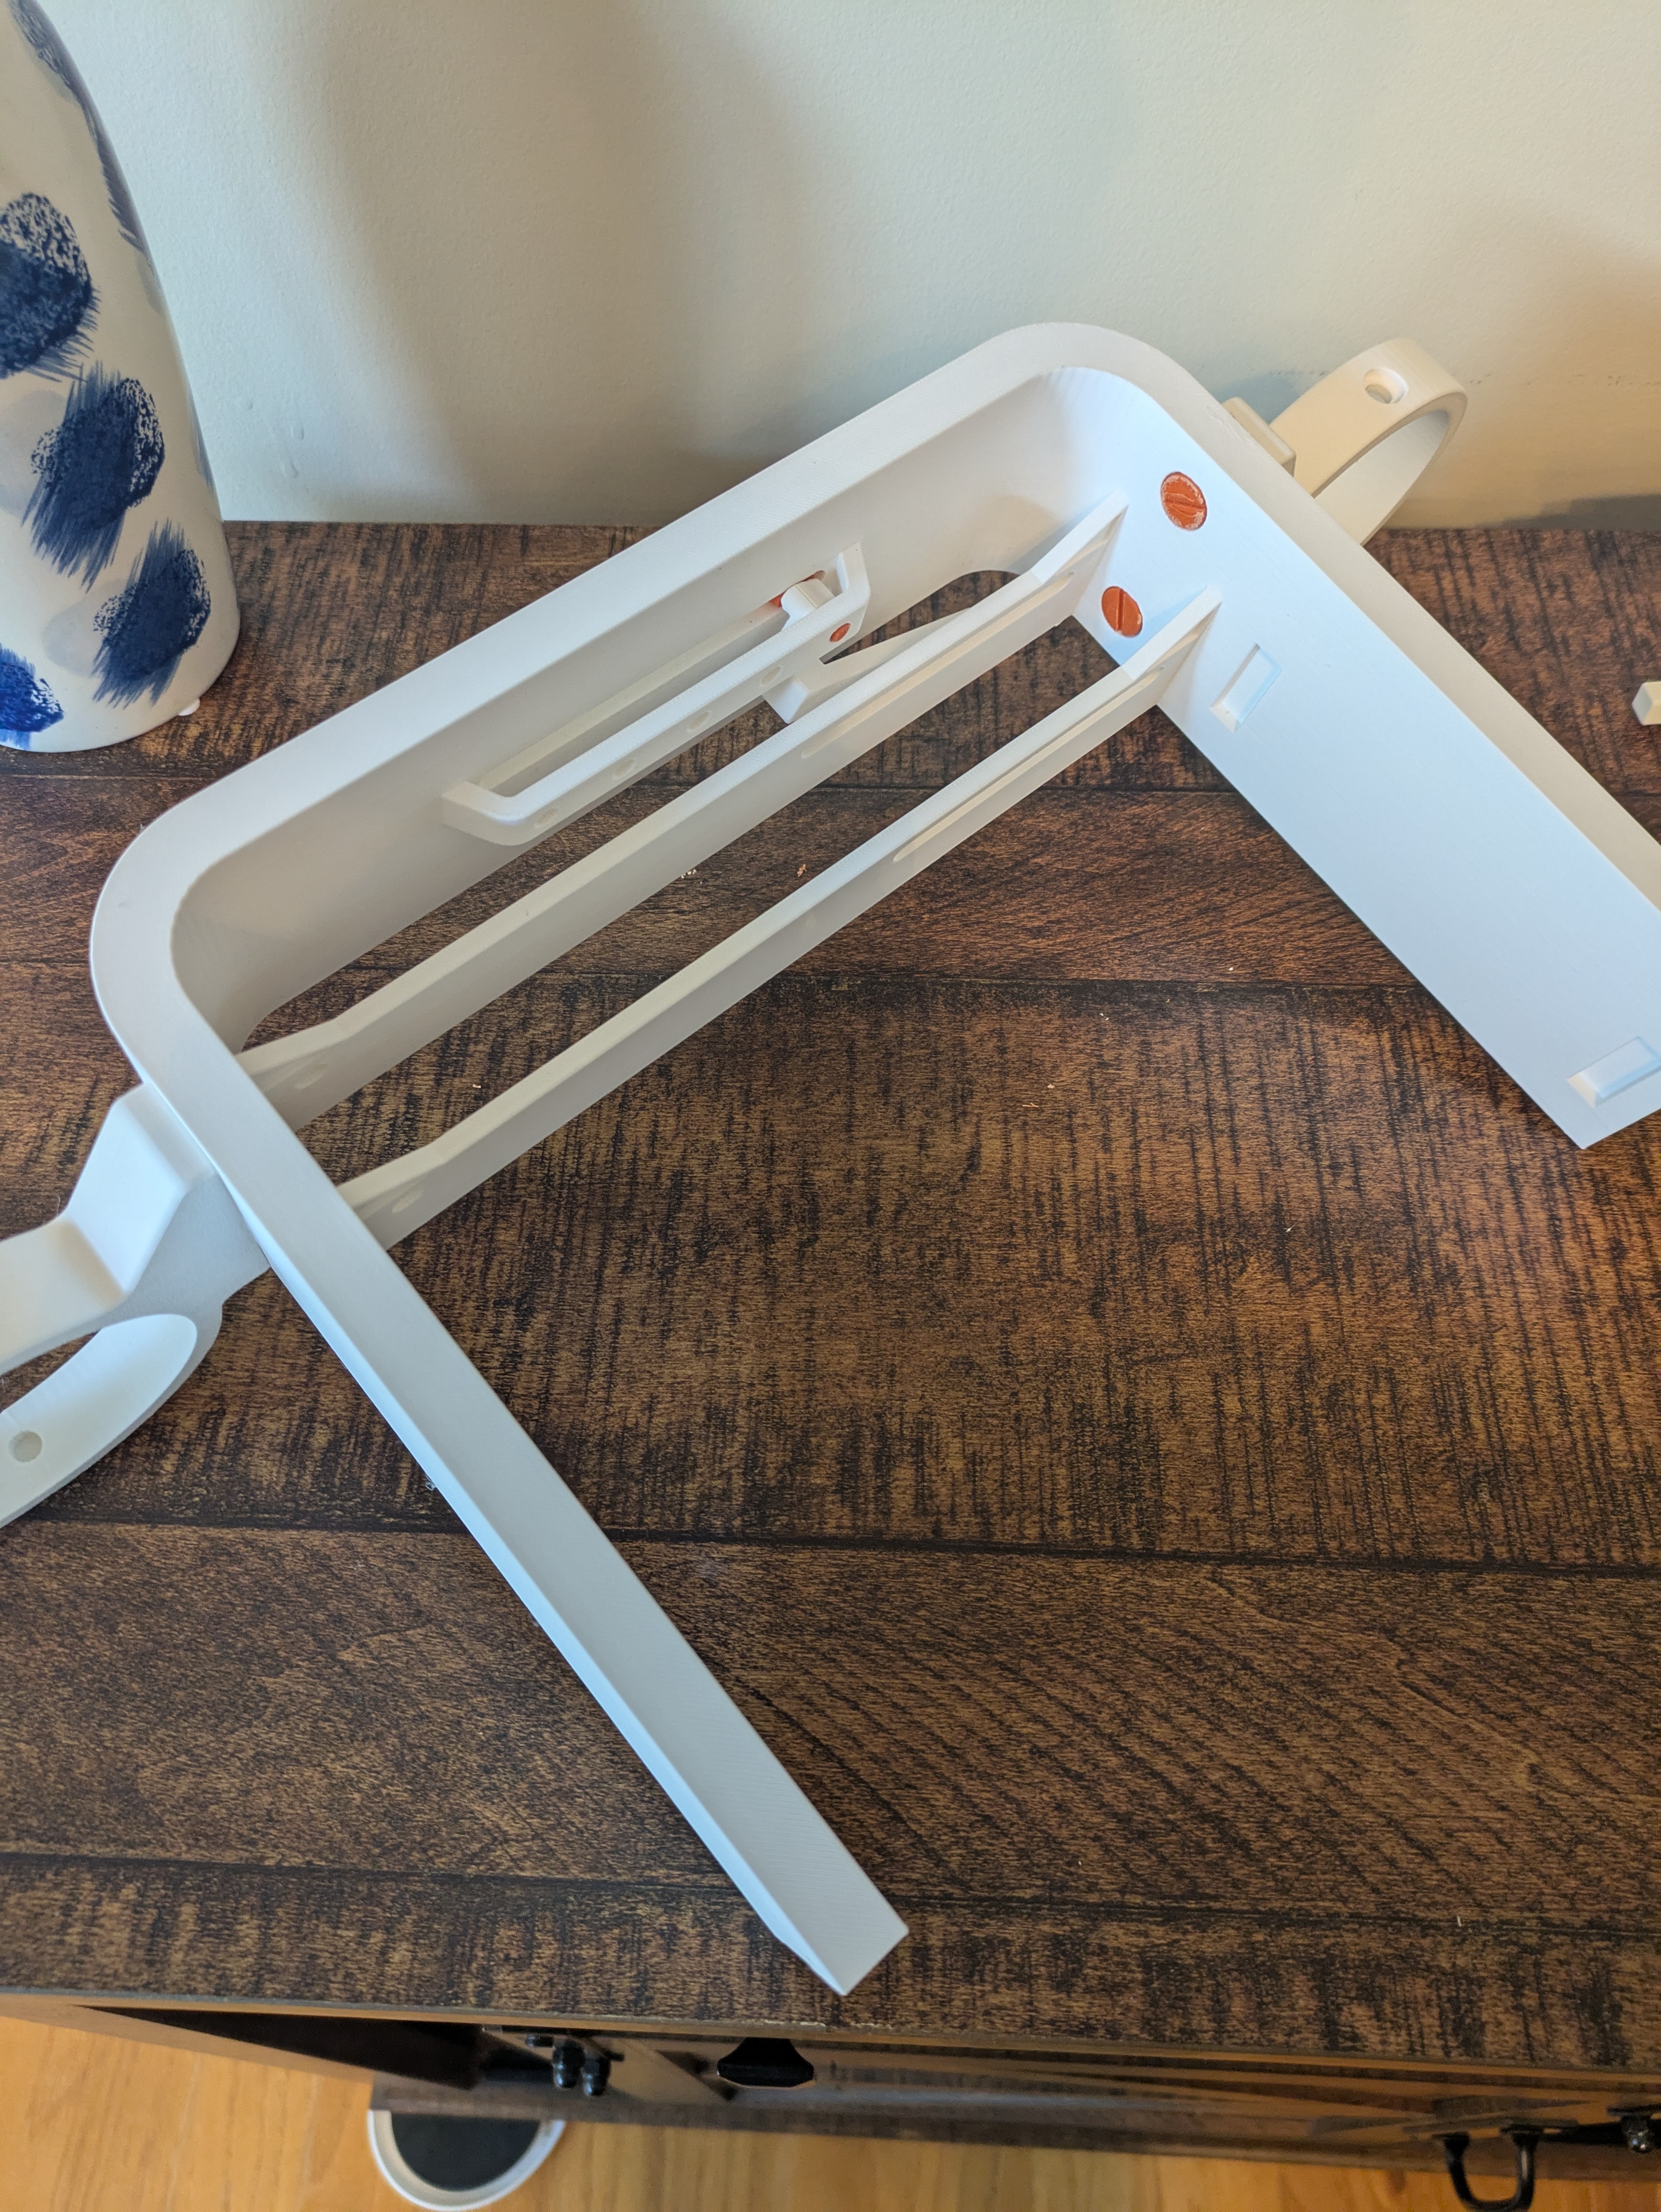
Attach Table Holder #1 & Table Holder #2 using super glue. Once dry and secure then attach the 4 Top Scissor Lift Bars. You should apply super glue inside the screw holes before screwing in for a more secure connection. Then set it aside to dry.
(MAKE SURE ALL OF THE BARS ARE POINTING IN THE SAME DIRECTION)
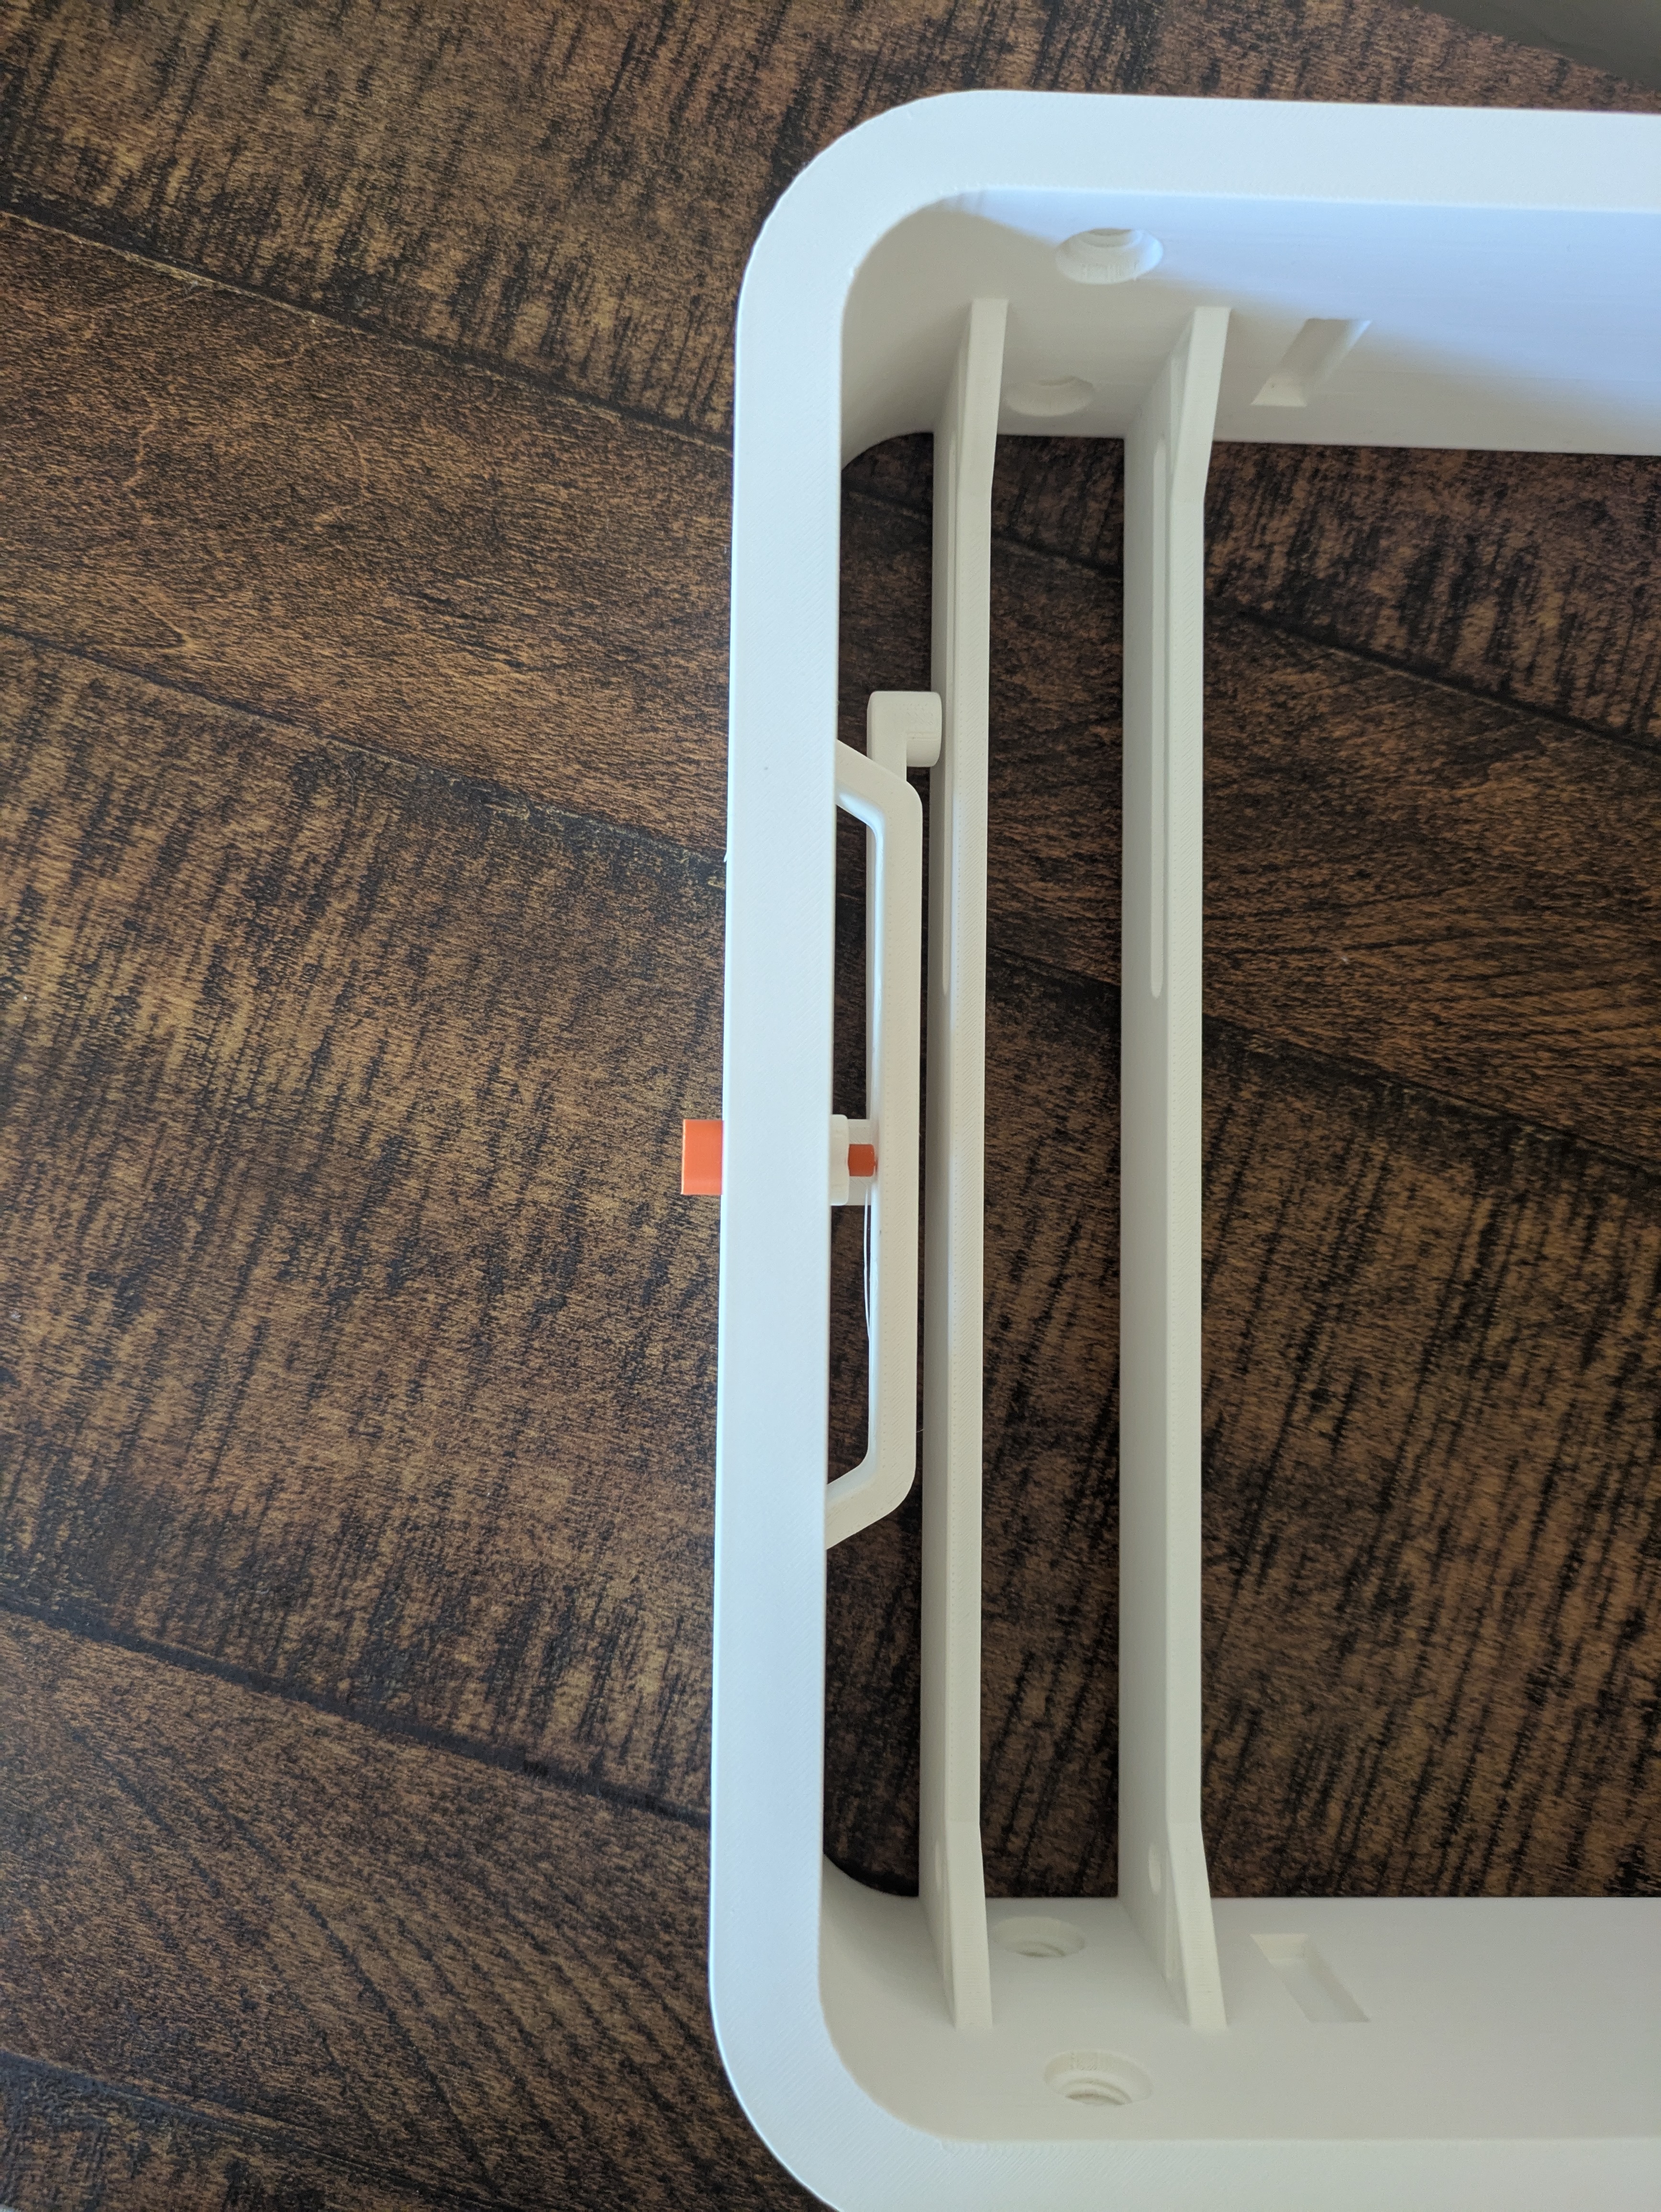
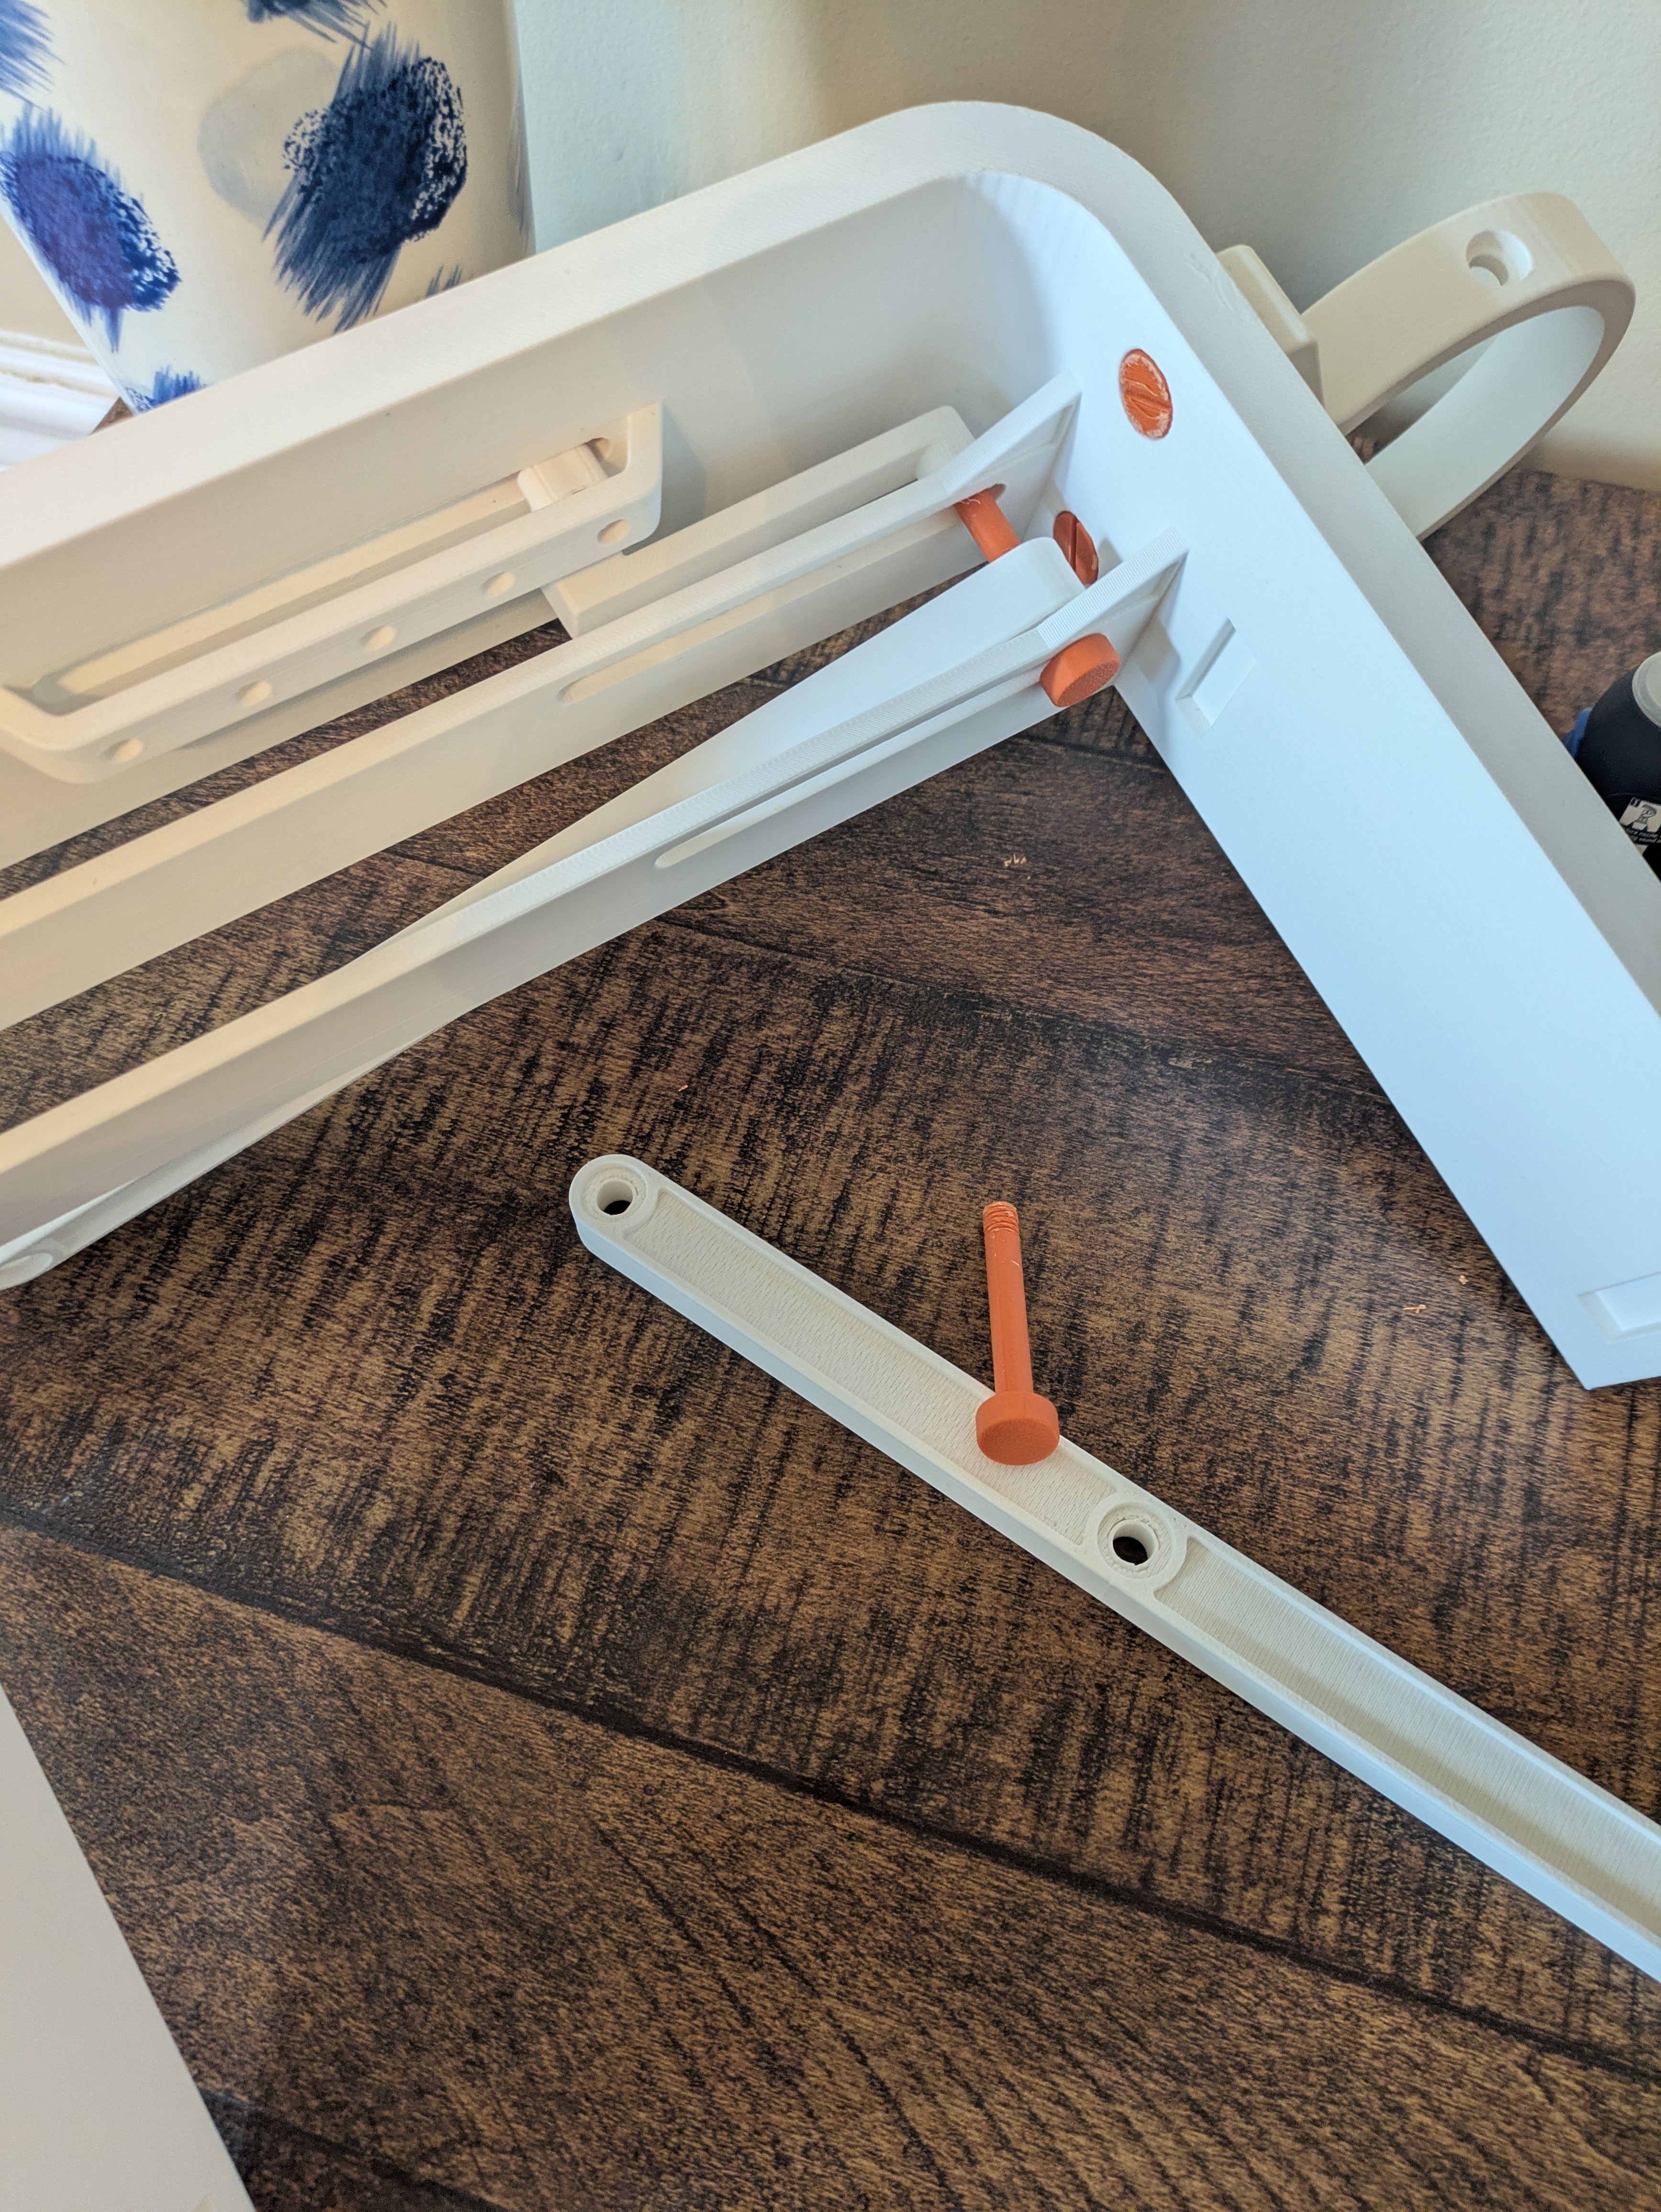
Take out Base #1, Base #2, Slider Linkage #1, Slider Linkage #2, both Lock Pins, and both Handles. Put the slider linkages in the proper gap (make sure you have the correct orientation (the screw part of the linkage should follow the oval hole). Once the slider linkage is in then you need to take the lock pin and from the outside align the pin part with the slider linkage hold and shove it into the gap. There will be a decent amount of resistance during this process, but it shouldn't break anything. Make sure the triangle side of the pin is facing in the direction of the oval hole to the circle hole. I forgot to put the handle on during this part, but you should. To do that you need to apply super glue in the hole of the Lock Pin and then insert the handle into the hole.
3. Take out the 4 pool noodle clamps and the 8 pool noodle clamp screws. Apply glue to the face of the pool noodle clamps and screw in the pool noodle clamps using the coin you chose. I found it was easier to first screw in the bottom screw almost the entire way and then screw on the pool noodle clamp almost all the way and then apply the glue. Then screw in the top and bottom screws all the way.
4. Take out 2 Scissor Lift Bars, 2 Scissor Lift Mounting Screws, and 1 Scissor Lift Mounting Screw Cap. Insert both bars with the screws passing through (the bar on the moving side will always be closer towards the center). Once inserted apply super glue to the inside of the screw cap and the slider linkage, and then screw the screws in. *Before doing this step I suggest testing if the screw will screw into both the slider linkage and screw cap and repeatedly insert it to break in the screw threads* Let it sit and dry for a bit. Then mirror what you did on the opposite side.
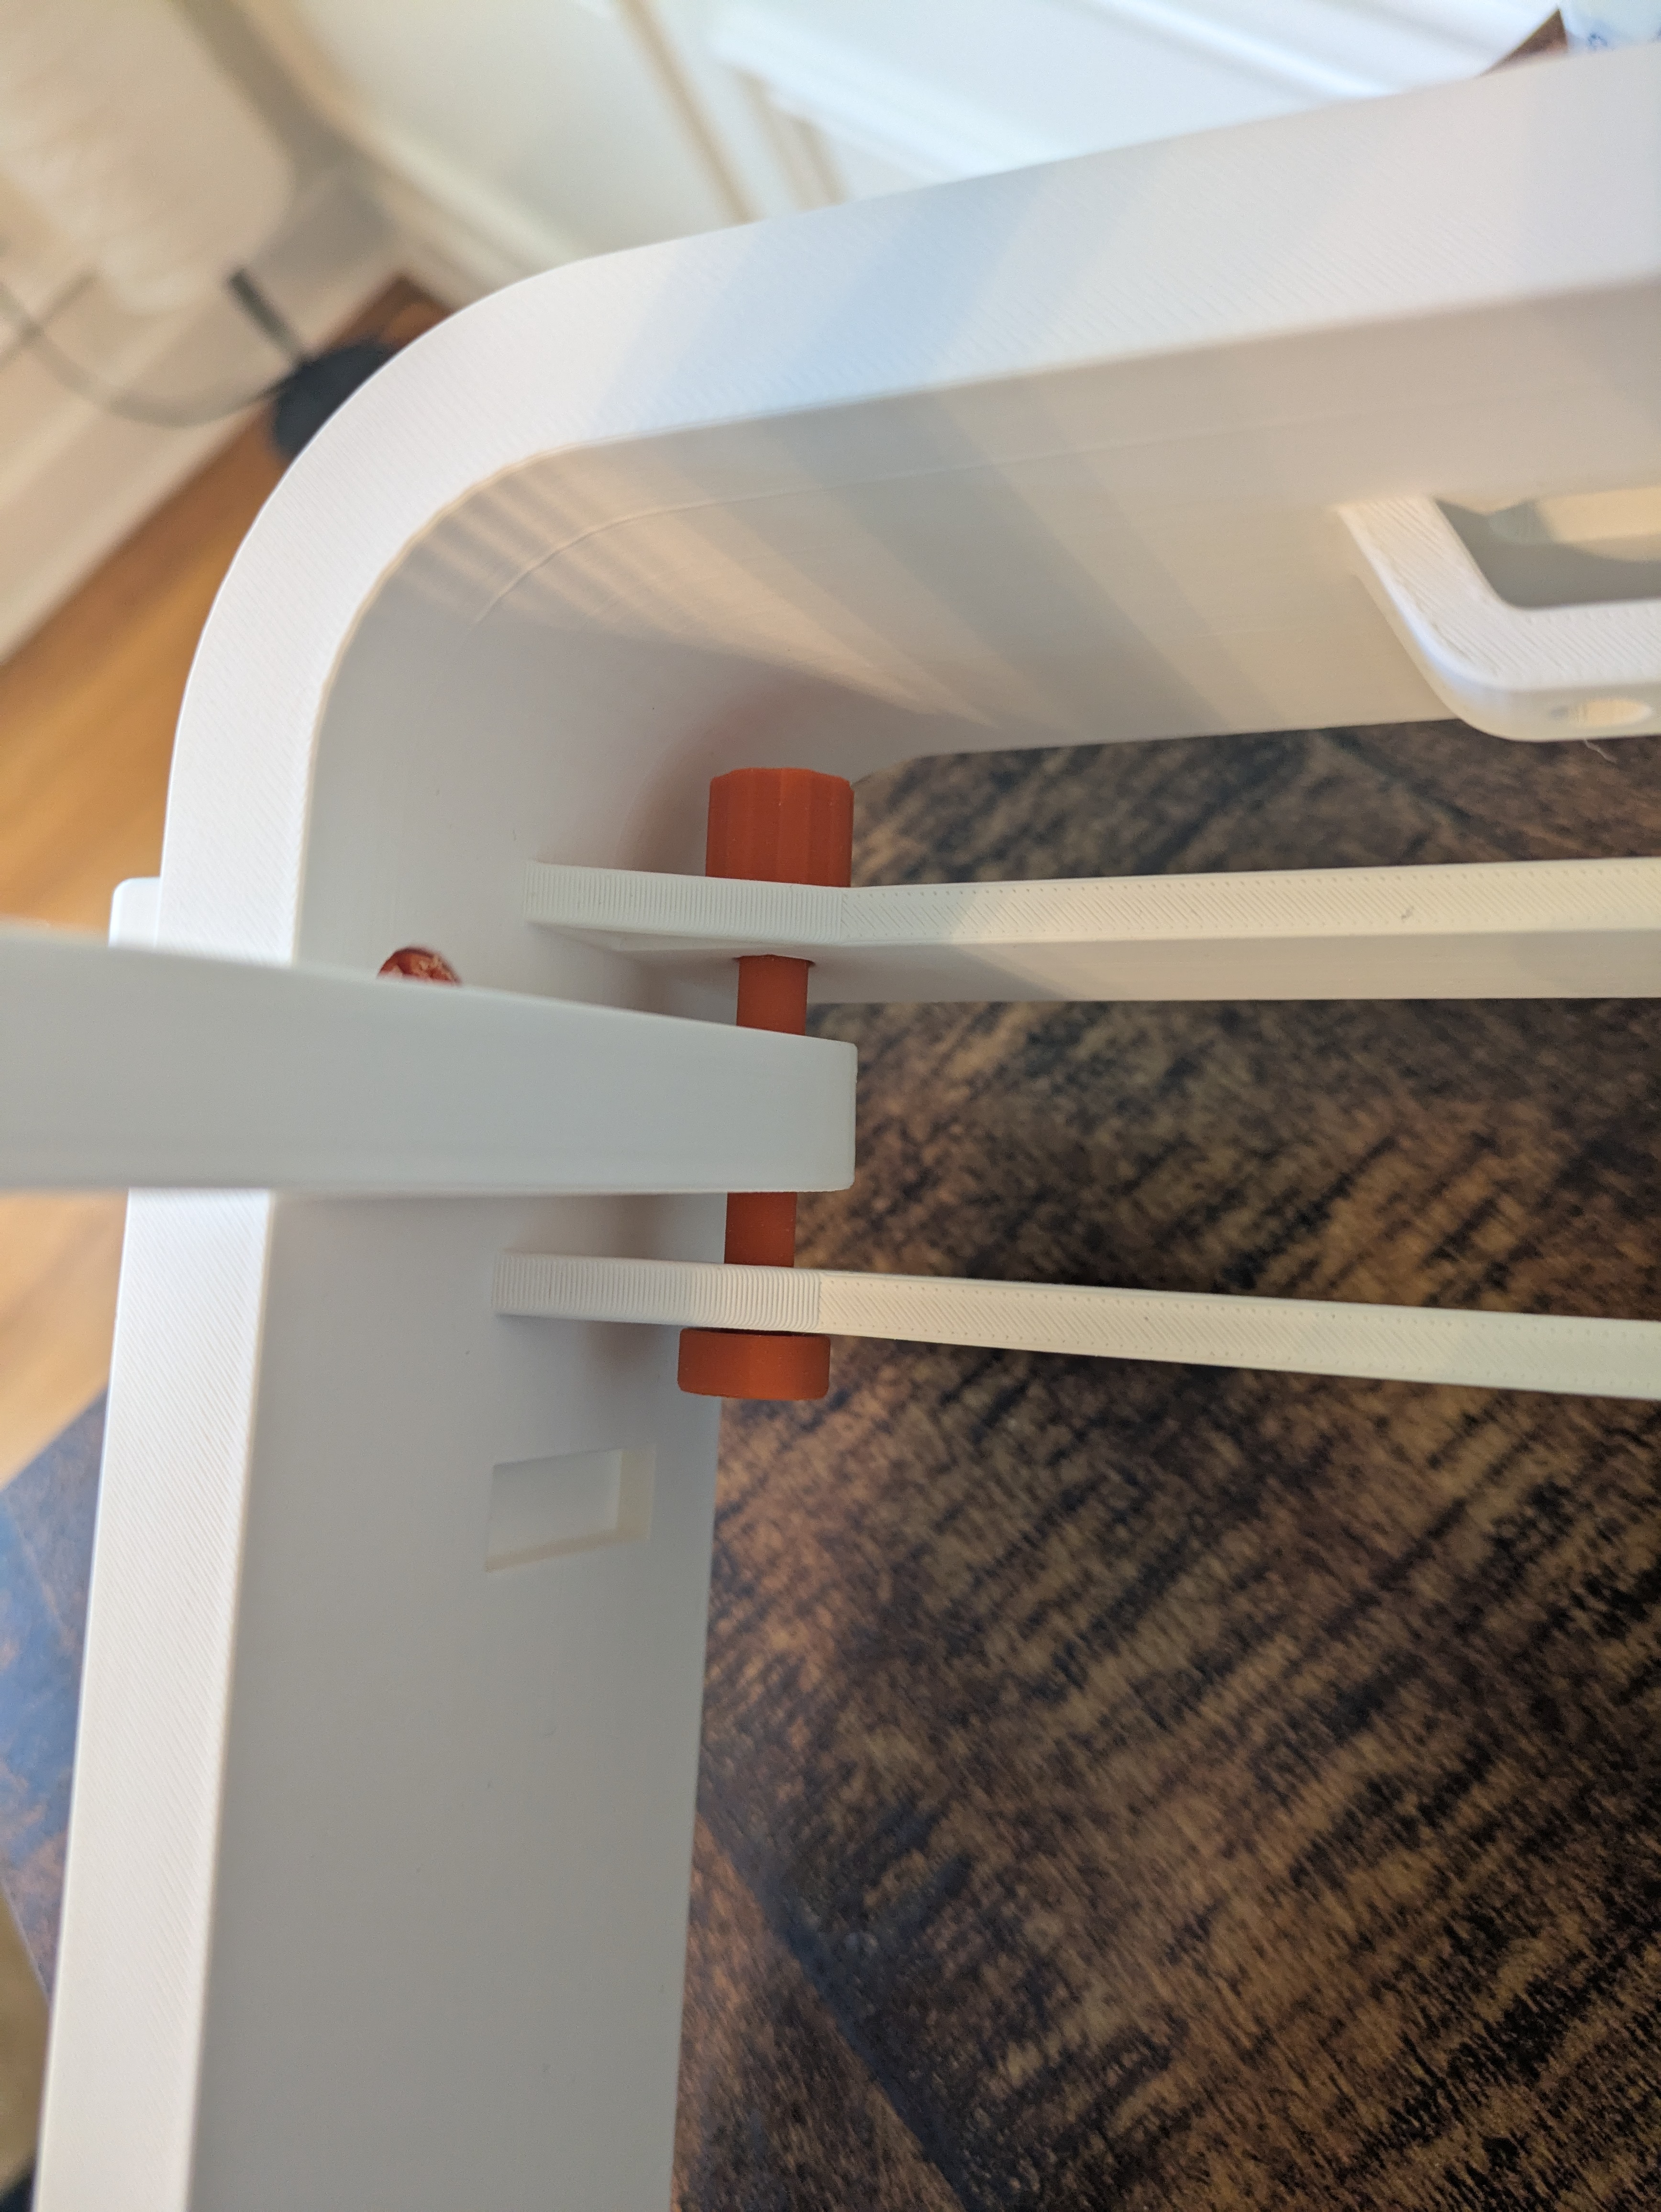
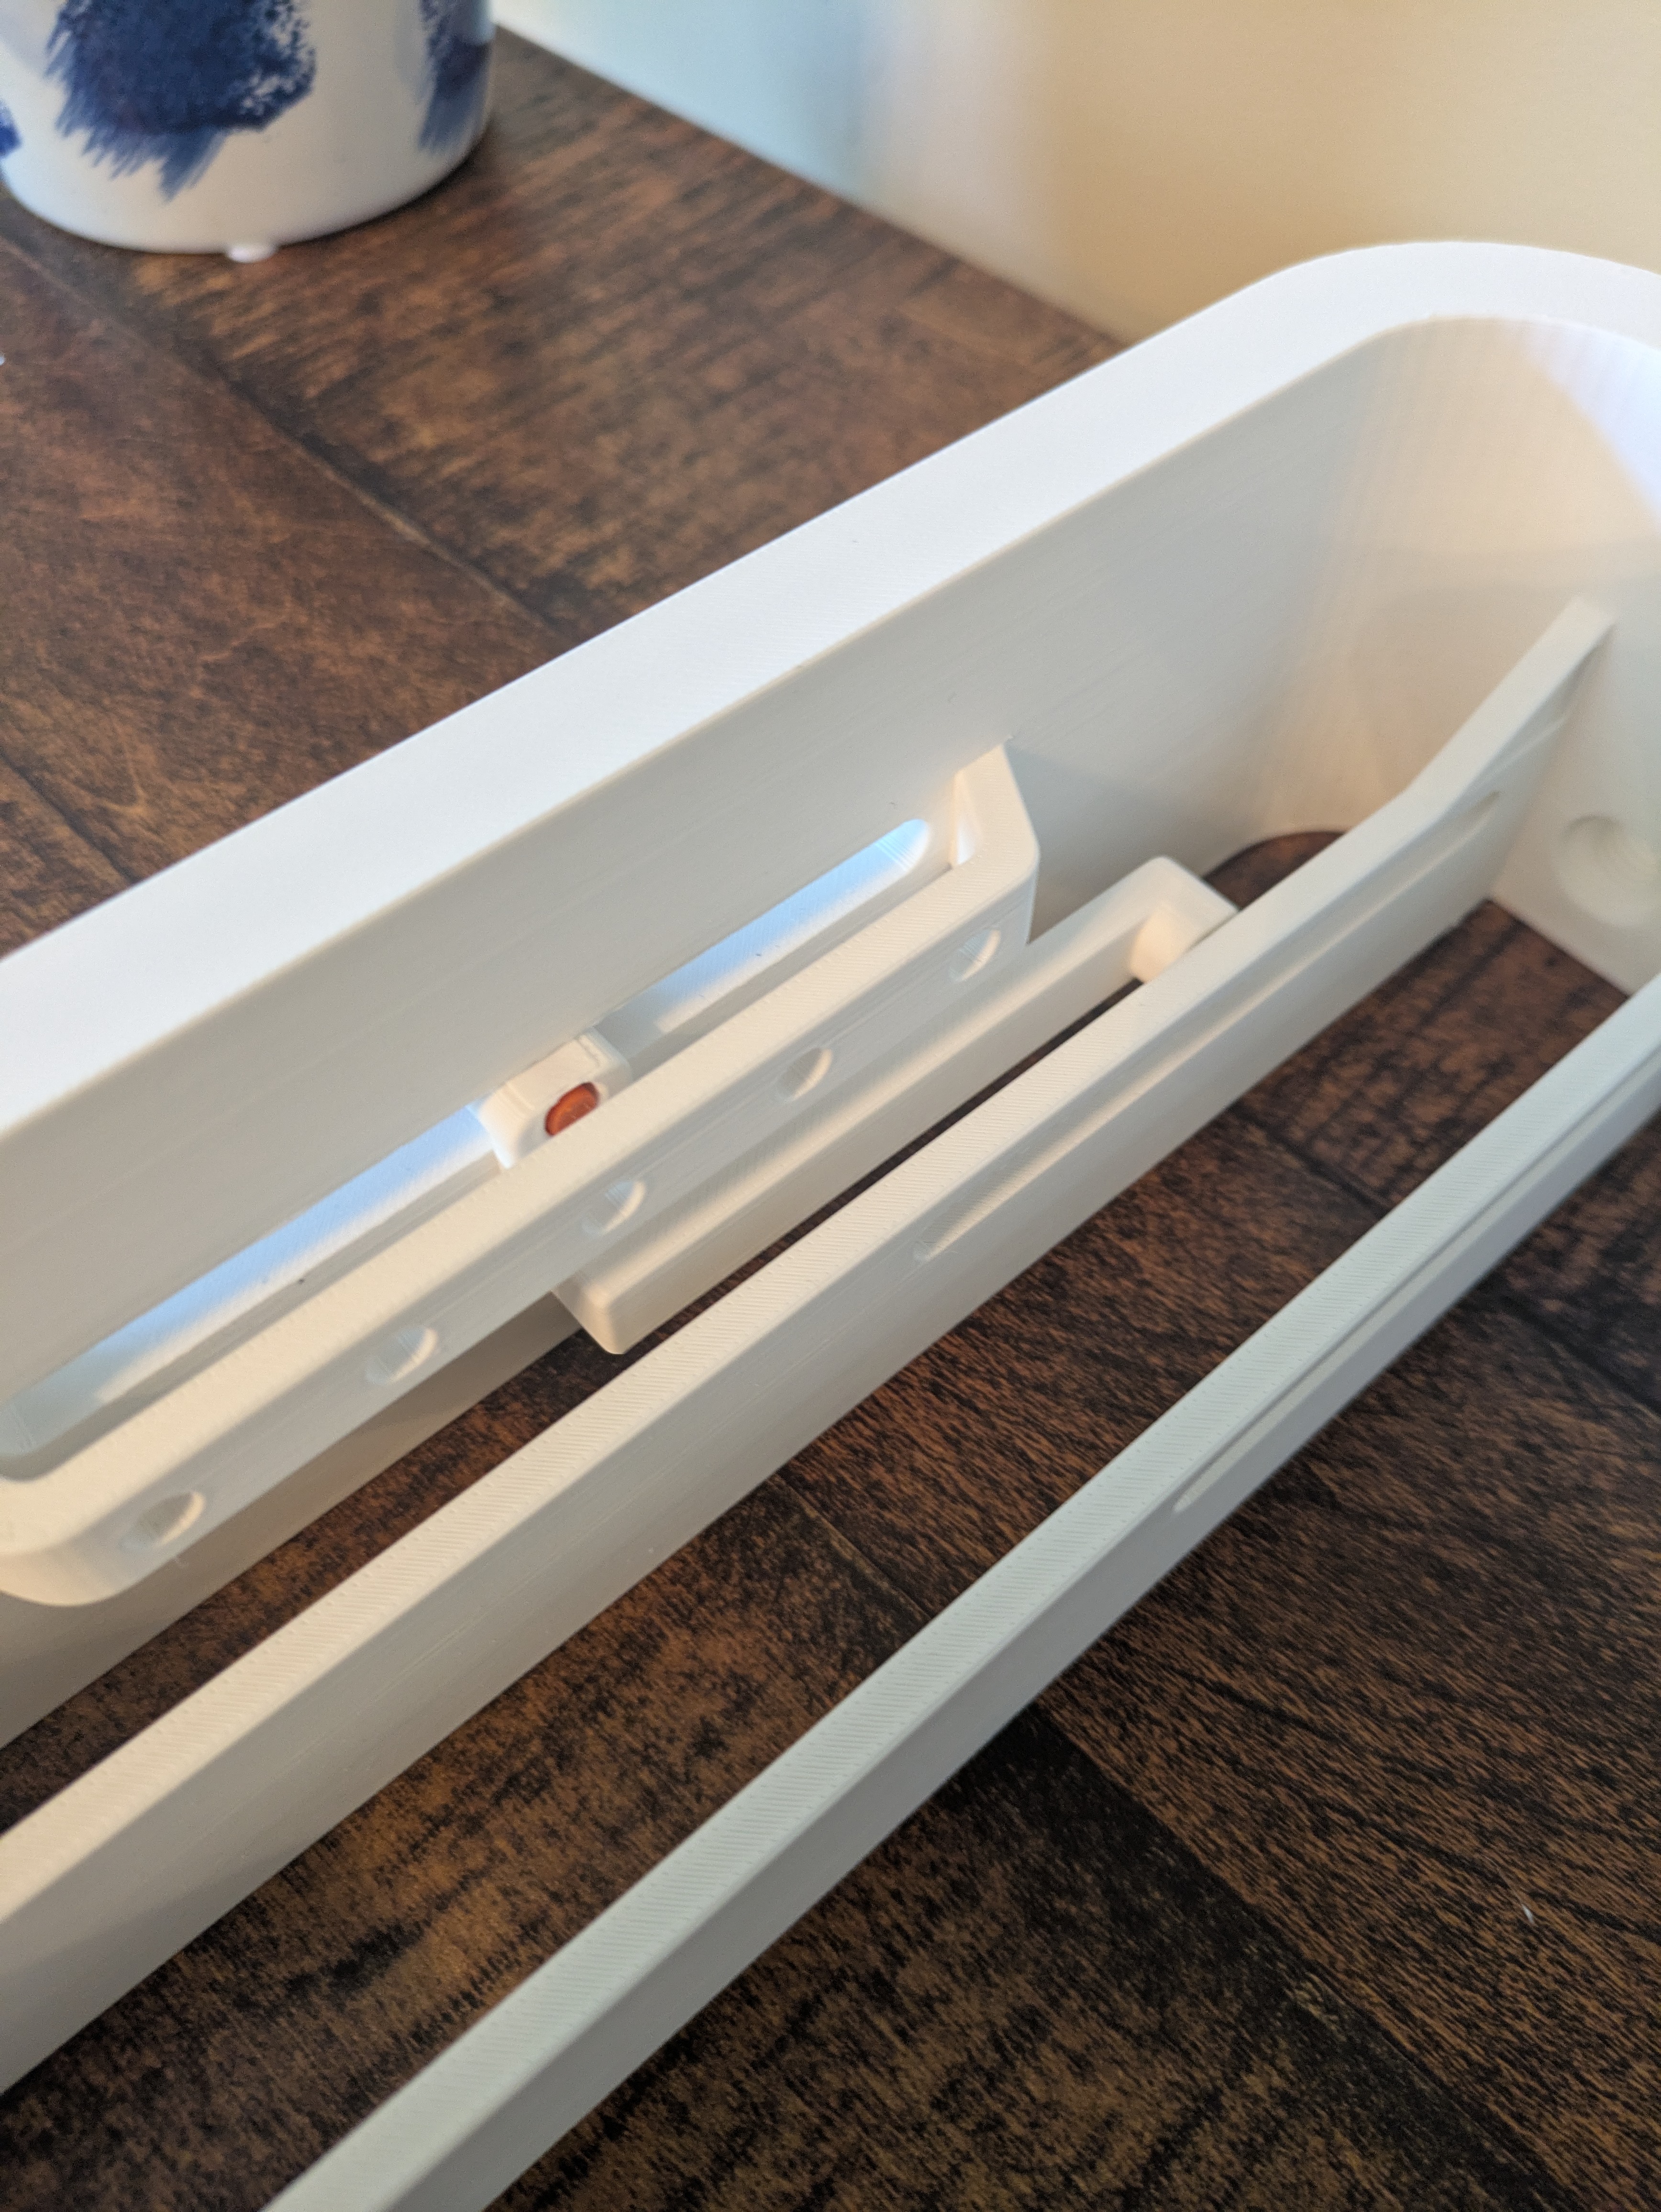
5. Before assembling anything else take the slider and move the pin to the 5th slot so the bars are as close as possible (make sure the pin is in place, so nothing slides out). Take out 4 Scissor Lift Flush Screws #1, 4 Scissor Lift Flush Screws #2, and 2 scissor lift bars. Apply super glue into the hole of the scissor lift flush screw #1 (don't apply to much) and then insert in both of the bars so they link. Then take scissor lift flush screw #2 and insert it on the other side and push firmly. You will repeat this step for the other bars as well until it looks like the image below. You may need masking tape to ensure that the bars aren't moving but it isn't necessary. Then mirror what you did on the opposite side. (It doesn't matter which side you put each of the flush screws)
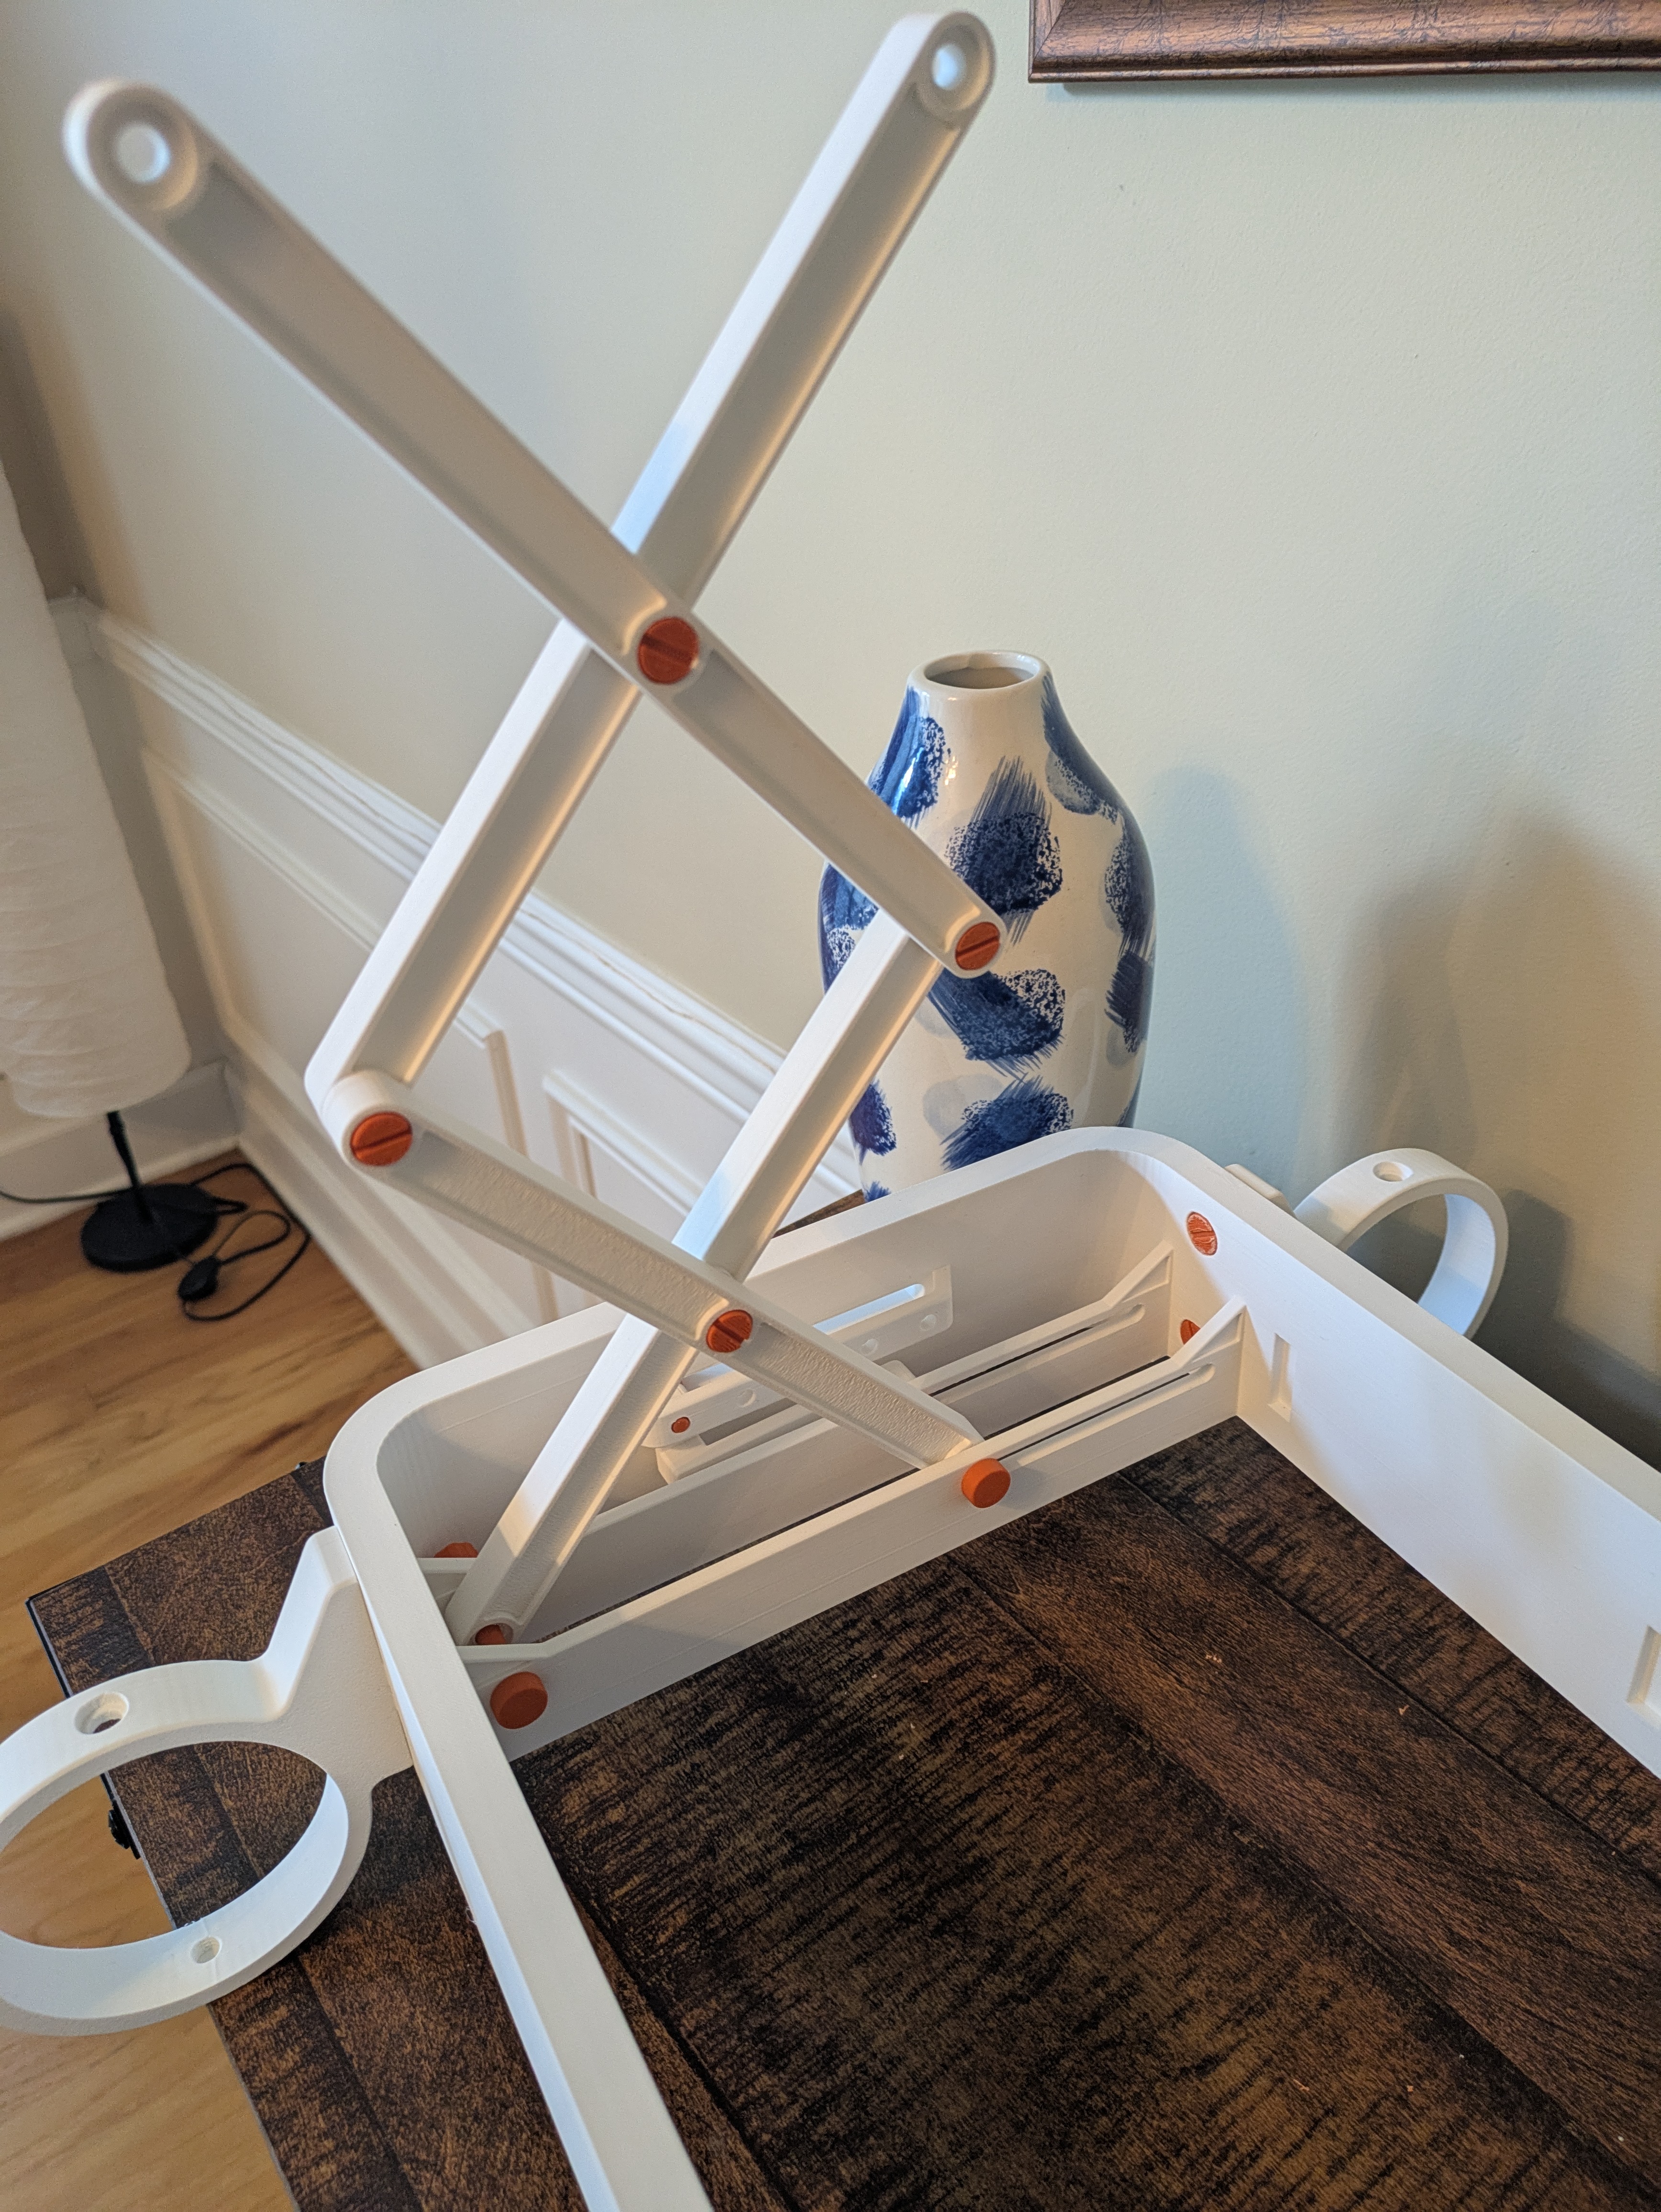
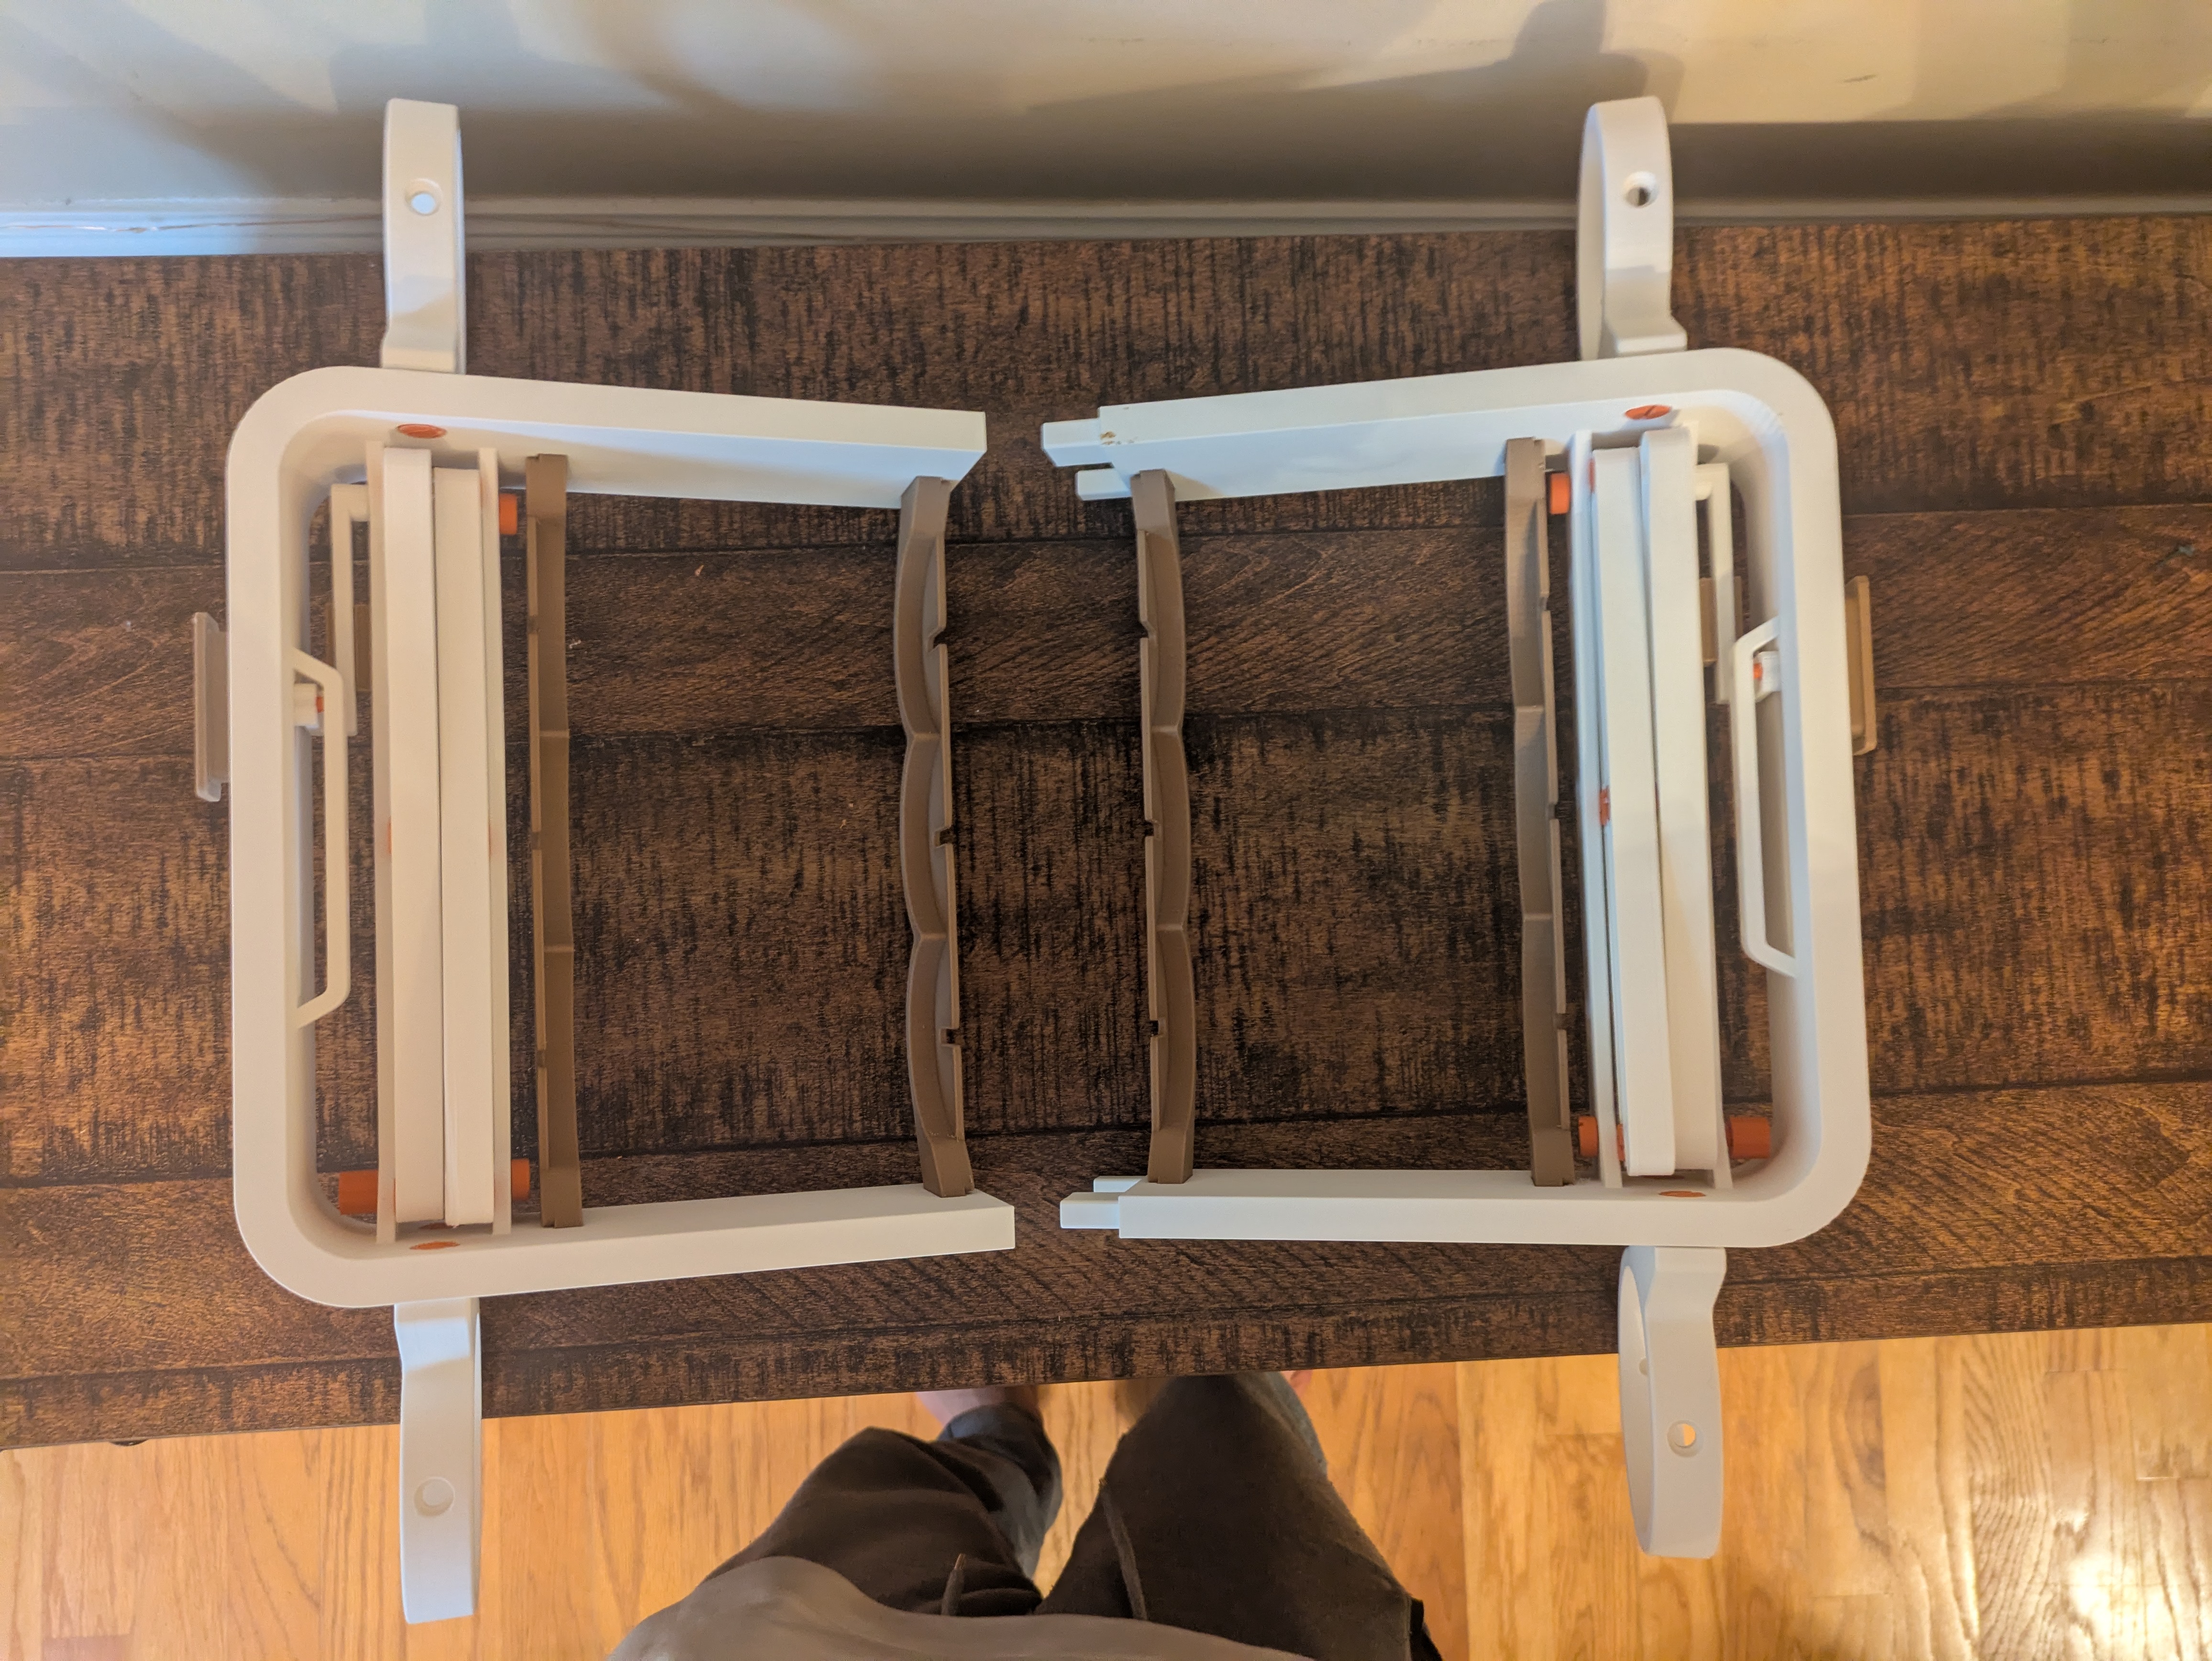
6. Then take the 4 drink racks and install them in the gaps. Make sure that they are both facing inwards towards each other. Don't worry too much about breaking them since they have been designed to be a bit more flexible but still be careful. Mirror that to the other side
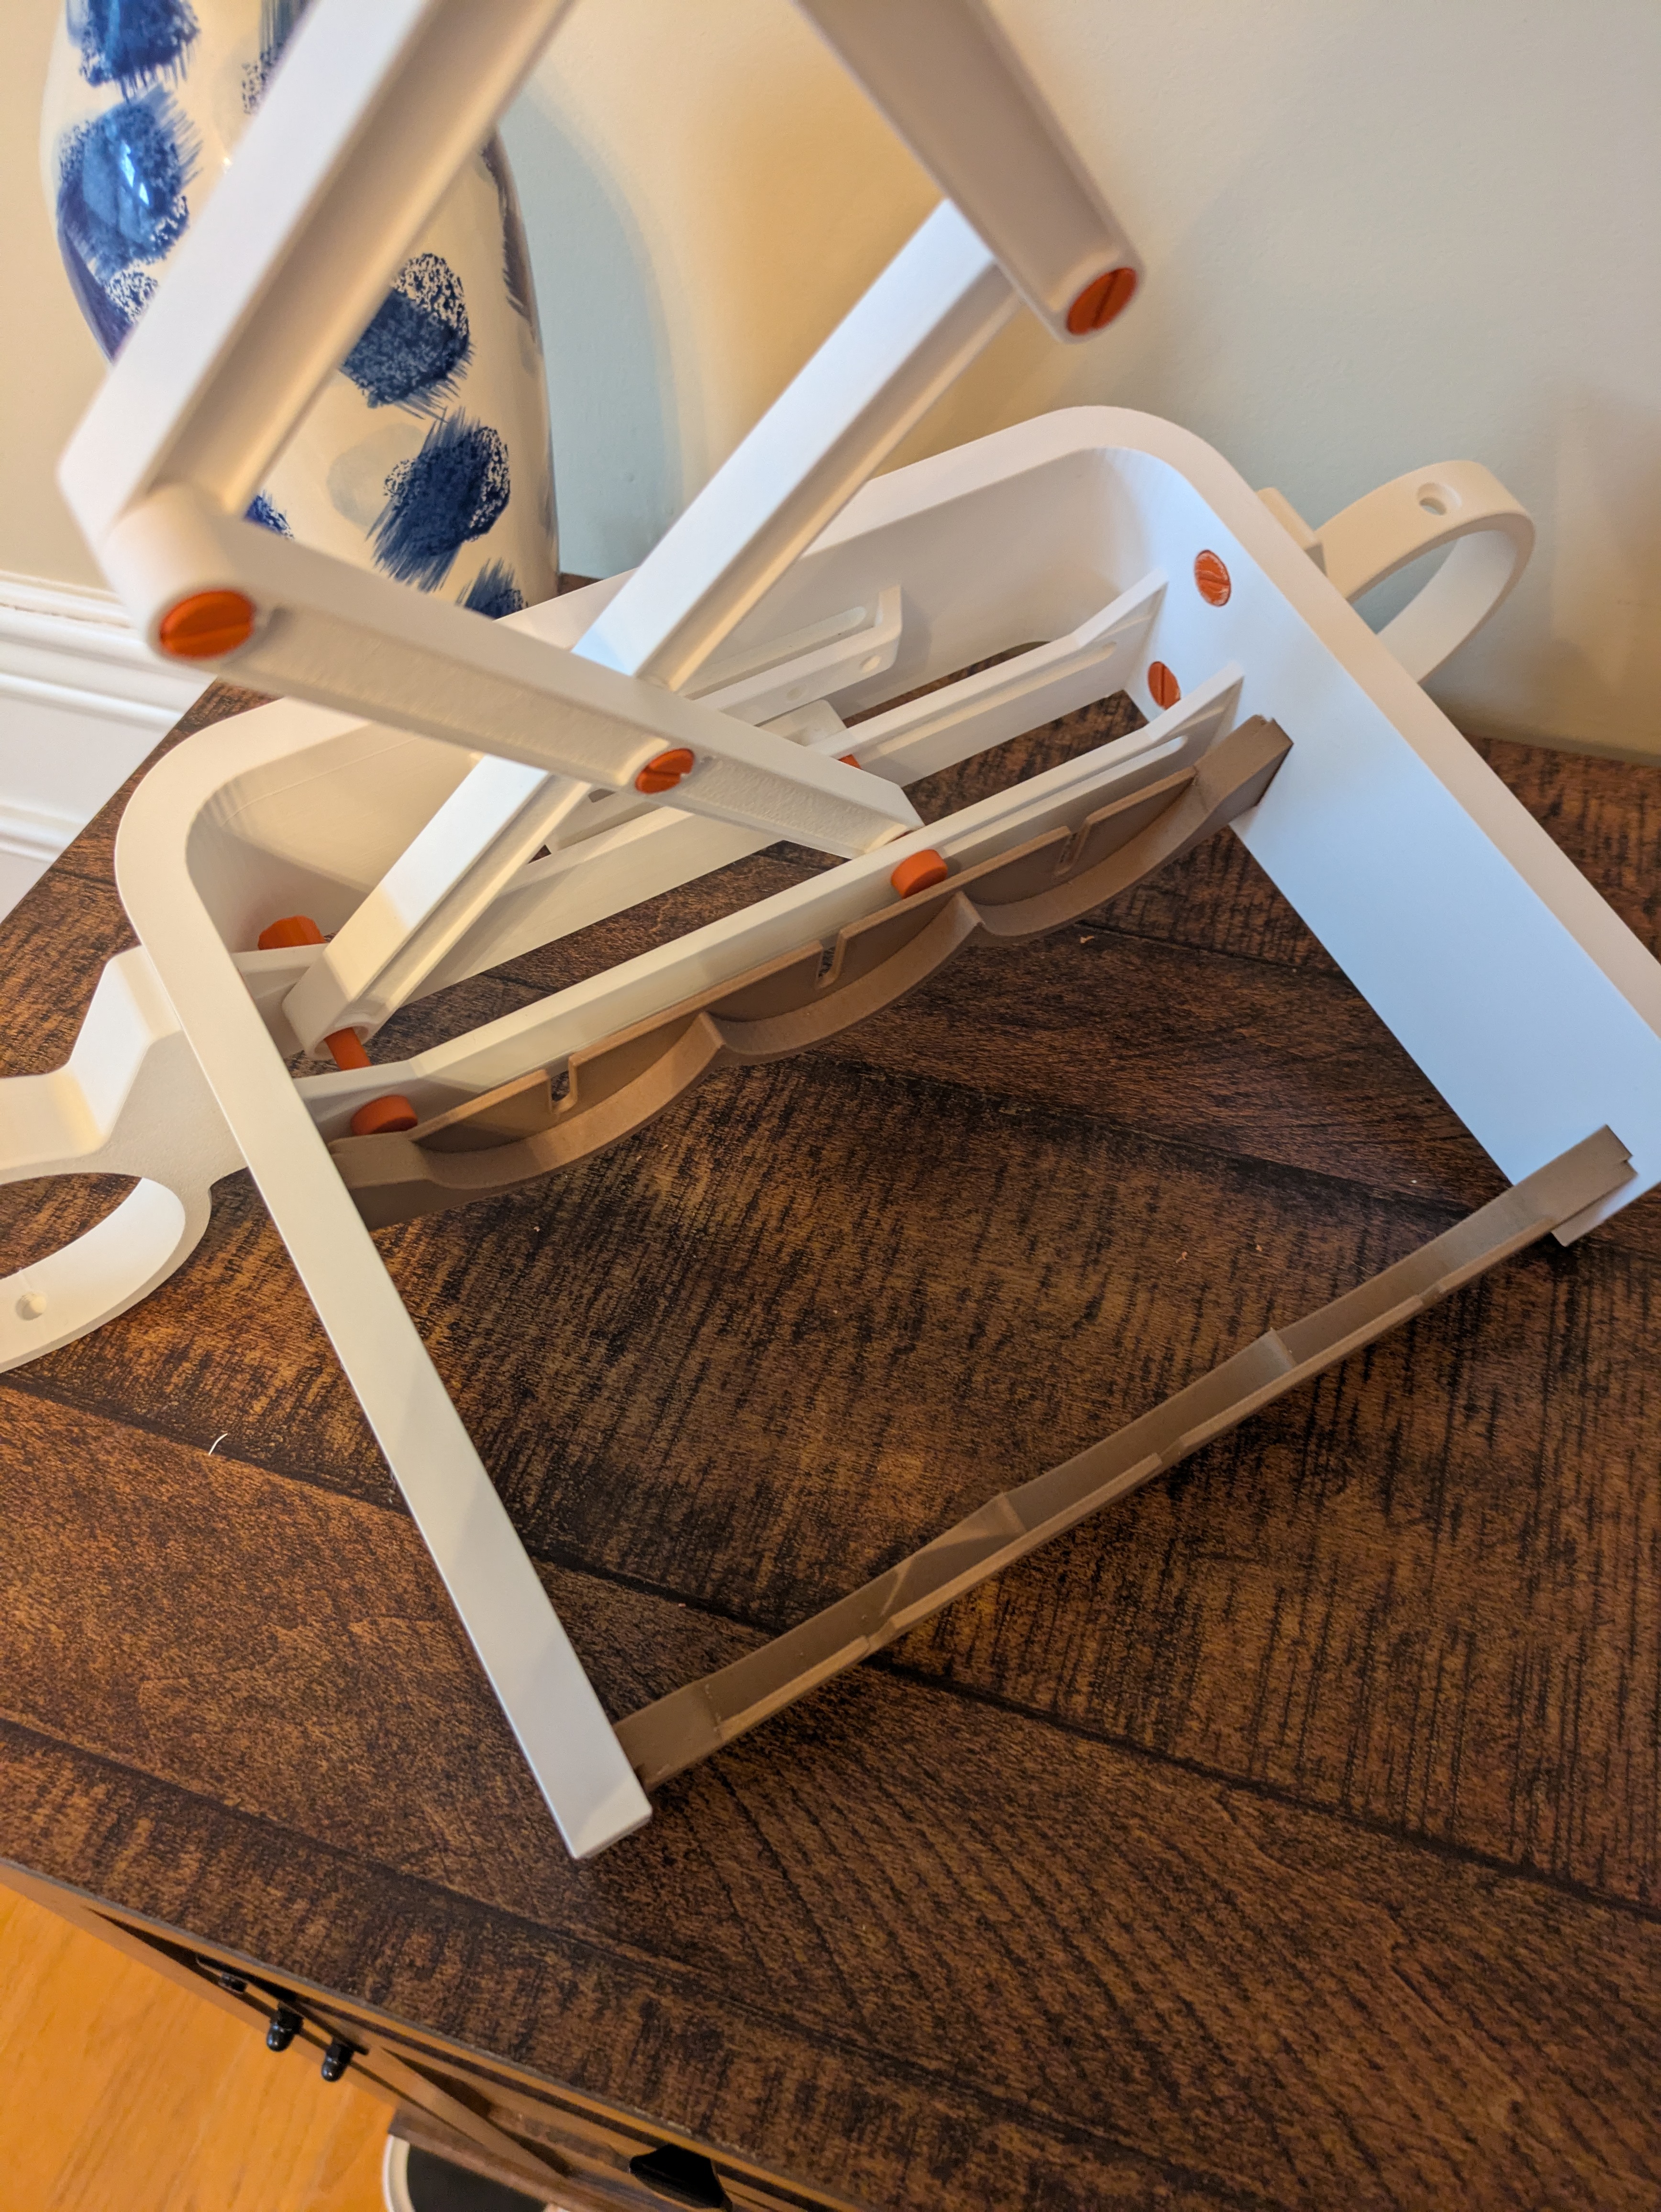
7. Once finished you should have both halves of the base fully assembled. You will then take Base #1 and apply super glue to the inside of the hole and then insert them together. Once dry you can move onto the next step.
8. Make sure both scissor lifts are in their highest position before doing this step. Take 4 Scissor Lift Mounting Screws, 4 Scissor Lift Mounting Screw Caps, and the initial assembly we made in step 1. Insert all the screws into their slots and then screw the screw caps into place securing. I found that the screw caps for some reason were very strong, so I didn't need to use super glue, but feel free to do so. You then will then take your 8 rubber bands and then wrap 2 on each knob so that they pull towards each other
9. Take all pool noodle lock screws and your pool noodle. Cut your pool noodle into two 20" (508 mm) small pool noodles. Then slowly insert them into the pool noodle clamps using a twisting motion. Make sure you take it slow and support the clamps using your other hand to make sure the screws or the clamp doesn't break. There should be 3.3" (83 mm) overhang on each side, so it is center. Then take your sharp object and poke holes in the screw hole are to score it. Then shove the pool noodle lock in and find the bottom. Once at the bottom screw it in using your coin and it should be secure. Do this for every side.
10. Finally place the 2 tabletops onto the top and then YOU ARE DONE!!!