Você está no 3DFinder
Buscamos em Thingiverse, MakerWorld e Printables ao mesmo tempo para te dar o melhor de cada uma.
Descrição
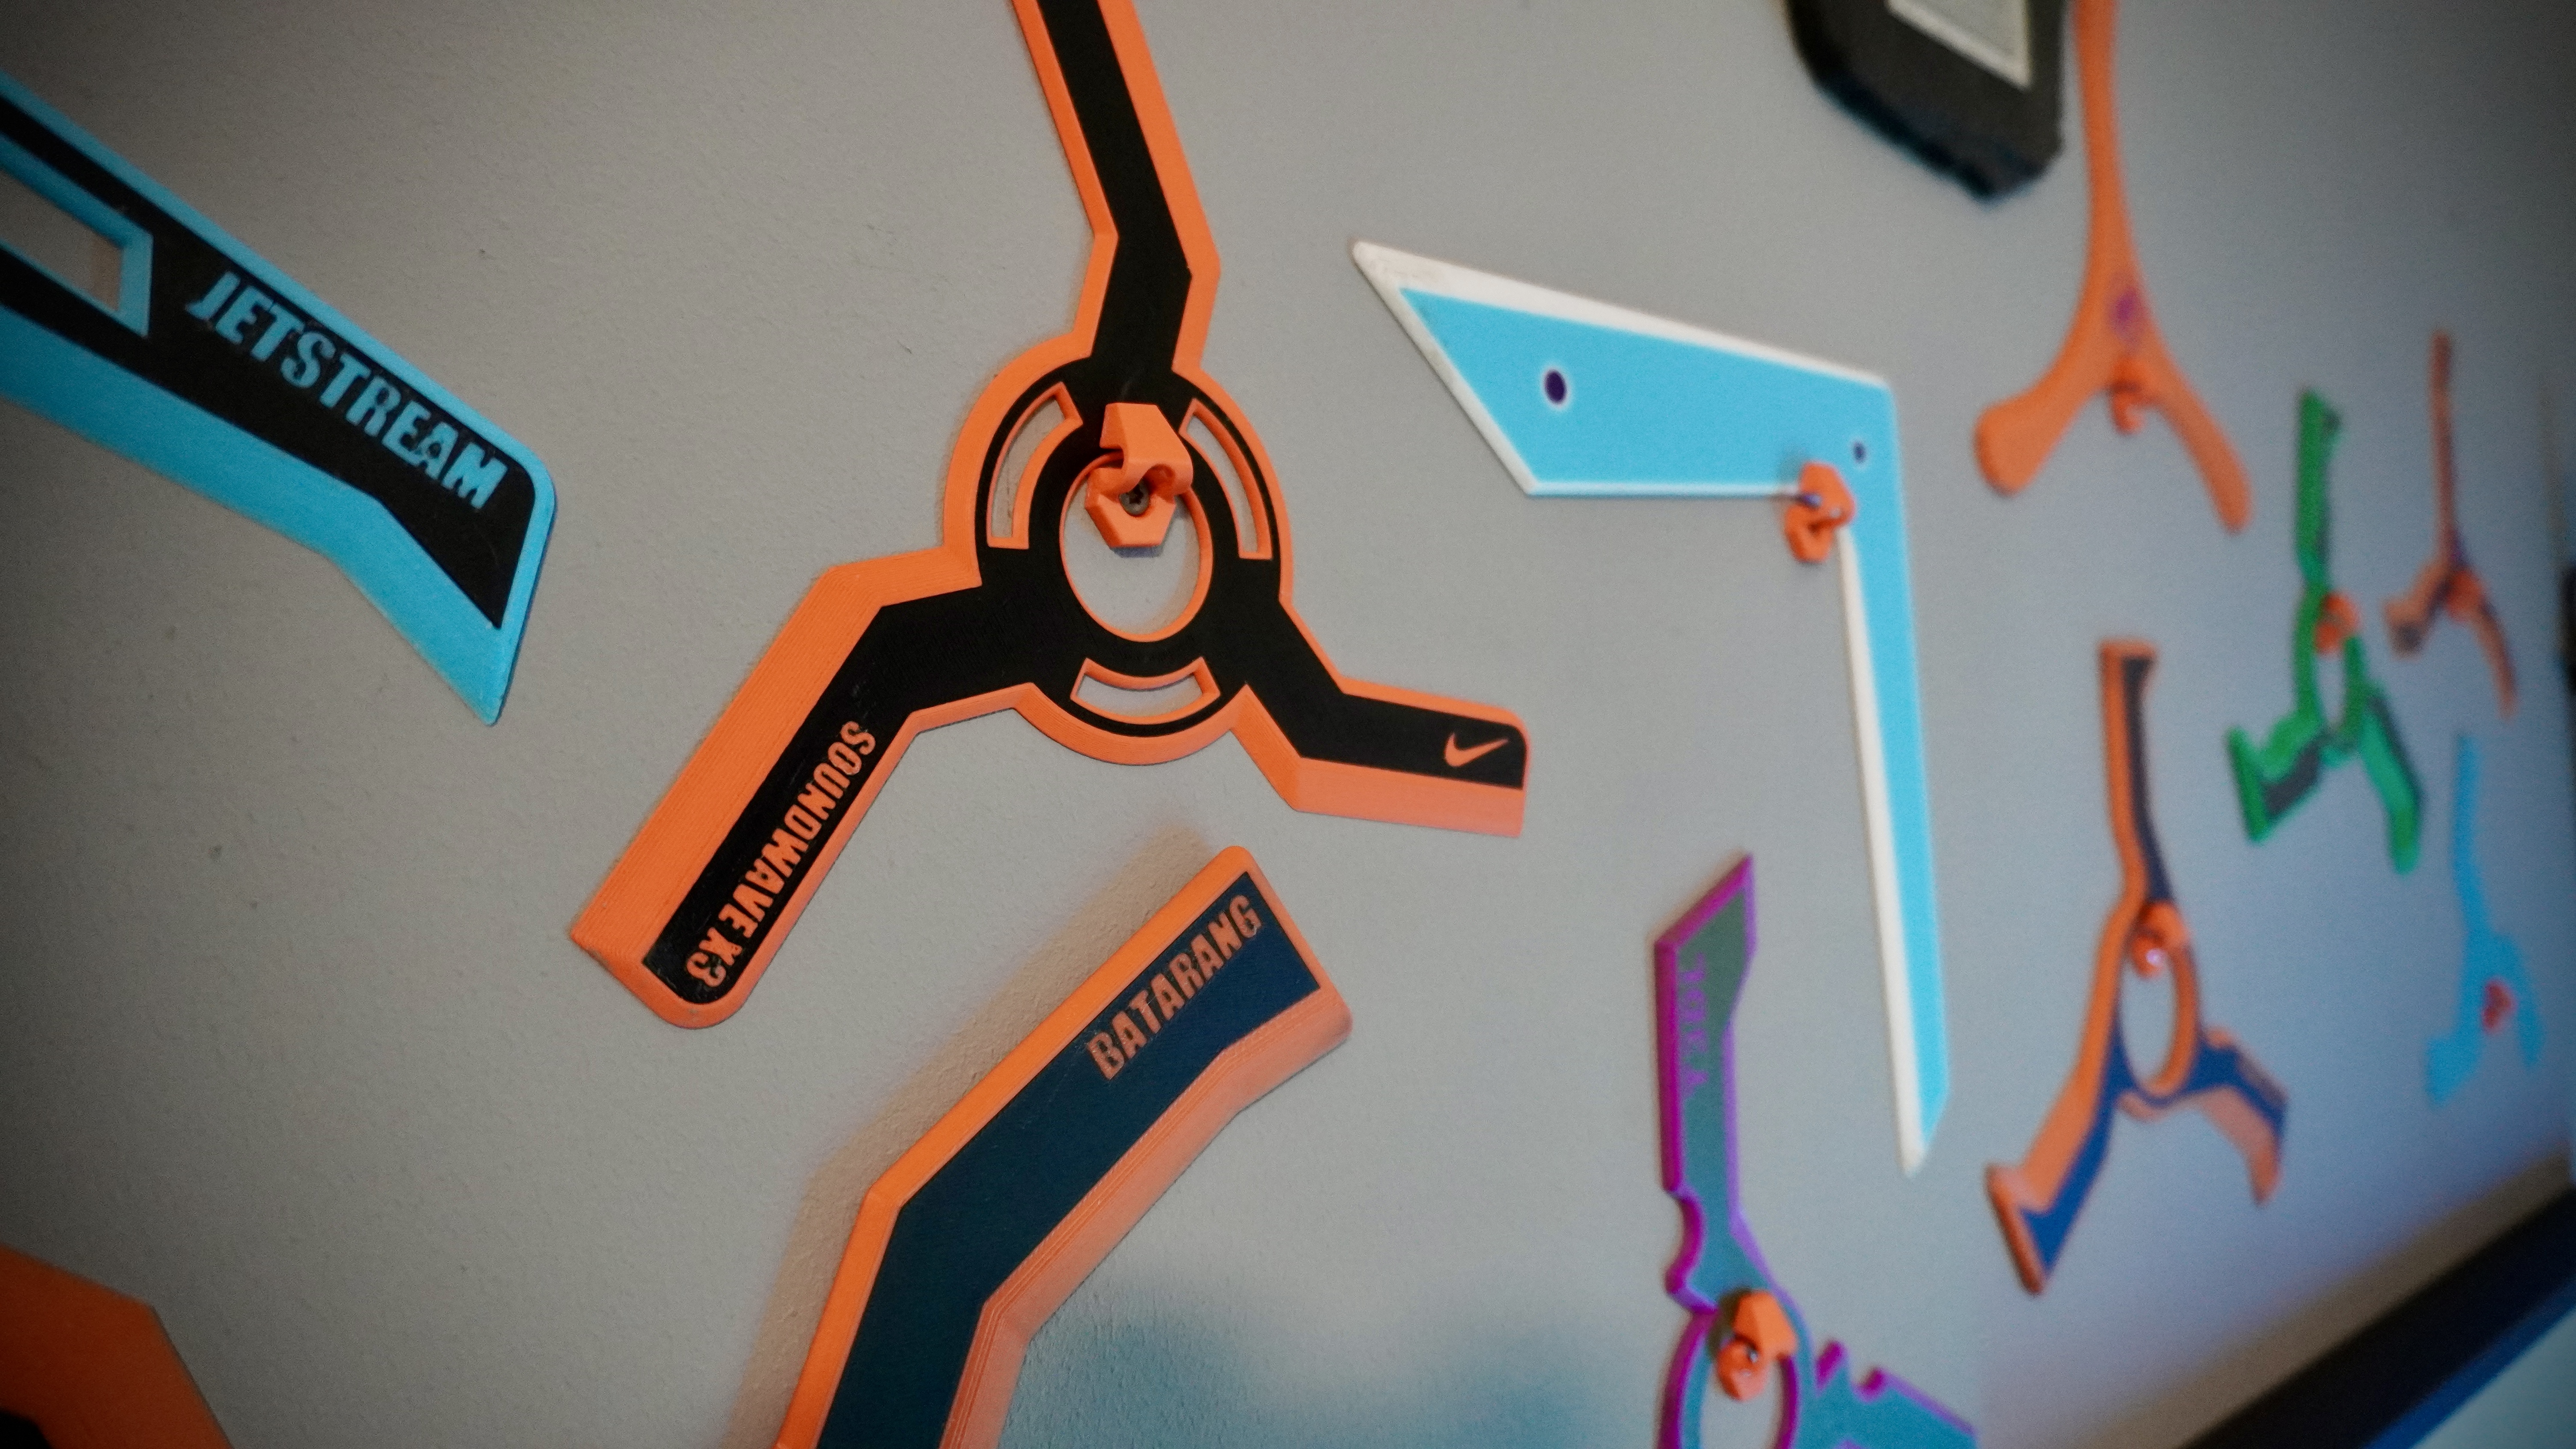
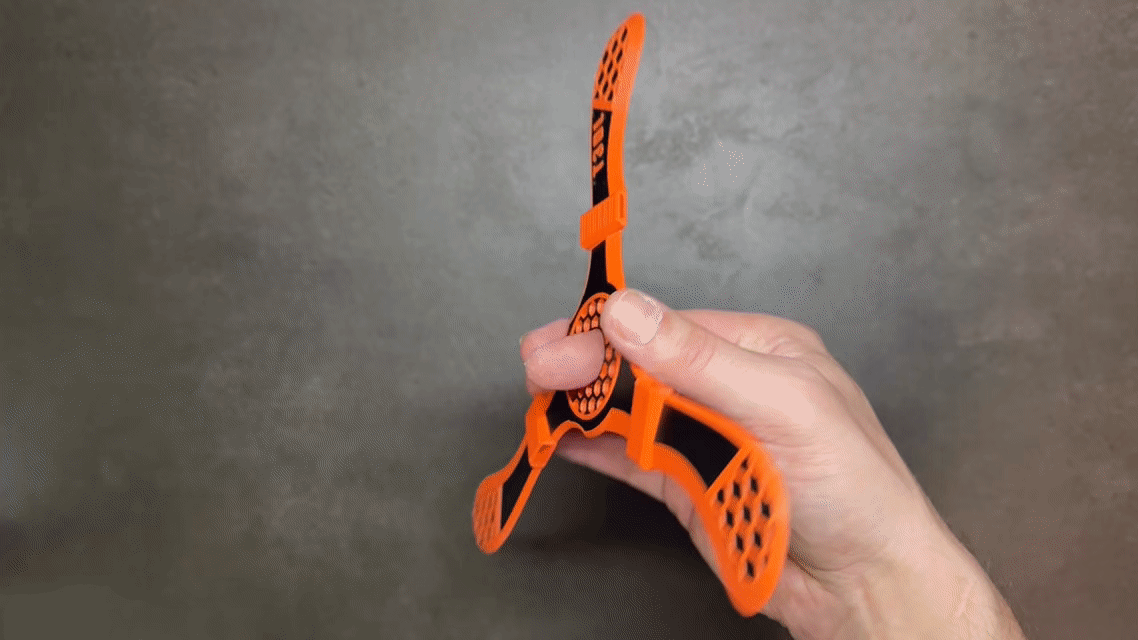
PROTOTYPE Y – is quite possibly one of a kind worldwide.
At least I haven’t seen any comparable boomerang model featuring controlled air intakes like this one.
The idea behind it was to reduce the flight radius… and that part worked out well! The air inlets act like a kind of “brake,” helping the boomerang stabilize and return sooner. However, this comes at a price: While you do get a solid feel for the rotation during the throw, it definitely requires a strong arm to perform properly.
So, I wouldn’t recommend this model for beginners. Instead, I see it as an experimental concept that helped me push my own design skills and aerodynamic understanding forward.
It’s simply the first of its kind. And who knows… maybe the beginning of something bigger. 😉
🎬Check out the video and see how well it flies in action!🎬
🎬Update V1 vs V2 🎬
🎬 Nimbus vs Prototyp Y 🎬
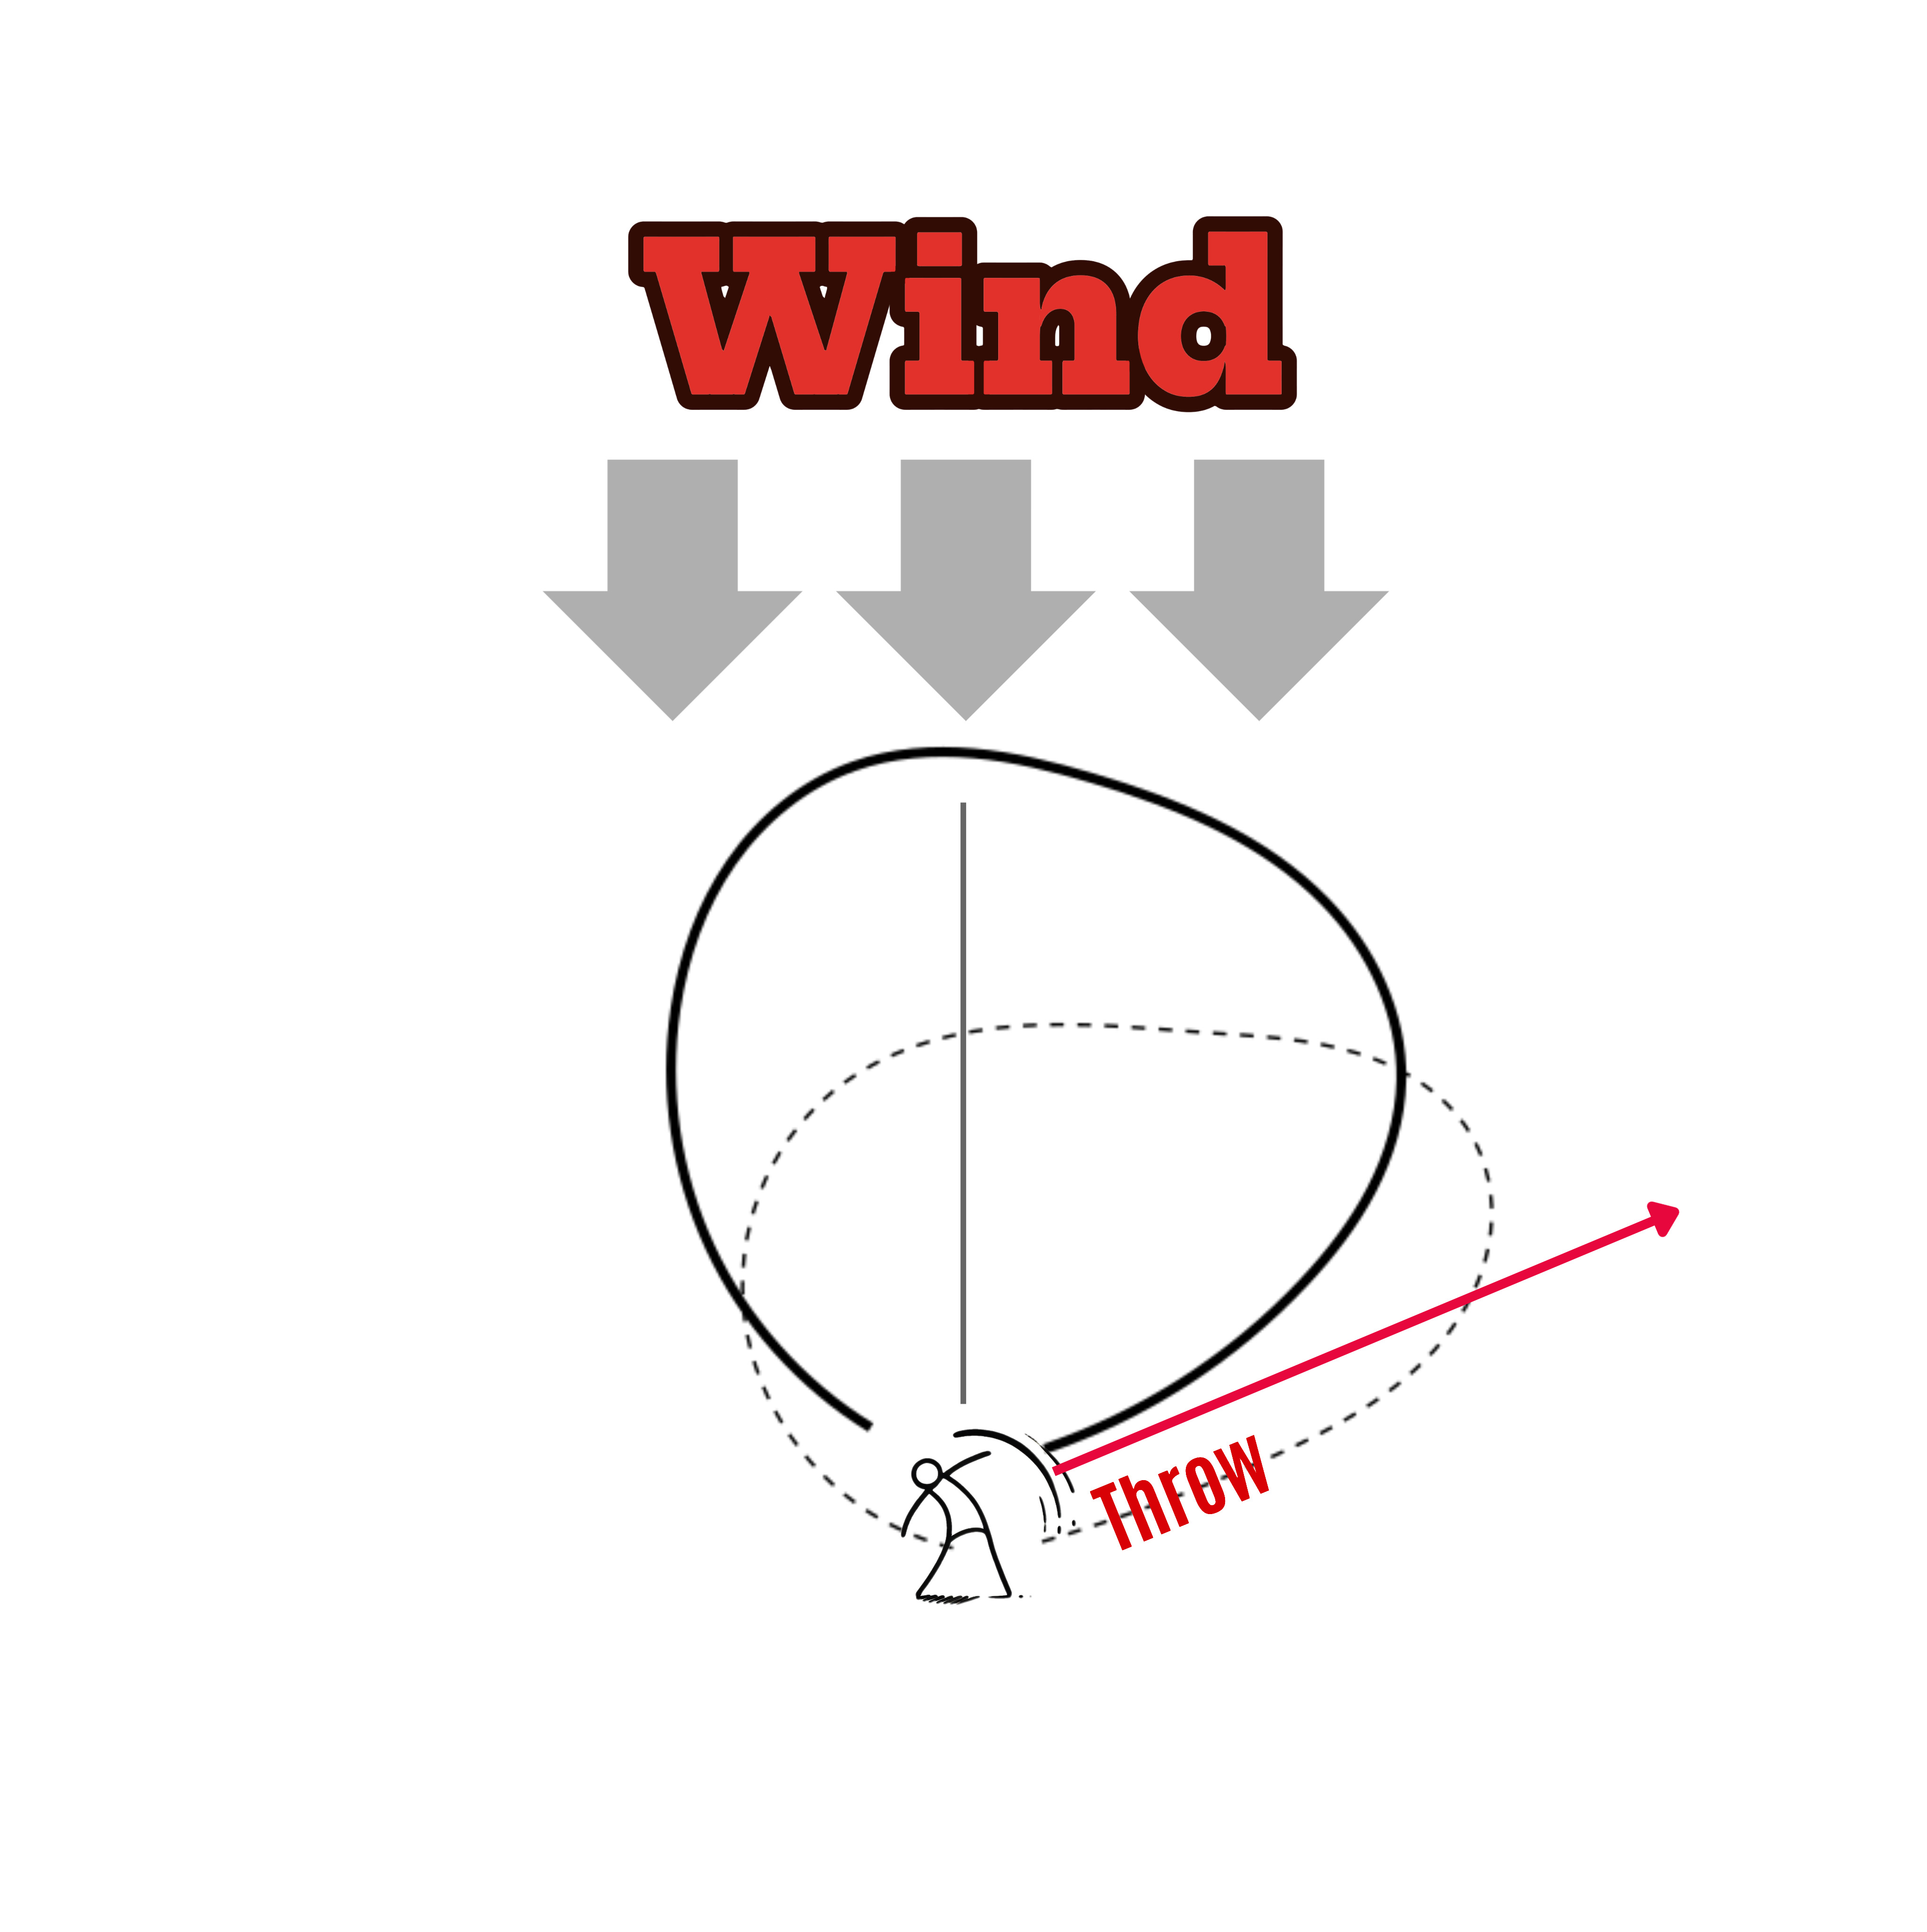
How to Throw a Boomerang
- Find out where the wind is coming from.
- Face directly into the wind.
- Turn 45–90 degrees to the right (if you're right-handed).
- Hold the boomerang at about eye level, maybe a little higher.
- Tilt the boomerang slightly (about 5–10 degrees).
- When throwing, aim roughly at the horizon, maintain the 5–10 degree tilt, and make sure to give it enough spin!
These are just general throwing guidelines! the exact technique may vary depending on the model and weather conditions.
You can actually see this in action in my videos….
First, I face the wind with the boomerang, then I turn slightly to the right and get into throwing position.
Wind direction and throw technique are absolutely crucial in boomerang throwing. Depending on the weather, one model might perform better than another….. that’s why I recommend printing 2–3 different designs and heading out to practice!
Technical Data:
- Difficulty Level: Medium
- Range: Approximately 10 meters, depending on throwing strength and technique
- Recommended Release Angle: 30-65 degrees against the wind at horizontal height, with a tilt of 1-5 percent
Additionally, I must warn that a boomerang can be dangerous, so you should ensure nobody is in its path. It's important to remember that a boomerang was originally a hunting weapon. I also recommend printing it in a signal color to make it easier to spot.
Experience with PROTOTYPE Y
I’ve now been able to test the new model under various weather conditions, and I have to say…. it performs quite similarly with or without wind. It tends to follow an elliptical flight path, with a brief high point at the peak of the curve before gliding back in a flatter arc.
Catching it with one hand can be a bit tricky. 😄
As mentioned before, it needs a good amount of spin, since the air brakes eat up a lot of its energy.
That results in a tighter flight radius and a quick return to the thrower.
Ideal for small throwing areas!
Note
A1 Mini size was not tested!!!!
If you're left-handed, you should mirror the boomerang…. but keep in mind that this will also flip the logo
Wall Boomerang Mount
[https://makerworld.com/en/models/1436492-boomerang-mount#profileId-1494491](https://makerworld.com/en/models/1436492-boomerang-mount#profileId-1494491)