Você está no 3DFinder
Buscamos em Thingiverse, MakerWorld e Printables ao mesmo tempo para te dar o melhor de cada uma.
Descrição
They’re huge! By using string, wands and a good bubble solution recipe, you can easily make these gigantic bubbles - just check out the info below.
This project uses 3D printed parts but there are many ways to create simple bubble wands - I’d recommend the Soap Bubble Wiki for many variations on this theme. It’s a fun project whether it’s 3D printed or constructed from items around your house. Some examples can be seen in this short video:
Tips for making big bubbles
- Wind is the enemy - try to choose a time with only a light (if any) breeze.
- When raising the wands out of the bubble mixture, keep the tips together until they are fully raised - then spread them out and in to form a bubble.
- Move slow - you have several second to form the bubble but moving too quick could prematurely pop it.
- Experiment with different lengths of dowel. Depending on your height (or length of your arms) you may be able to use longer dowels to make the bubbles higher in the air.
- You may be able to make multiple bubbles before re-dipping but the additional bubbles may need to be smaller since most of the fluid will be used for the first.
Printed Parts
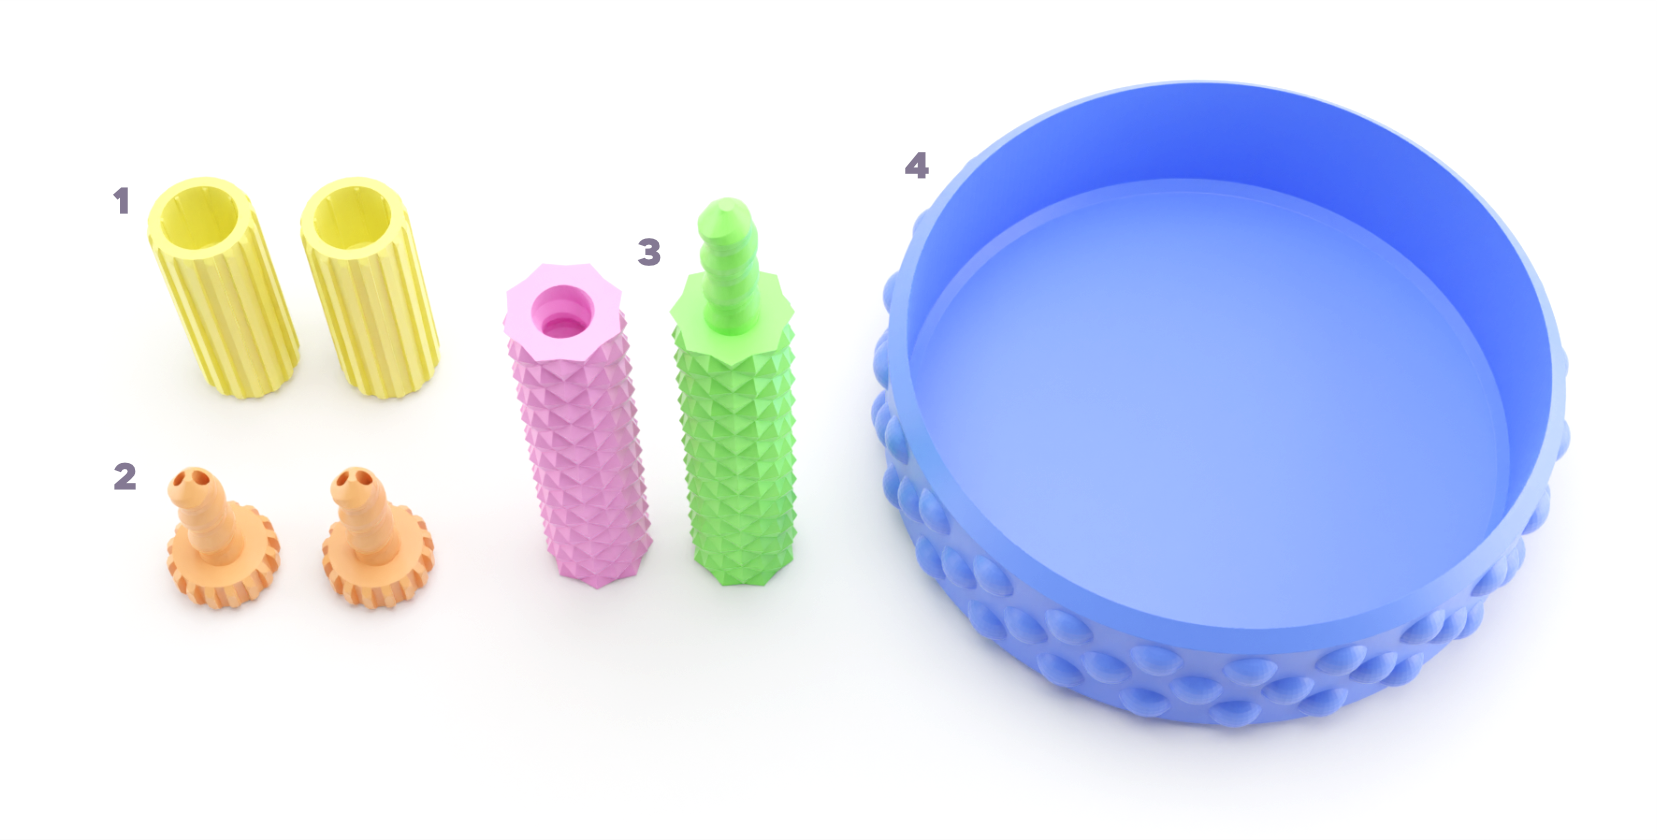
- Dowel Cap (2)
- Screw (2)
- (optional) Printed Rod (Bottom & Middle/Top) - if you don’t have a dowel, you can print a small rod which uses the same top screws but not the dowel cap. This will never be as strong (or long) as a wood dowel but is provided as an optional alternate.
- (optional) Bubble Tray - this is a small dish for your bubble liquid but is completely optional as you can use any small bucket or bowl for the bubble liquid.
Additional Parts
16mm or 5/8” wooden dowel
- I used a 4 ft. dowel (1.2m), cut it in half and painted.
- Although I tested with a 5/8” wooden dowel, I also printed a 16mm cylinder and it appeared to provide a snug fit as well.
Yarn - 3-4.5 meters
- I used a 5mm knitting yarn
- Alternately, the Soap Bubble Wiki provides recommendations for other materials. I tried braided nylon string and even braided filament but had the best results with knitting yarn.
Assembly Instructions
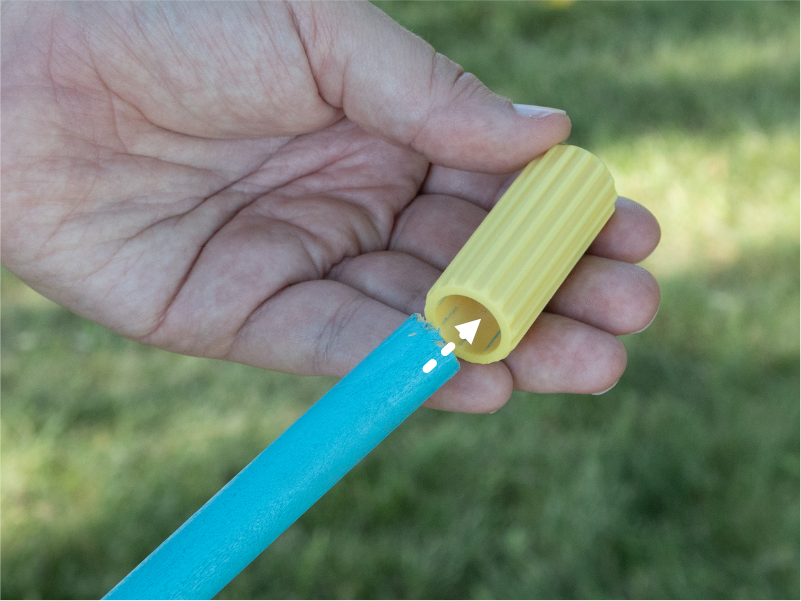 | Press the caps onto your dowels. Glue shouldn’t be needed but can be used. |
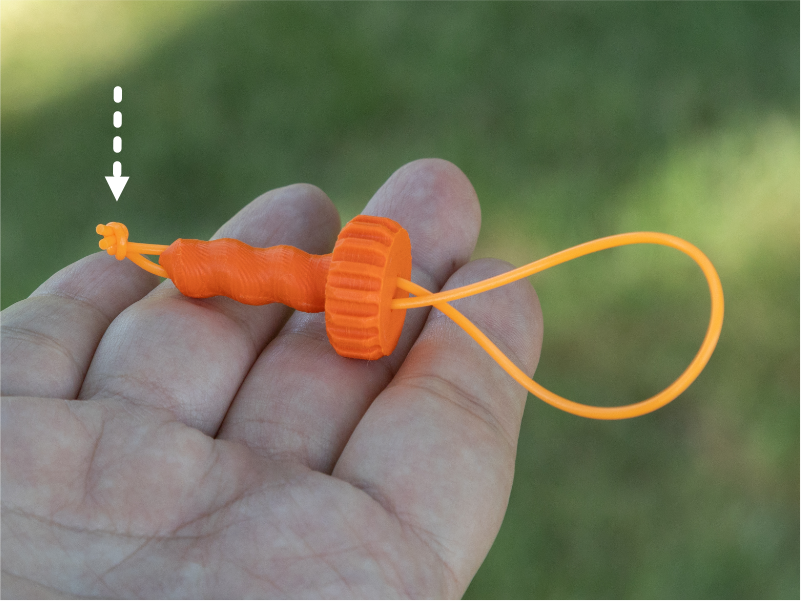 | Tie a loop through each of the screws with the knot on the side of the screw threads. I used TPU 85A for this because I liked the smooth and pliable surface. You can also create loops out of yarn. |
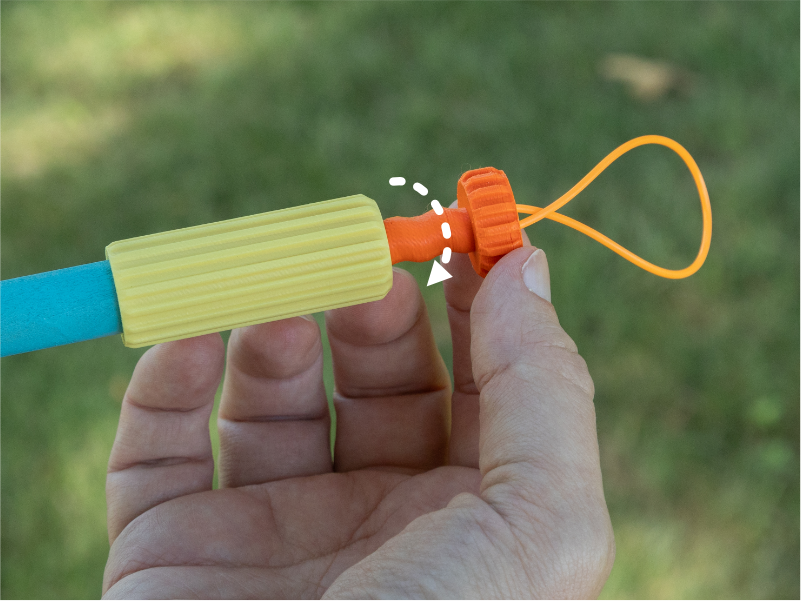 | Rotate each screw into a dowel cap. |
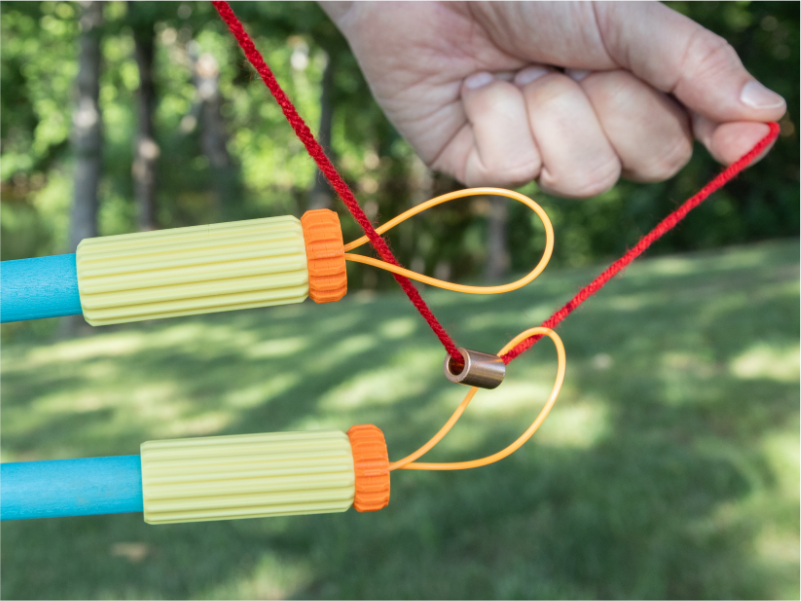 | Cut your yarn - I find 3 meters easier to manage but have gone as large as 4.5 meters.
|
Bubble Liquid Recipe
I’ve had good success with this recipe which is adapted from this guar gum recipe on the Soap Bubble wiki.
 | Ingredients:
Directions:
|
Printing Tips
- Most any filament should work for this project although I’ve tested in both PETG and PLA. If you plan to leave this outside, PETG may be a better choice.
- I’ve tested this successfully on an H2D and A1 Mini. Because the portion of the print in contact with the bed is small, it’s important to have a clean plate and use a brim with A1 printers. You may need to reduce the speed If you are having adhesion issues.
Updates
- 6/27/5: Reconfigured to stop using print by object. This simplified the compatibility across printer models although the items are now split into 2 plates.
