Você está no 3DFinder
Buscamos em Thingiverse, MakerWorld e Printables ao mesmo tempo para te dar o melhor de cada uma.
Descrição
SIMPLE. FLYING. FUN.
I'd like to present to you the mini glider model "Swallow" as my contribution to micro aviation in the MakerWorld community. Over the past few weeks, I’ve been working on this model with the goal of making it both highly functional and fun for kids (oh yes, my own kids loved it! 😊), while also keeping it relatively simple and quick to print. Customization is possible, and the build allows for creative modifications.
Video of model launch and flight you can see here:
1 - Model
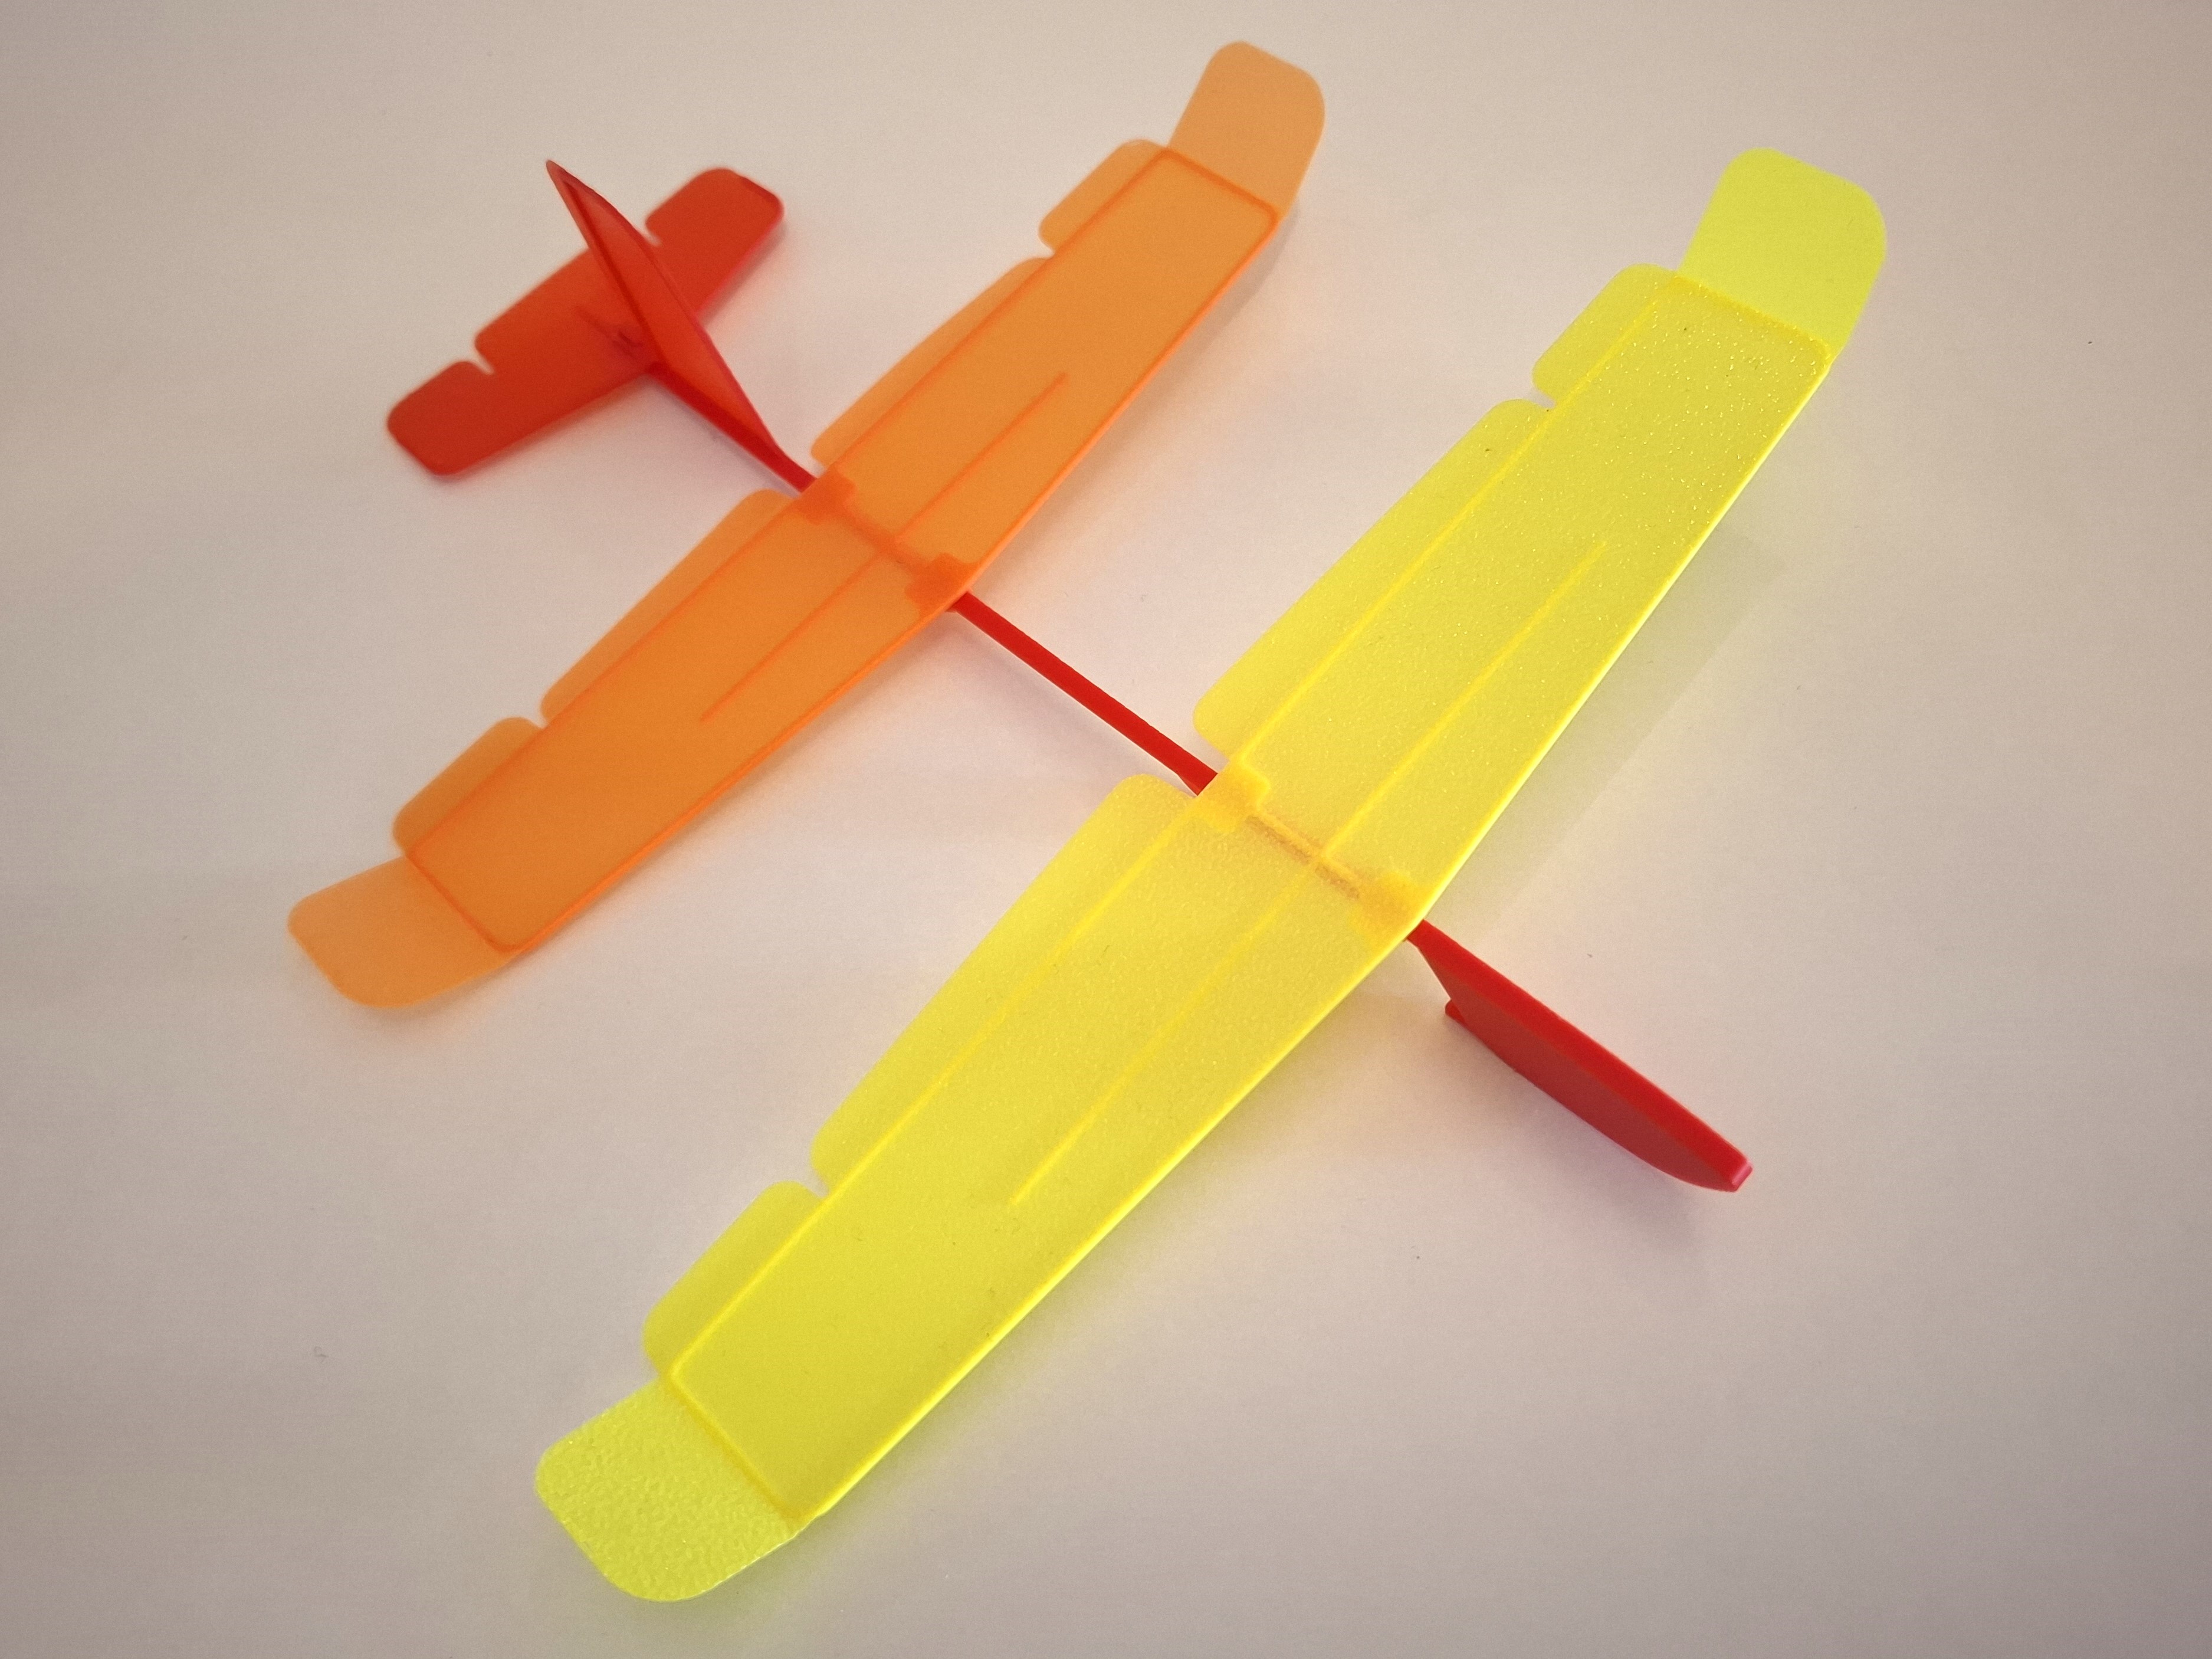
This lightweight and playful micro glider features a 205 mm wingspan, measures 205 mm in length, and weighs just around 5 grams. It flies beautifully both indoors and outdoors (in calm weather). Despite its simple design, the model offers adjustable control surfaces — including flaps, elevator, rudder, and ailerons. You can also fine-tune the center of gravity by shifting the wing position, allowing for various flight behaviors and customization.
Current configuration V0B:
improved strength of wing mounting clips, increased radii of fuselage edges, added chamfer on stabilizer mount.
2 - Model Print
The model was tested exclusively using Bambu Lab PLA Basic filament. During test flights, no issues with structural strength were observed. Only after 50 or more launches and impacts against hard surfaces did the model begin to show signs of damage.
I recommend printing it on a standard textured PEI build plate — it gives good grip and clean results.
After printing, let the plate and parts cool for about 5–7 minutes before removing them.
3 - Assembly
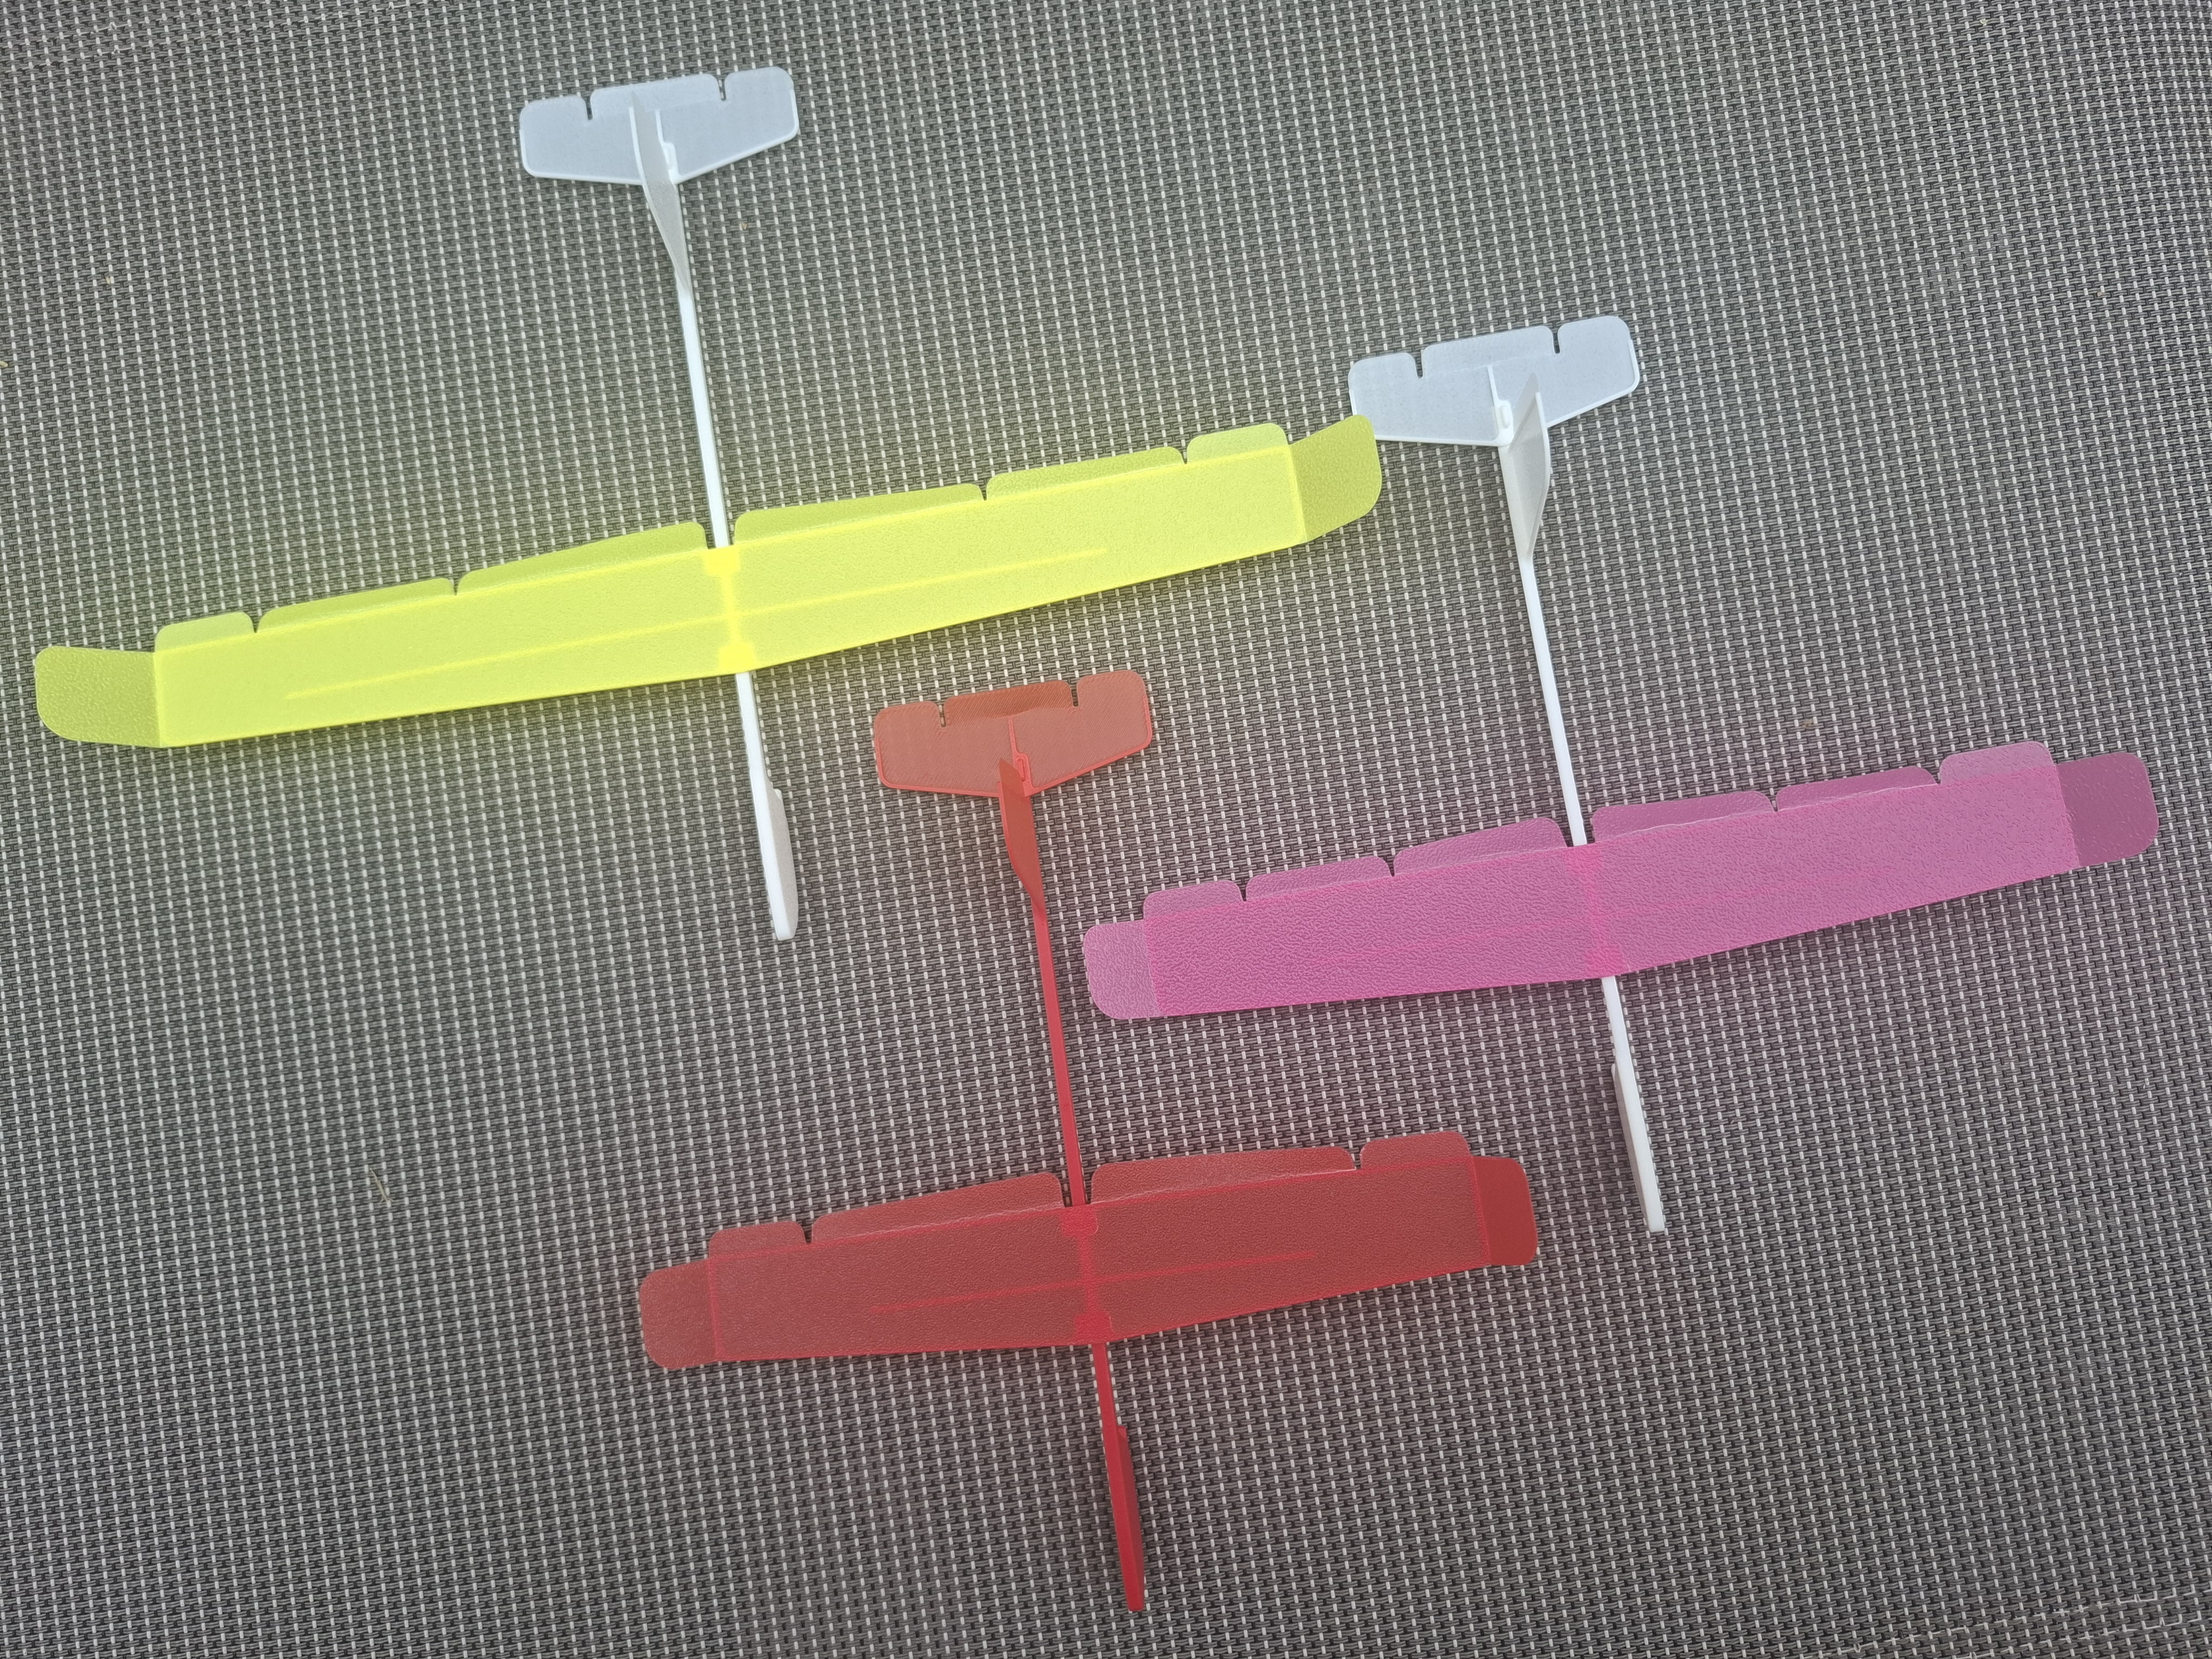
The model consists of 3 parts, as shown below.
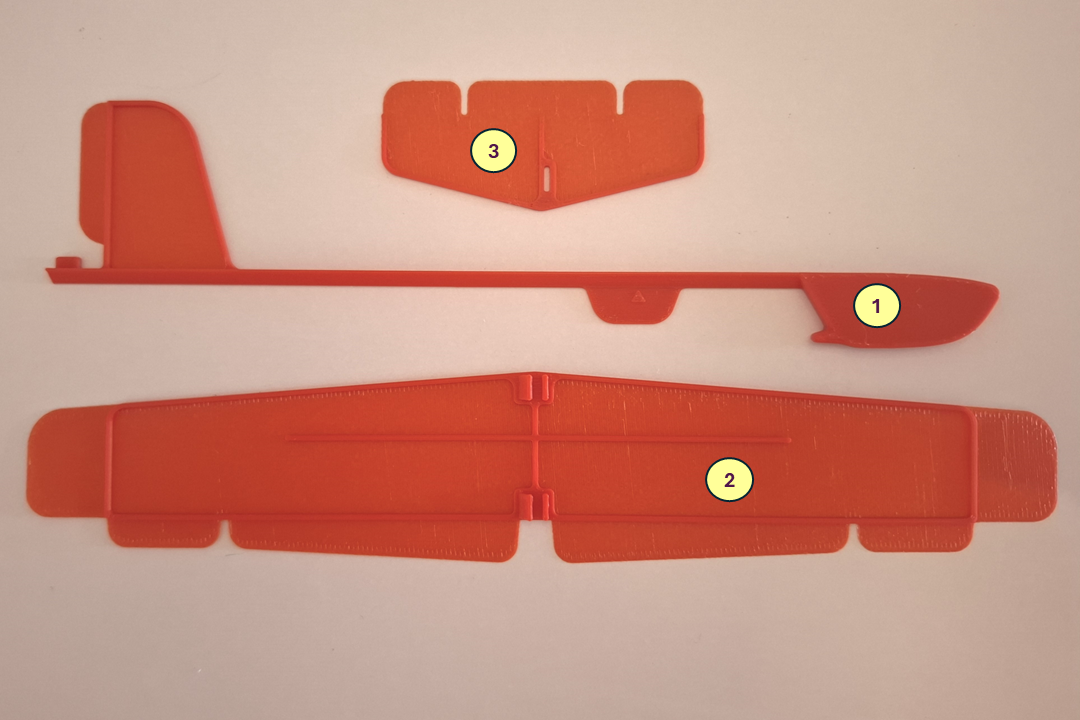
1 – Fuselage, 2 – Wing, 3 – Stabilizer.
Additional OPTIONAL Wing parts with increased span and strength (Wing XXL and Wing XL) are available in separate print profiles
By default, no glue is required for model assembly.
Before installing the stabilizer, bend the elevator up by about 10–15 degrees, as shown in the figure.
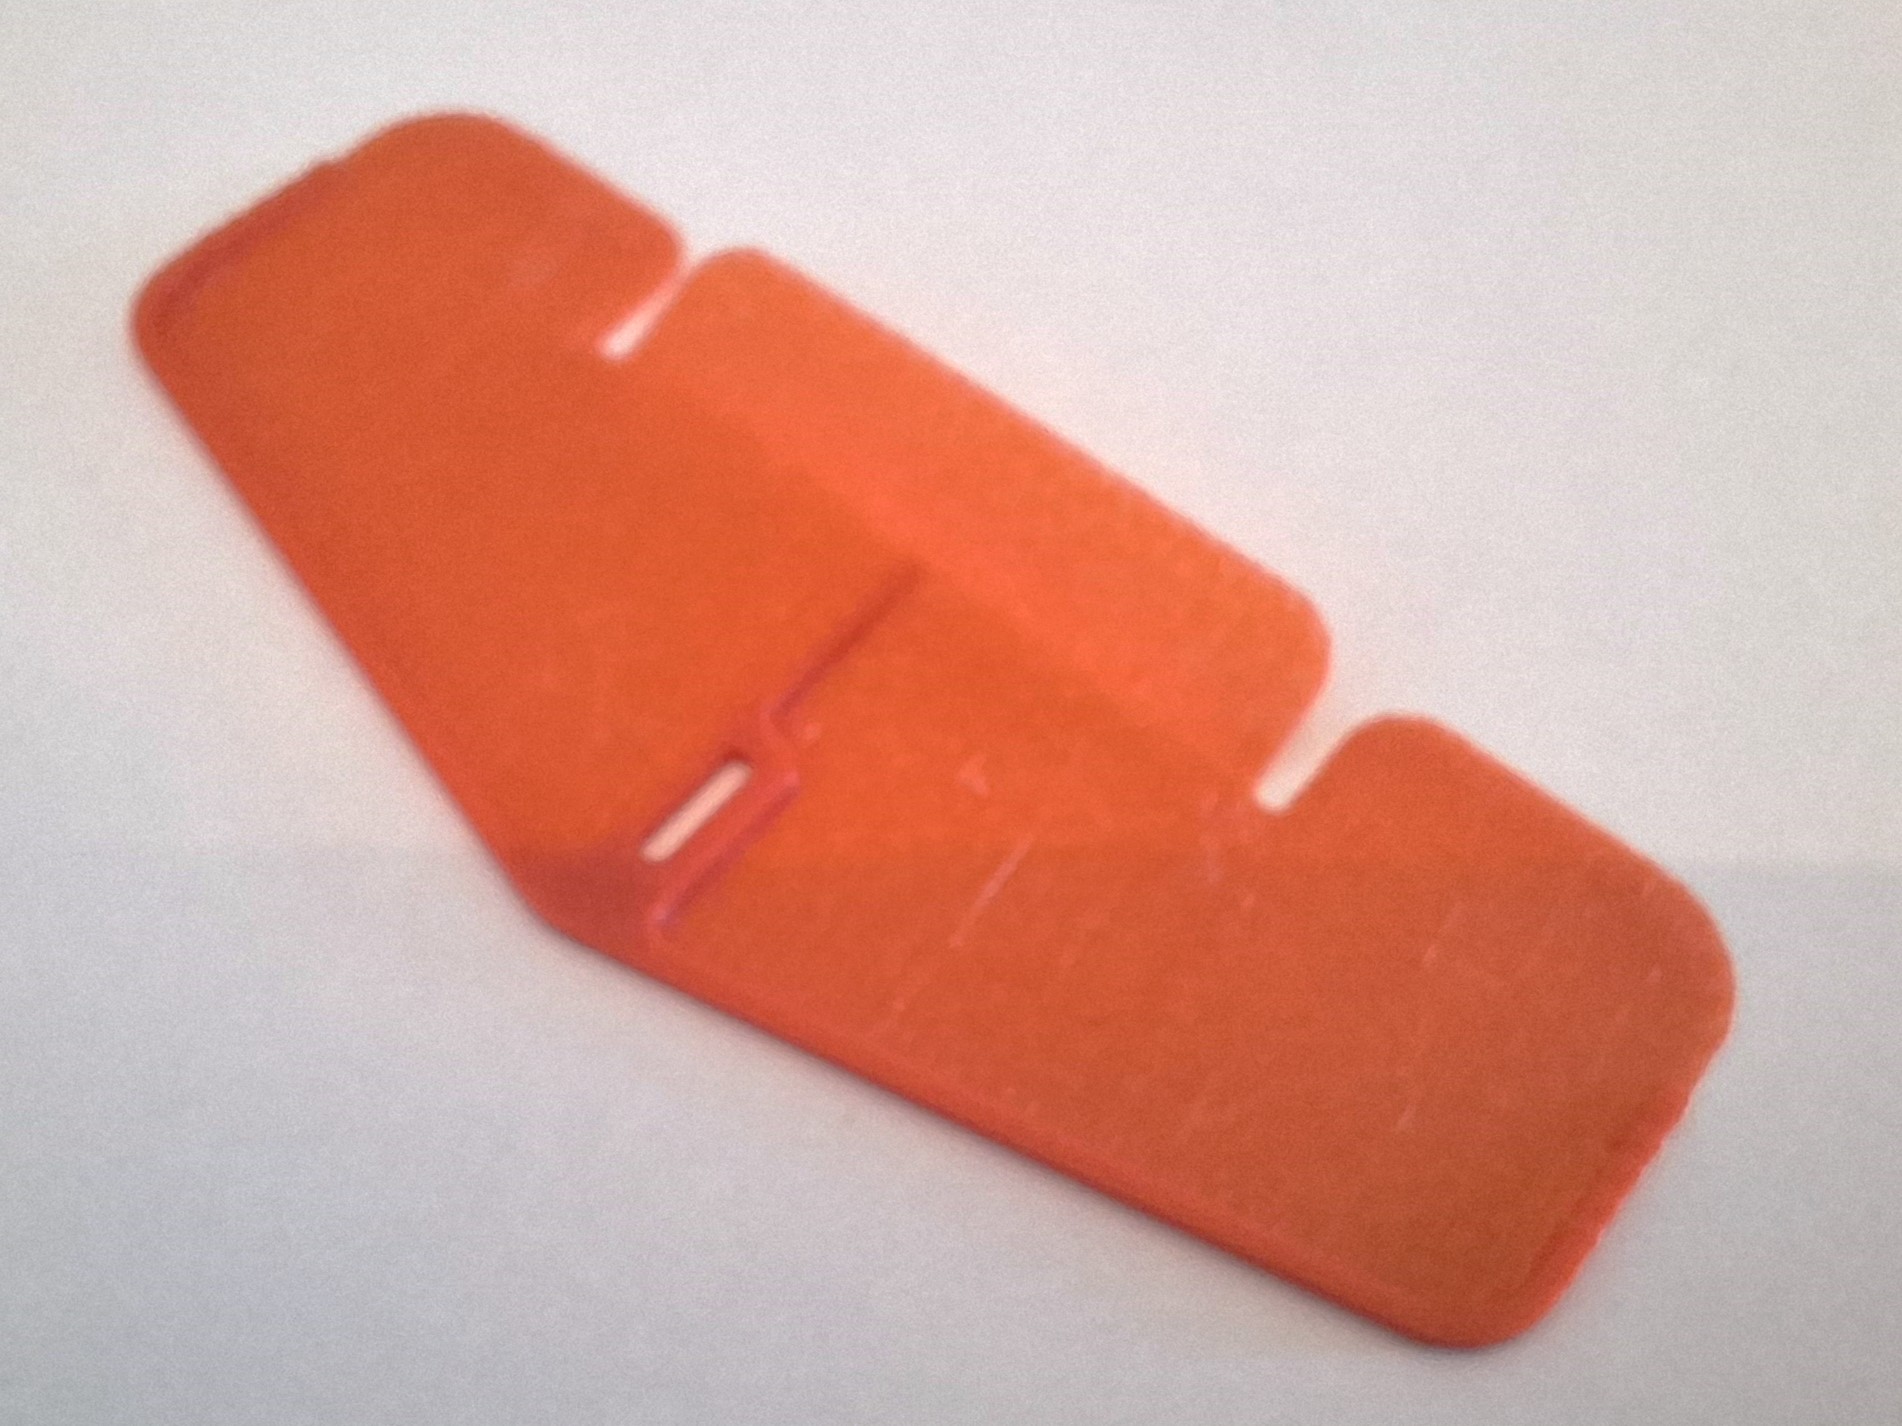
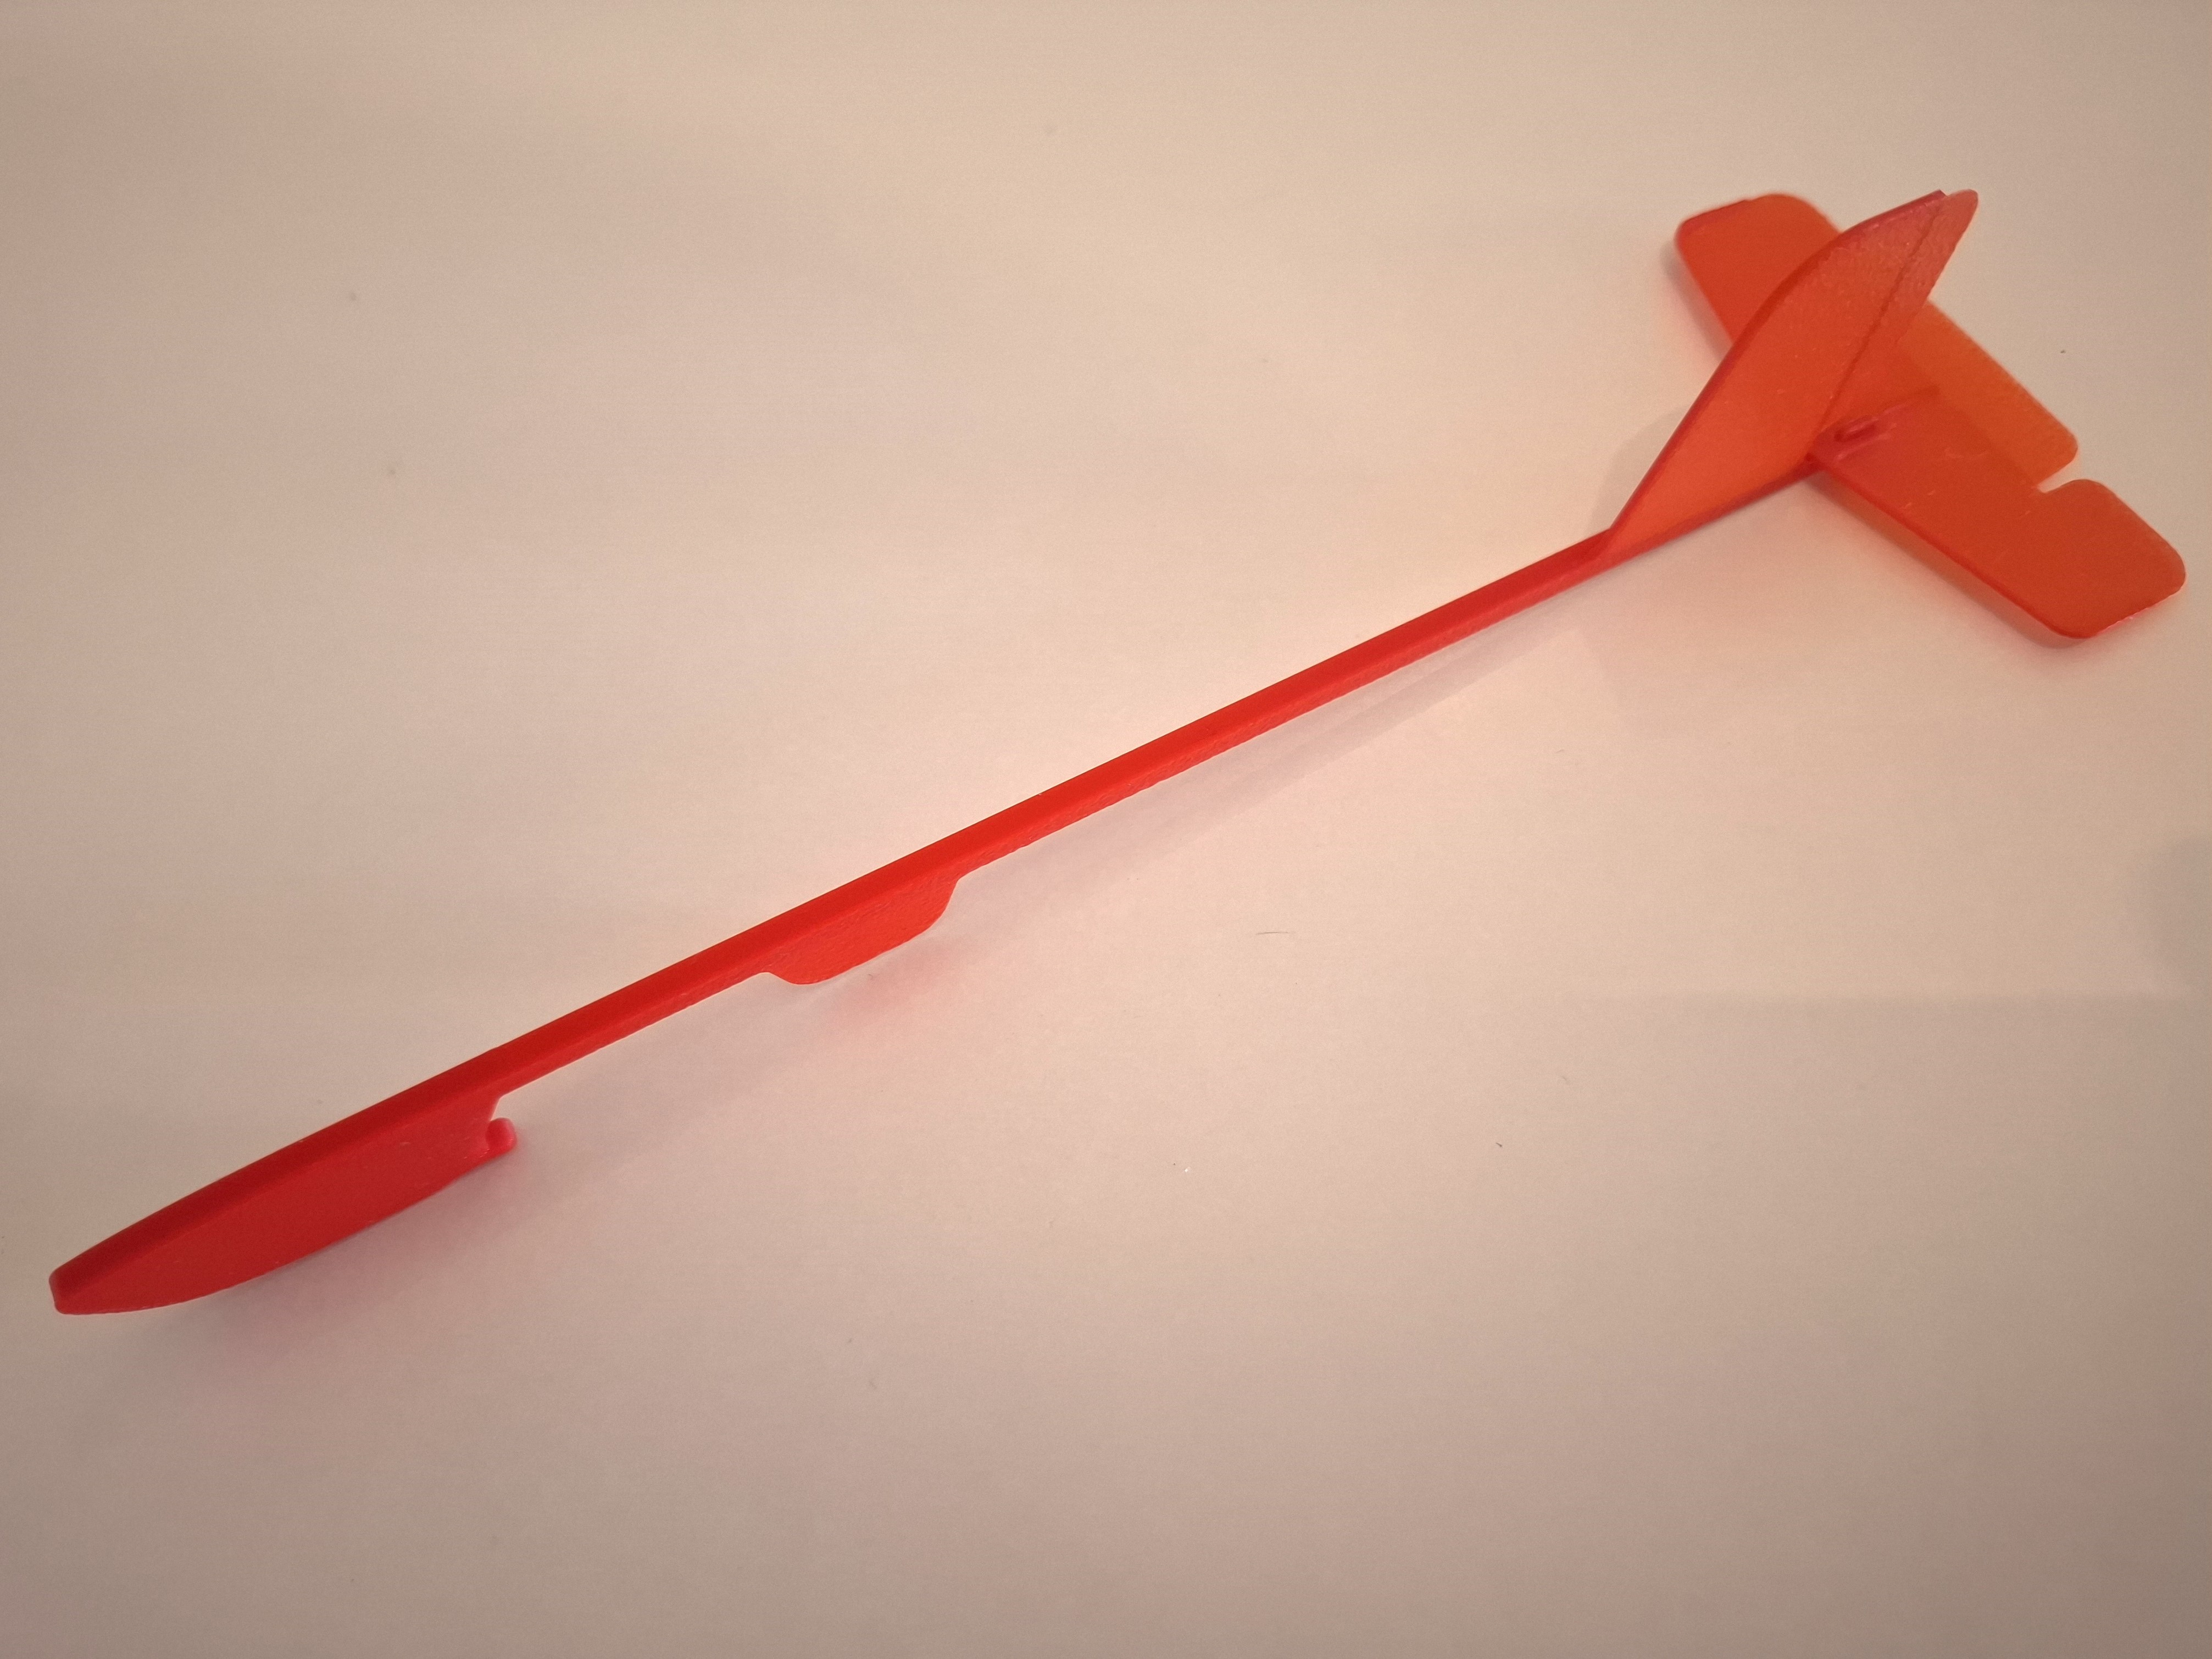
Install the stabilizer on the Fuselage.
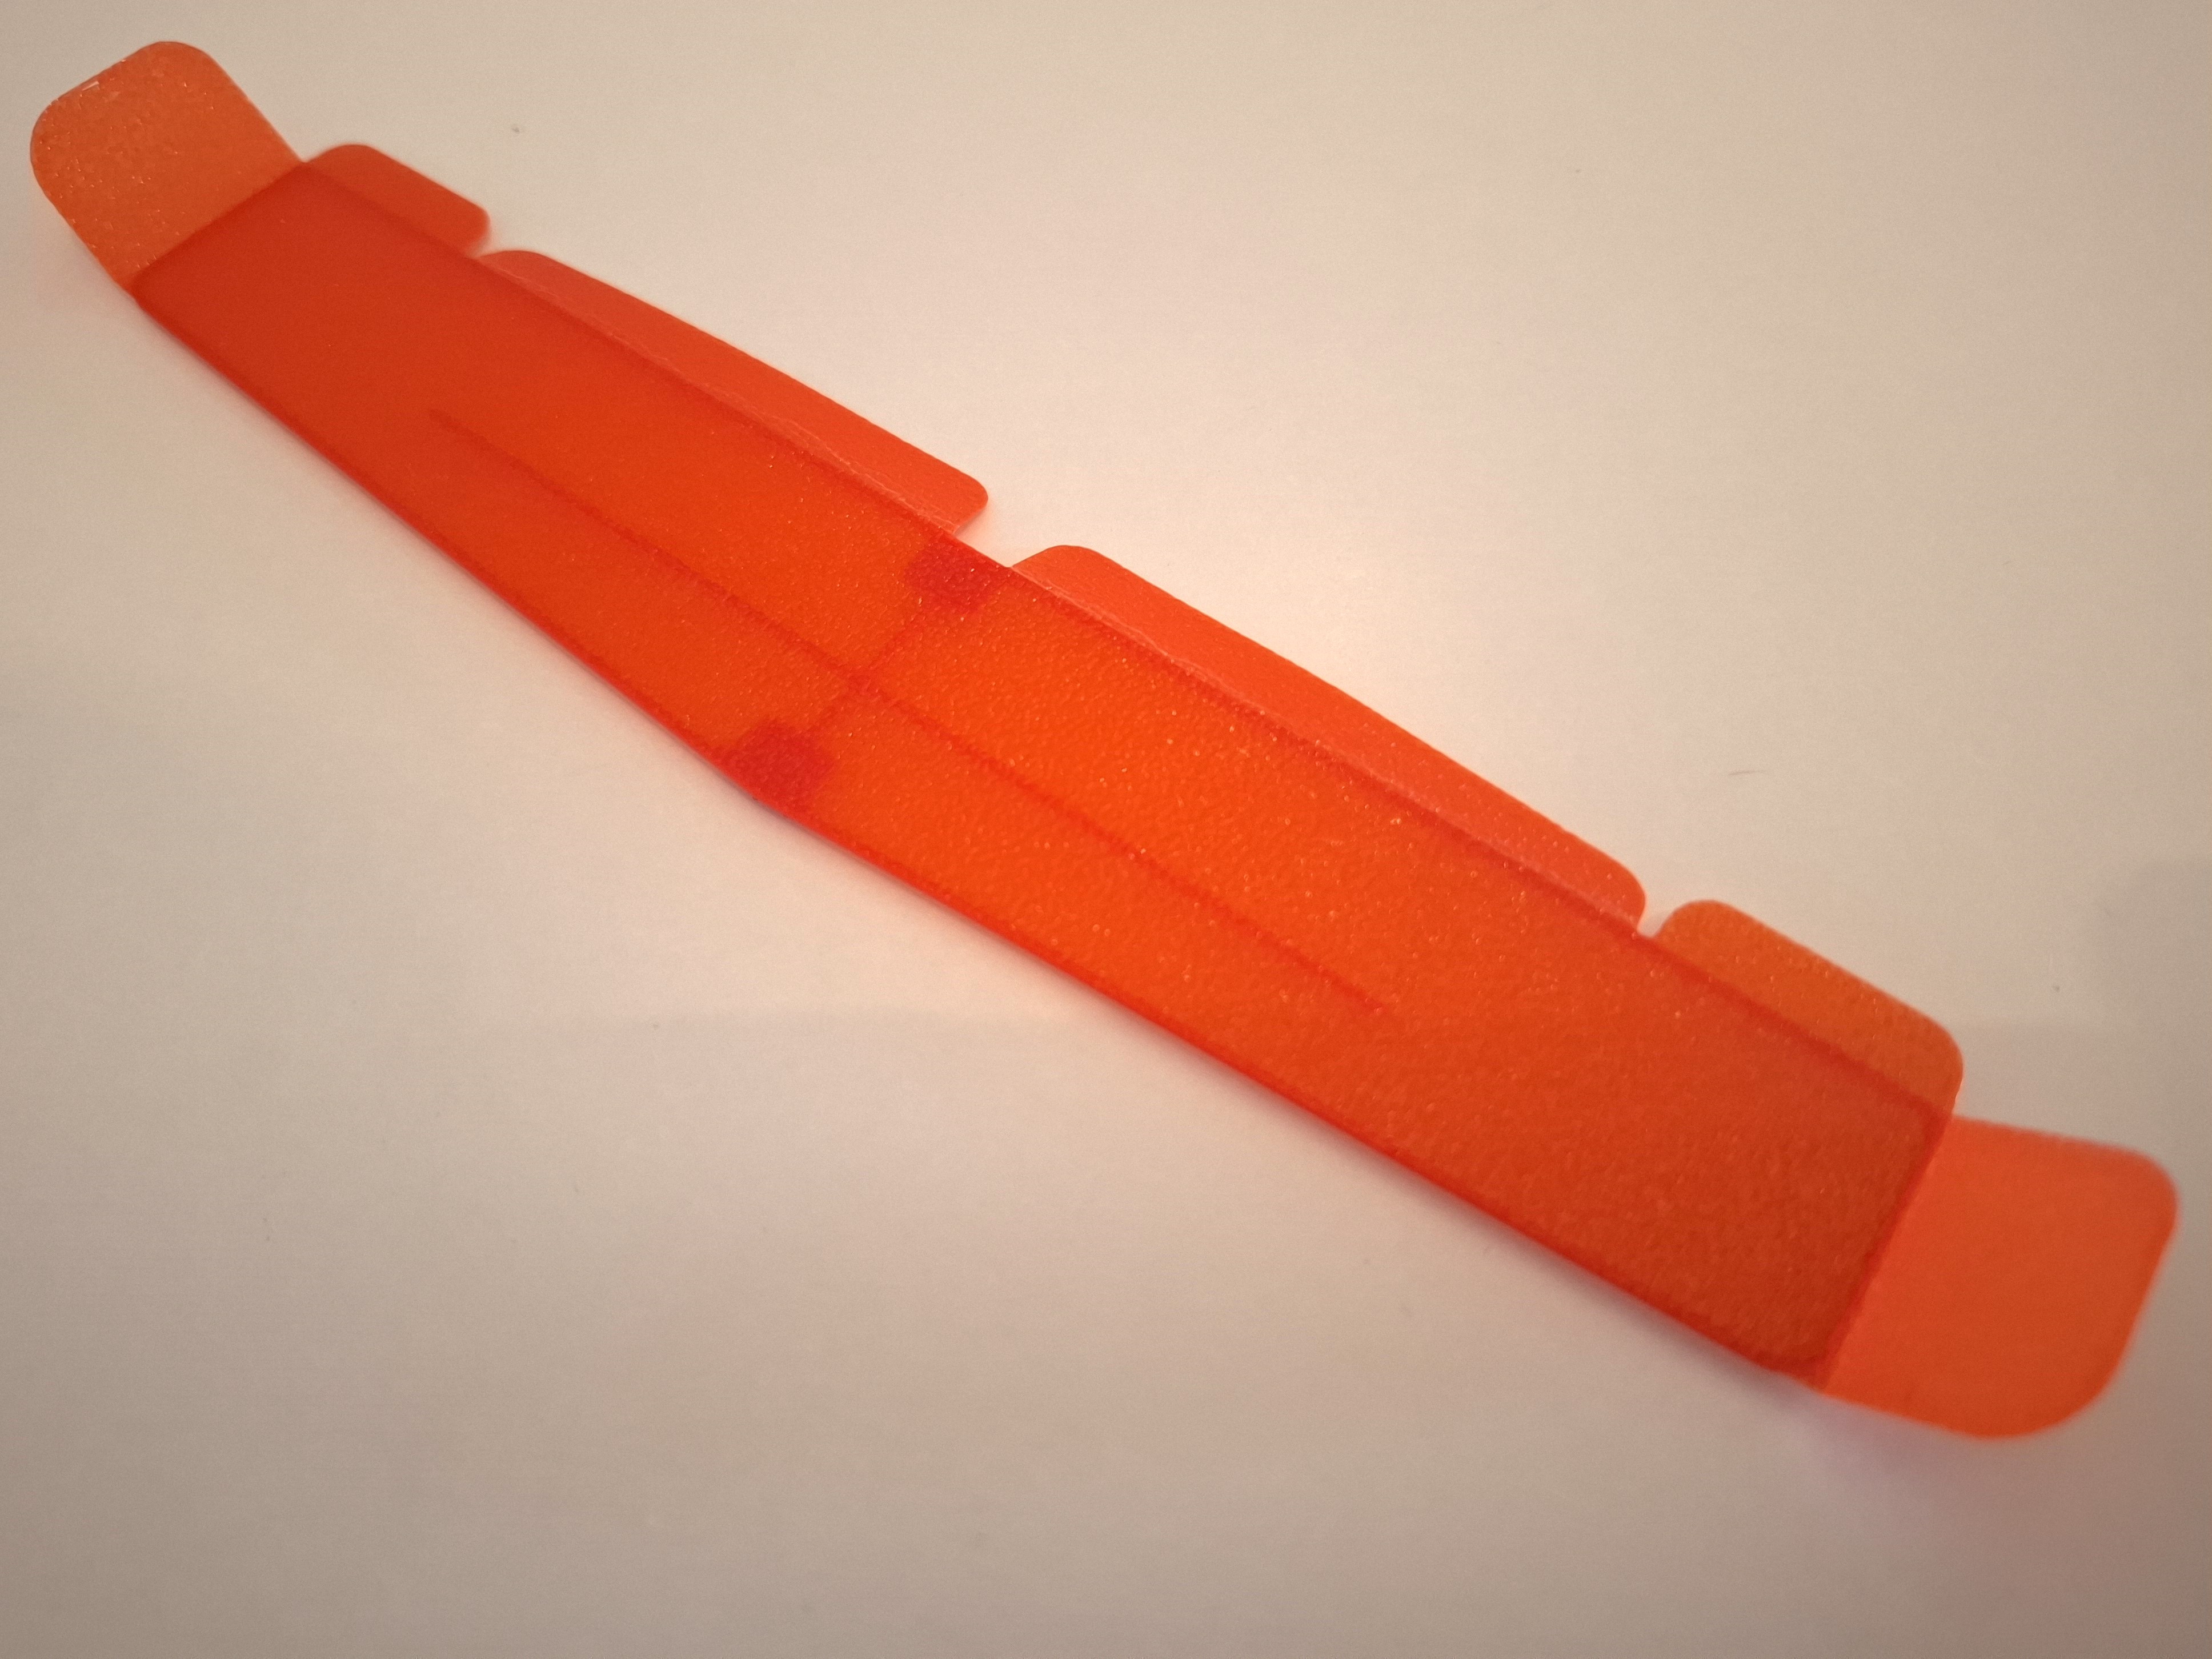
Deflect winglets of the wing and flaps down (15-20 degrees) as shown on the figure below.
Install the wing onto the fuselage as explained below.
First, insert the sharp end of the fuselage into the proper slot (Step A).
Then, with a slight twist and gentle pressure (Step B), fit the flat side of the fuselage beam into the wing connector slot.
To remove the wing, simply reverse the steps.
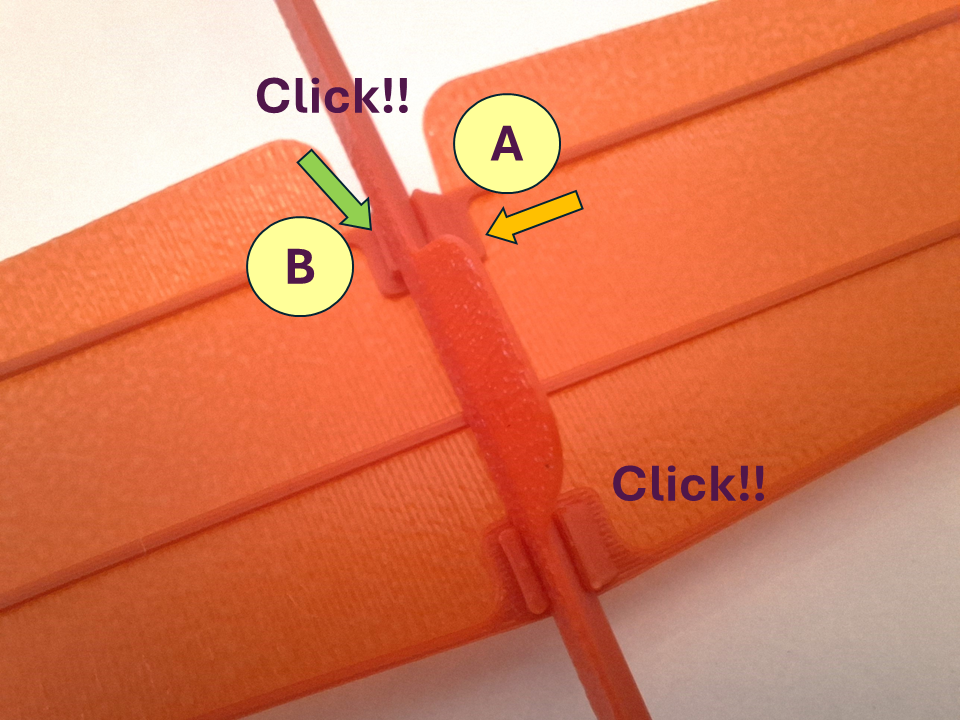
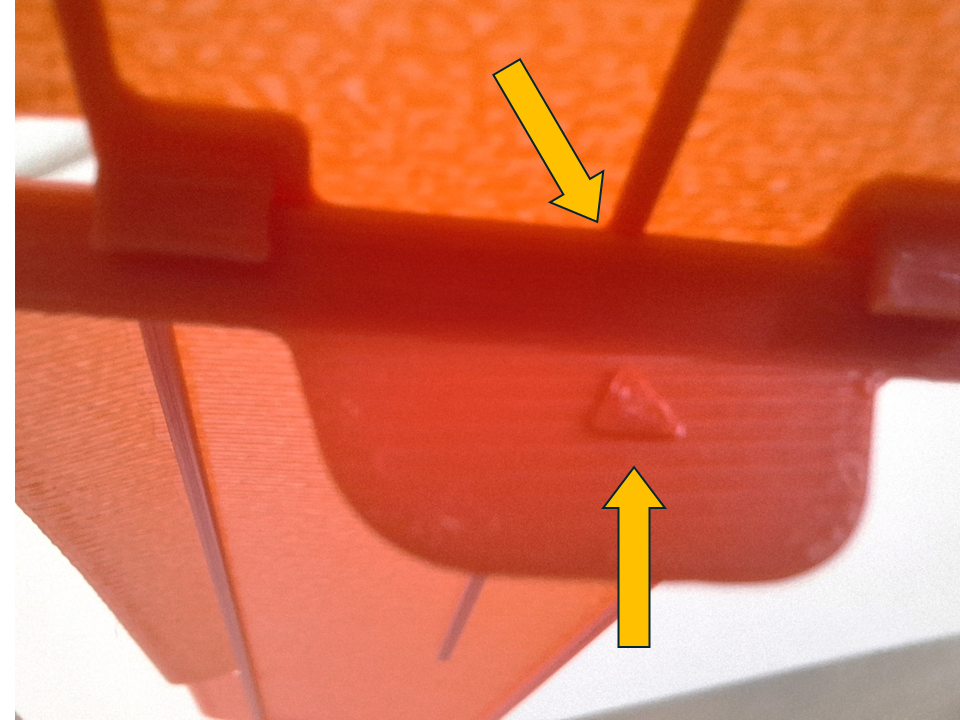
After installing the wing, check that the special marking is positioned directly under the wing spar — this is important for Gliding Mode.
4 - Model Flight
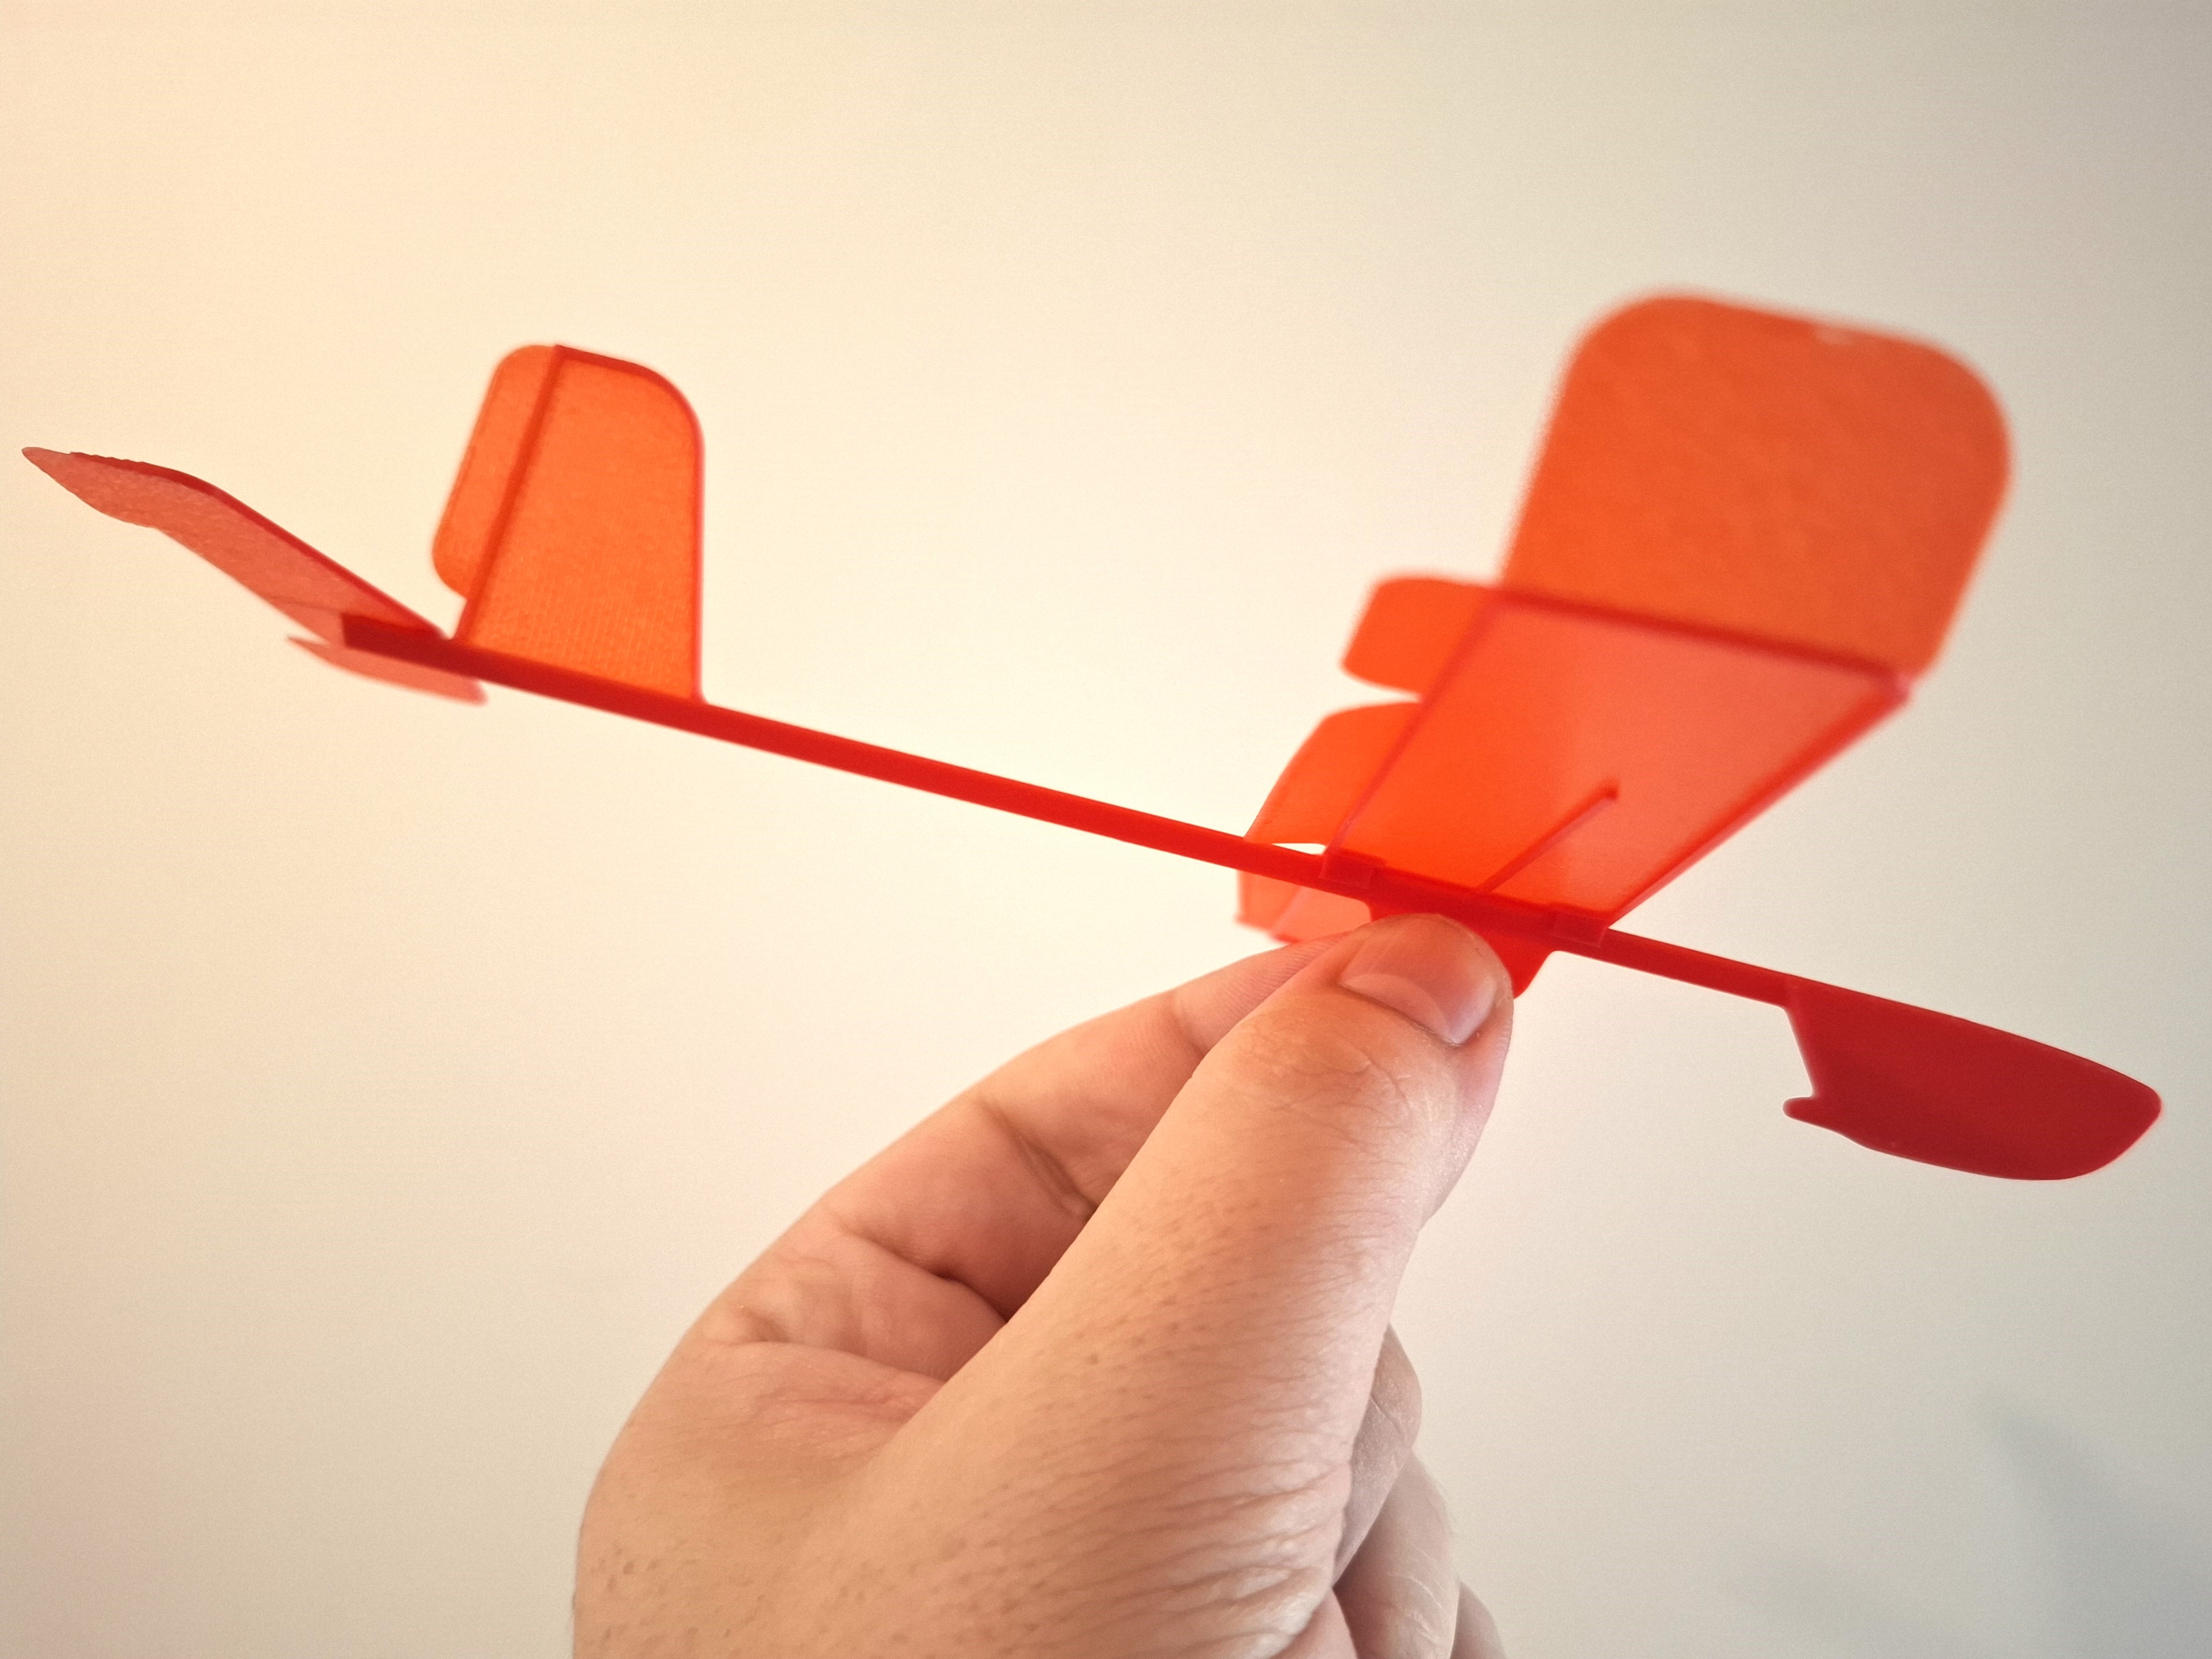
Launching of the model to be done by gentle push forward from the position (slight nose down) as shown below.
After the first flight, if required, adjust the elevator deflection angle or wing positioning for the best smooth straight flight.
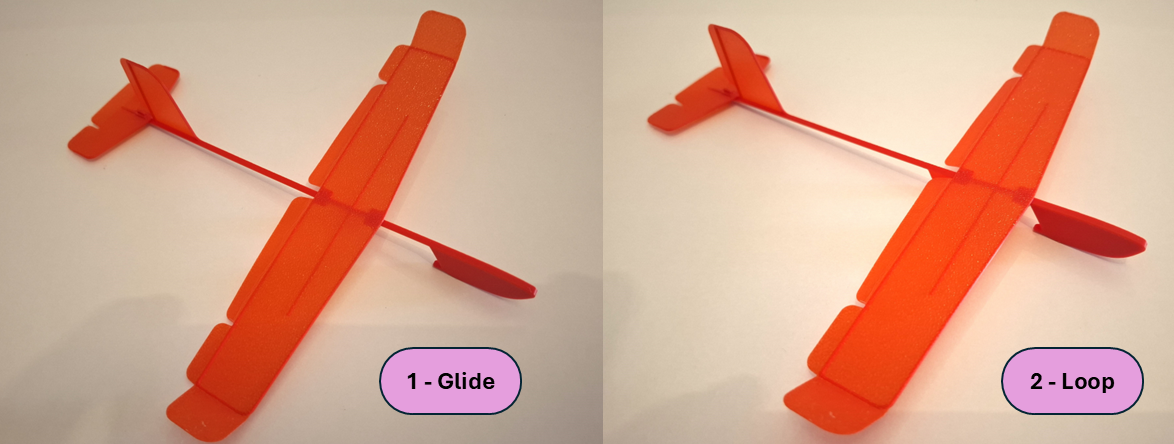
If model pitch UP: reduce the elevator upward deflection angle, OR reduce flap downward deflection angle, OR move the wing slightly rearward.
If model pitch DOWN: increase the elevator upward deflection angle, OR increase flap downward deflection angle, OR move the wing slightly forward.
For the “Looping” Mode simply move the wing maximum forward. Launch the model as strong as possible. Enjoy model aerobatics 😉
Launching of the model also can be done with rubber band (for "standard model and optional Wing XL (235mm).
Use the print profile “ÖPTIONAL - Launcher” to print stick. As rubber band any office or BambuLab elastic rubber rings can be used.
For a smooth and powerful launch, I recommend connecting 2–3 rubber bands in a row. This setup makes the launch more fluid while still dynamic, and it transfers the speed impulse to the model in the most efficient way.
Check out the demo video in the model description! 😊
5 - Maintenance and Customization
If any parts get damaged, they can be replaced. If needed, parts can also be glued together.
If the wing-to-fuselage connection becomes too loose, just place a small strip of thin office paper inside the wing slot to tighten the fit.
Since the model is detachable, it fits perfectly into a small box along with launch accessories (not fit to XXL wing). I customized the box with 220mm x 45mm x 25 mm x 2mm (wall thickness) using following model: [https://makerworld.com/en/models/463688-customizable-box-with-lid#profileId-372271](https://makerworld.com/en/models/463688-customizable-box-with-lid#profileId-372271)
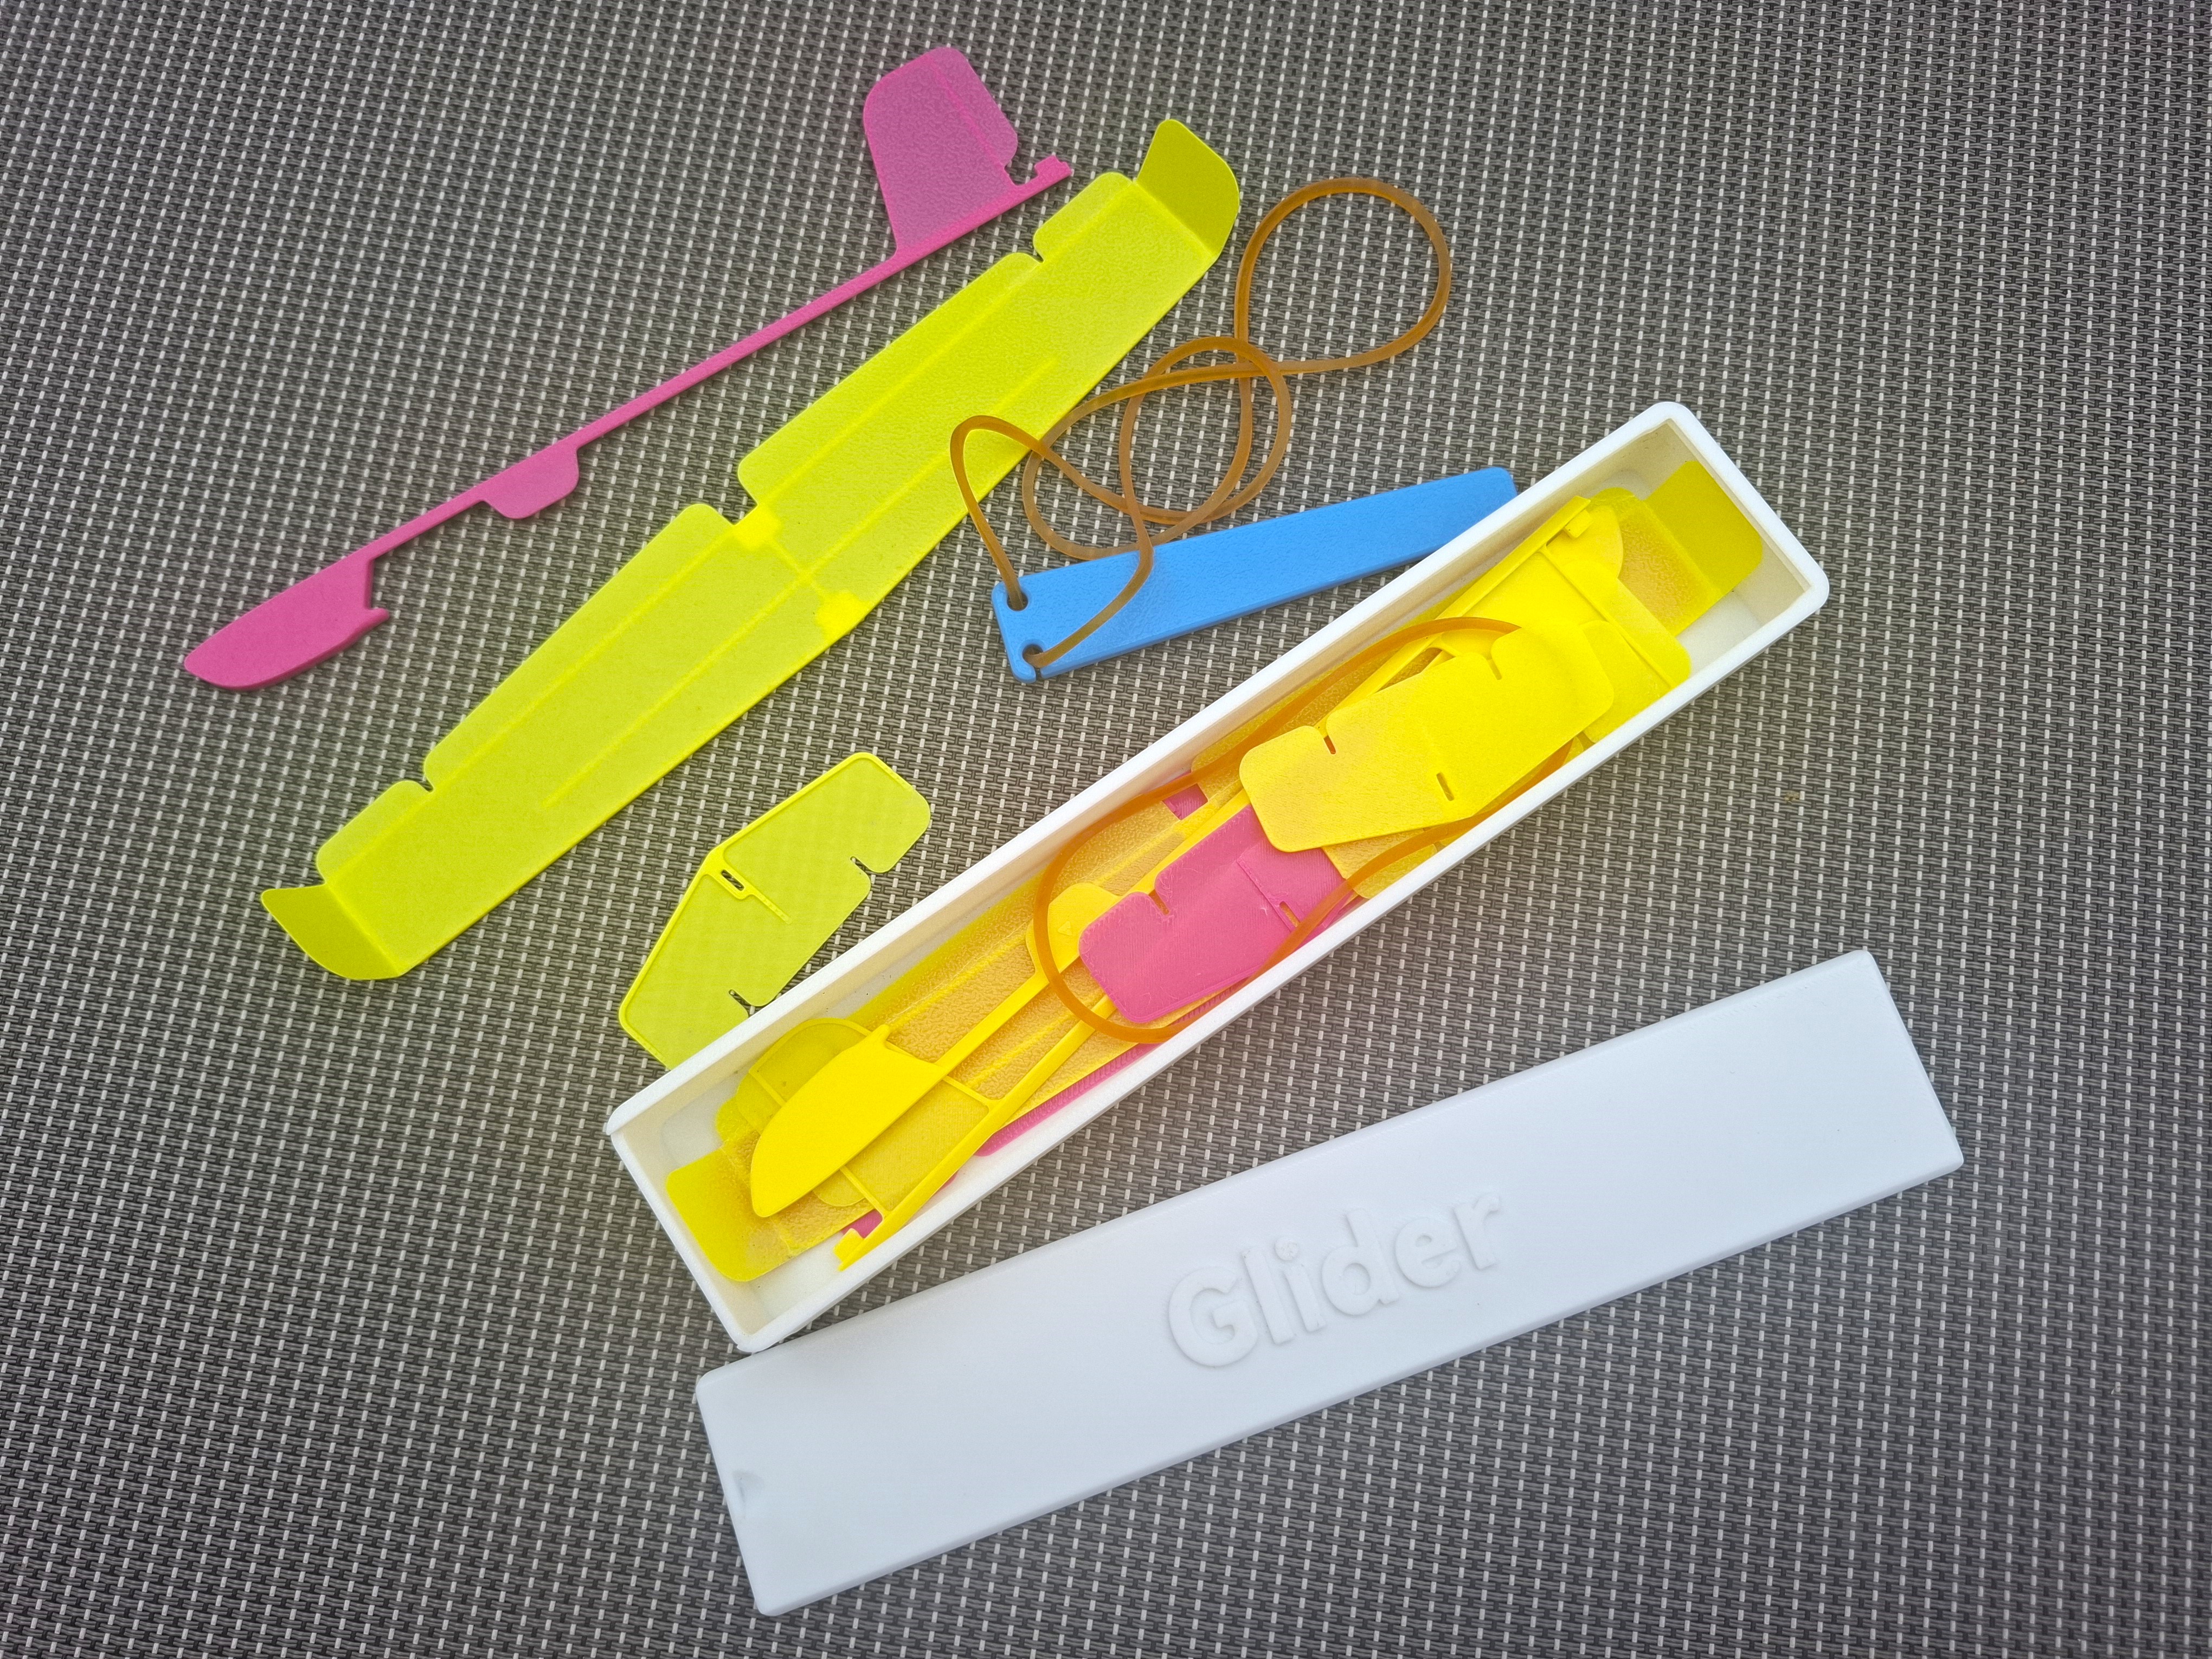
The parts of Swallow mini glider are fully interchangeable with the parts of the "Sparrow" model: [https://makerworld.com/en/models/1539663-mini-aircraft-sparrow#profileId-1615680](https://makerworld.com/en/models/1539663-mini-aircraft-sparrow#profileId-1615680)
This model is a great playground for customization and experimenting with different control surface settings.
As they say — the sky is the limit!
Happy Flights and Smooth Landings!

Gostou deste modelo? Crie uma conta grátis para salvar seus favoritos e voltar a eles depois.
Criar conta