Você está no 3DFinder
Buscamos em Thingiverse, MakerWorld e Printables ao mesmo tempo para te dar o melhor de cada uma.
Descrição
Smart 5-Light Parking Sensor System
Overview
This Parking Sensor System uses a high-precision ultrasonic distance sensor and five LED indicators to help drivers safely park their vehicle with visual guidance. Based on the distance to the nearest object, the LED lights provide real-time feedback as the vehicle approaches.
Key Features
Real-Time Proximity Detection
- Uses an ultrasonic sensor (HC-SR04) to constantly measure distance.
- Reacts instantly to your vehicle’s movement.
5-Stage Visual Feedback
- Five LED lights give clear proximity stages:
- Light 1: Indicates a distance of approximately 190 cm.
- Light 2: Indicates a distance of approximately 150 cm.
- Light 3: Indicates a distance of approximately 110 cm.
- Light 4: Indicates a distance of approximately 70 cm.
- Light 5: Indicates a distance of approximately 40 cm.
- Fast flashing all 5 lights indicates less than 30cm and vehicle moving.
- Slow flashing all 5 lights indicates less than 30cm but vehicle stopped.
Smart Movement Detection
- Detects vehicle motion direction (forward or reverse).
- Automatically resets when no movement is detected for 10+ seconds.
Compact and Efficient
- Runs on 12V power, theoretically it could run on 5v as long as there are enough amps to power the lights and sensor.
- Low power draw, no overheating, no external capacitors needed.
Flashing Alert Mode
- Fast flashing for danger close proximity (approximately 30cm and moving.
- Slow flashing after extended presence at less than 30cm and NOT moving.
- Full reset when no object is detected.
Sleep Modes for Efficiency
- Smart timing delays optimize power consumption and system lifespan.
Perfect For
- Home garages
- Tight driveways
- Carports
- Commercial fleet parking
- DIY enthusiasts and makers
Additional Items Required
- Car LED Atmosphere Lights available from amazon and other places: [https://www.amazon.de/Atmosphere-Lights-Light-Lighting-Interior/dp/B08L641P6Q/](https://www.amazon.de/Atmosphere-Lights-Light-Lighting-Interior/dp/B08L641P6Q/)
- HC-SR04 Sensor
- Arduino Uno R4 the 3d print has been designed around the R4 but should also work with the R3
- Female dupont connector from Maker World (5 prints, one for each bulb)
- Dupont Wire Male to Female and Male to Male
- 6 x M3 x 6mm bolts.
- Terminal connectors.
- Barrel Plug and Barrel Jack connector
- 12v Pressure Switch
- Screws to fix to wall
- 2 x Female crimp terminals
- 12v Power Source
Construction
Before continuing please read all steps.
Step 1
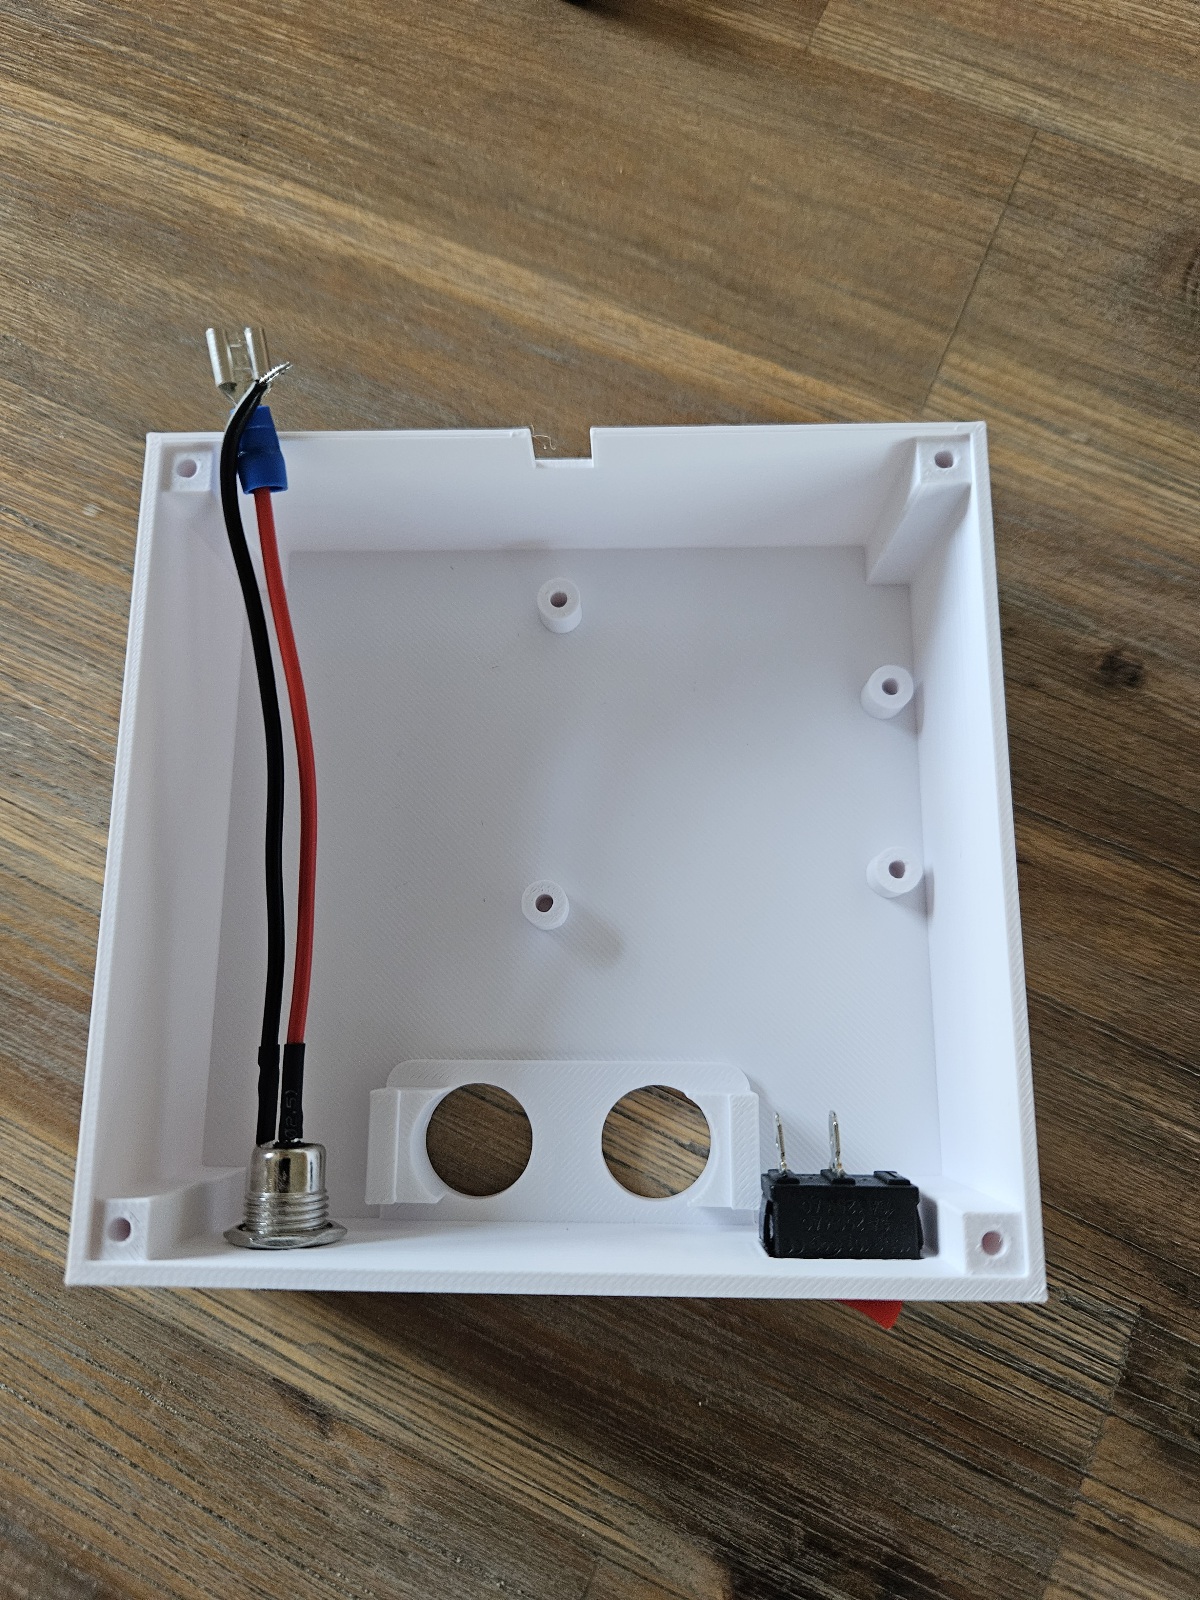
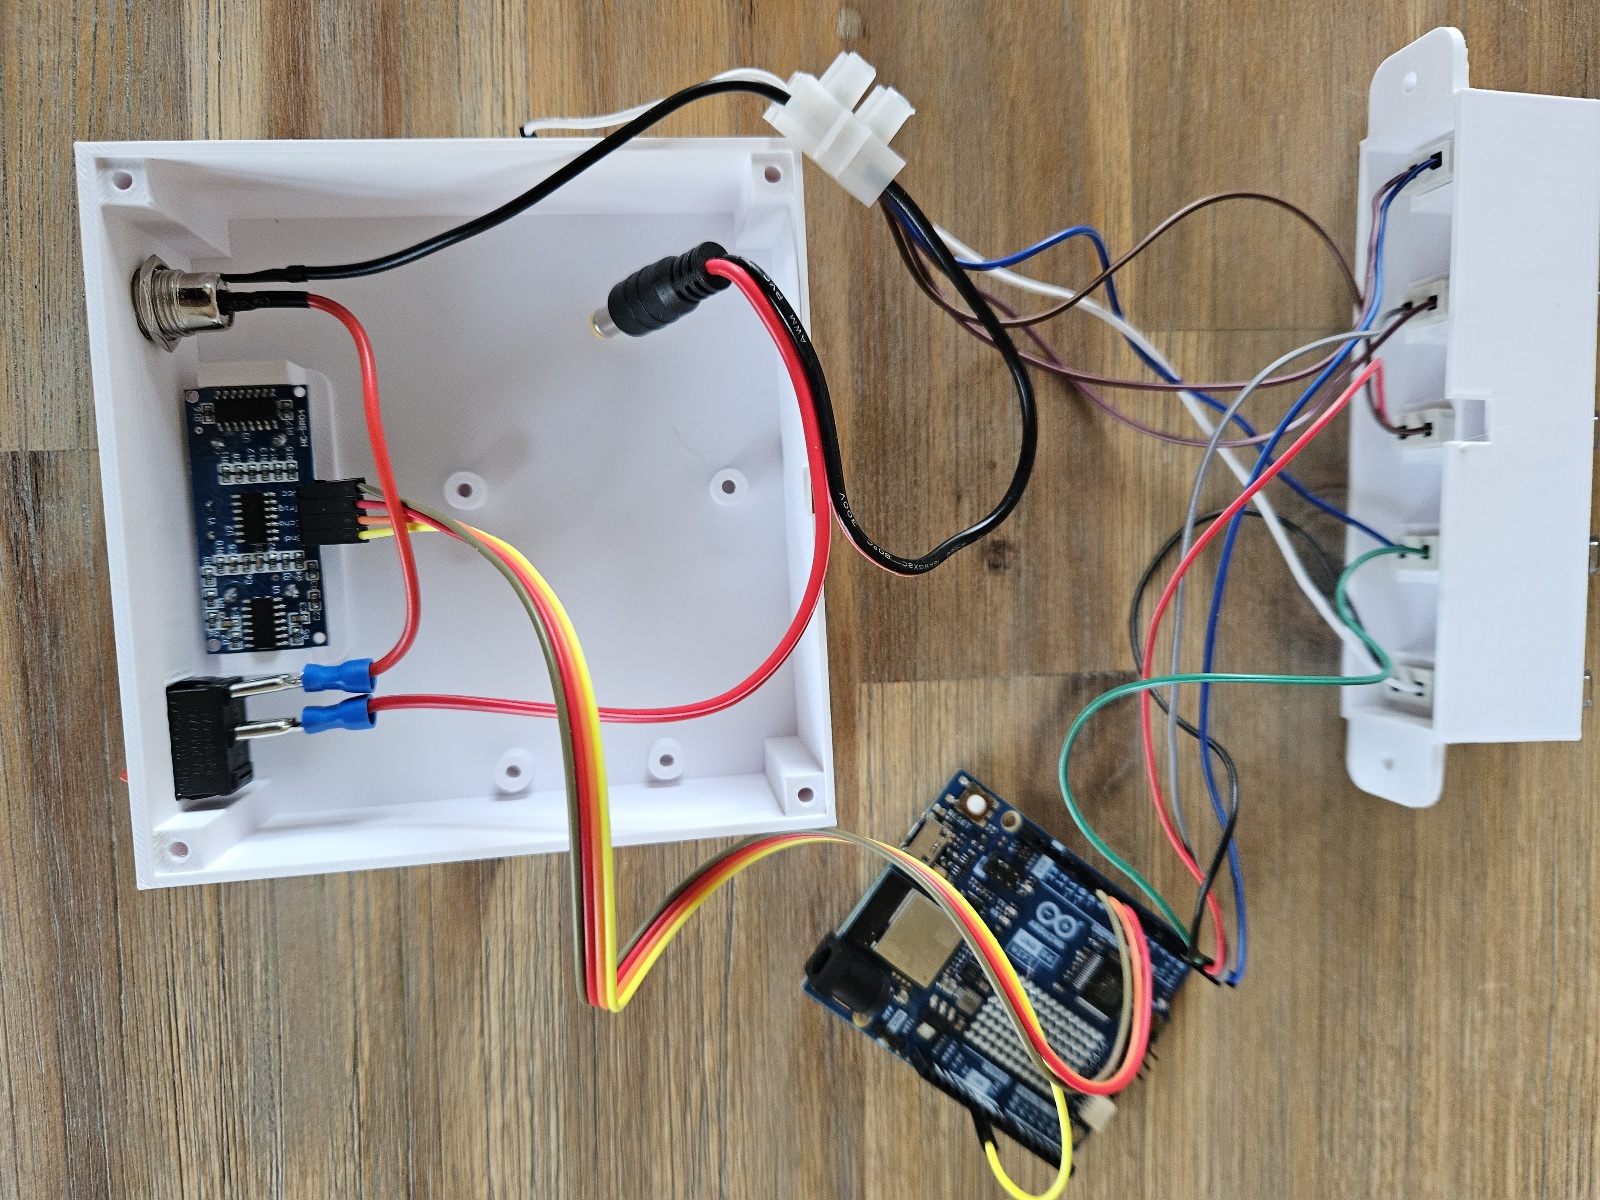
Insert the barrel plug and pressure switch into the housing. Attach a female crimp terminal to the red (positive) cable from the barrel connector.
Step 2
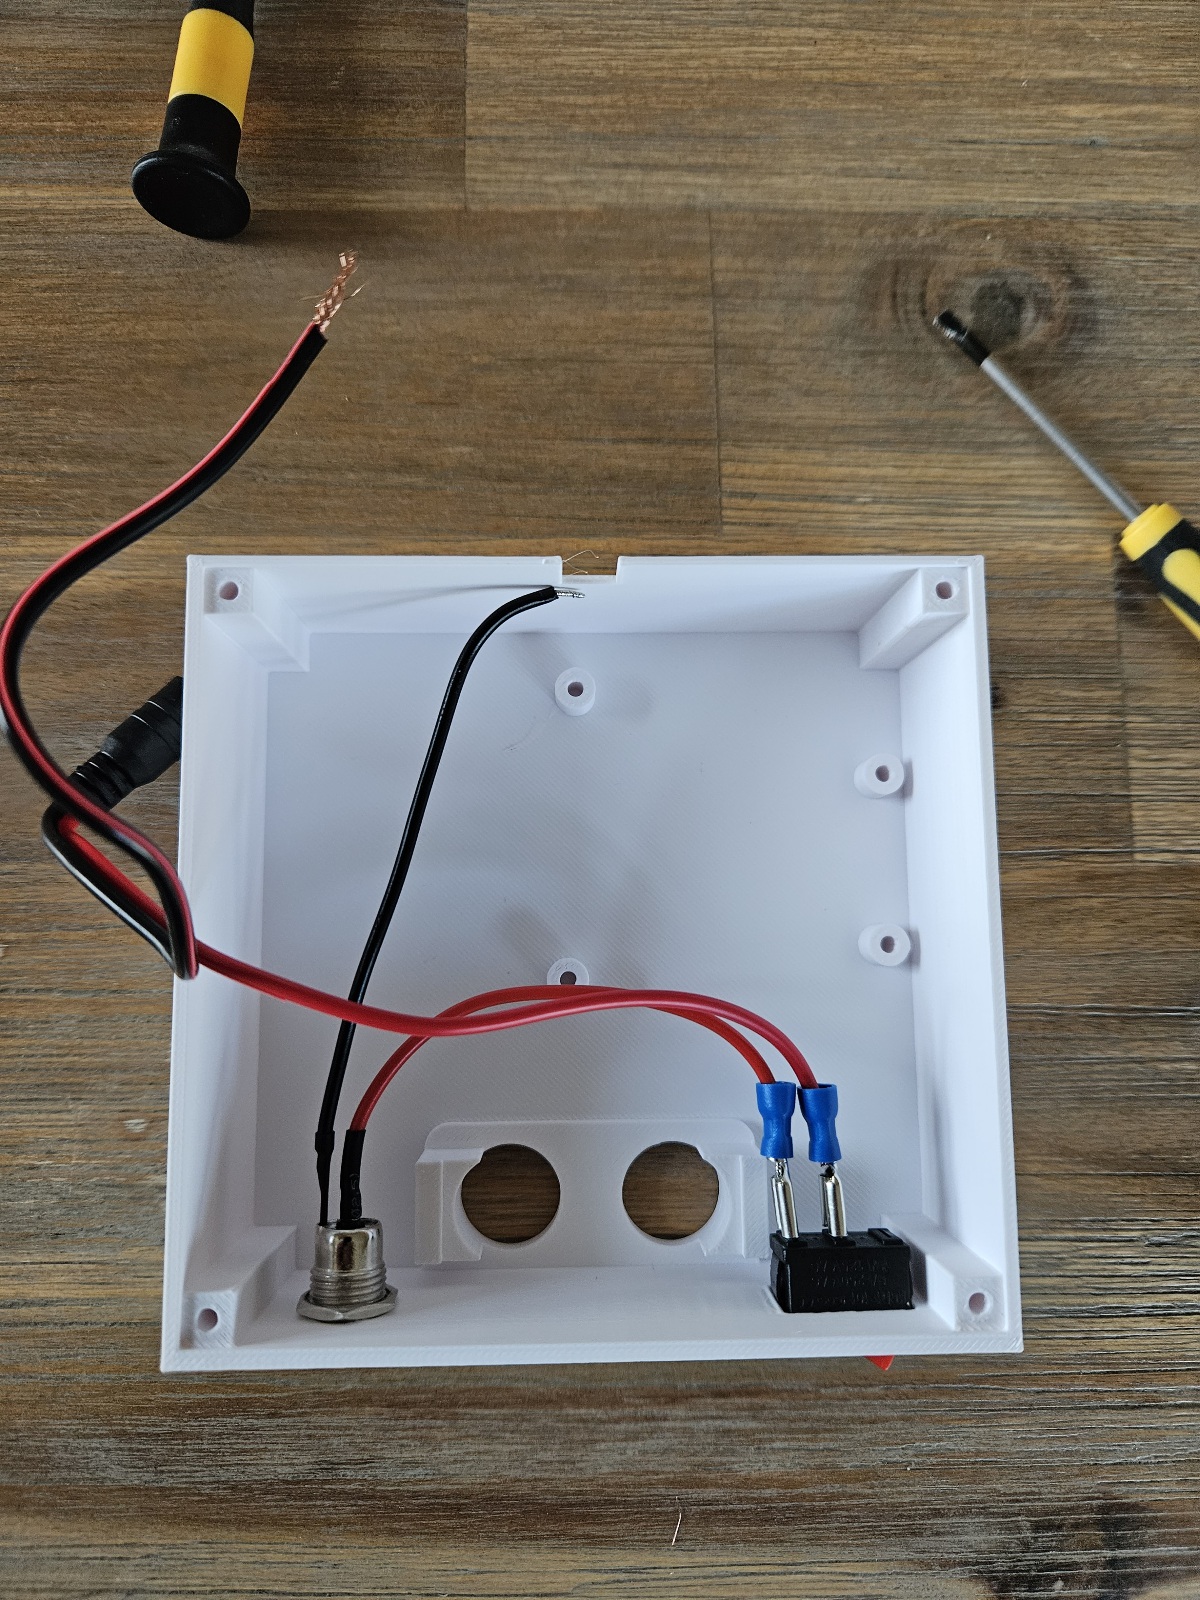
Take the barrel plug connector and add a female crimp terminal to the positive wire (red). Connect the red (positive) from the barrel plug to the input of the pressure switch and the positive from plug connector to the output of the terminal switch.
Step 3
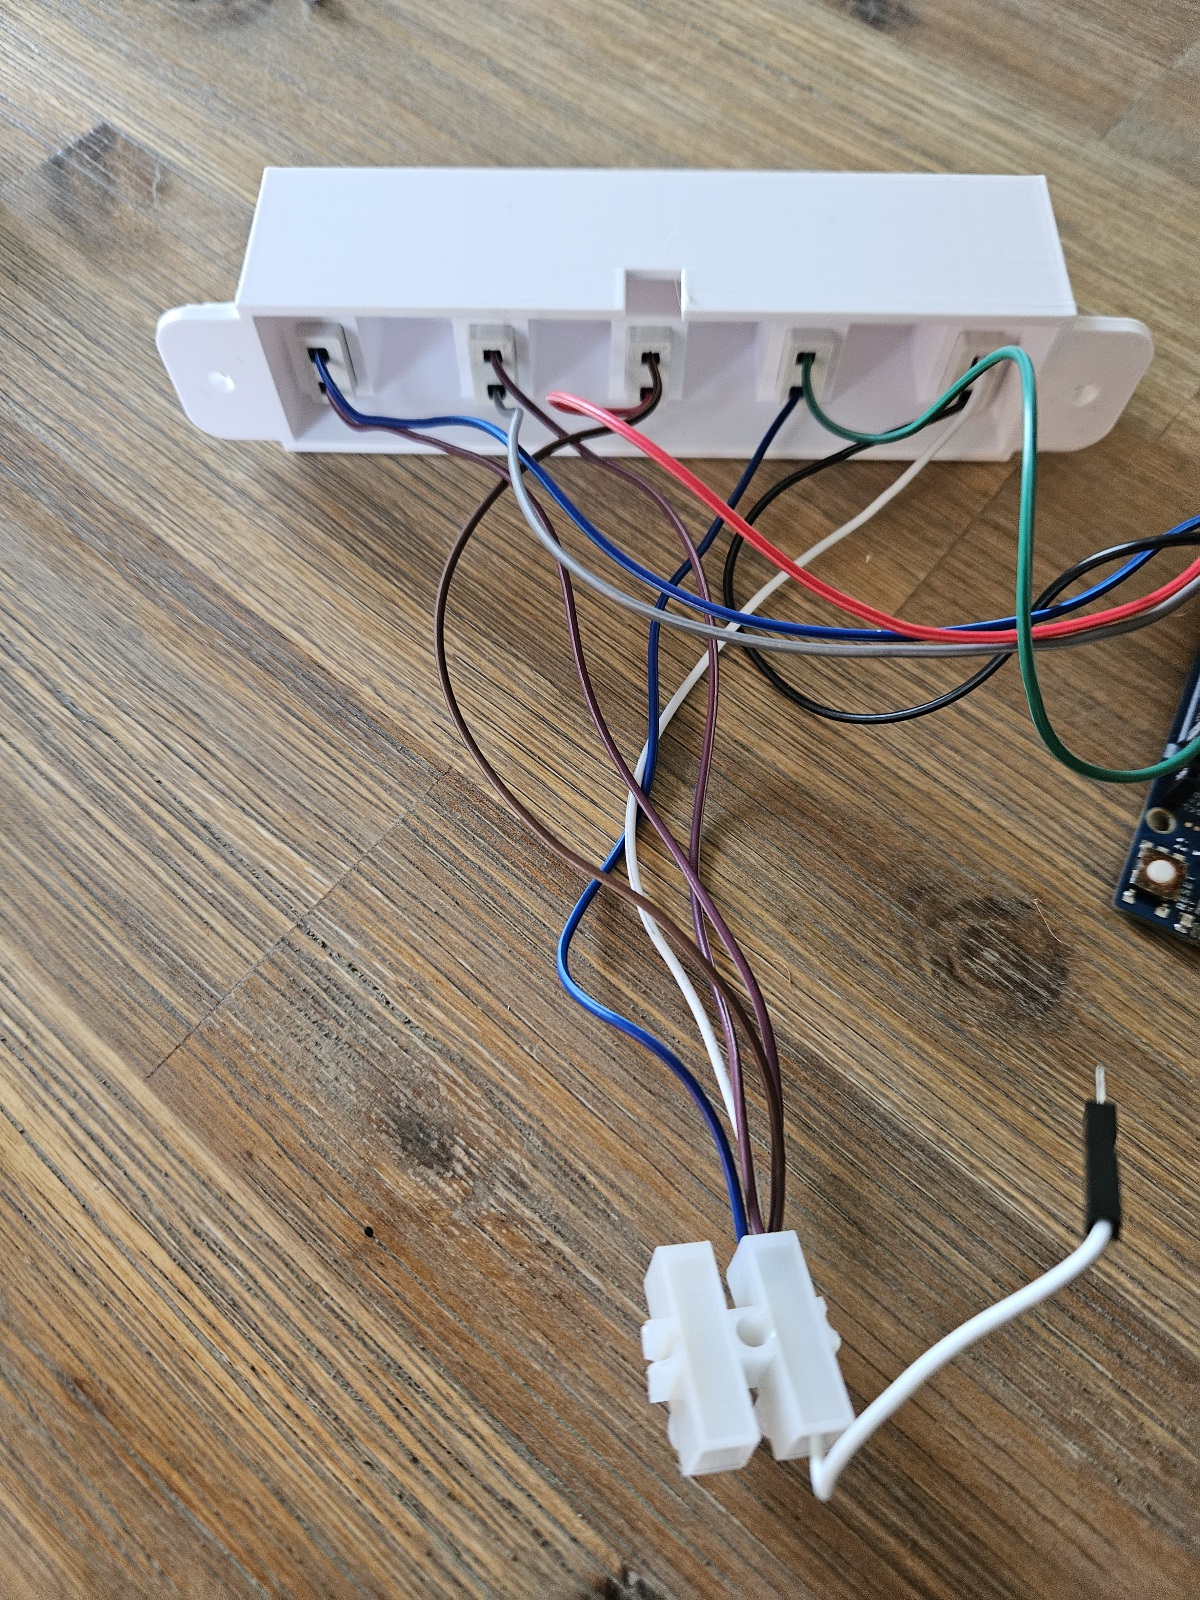
Connect the female dupont connectors to dupone wire and insert into the light housing. Remove the connector from the negative wires and connect to the terminal connector. Add a male dupont wire to the other end of the terminal connector. This will be the negative and needs to be connected to the ground (GND) on the arduino. The positive dupont wires will connect up to the arduino on pins D2, D3, D4, D5 and D6.
Step 4
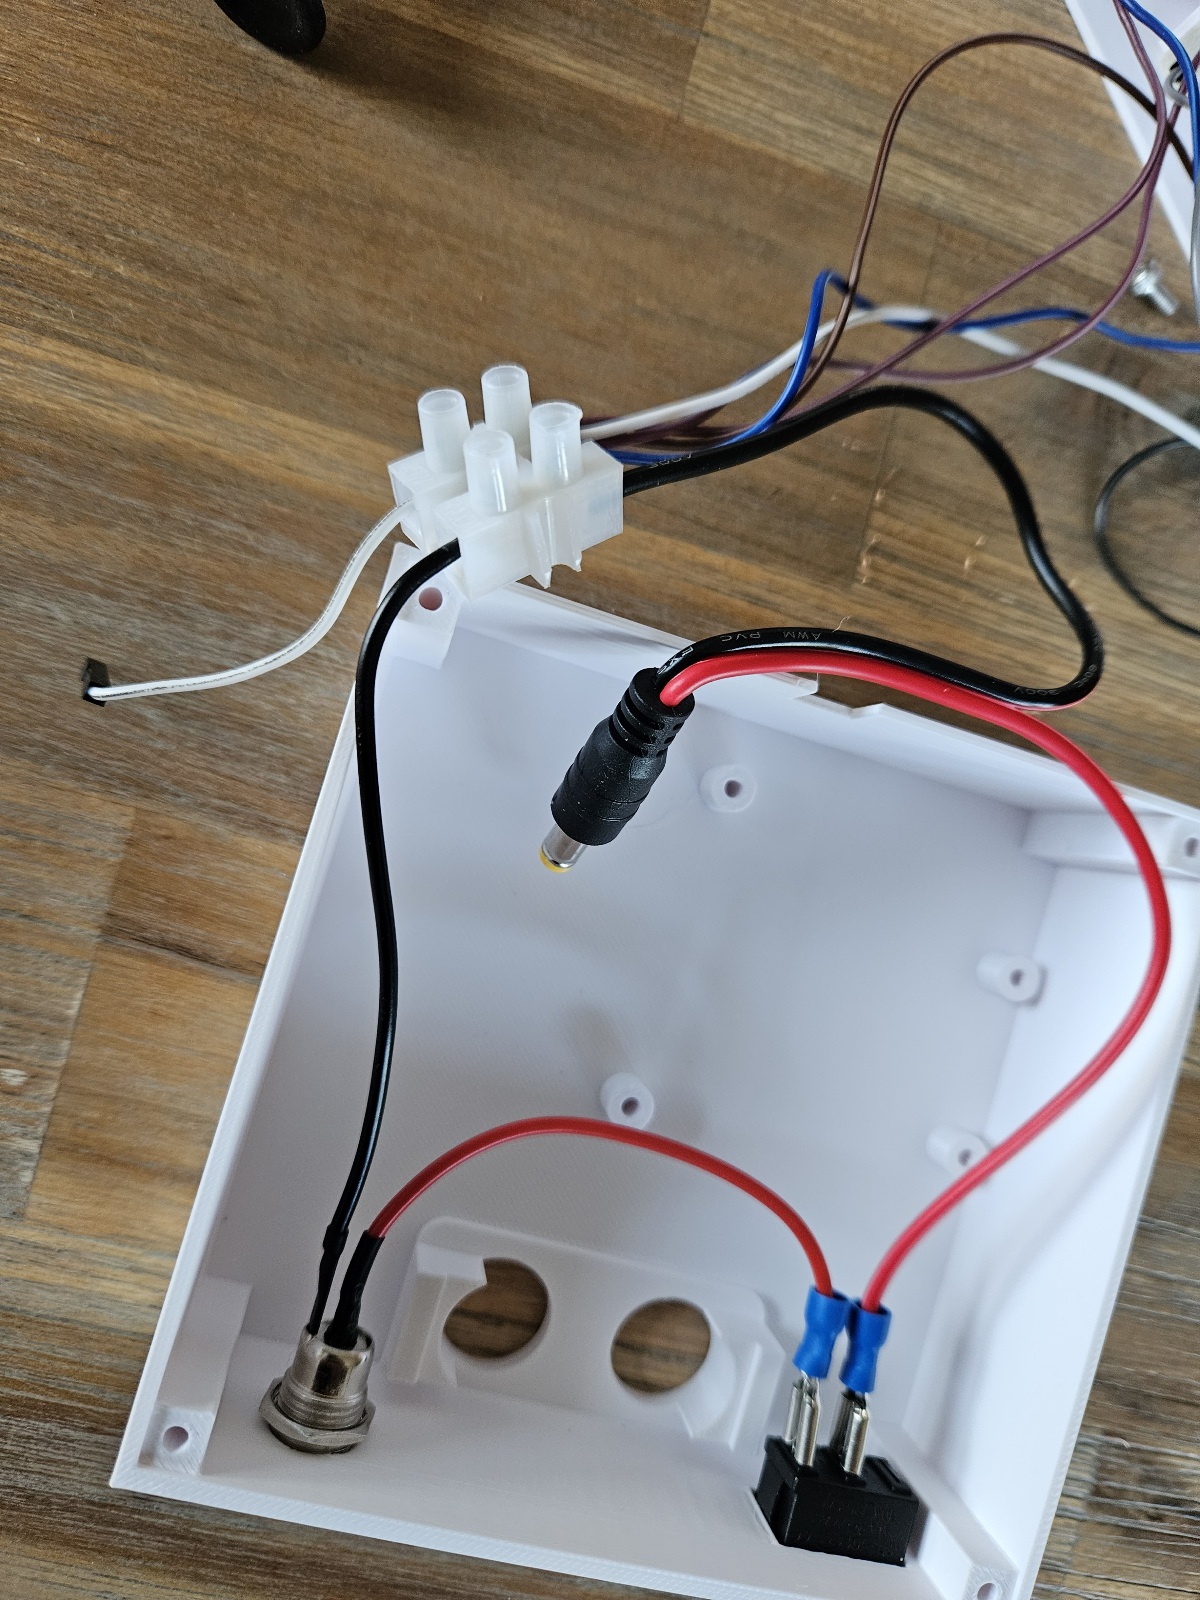
Connect the negative (black wire) from the barrel plug and barrel plug connector via the terminal connector.
Step 5
Connect the HC-SR04 to the arduino using male to female dupont wires, on the arduino the following pins are used:
- D11 - Trigger pin
- D12 - Echo pin
- D13 - Positive (VCC)
- The ground (GND) needs to connect to one of the ground terminals on the arduino board
Step 6
Upload the source code to the arduino device using Arduino IDE, the source code can be found on github [https://github.com/k3ldar/Arduino/tree/main/ParkingSensor](https://github.com/k3ldar/Arduino/tree/main/ParkingSensor)
Step 7
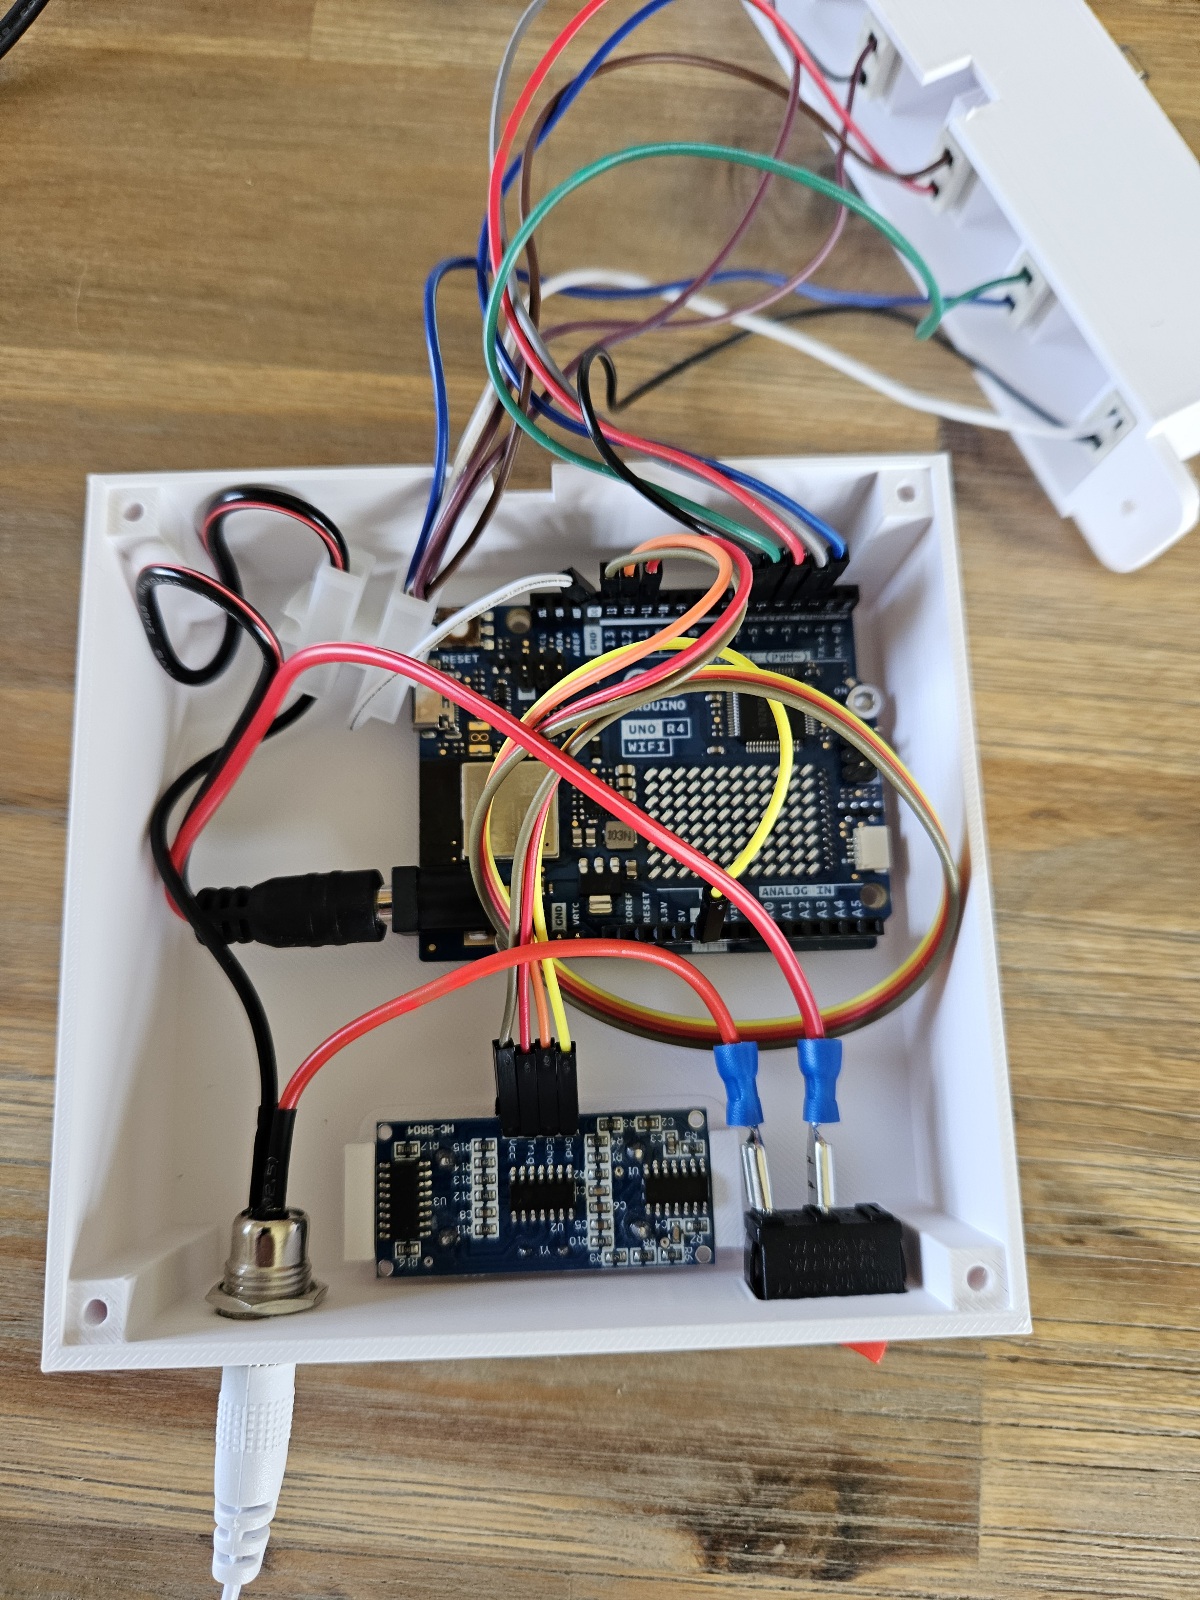
Connect the barrel jack to the arduino, insert the aruino to the housing and secure using 2 x M3 6mm bolts. Connect a power supply and test the system works, make any adjustments required to make it work prior to proceeding to the next step.
Step 8
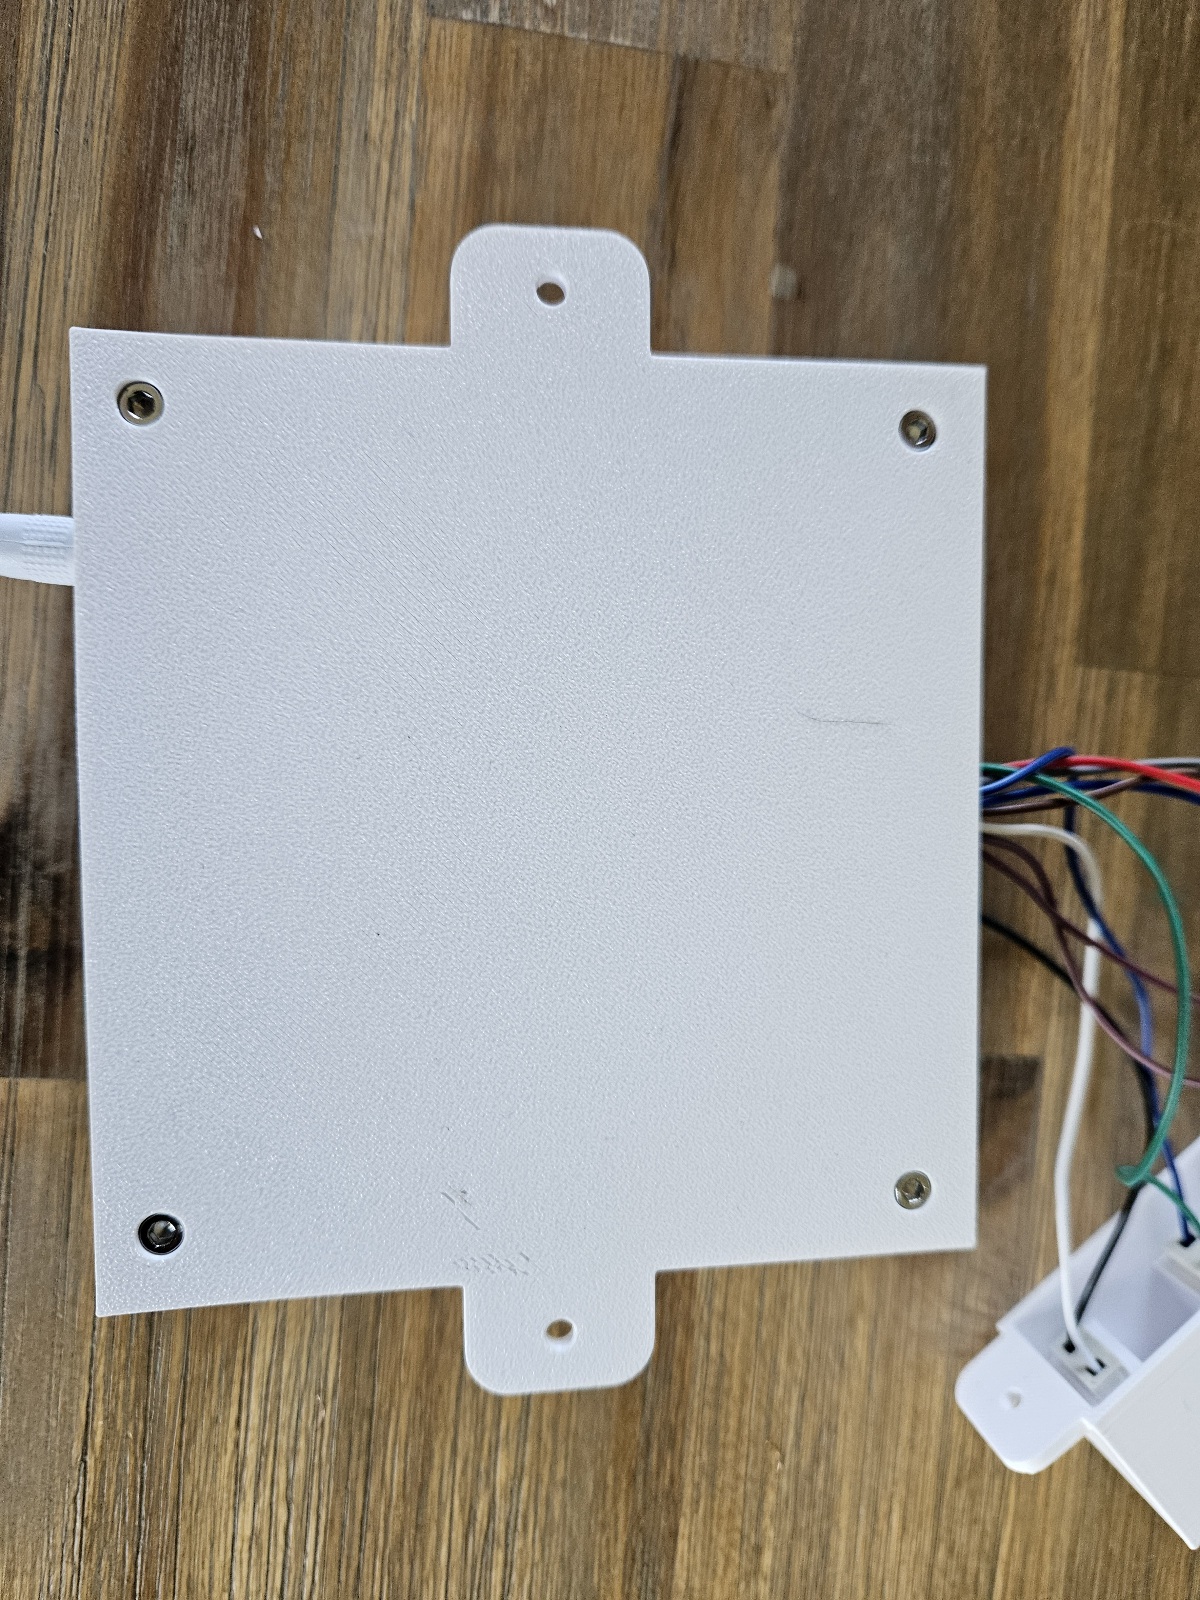
Connect the housing to the base plate. It will only fit one way so make sure the holes align. Once the holes align insert 4 x M3 6mm (or 10mm) bolts.
Step 9
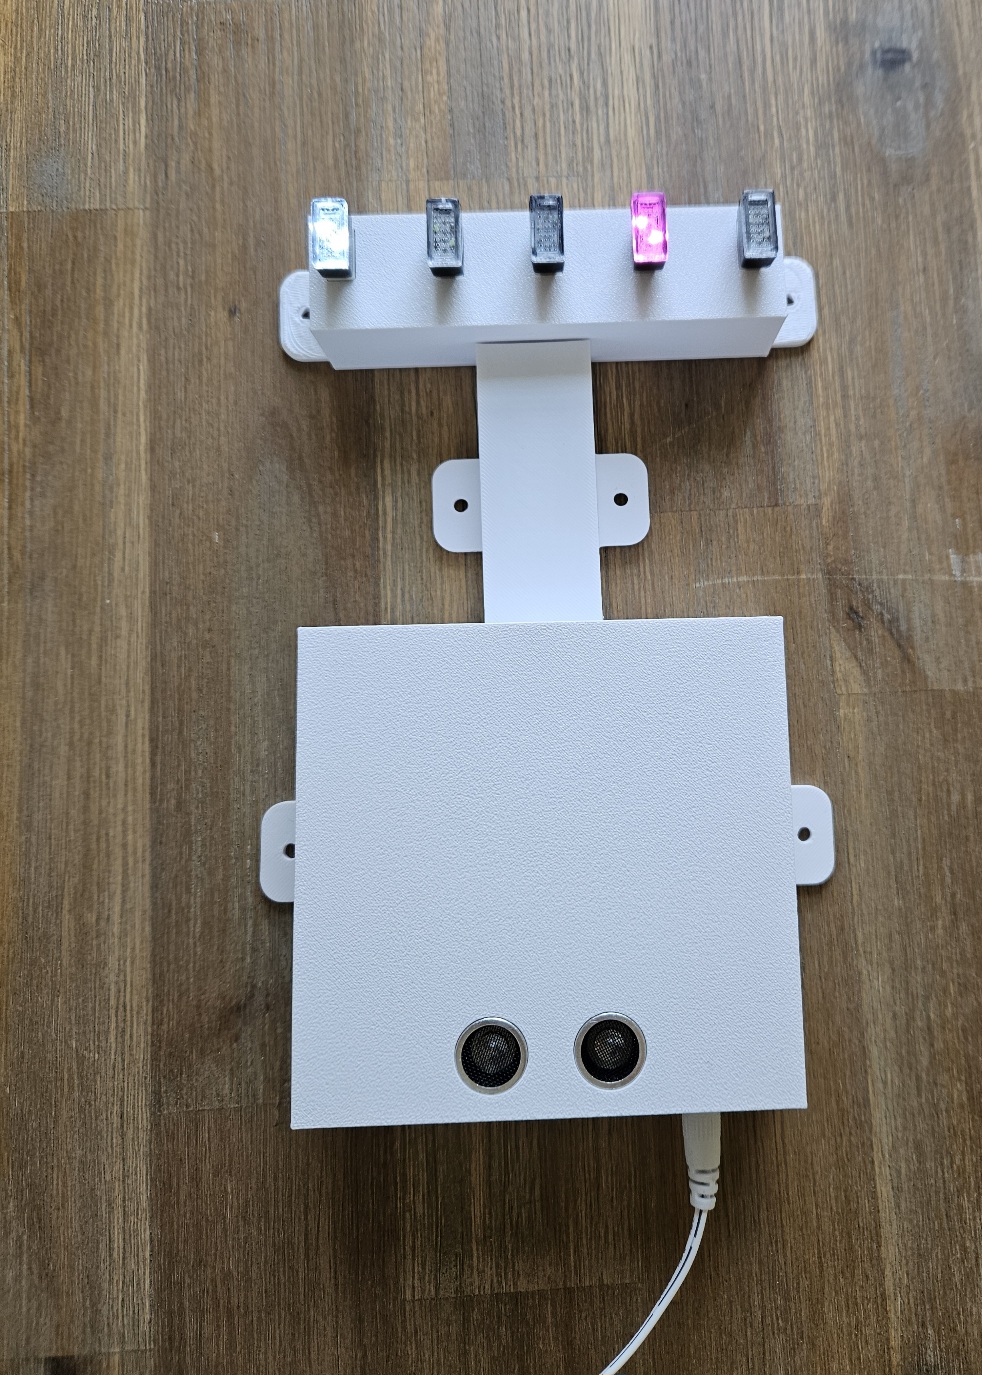
Test the system prior to attaching to it's final location.
Final thoughts
There is an optional extension in case you want the sensor lower, to this end it may be worth using longer dupont wire, if you think it is needed.
With extension it would look like the following:
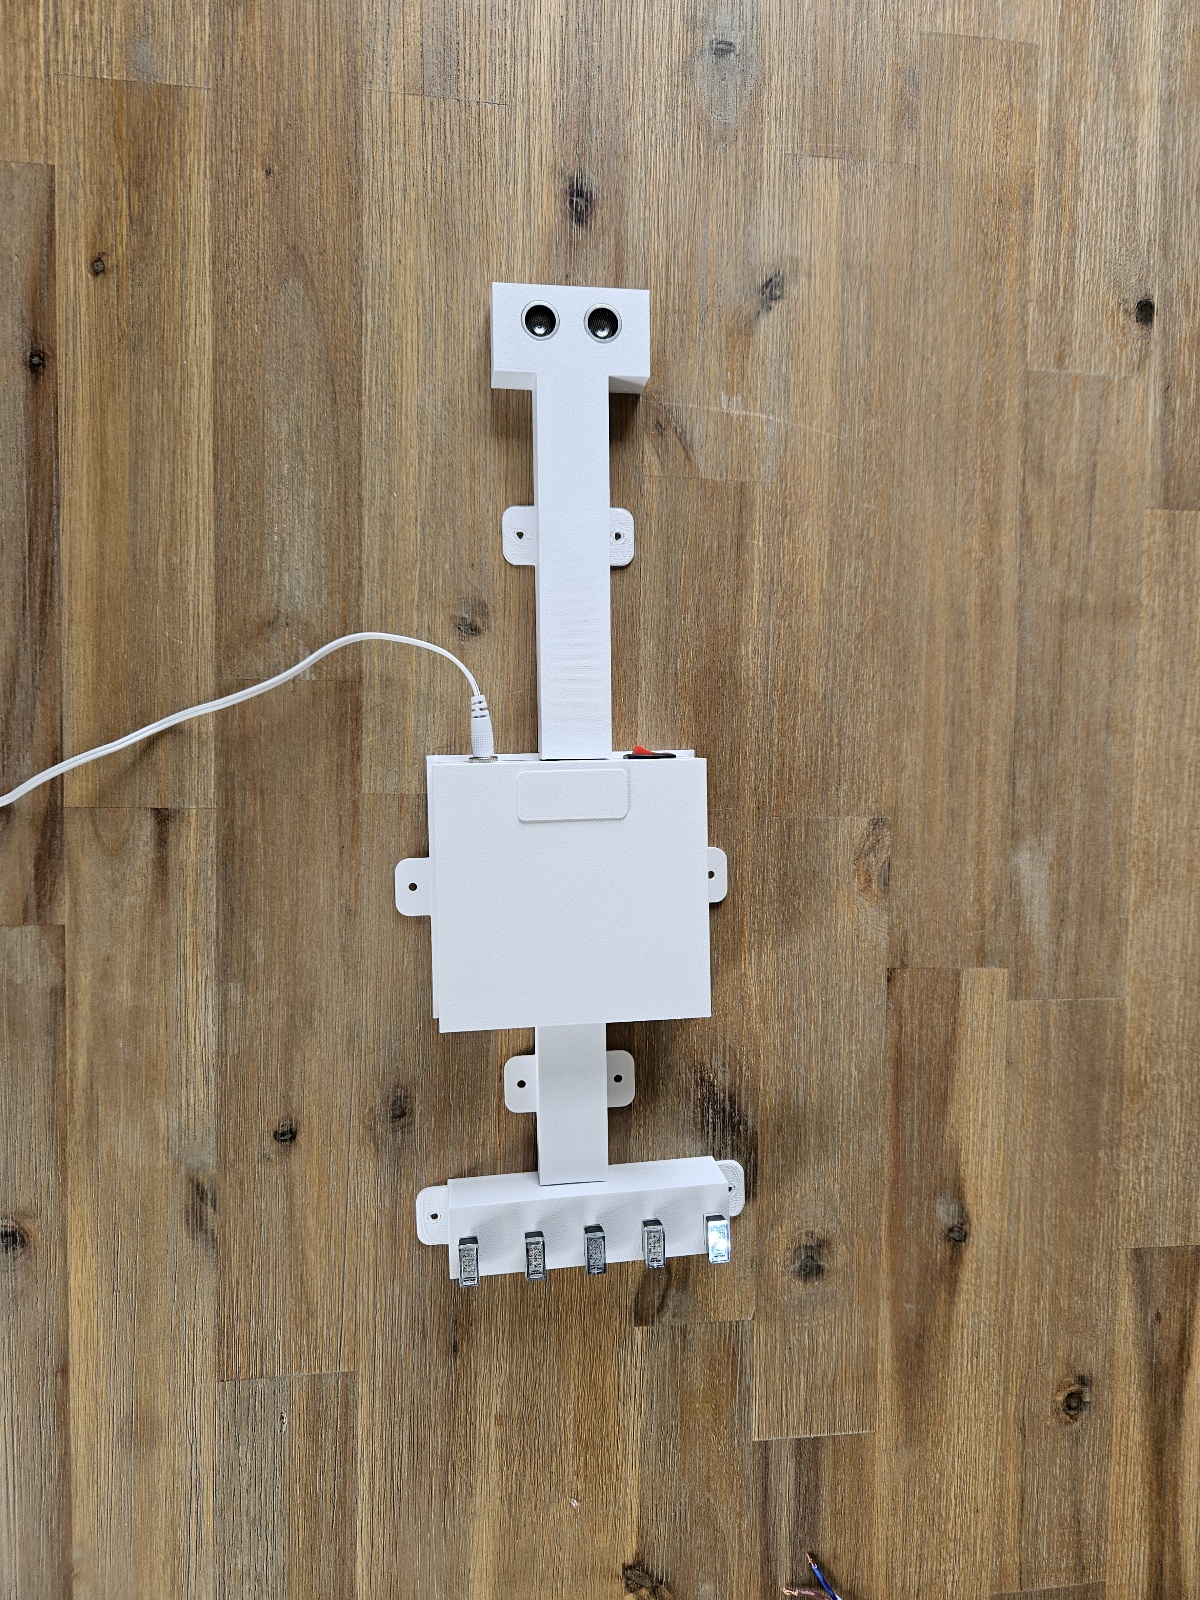
This model is not intended to be waterproof and should be well sheltered if located outdoors.
If you have any questions please ask and hope you enjoy this model :-)
Intelligent Parking Sensor System

Publicado em 5 de jun de 2025
Gostou deste modelo? Crie uma conta grátis para salvar seus favoritos e voltar a eles depois.
Criar conta