Você está no 3DFinder
Buscamos em Thingiverse, MakerWorld e Printables ao mesmo tempo para te dar o melhor de cada uma.
Descrição
This is a candy bar modular dispenser vending machine. It's a V2 to my original 3D printed vending machine which used a coil.
This version uses a chain with prongs to push candy along a tray.
There are now 2 sizes available:
100mm for small chocolate bars
150mm for large chocolate bars.
Both sizes assemble the same way.
It has a handle for manually dispensing, or a module for attaching a Nema 17 stepper motor for motorizing your own 3D printed vending machine.
This model is designed to require minimal supports, and no additional parts other than nuts and bolts.
![WhatsApp Video 2025-05-31 at 20.59.32.mp4 [optimize output image]](https://makerworld.bblmw.com/makerworld/model/DSM00000001473922/design/0816abb4-4ec8-4847-bee5-a670c1f628da.gif)
Build Instructions
Dispenser Frame
All modules attach together with M3 x 6mm self tapping screws.
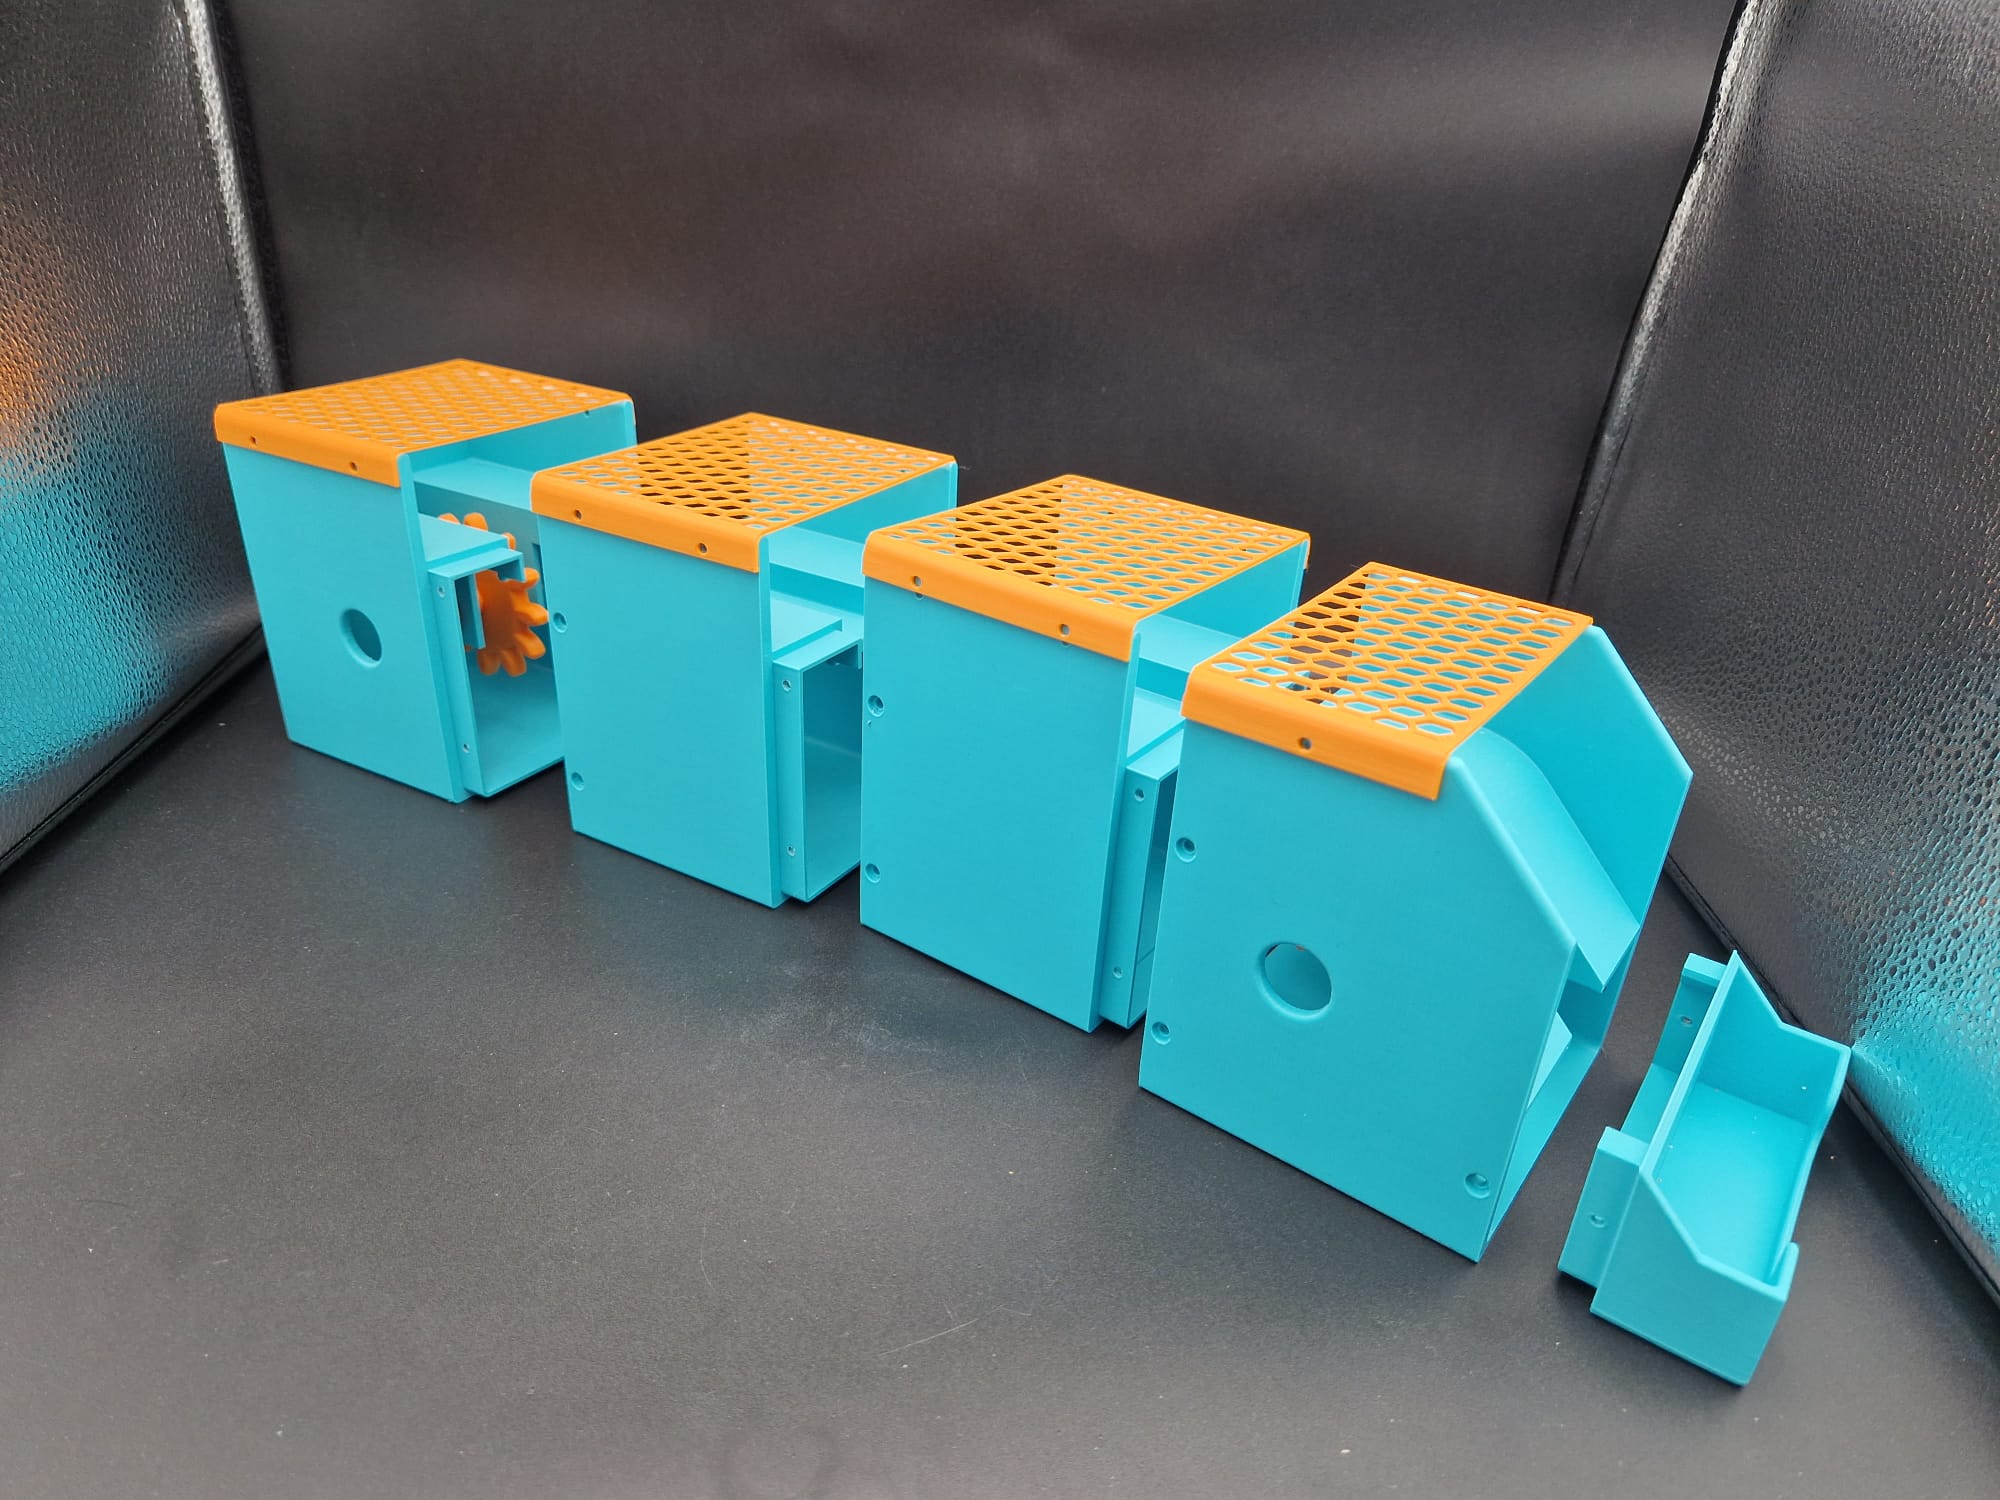
The frame is designed to be modular so you can swap out modules, or print it longer / shorter. The whole frame will take a few minutes to assemble.
Back Module - This either uses a short hex shaft with a hex end stop and acts as a back pulley, or you can print the motor one and install it with a Nema 17 to motorise this candy dispenser. Perfect if you want to build a 3D printed Vending Machine.
To print the pulley version, print the short Hex shaft, a shaft endstop and a pulley cog . Push the shaft in from the side, push on the cog and close it off with an endstop ensuring you line up the holes. Insert a M3 x 6mm self tapping screw, or m3 x 6mm bolt.
with The Motorised version, print off the motor cog, insert the motor and push it on. It has a D shaft on the cog, it's quite tight so push it hard!
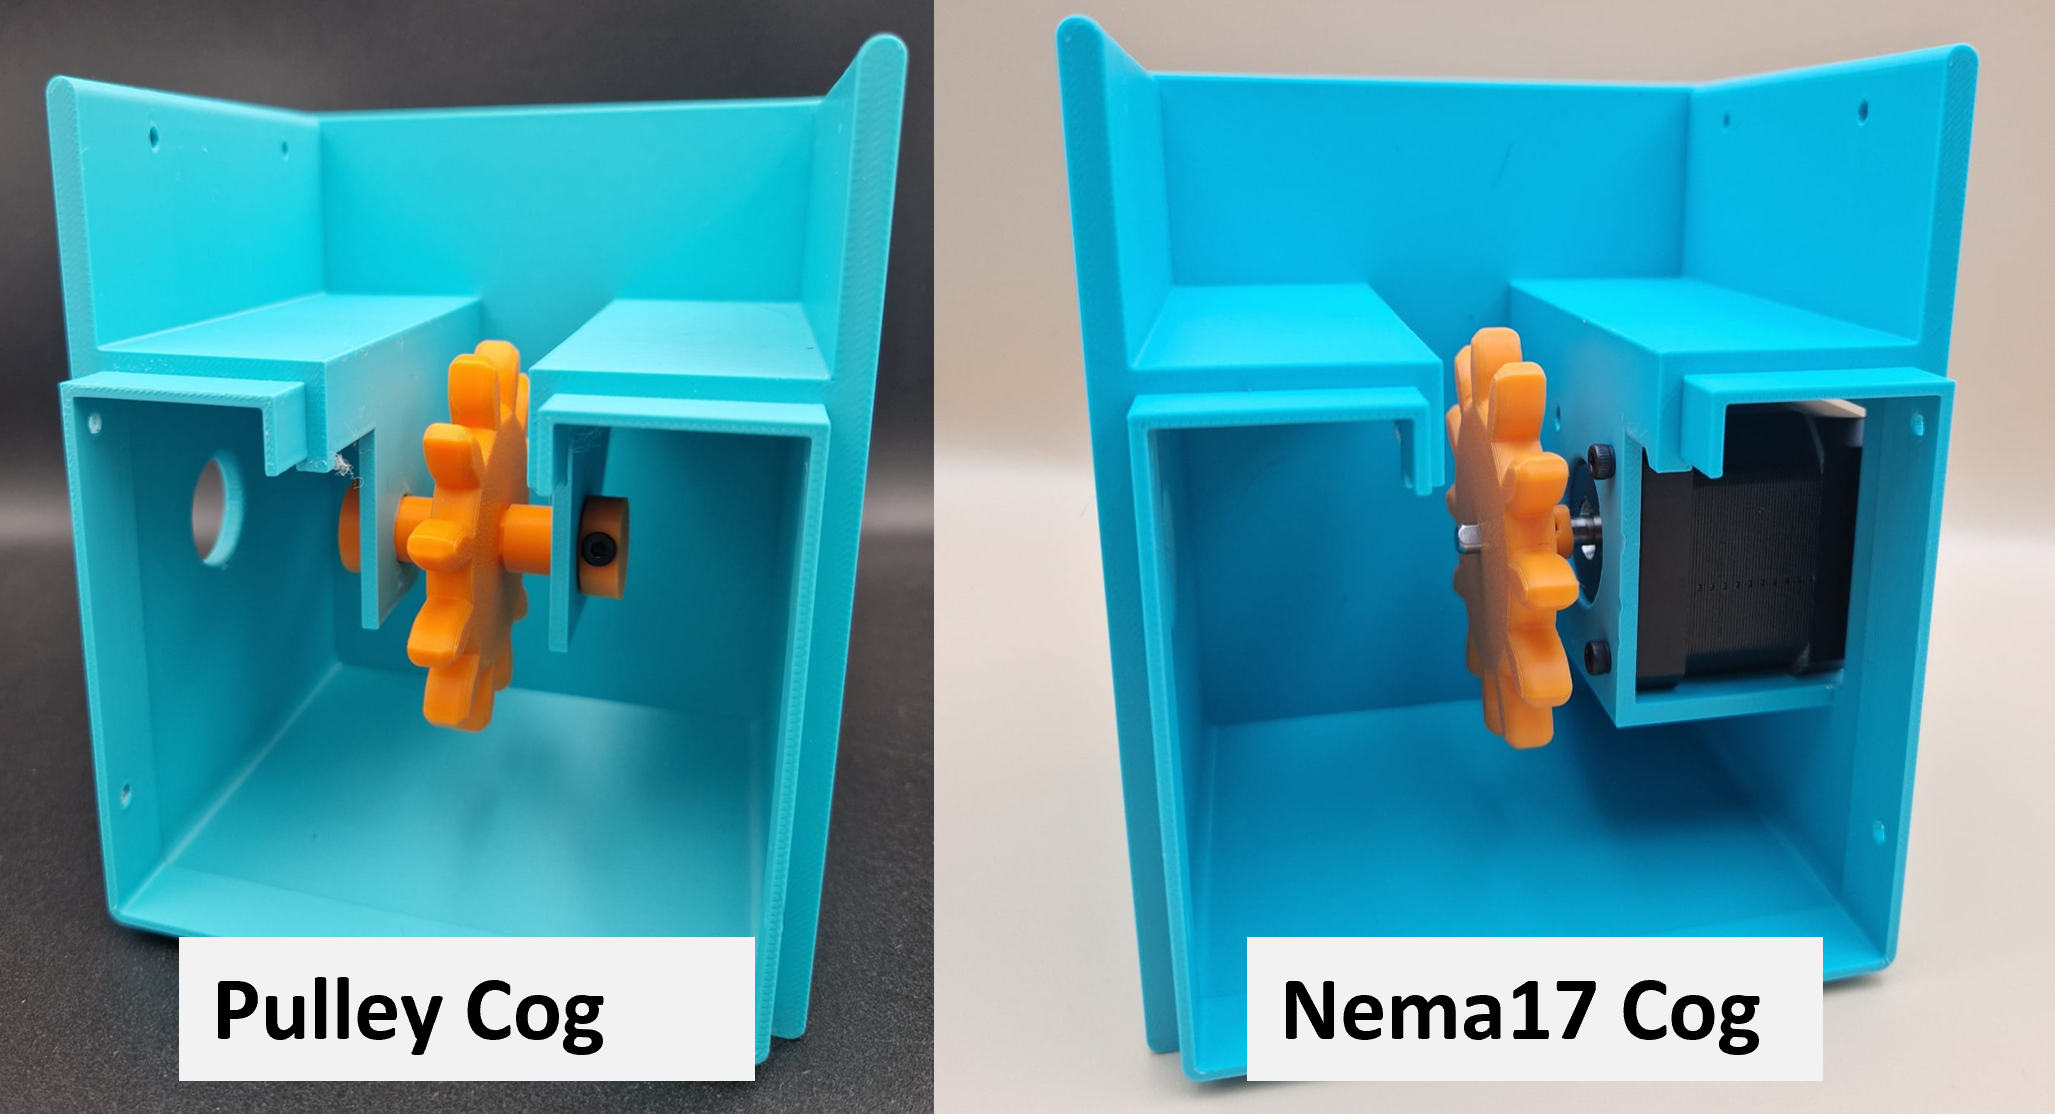
Middle Module - Each middle model is 90mm long and adds space for 3 more candy bars. Print this upright with no supports.
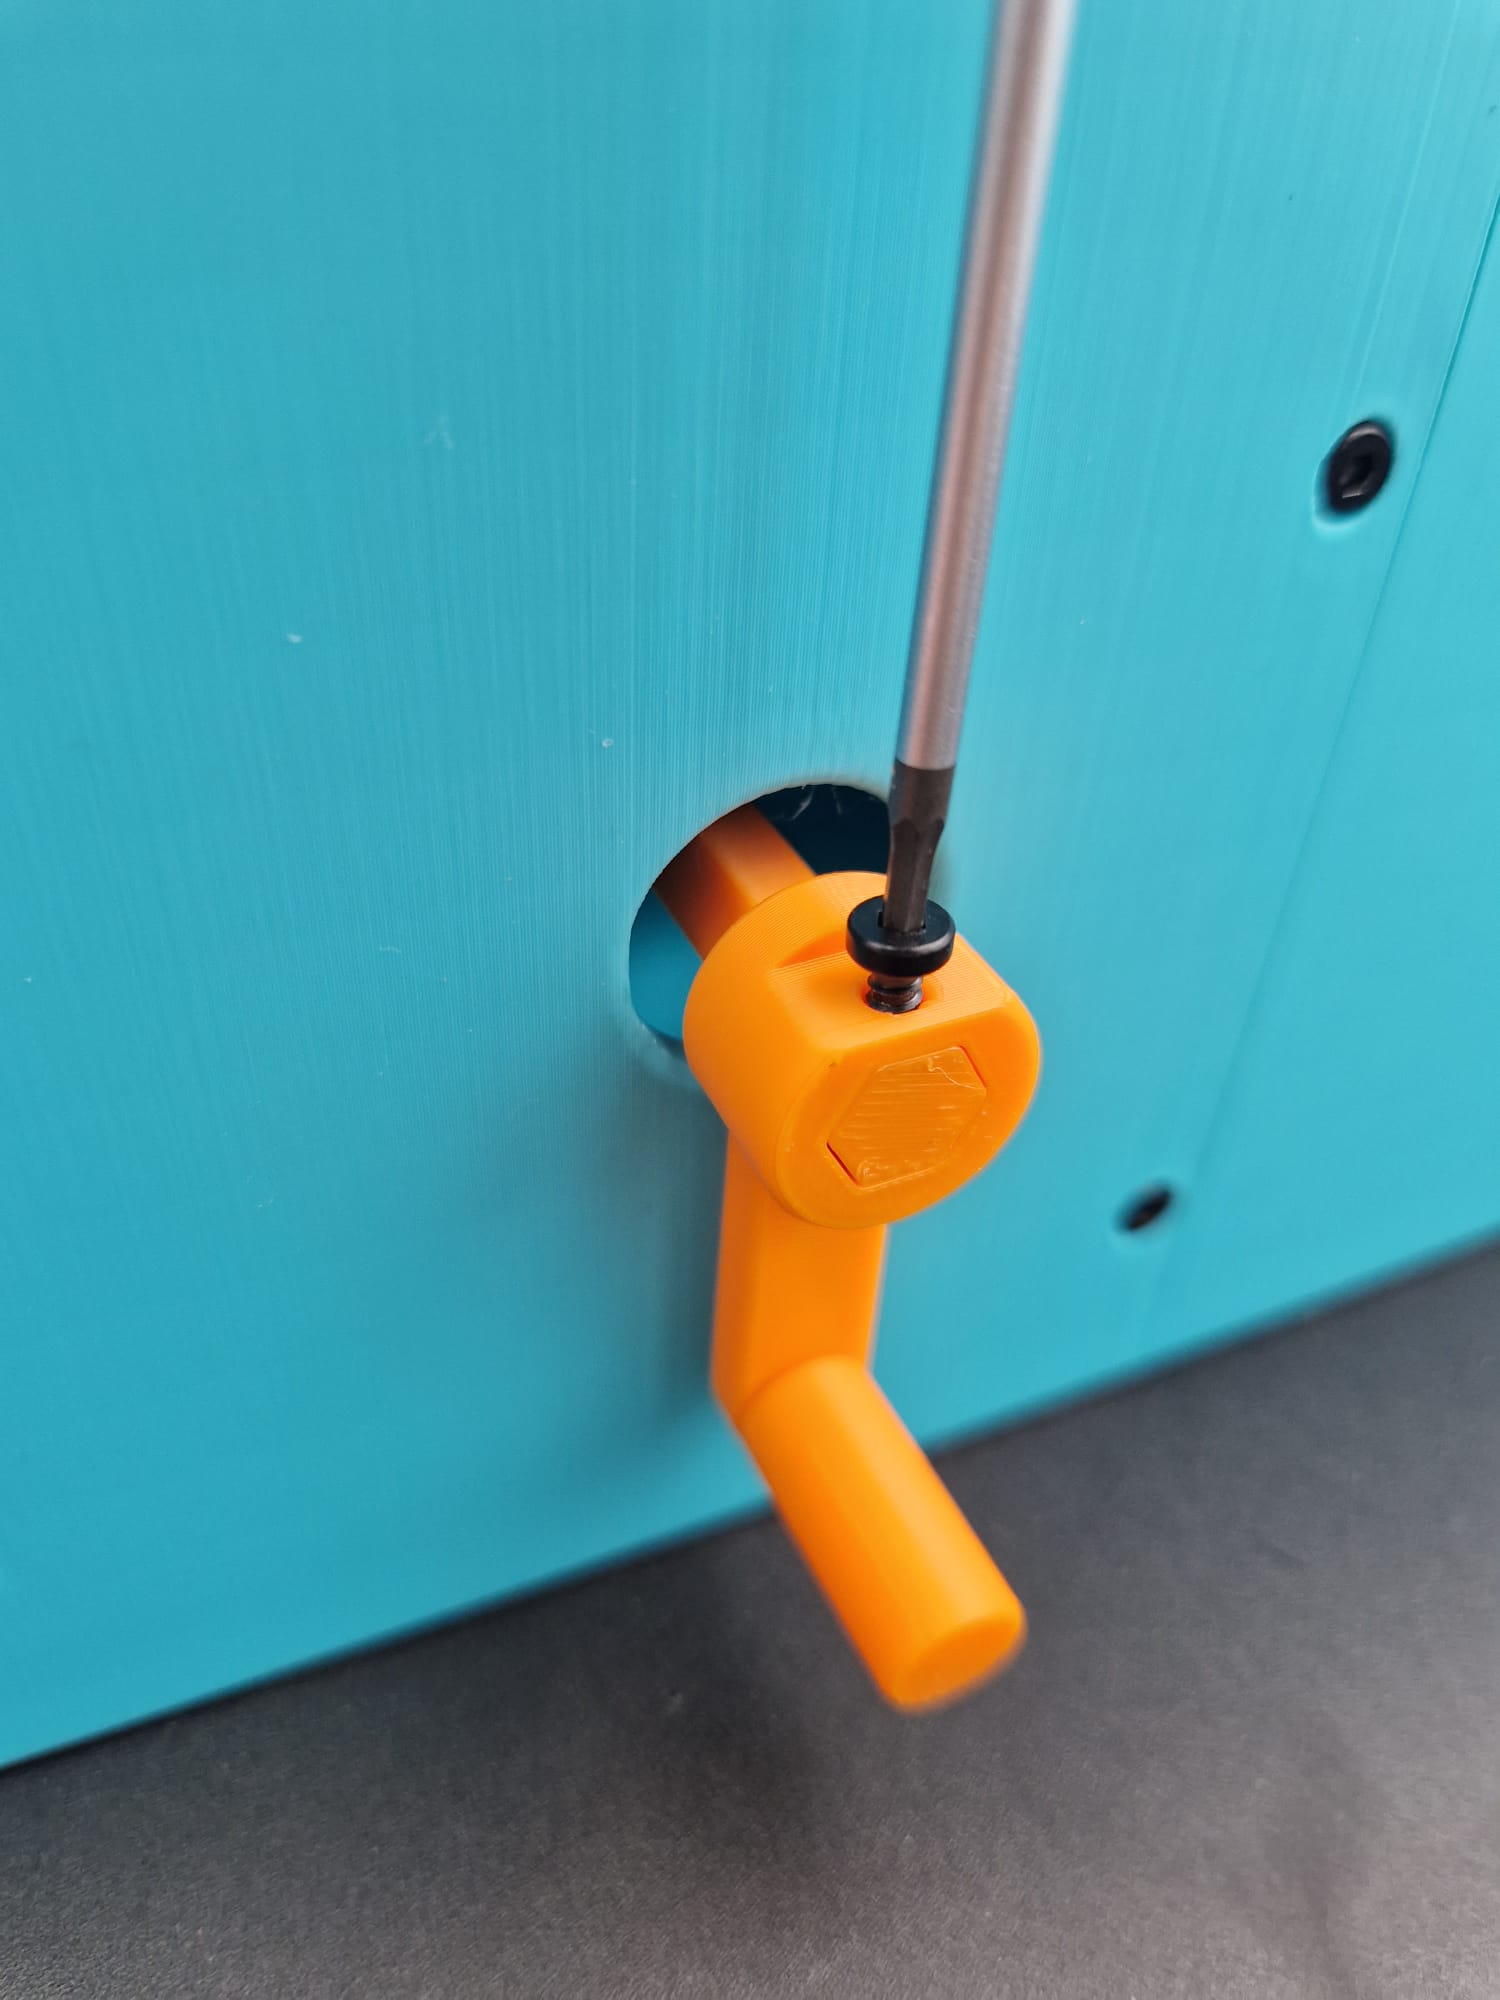
Front module - Print upright with no supports. Either attach a pulley cog like that on the back module, or use the long shaft to also attach the lever. The lever is two parts and uses an m3 x 6mm self tapping screw, though don't do fully up so the lever arm can swivel. Attach the lever to the shaft with another m3 x 6mm self tapping screw.
Chain
The chain consists of 3 parts, the inner roller and inner plate (both yellow) and the outer prongs. These attach together using M3 x 20mm bolts and M3 Nyloc nuts. You need them loose enough they can move freely. Using a nut runner will definitely save you some time here!
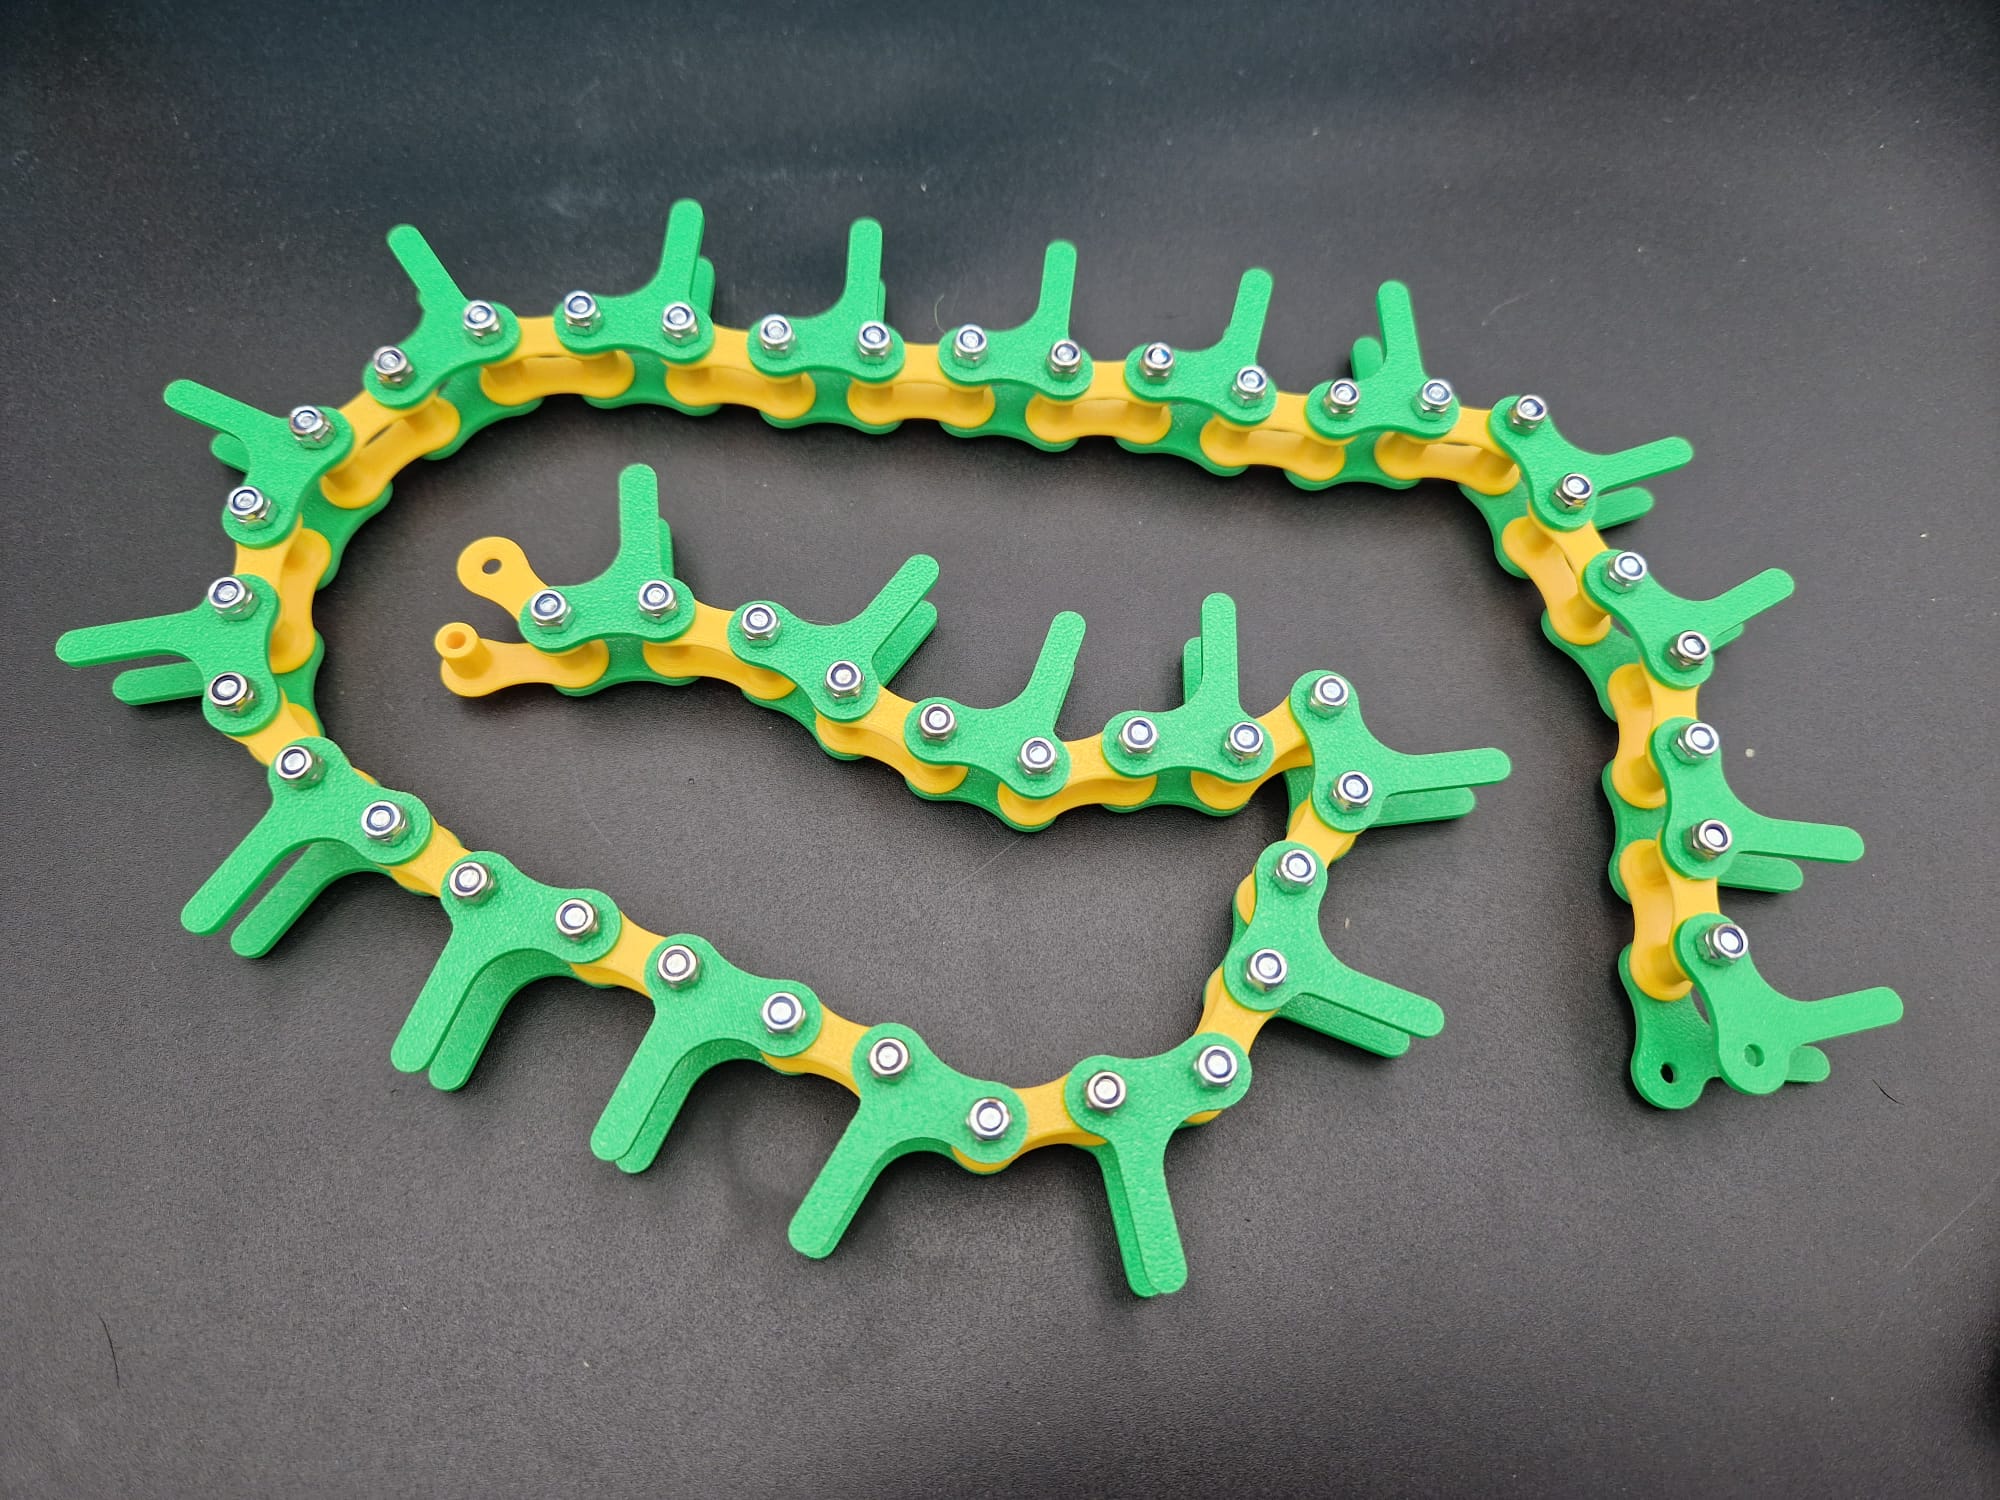
You will need the following quantities for front module, a single middle module and end module config:
17 x inner plate, 17x inner roller, 34x outer prongs, 34x M3 x 20mm Bolts, 34x Nyloc Nuts.
For each additional middle module, you will need:
6x inner plate, 6x inner roller, 12x outer prongs, 12x M3 x 20mm Bolts, 12x Nyloc Nuts.
Final Assembly
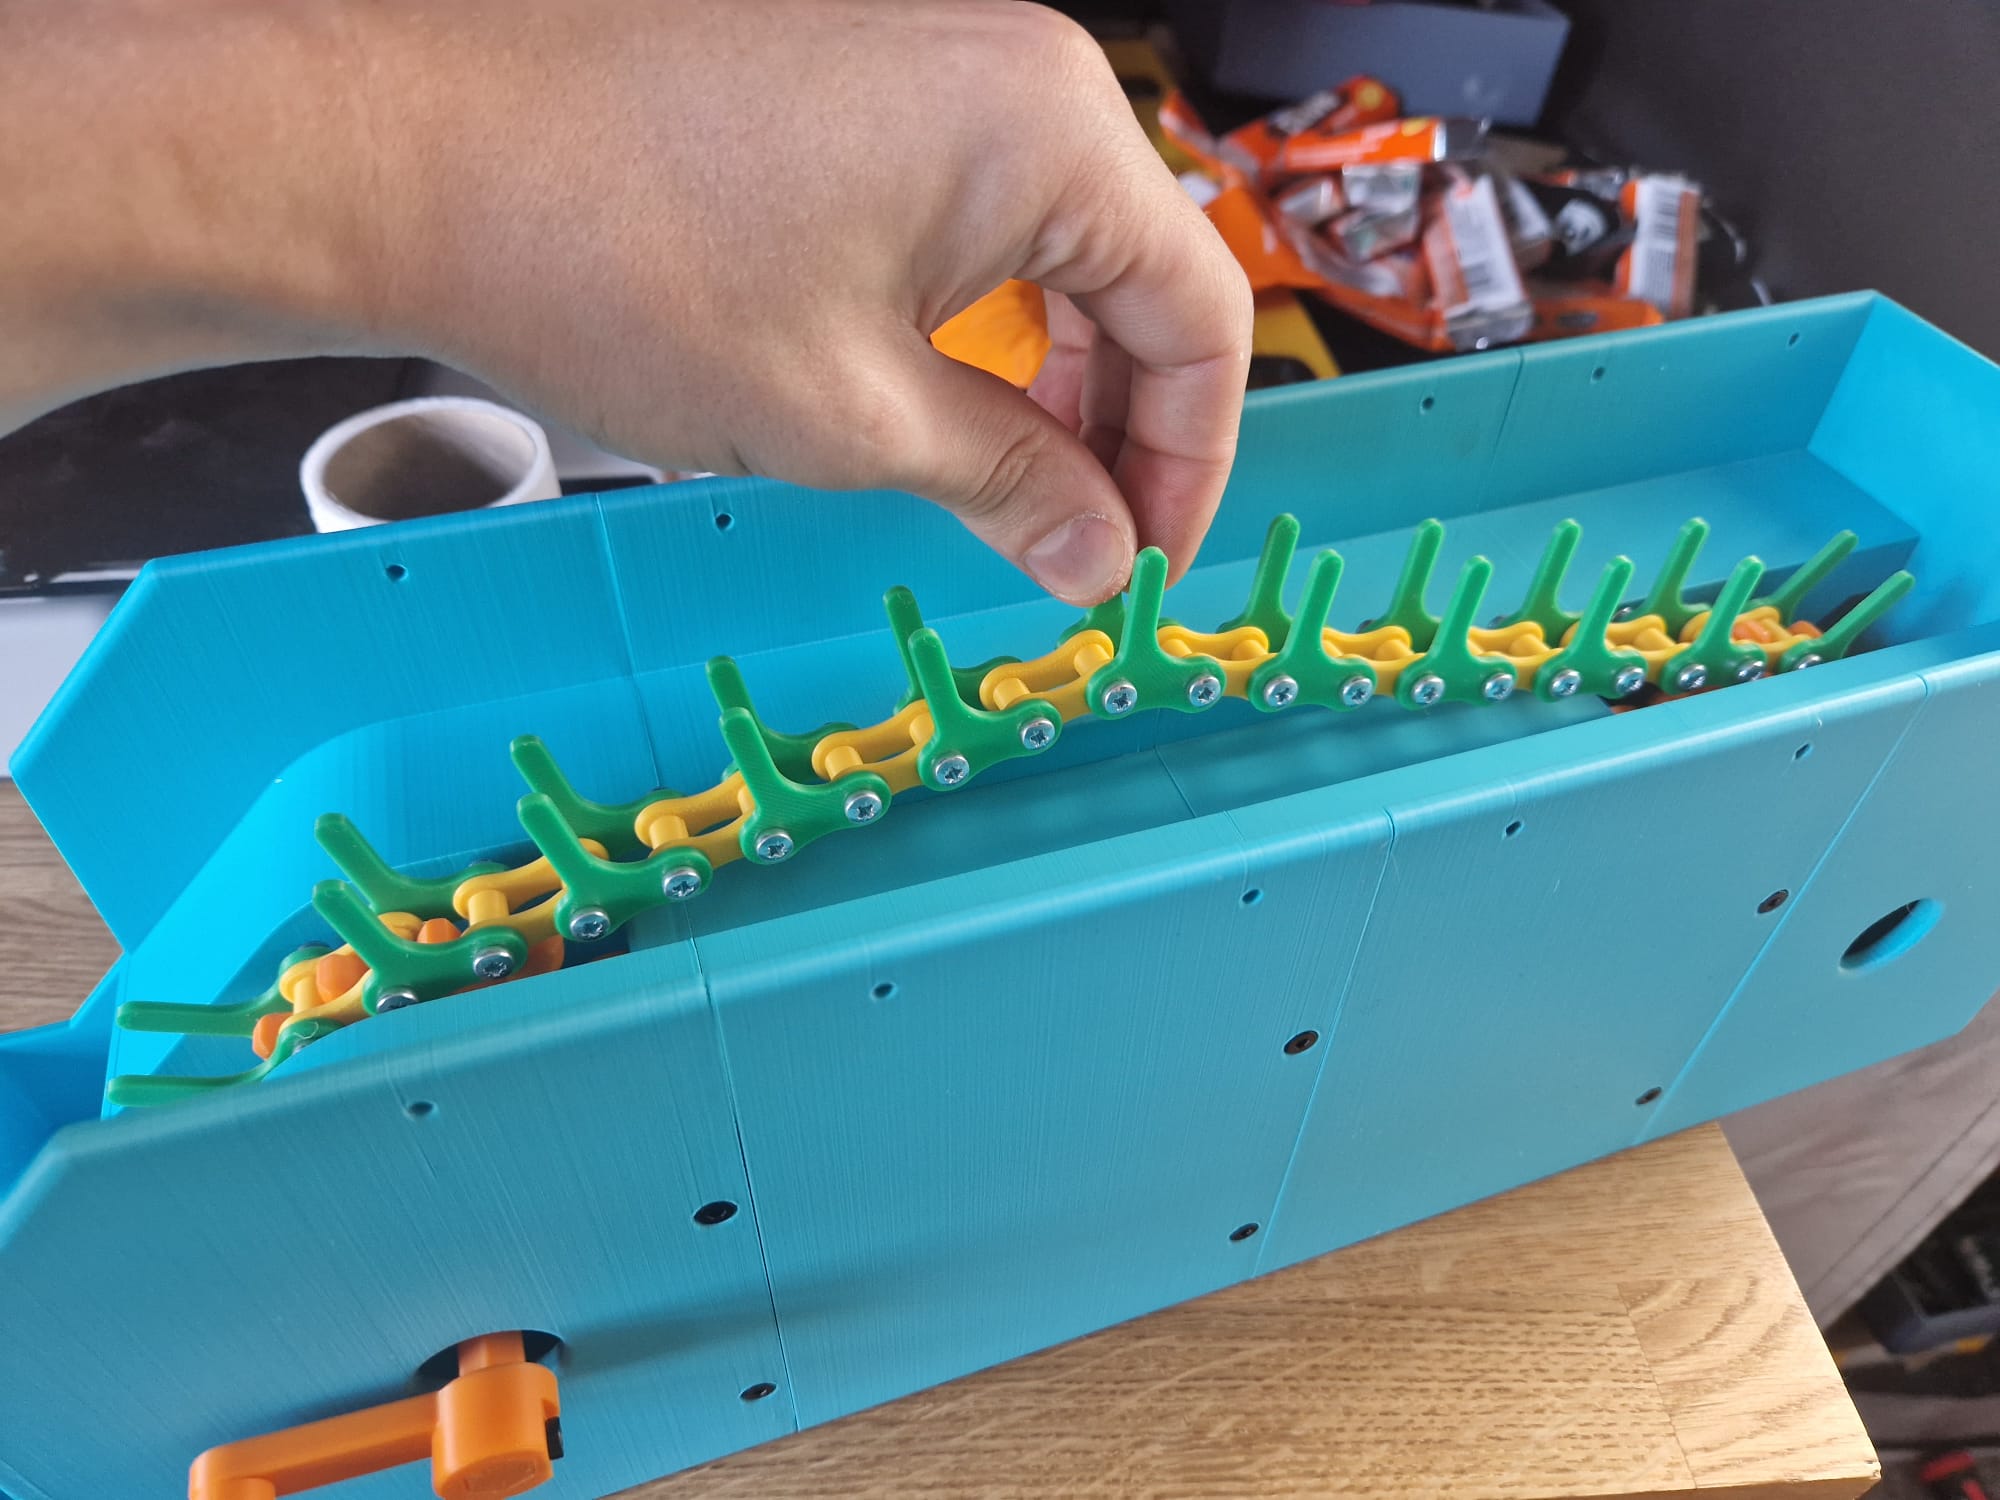
The easiest way to attach the belt is to split the modules in half and feed the belt around the cogs from both sides like below:
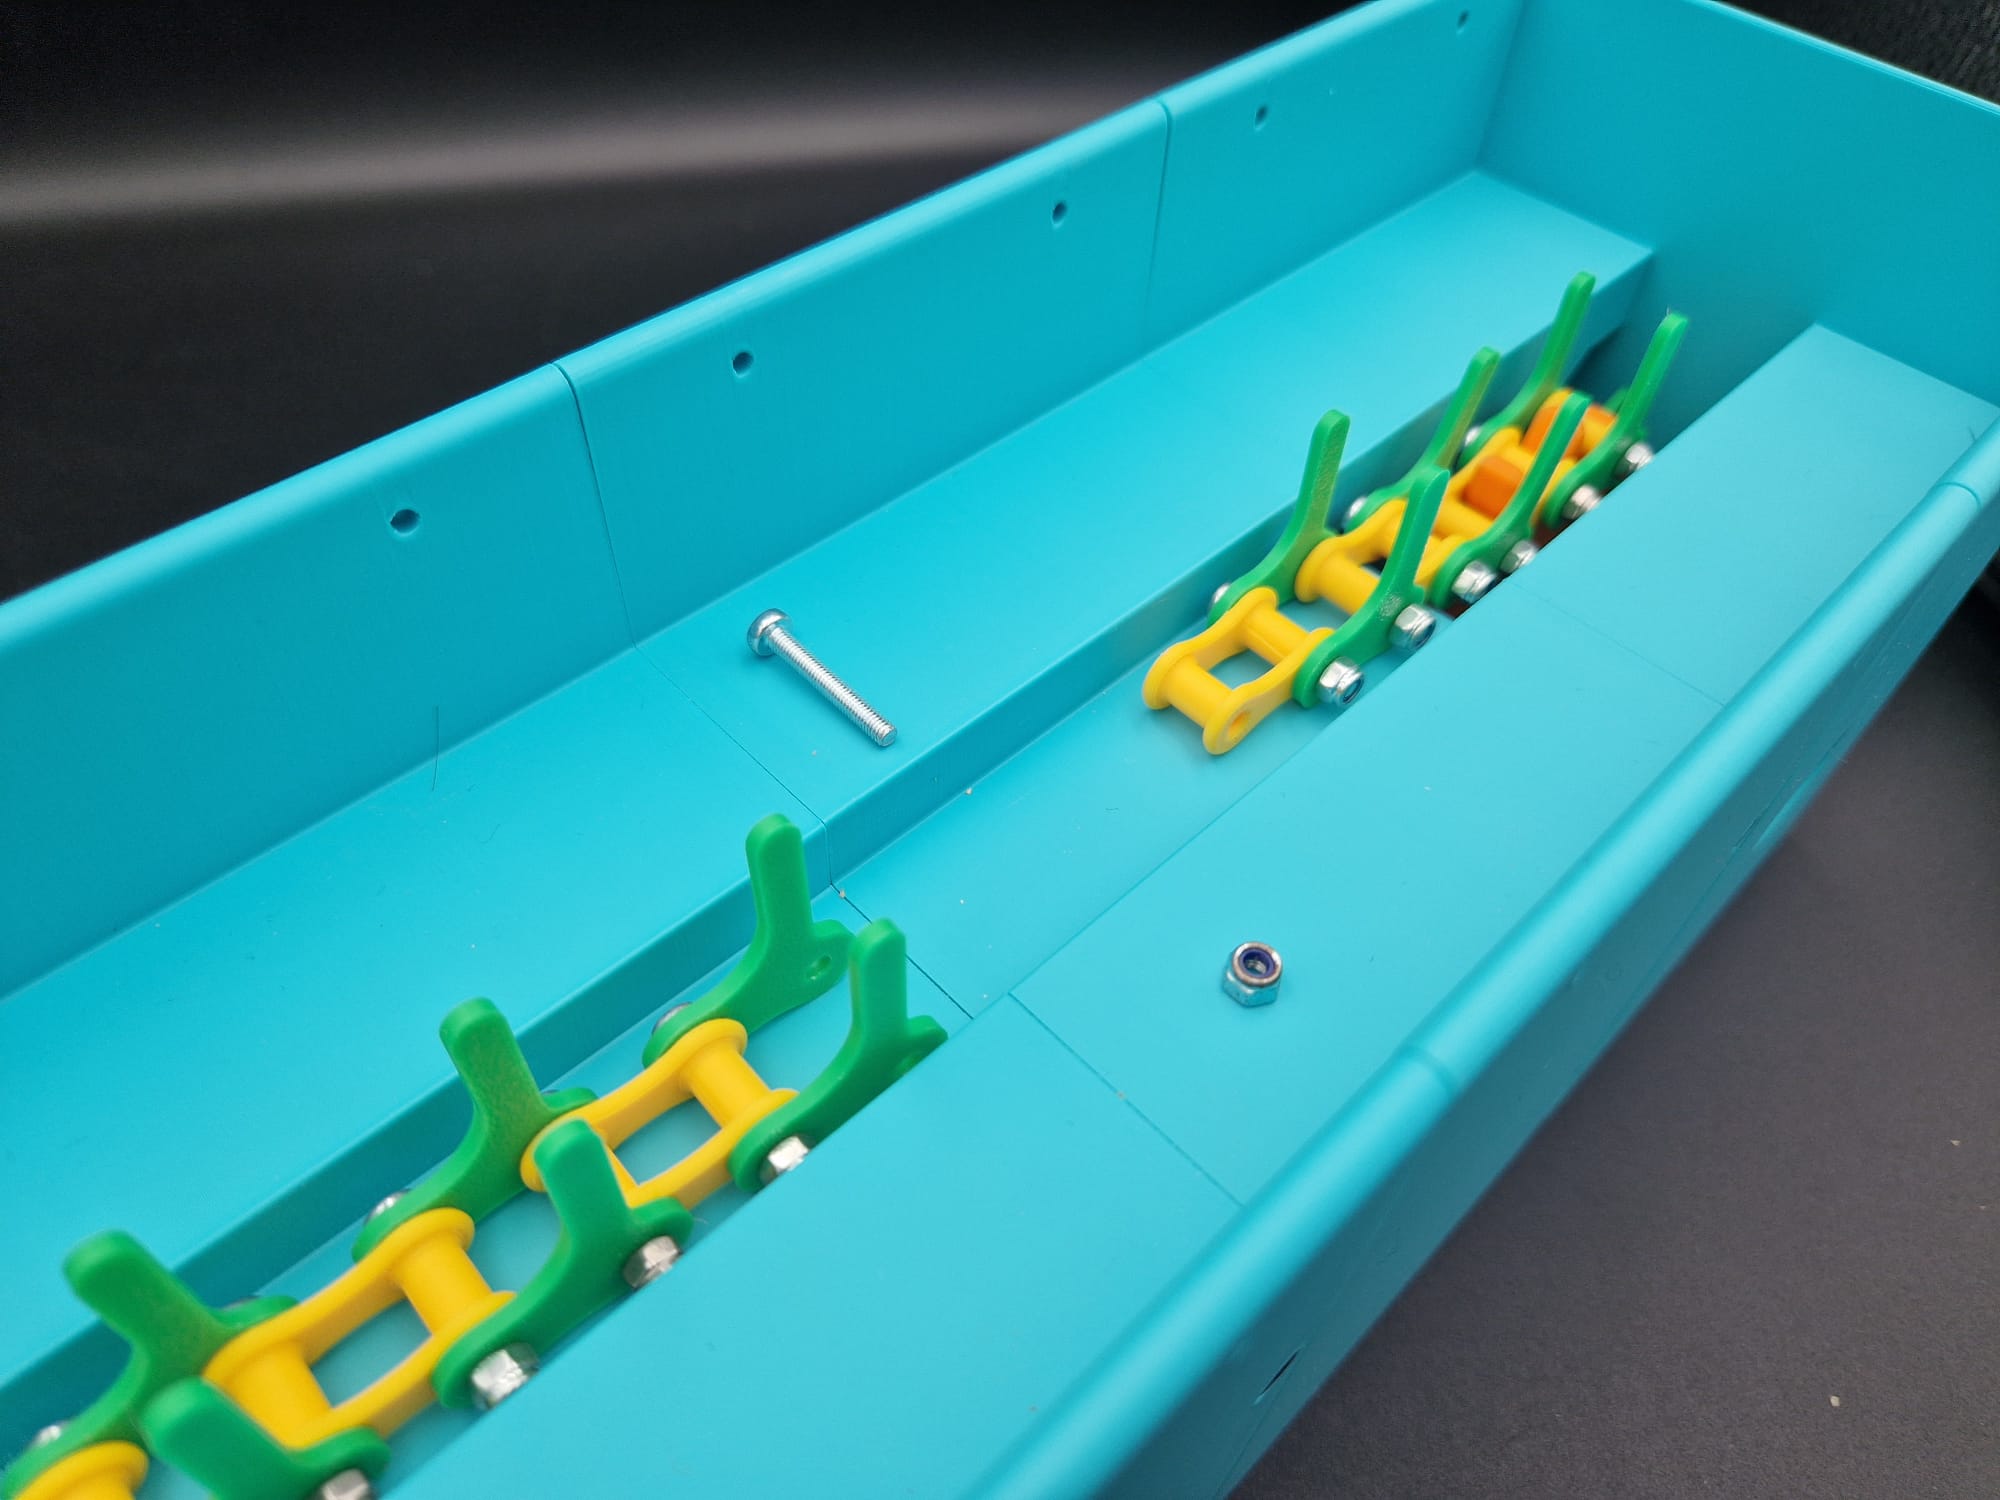
The belt should be a little loose, able to pull up about an inch. Putting the final bolt in and doing it up can be a little tough. If it's a hex key and a pair of plyers it's not too bad.
Covers
You can add the covers to stop people taking candy from the top, ruining all your hard work! the back and middle modules use the standard size, the front module uses the smaller one. These secure again with M3 x 6mm self tapping screws.
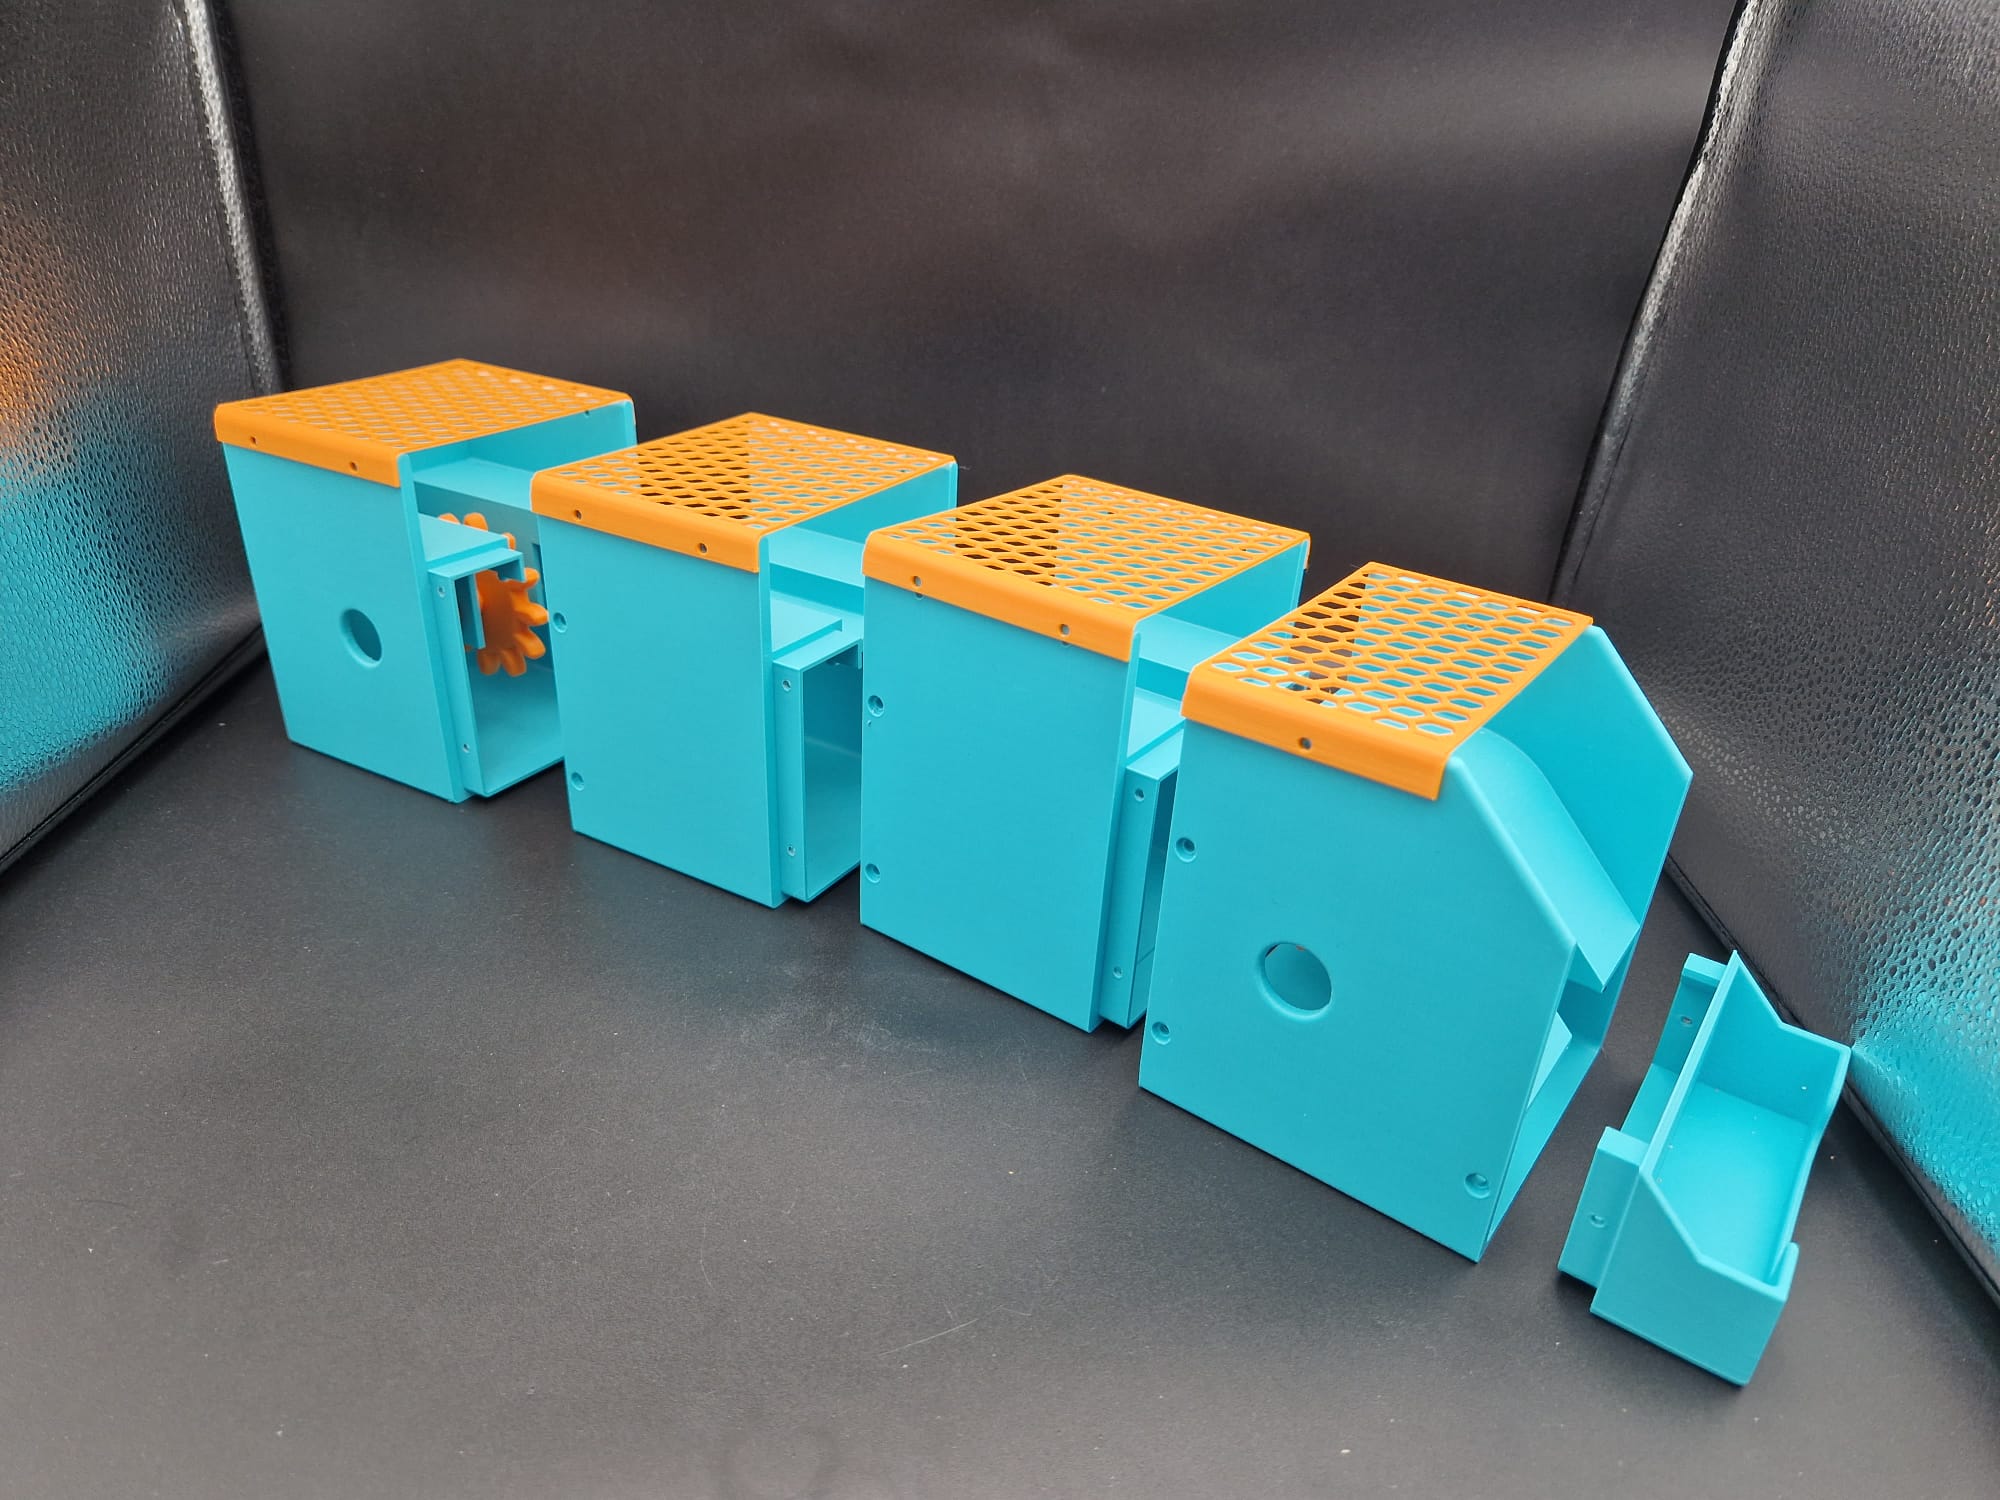
Once you add covers, you can load chocolate in from the front and turn the handle backwards to load more in.
If you plan to motorize this, make sure to add this feature into your code!

Gostou deste modelo? Crie uma conta grátis para salvar seus favoritos e voltar a eles depois.
Criar conta