Você está no 3DFinder
Buscamos em Thingiverse, MakerWorld e Printables ao mesmo tempo para te dar o melhor de cada uma.
Descrição
This tool helps you to get rough measurements for your head and other parts of your body, and can possibly be used for measuring other things such as pipes etc… Useful to get rough measurements required when sizing a helmet to fit your head, or others.
The Tool requires 4 x Arms (Plate 2) and 4 x Nut and Bolt Sets
Each Nut and Bolt set comprises of the following
- 1x T Bolt (2 Parts) - which has been cut in half to allow for a Stronger bolt
- 1x T Bolt Joiner - Place over the T Bolt head to join the 2 T Bolt halves together
- 1 x Nut
UPDATE: A user advised that the nuts they printed seemed a little loose. While this probably could have been fixed by reducing the print scale on the Nut to something like 99%, I have designed new Nuts and Bolts that should hopefully now fit tighter.
As such, I have added 2 extra plates
- Plate 3 has the NEW sized Nuts - 1 of which has an “O” on it, and is slightly larger than the other one.
(Print both to test which fits best for you - The one with the “O” worked best for me, the other was just a little tight).
- Plate 4 has the NEW sized Bolts - I have made the top of the thread slightly wider than the bottom of the thread, so the further down the bolt goes into the nut, the tighter it gets. There are also 2 types of nuts, a single one, and one that is split into 2 halves with a Joiner. The idea of the 2 halves is that the print orientation increases the strength of the bolt, as the print lines don't go the same way as the thread. When I initially designed and tested the bolt, it snapped. The 2 halves seems to be stronger.
Ideally 2 Vertical Arms should be placed Up - with the measurements (in mm) and gauge lines every 10mm, face up, and the 2 Horizontal Arms placed face down. This will allow you to use the End Guides to create Right Angles.
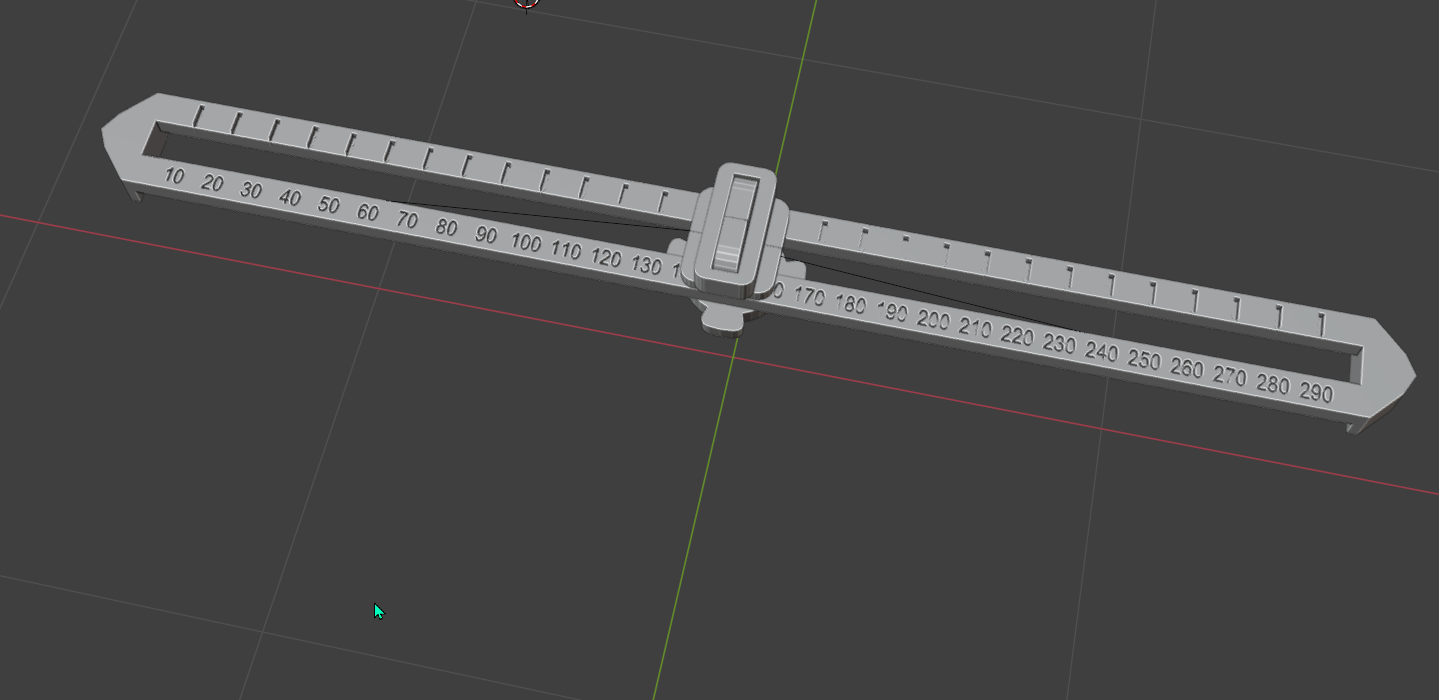
Use 1x Nut/Bolt set in each corner to join the 4 arms, and tighten so that each arm can still be adjusted/moved, using a little bit of force, with the arm able to stay in place, if angled slightly ie. When moving the tool from your head.
Once the Tool has been assembled, Ideally you want to place the tool at Ear and Nose height, as this is where your head will be the widest (Ears), and the deepest (Nose). You can then get the measurements from the numbers on each arm.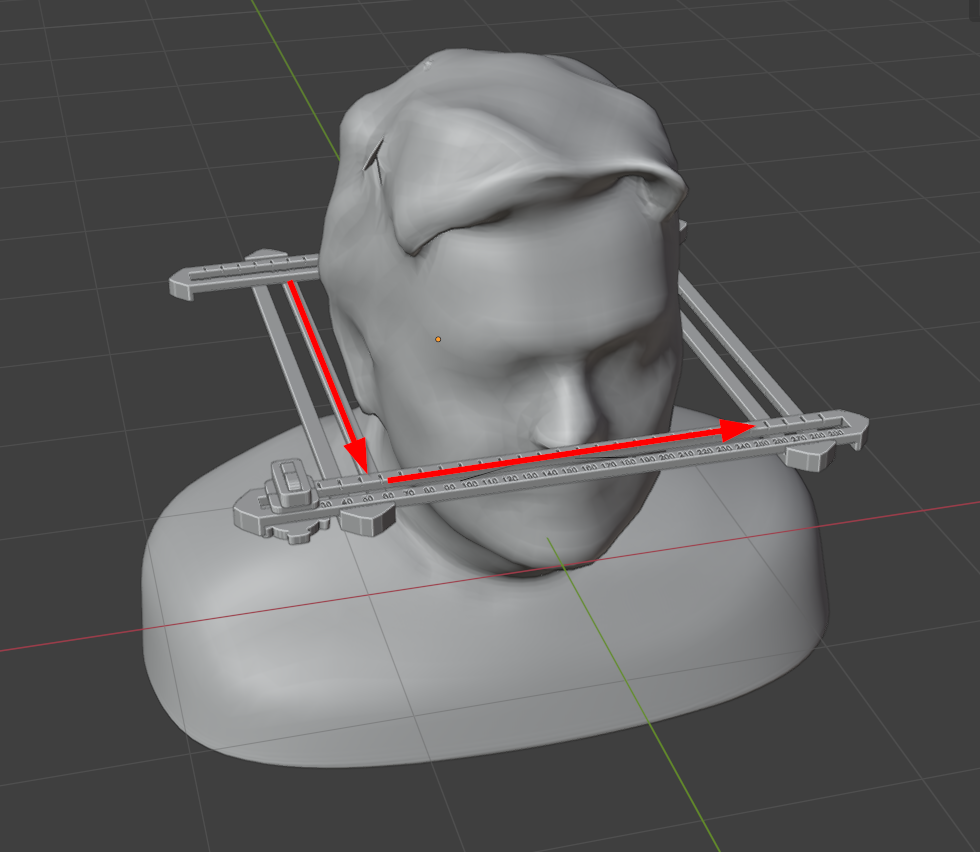
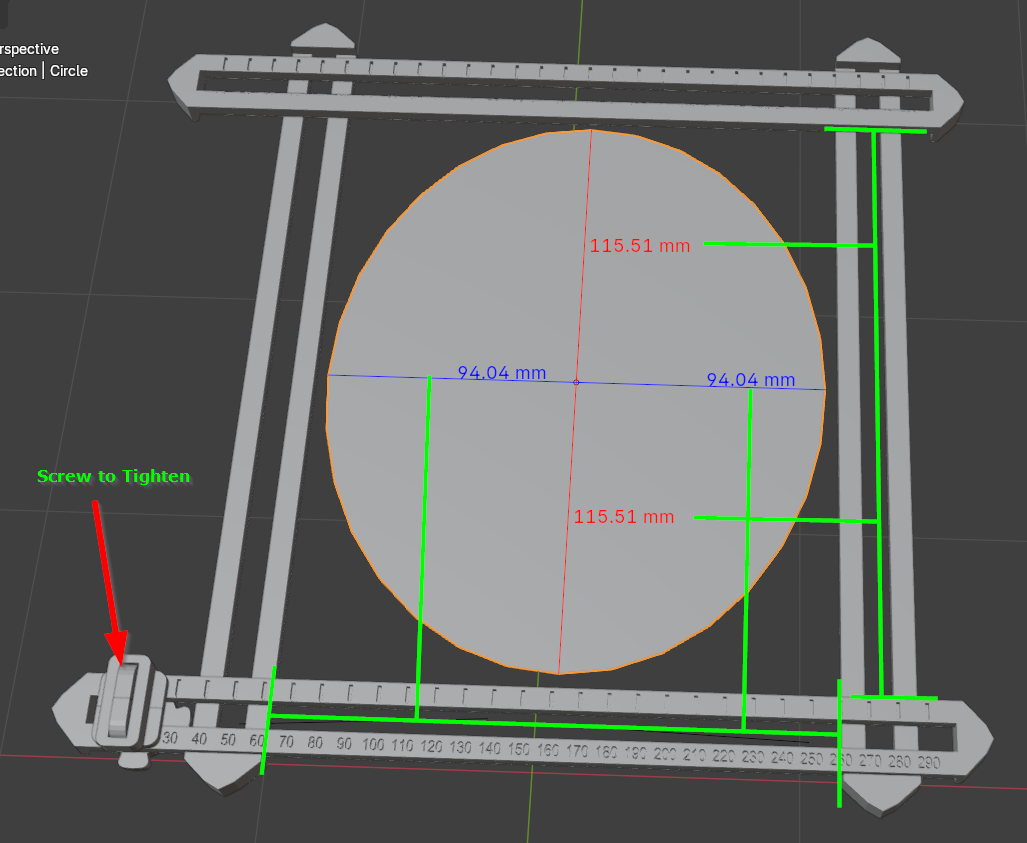
Once done, you can then rotate the tool to measure the height of your head, so that the height between the top of your head and your bottom of your jaw OR top of your shoulders are measured.

Gostou deste modelo? Crie uma conta grátis para salvar seus favoritos e voltar a eles depois.
Criar conta