Você está no 3DFinder
Buscamos em Thingiverse, MakerWorld e Printables ao mesmo tempo para te dar o melhor de cada uma.
Descrição
Designed to keep dogs and cats entertained, this interactive toy combines technology and fun. It features two servomotors that control the X and Y axes to generate precise and dynamic movements. Additionally, its adjustable neck allows you to customize the play angle, offering an engaging and entertaining experience for your pets.
Recommendations for safely and healthily playing with laser pointers with your pets:
- Avoid pointing directly at their eyes: Lasers can cause retinal damage, even if they are low-power.
- Combine the laser with physical toys: Offer a tangible toy at the end of the game to avoid frustration and stress.
- Limit the playtime: Keep sessions short to prevent compulsive behaviors.
- Use the laser as a guide: Utilize the laser to lead your pet to a reward or toy, simulating a "prey" they can catch.
- Observe your pet’s behavior: If you notice signs of anxiety or obsession, stop the game and look for alternatives.
Objective
The idea behind this project is to provide entertainment for my dog when I can't give him the attention he needs. This way, my dog focuses on the game, and when I can give him my attention, we can move on to games with a tangible goal.
The functionalities of this toy are
- It moves autonomously along the X/Y axis with values generated randomly, creating distinct movements each time without repeating patterns.
- It has a neck that allows you to center the play area wherever it suits you depending on the toy's location.
- It features a timer with 2 minutes of play and 2 minutes of rest.
Hardware and Software Used
For the modeling, I used Fusion 360, and for the coding, I used the Arduino IDE with Python.
Materials
- Wemos D1 board
- Arduino connection cables
- 5V laser for Arduino
- 2 SG90 servo motors
- USB cable for powering the toy
Code
#include <Servo.h>
// Declarar los servos
Servo servo1;
Servo servo2;// Pines
int laserPin = D1; // GPIO5
int servo1Pin = D2; // GPIO4
int servo2Pin = D3; // GPIO0void setup() {
// Configurar servos
servo1.attach(servo1Pin);
servo2.attach(servo2Pin);// laser config
pinMode(laserPin, OUTPUT);// Make sure everything starts off
digitalWrite(laserPin, LOW);
servo1.write(90); // Position neutral
servo2.write(90); // Position neutral
}void loop() {
// X/Y: servos
unsigned long startTime = millis(); // Record the start time
while (millis() - startTime < 120000) { // 120000 ms = 2 min
// Generate random positions for both servos
int posServo1 = random(0, 181);
int posServo2 = random(0, 181);// Move both servos gradually into their positions
int currentPos1 = servo1.read();
int currentPos2 = servo2.read();while (currentPos1 != posServo1 || currentPos2 != posServo2) {
if (currentPos1 < posServo1) currentPos1++;
else if (currentPos1 > posServo1) currentPos1--;if (currentPos2 < posServo2) currentPos2++;
else if (currentPos2 > posServo2) currentPos2--;servo1.write(currentPos1);
servo2.write(currentPos2);delay(20); // Movement speed control
}// Turn on laser with servos
digitalWrite(laserPin, HIGH);
}// **pause: stop 2 min**
digitalWrite(laserPin, LOW); // turn off laser
servo1.write(90); // Position neutral
servo2.write(90); // Position neutral
delay(120000); // wait 2 min
}
Assembly plan
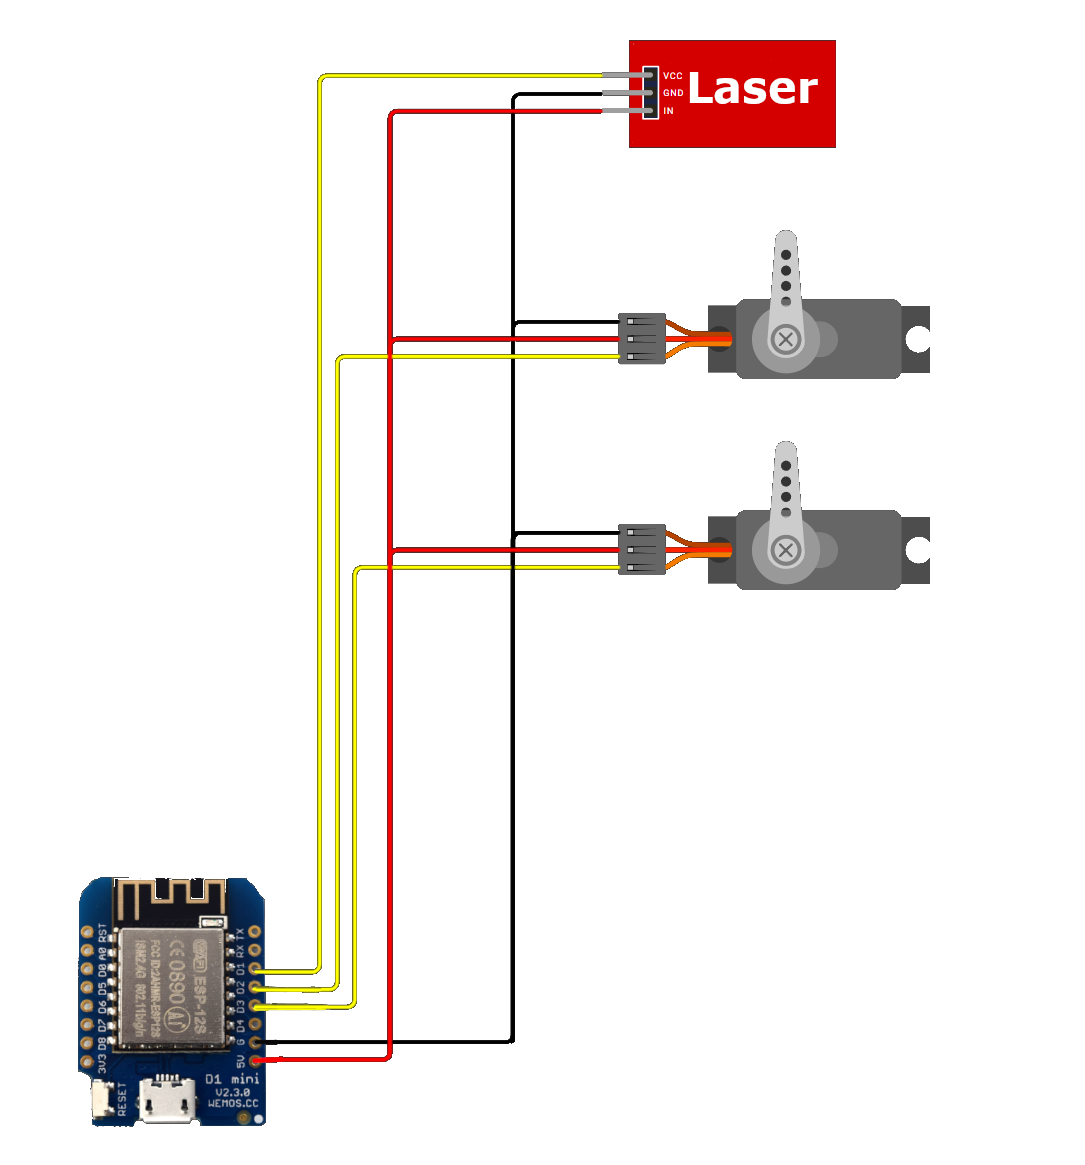
Printing Instructions
For printing the parts, only the piece "TapaY" requires supports, while the rest do not need any supports. All pieces can be printed with the following parameters:
- Infill: 15%
- Walls: 2
- Layer height: 0.2
Video
Demonstration video showcasing assembly and mobility.
Assembly Instructions
First, we attach the servo motor responsible for the X-axis to the Top model and screw the servo motor to the Top model on just one side: 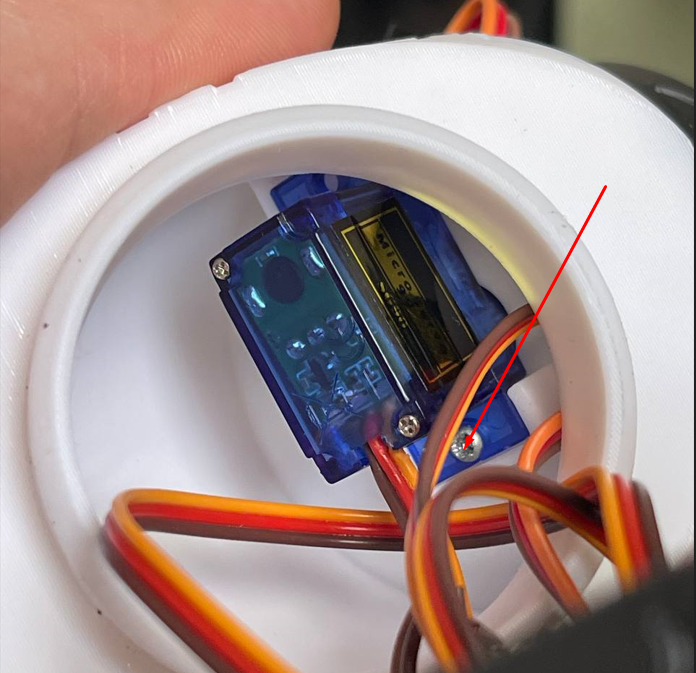
Next, we connect the “basex” to the servo motor we just attached, insert the laser module into the laser model, and pass the wires through the Top model.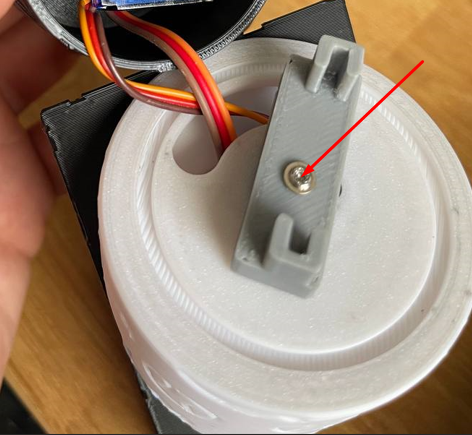
We place the servo motor for the Y-axis in the Top model and screw the laser model to the Y servo motor. Then, we pass the wires of the Y servo motor and the laser through the hole in the Top model, aligning the Y servo motor with the X servo motor.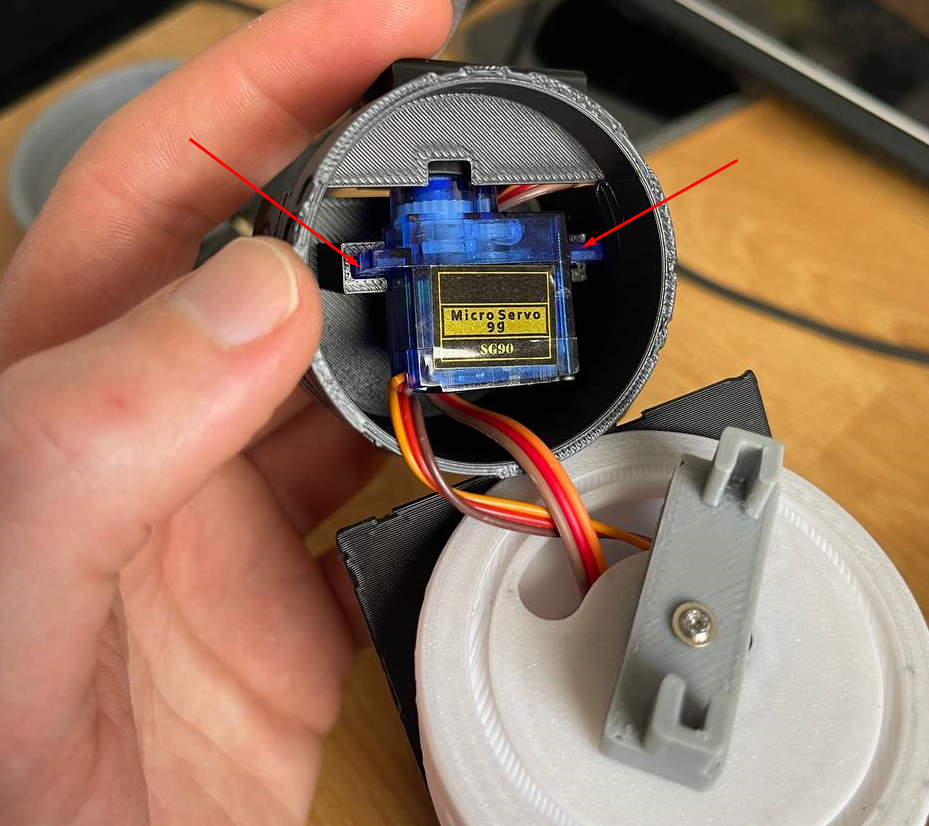
These pieces snap together
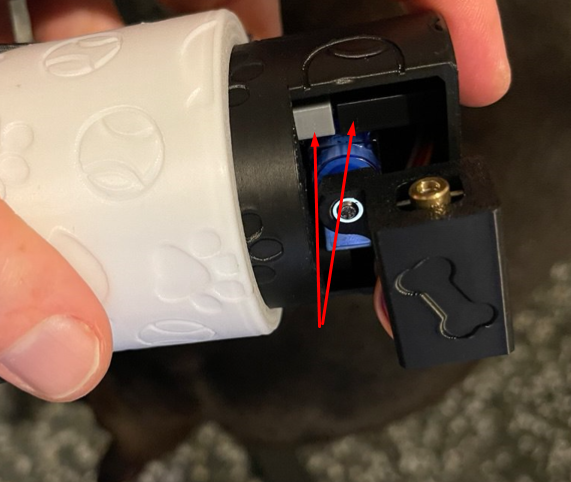
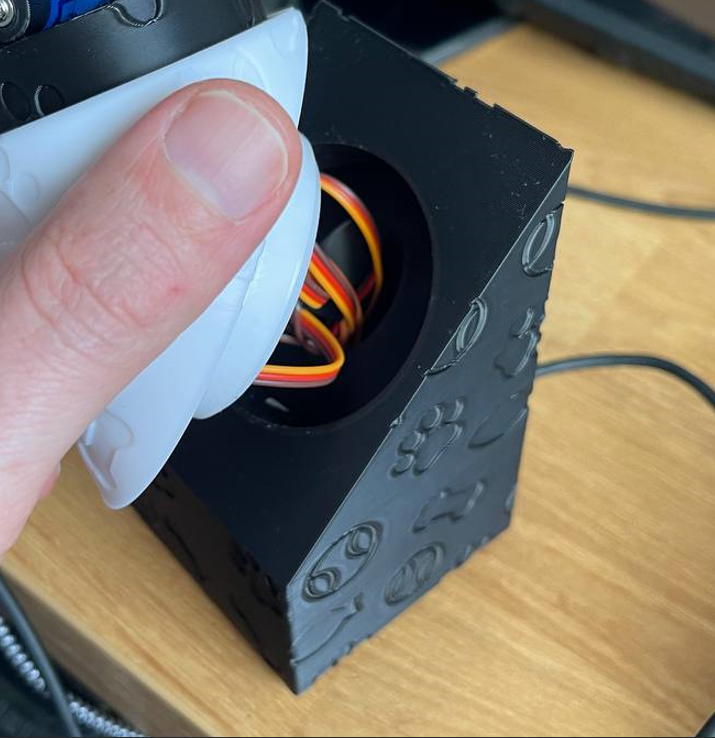
Now that we have the upper part assembled, we pass the wires through the base model, bringing them out from the bottom, and make the connections following the Arduino diagram.
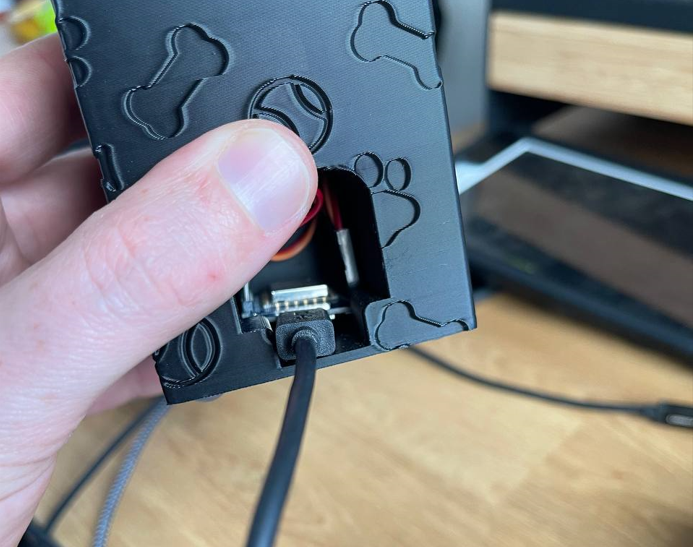
Once the connections are made, we place the Wemos D1 mini board in its slot and plug it in using the USB cable.
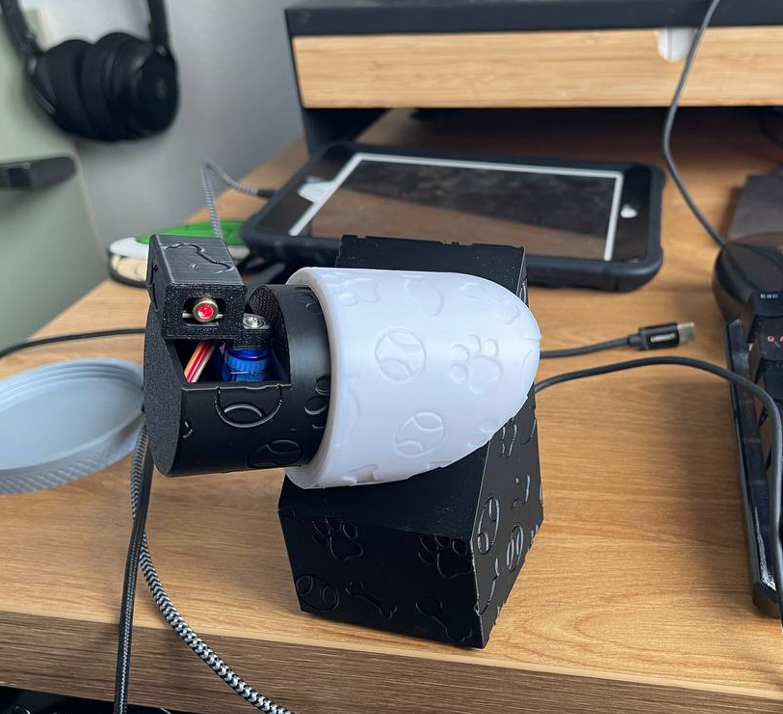
Finally it should look like this, and we can turn it so that it points where we are most interested.

Gostou deste modelo? Crie uma conta grátis para salvar seus favoritos e voltar a eles depois.
Criar conta