Você está no 3DFinder
Buscamos em Thingiverse, MakerWorld e Printables ao mesmo tempo para te dar o melhor de cada uma.
Descrição
Tuned support interface settings for stacking flat-ish models like MultiBoard core tiles. Download the .3mf print profile and save the settings to your preferred Bambu Studio presets.
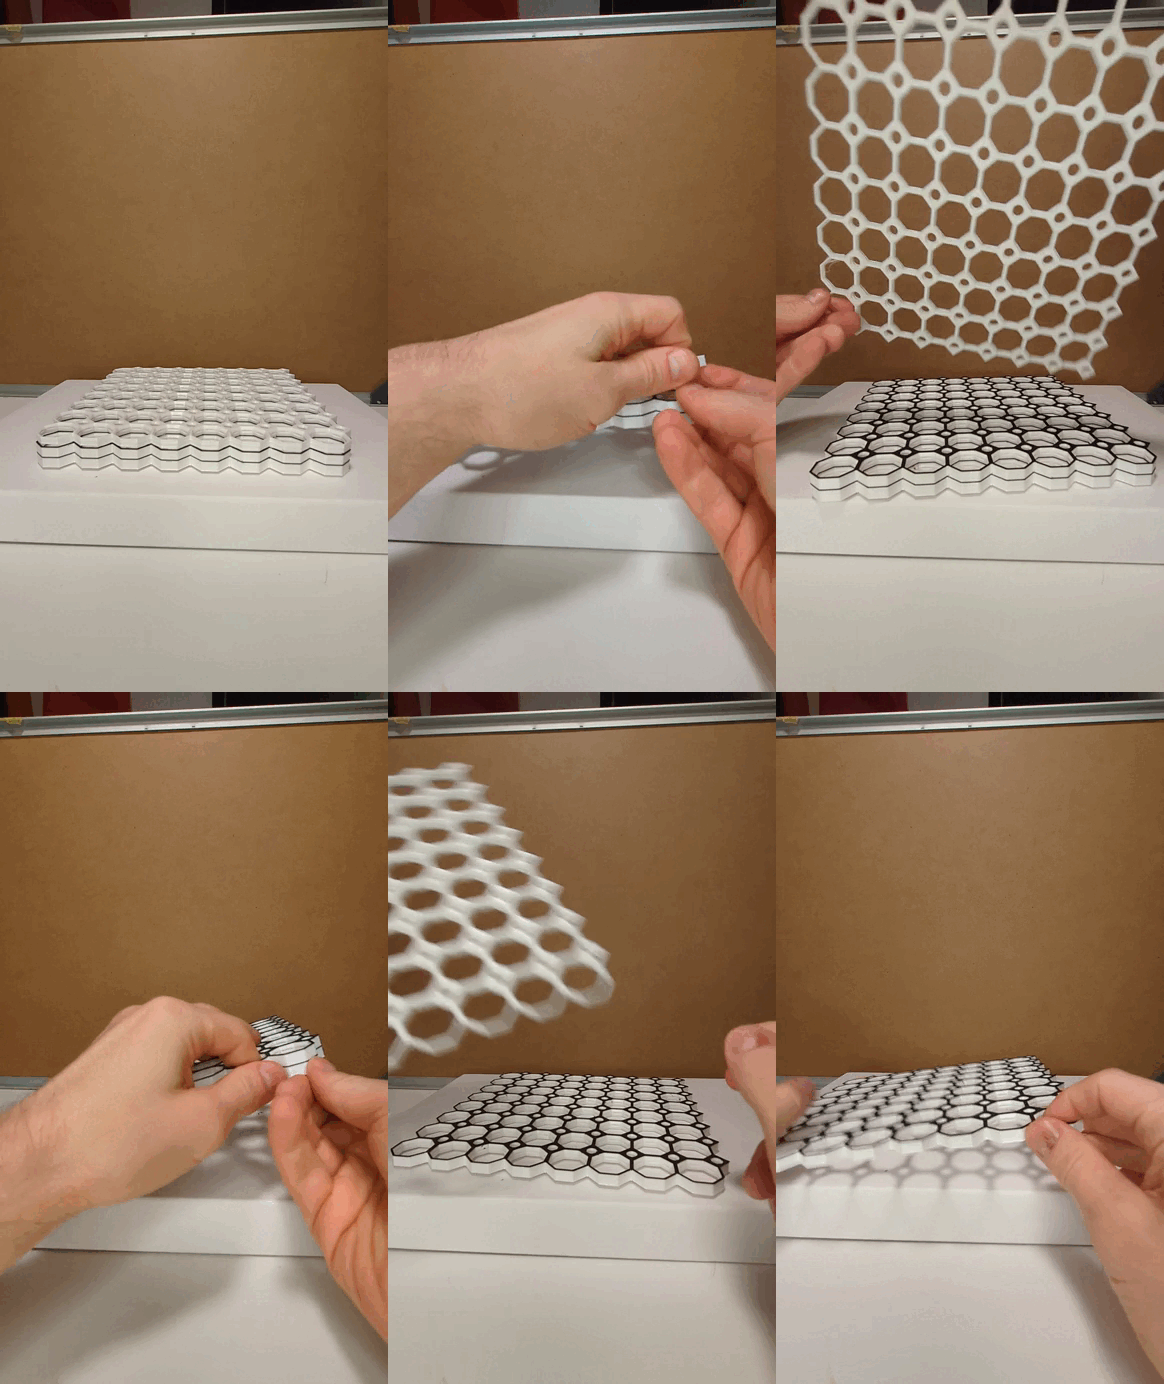
This profile makes use of the material properties of PLA and PETG; they don't stick to each other particularly well when cool. So if you have large, flat prints that take up the majority of your print bed, you can use these settings to print a stack of them instead of having to do multiple prints. I have used these settings to print MultiBoard tiles in batches of 3 and 6 with great results, as you can see here →
You have to manually move the objects in the slicer so that they are separated by two layers. If you're printing with a .2mm layer height, then the objects need to be .4mm apart.
I have set the flush volumes to 700 in this profile, which is overly cautious. I've tried with 200 and it has worked just fine. Your mileage may vary.
This profile assumes that you are printing models in PETG, and thus uses PLA as the interface layer. You can change these settings under Global → support → filament for supports → support/raft interface.
|
 |
Step-by-step instructions
STEP 1
Make sure your models are perfectly overlapping. To do this, right click the models (one at a time) and select “center” from the dropdown menu. | V 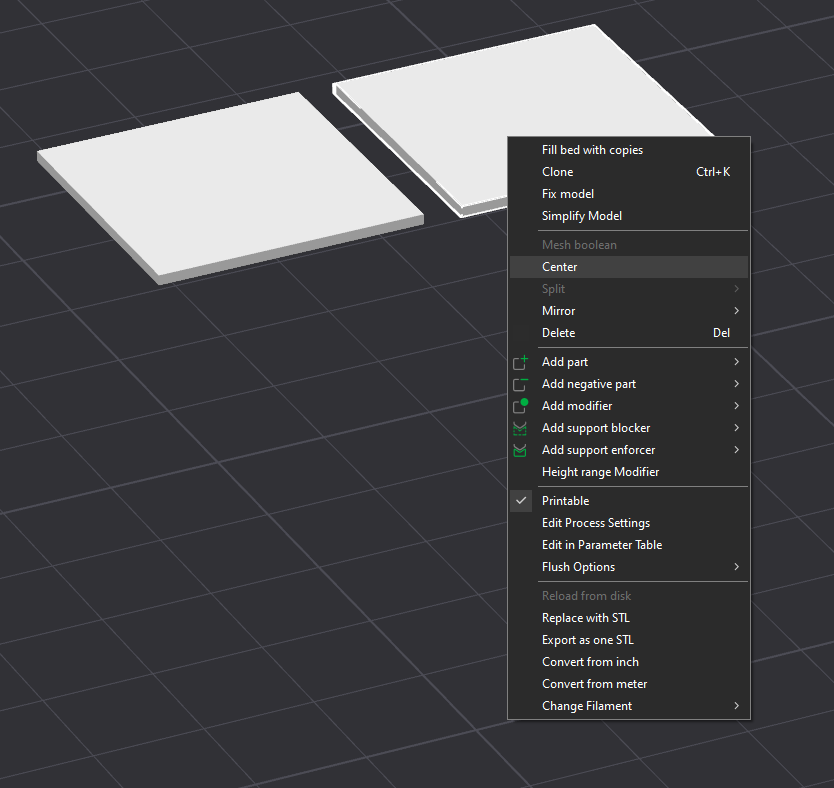 |
STEP 2
Now that the models are “on top of” each other, click the “objects” tab in the left hand side menu, under the filament settings. “Global” is selcted by default.
Select all of the objects (hold shift while clicking the first and last object in the list), right click and choose “merge”. This will tell the slicer that all of the models you have selected belong to the same print unit, which will stop it from re-arranging their positions (like forcing all objects to touch the buildplate. | 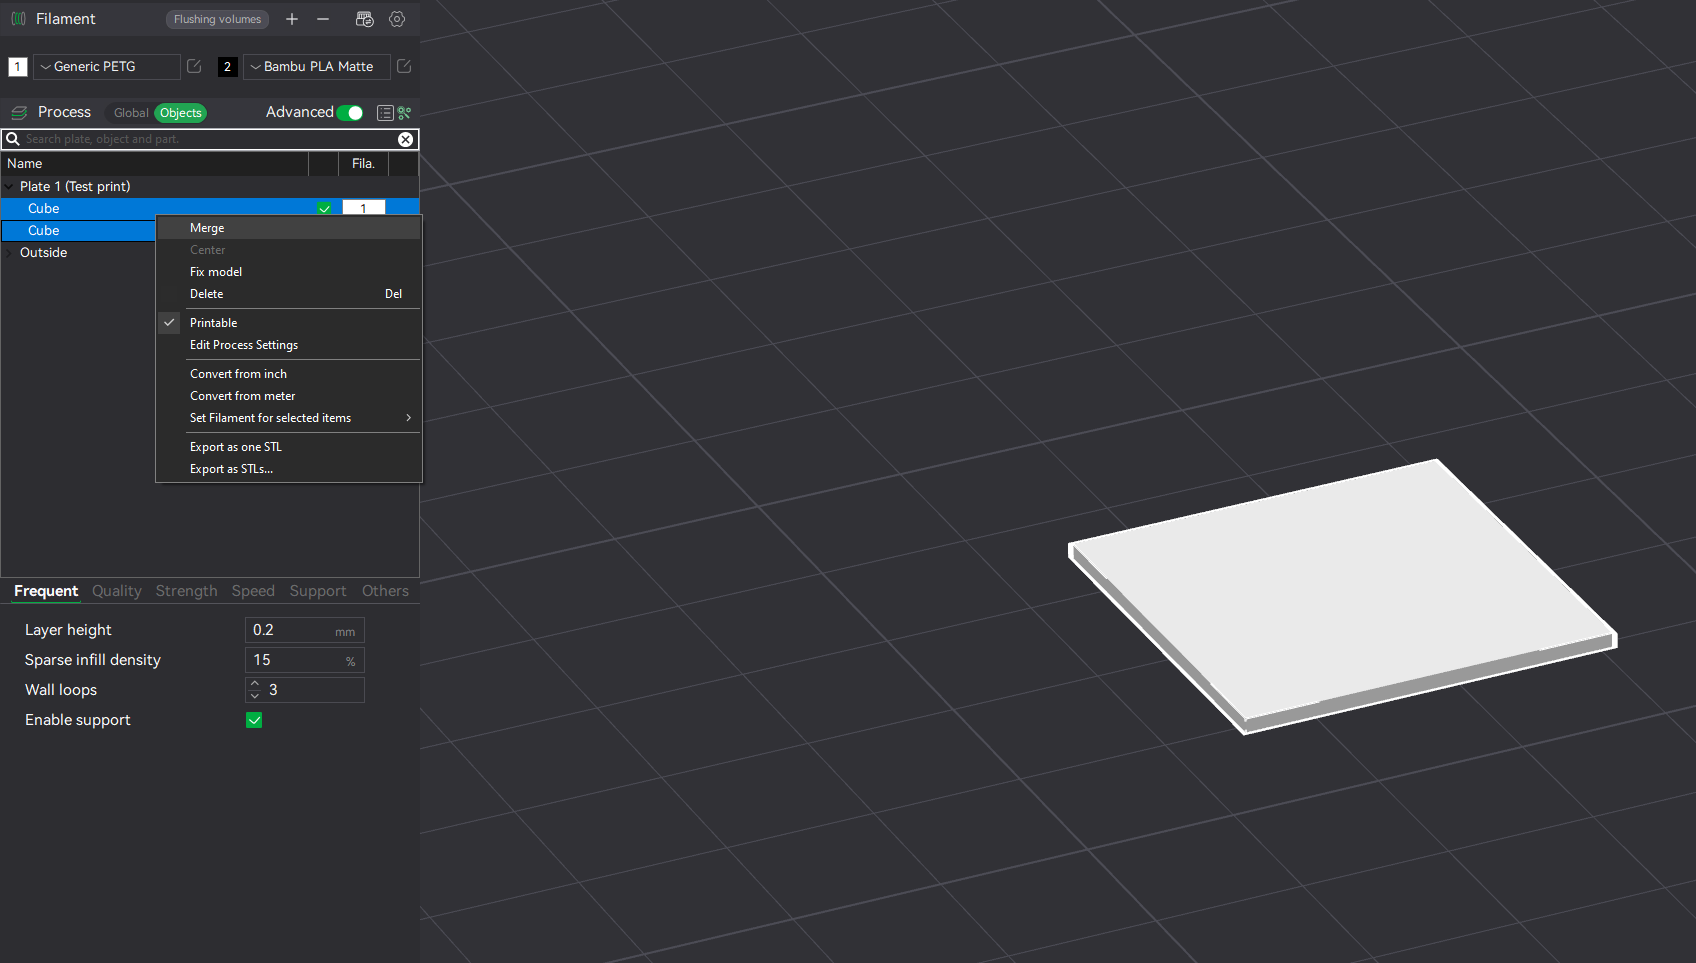 |
STEP 3
Select one of the objects from the list, then click the “move” tool in the menu at the top of the screen. I think you have to actually click the icon instead of using the keyboard shortcut ([M] for Move). | 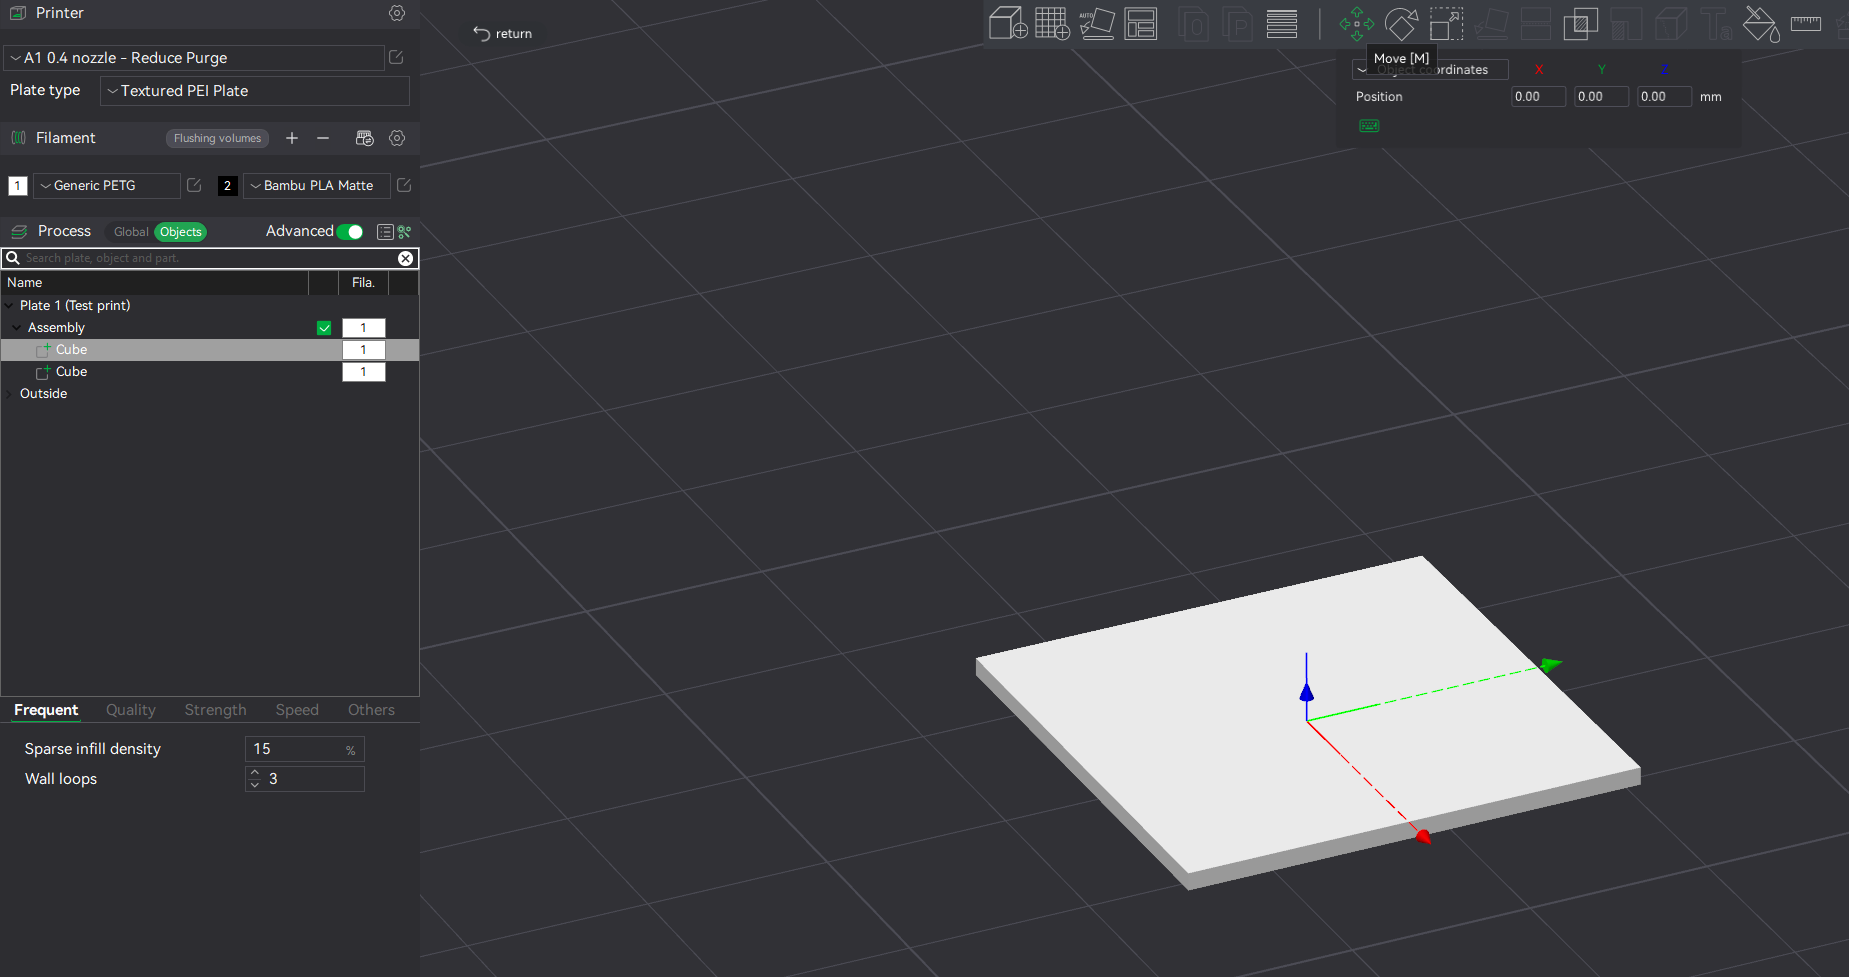 |
STEP 4
pay extra attention here!
This step is the most important. Move one of the objects in the Z direction, so that it floats 2 layers above the object underneath. So if your models are 1mm tall (as in this test print profile) and your print layer height is 0.2mm, you need to move the object up 1.4mm.
Repeat for the rest of the objects you wish to stack. So in this example, a third object would be placed at Z = 1.4 + 1.4 => Z = 2.8 |
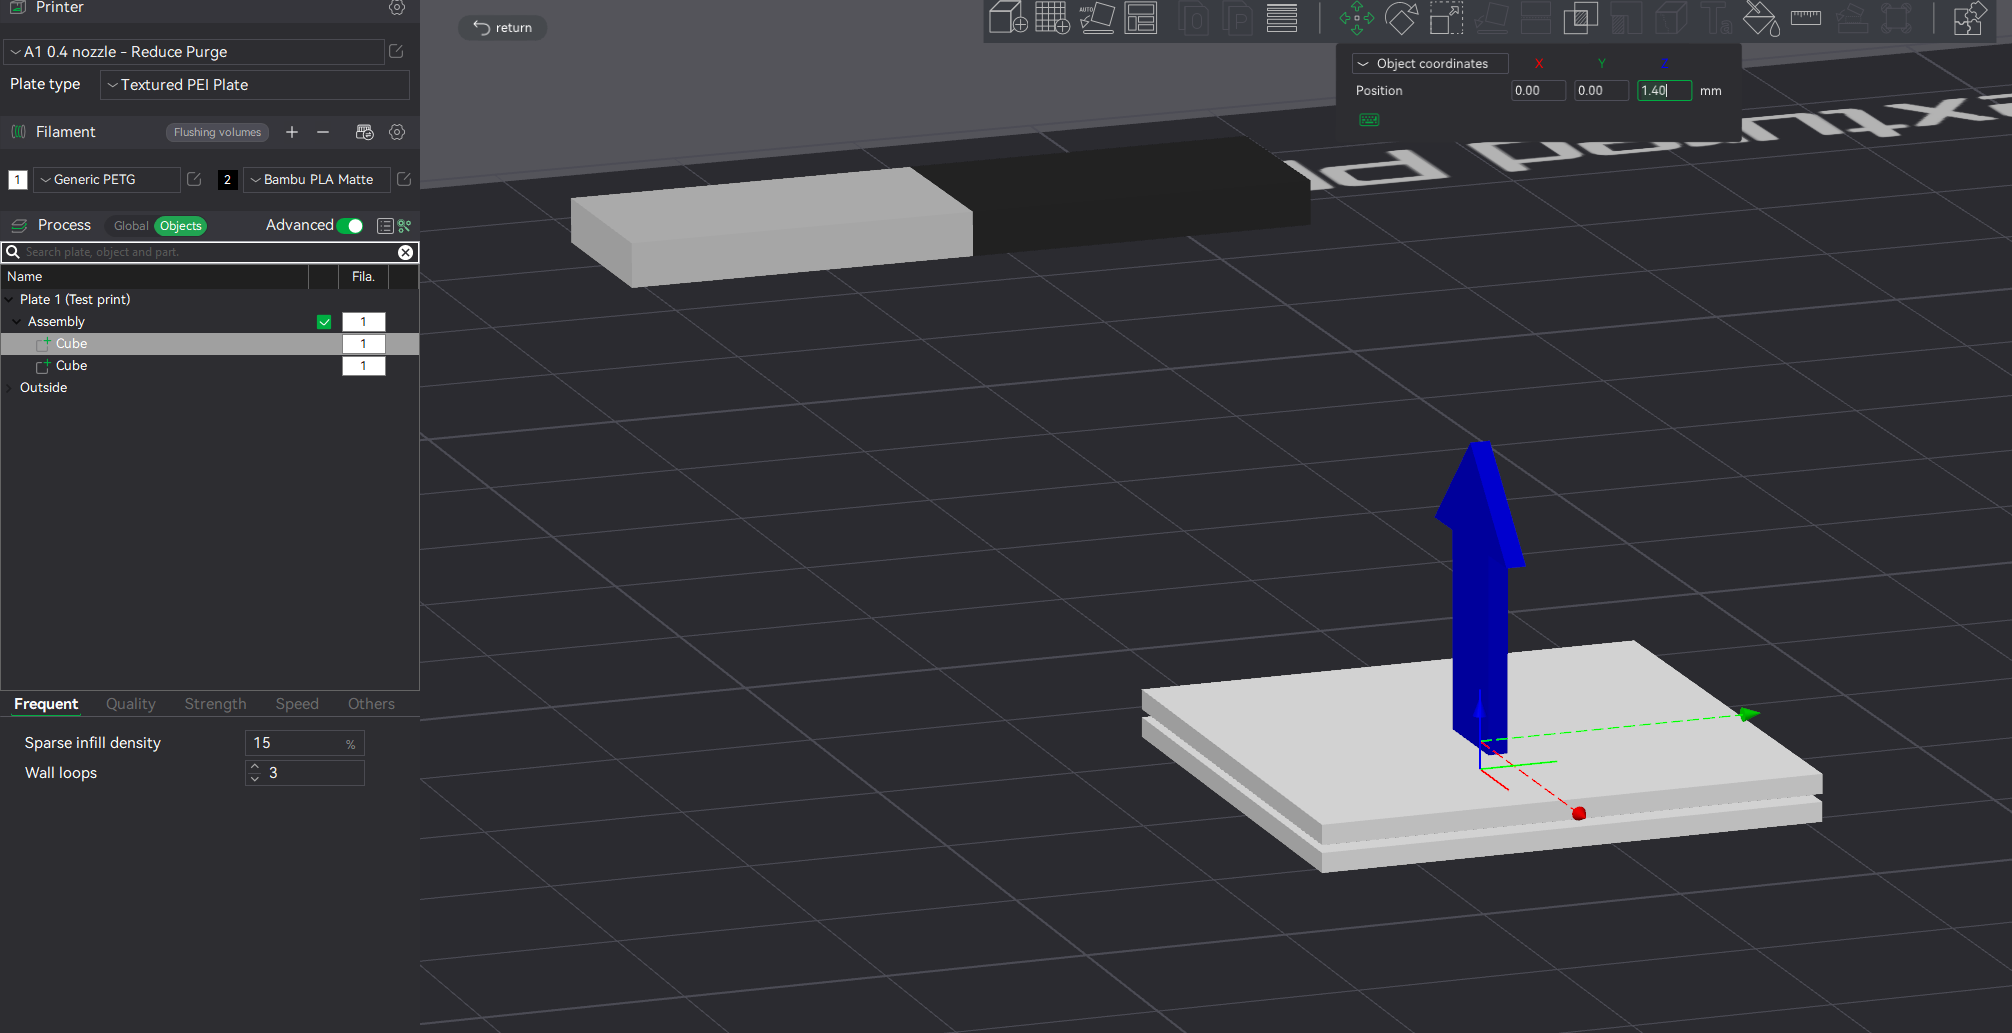 |
STEP 5
You should now have a two layer gap between the objects you want to print. Hit slice and double check that there are indeed two layers worth of material between each object. | 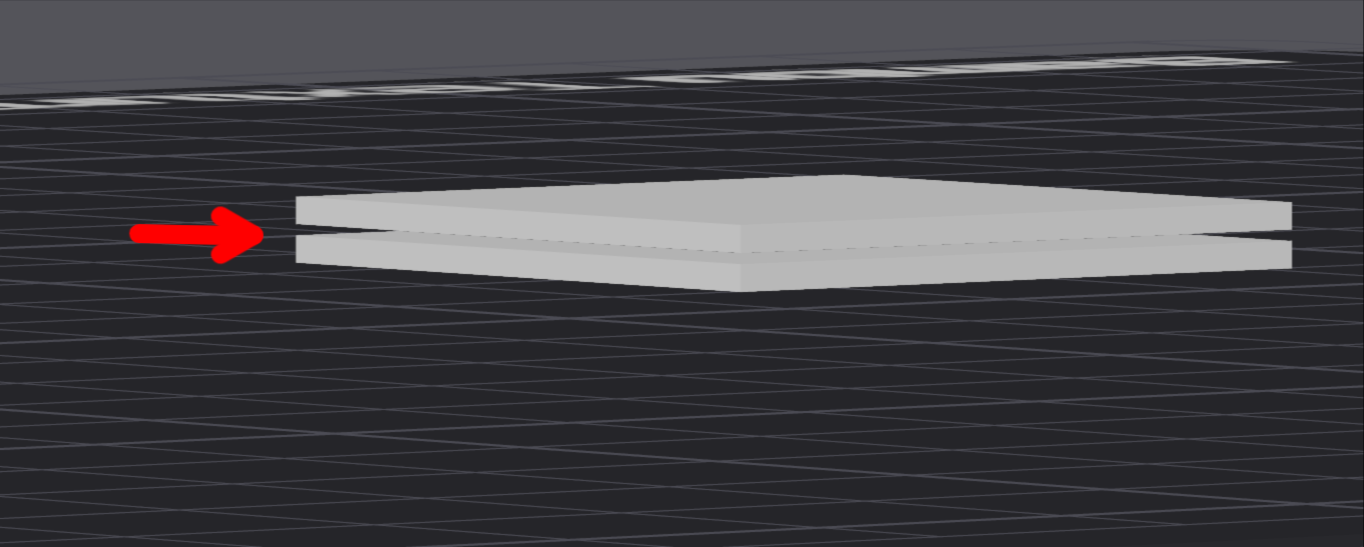 |
Step 6
Hit print plate and watch the magic unfold! |
I would highly suggest printing the test print provided here BEFORE you commit to like a 13h MultiBoard print.
[print settings] Easy separate support interface

Publicado em 19 de abr de 2025
Gostou deste modelo? Crie uma conta grátis para salvar seus favoritos e voltar a eles depois.
Criar conta