Você está no 3DFinder
Buscamos em Thingiverse, MakerWorld e Printables ao mesmo tempo para te dar o melhor de cada uma.
Descrição
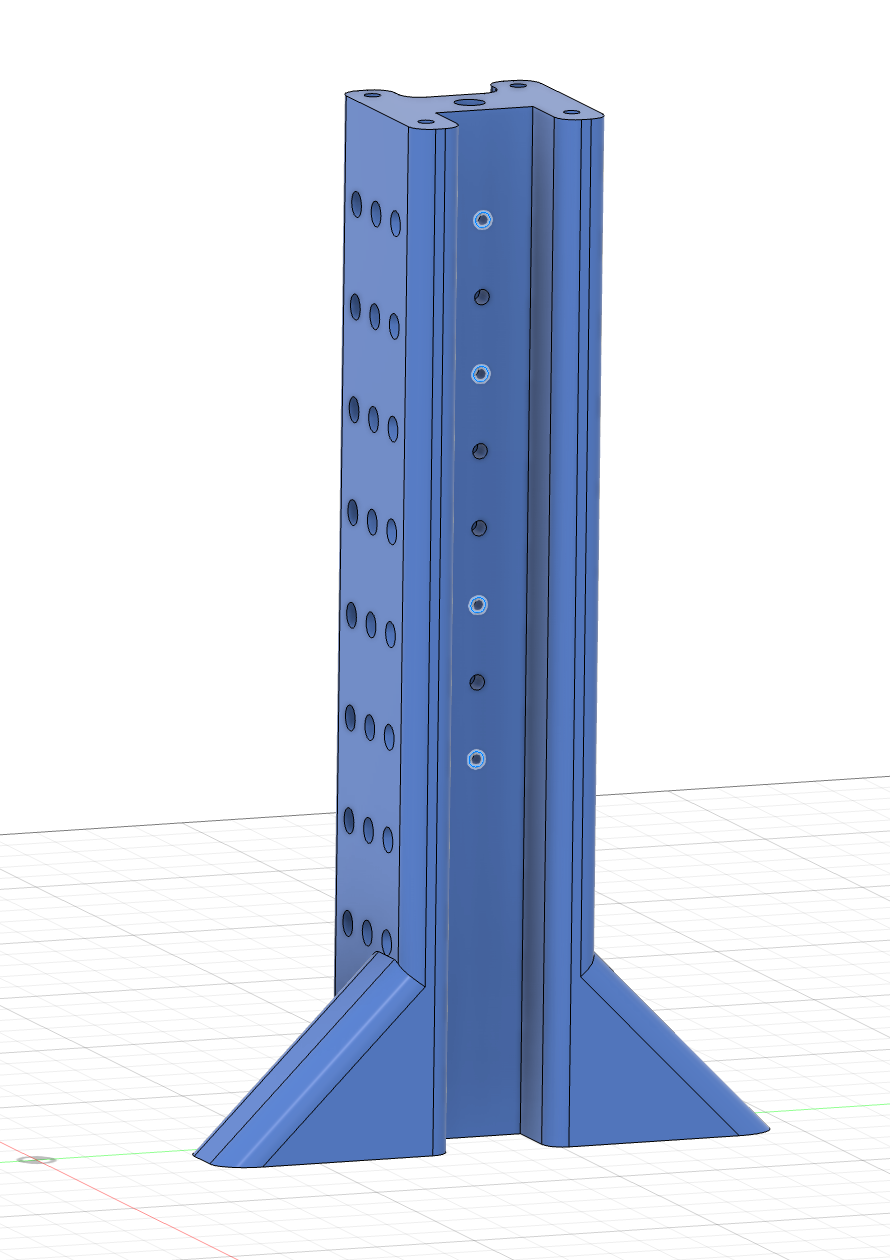
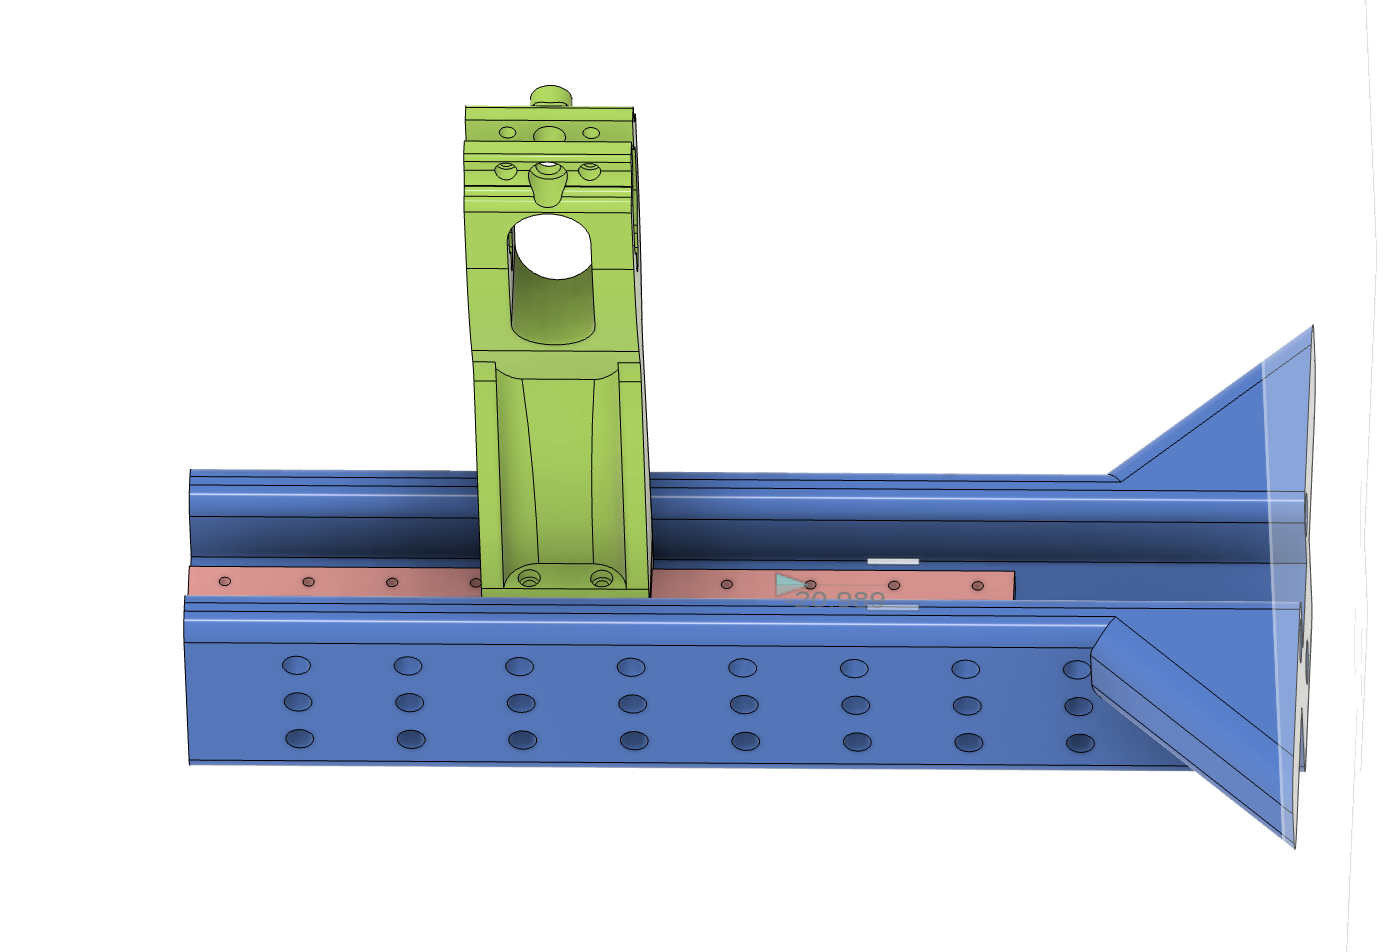
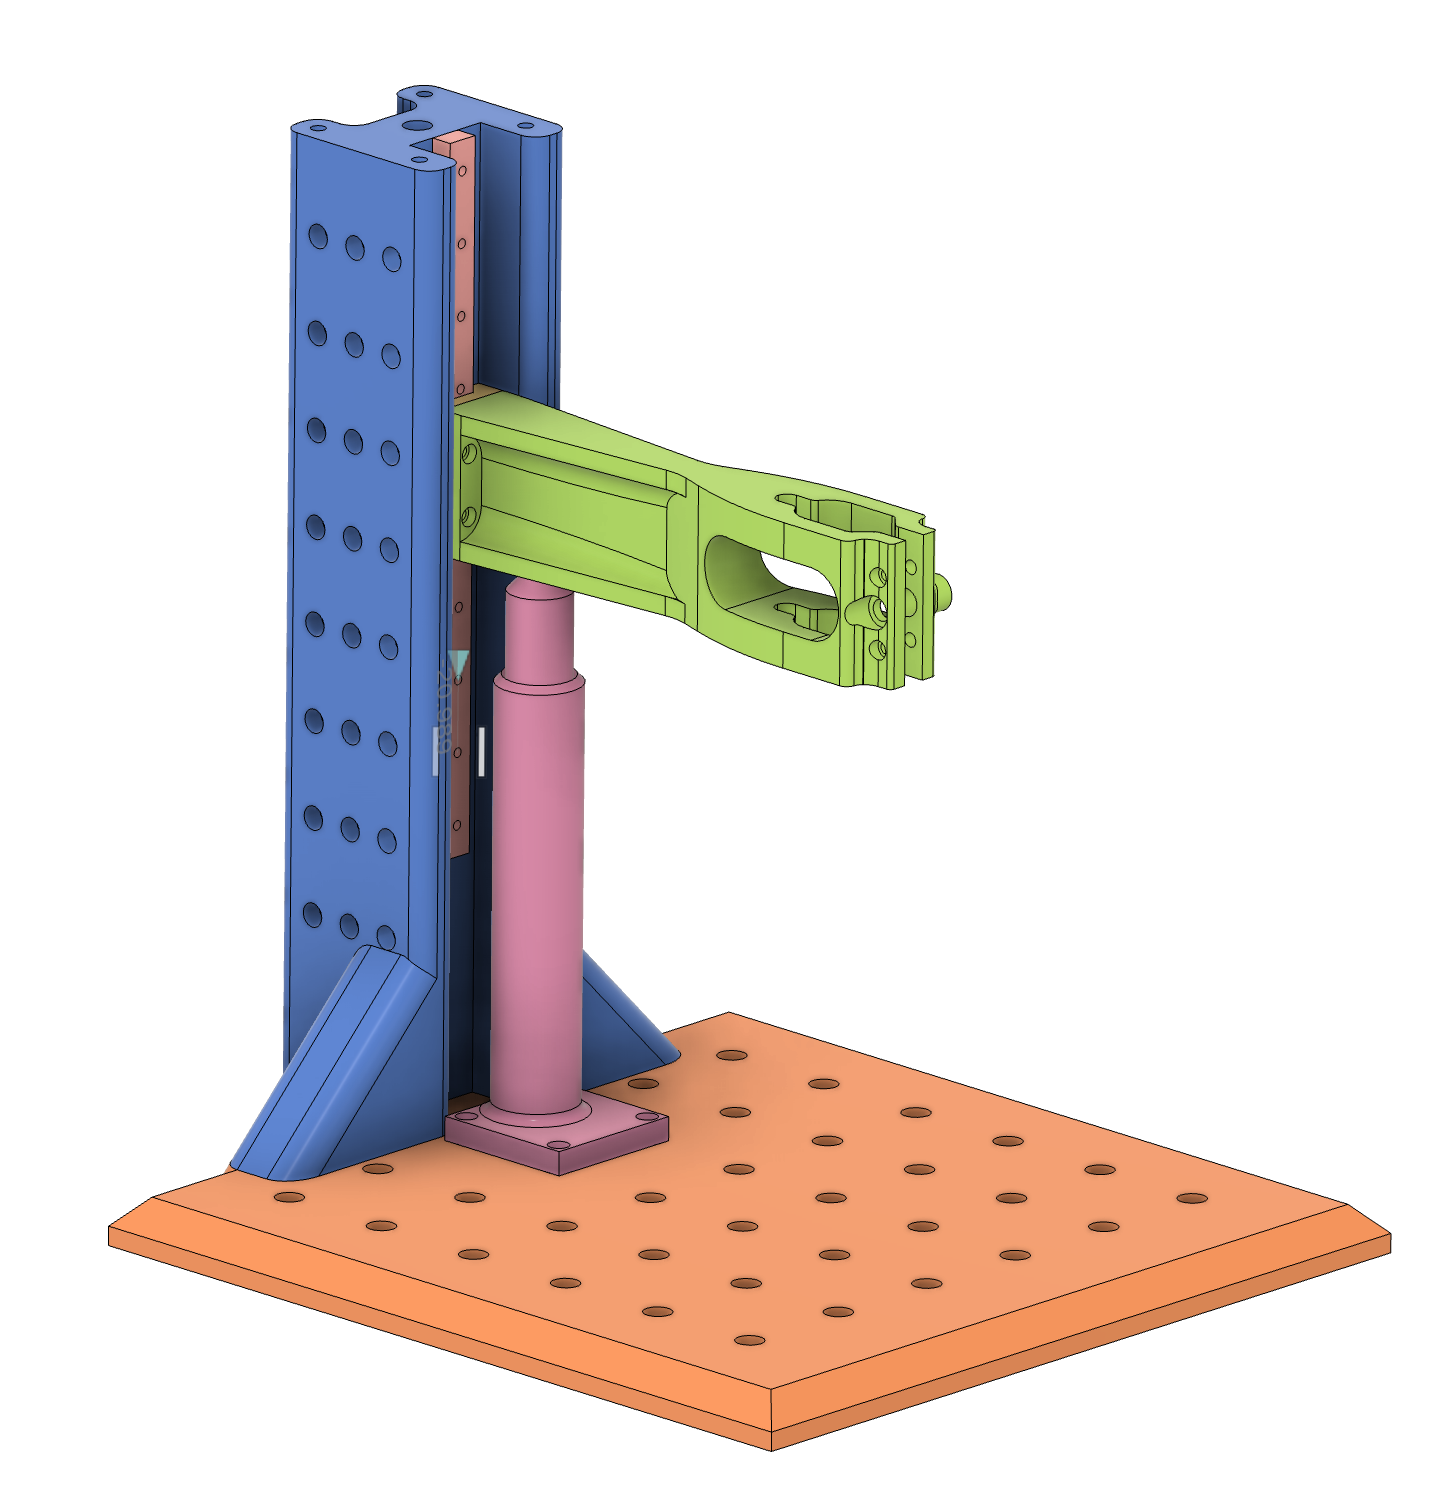
This is a press for a TS101 soldering iron for pressing in threaded inserts using appropriate tip adapters. It is entirely modular. There are 6mm holes in the bed to make friction fit jigs or drop in M4 threaded inserts. There are 6mm holes on the sides of the tower so you can customize, create holders, setup jigs. There are holes for M2 and M4 inserts on top of the tower so you can expand or add an accessory to the top. As per license, no posting remixes please, but feel free to make it you own at home. If you don't like the plunger, toss it. If you want to mount a power bank to the side, do it. If you want to build a setup jig, get on it. Its made to be customized. I bought everything not plastic right off amazon. Links below to what “I” bought. Feel free to use equivalents if you have them on hand. The linear rail is the only thing that is rather specific because of the hole spacing M2 holes 15mm apart. Actual size of my rail was 148mm.
Need a slightly different dimension? Message me and I'll see what I can do.
HARDWARE NEEDED:
MGN7 150mm linear rail
TS101 Soldering Iron with Insert Coupler and Adapters
Assorted Metric Hardware (M2, M4, M6)
Assorted Springs
Assorted Threaded Inserts
TO ASSEMBLE:
Insert (3) M6 inserts into the bottom of the tower
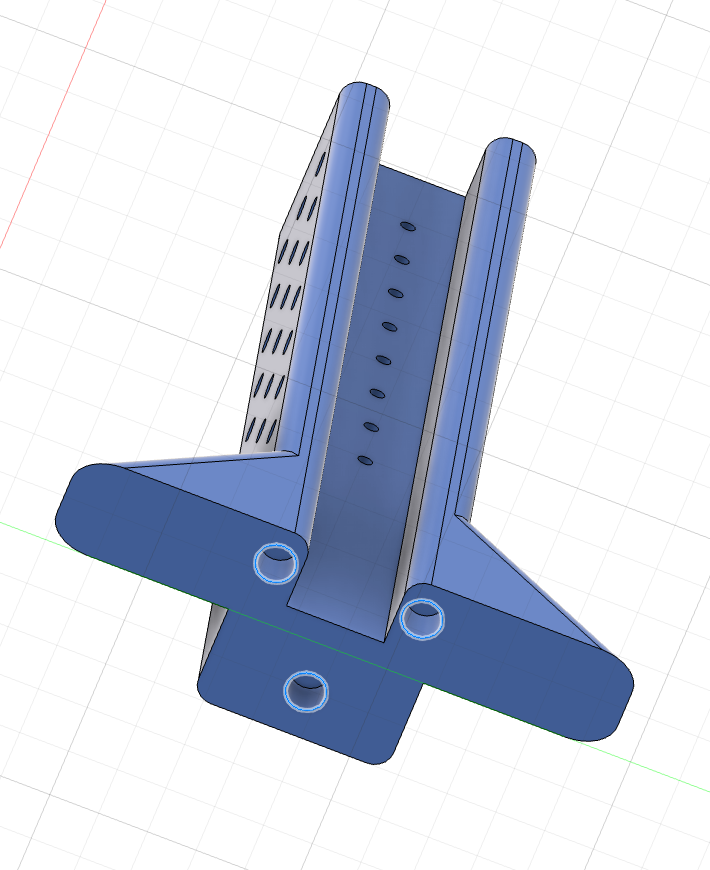
Insert at least (4) M2 threaded inserts in to the tower
Insert (4) M4 threaded inserts in to the base for the spring plunger near the M6 holes

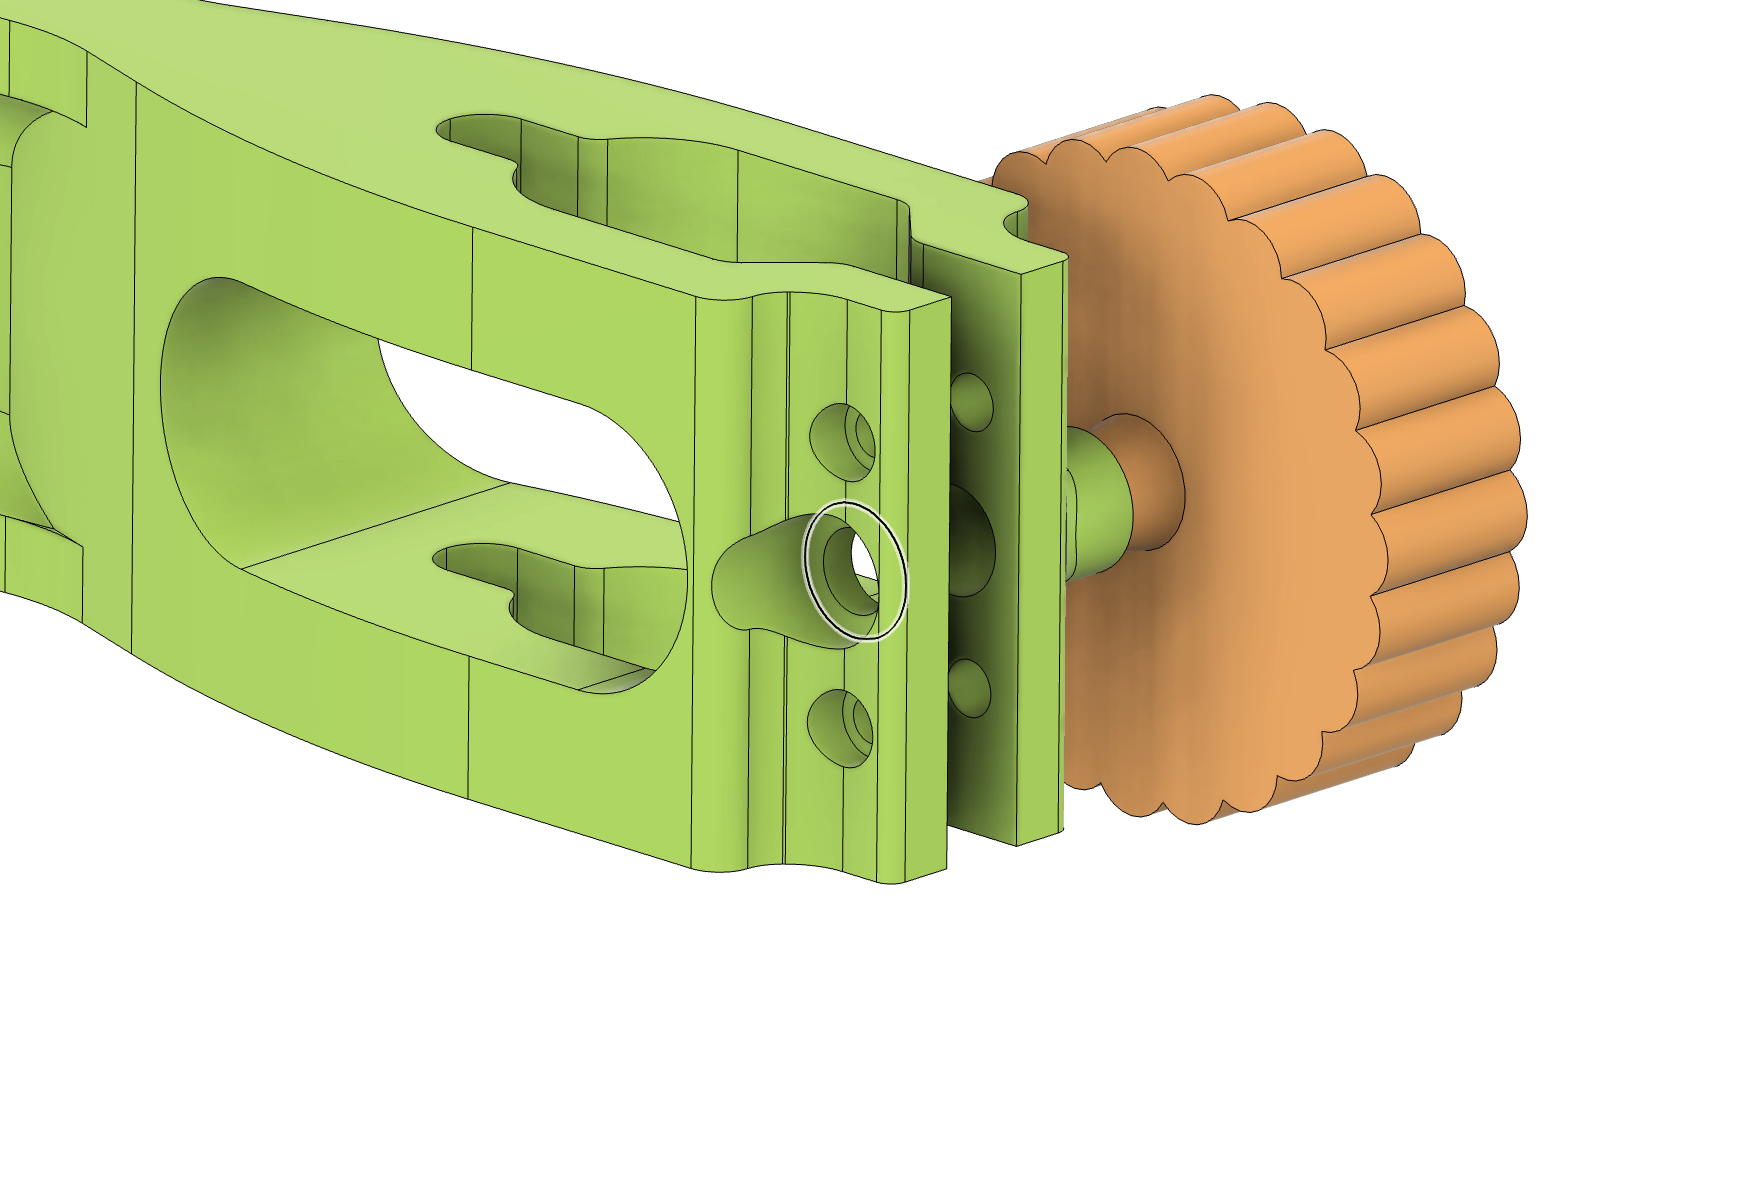
Insert (1) M4 insert into the clamp at the end of the arm. There are provisions for (2) M2 inserts from the opposite side on either side of the M4.
Mount the Linear Rail to the Tower with M2 hardware
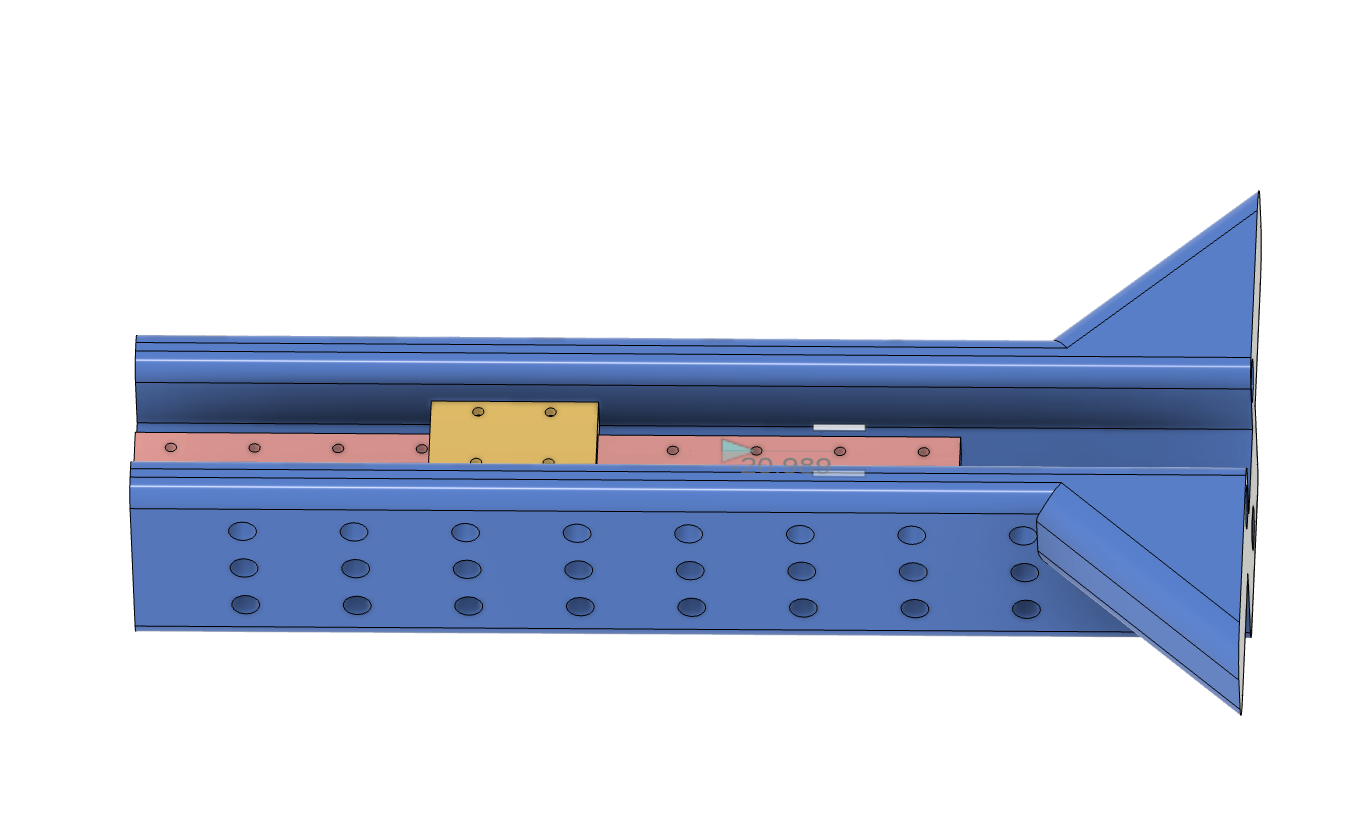
Mount the arm to the linear rail using M2 hardware. The arm can be mounted in either direction. If you are right-handed it is recommended to put the extruding barrel to the right (as shown) as that is where the tension knob will be. If lefty then opposite.
Use the included shims and a combination of springs to adjust how much spring compression you want. You can put a skinny spring inside a larger spring for more spring. Separate stacked springs with a shim as a spacer. The two shims fit in the wider and narrower tubes as appropriate. This will take a little trial and error.
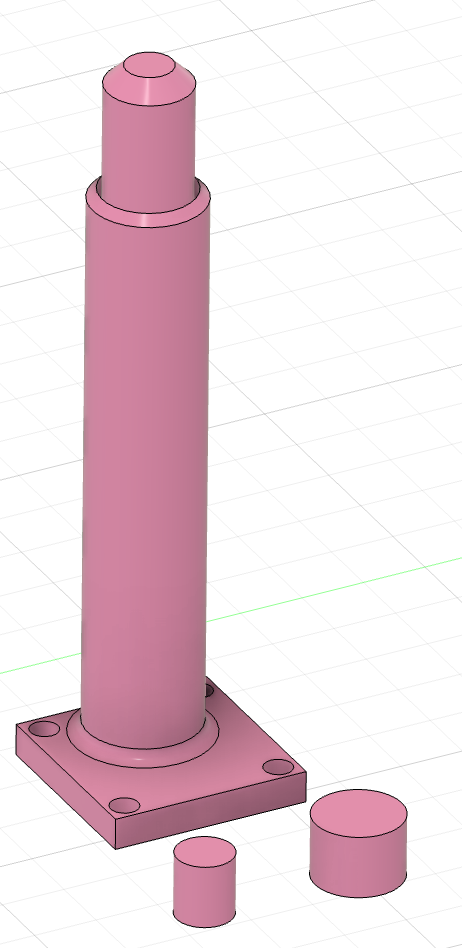
Mount the plunger to the base with M4 hardware

Mount the tower to the base with M6 hardware from the bottom. Do not over torque.
Slide the handle from the middle of the arm towards the tower. It fits snugly only in one direction.
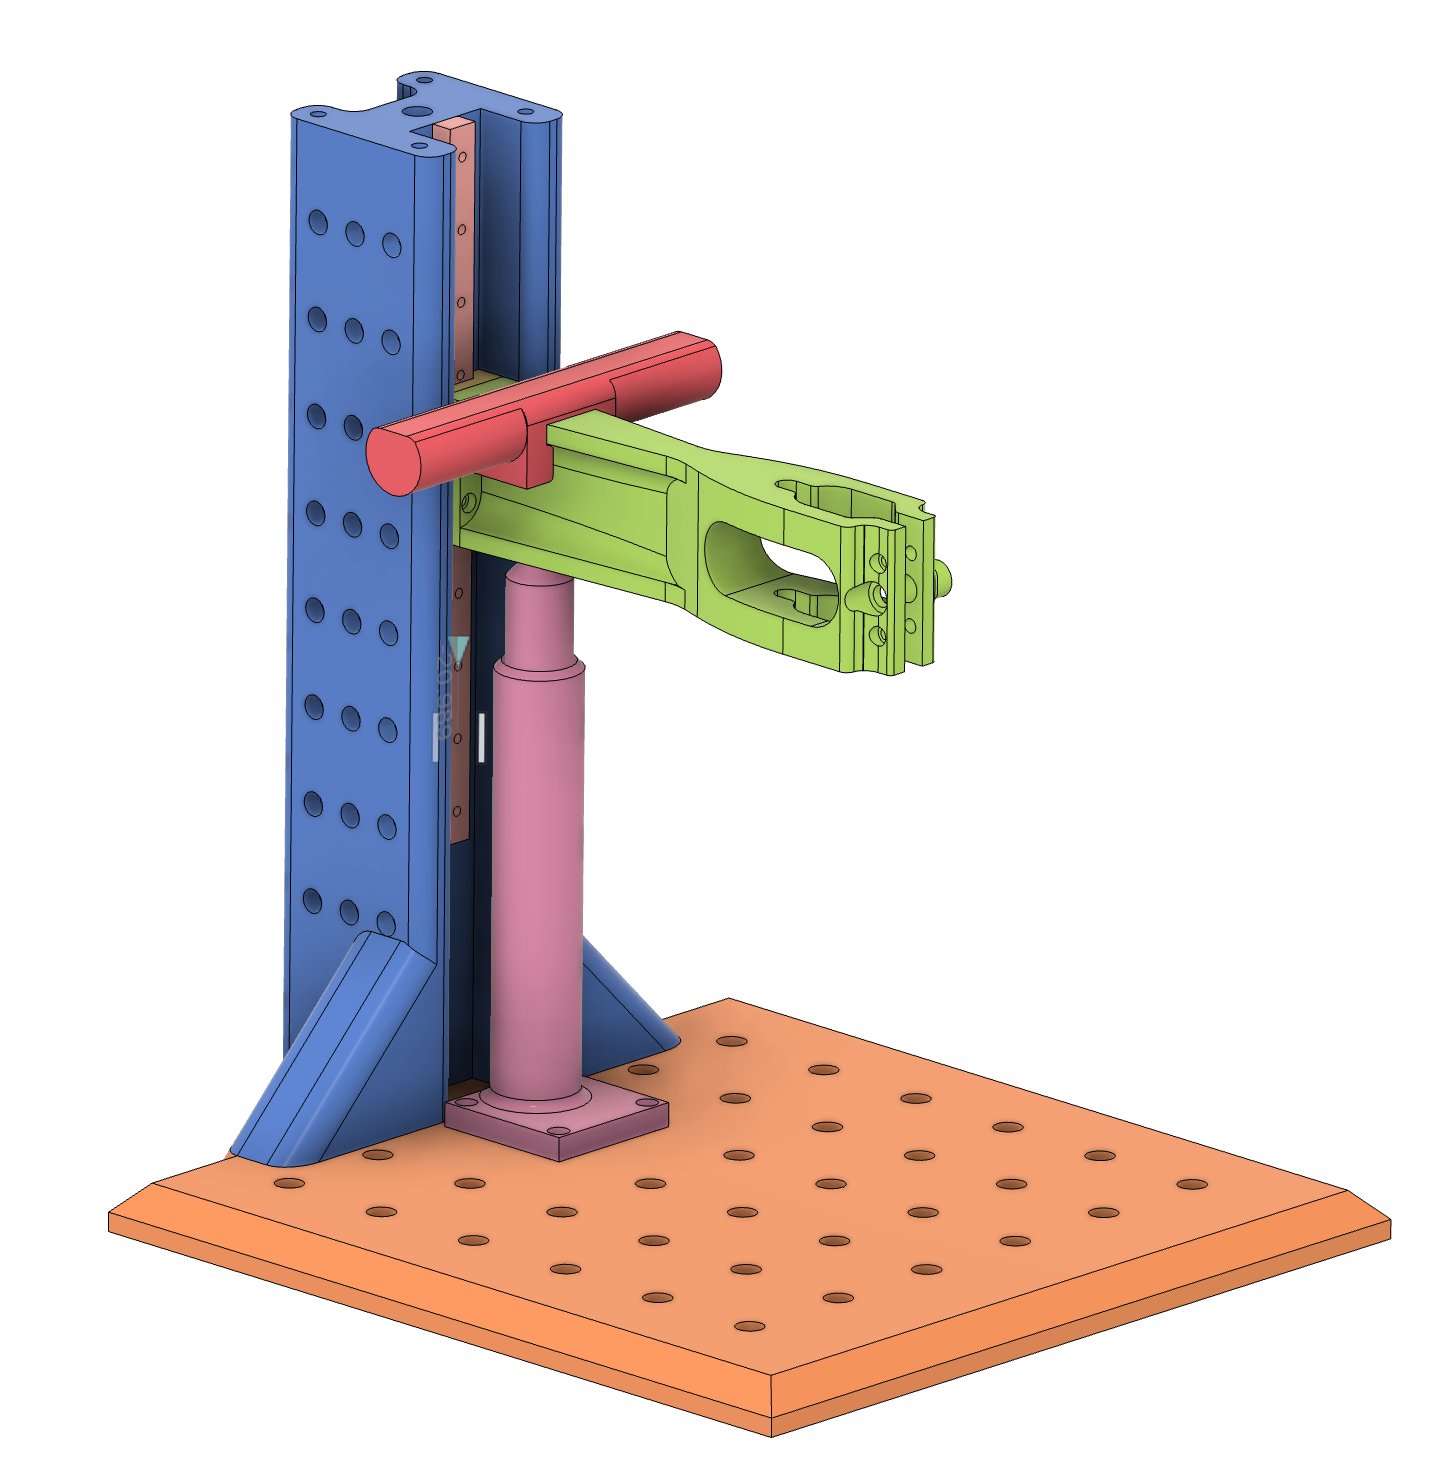
Place a M4 screw (20mm) in the tension handle. Make sure it is all the way through. If it spins in the slot, add a drop of CA glue. Insert the handle with the screw into the barrel and tighten a few turns.
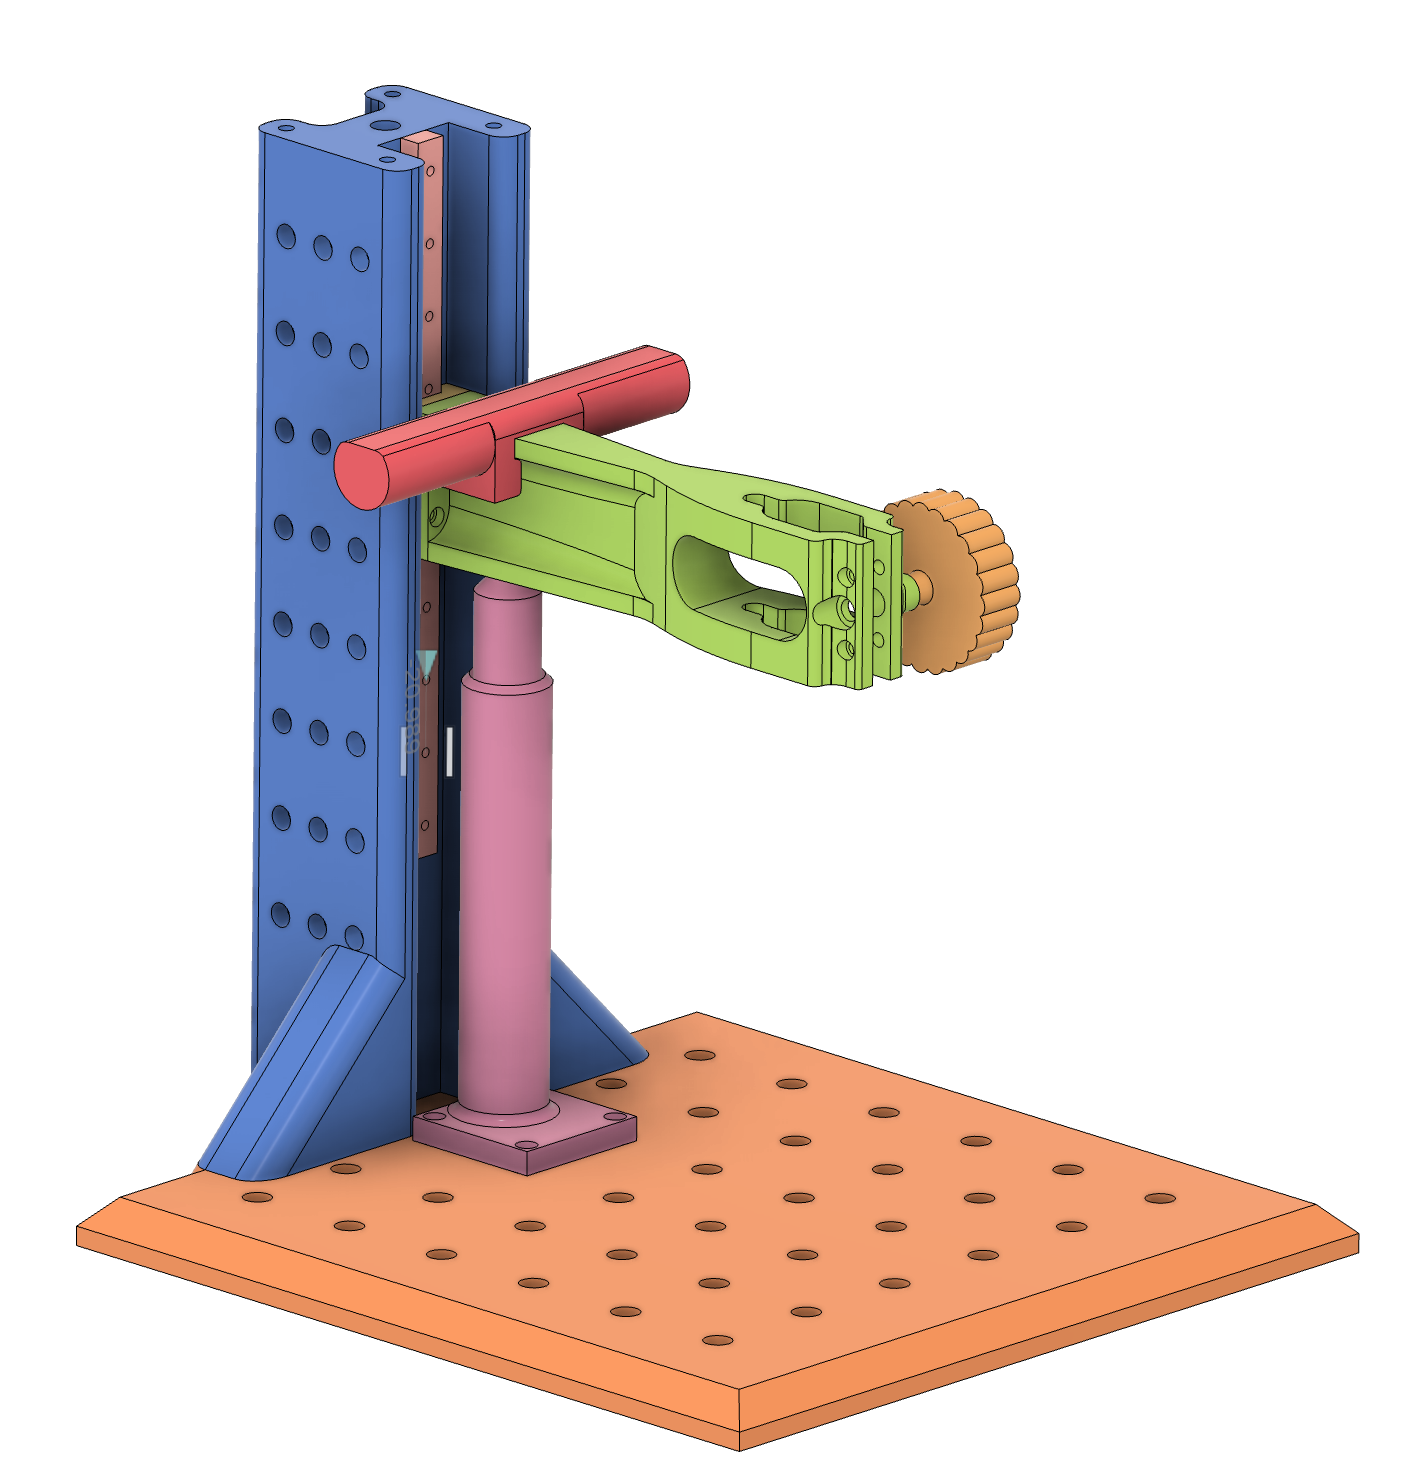
Mount TS101 and GO!
TS101 Threaded Insert Heat Press

Publicado em 5 de abr de 2025