Você está no 3DFinder
Buscamos em Thingiverse, MakerWorld e Printables ao mesmo tempo para te dar o melhor de cada uma.
Descrição
This is a fully 3D-printed mechanical keyboard switch adapted to fit inside a Bambu Labs cardboard spool! For the version displayed, each (besides the spool) is 3D printed, including the spring mechanism & cherry keycap. Written below is a description of the assembly and printing specifications(which I highly recommend checking out if you plan to print this).
The print profiles for each version will be attached.
Printing(PLEASE READ!)
The large mechanical keyboard switch print was made possible by the use of a PETG interface between the PLA supports and the PLA body(or whatever material you choose to print it in)(this is NOT my idea, and the original maker of this idea is featured in this video). I will list my support settings below, and the print profile/.3mf files should also include the correct settings in the Bambu slicer. If needed, I also got the settings from this Reddit post.
Support(advanced options on)
- enable supports
- normal(auto)
- snug type
- on build plate only + remove small overhangs
- support/raft interface: PETG(or whichever filament slot you want to use that doesn't stick well to your main filament)
- top & bottom z distance to 0
- base pattern spacing 2mm
- top interface layers 3
- interface pattern rectilinear
- top interface spacing 0
- support/object xy distance to 0.5
In my experience, without these support settings, printing the components to build the large switch is virtually impossible. For the other version with small switches, this is NOT needed.
Assembly
In this model, I've provided two main versions to print. The first option is the large mechanical keyboard switch, and the second option is a mount for several standard-sized switches.
Large mechanical keyboard switch:
- Attach the bottom piece that has a slot for the spring to either opening side of the cardboard spool(use glue as necessary)
- Glue on the spring to the bottom of the slot so that it sticks out of the other opening of the spool
- Attach on the top piece that will secure the spring to prevent stem wobble(glue as necessary)
- Attach on keycap/top mount of choice(customizable - scroll down!)
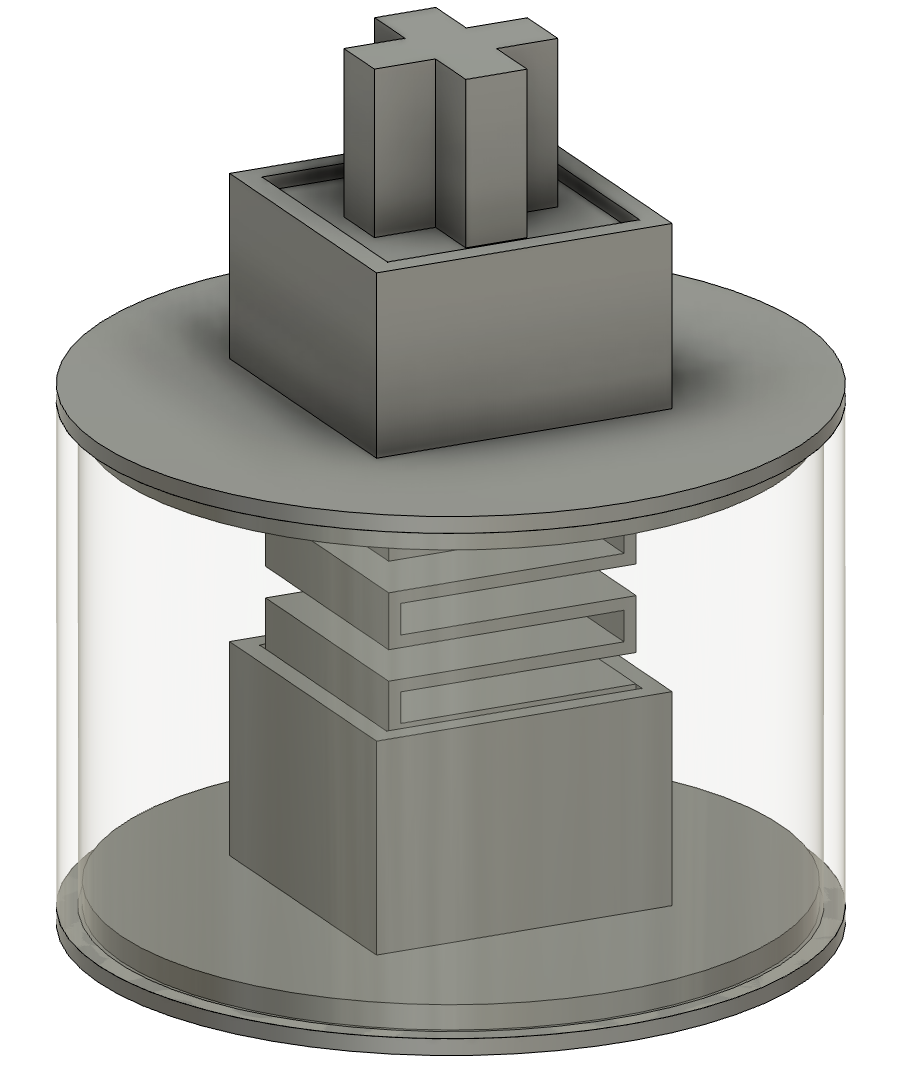
Transparent part is cardboard spool; NO keycap mounted
Standard mechanical keyboard switch:
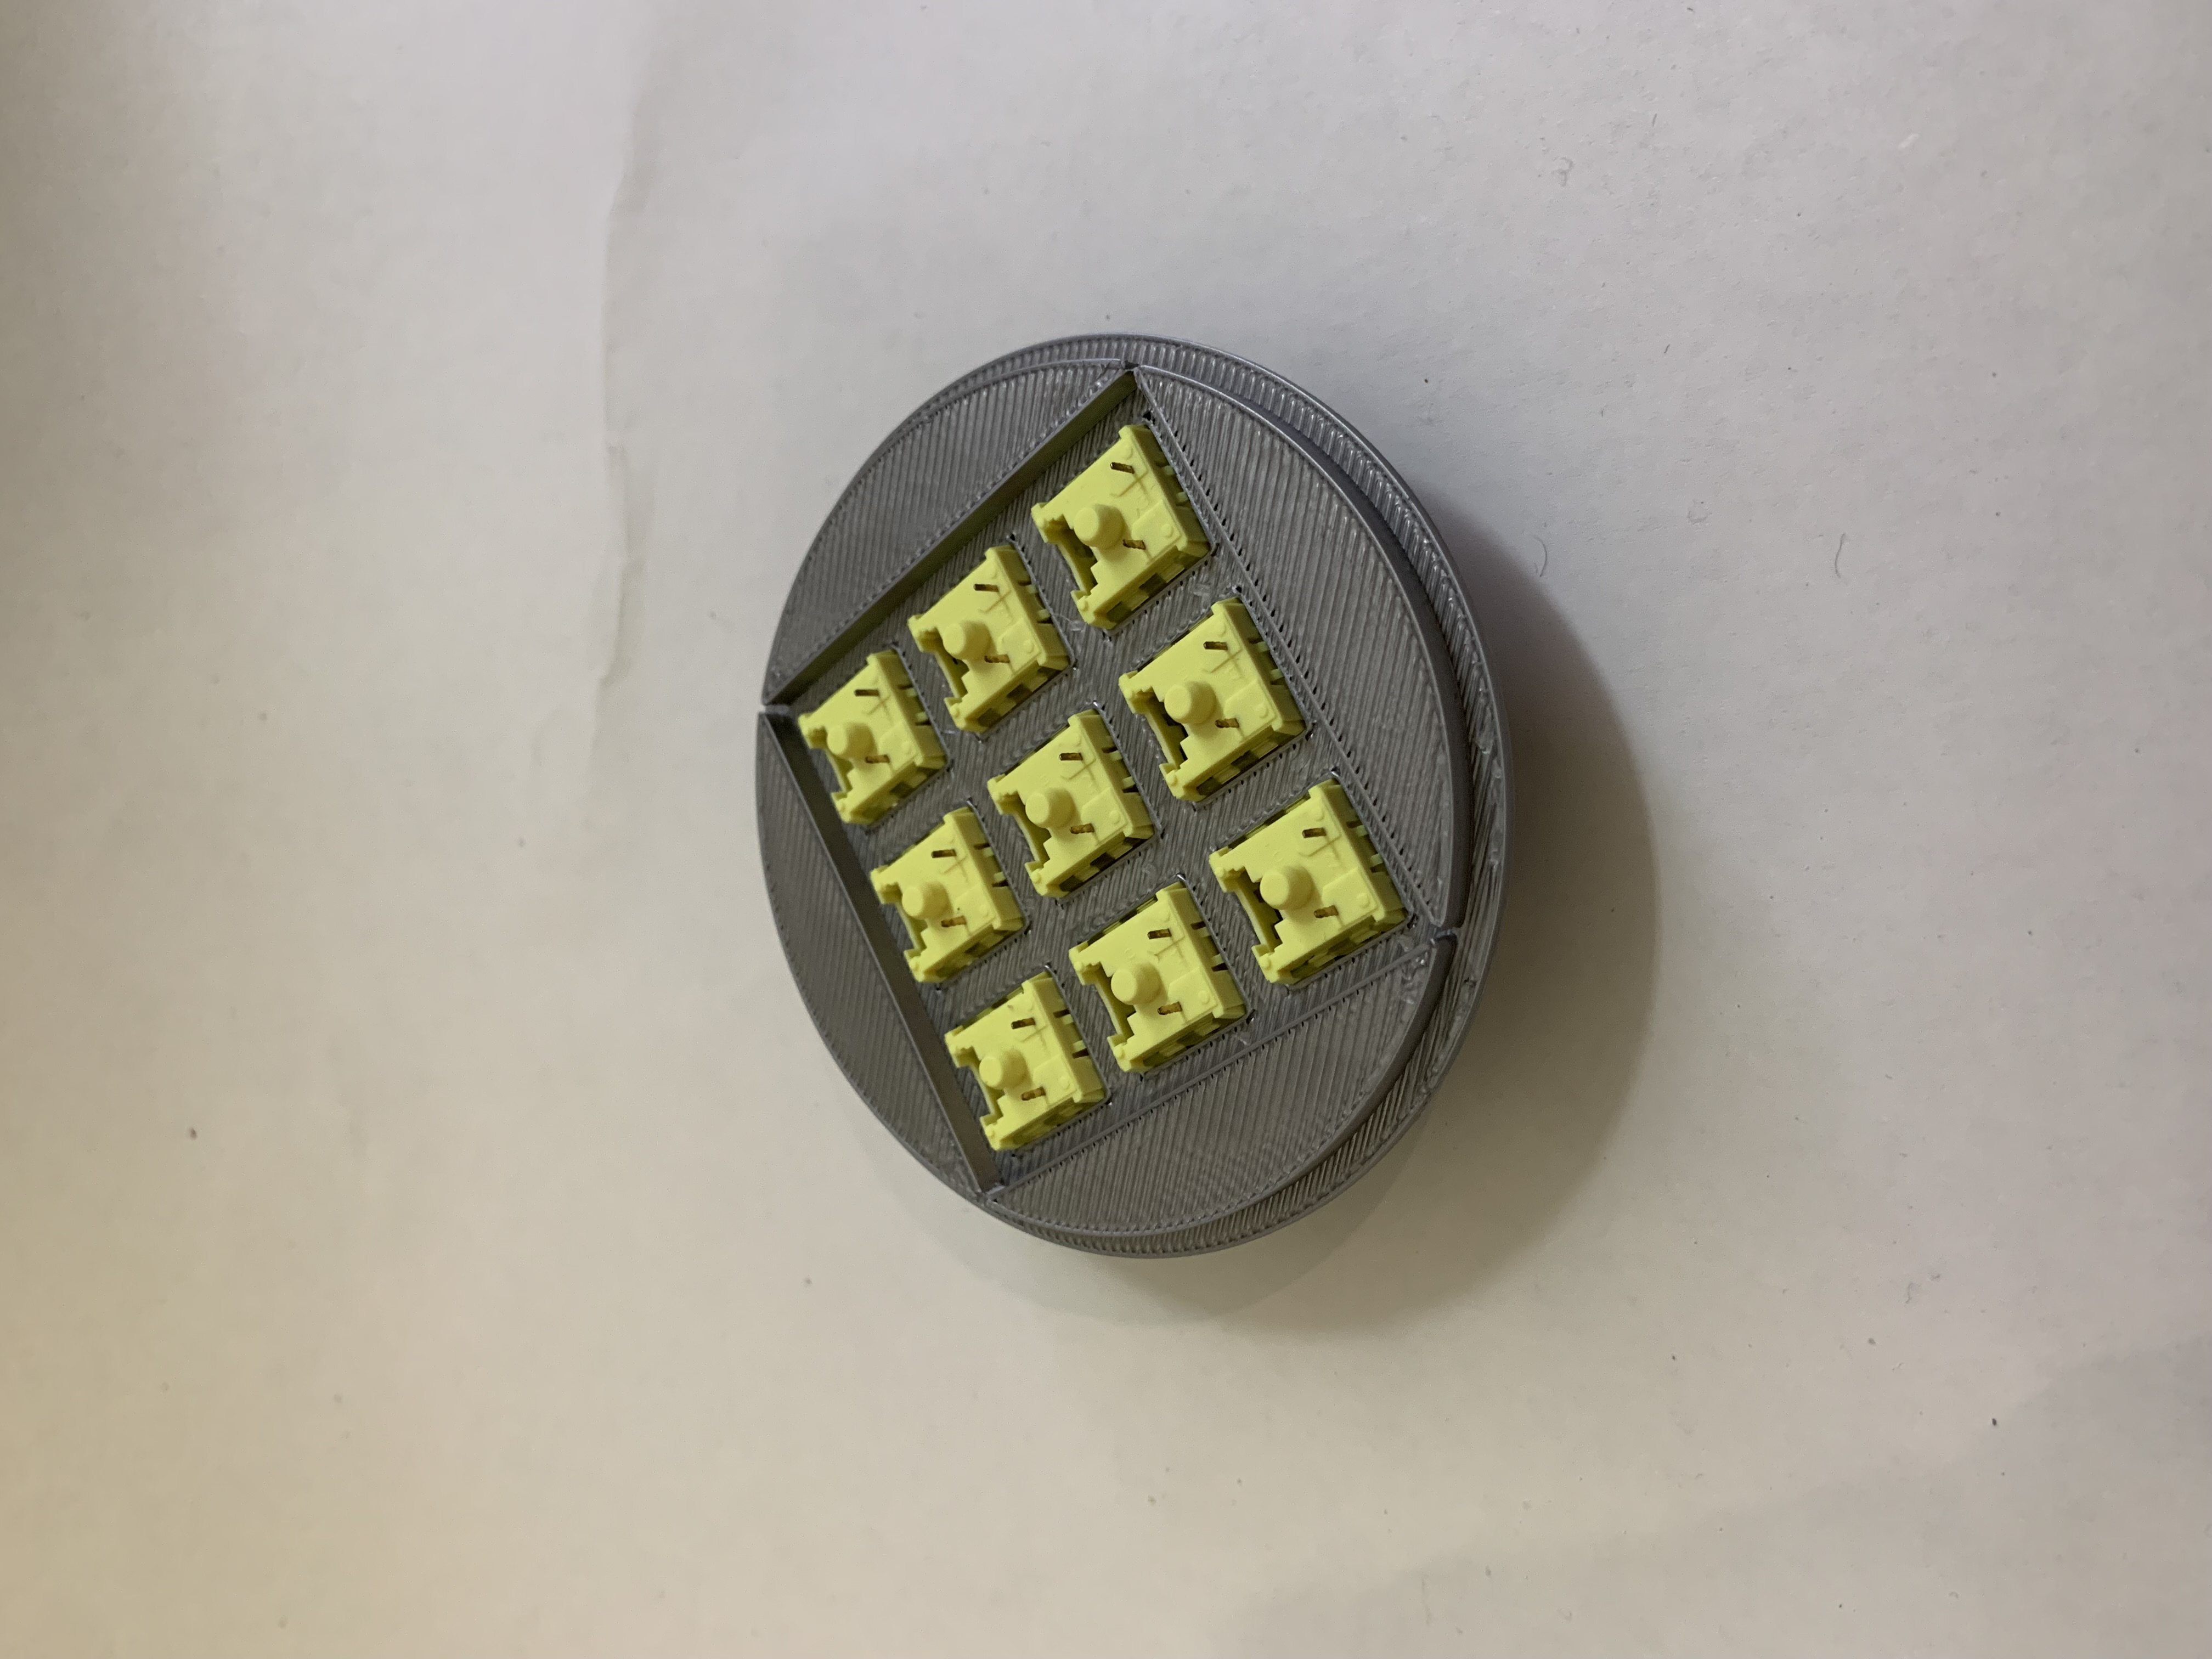
- You can either add the PCB mount with the plate mount or simply only use the plate mount. If you plan to only use the plate mount, then skip to step 3
- Attach a switch to any slot on the plate, then carefully attach the PCB mount to the bottom of that switch so that the plate and PCB mount align
- Attach the other switches to complete
- Mount onto the top of the cardboard spool
No PCB mount:
PCB mount:
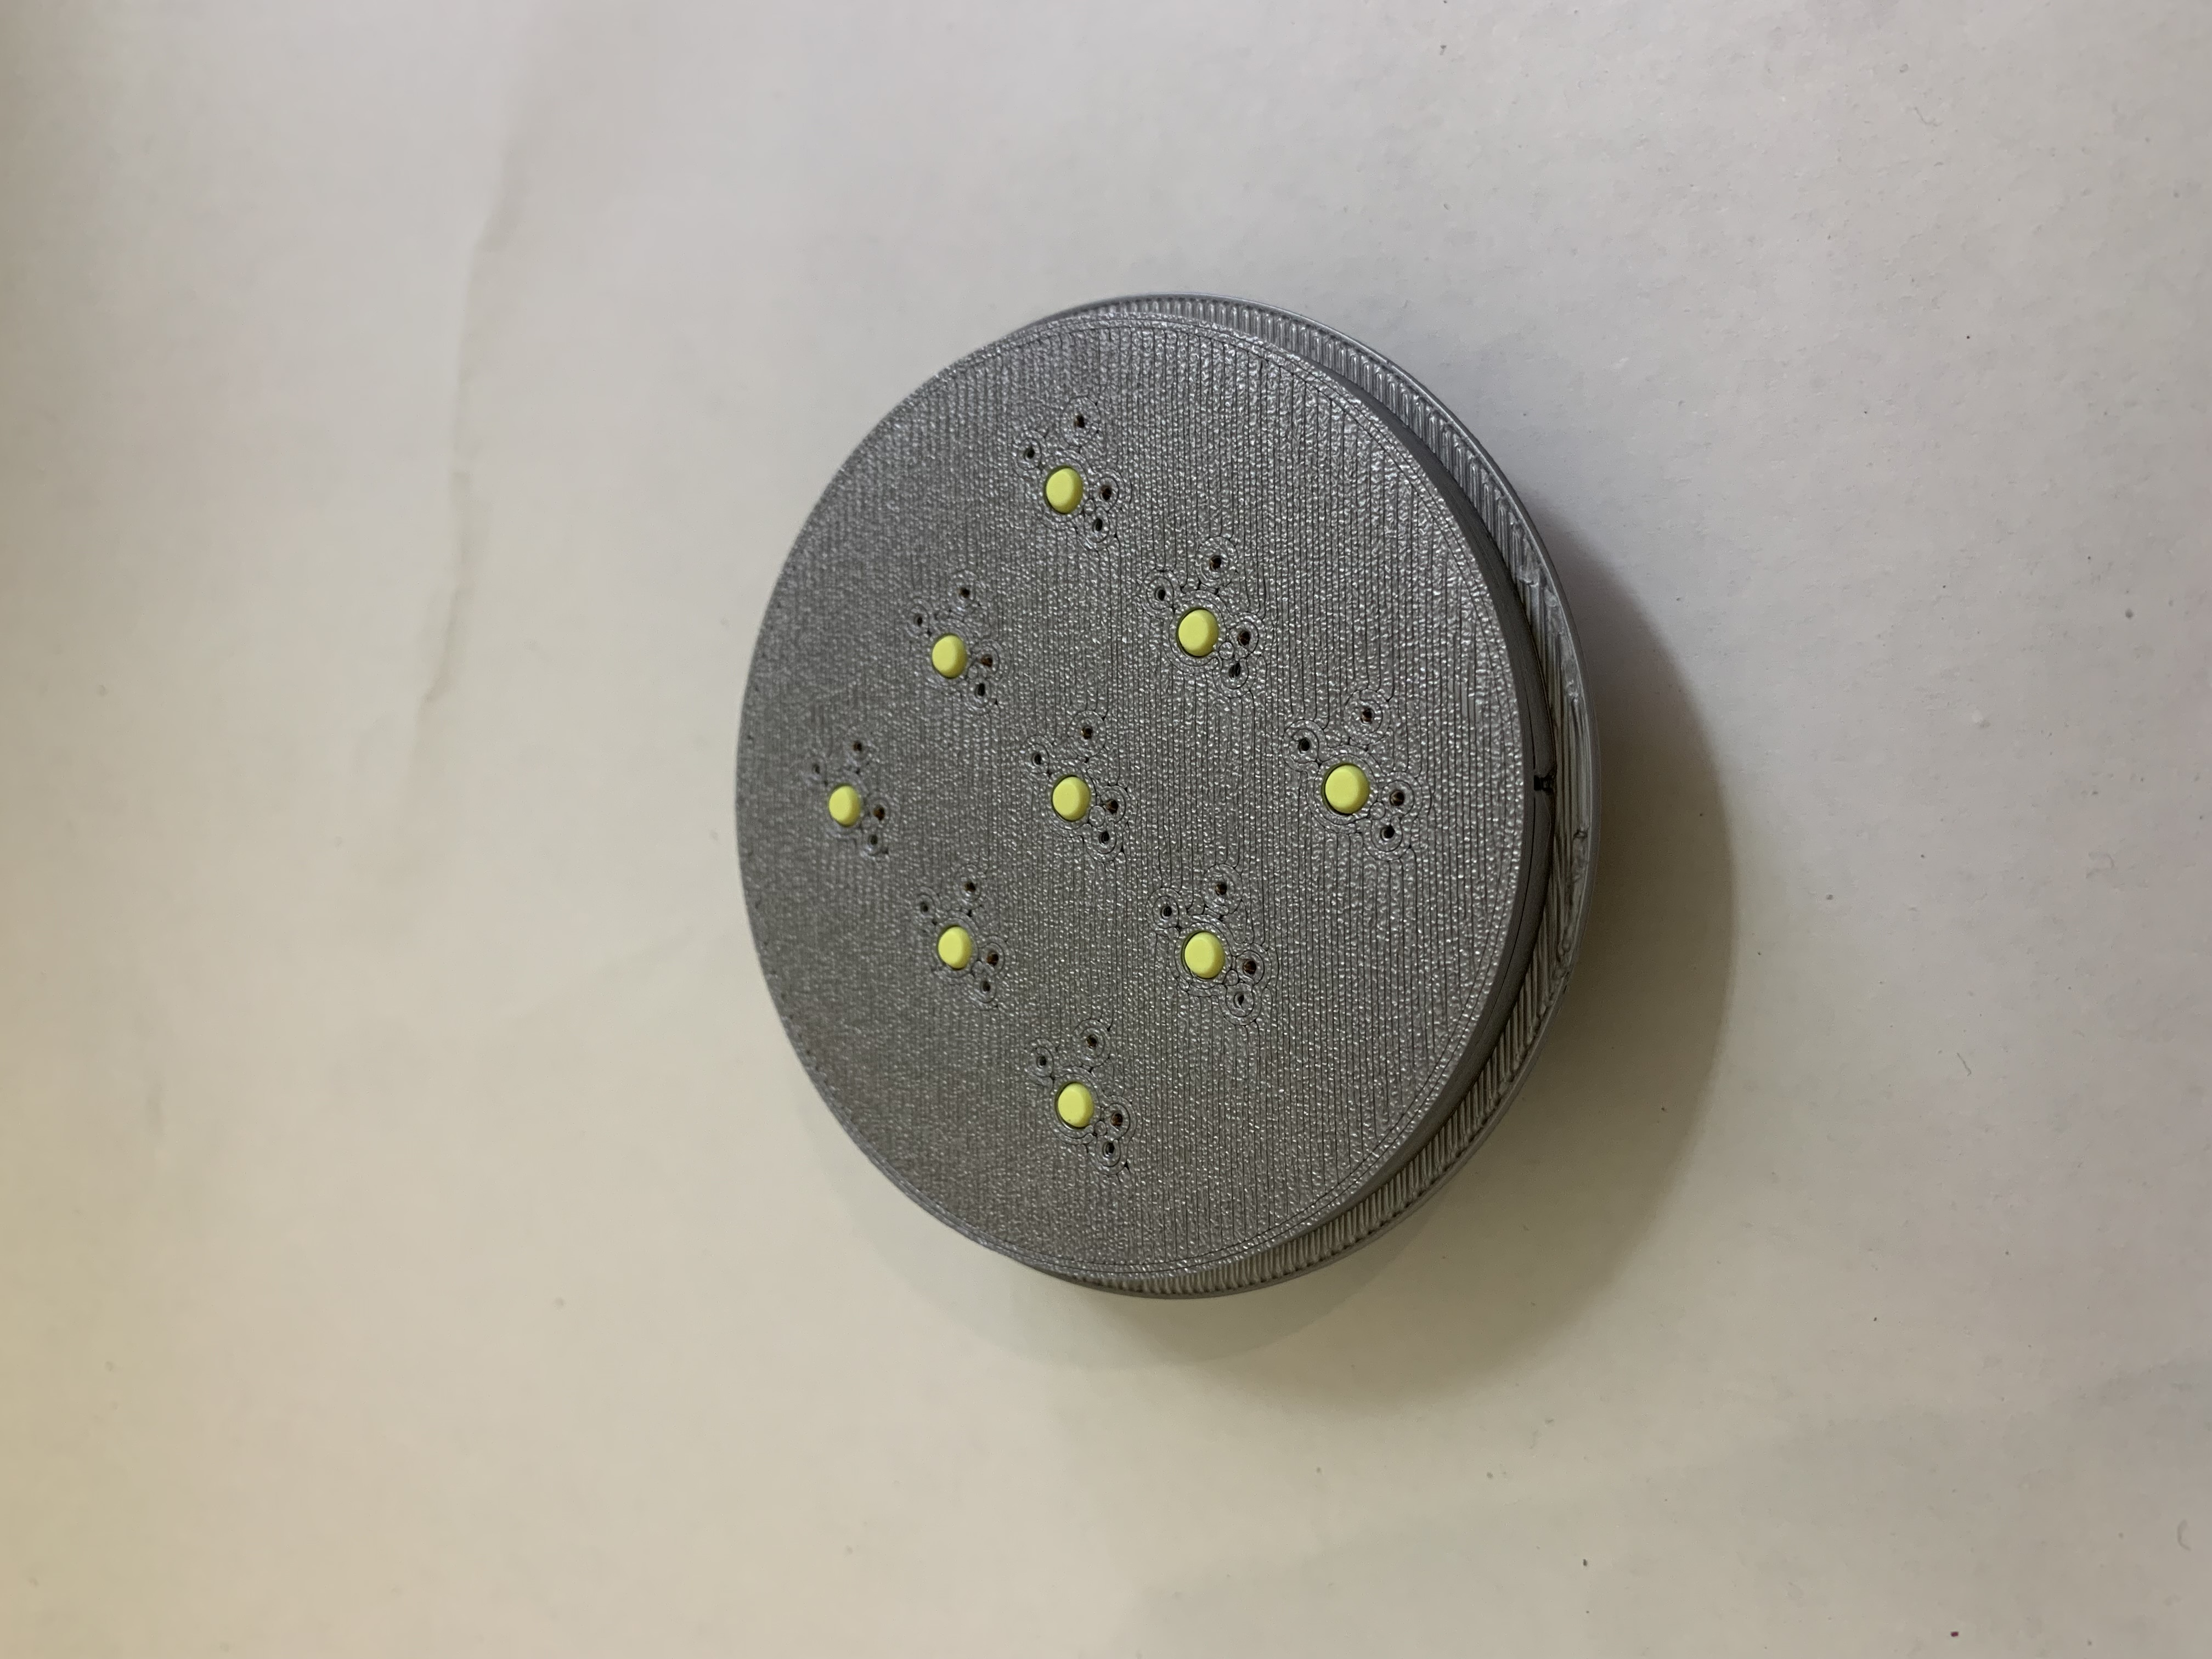
Switches: Akko v2 Cream Yellows
Custom Designing(large mechanical keyboard switch)
Although the large mechanical keyboard switch “keycap” is not parametric/directly customizable, I've included a diagram of the MX stem stabilizer that mounts attachments to the switch, allowing you to customize the attachment of the switch! I'll also include a sketch file in the format of a .dxf file(2D sketch) for reference.
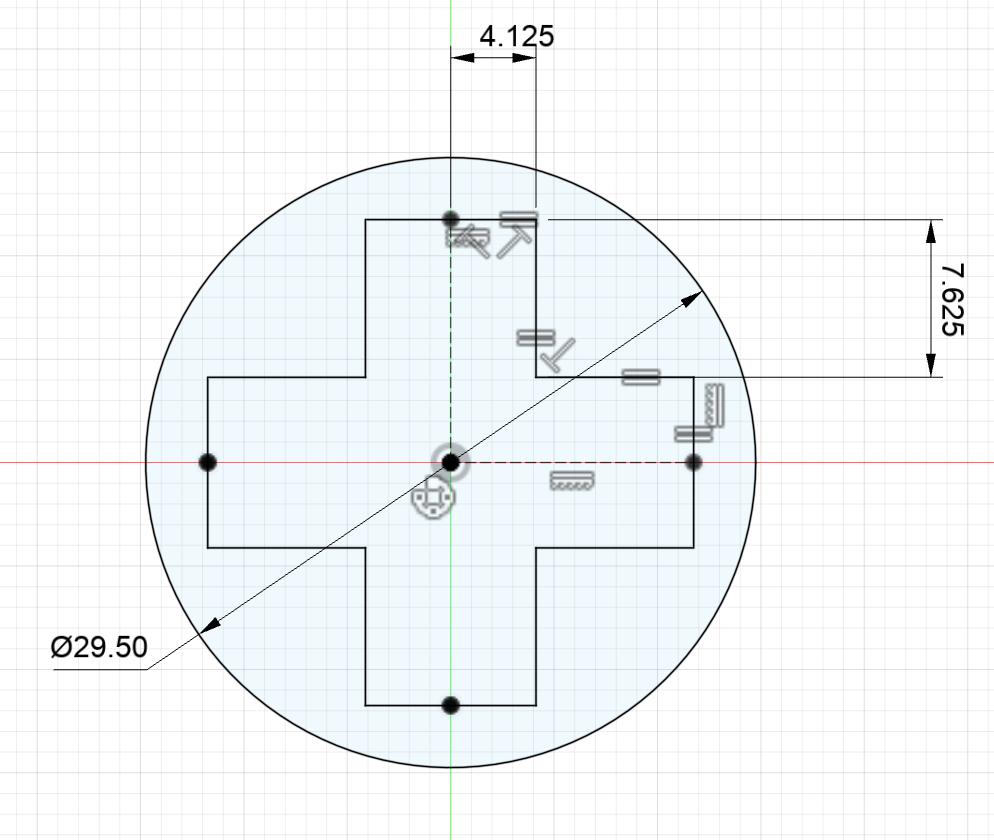
Units are in MM, and the sketch is symmetrical along the X and Y axis.
Let me know in the comments thoughts & suggestions for future improvements/additions.
Happy Printing!
Spool Mechanical Keyboard Switch

Publicado em 19 de mar de 2025
Gostou deste modelo? Crie uma conta grátis para salvar seus favoritos e voltar a eles depois.
Criar conta