Você está no 3DFinder
Buscamos em Thingiverse, MakerWorld e Printables ao mesmo tempo para te dar o melhor de cada uma.
Descrição
WIND CHIME - FULLY CUSTOM!
Here I present the fully custom wind chime. LETS FIND THE PERFECT ONE TOGETHER!
I've upload an example I like how it sounds, but feel free to upload your own print profiles.
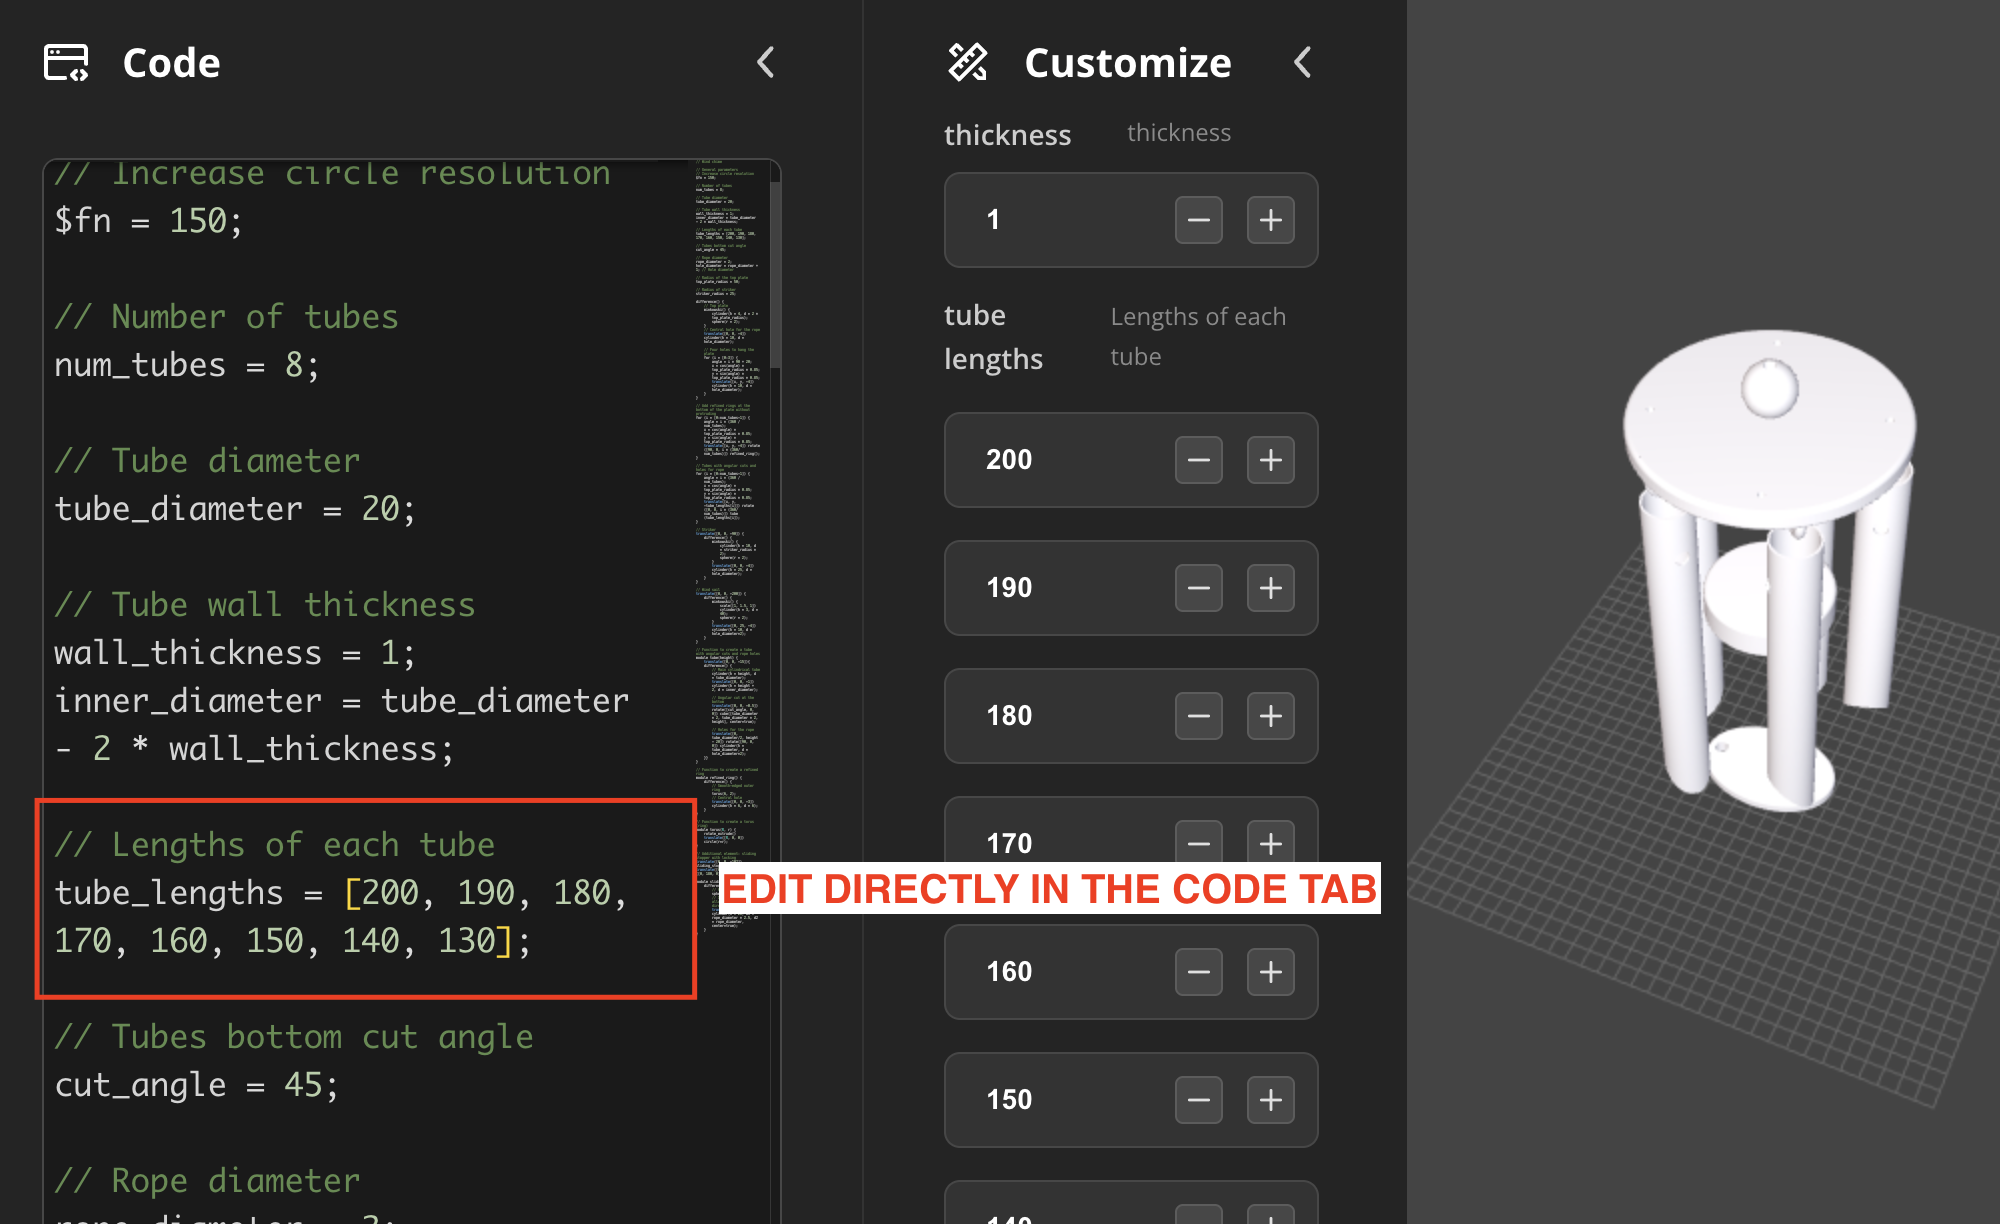
Tip to add/remove number of tubes:
Edit the array of tube lengths directly in the Code tab. If you are not familiarise with Arrays here you have a tutorial.
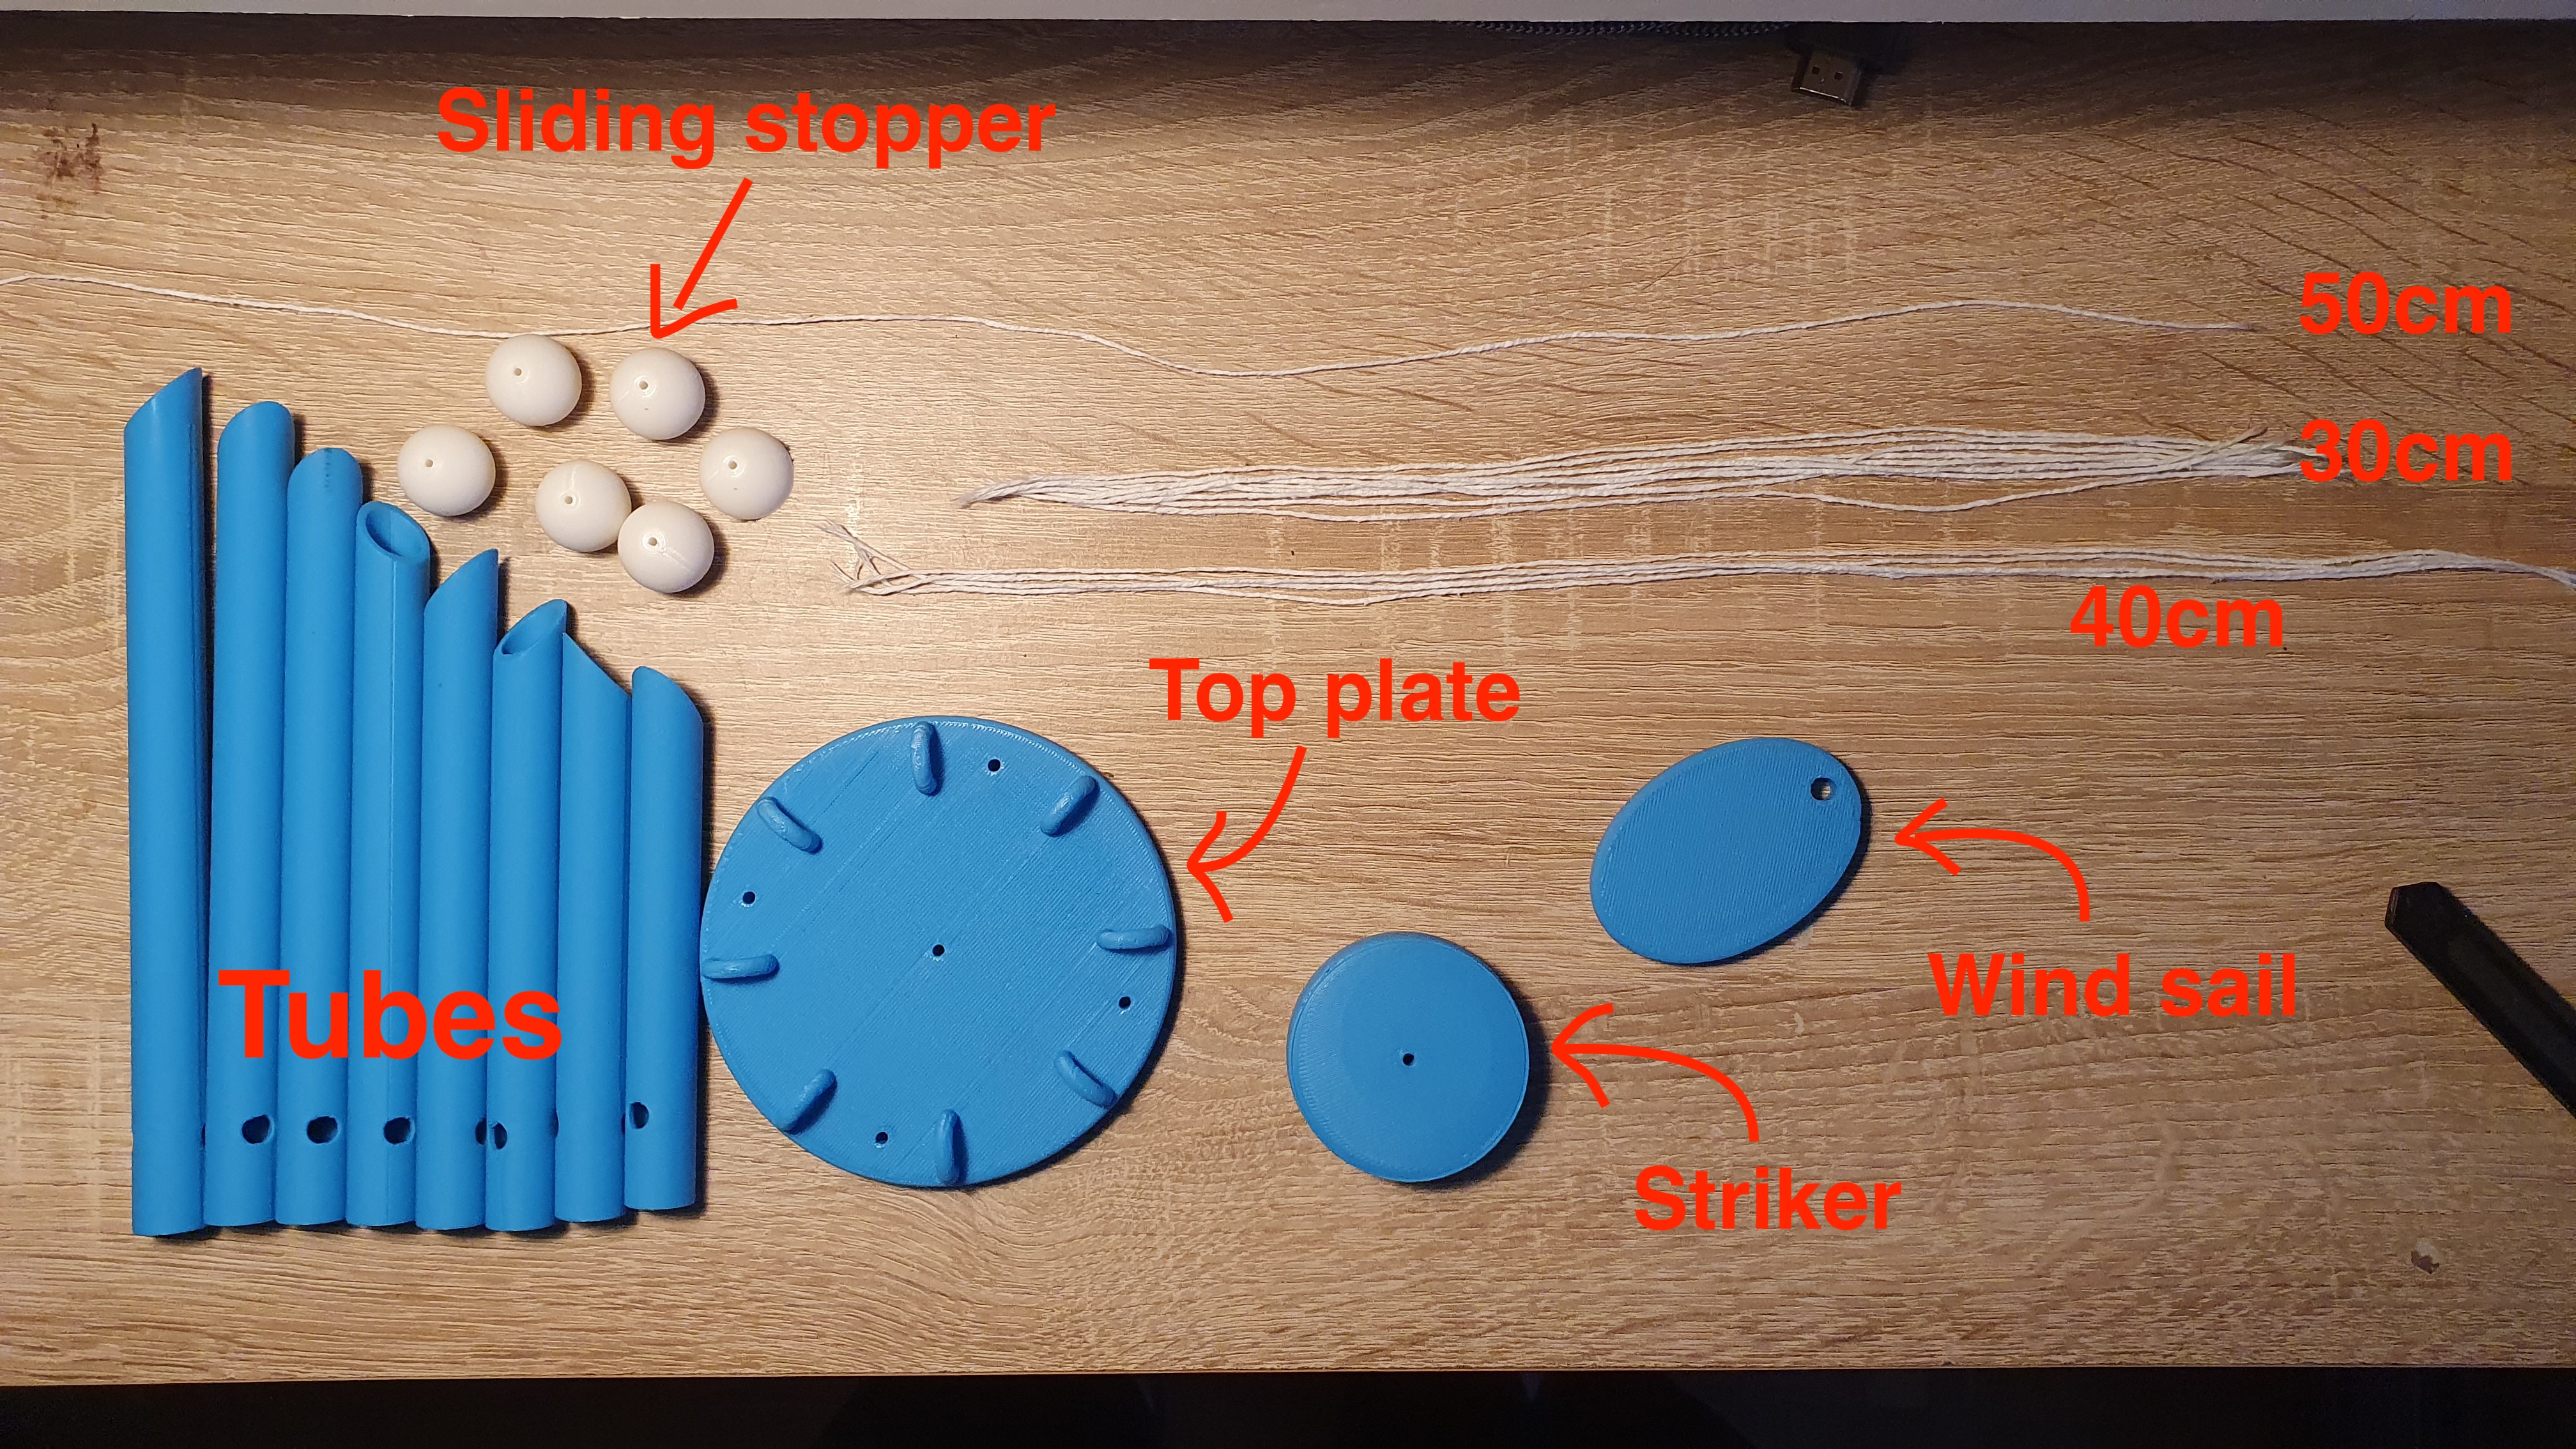
How I've assemble it
STEP 1: PREPARE PARTS
- Tubes
- Top plate
- Striker
- Wind sail
- Sliding stopper (x6)
- 30cm ropes (xnum_tubes)
- 40cm ropes (x4)
- 50cm rope (x1)
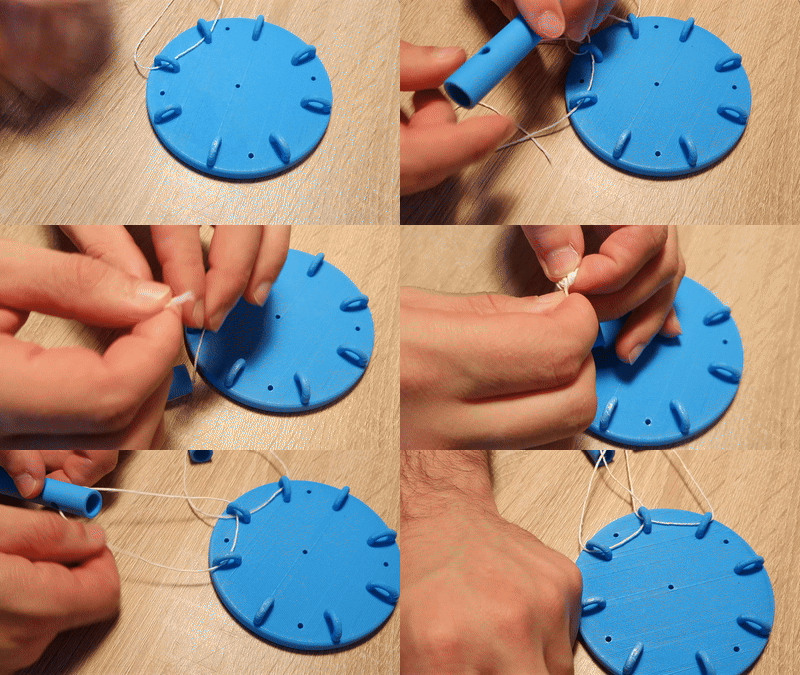
STEP 2: Join Top plate to Tubes
Use simple knots through rings and Tubes holes with 30cm ropes and hide knots inside the tubes. I've pass the rope through 2 rings each but you can try with 1.
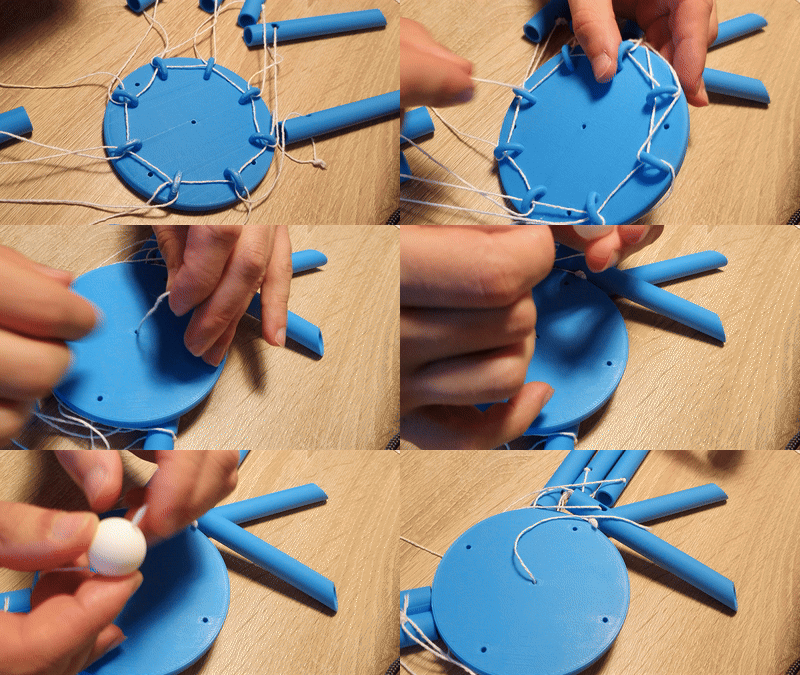
STEP 3: Top plate first knot
Use the Sliding stopper and the 50cm rope to make the top knot in the top plate, use as knots as you need to stop the rope.
STEP 4: Join the Striker
Use knots in the desired lenght of the big rope and the Sliding stopper to joint the Striker to the structure.
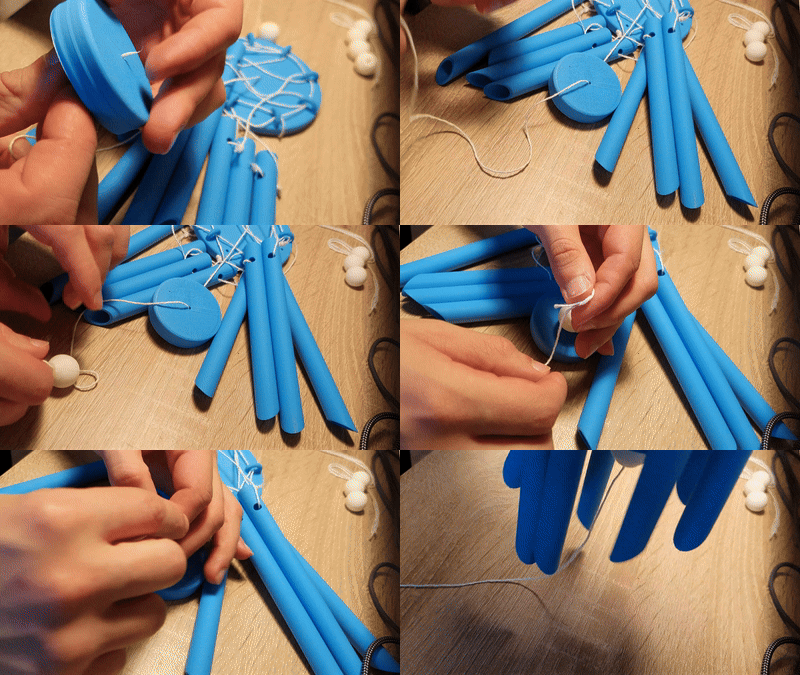
STEP 5: Join the Wind sail
Pass the 50cm rope extreme through the Wind sail and do a simple double knot to fix it.
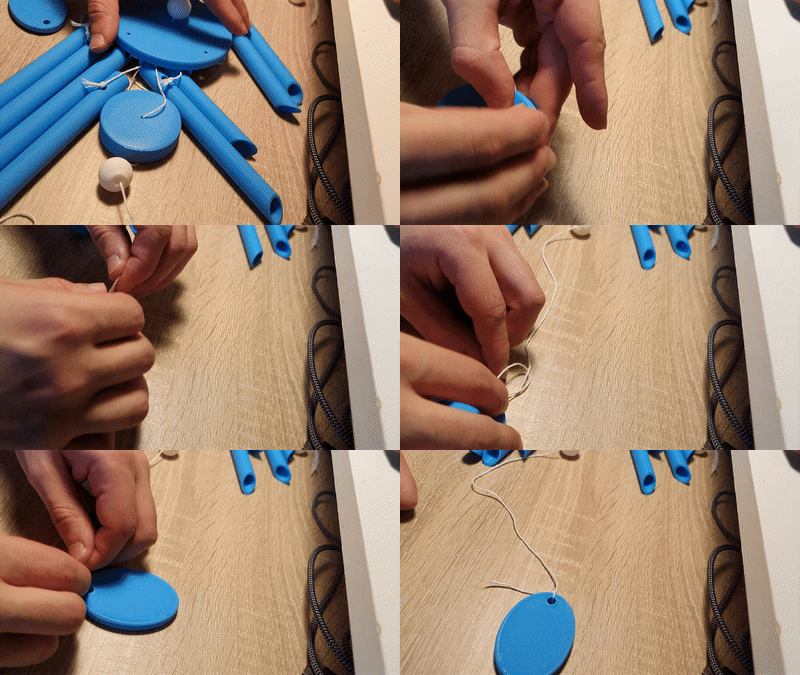
STEP 6: Pass the 4 40cm ropes through the top plate
Use the Sliding stoppers to fix the 40cm ropes to the top plate through the 4 holes
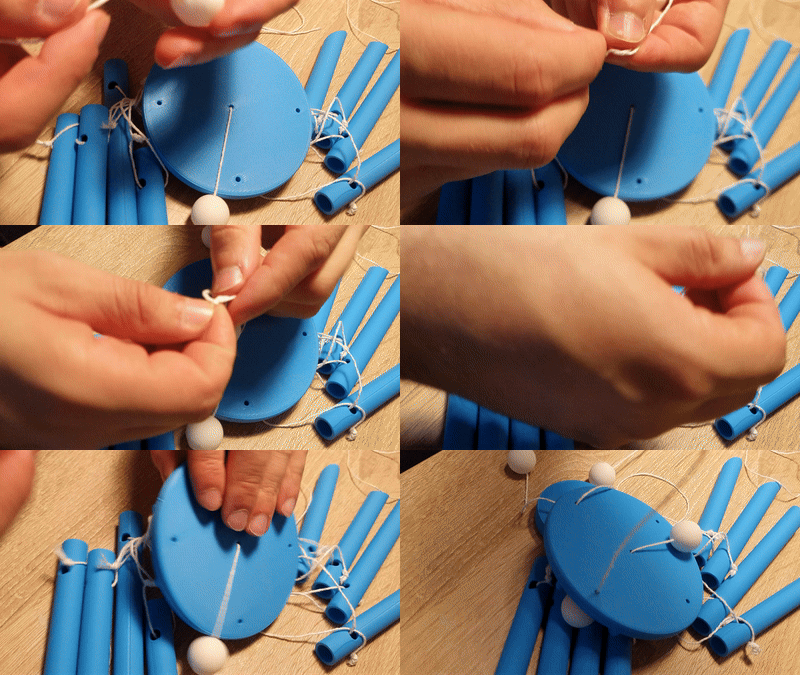
STEP 7: Make the last knot
Take the 4 40cm ropes already fixed to the Top plate and try to take a equidistant point to join them and in that way stabilise the plate horizontally.
Then make a knot in that point with the 4 ropes at same time.
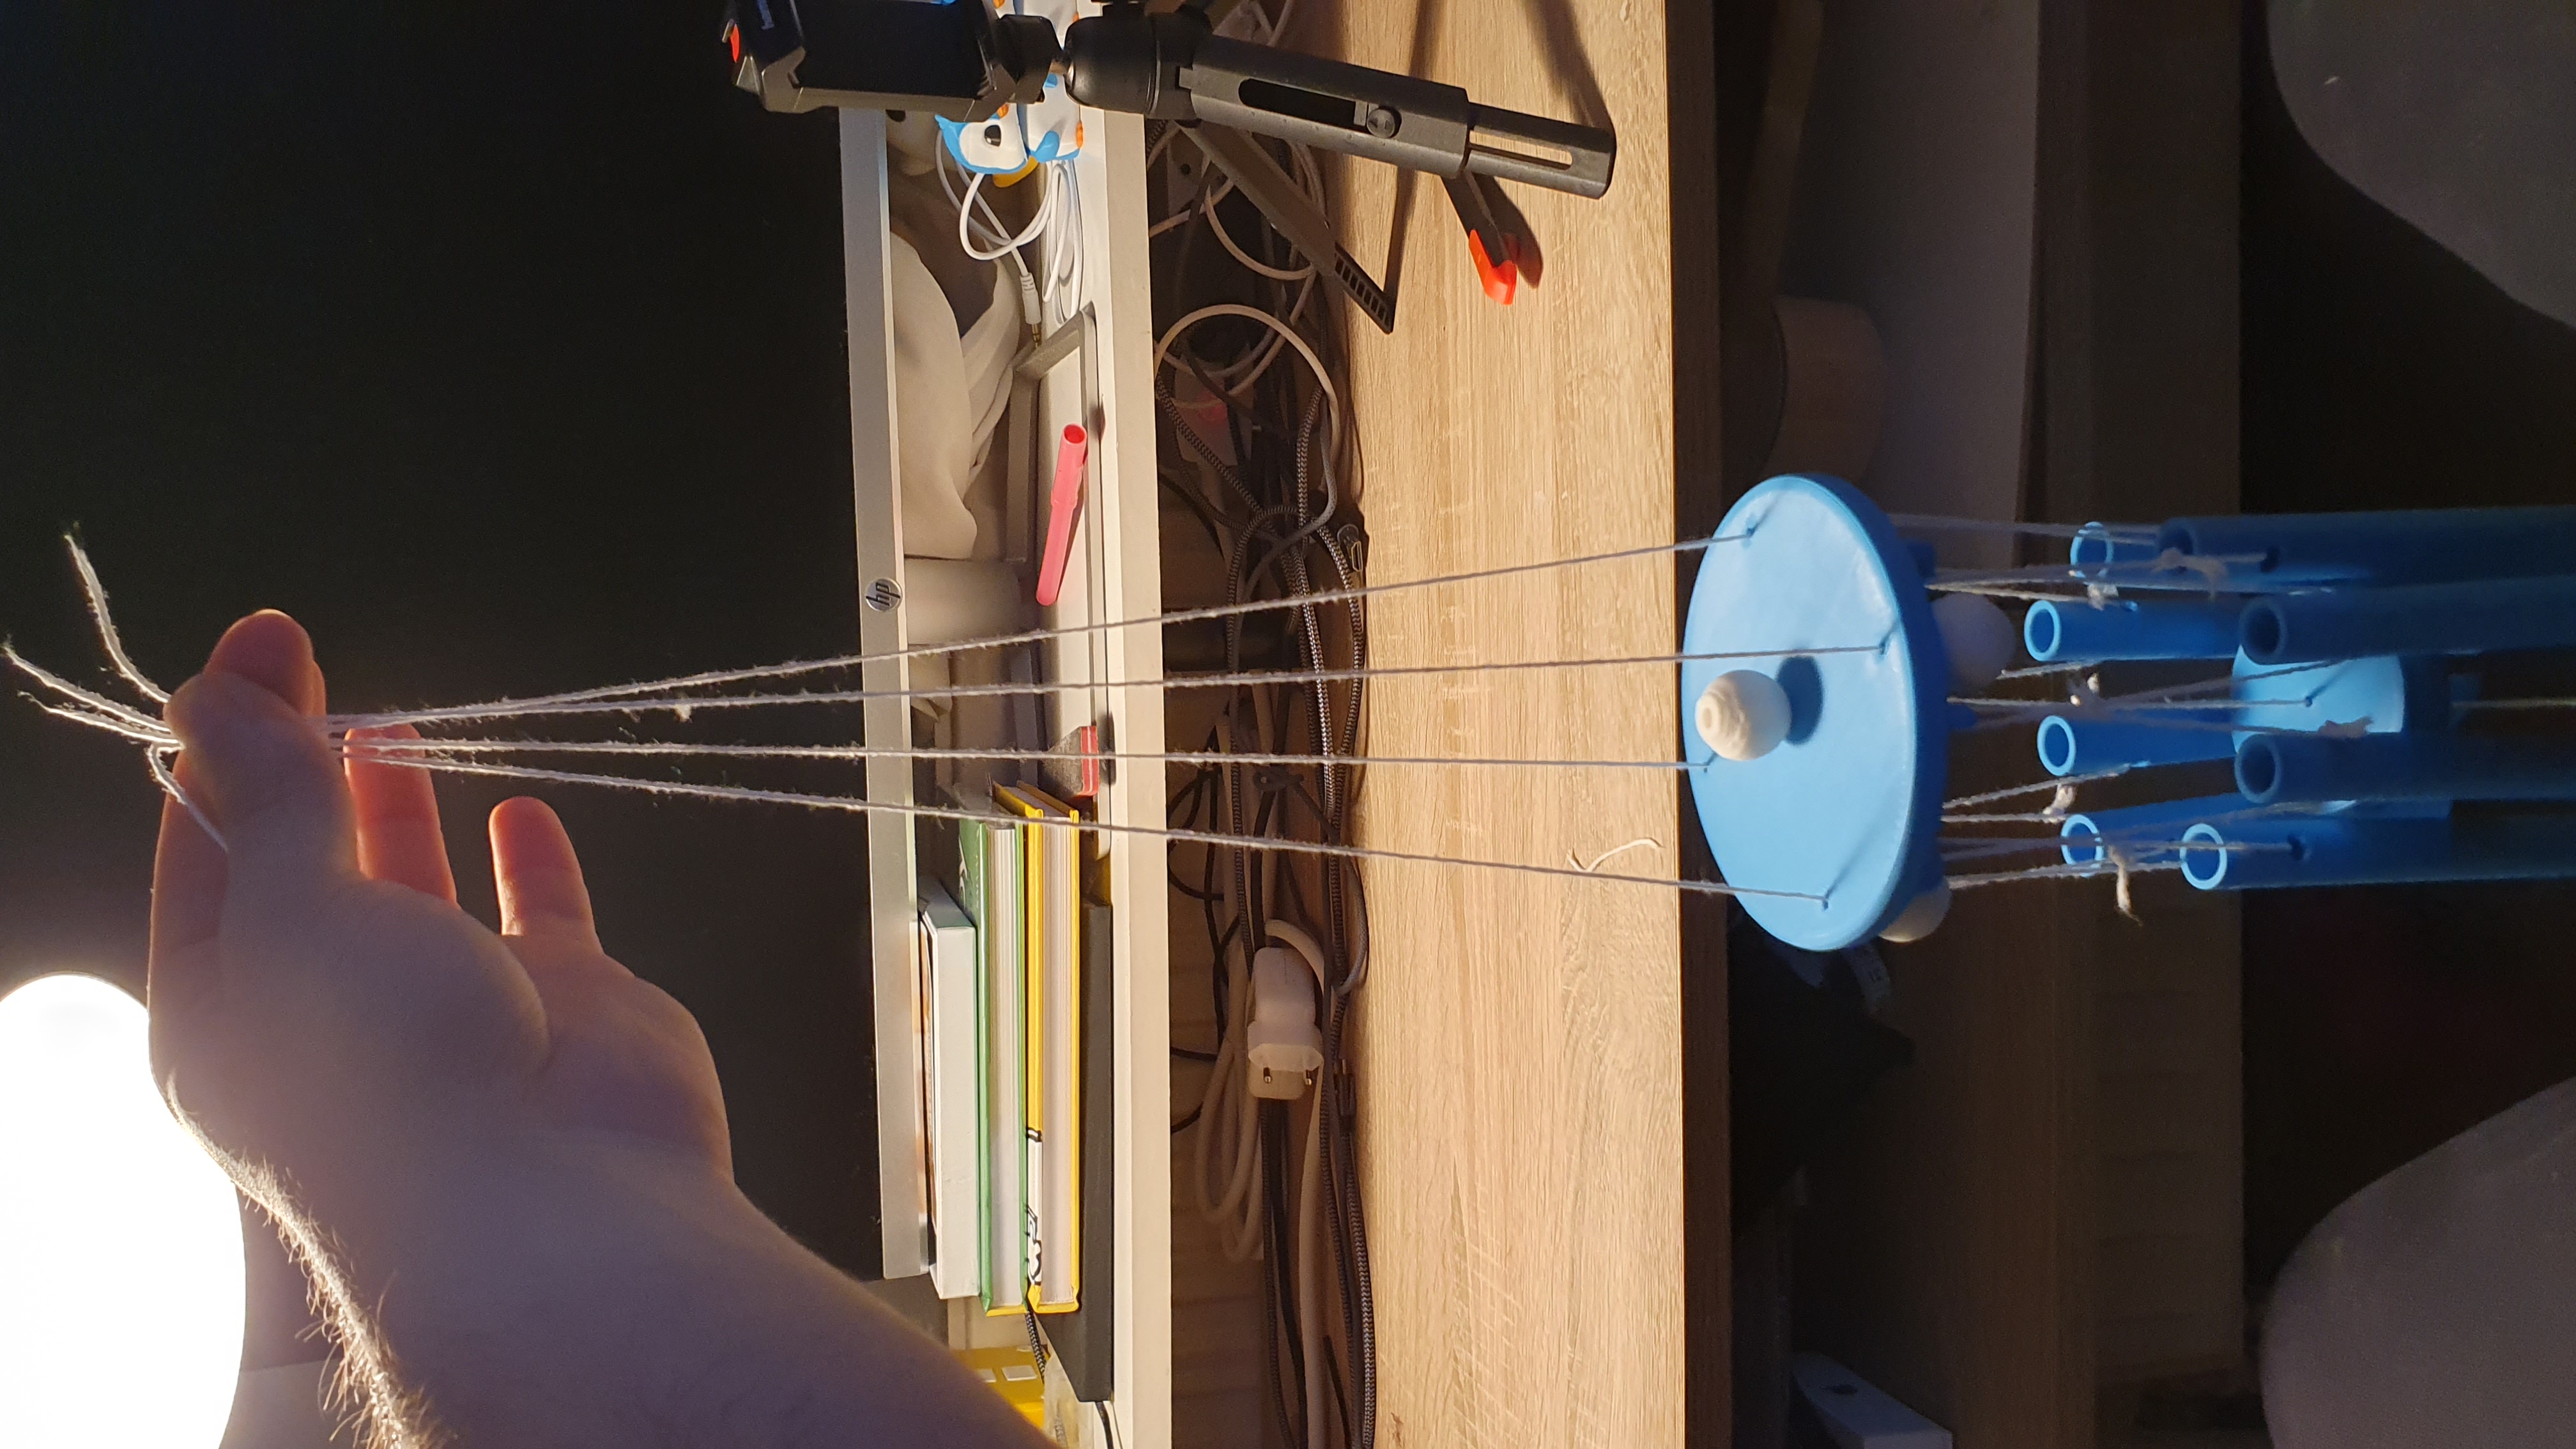
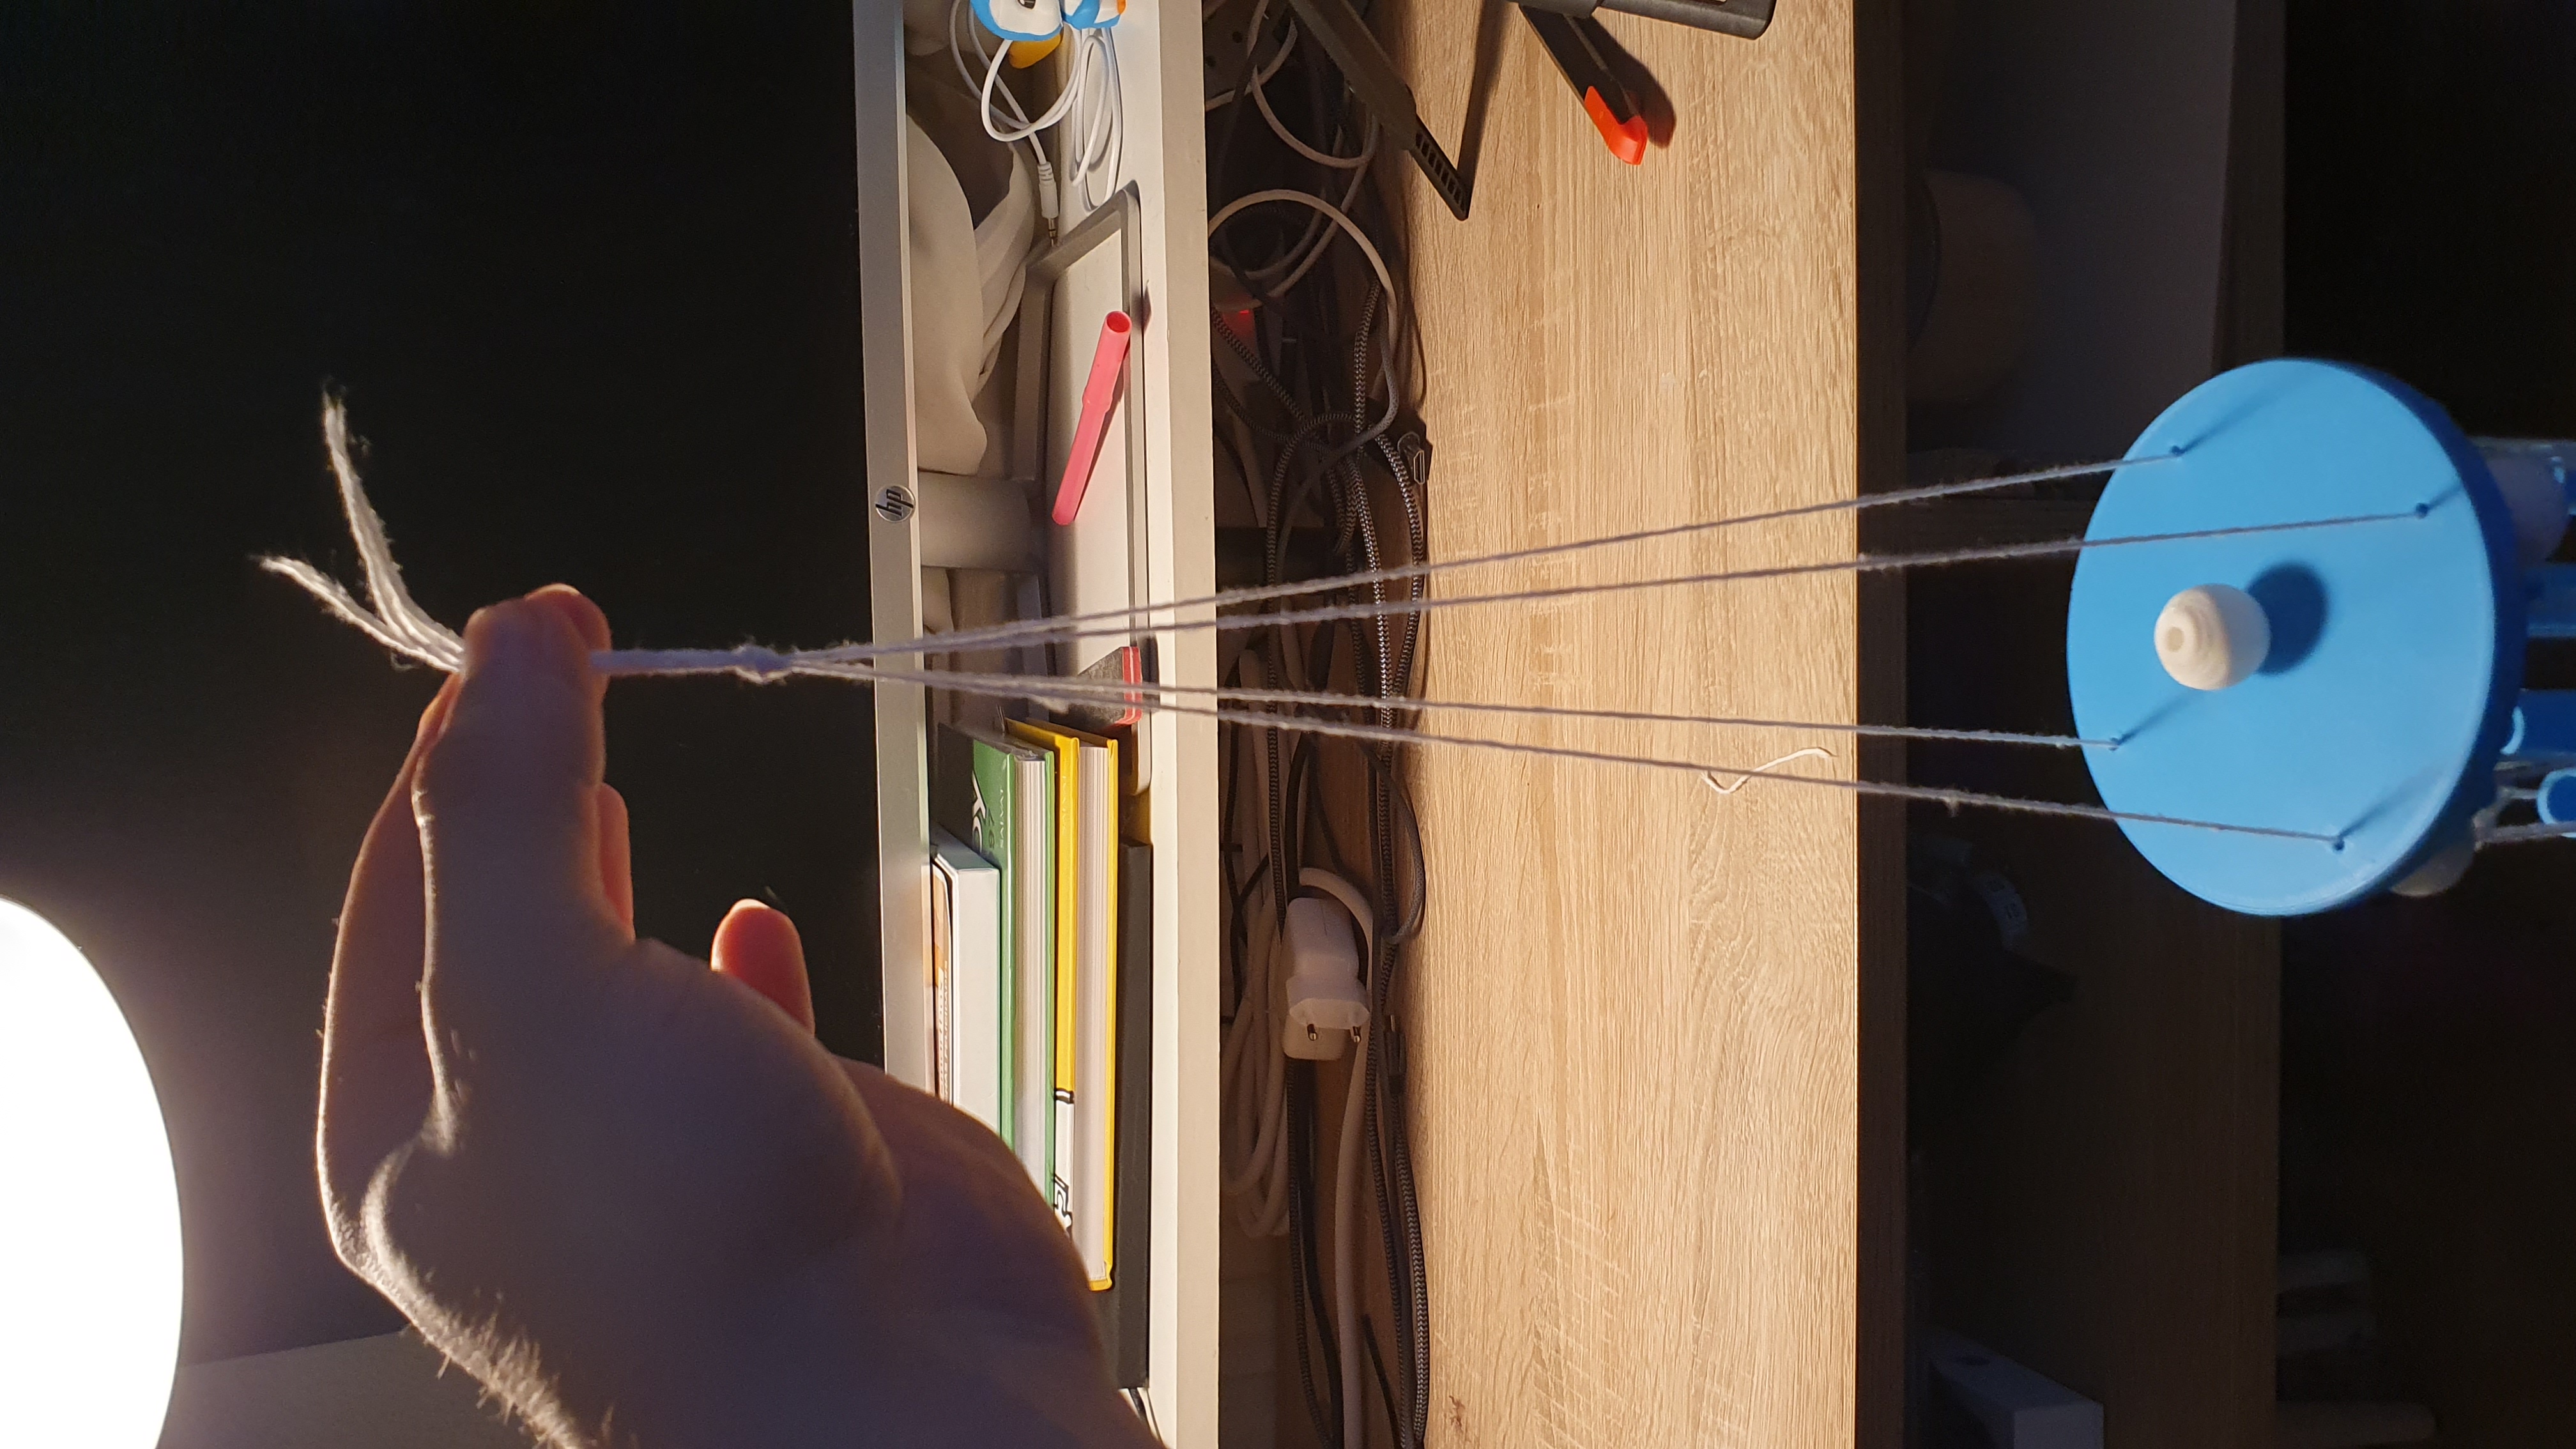
Thats it! Ready to hang it wherever you want and enjoy the relaxing sound

Gostou deste modelo? Crie uma conta grátis para salvar seus favoritos e voltar a eles depois.
Criar conta