Você está no 3DFinder
Buscamos em Thingiverse, MakerWorld e Printables ao mesmo tempo para te dar o melhor de cada uma.
Descrição
This is NOT meant to replace a traditional cast-iron arbor press. It will be significantly weaker than one.
I often struggled with inserting magnets, bearings, and other tight-tolerance parts into my prints. Instead of buying an arbor press, I decided to design and 3D print my own!
This 3D-printable arbor press is easy to assemble and perfect for lighter pressing tasks, such as inserting magnets and bearings. The majority of its components are 3D printable, with only a few additional hardware pieces require. M screws, washers, heat-set inserts, and optionally, dowel rods for one of the gear variations.
The fixtures, press plates, and handle will be open source! You can find the model page here so you can design your own fixtures, press plates, and handles to share with everyone! I have the models for each with a blank template for the pressing fixtures so you can easily upload them to your CAD software of choice and edit it! I can't wait to see the tooling you guys come up with!
Non-3D printable parts needed:
- 7 M3 Heat-set inserts
- 4 M5 Heat-set inserts
- 7 M3 washers
- 4 M5 washers
- 4 M3x16 bolts
- 3 M3x20 bolts
- 4 M5x20 bolts
- 3 3mmx40mm metal dowels (optional)
Notes:
I used the PETG support interface trick to print all these parts so they would have a smooth finish where the supports go. You can experiment with regular support methods. Results will, most definitely, vary.
I printed all of these parts with a higher infill % and wall loops to add a whole lot more strength. For even more added strength consider printing this out of PETG or ABS.
There are 2 variants for the retainer ring. I learned the solid retainer ring was very strong, but very hard to get around the slot in the gear. The 2nd variant features notches to make flexing it around the slot much easier.
You can adjust the resting position of the handle by removing the gear ram rack and turning the gear to various degrees and then re-attaching the gear ram rack/cover plate.
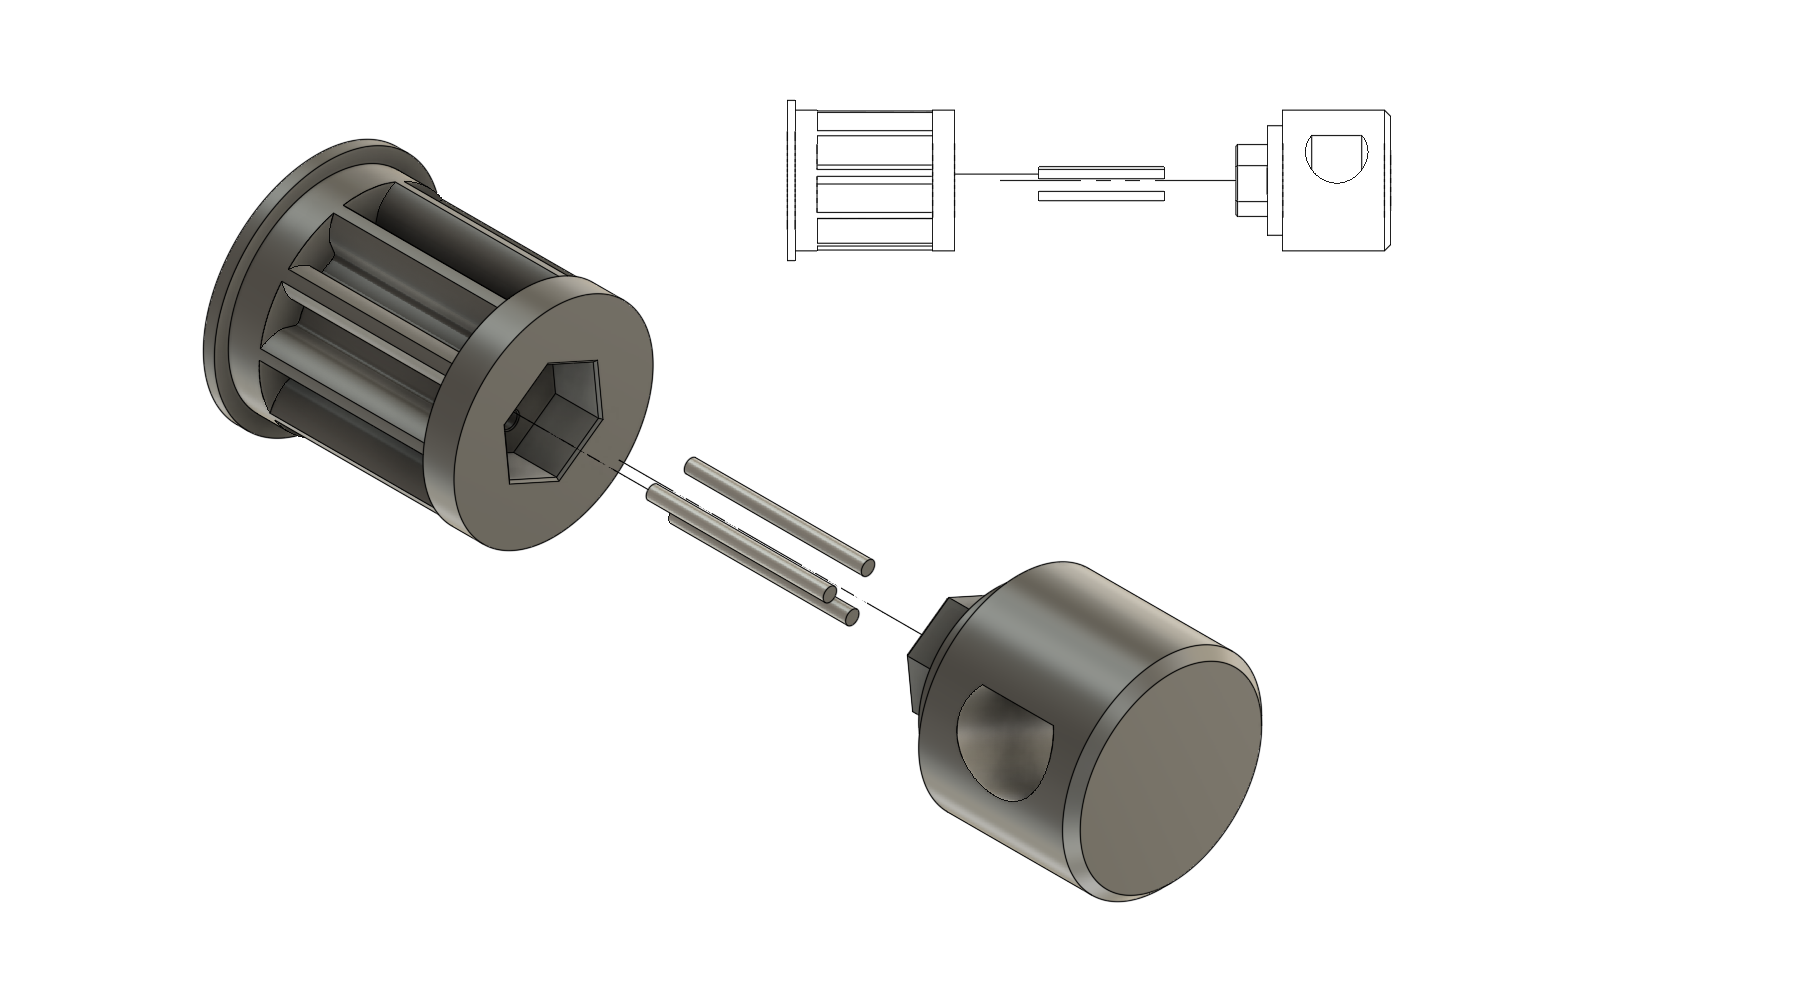
The gear is tricky to print, that is why there are 3 variants to it.
- Whole gear: I tried this one first, but my machine didn't purge all the PETG out of the line (my fault) and created a very weak layer of PETG mixed with PLA where the gear failed and snapped. Only do this method if you're absolutely confident your support methods will work.
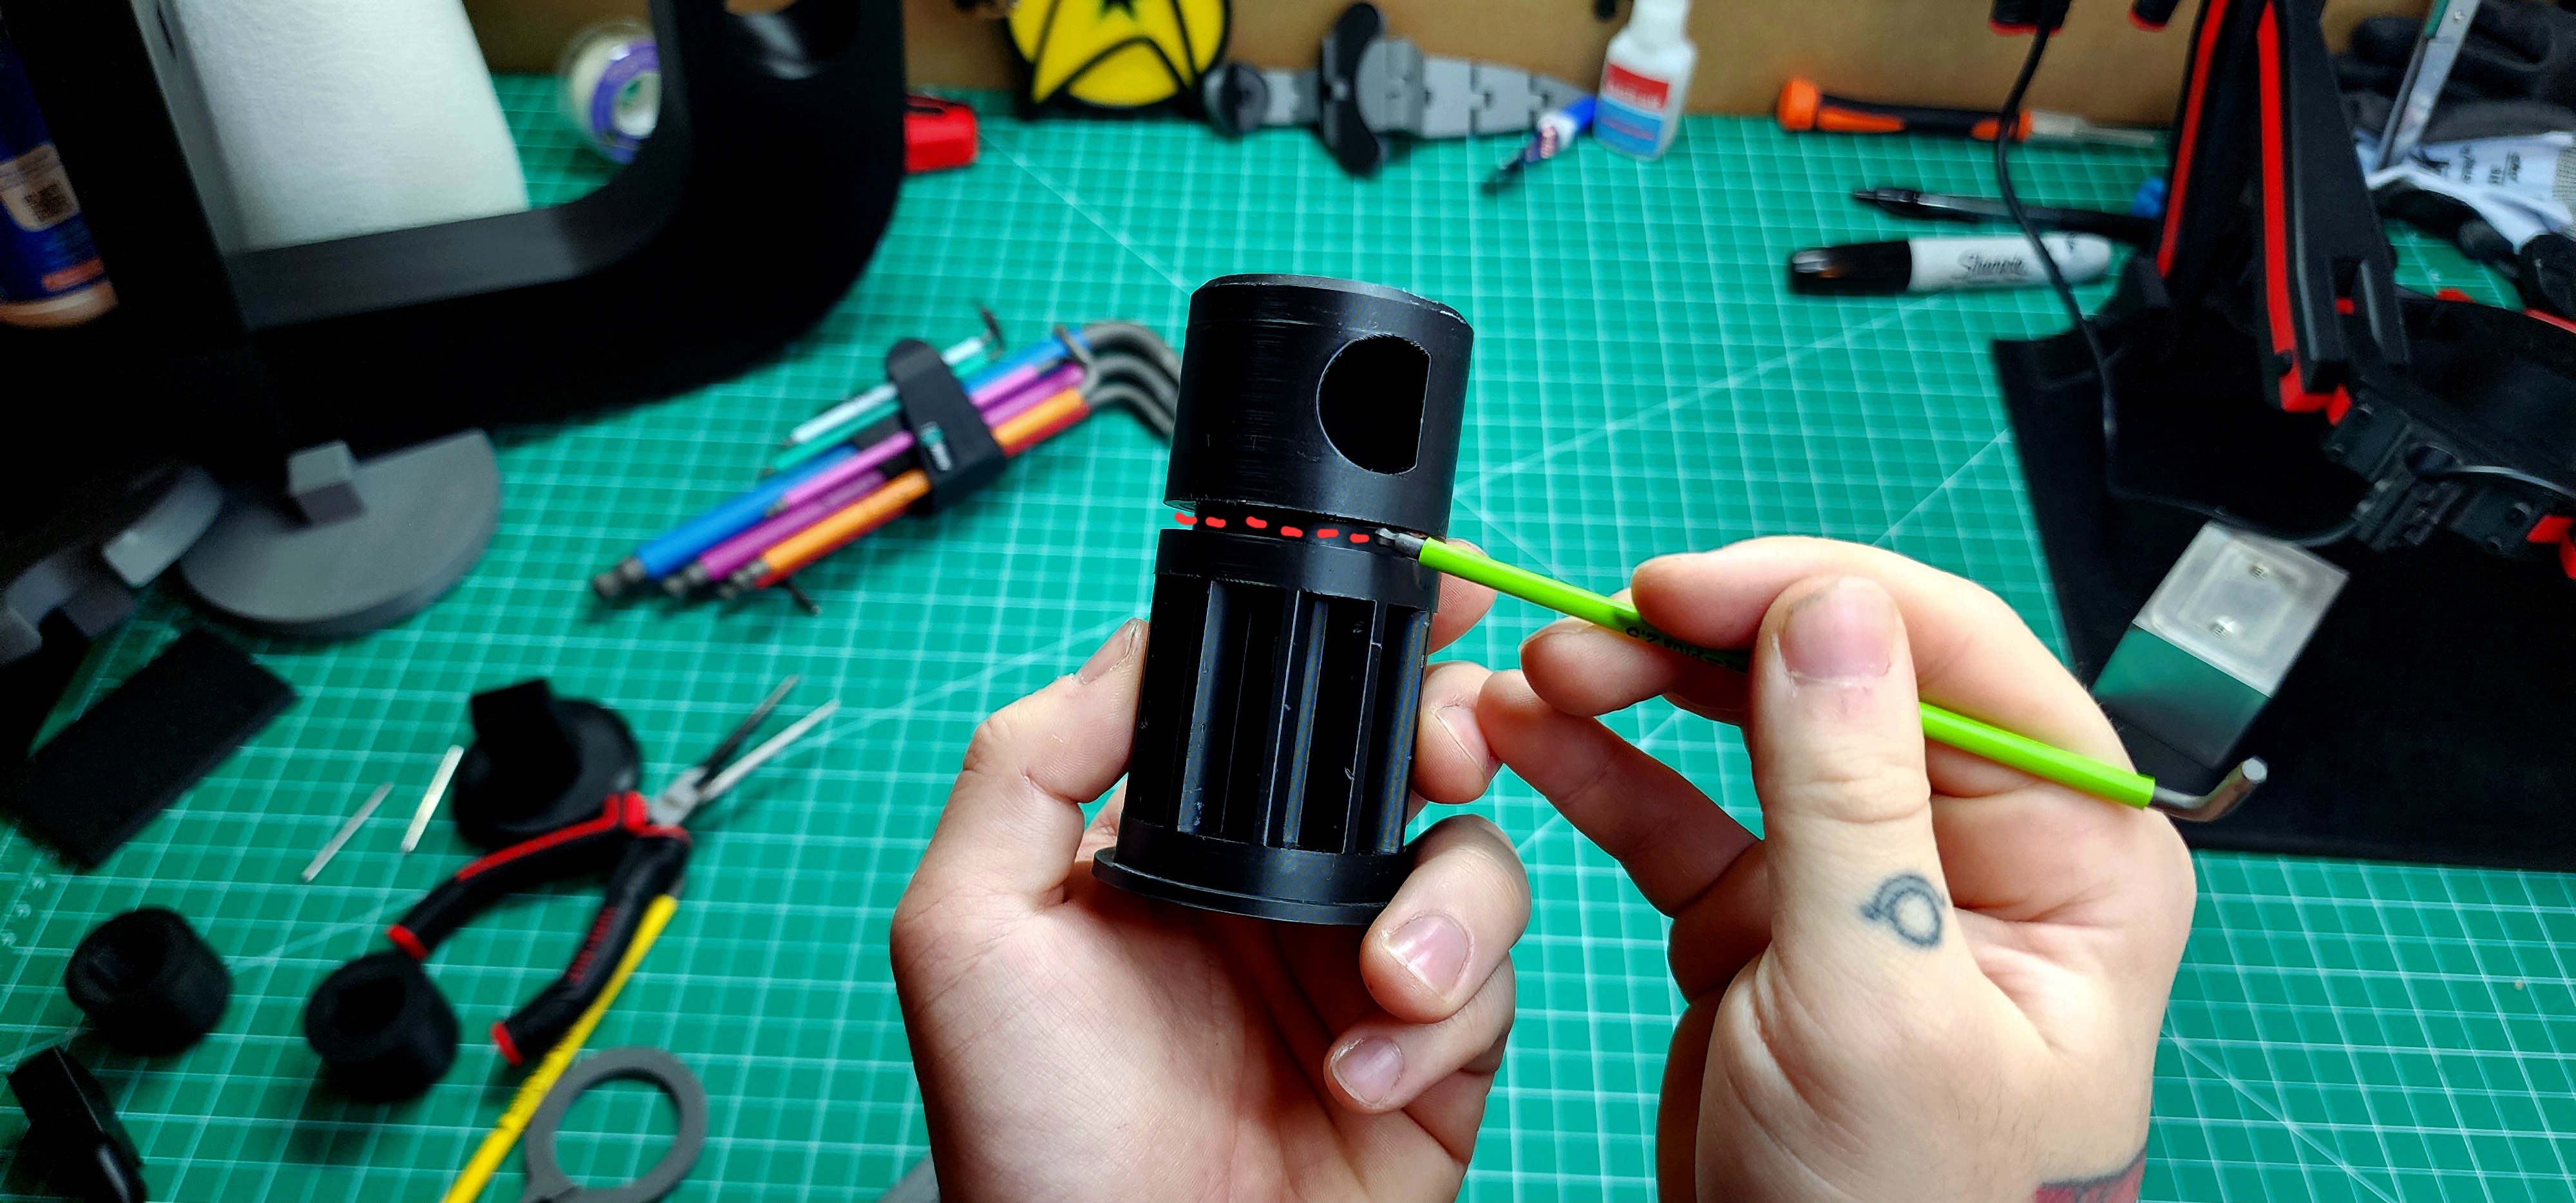
- 2 Separate gear parts: This uses a peg and hole method to so there is no weak point with the PETG interface layer. I suggest a very high infill % for these parts to add a lot of strength. Glue the parts together.
- 2 Separate gear parts with 3 40x3mm metal dowels: This is by far the strongest of the gears because it uses 3 metal dowel inside to reinforce the gear. Glue everything together.
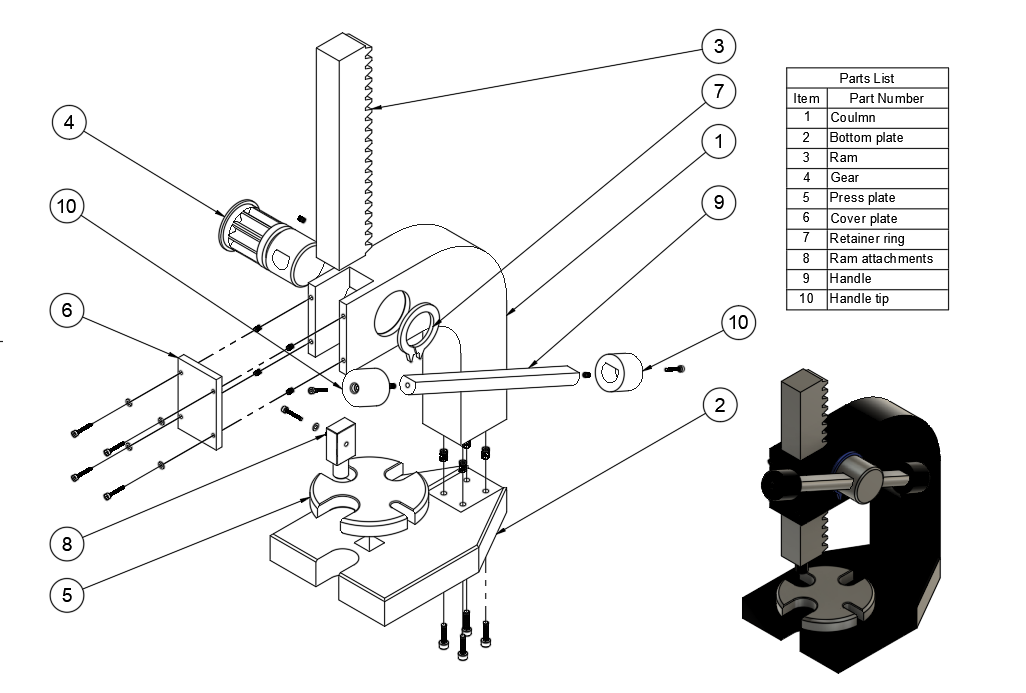
Assembly:
You can use this technical drawing for reference on assembly:
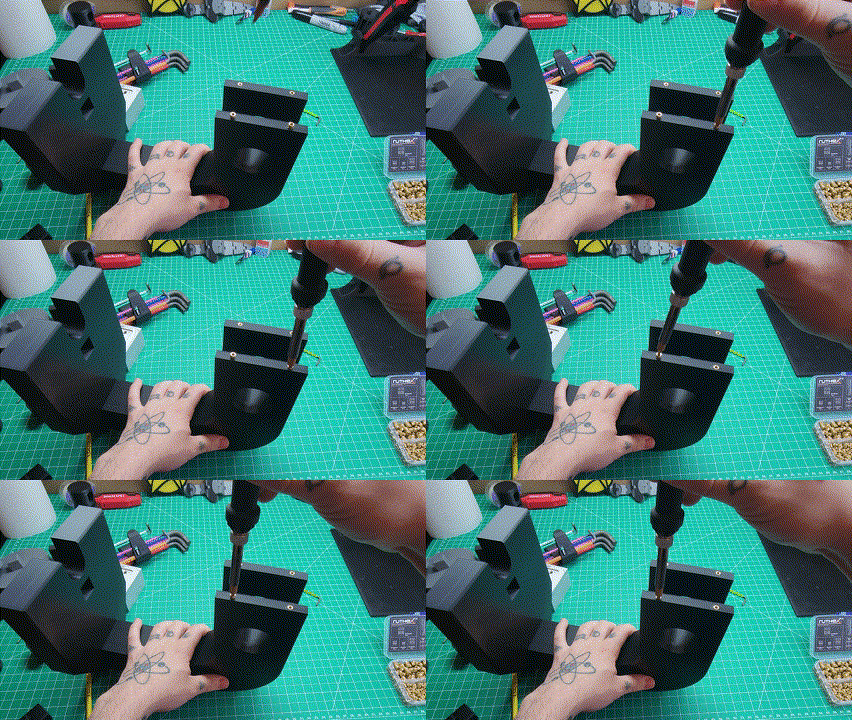
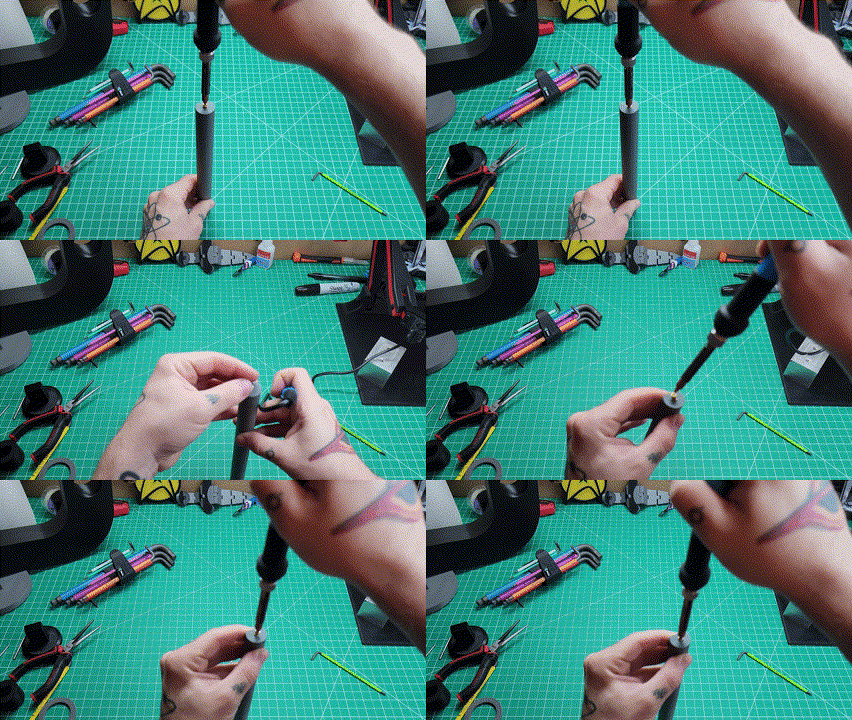
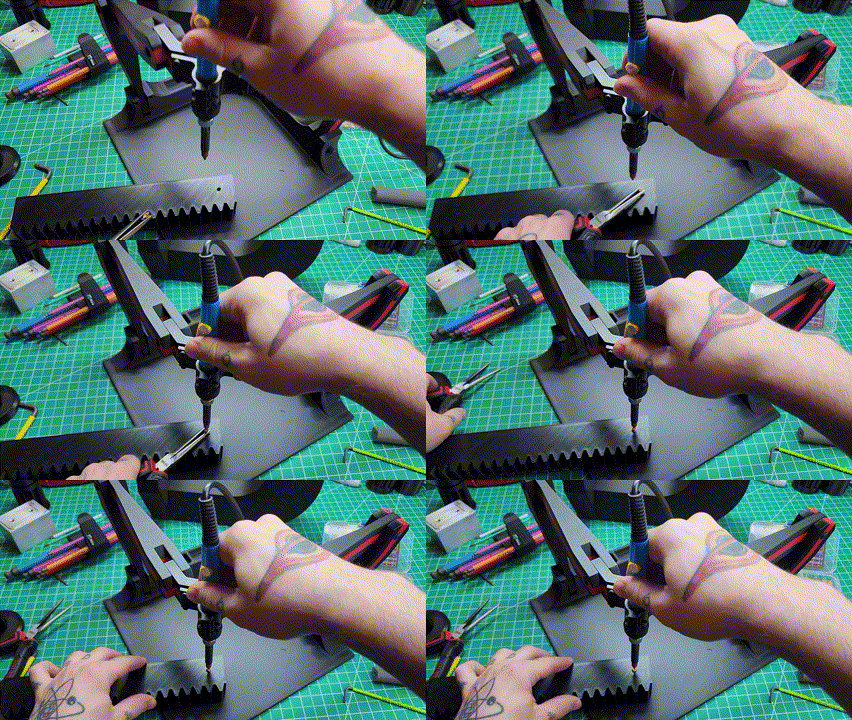
Step 1: Insert the heat-set inserts into all the parts.
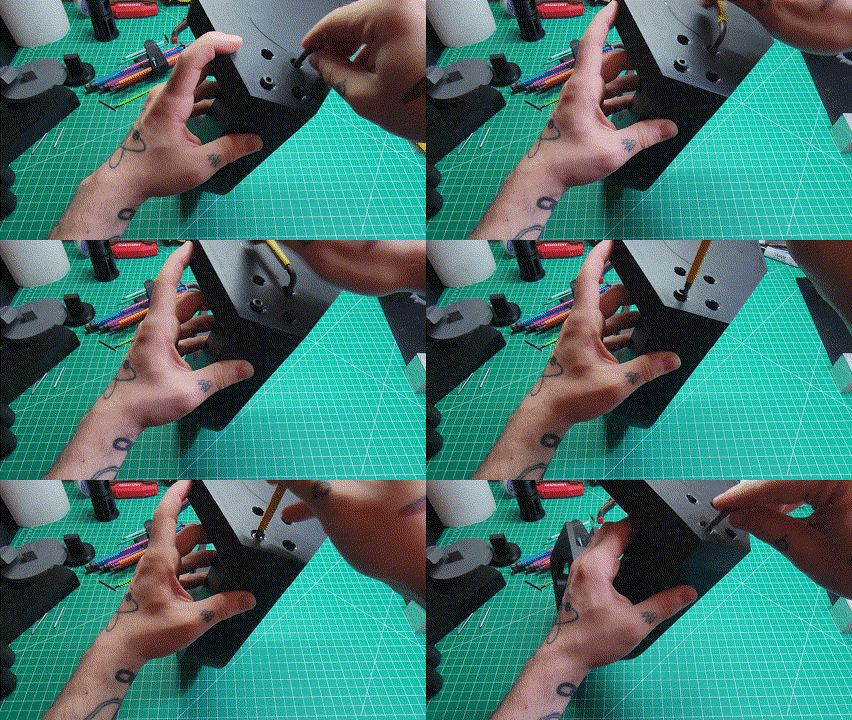
Column: 4 M5 heat-set inserts at the bottom, 4 M3 Heat-set inserts on the front.
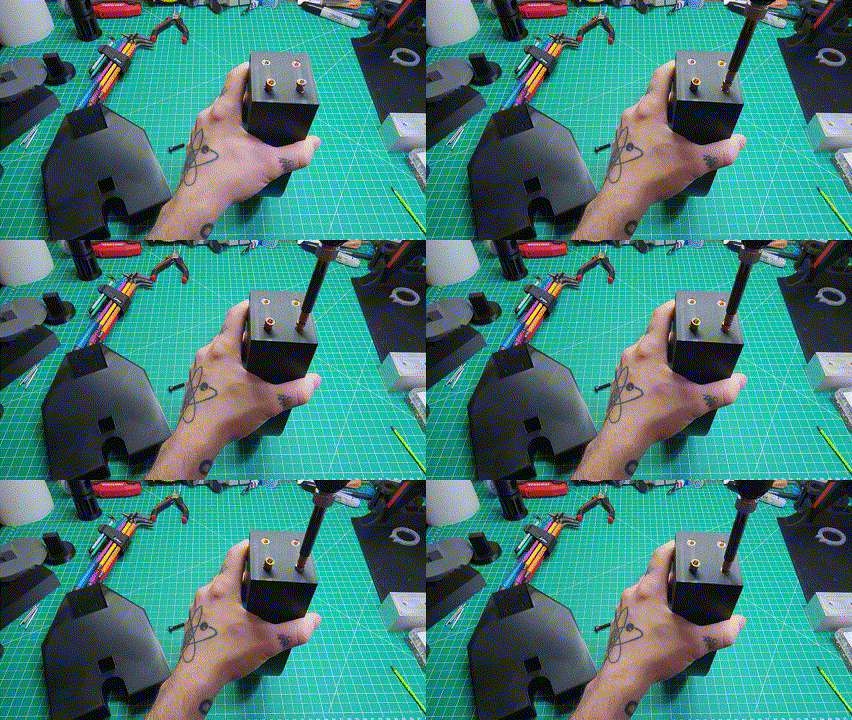
Handle Shaft: 2 M3 heat-set inserts. One at each end.
Gear Ram Rack: 1 M3 head-set insert on the left bottom side. (To attach ram fixtures.)
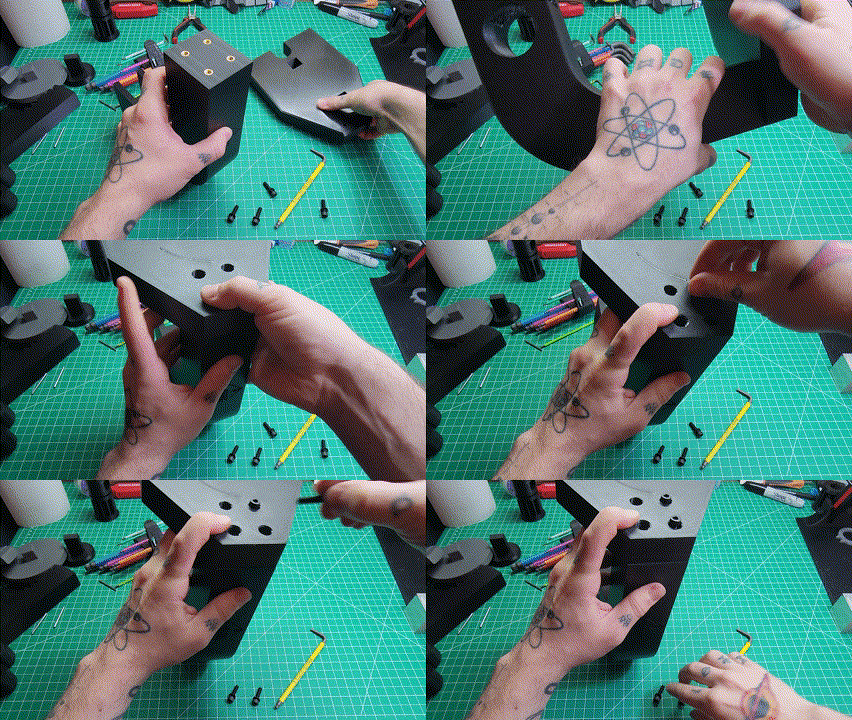
Step 2: Attach the column to the bottom plate using M5x20 bolts/M5 washers.
(Don't mind the bottom defect, the long poop got caught in the print but doesn't affect quality.😅)
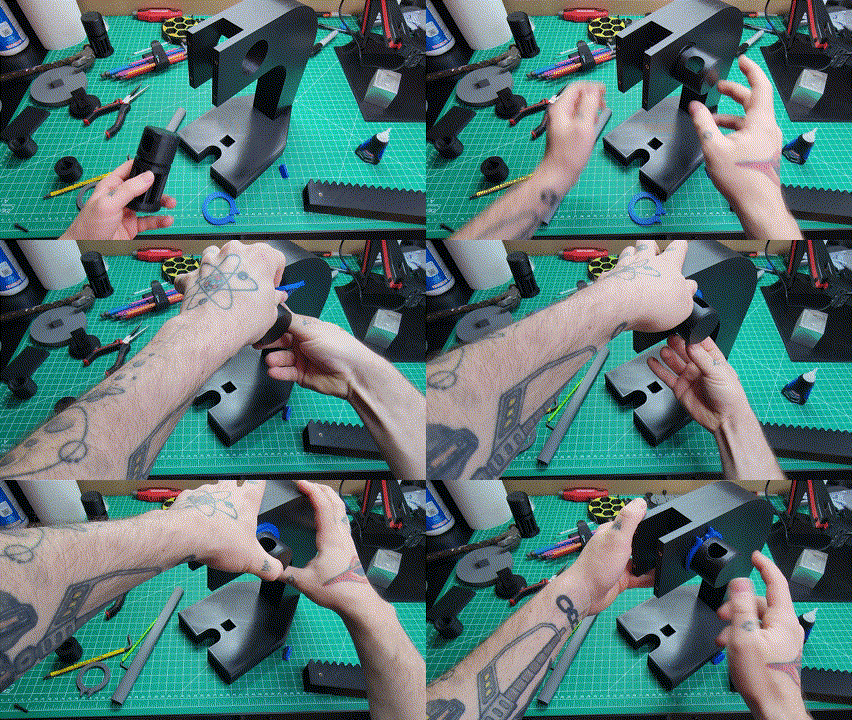
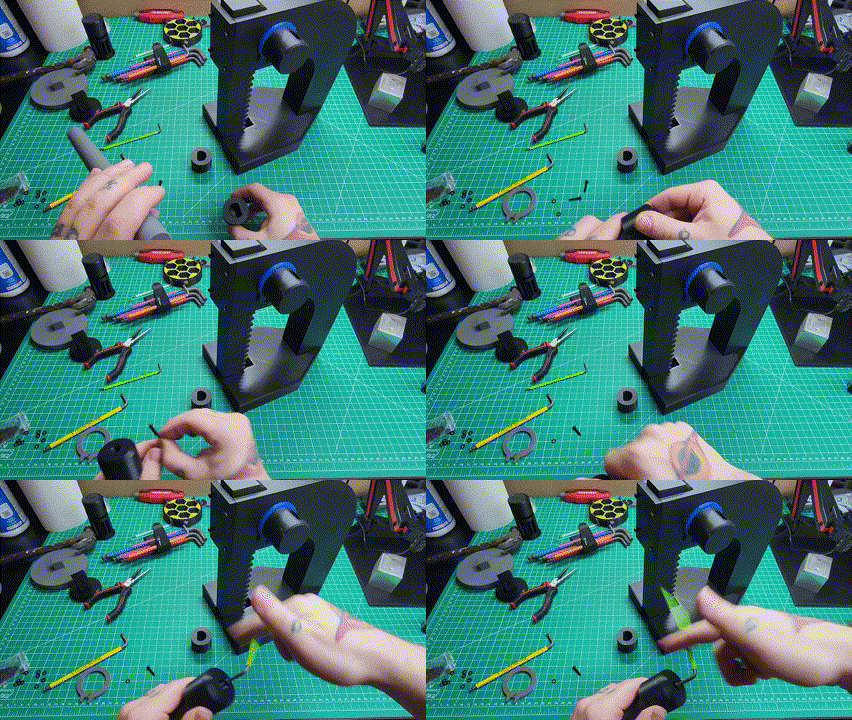
Step 3: Insert the gear so the handle is facing the side you want it on. Attach the retainer ring in the groove. This will be difficult to do!
Step 4: Put the ram rack in place, making sure to have the heat-set insert on the bottom.
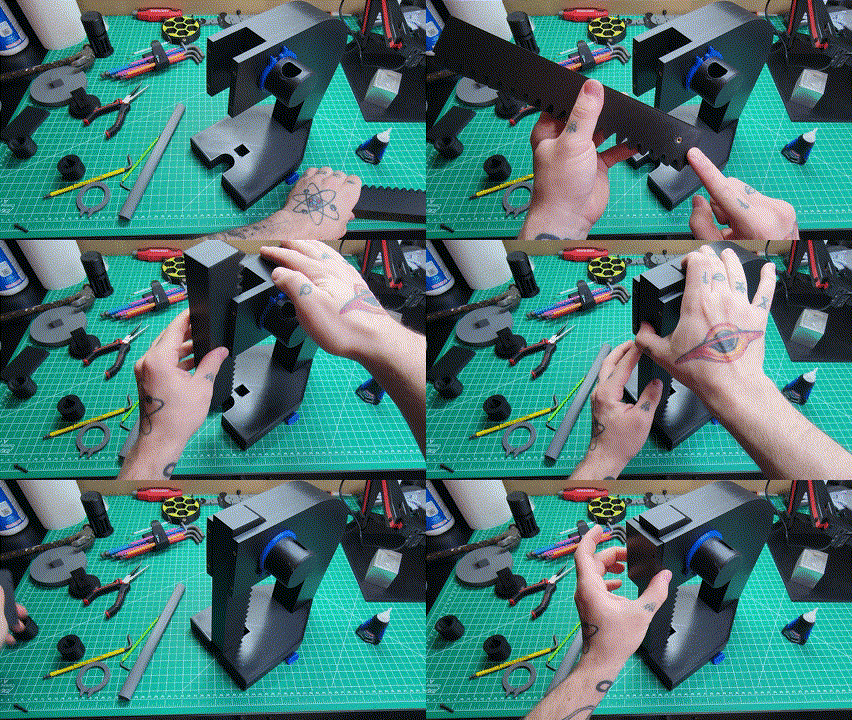
Step 5: Attach the cover plate to the column using M3x16 screws/washers.
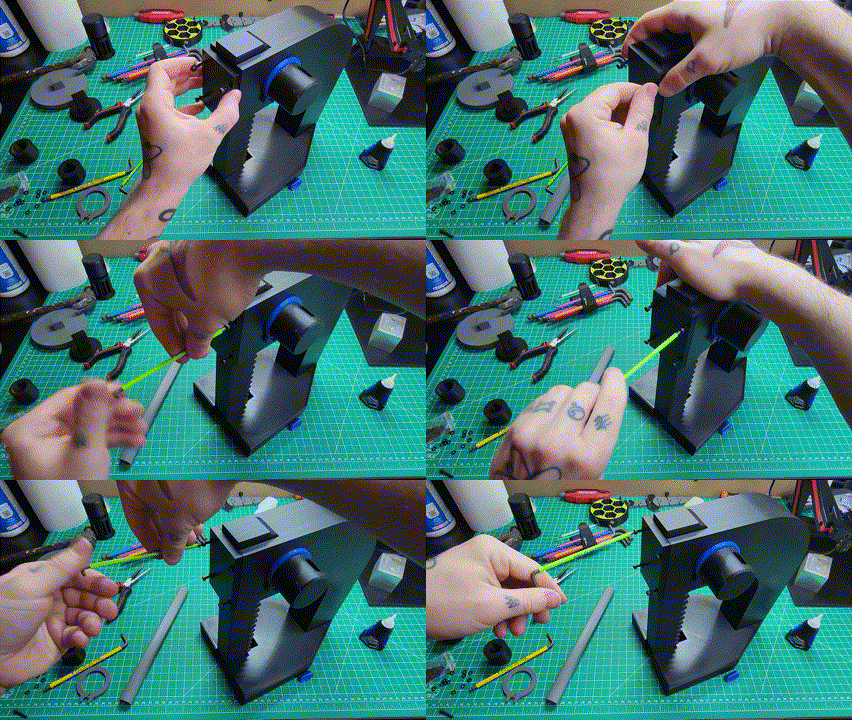
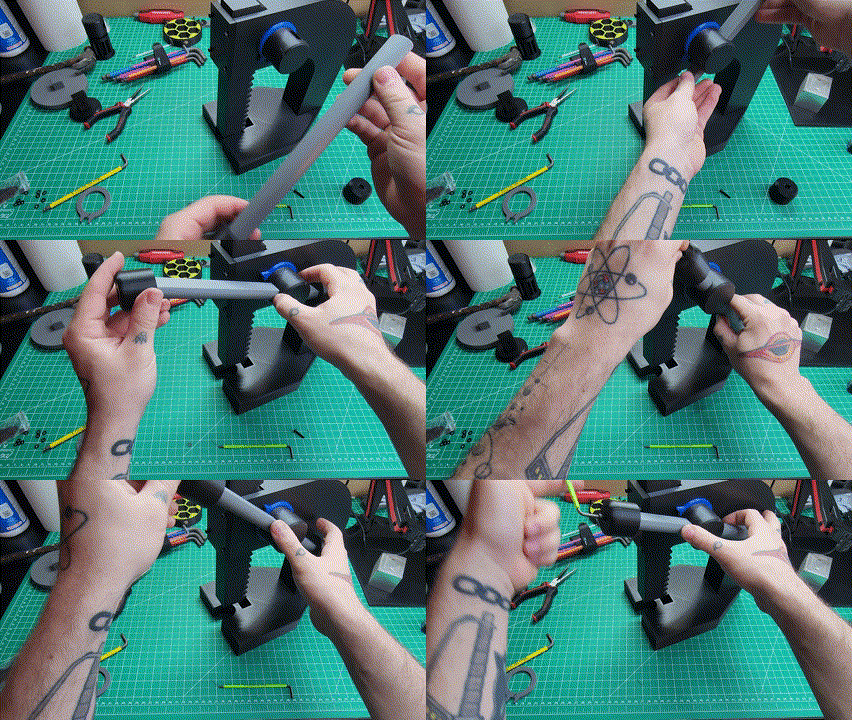
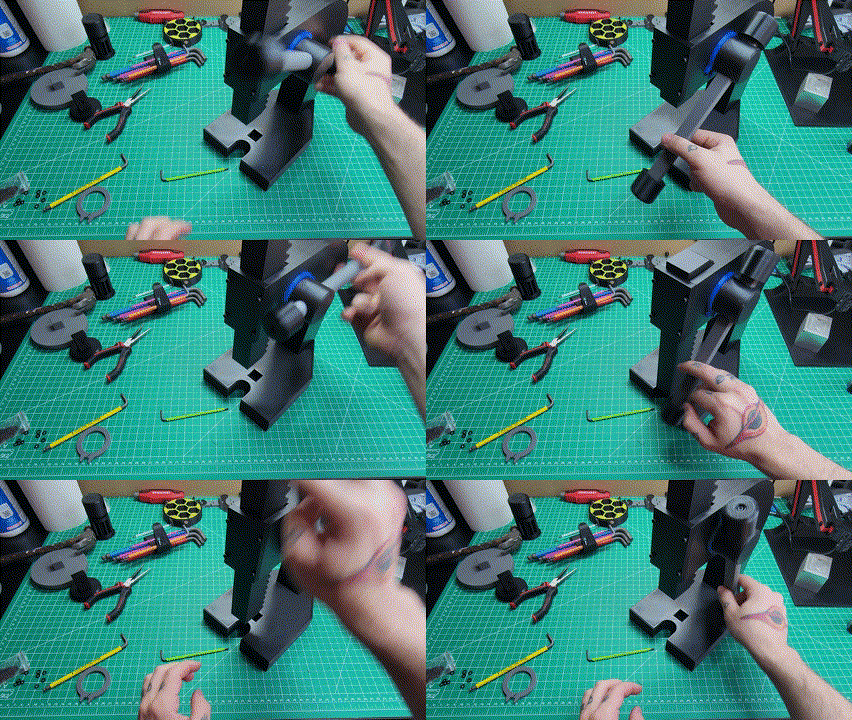
Step 6: Attach one handle cover to the shaft using an M3x20 bolt/washer. Insert the open end of the handle shaft into the gear opening. Attach the other handle cover to the shaft. Again, using an M3x20 bolt/washer. Make sure the gear mechanism is working.
Step 7: Choose the press plate you want. Insert it into the peg hole of the bottom plate.
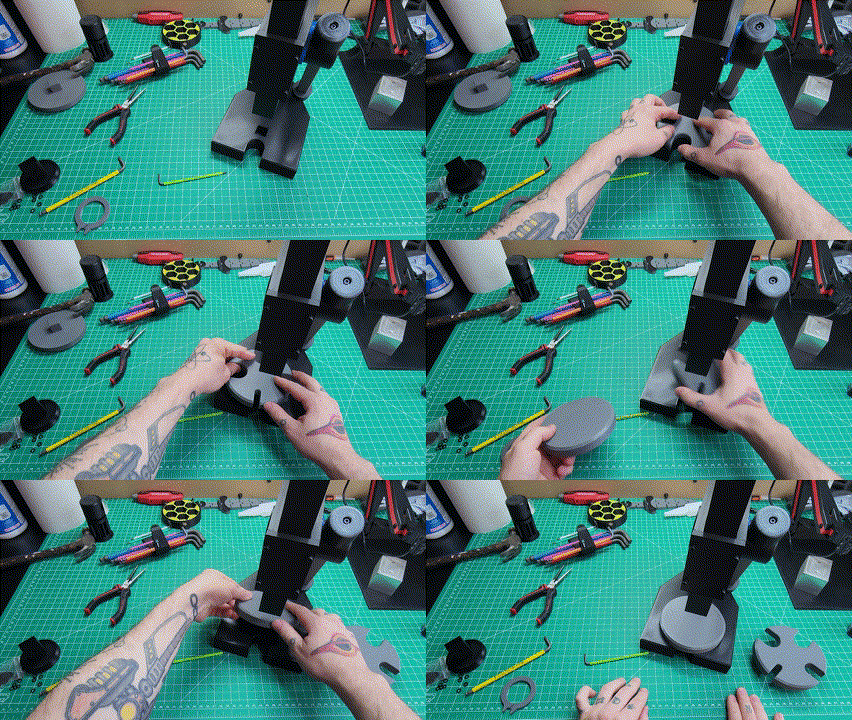
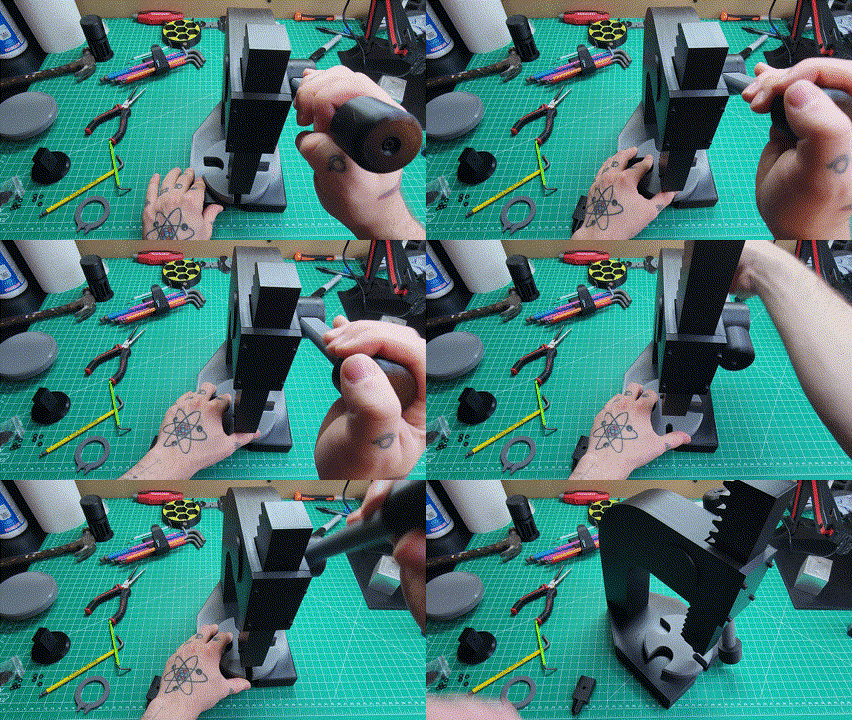
Step 8: Pick out which press fixture you want. Insert the fixture into the ram rack and line up the bolt holes. Using another M3x20 bolt/washer, secure the press fixture into place. This can easily be swapped out for another fixture whenever needed.
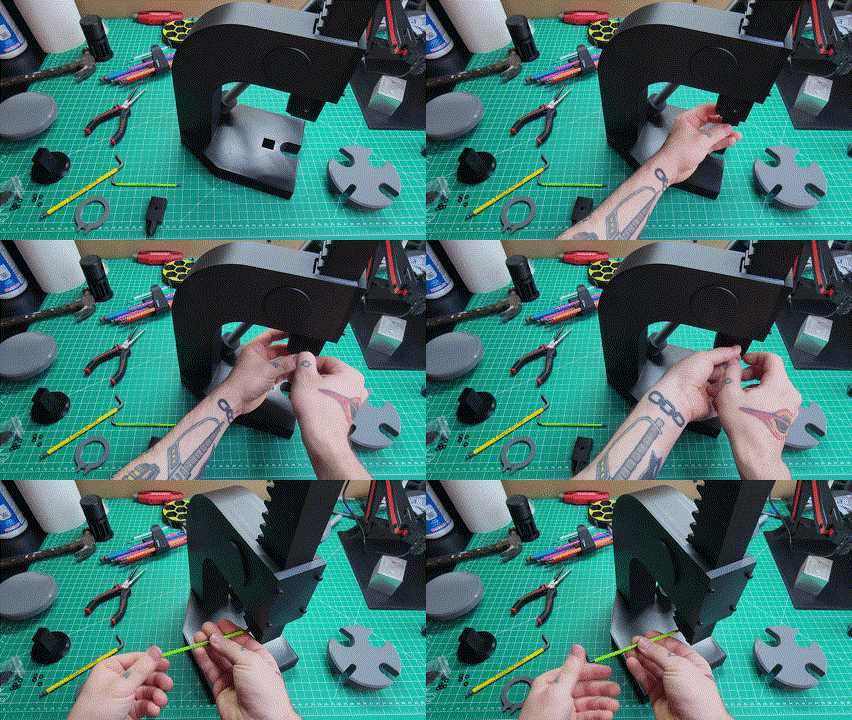
Step 9: You're all done! Press things until your hearts content!
If you like my work, why not buy me a cup of coffee! :) buymeacoffee.com/FletchFormStudios
3D Printable Arbor Press

Publicado em 14 de mar de 2025
Gostou deste modelo? Crie uma conta grátis para salvar seus favoritos e voltar a eles depois.
Criar conta