Você está no 3DFinder
Buscamos em Thingiverse, MakerWorld e Printables ao mesmo tempo para te dar o melhor de cada uma.
Descrição
With dozens of small local birds near my apartment I wanted to install bird feeders for them - unfortunately, the moment a feeder goes up the local pigeon gang descend to ransack the feeders leaving them empty within minutes of filling and scaring off the smaller birds. This feeder is the iteration that beat them into finally giving up. There is minimal mess, with the seeds being nicely contained. There are two versions in the 3mf file, the tape version I am using for glass or windows, and a screw-mounted version with modified cleats (for 4mm screws) for wall or fence mounting. I have also included a print profile with some mounting tools and spacers for every version of the print, both tape-mounted and screw-mounted, single-port and double-port - to make getting things installed a bit easier.
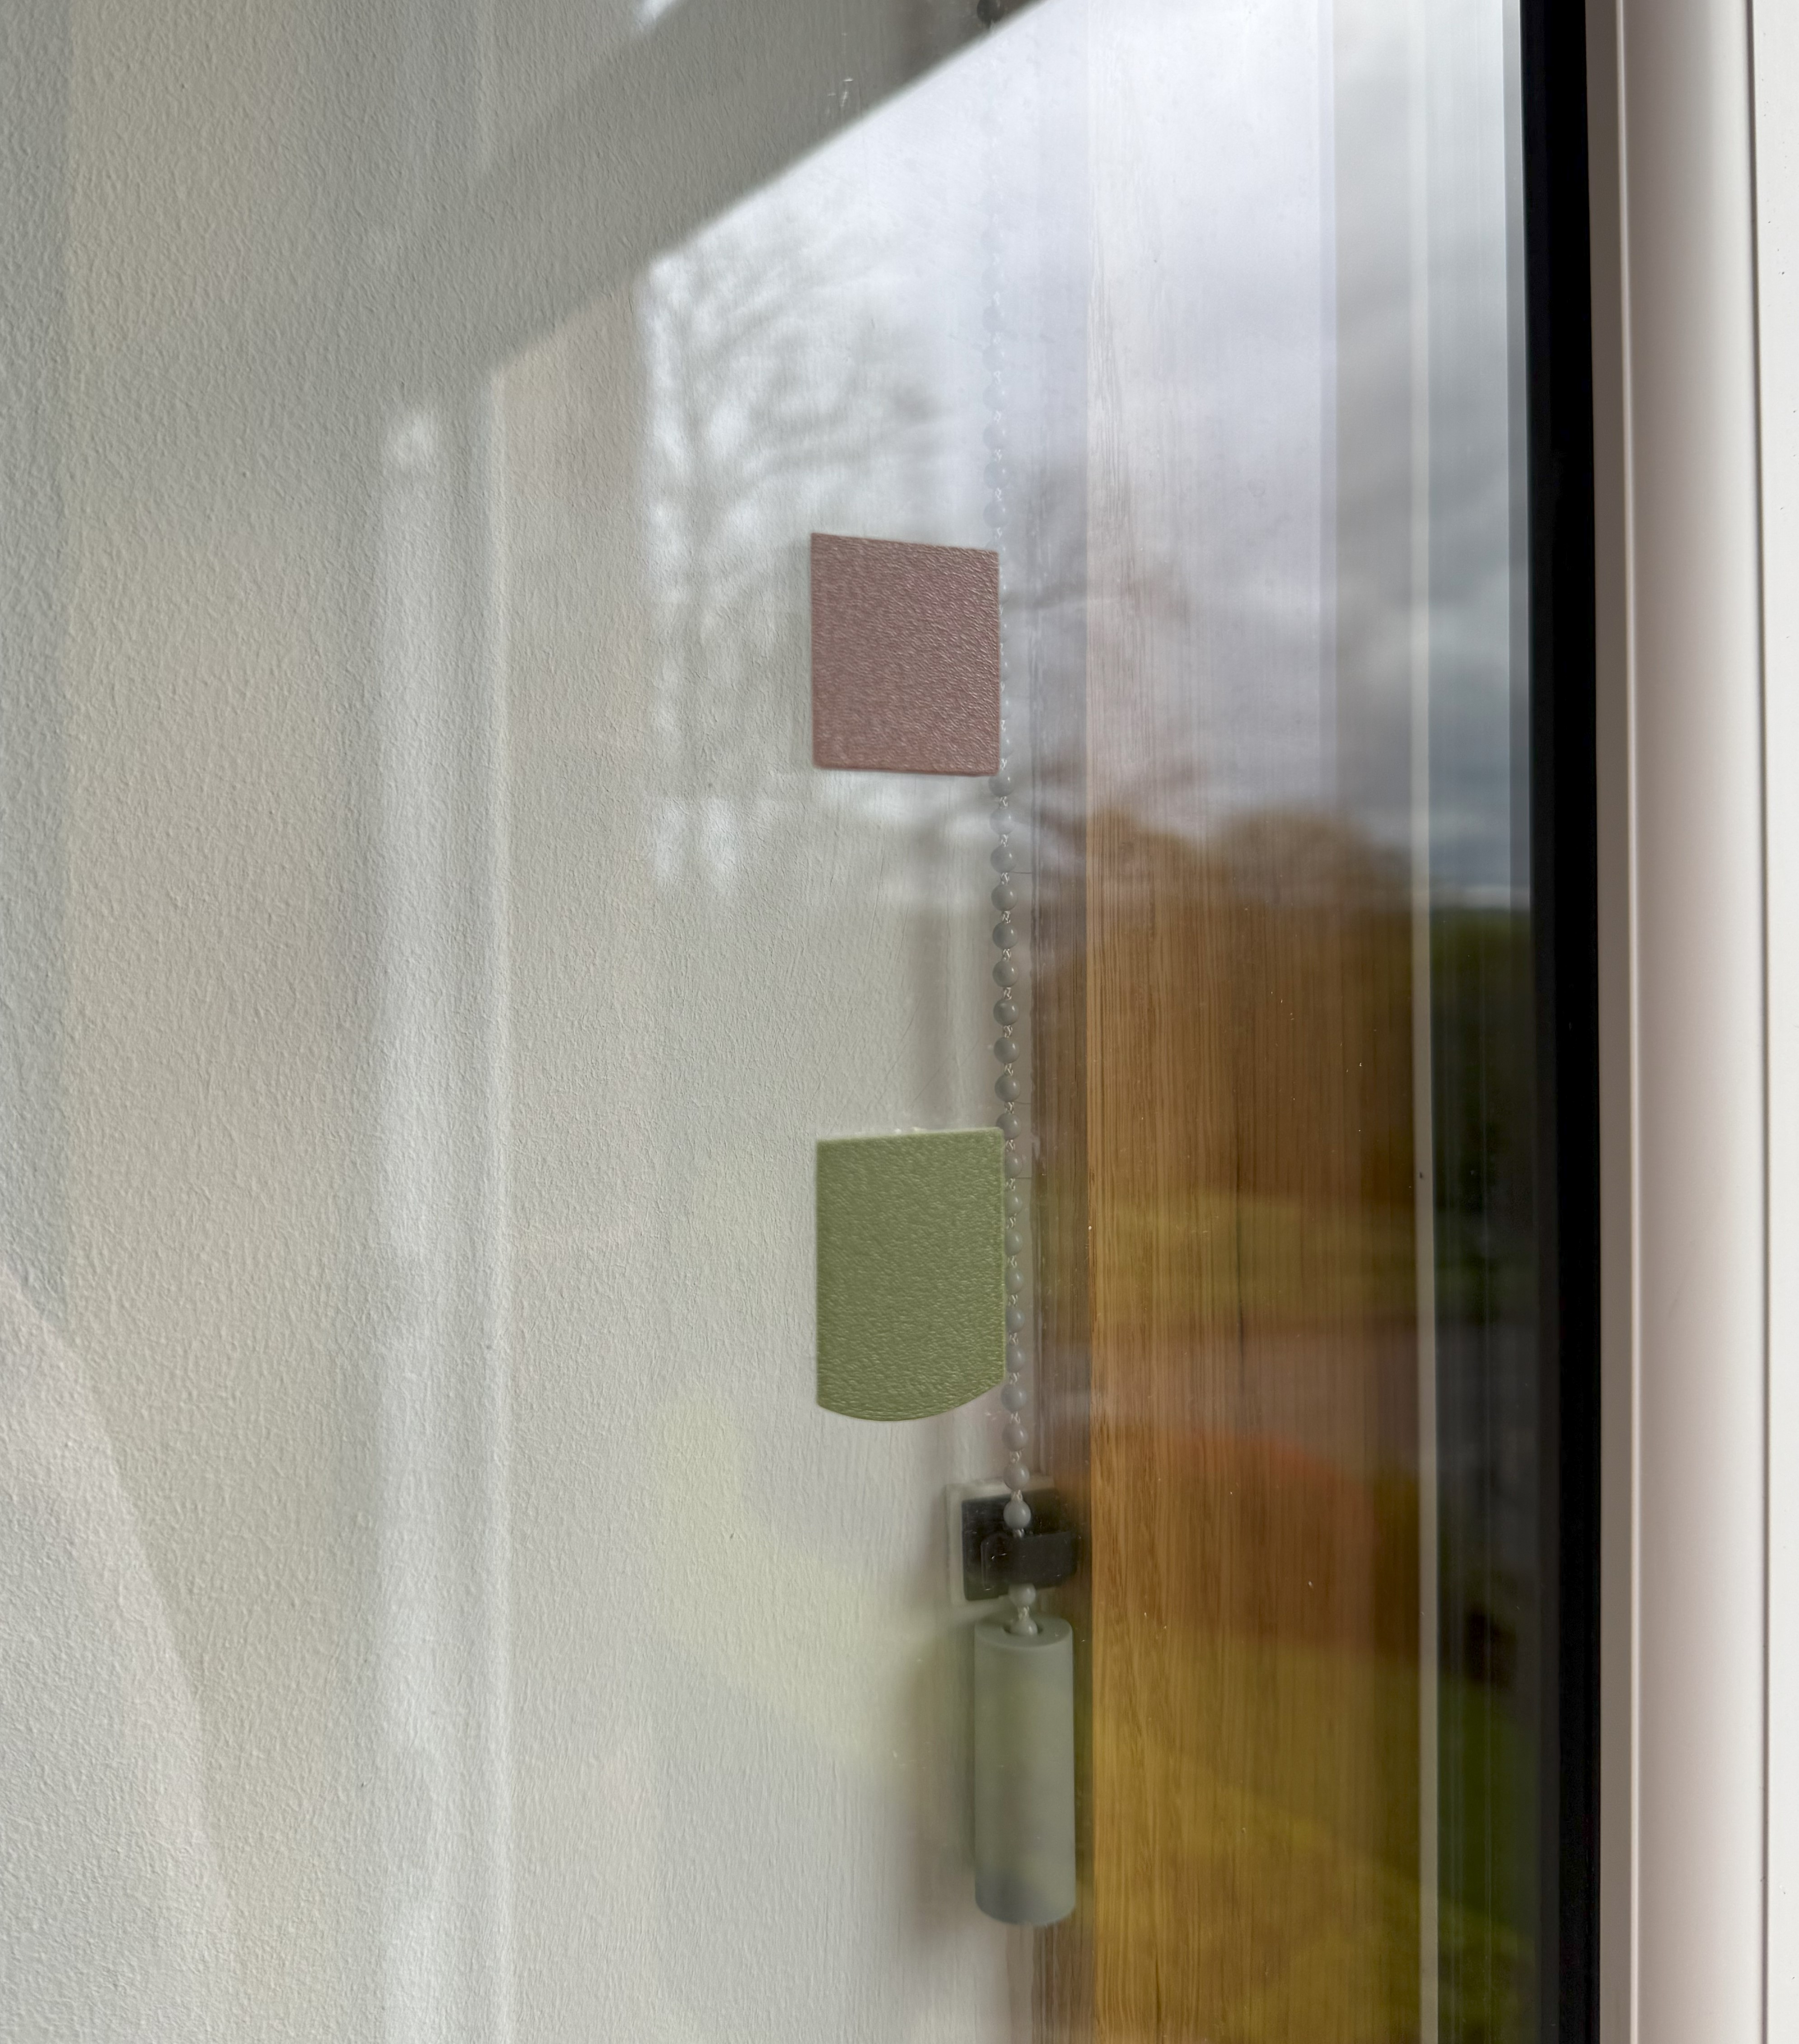
Comprising of four parts, each feeder has a hat (easily slid off to replenish the seeds), a base which holds the seeds (having either a single or pair of small apertures for the birds to land), and a pair of mounting cleats so the hat and base can easily be slid off the mounts to clean the window or the feeders themselves. I used double-sided tape to mount mine which has been on the window since March 2024; through winter and plenty of rain - all of which the seeds are protected from.
In my window I have 6 feeders in two rows - a left and right small acorn for the sides and a central large twin aperture acorn for the middle - which is sometimes frequented by magpies if filled with suet nuggets.
I have printed these in PETG and PLA - both have lasted out in the open very well (since March 2024 with no issues at all) - however, if you live somewhere particularly hot or humid, you may wish to swap to ASA or something a bit less likely to fatigue in the heat.
Here are a few photos of the assembly, starting with the cleat mounts (and how you'd very easily be able to clean your windows and reinstall the feeders with absolutely no fuss in just a few seconds):
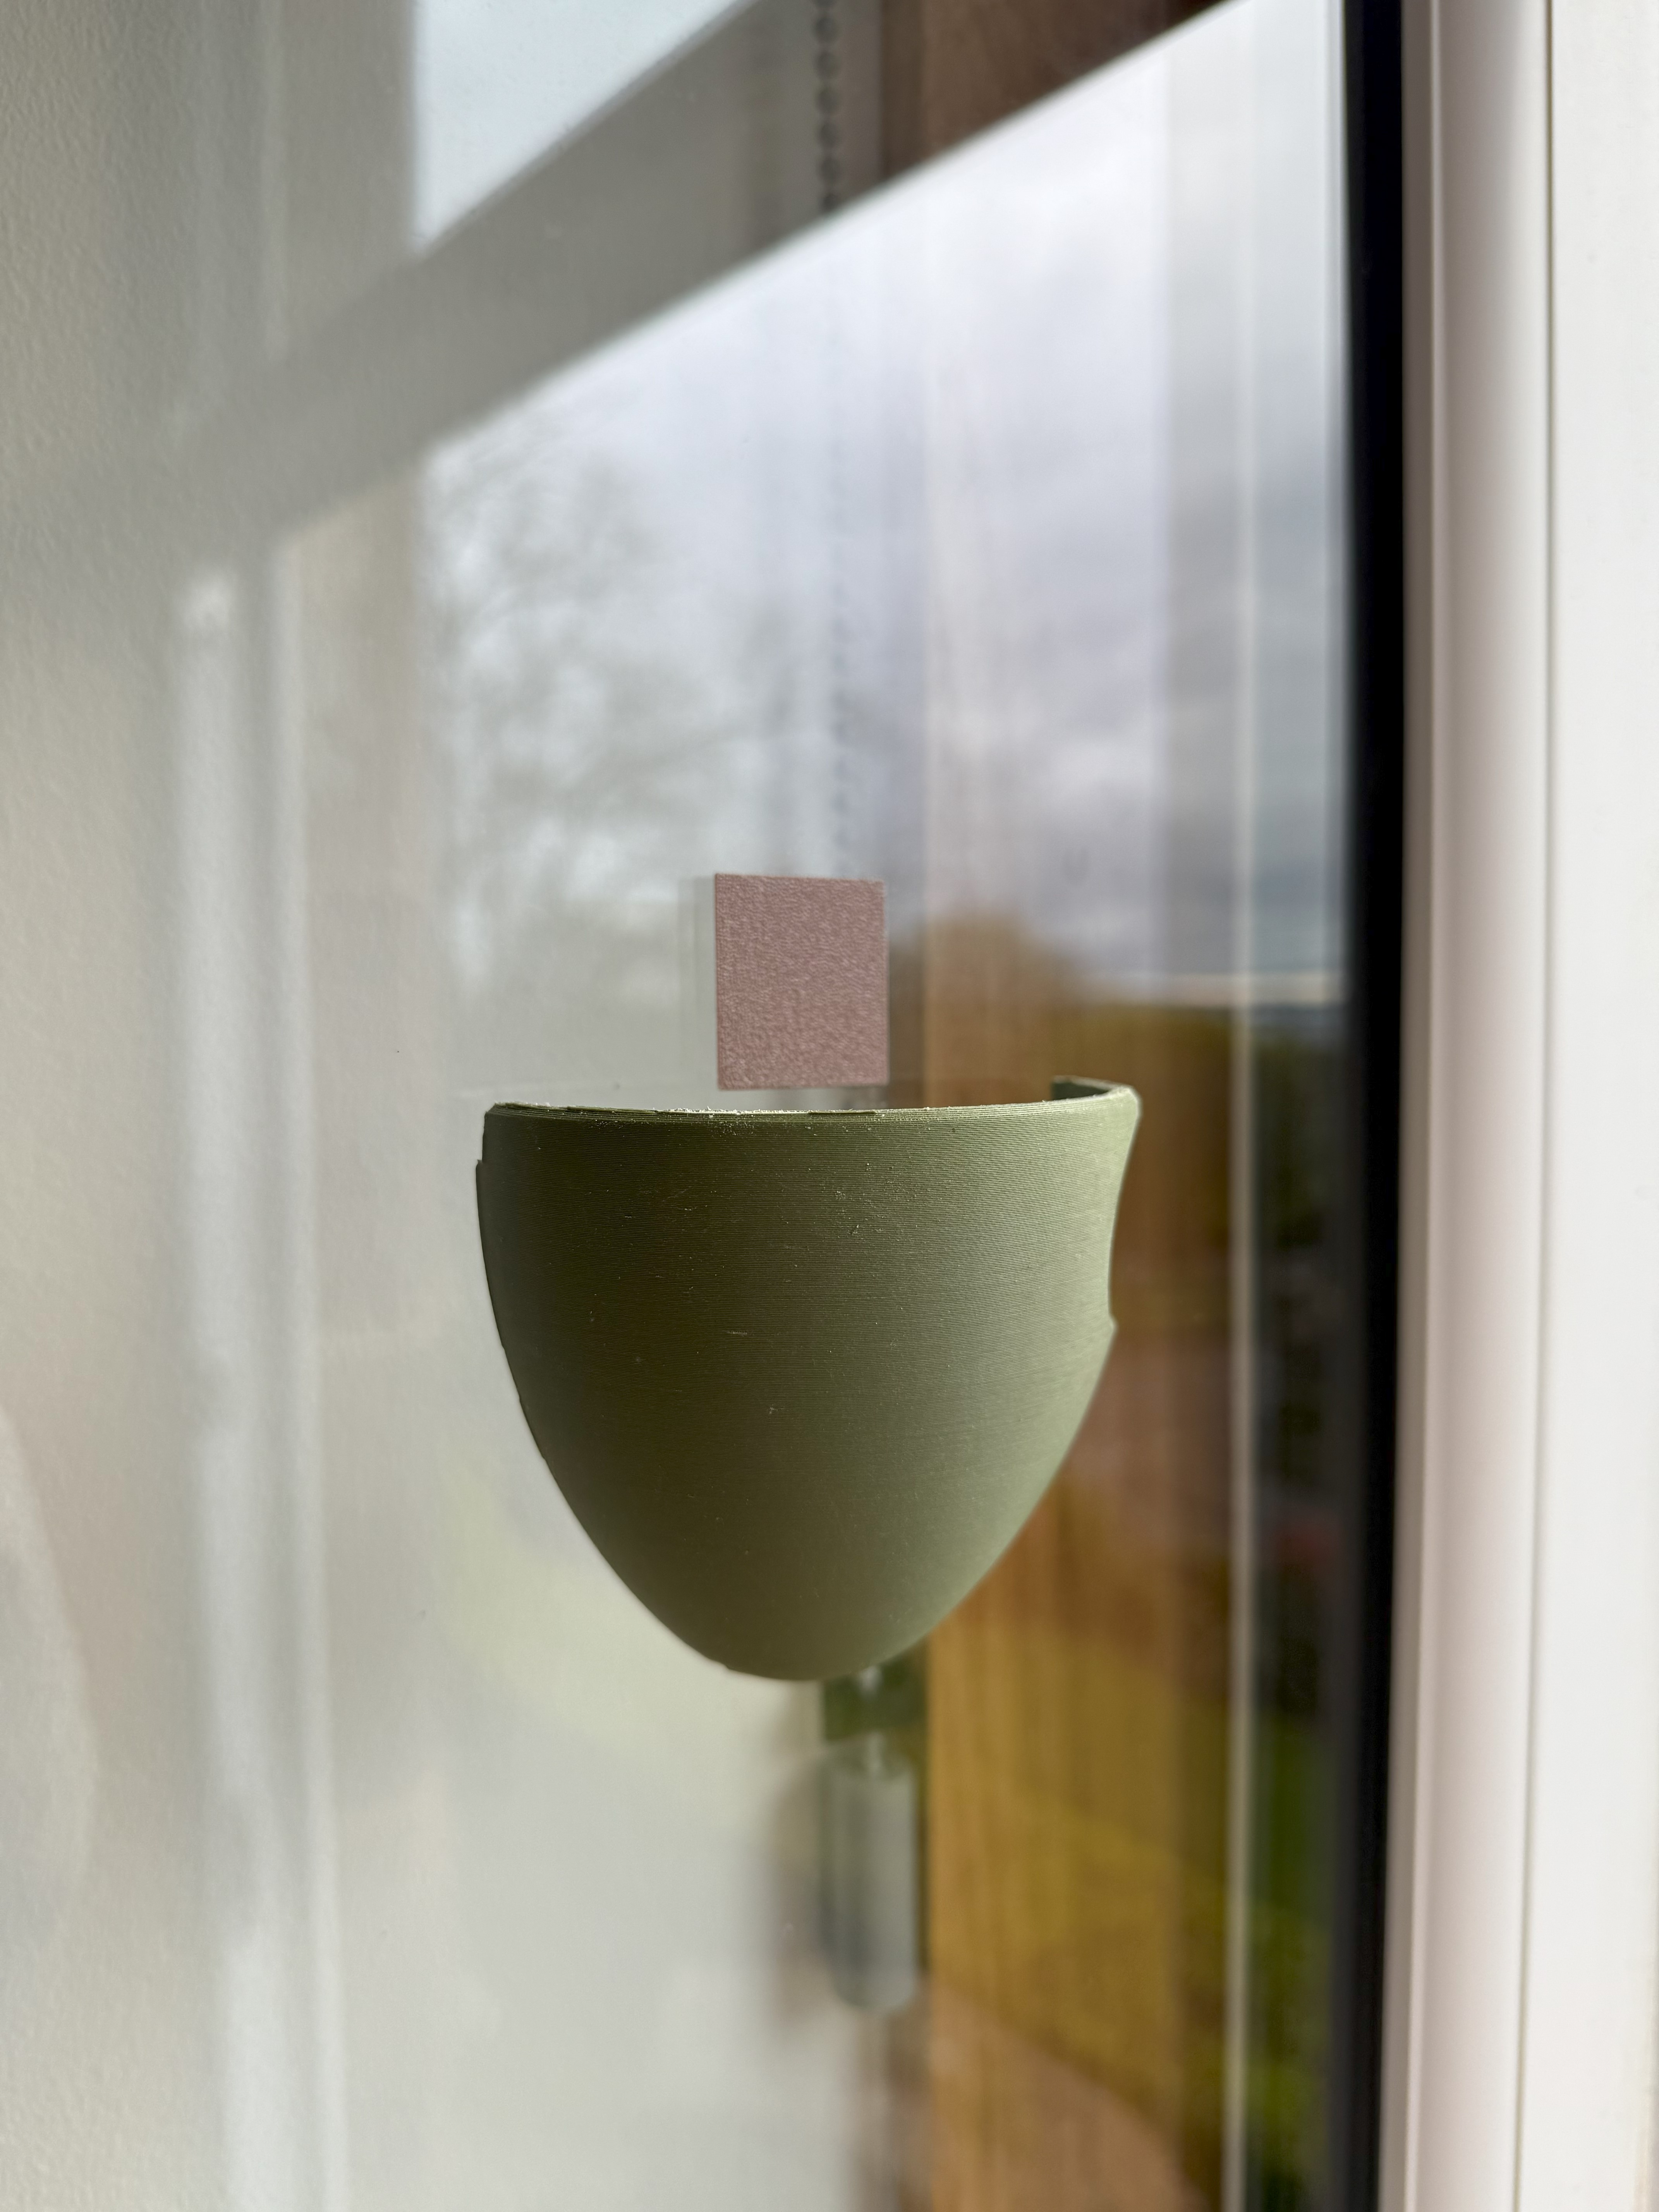
Installing the base first, this is also how you can easily load the feeders with seeds and suet nuggets:
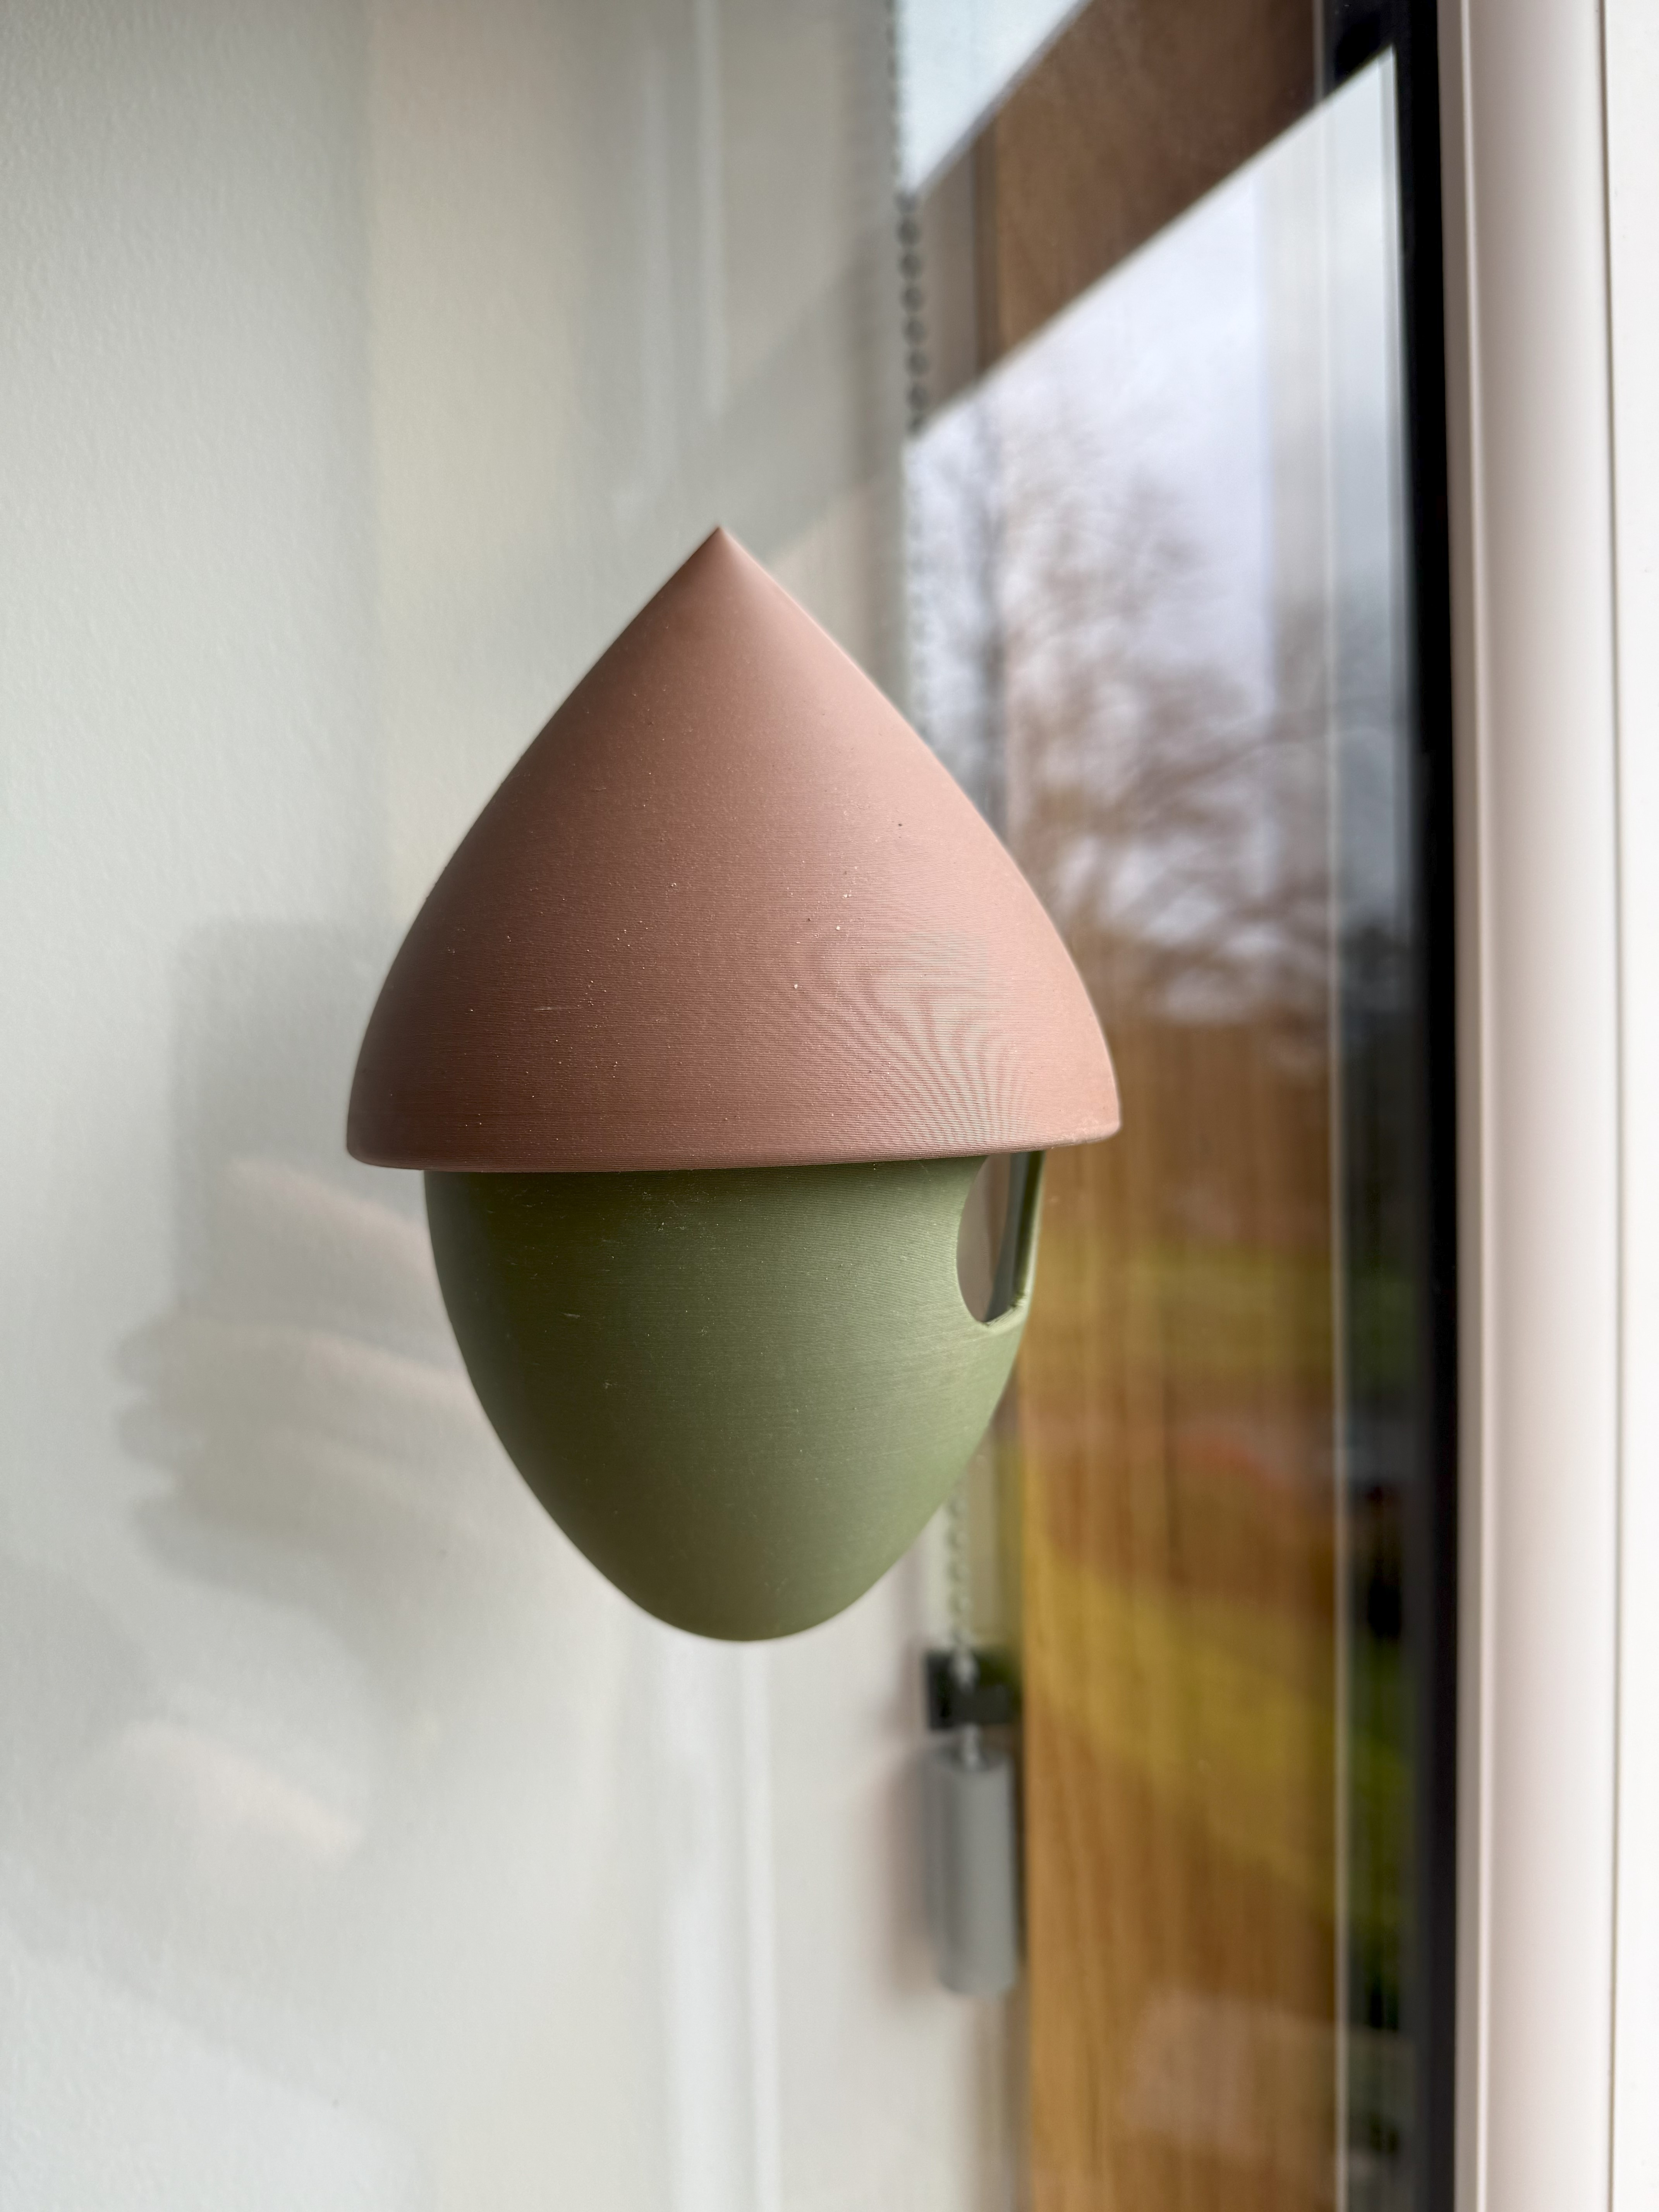
Finally, installing the top cap seals the feeders and protects them from the elements. All three designs share an identical top cap and upper cleat, the single side-hole variants have interchangeable cleats. Only the double-sided larger variant has a unique cleat for the seed tray portion.
To mount the feeders:
Tape Mounted - Required: Double-sided tape. Cut the tape into the slot on the two window cleats. Ensure the glass is clean and dry. If using the spacers, place the tool on the surface you are mounting the feeder to, with the arrow pointing up. Peel the tape backing off of the two cleats and press the top (square shaped cleat) tape side towards the glass, repeat the with the longer curved bottom base cleat. Remove the spacing tool and give the cleats a firm press against the glass (try to squeeze out any air bubbles). Install the base part of the acorn first, fill with seeds and then install the hat, which will sit overlapping the base to ensure rain runs off the roof away from the seeds keeping them dry and fresh for as long as possible. If you are not using the spacers, with the tape cut on the cleats, install them into the assembled acorn, peel the backing off the tape and use the unit itself to position the cleats in the correct spacings - pushing firmly. With the location of the cleats now set, slide the top and bottom portion off and give the cleats a firm press for air-bubbles and to adhere the tape fully. Re-install your base on to the lower cleat, fill with seeds, and install the hat.
Screw Mounted - Required: four 4mm screws. Using the spacing tool, locate the position and level you wish the feeder to be installed at. Drill your pilot holes, or mark with a pen, using the spacer as a guide. Now get your cleats and with the square cleat at the top drive in your screws into the marked or piloted holes, similarly with the lower cleat, it has a curved lower portion matching the acorn base. The chamfer is single side only for both the top and bottom cleats, so if the screws don't countersink - the cleat is back to front.
You may need to entice some birds into the area to check it out with some loose seeds around the feeder until they figure it out - once you have one success others will copy. An earlier iteration of this bird feeder design was mounted to my window on the 15th March 2024, so now the birds know if the window is opened - a seed top up will soon follow.
Acorn Window Bird Feeder - Pigeon Resistant

Publicado em 11 de mar de 2025