Você está no 3DFinder
Buscamos em Thingiverse, MakerWorld e Printables ao mesmo tempo para te dar o melhor de cada uma.
Descrição
I'll let the video do the talking about the history and cut to the chase - this is a kinda not-so-tough shell for a slab pinewood derby car. To every interpretation of the rules I can find, it is 100% race-legal.
I did not fully document this build as I did not intent to share it initially, so I'll share what I can here. If you promise not to judge me for my timeline, I've included the F3D as well 😁
WHAT YOU'LL NEED:
- 1x BSA Pinewood Derby kit, cut flat to ~½" (12-13mm) thick
- ~180mm segment of 5mm RGB-IC COB LEDs (Ali)
- 1x Wemos D1 Mini v3 (Ali)
- 1x USB-C TP4056 (Ali)
- 1x 6mm micro slide switch (Amazon)
- 1x 952540 3.7V LiPo Battery (Amazon)
- You can go smaller if you want, but this lasted all day.
- Some screws (Amazon)
- 2x M2.6x5 Self-tapping (sides)
- 2x M2.3x8 Self-tapping (D1)
- Two M2x3 bolts and nuts
- Some ½" VHB tape and Adhesive (CA/E6000)
- Heatshrink
- Optional - JST1.25 2 pin connectors for the battery, JST 3 pin for the LED strip
- Optional - some wire harness tape
- very dry Transparent PETG
PRINTING TIPS:
Printing transparent PETG requires it be very, very dry. Skipping this step will result in a lot of artifacts (bubbles) in the print!
My profile is set to go slow, as is needed for transparent effects. If you wanted to crank up the layer height it might help some with the effect, but I did not. You could make it go slower, if you'd like. Make sure and share how it goes if you do!
Plate contact is virtually nil on this print, so your build plate must be hot and sparkling clean to maintain adhesion! I printed this and three similar prototypes without a failure, you can too!
ELECTRONICS
Start by loading WLED on to your D1 mini and testing your components with test probes if you have them. I have attached my configs and presets as TXT files, just rename them as .JSON files and you can upload them if you wish.
The slider switch should interrupt the positive feed between the battery and B+ on the TP4056. OUT+/- will go to both the D1 Mini and the +5V and - feeds on the LED strip.
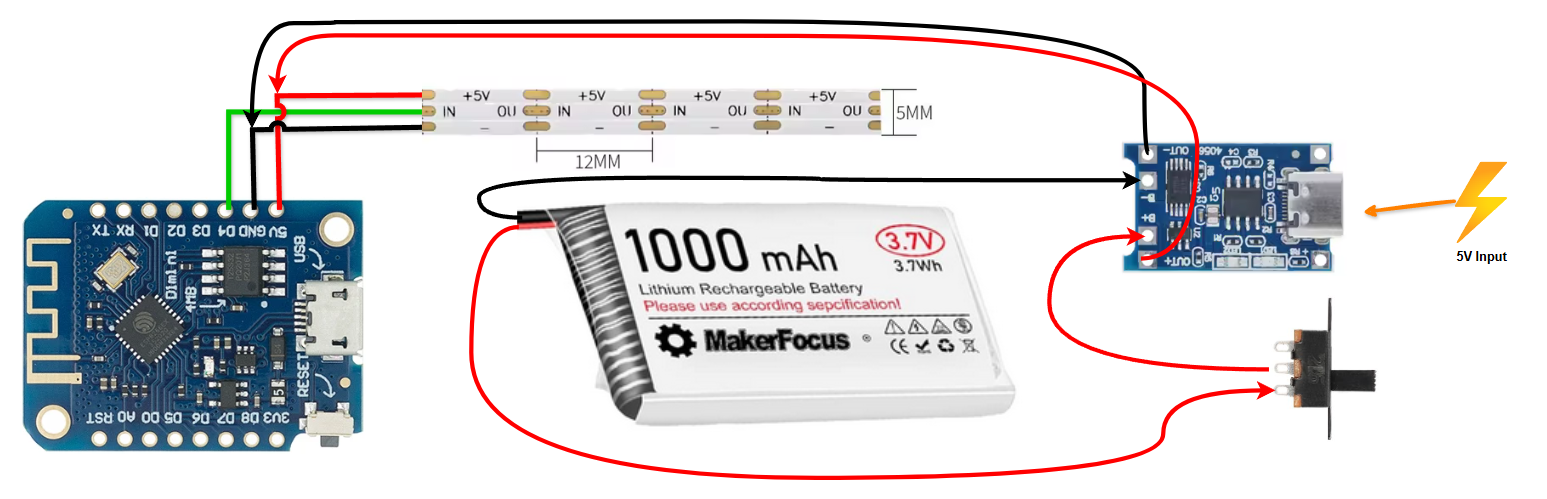
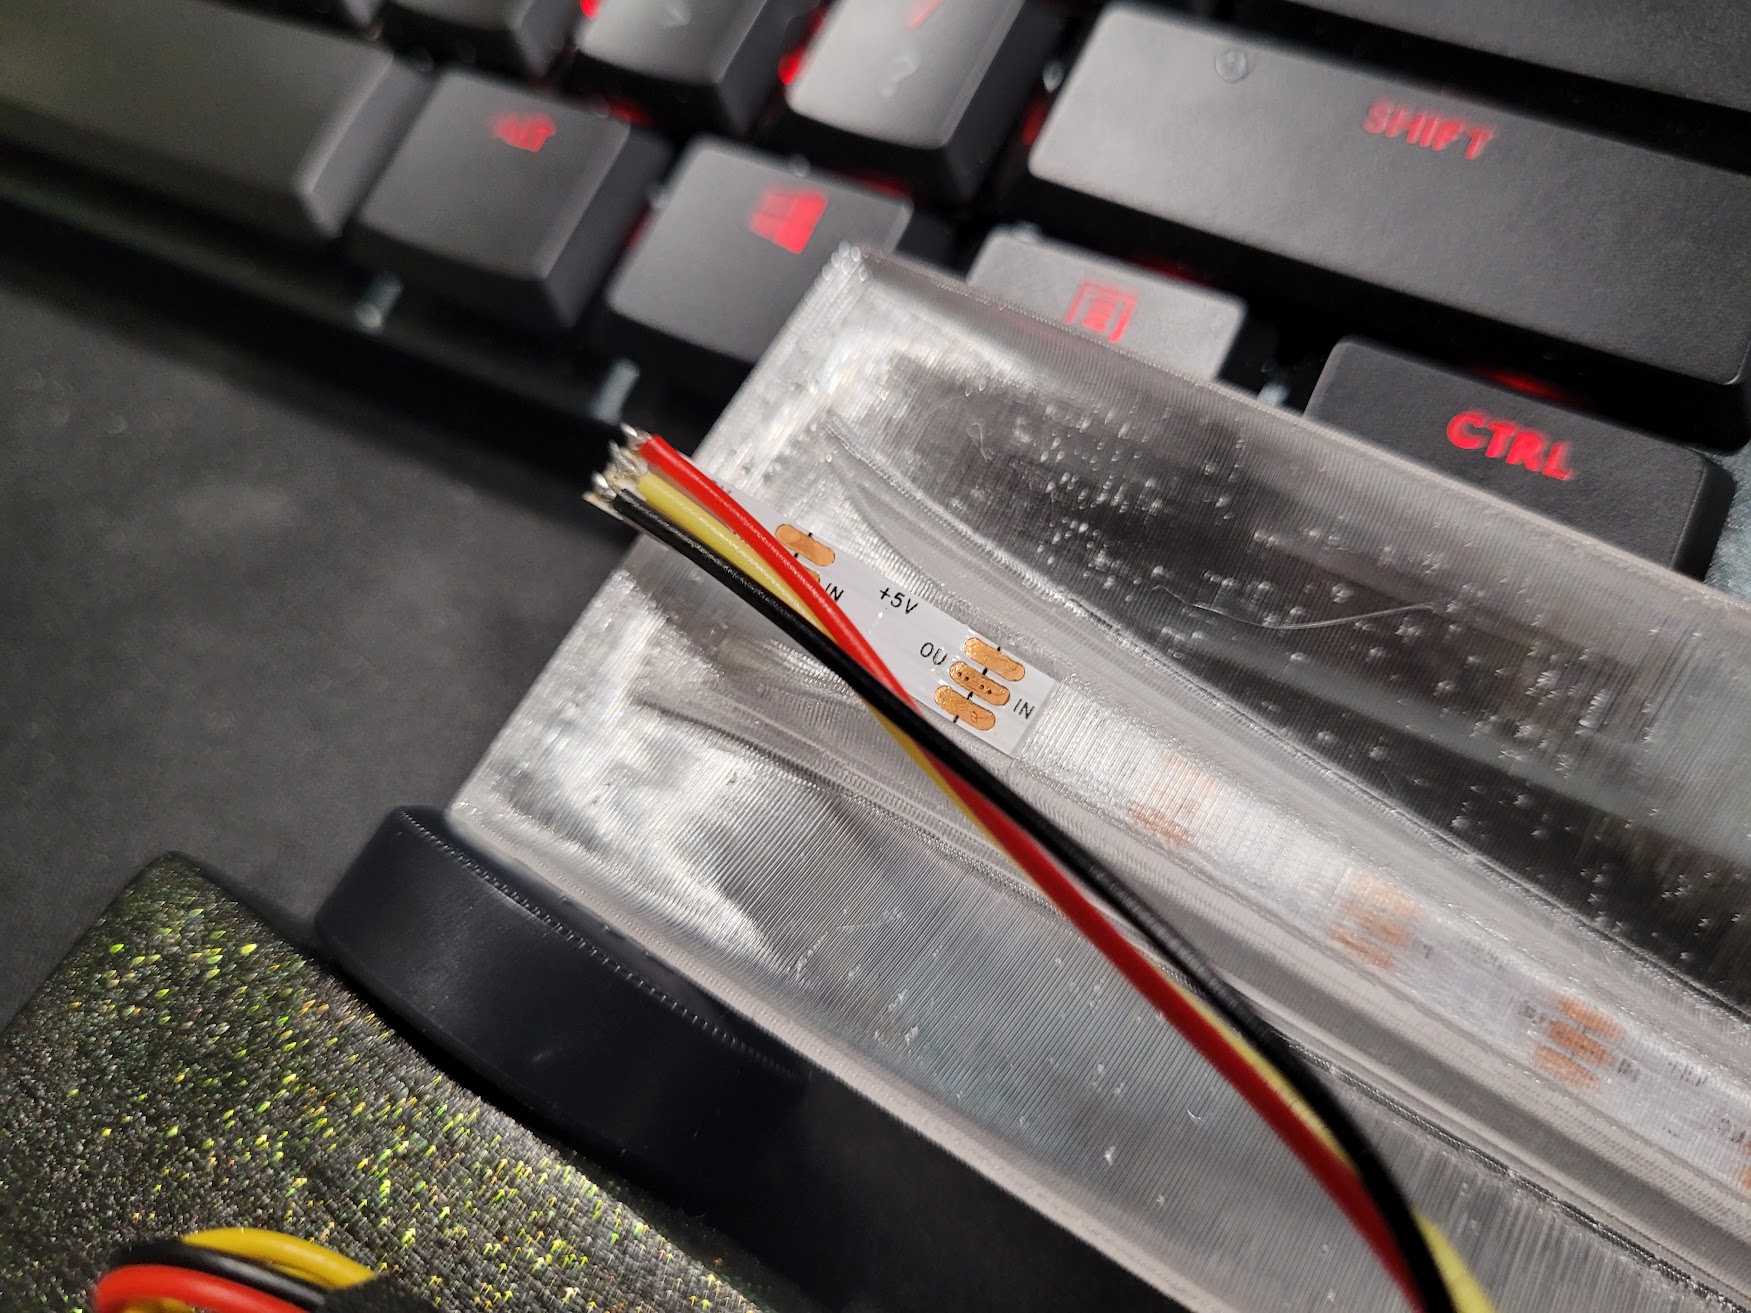
TAKE NOTE: the contacts for these LEDs are on the bottom of the strip. I actually completely pulled off the adhesive strip for the entire thing and it was still a snug fit. Solder your wires so the wires point back down the length of the strip, not away from it!
ASSEMBLY
Once your slab is cut to size (can be shorter or taller, but I went with ½"), sanded, painted, has the wheels installed, etc, start by using your glue to hold the printed frame at the back of your car. Make sure to align this part well - a gel CA or E6000 will give you time to make adjustments if needed.
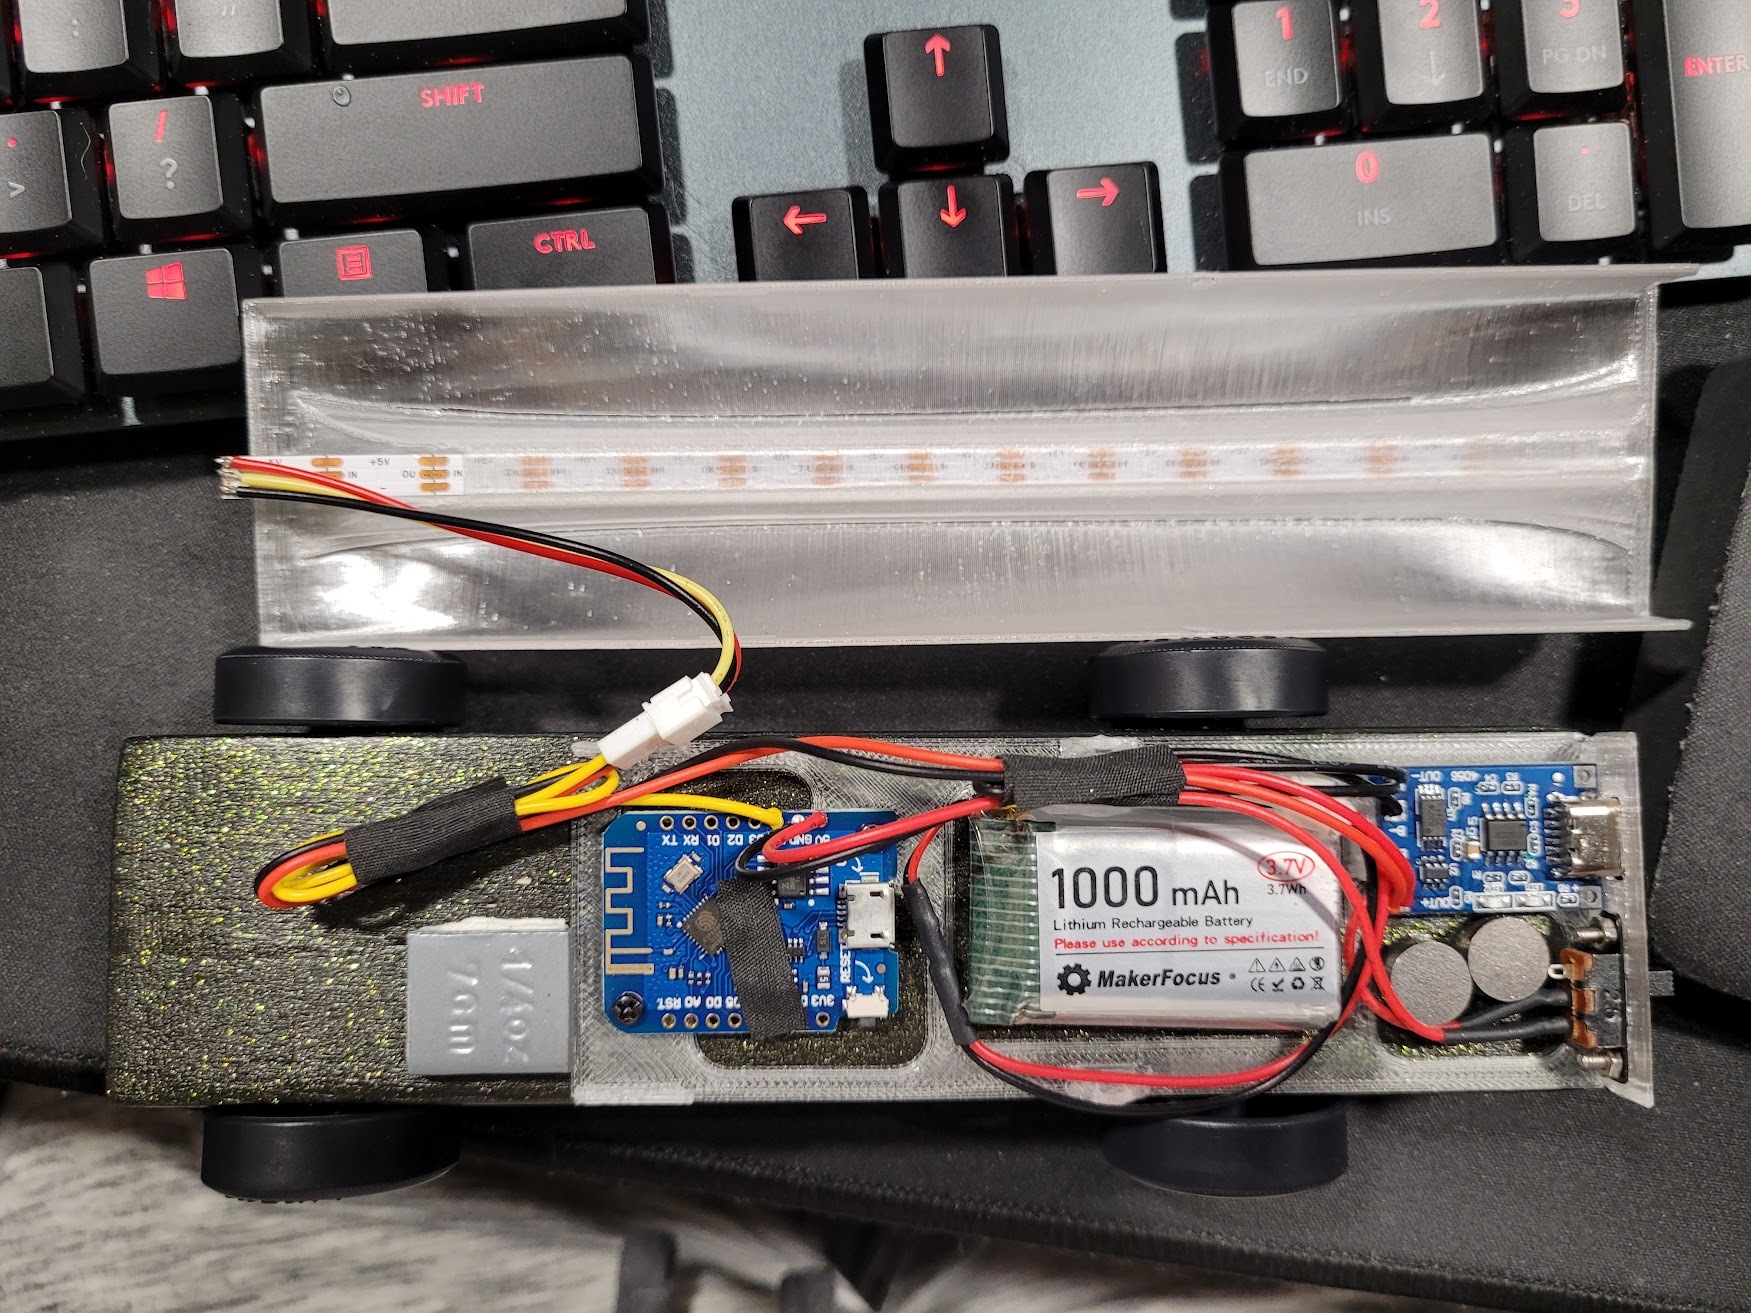
- The TP4056 is held down with some VHB tape. It should pop in to the little alignment tab.
- The micro switch is held in with two M2 machine screws and nuts (washers might help).
- The orientation of the battery matters as it has a slope to one side, which should face forward. It is held down with VHB tape. You can optionally carve a cavity out for the battery if you'd like, though this is not necessary. If you use hot melt glue here, it must be thin - too much and the battery will be too tall. This is where an alternative shorter battery may work well, though not last as long.
- The D1 mini is screwed down by the two long M2.3 screws - longer is better as these will penetrate in to the wood for additional purchase between the frame and the car.
Carefully slip the LED strip in the cavity on the shell from the front, as pictured above. You might need a drop of lubricant to get it fully moving as it's a tighter fit than I had anticipated, but with careful constant pressure it does fit. Wrap up any surplus wire you might have used (oops!) and use one M2.6 screw on each side to pin the two halves together. There are some micro dovetails modeled in, but they did not come out with enough detail to really work.
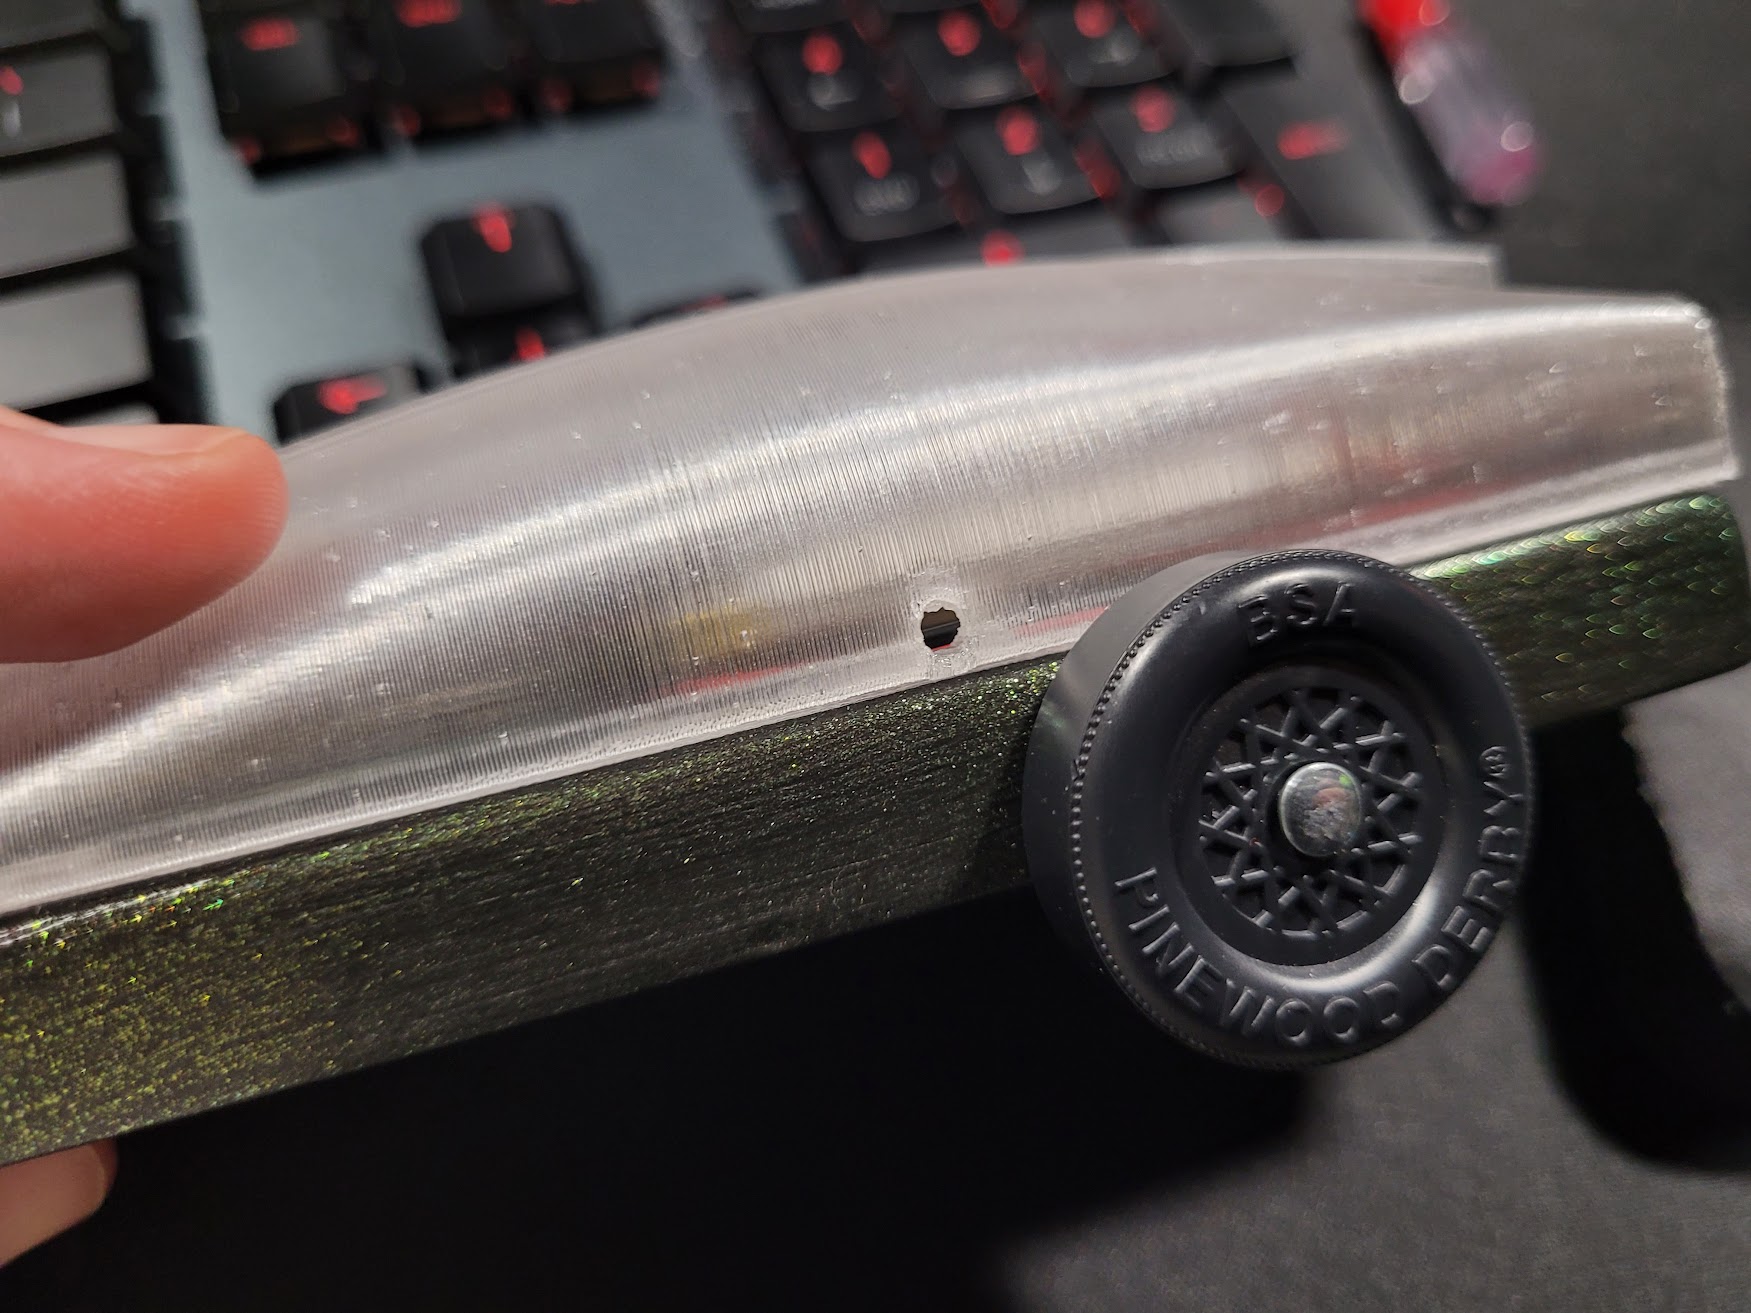
That's it! With my included presets it should automatically rotate between a handful of effects every 10 seconds. If you'd rather connect to it's AP and control it directly from your phone, have at it!
I had to add 2.5oz to mine in the form of tungsten and iron tire weights. It actually balanced really well and if I had wanted it to be a winner car, polishing the axels would have gotten me there. Good luck!
In next year's iteration I'll have the accelerometer working so the effects will be controlled by movement 😁
Gostou deste modelo? Crie uma conta grátis para salvar seus favoritos e voltar a eles depois.
Criar conta