Você está no 3DFinder
Buscamos em Thingiverse, MakerWorld e Printables ao mesmo tempo para te dar o melhor de cada uma.
Descrição
Had a lot of questions regarding which frames are best suited for my Hueforge portraits. Since I have so many different prints sizes I was not able to find a universal model or a designer that offers all my required sizes. That prompted me to design a minimalist style frame/border that was scalable, customizable, and easy to assemble to house any and all hueforge print sizes - mine and any one else's, bookmarks included. There are 2 versions: a wall mounted frame for individual prints and another more suited to display a collage of prints, examples are my Wall of Creativity(I did not come up with that name. LOL. Was gonna call it a Board of Prints) and my Bookmark Panel. In addition, both can be used with a desktop stand that I created in conjunction to display the print with or without the frame. The instructions below are for Hueforge prints that are 3mm or less in thickness.
Instructions:
- Identify the size of your portrait and print the corresponding print profile. My prints consist mostly of these 5 sizes for which you can find in the accompanied print profiles. The sizes are(Width X Height): 200x200mm, 160x200mm, 150x200mm,133x200mm, 112-113x200mm. If your portrait is a different size, follow these scaling instructions to customize the frame to fit your portrait.
Scaling Instructions: Use the accompanied image for reference
- Obtain the measurements of your portrait's width and height.
- Select any print profile size.
Open that print profile, locate Process and click on Objects (1).
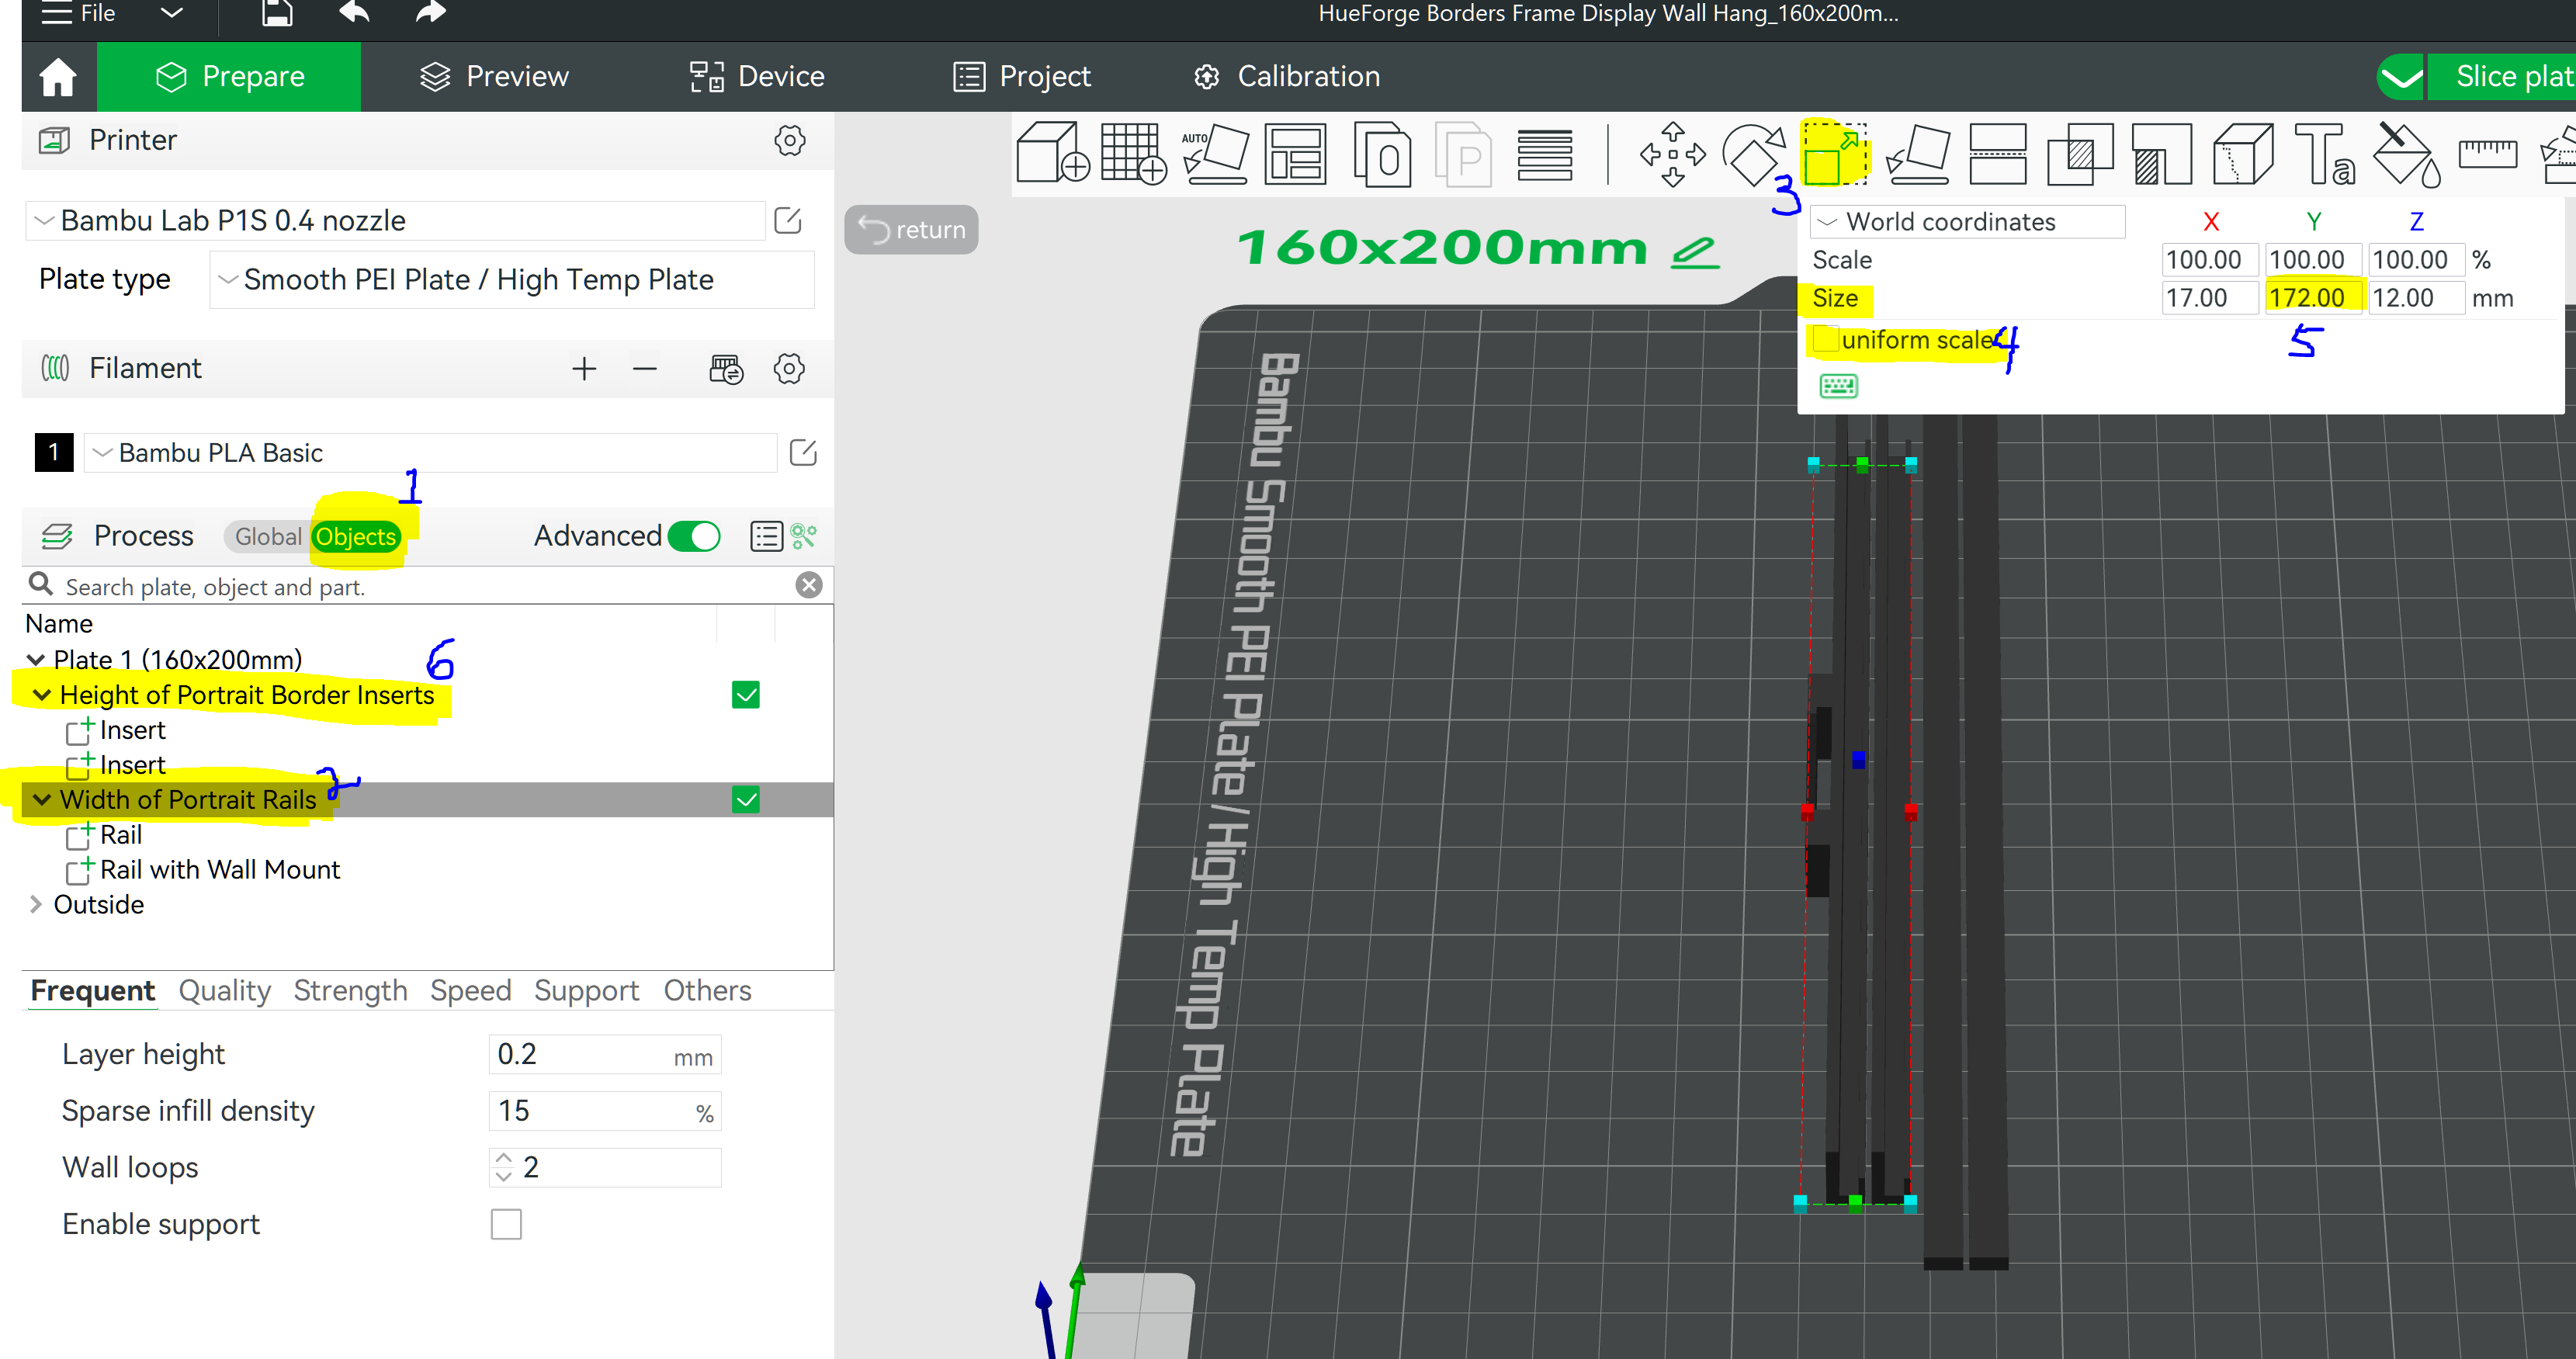
- Next, click on the “Width of Portrait Rails” assembly (2).
- Click on the Scale Tool (3)
- Uncheck to “Uniform Scale” box (4) and should remain unchecked.
- Change the “Y” size value (5) to the sum of the width of your portrait plus 12 to accommodate the two 6mm border inserts. IE. Your width is 165 + 12 = 177. Insert 177 into “Y”.
- If your portrait is not 200mm in height, scale the height by selecting the “Height of Portrait Border inserts” assembly (6).
- Then go to the “Y” size value (5) , change it to the difference of the measured height of your portrait minus 1 so that the border insert can be easily installed. IE. Your height is 180 - 1 = 179. Insert 179 into “Y”.
Slice and Print.
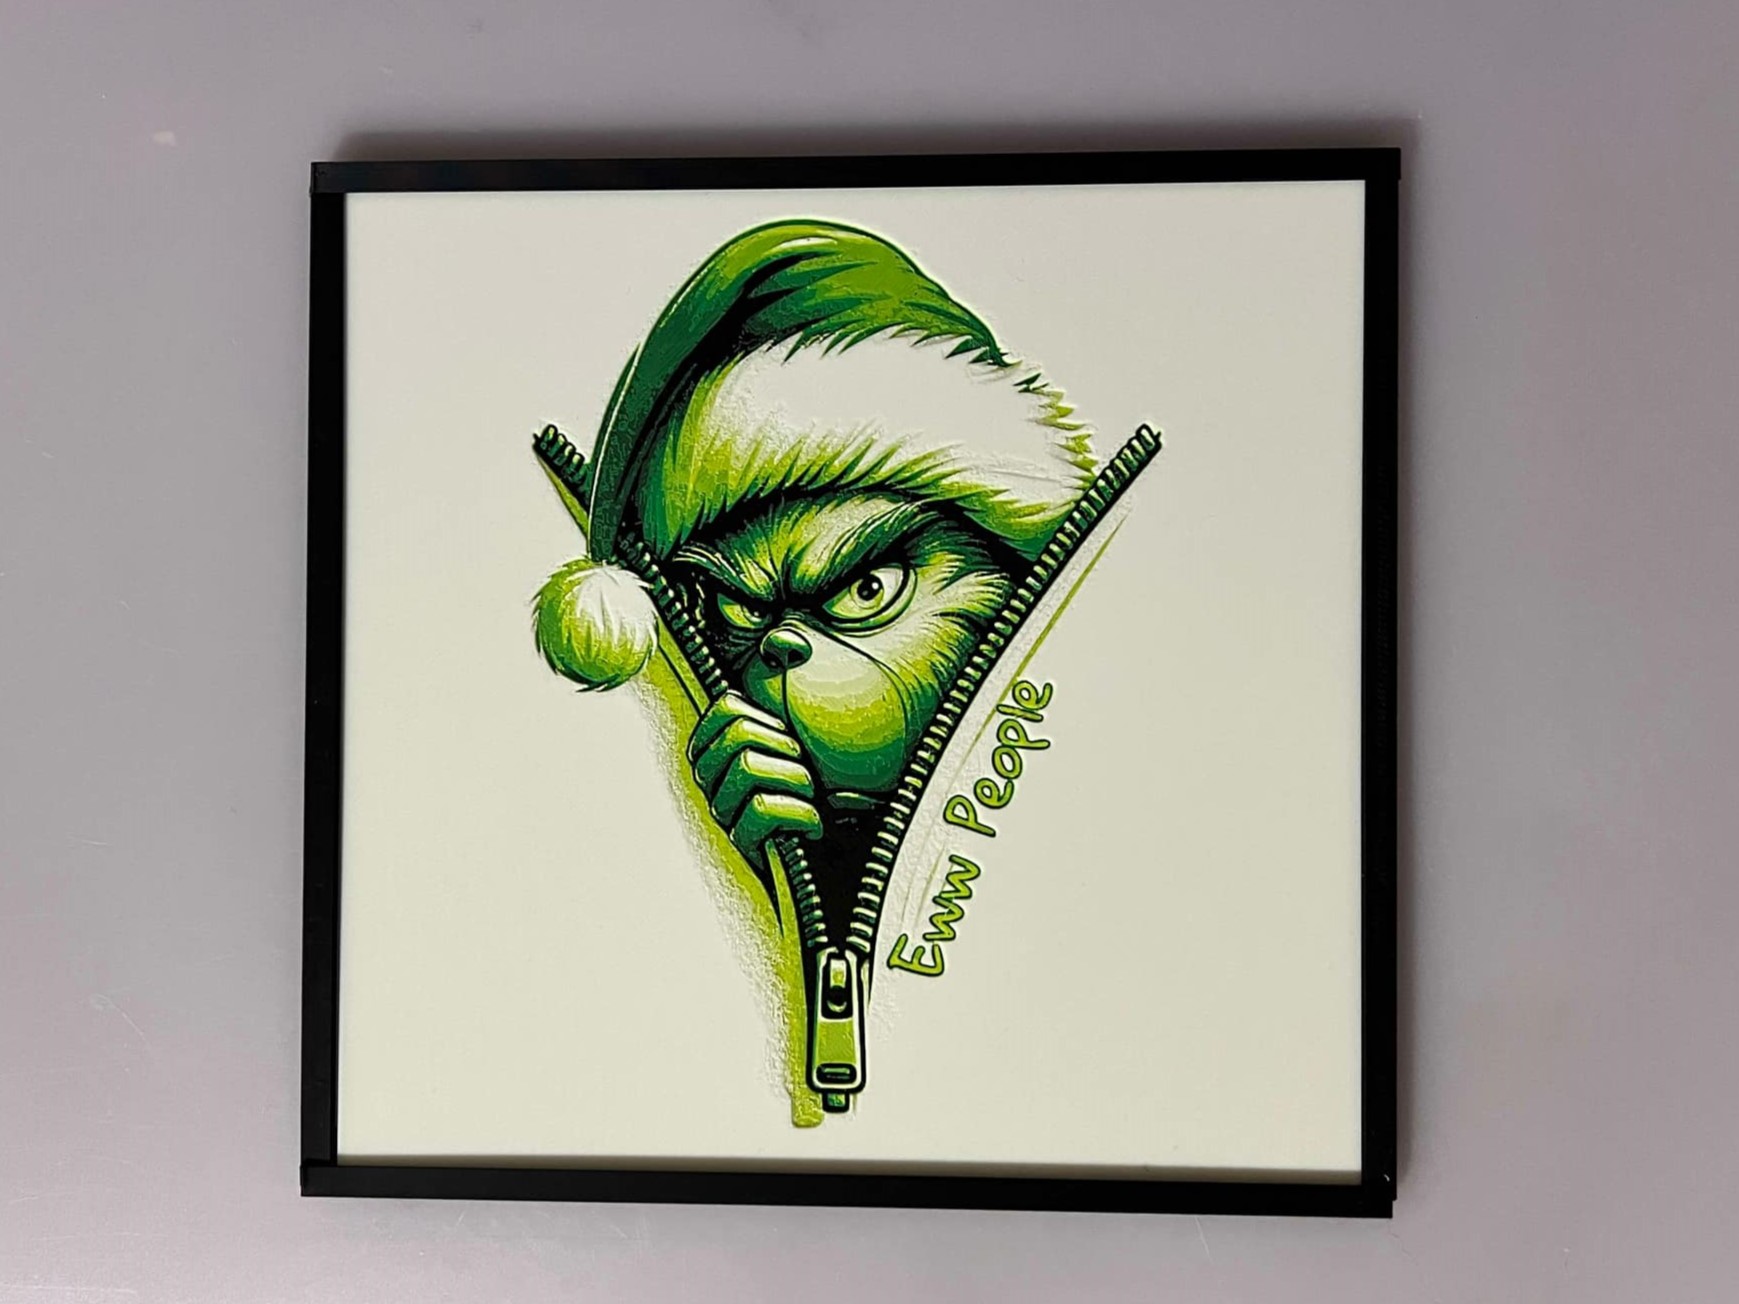
2. Assembly of the frame is straight forward. The 2 rail goes to the top and bottom and the 2 inserts goes to both sides. The portrait slides into the rails guides. It is recommended to use a small amount of Super Glue at the corners to prevent the assembly from coming apart when hung. However, no glue is needed if used with the desktop display, or if the rails are glued to another surface, or the print is used as an attachment surface to the wall. I did not glue the inserts in My Wall of Creativity so I may easily swap out my prints.
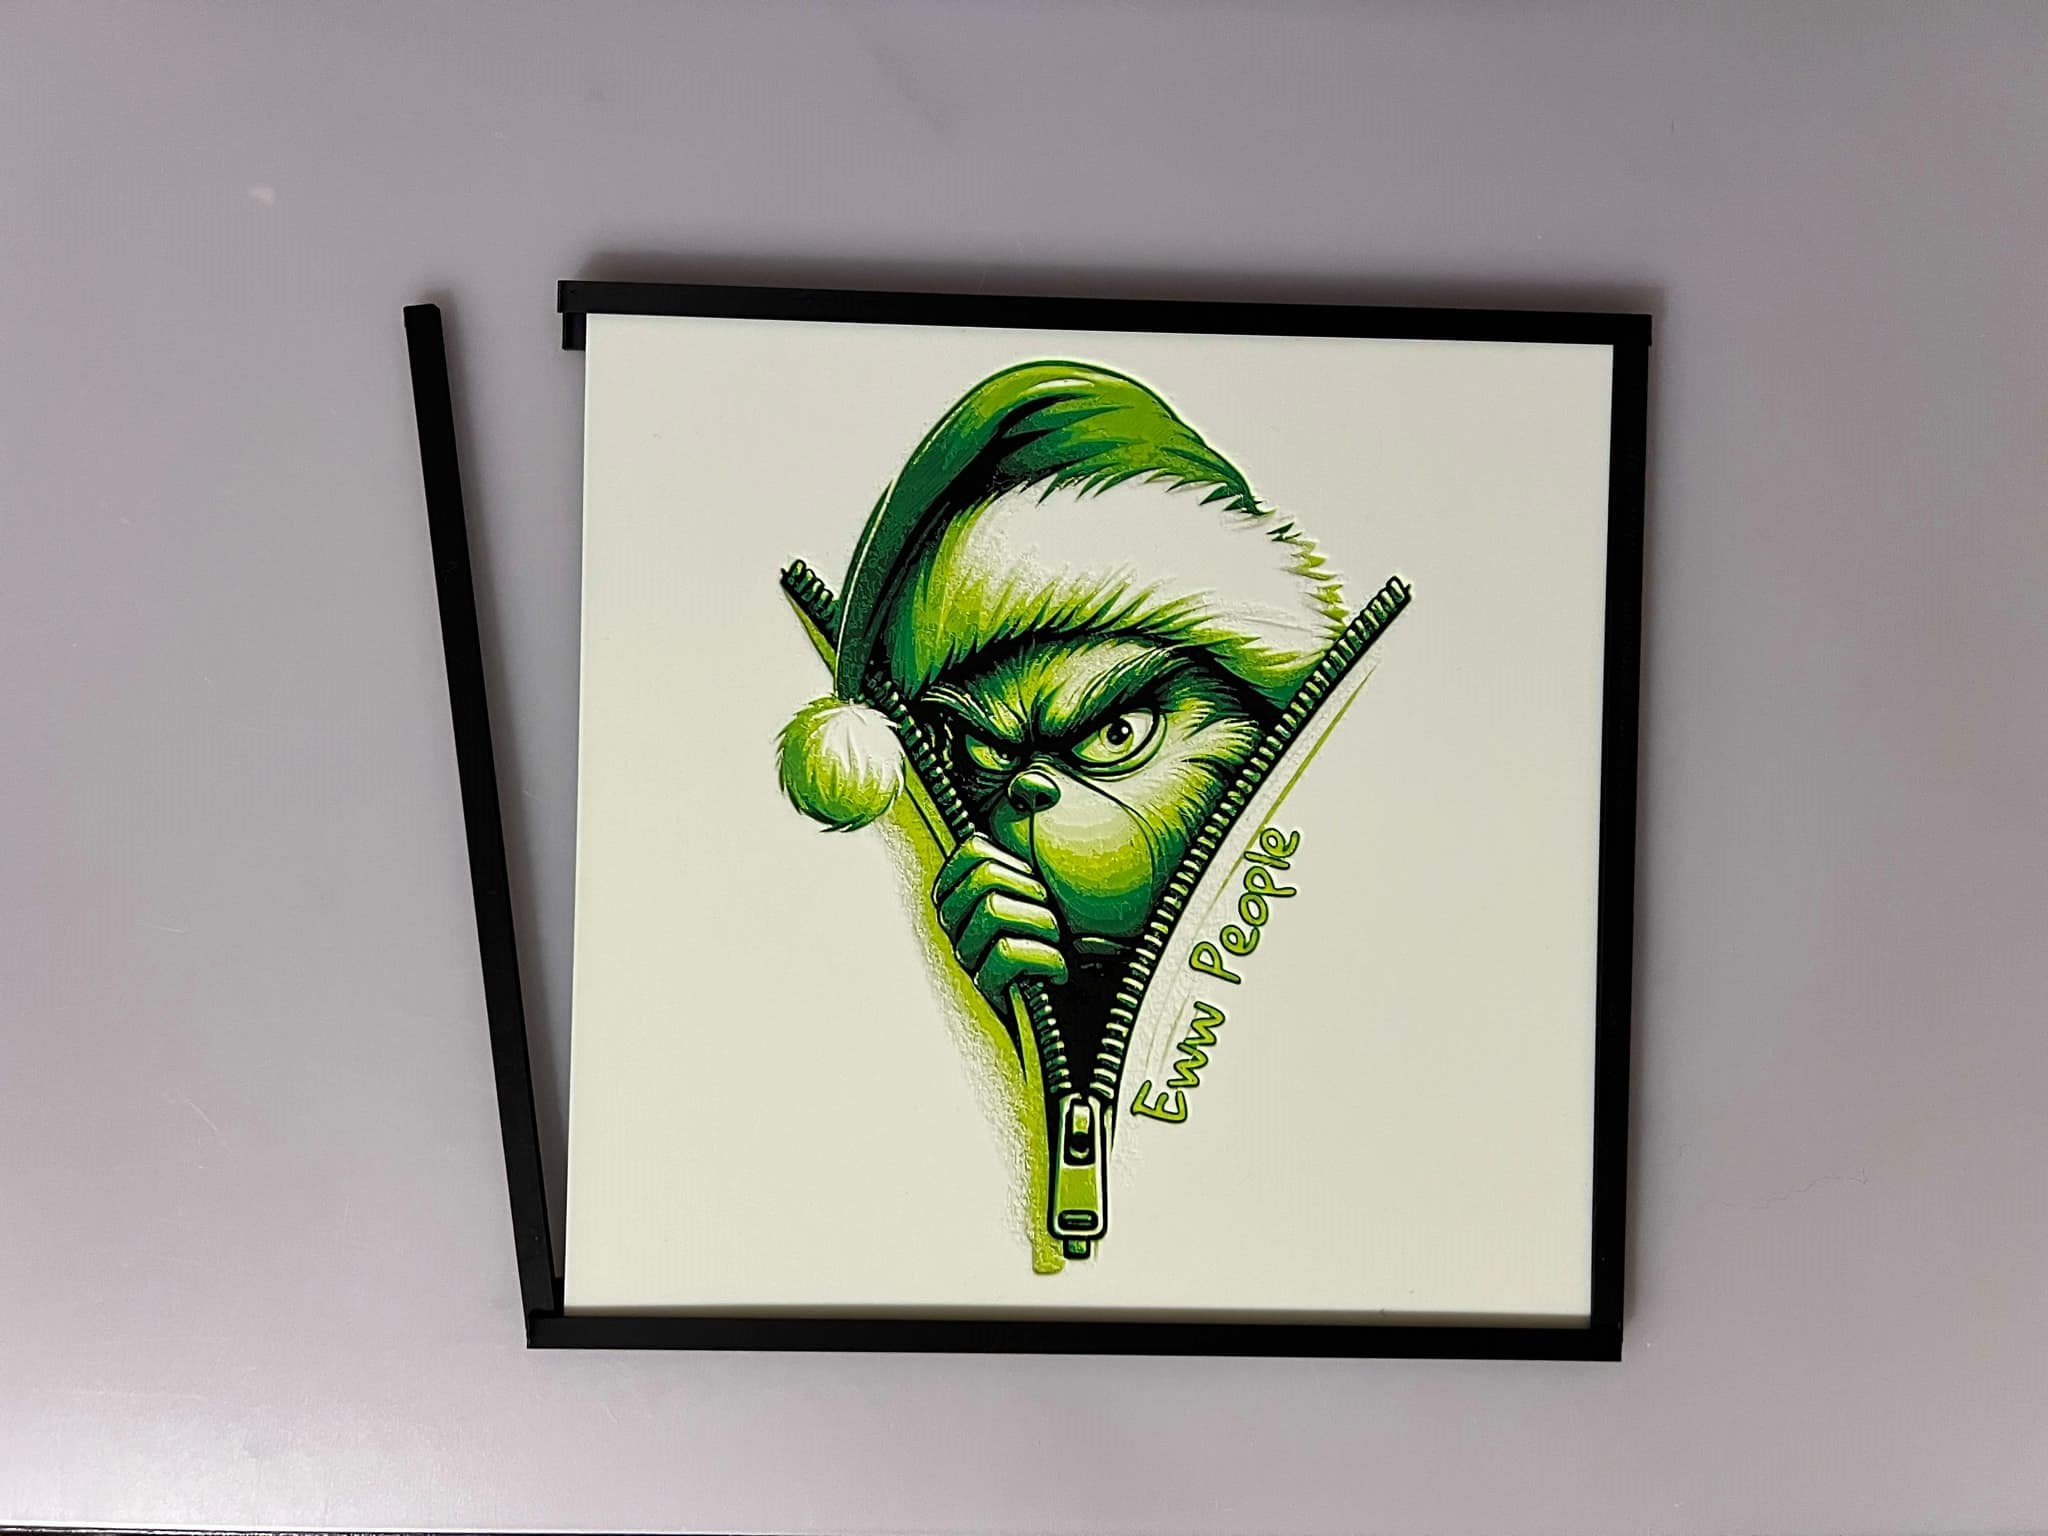
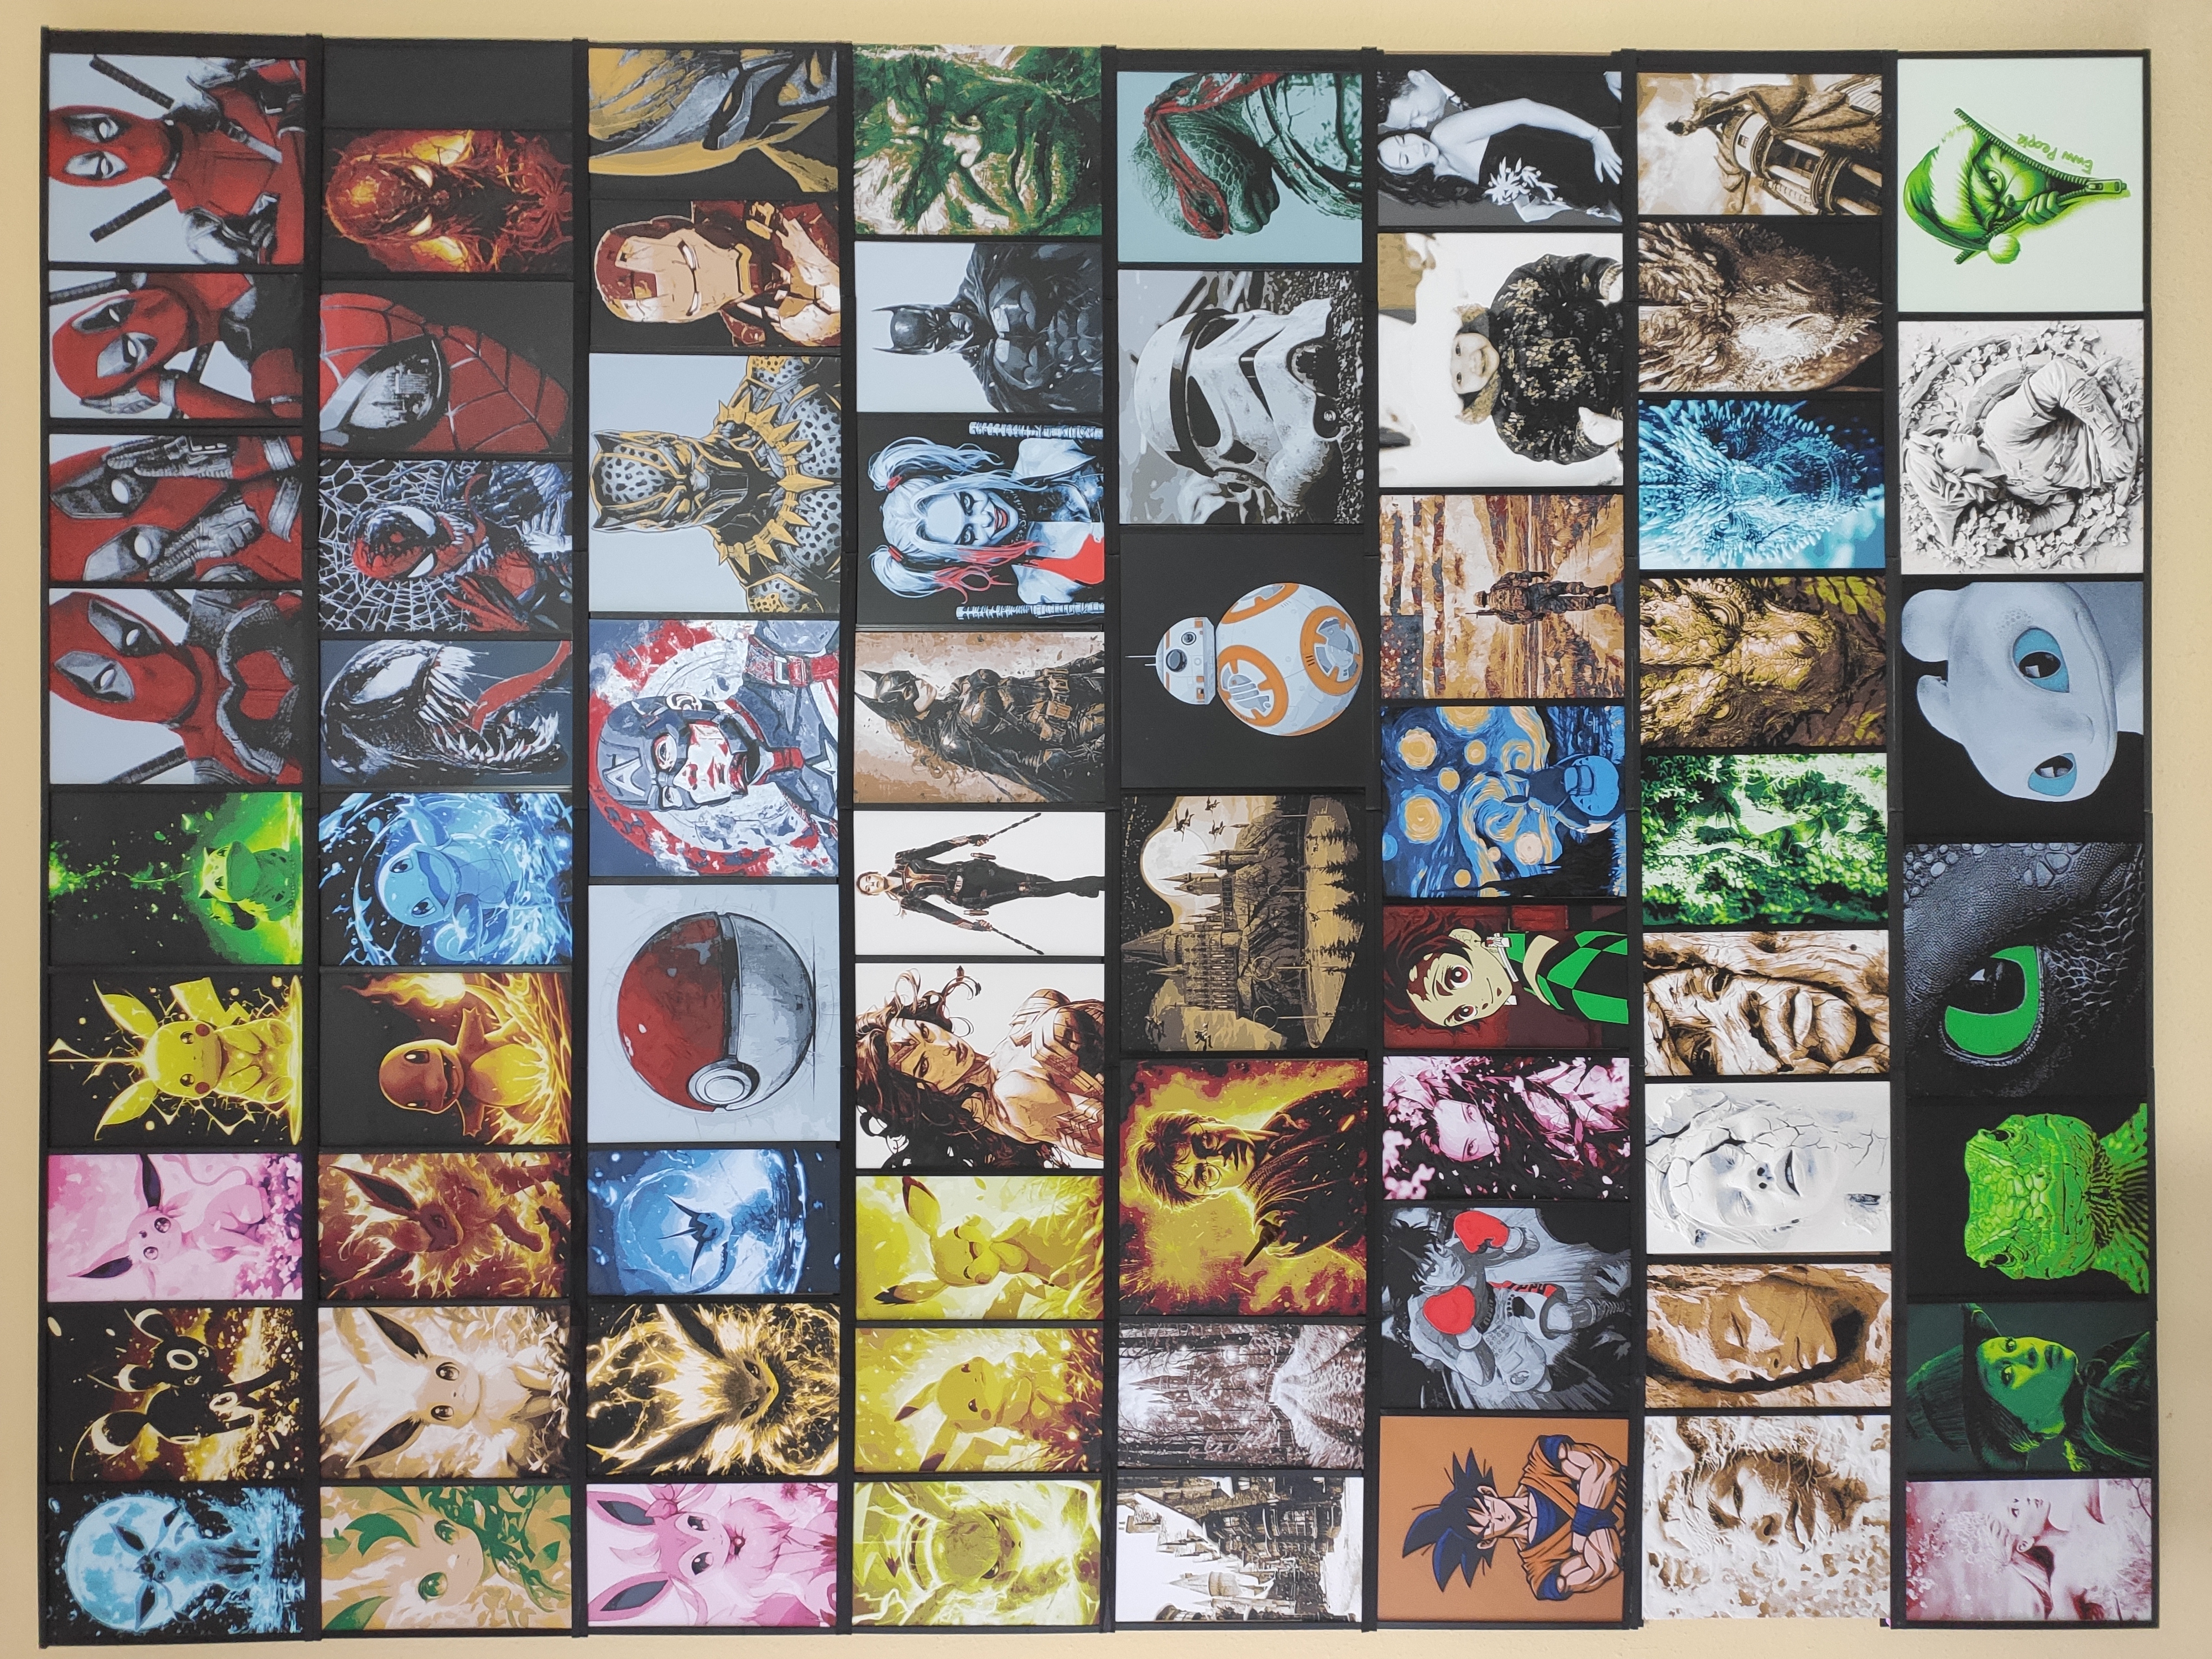
The rails can be glued to a flat display surface to accommodate any configuration your mind can come up with to display your collection of art. You need to know the overall width of your display and do a little math to accommodate for the number of border inserts you may use. Below is an example of how I combined the rails and inserts to make my "Wall of Creativity". I had a huge display and did not want to be constricted. I printed about 100 rails and inserts, glued the rails to a 4x6ft board using crazy glue gel from the Dollar Store so that I can have a little extra time (gel does not dry immediately like regular crazy glue) to align it properly straight by using a leveler. I then used my prints as guides to align the next row by sliding them in the already glued rails and position the other end on top of my print to make sure I have a little movement for the prints. I can never draw a straight line, so I used this method. On a 4 foot board, the rails can be off-positioned once you reach the other side. With the rails completed, I filled the rails randomly and estimated which prints would fill the row without leaving a big gap at the ends. If I was not able to fill the portraits all the way to the end, I just filled the dead space with border inserts. As I create more Hueforge or just want to reconfigure my poster wall, I can switch out the portraits by easily sliding them out and replacing them with the new designs. I did not glue any of the border inserts - that is why I can do that. There is not a need to glue the inserts since the rails are already glued and the whole piece will be hung from the backing board. Have fun.
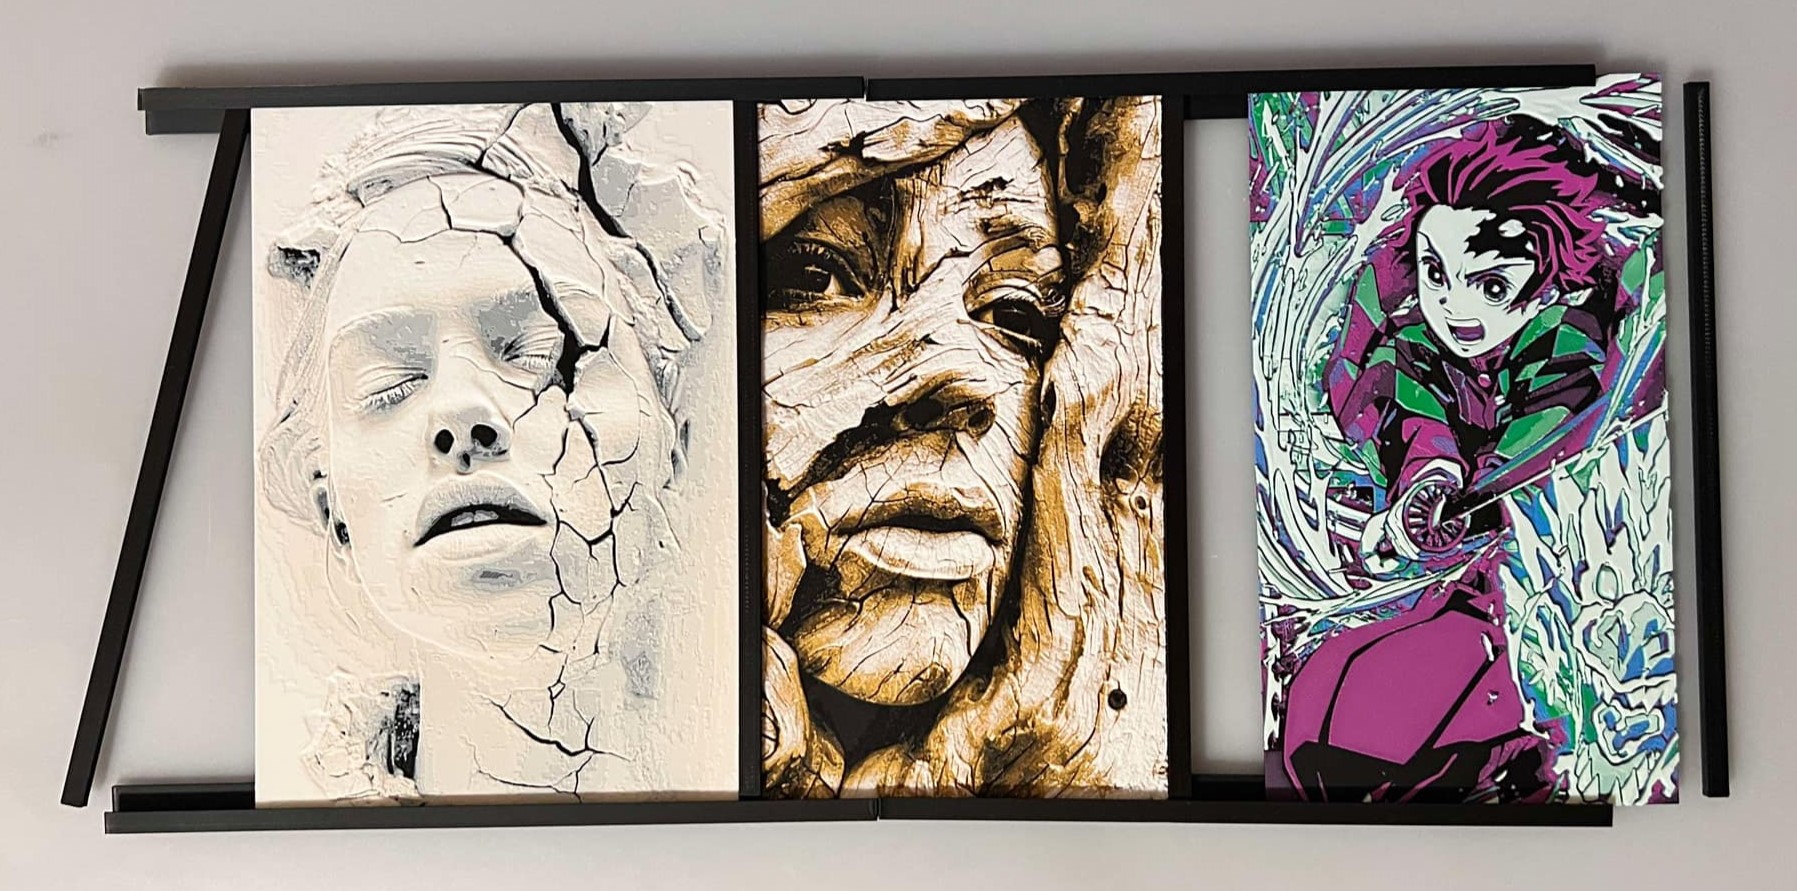
“Wall of Creativity”
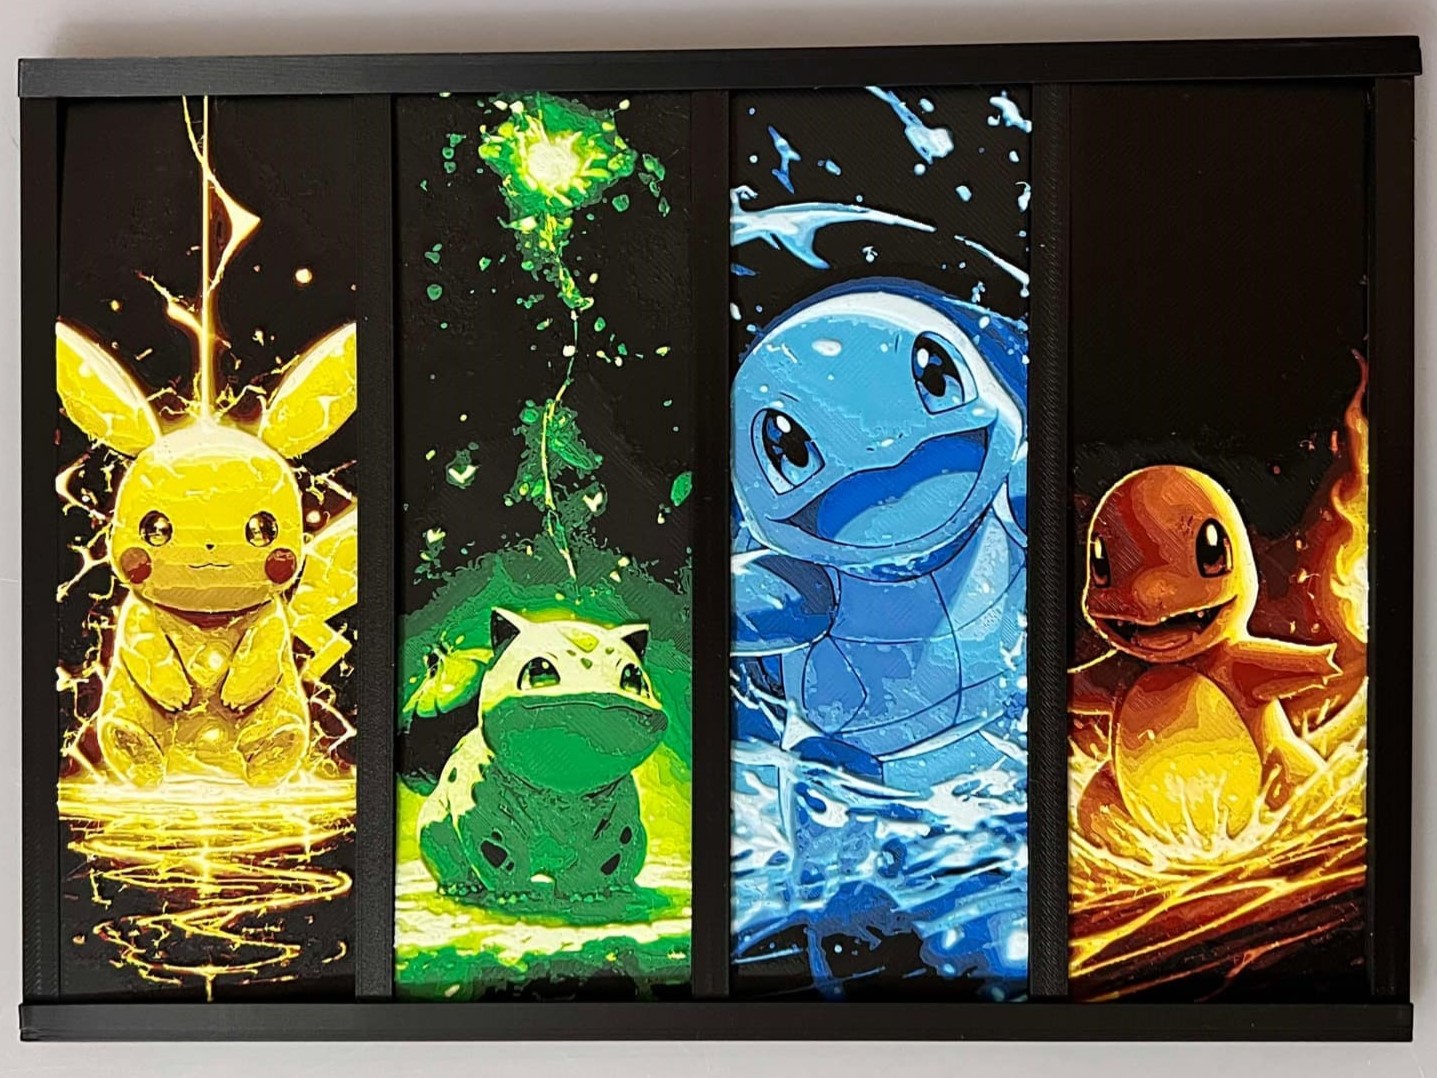
Real Case Example:
- We are going to make a small display consisting of 4 prints. They can be any size width, but all the same height. In this case, I am going to use 4 Bookmarks.
1) Use this formula to figure the size of the total Width of the Rails you need for all your bookmarks: total width + (total # of prints + 1)*( 6) = Total width of rails you need. The case above, I have 4 bookmarks (47+47+47+47) totaling 188 adding, and I have (4 prints +1 totaling 5. Let's plug in our numbers: 188+5*6= 218. So I need 218mm total for my rail. You can refer to the above showing how to rescale. In this case, I only need 1 rail. In other instances, your total length may be more than the plate size, so just duplicate as many rails as needed and size accordingly. For more than one rail to be used, you would need to adhere them to another surface first so they may be contiguous and aligned.
2) Figure the the border lengths inserts by subtracting 1 from the height of your print. In this case 150 - 1 = 149. Size the inserts to that number and print as many inserts as needed. The number of inserts you would need are Total of prints plus 1. The case we are using is 4+1 totaling 5. We need 5 inserts, and the groupings are a set of 2, so we need to make 2 more copies totaling 3 sets totaling 6. You can print an extra insert or split one from the assembly and print just one. Assembly of the rails and inserts are described above.
The frame can be used with my universal Desktop Stand: [https://makerworld.com/en/models/1129786#profileId-1129827](https://makerworld.com/en/models/1129786#profileId-1129827)
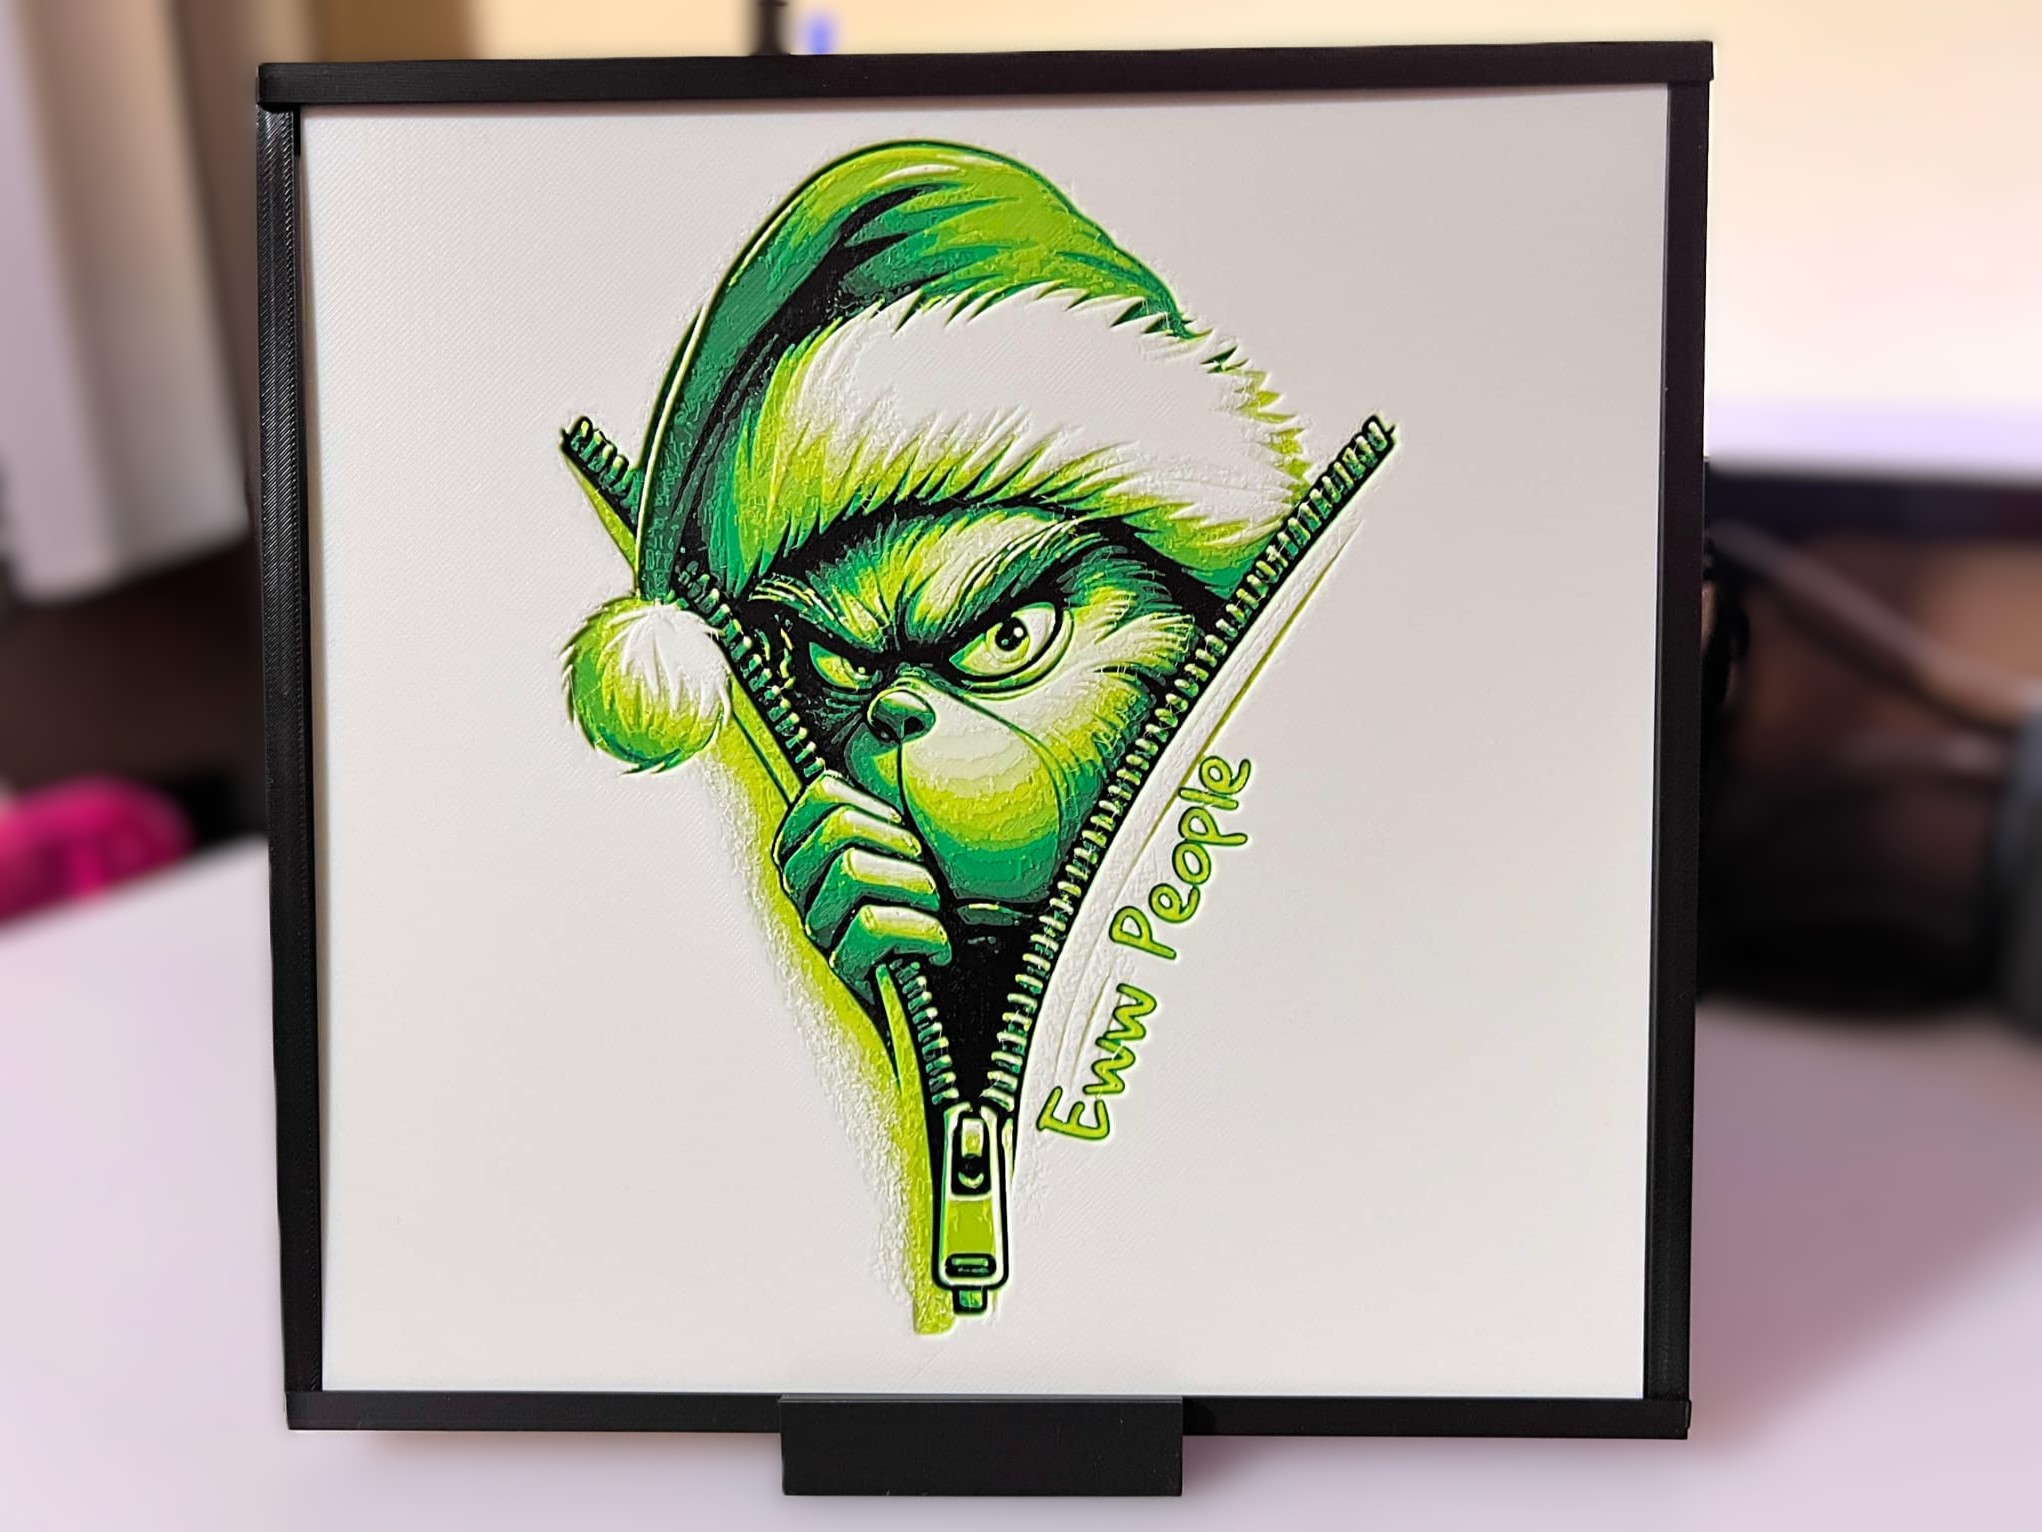
Universal and Customizable HueForge Frame/Border
Publicado em 20 de fev de 2025
Gostou deste modelo? Crie uma conta grátis para salvar seus favoritos e voltar a eles depois.
Criar conta