Você está no 3DFinder
Buscamos em Thingiverse, MakerWorld e Printables ao mesmo tempo para te dar o melhor de cada uma.
Descrição
IMPORTANT : This model is made for the “AMS Hub” with 4 input tubes, if you own another model have a look below :
- for anybody that have the AMS “Buffer” (only 1 input), please find here a link to his little brother : AMS Buffer Guide + Quick Release
- for those who have the P2S Buffer, here is a link to this specific model : P2S Buffer Guide + Quick Release
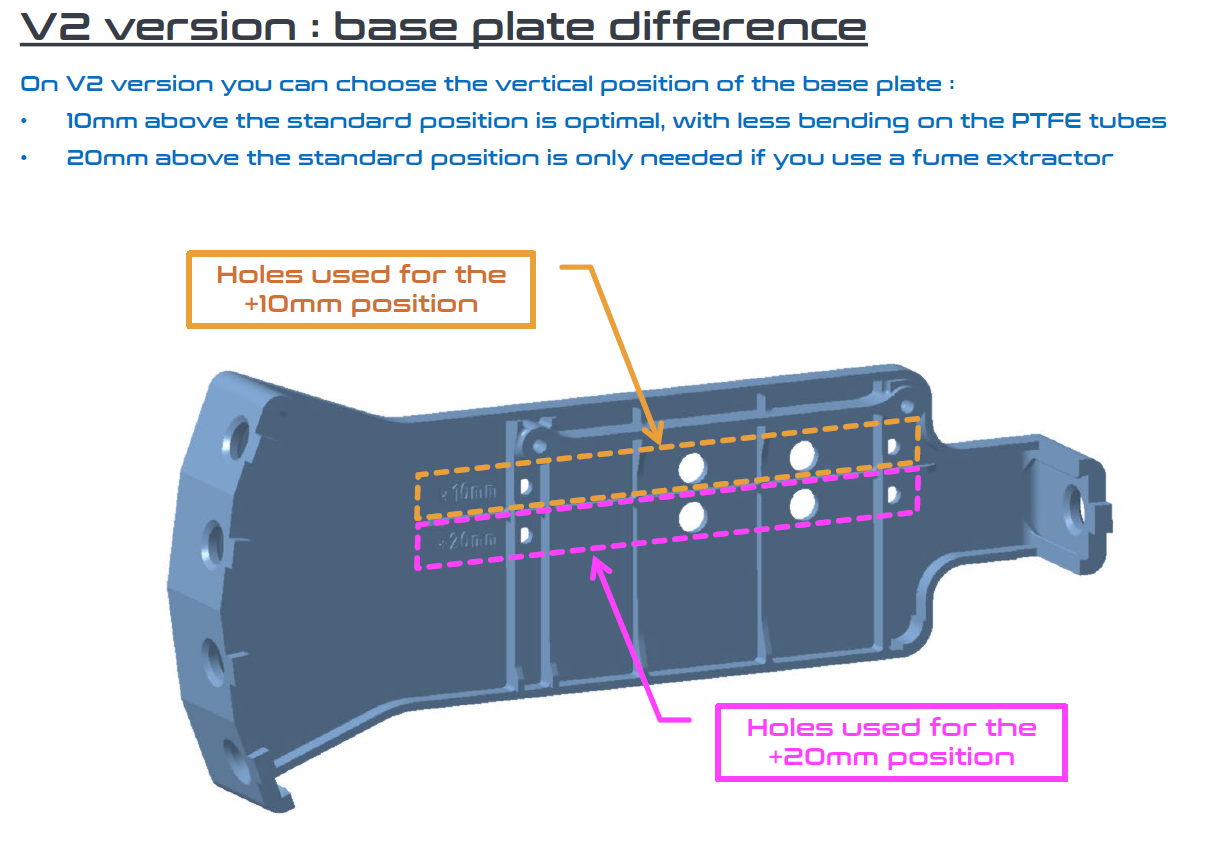
29/07/2025 update : new version V2 available! The new base plate now allows a position choice : you can choose to move up the Buffer guide at 10mm or 20mm above the standard position. This new +20mm position was needed for those who use an air/fume extractor bolted to the back of the printer. The +10mm is still available and remains the best choice for an optimal PTFE tube routing.
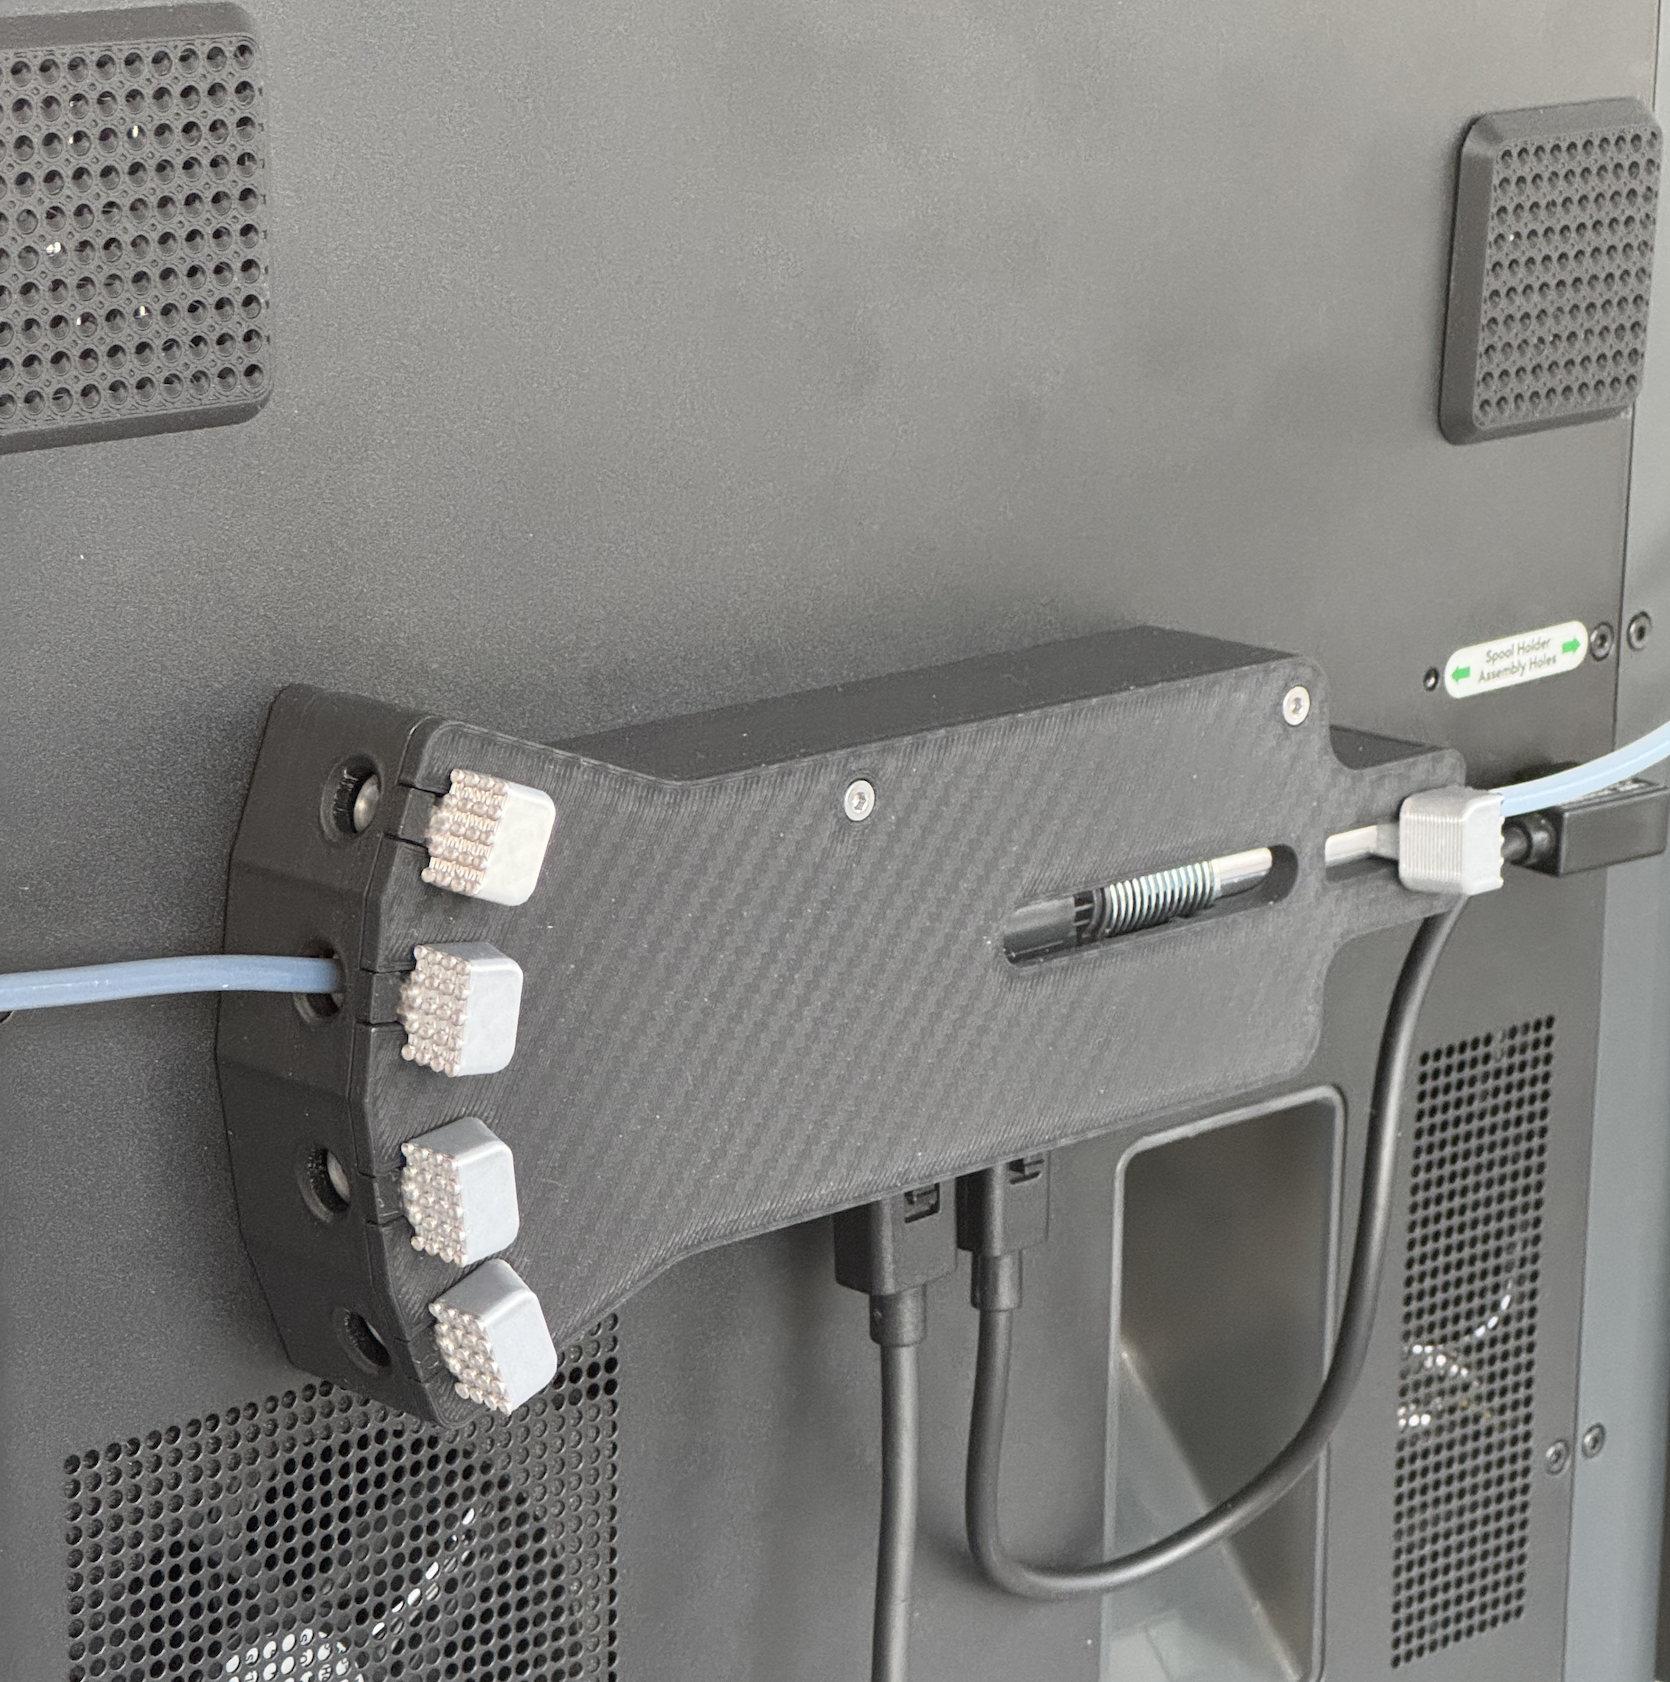
After many requests following the release of my AMS Buffer Guide + Quick Release, and taking in account all your great comments and messages, I have created the AMS Hub Guide + Quick Release variant with the same goal in mind :
- keep the perfect alignment of the PTFE tube at the exit, and keep this as close as possible of the sliding system, where other models are bolted far away from the Hub, this one will guide the filament even inside the AMS Hub system. This has cured the issue I had with retractation error messages when the AMS failed to pull or push the filament.
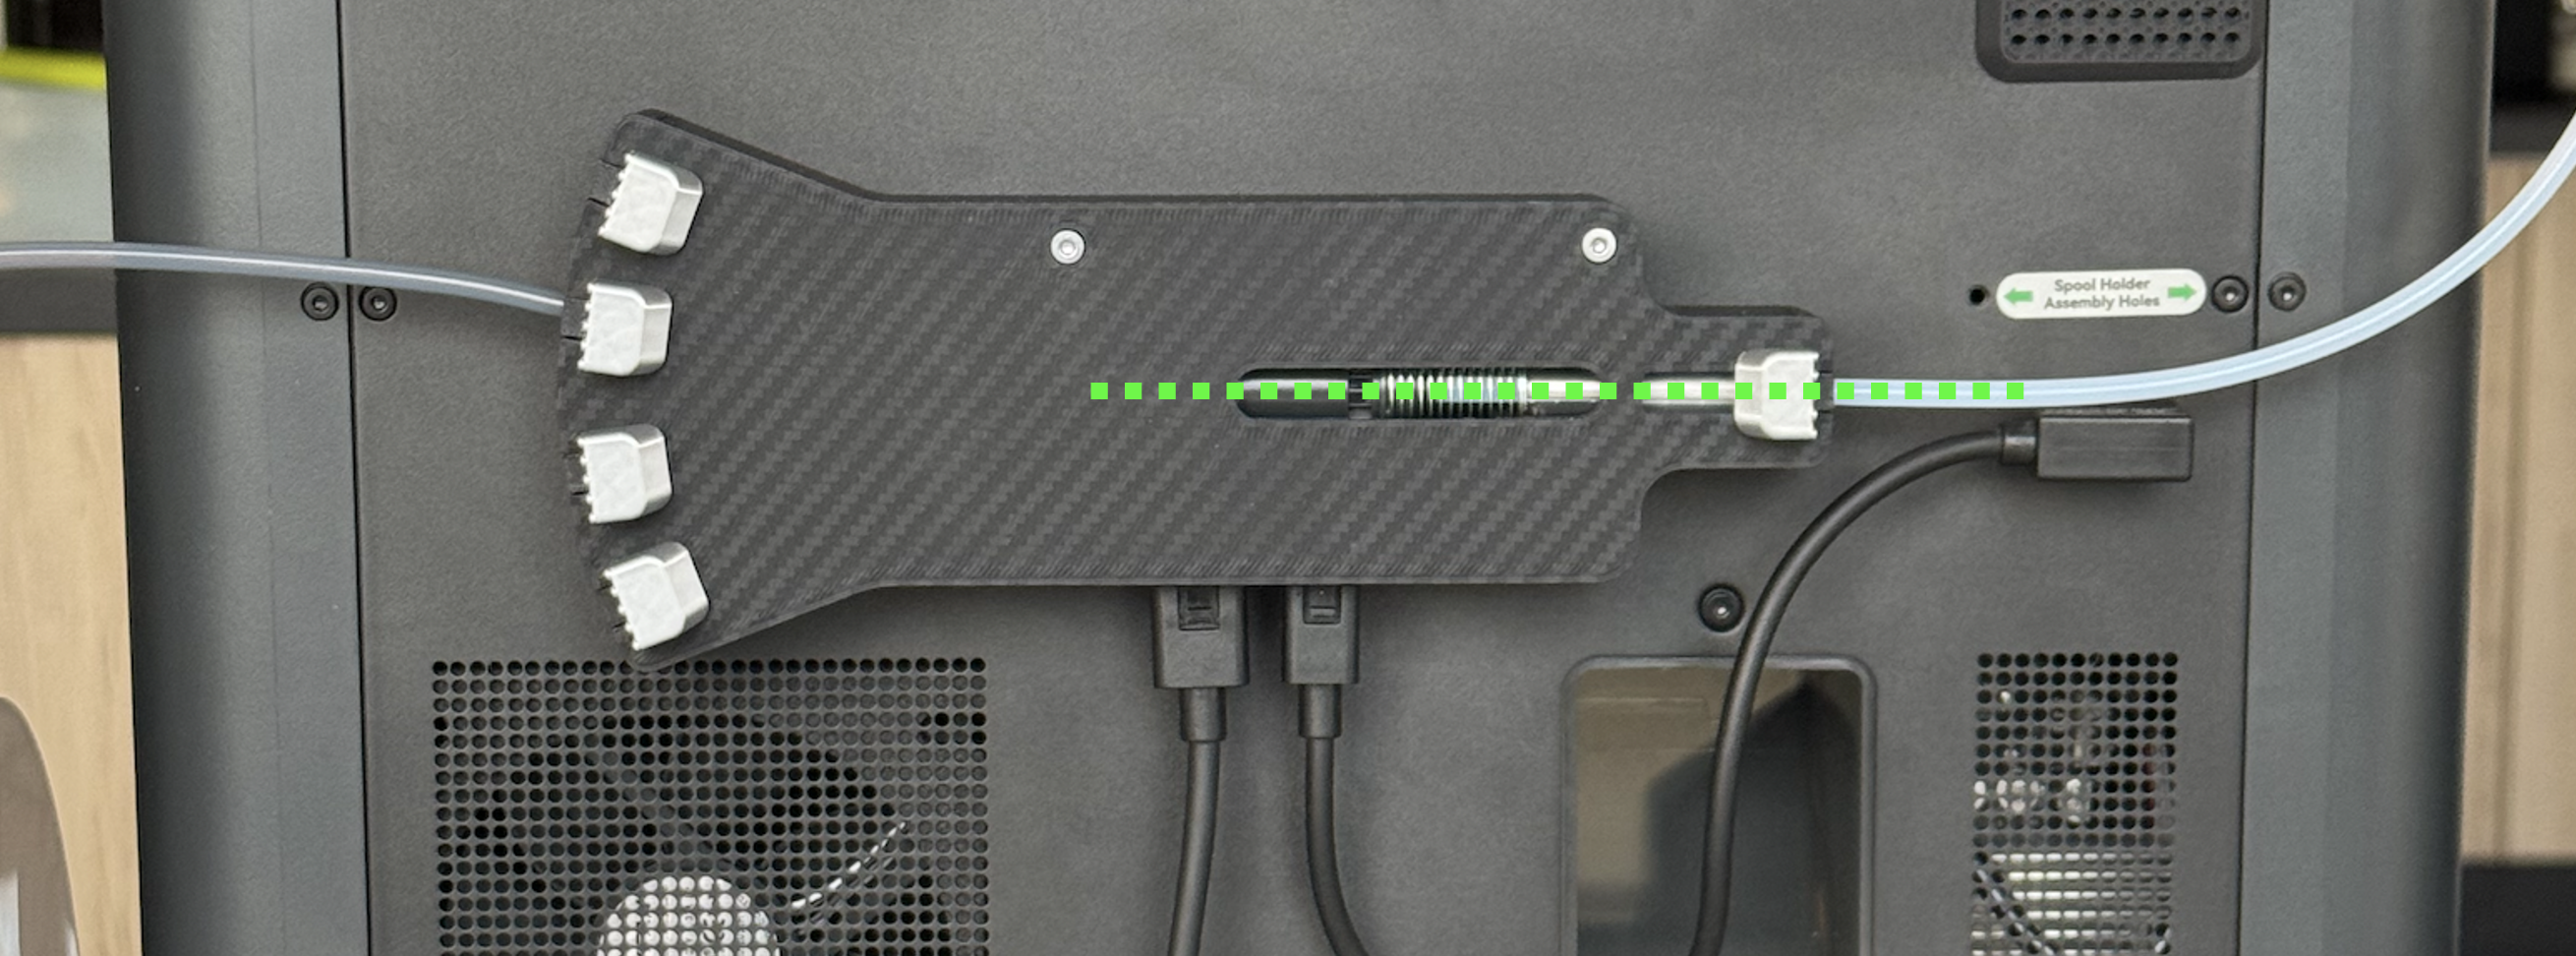
- the quick and tool-less release of the PTFE tube is similar : with a small push on the sliding bolt the PTFE tubes will be released, no need for a tool anymore, it is even better if like me the access to the back of your printer is not easy
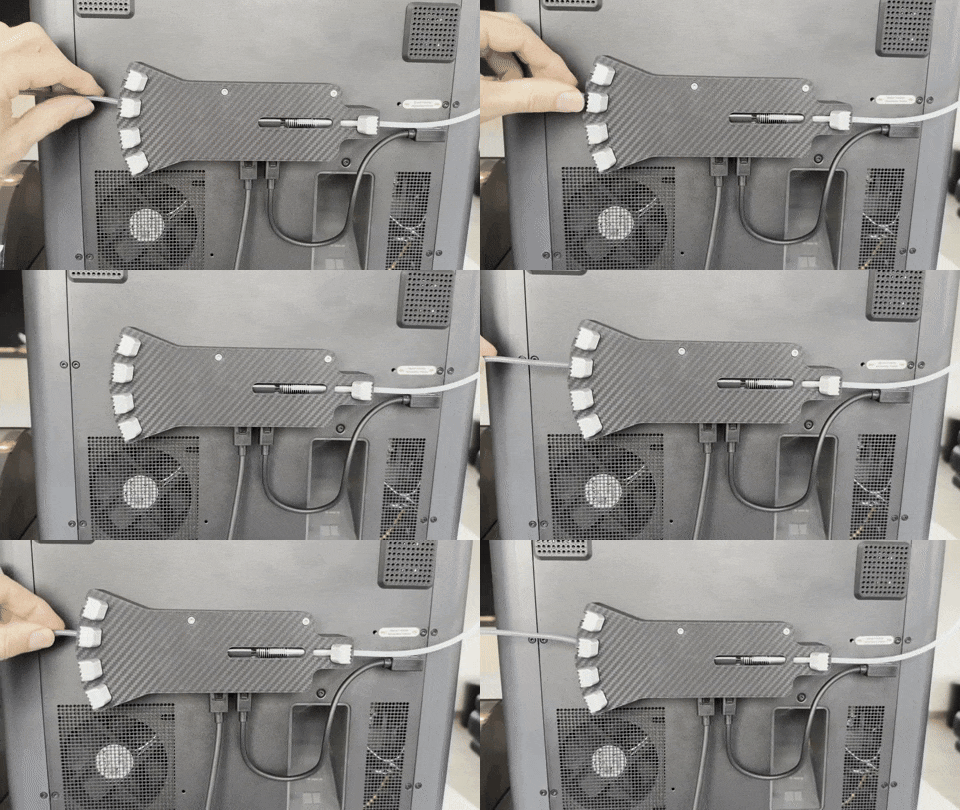
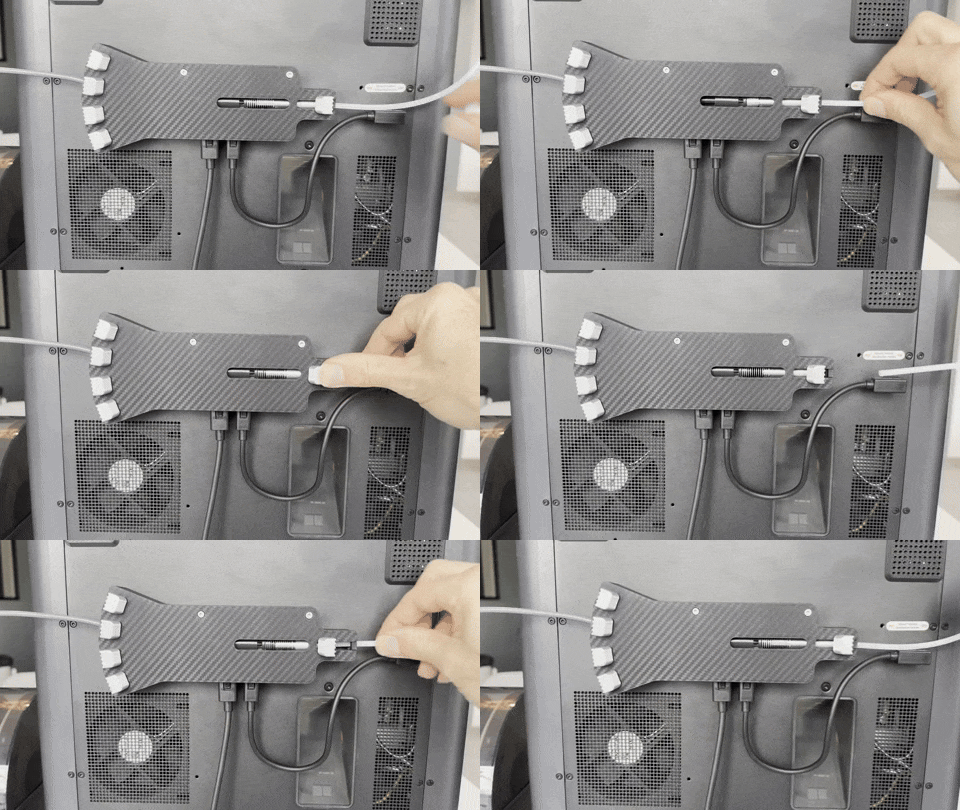
The model printability has been widely improved compared to the buffer version (pending an update too)!
- No more pain with supports removal : I felt that the V1 of the AMS Buffer Guide model required many supports to work perfectly, sometimes on not so accessible areas I recon. Thank you for challenging me, I have read all your comments and improved this point : now with this model there is no need of any support on the cylindrical bores anymore! The only remaining ones are on the connectors cutout and on some small holes, so there are only a few and they are very easy to pop out.
- The dimensions of the stand-off for the electronic board screws have also been refined, they are very sturdy and will not fail when tightening.
- The model dimensions have been optimized for printing with 0.2mm layers to improve the print speed as much as possible. It is still a big model so it takes a bit of time for sure but it worth it I think... You can use your standard profile if you like, I have mainly modified the infill pattern to cubic instead of the default grid : the model is naturally stiff and sturdy, you will not need more than the standard 2 walls. PLA is sufficient also, but other materials will work (except TPU of course!), PETG is known to have even less friction, it might worth it if your printer is in a hot place (or if you have it inside a cabinet)
You will find 2 options available :
- Option 1 : you can install the Hub at the exact same location than the original part. But you will still have the common issue of the PTFE tube going right into the Hub connector! I do not understand why Bambu made it this way, it is really not optimal as the tube has to be bent, and as it will moved back and forth during use it will worn everything around it…
- Option 2 : you can install the hub on a base, which will put it 10mm or even 20mm above the original location: with this option the PTFE tube routing is perfect at the exit, just above the cable connector and still below the external spool holder. It also better clear the fan exit.
The main body of this model and the sliding bolts are exactly the same for the 2 options! So you will not have to print again everything if you want to change to the other configuration.
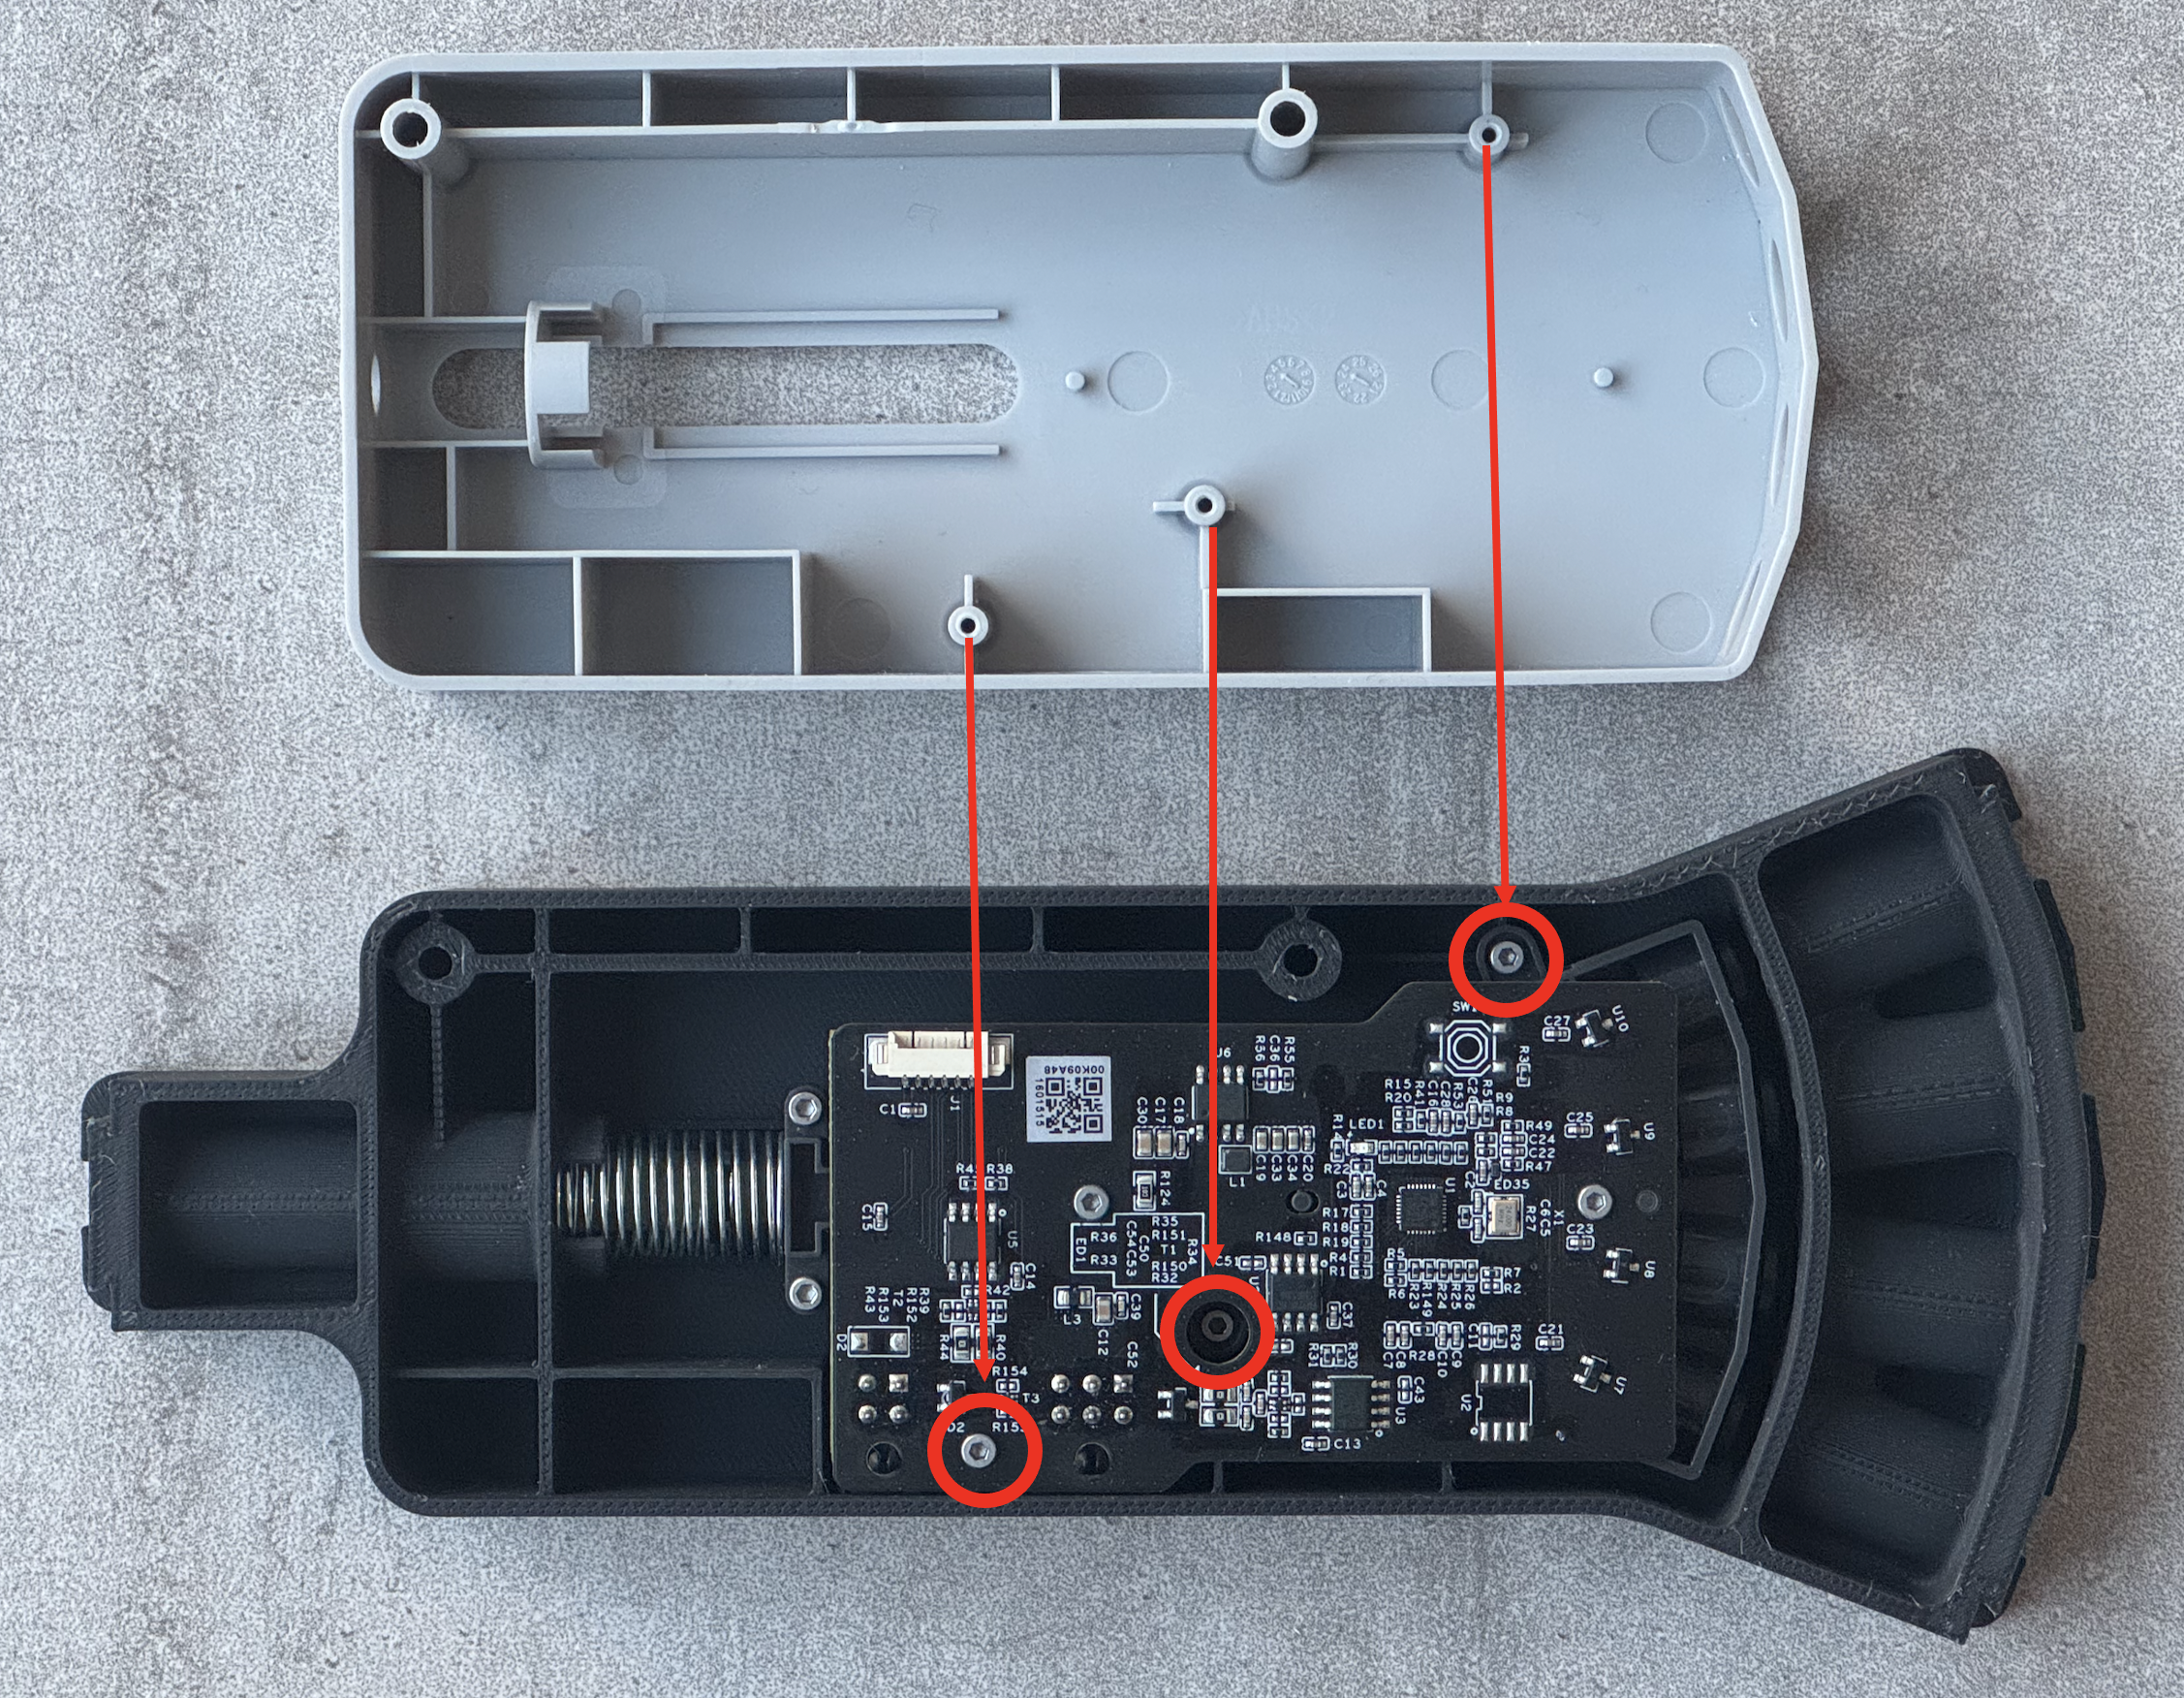
The assembly is very easy, you can use the excellent guide from Bambu Lab Wiki : there are only 3 screws to remove (circled on red below), then you switch the board and the spring from the original part to this new model. As the shape as the original part has been precisely duplicated, you do not need any further hardware, just re-use all the screws.
Installation on the rear panel is also very simple :
If you chose Option 1 (standard location) :
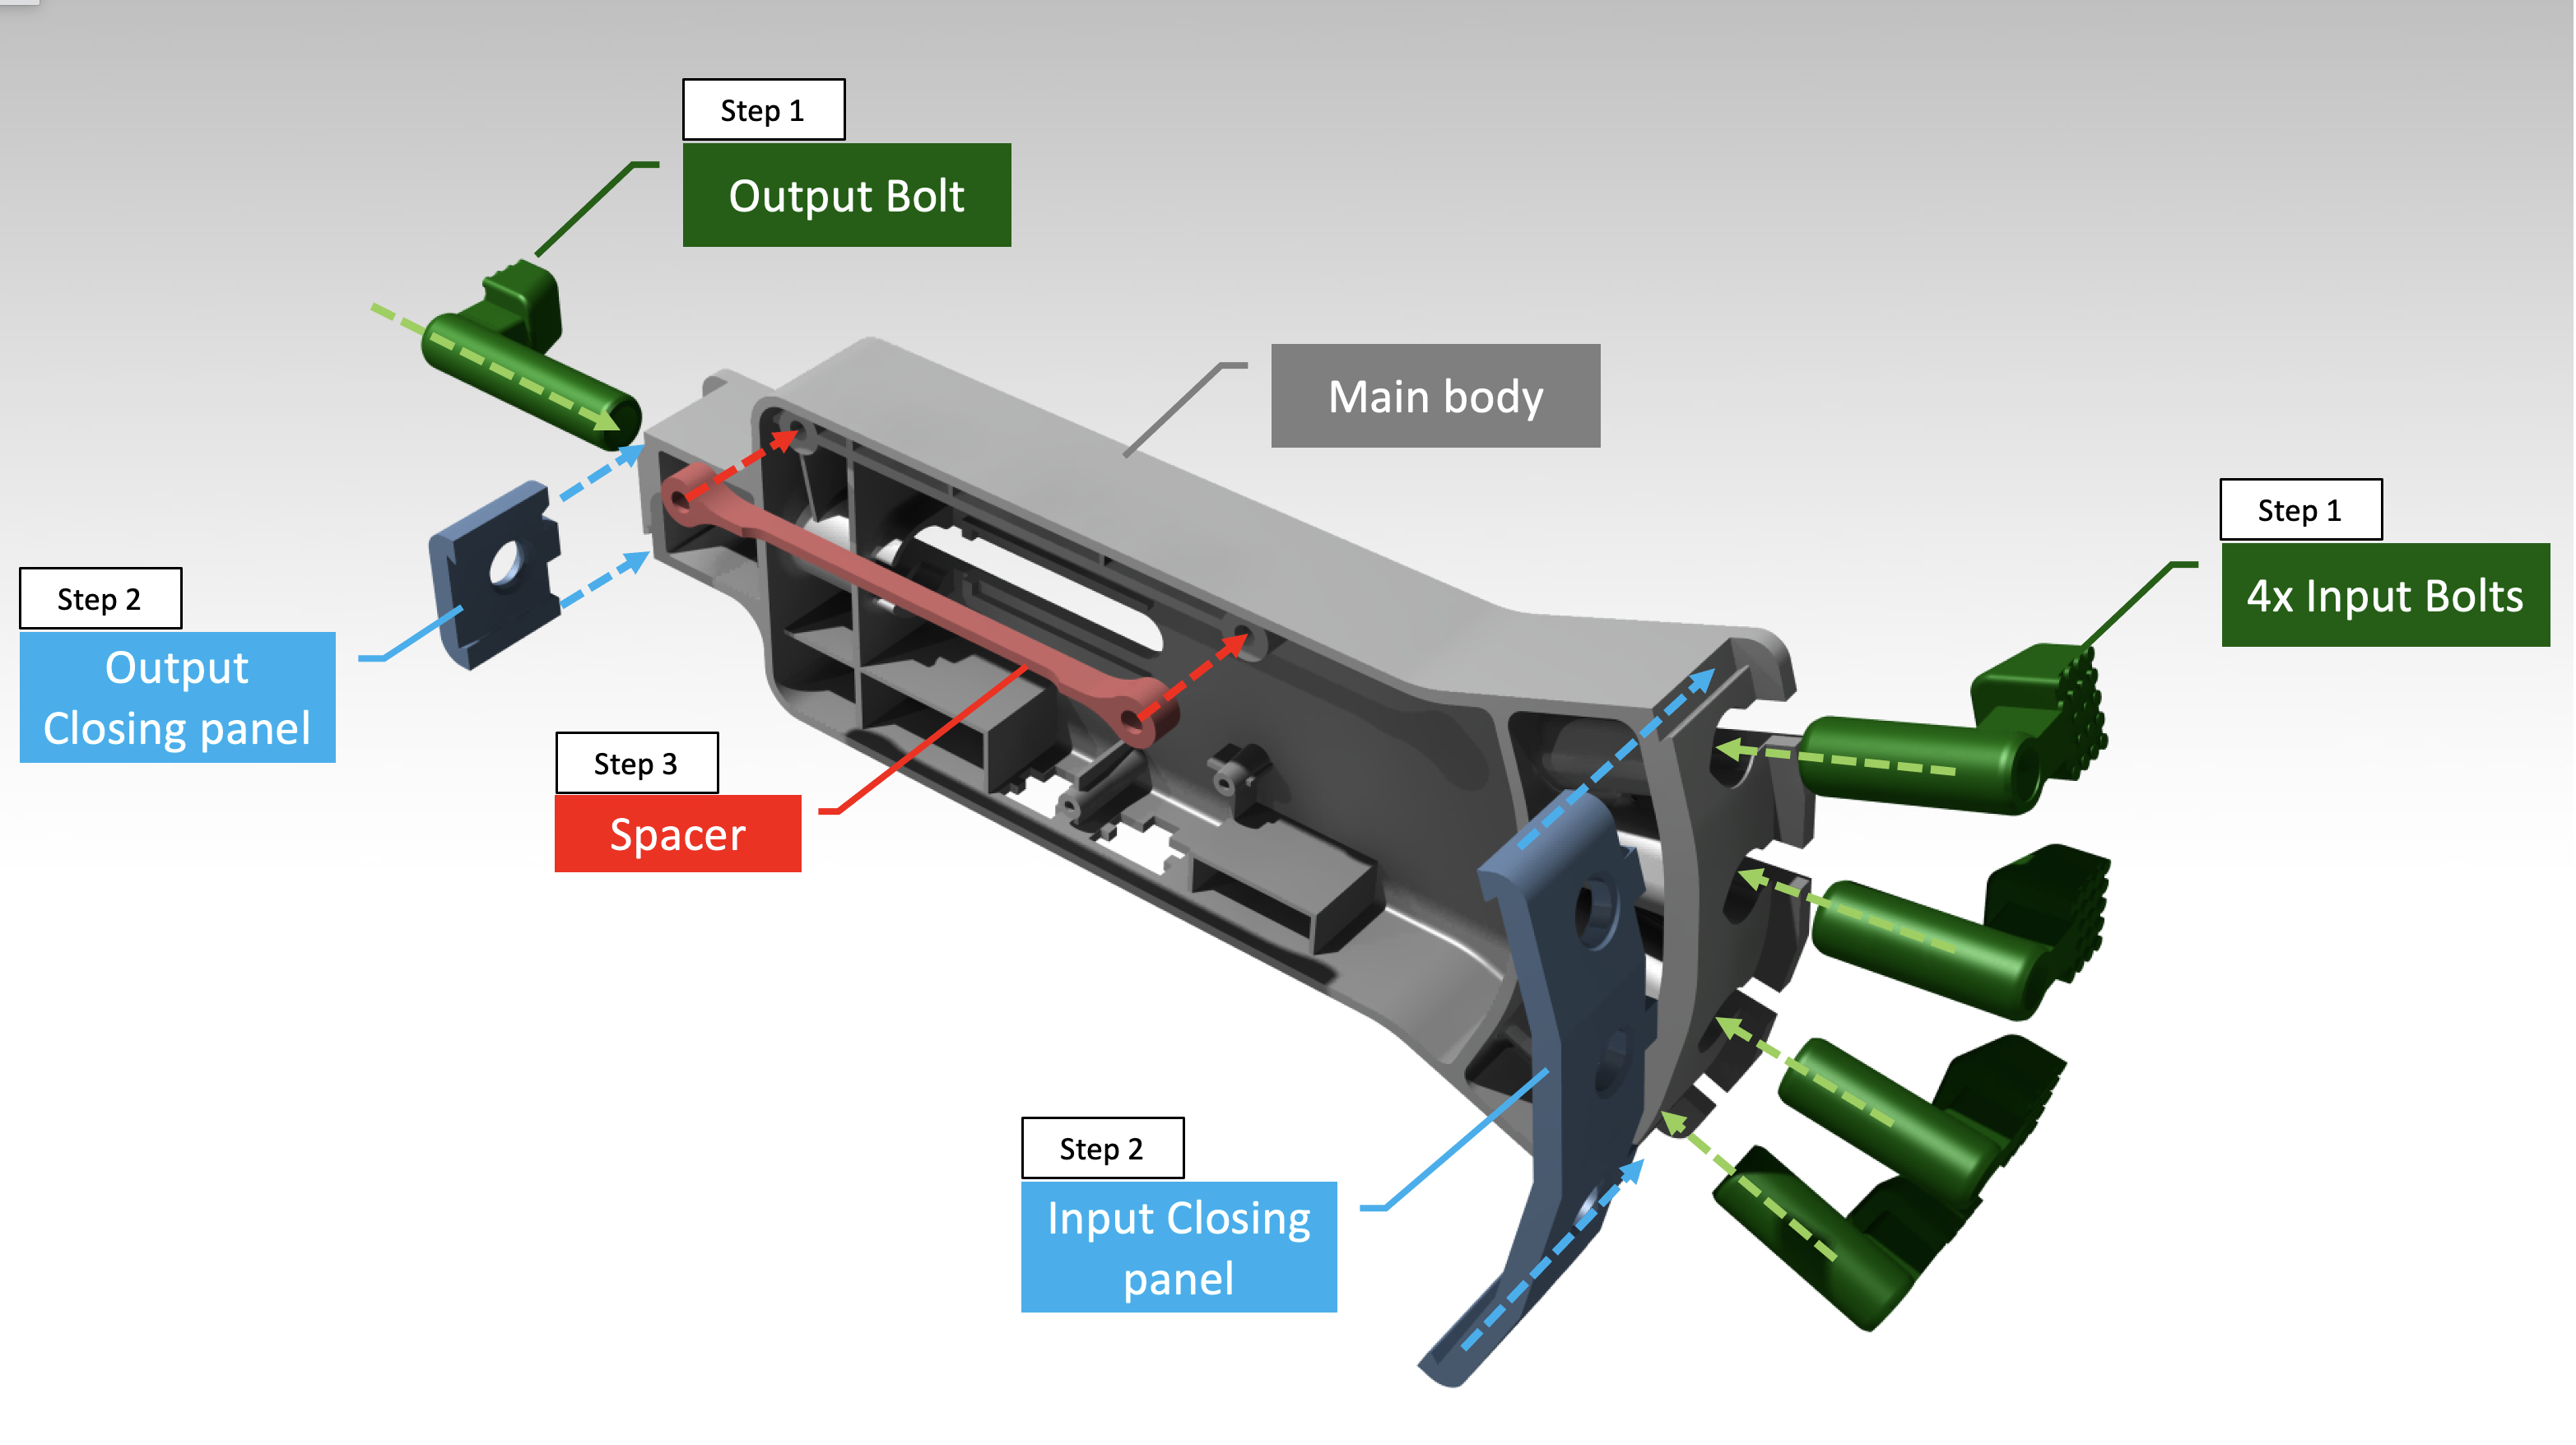
- Slide the bolts on the cylindrical bores of the main body
- Lock them in place with the closing sliding panels (no glue needed)
- Do not forget the “bone-like” spacer on the back-side and screw your new Hub to the back of the printer with the same screws as the original, thats all!
If you chose Option 2 (10mm or 20mm above the original position) :
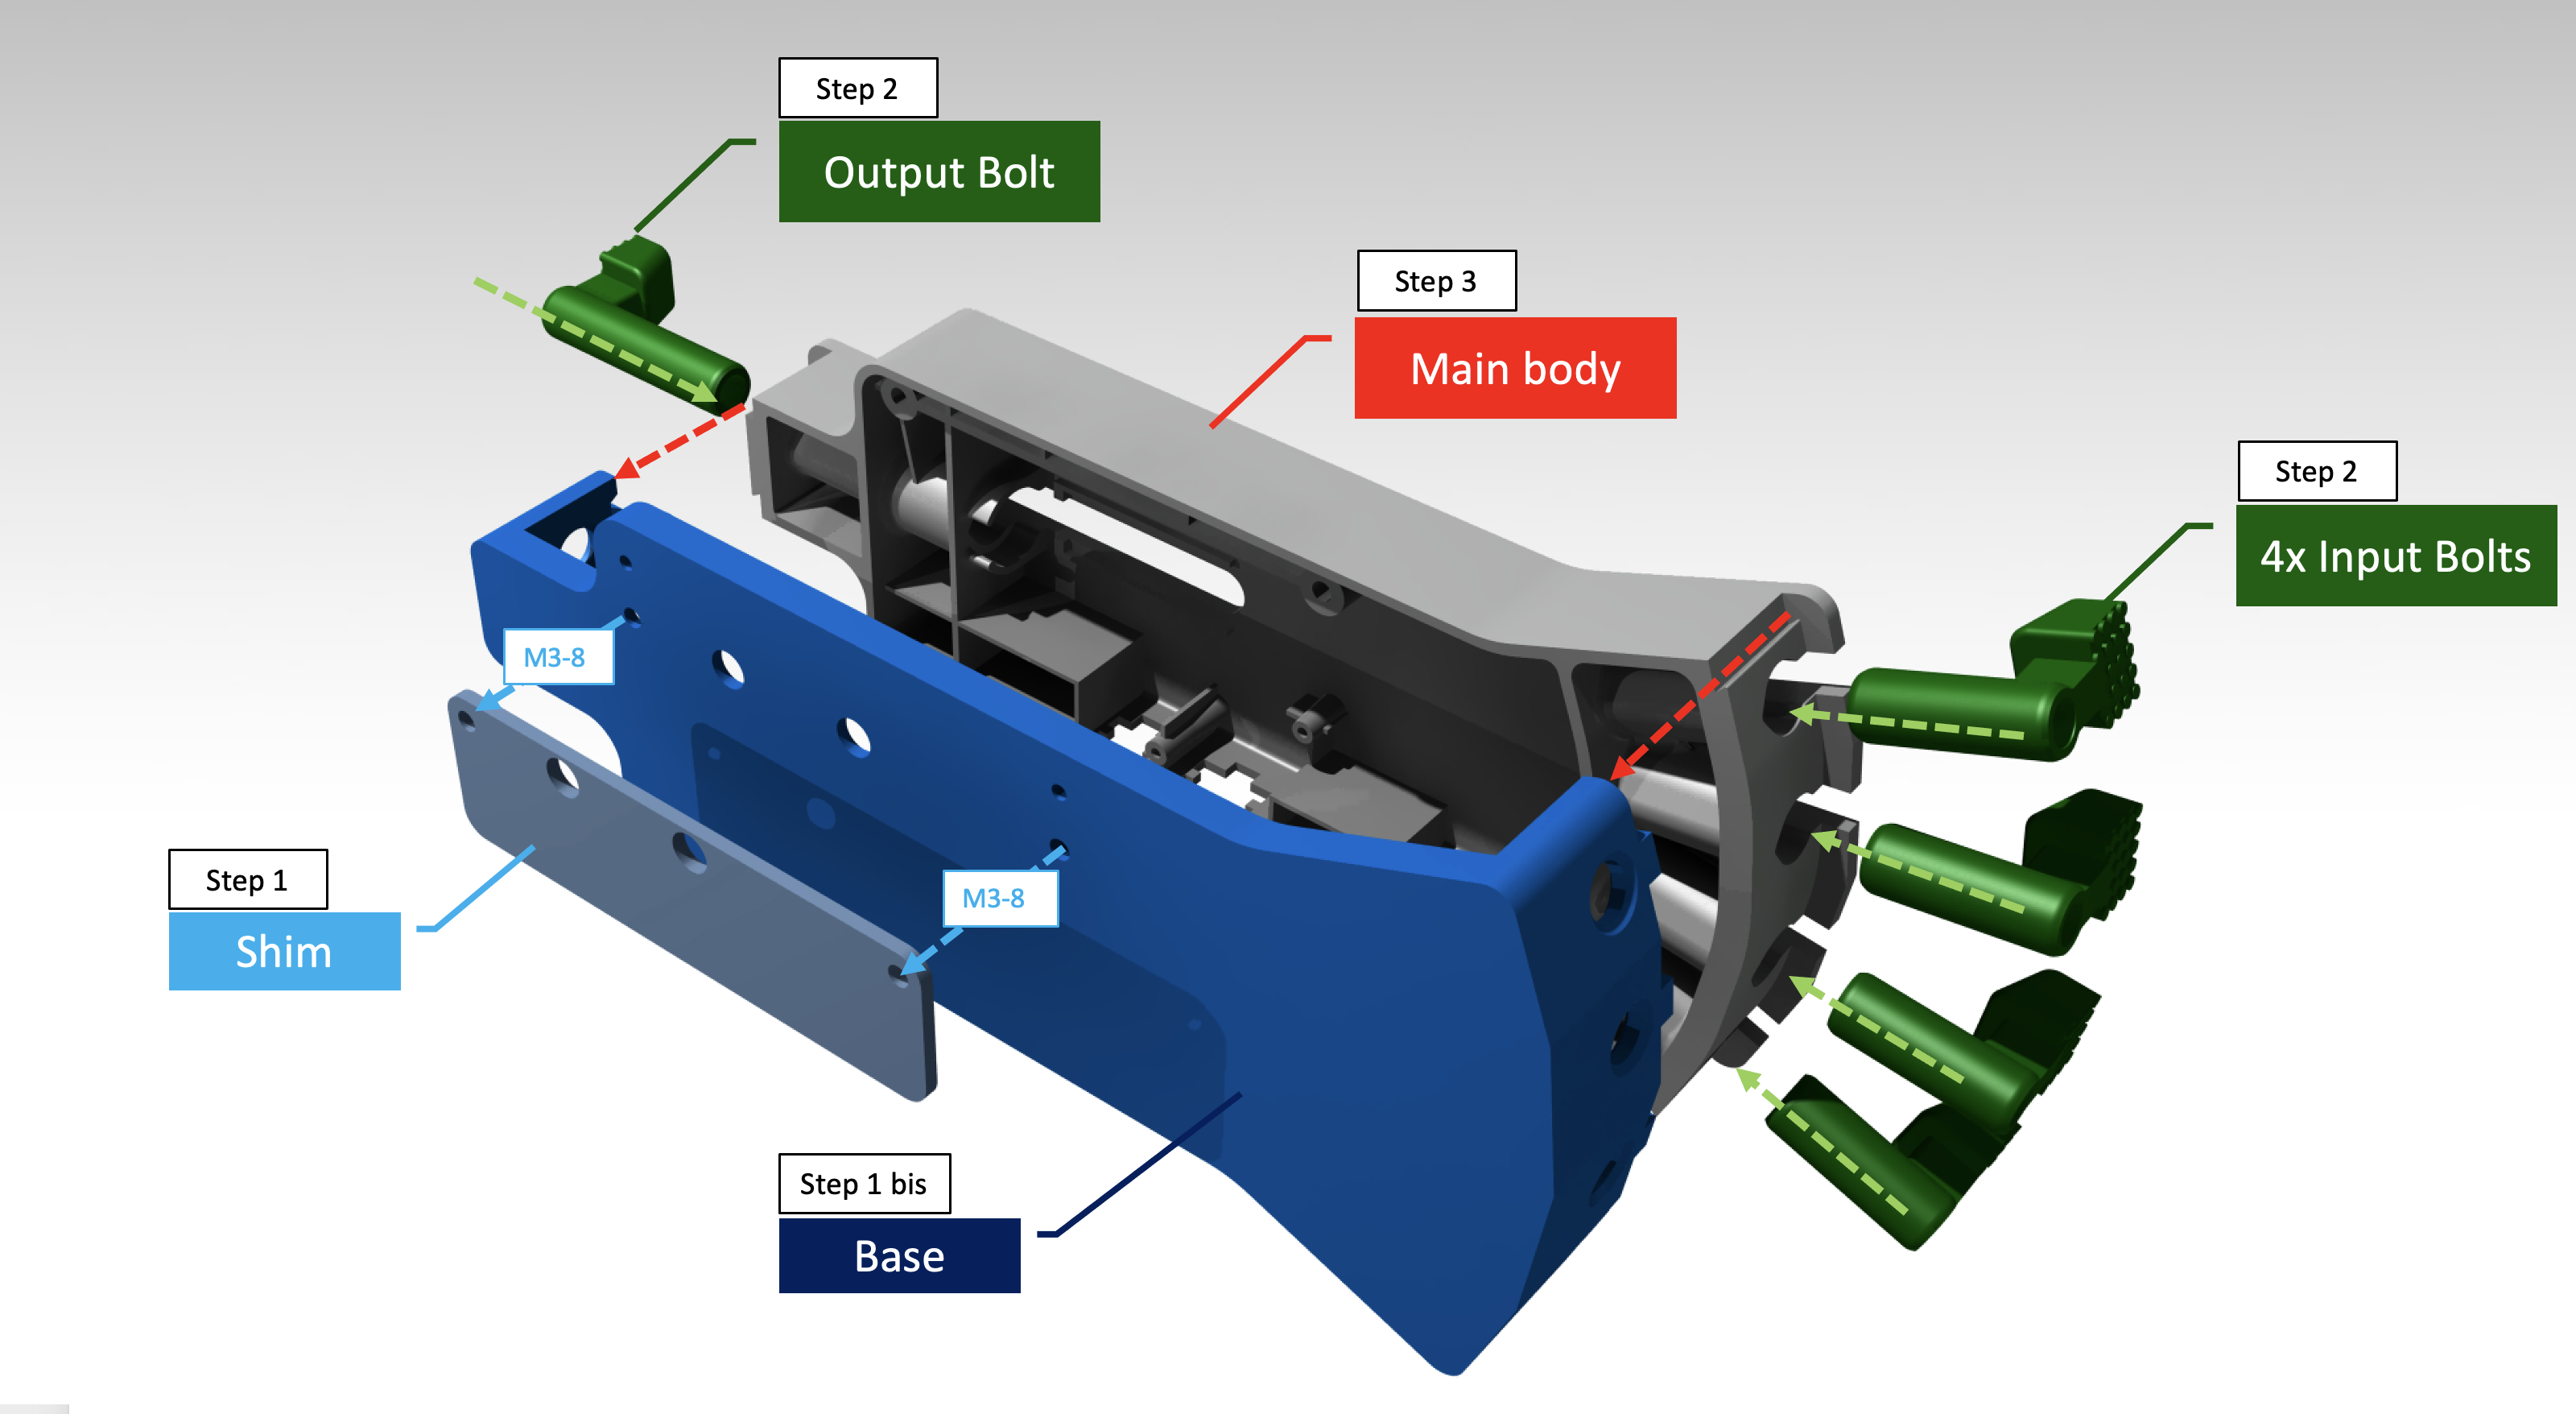
- First you need to install the adapter base on the printer, do not forget the rectangular shim behind it (to fill the gap of the rear panel dimple). You will need 2x M3-8/M3-10 screws, but you should already have them : you can re-use the 2 screws provided with your printer for the Spool Holder for exemple
- Put the sliding bolts in the main body
- Slide this assembly on the adapter base. You can re-use the original screws of your hub (there is no real need to tap the adapter base) or you can also use a BT3 self-tapping screws (cut them below 28mm if possible)
I hope you will like this one as much as my AMS Buffer Guide, it has been a real pleasure to see that so many people tried it, liked it as proposed or have adapted it to their liking. As a first model it was a bit of a surprise so I could let the Bambu Lab community without his big brother!
Enjoy!

Gostou deste modelo? Crie uma conta grátis para salvar seus favoritos e voltar a eles depois.
Criar conta