Você está no 3DFinder
Buscamos em Thingiverse, MakerWorld e Printables ao mesmo tempo para te dar o melhor de cada uma.
Descrição
This is a case for a Raspberry Pi 5 inspired by a drawing from Niklas Jansson. This is not an easy print, please read the description below.
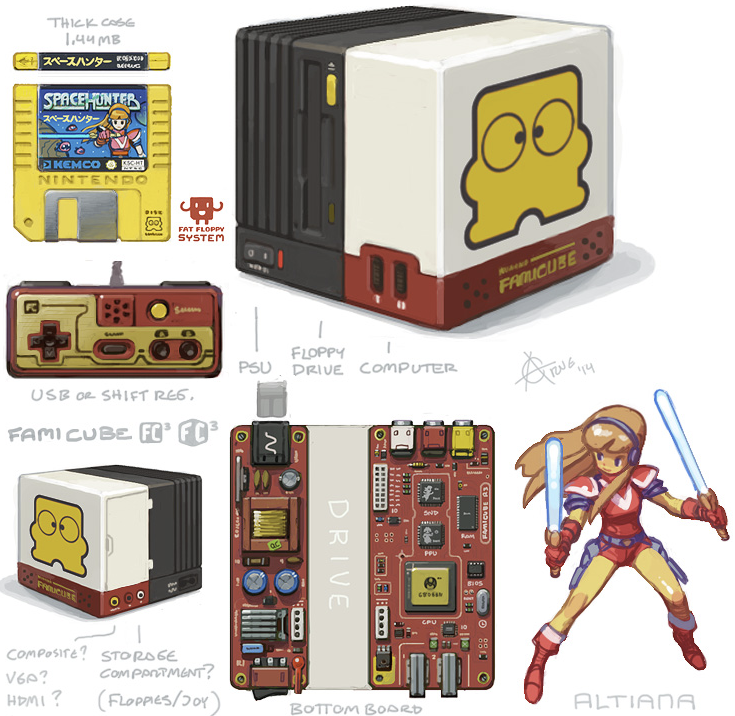
Bill of materials
Required:
- WaveShare Connector Adapter: [https://www.aliexpress.com/item/1005007407974727.html](https://www.aliexpress.com/item/1005007407974727.html)
- 8x M2.5x5 screws to secure the connector adapter and the Raspberry Pi, Bambu Lab has some in their shop: [https://uk.store.bambulab.com/products/m2-5-button-head-cap-machine-screws-bhcs-1?id=41627994456124](https://uk.store.bambulab.com/products/m2-5-button-head-cap-machine-screws-bhcs-1?id=41627994456124)
- 2x M3x40 screws to secure the case (the Bambu Lab shop doesn't seem to have M3 screws that are 40mm long)
Recommended:
- WaveShare PCIe to M.2 adapter board: [https://www.aliexpress.com/item/1005006691876107.html](https://www.aliexpress.com/item/1005006691876107.html)
- Bambu Lab PLA Basic Maroon Red (10205) (it's the closest color to the Famicon red I've found)
- Bambu Lab PLA Basic Sunflower Yellow (10402) (it's the closest to the Disk-kun yellow)
- Bambu Lab PLA Matte Ivory White (11100) (Basic White should work but will create shinny areas on overhangs, matte filament fixes this)
- Bambu Lab PLA Matte Charcoal (11101) (as above, matte filament will avoid shinny areas on overhangs)
For the power switch base I didn't bake the holes in CAD, instead I'm using negative parts in Bambu Studio, so you can easily scale/move those to fit your own power switch and barrel, but if you are interested in the ones I'm using, these are:
- Power switch: [https://www.amazon.co.uk/dp/B07KP7X8J3](https://www.amazon.co.uk/dp/B07KP7X8J3)
- Barrel connector: [https://www.amazon.co.uk/dp/B07X9MMJL2](https://www.amazon.co.uk/dp/B07X9MMJL2)
Advanced profiles
This is a difficult print, there are many supports and it takes a long time to print, but I optimized it to minimize the number of filament changes. The recommended profile has further optimizations to reduce the supports and printing time:
- Base: If you don't need a power switch (most people will probably just use the USB-C port) the recommended profile without power icon saves more than 4h of printing time over the advanced profile.
- Top: If you don't need the extra room for modding or hats and you don't need any extra cooling, the recommended profile saves 4.5h of printing time.
Warping
Dimensions are very tight and the shape of the case is very prone to warping, this is caused by differences in temperature between the upper PLA layers and the buildplate. I had success reducing warpage by using a garolite buildplate (G10) at 45 C, but using a Bambu Cool Plate SuperTack should have the same effect. Warping can also affect the effectiveness of the front button, but it's a very quick print, just use the scaling in Bambu studio to adjust the X-axis if the button is too long or too short to actuate the click, and the Z-Axis if the button is too thick or too slim to fit in the case.
Assembly
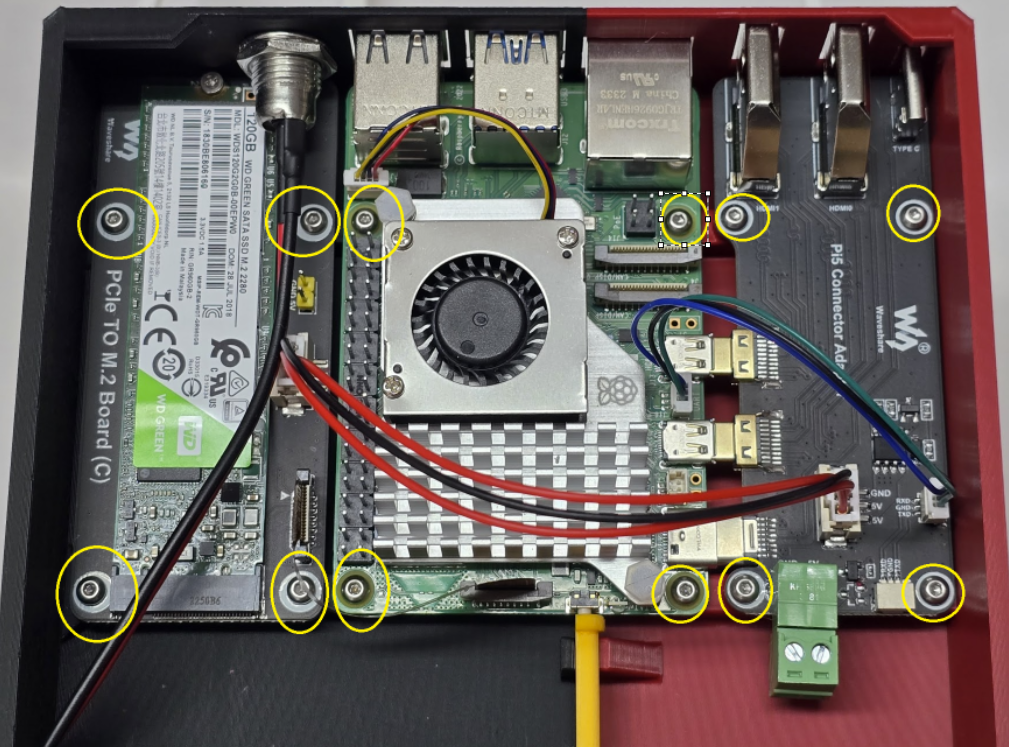
First you need to install the boards in the base of the case, each board needs 4x M2.5x5 screws (M2.5x6 will work as well).
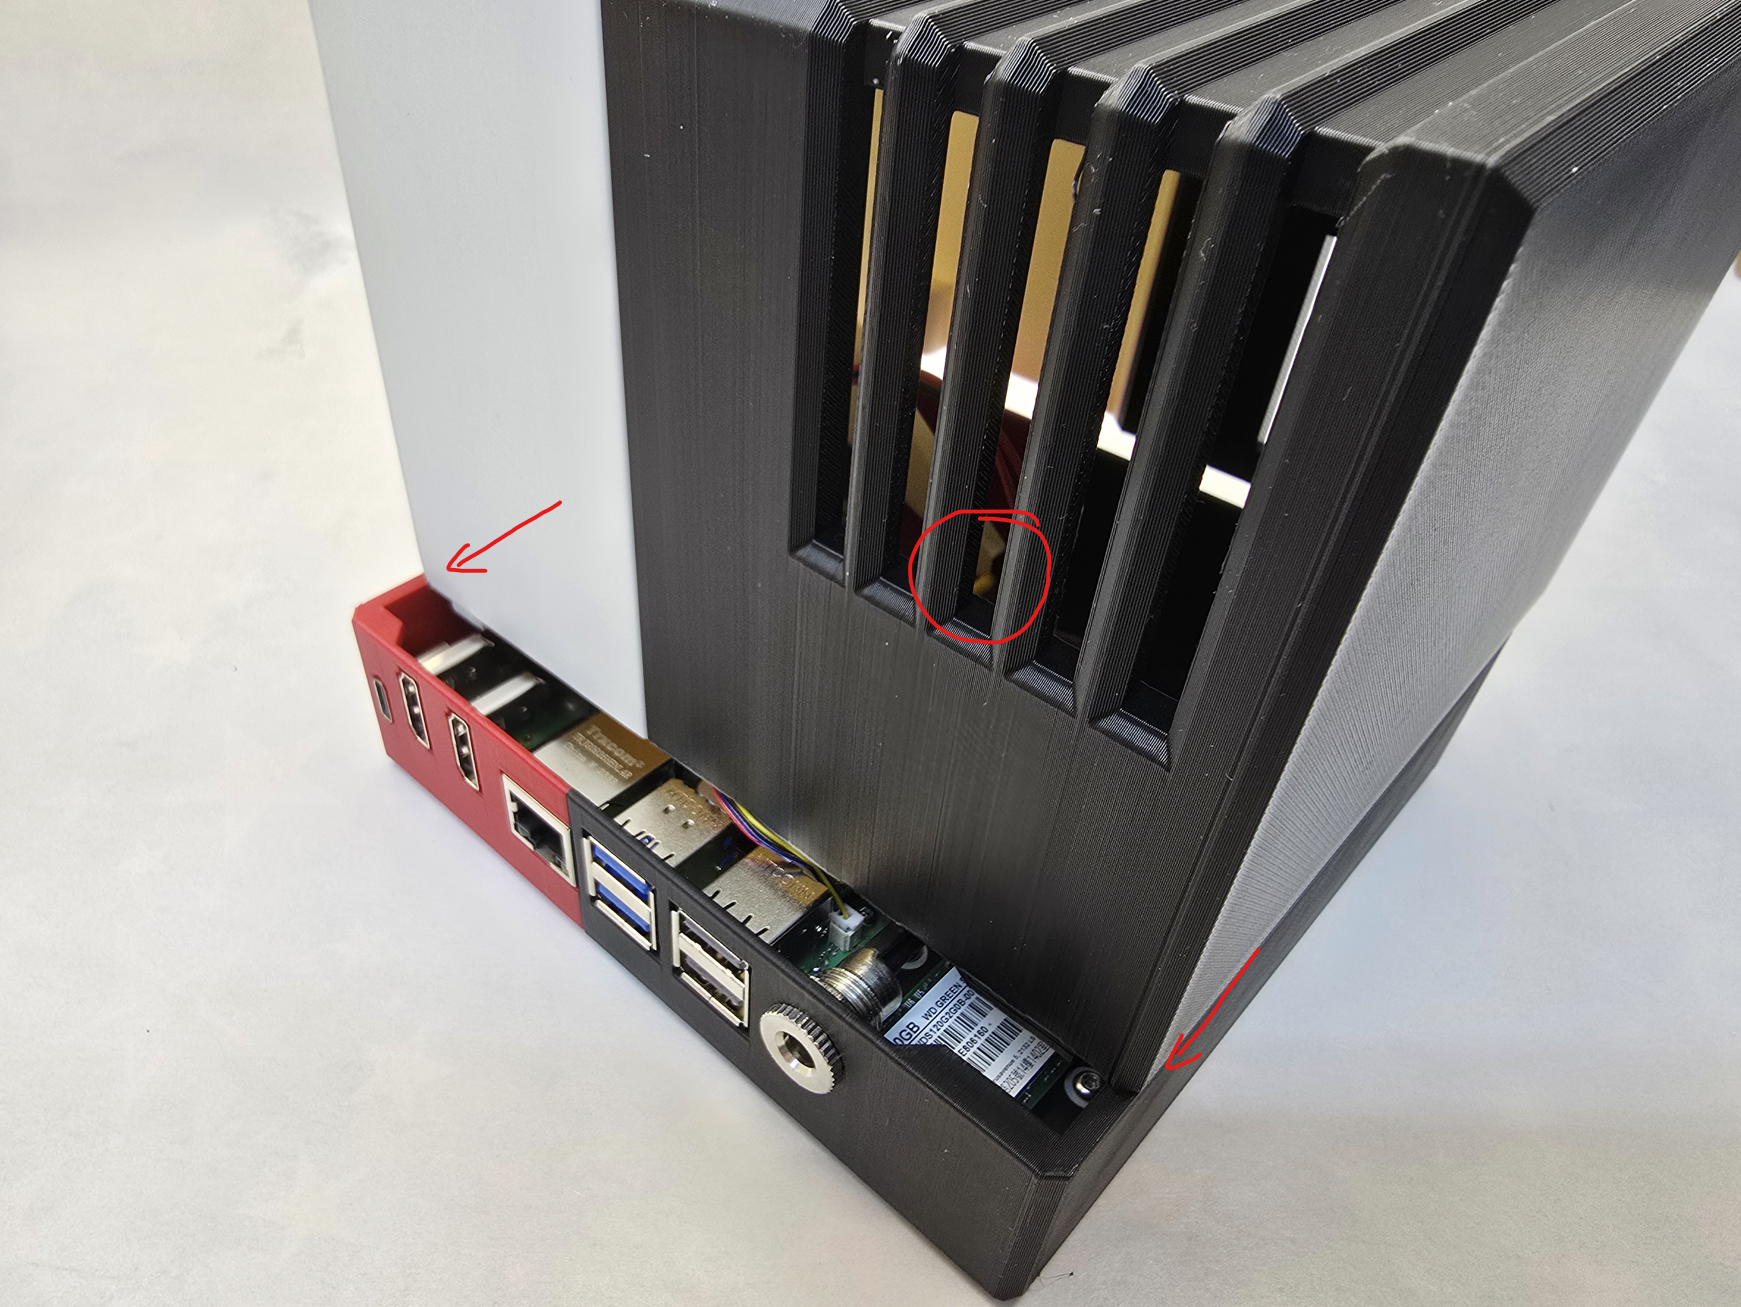
The case has to be aligned on both sides and then the top latches on the base by pushing it back. Make sure the top case secures the button correctly.
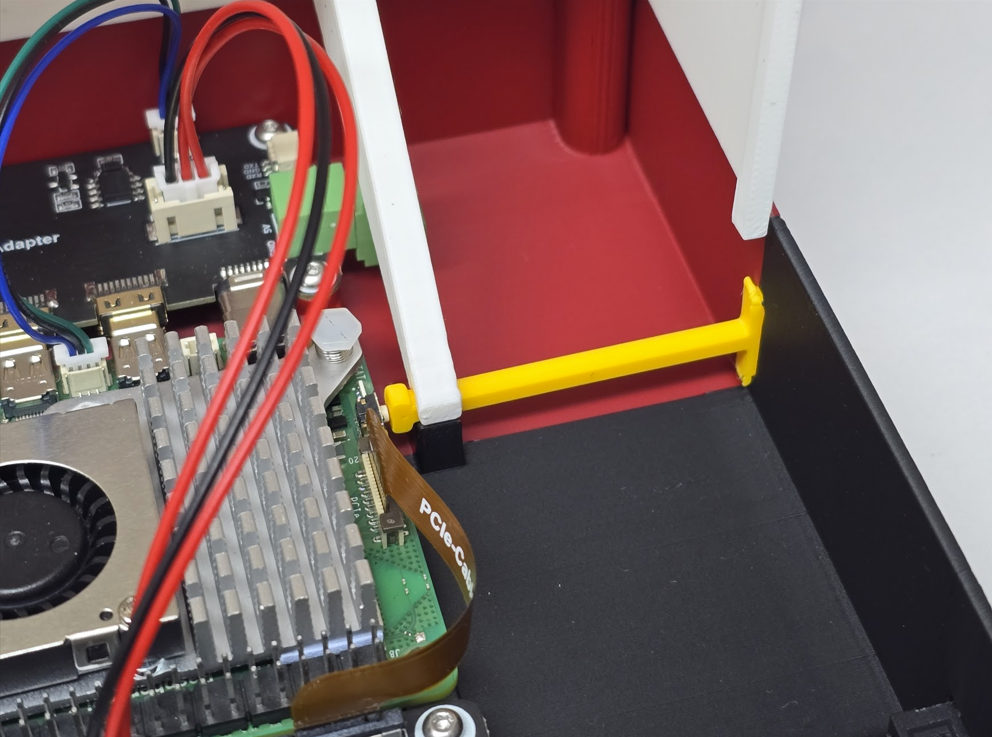
Here is a cutout of the top and how the button and top case should be assembled:
Then you can secure it with 2x M3x40 screws.
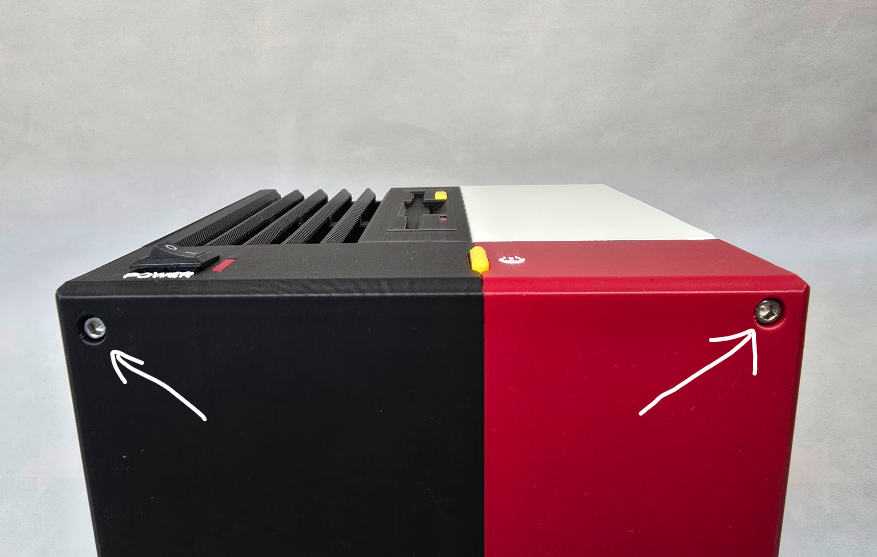
Famicube (Raspberry Pi 5 case)
Publicado em 2 de fev de 2025
Gostou deste modelo? Crie uma conta grátis para salvar seus favoritos e voltar a eles depois.
Criar conta