Você está no 3DFinder
Buscamos em Thingiverse, MakerWorld e Printables ao mesmo tempo para te dar o melhor de cada uma.
Descrição
WARNING: MUST be lubed and worked in as even with 0.12mm layer height you still create a ‘sandpaper’ like surface, so take some patience to get it worked in. It will get butter smooth after some wearing in.
My rubiks cube designs:
| Name | Ease of assembly | Corner cutting | Magnet positioning | Compatible with “Themed sides” |
| Maglev speedcube | +/- | ++ | Possible | V |
| 100% printed speedcube | + | + | Possible | V |
| Printed rubiks cube | ++ | - | N/A | X |
| Themed sides: |
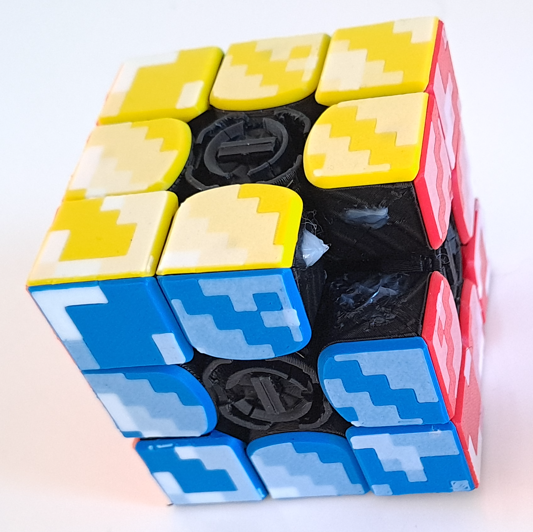
| Minecraft theme sides |
| Super mario theme sides |
| 8 Color Mod (Design by Kragleh) |
High precision model! => tight tolerances.
(TIP: if you have fitting issues: dry your filament, don't use weared out nozzle, use correct K-values, use your bed with highest adhesion,…)
If you slice it yourself, be weary about seam location, layer height (finer is better).
Use the assembly tools provided to get the best results and save your thumbs.
The correct colors you can find here (there is Japanese and Western): [https://ruwix.com/the-rubiks-cube/japanese-western-color-schemes/](https://ruwix.com/the-rubiks-cube/japanese-western-color-schemes/)
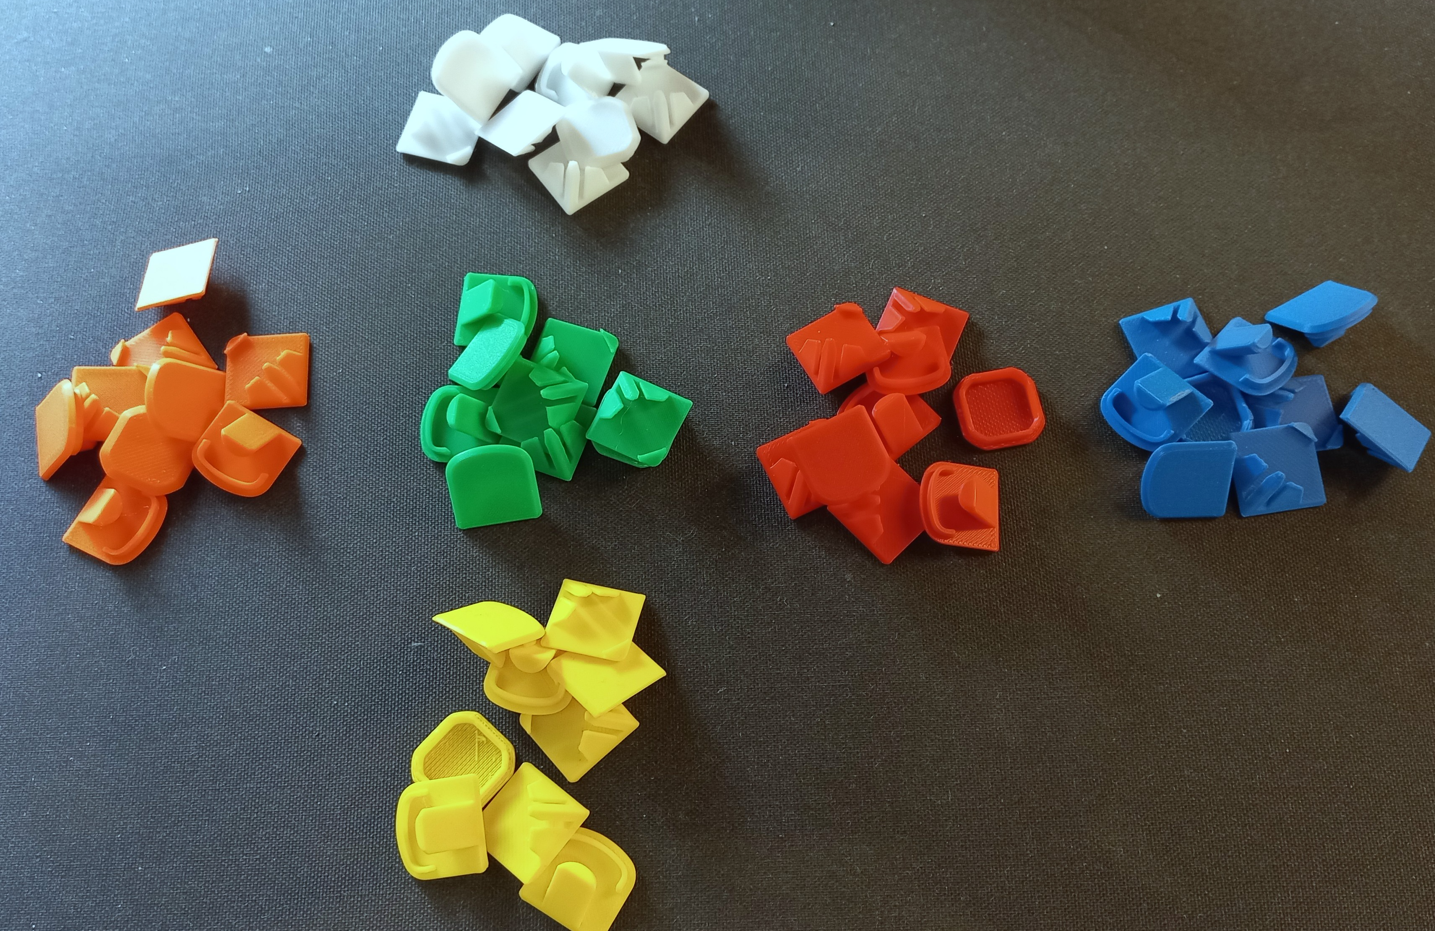
Bill of materials (links are not affiliated, you can find another supplier):
6 colors of filament
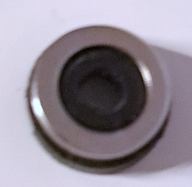
Ring magnet:
12x Ø12-Ø8-2 washer/ring Magnet => std design
OR 12x Ø12-Ø9-1.5 washer/ring magnet => alternative design as 12x8x2 are currently not available on Aliexpress. => use the additional print profile with correct name to seat these magnets properly.
Not mandatory but recommended for a smoother experience
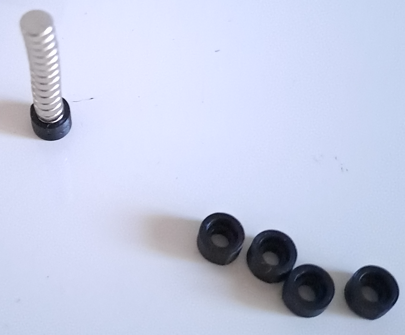
48x Ø6*4 round magnet => you can use thinner magnets but don't forget to print a small spacer for the thickness difference to put behind the magnet.
16x Ø4x1.5 round magnet + glue => core magnets
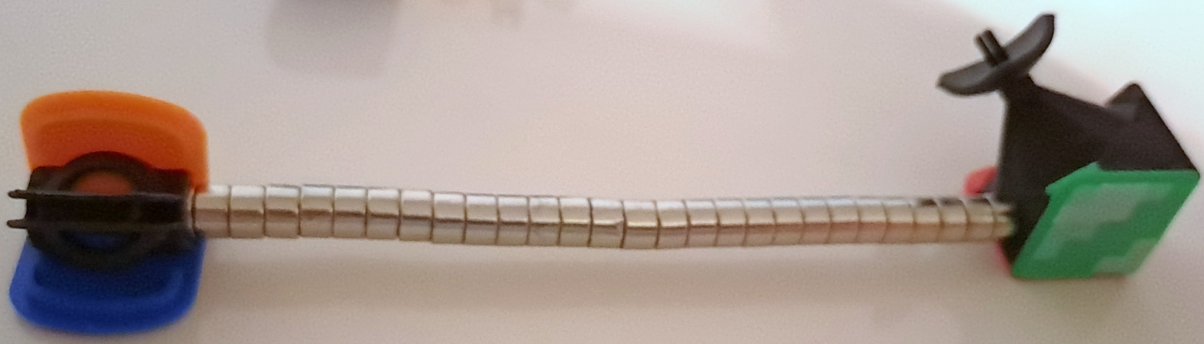
Assembly:

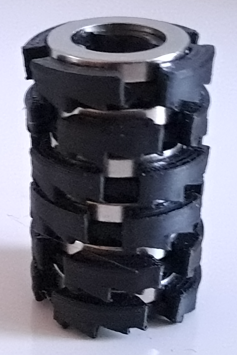
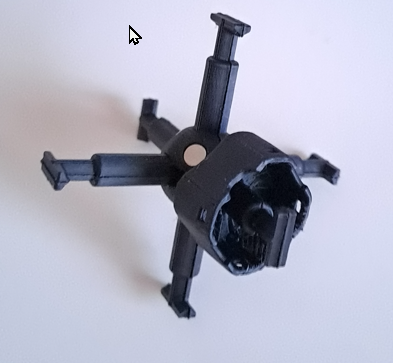
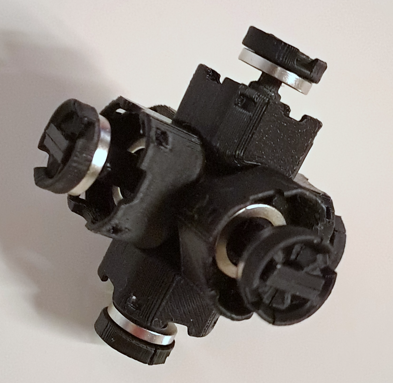
- core
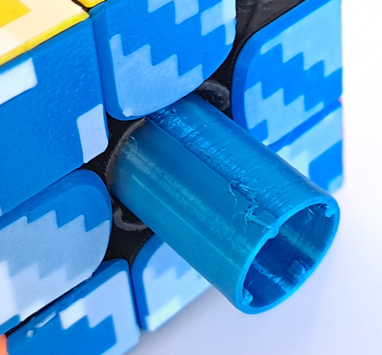
Pretty straight forward only 1 way to assemble. After assembly add the corner magnets. To avoid reverse polarity, put all magnets immediately in place on the core making a long ‘stick’ of magnets.
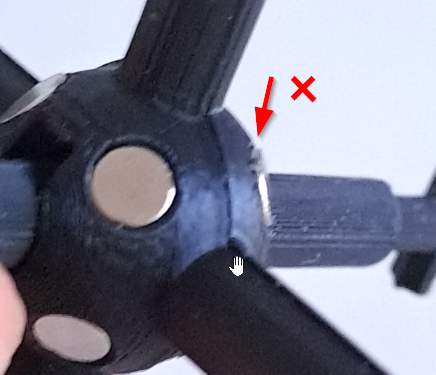
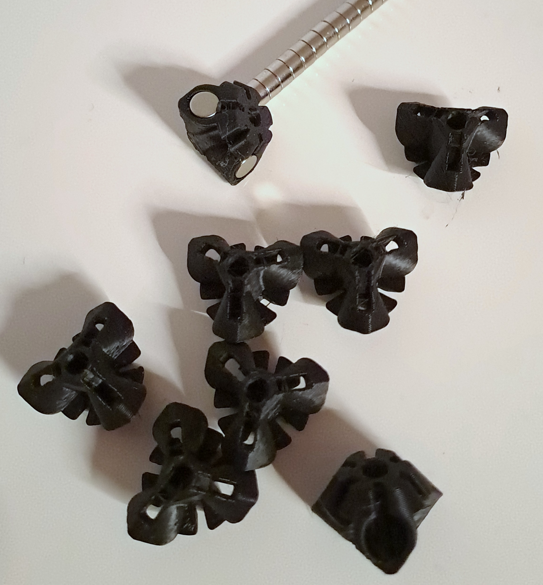
- Make sure the magnets sits completely in the socket:
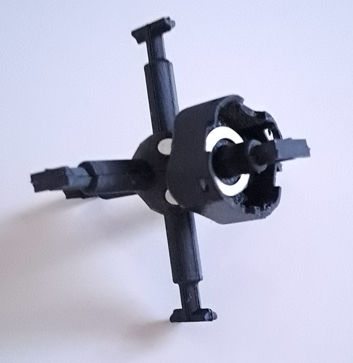
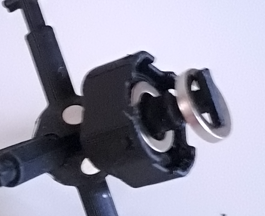
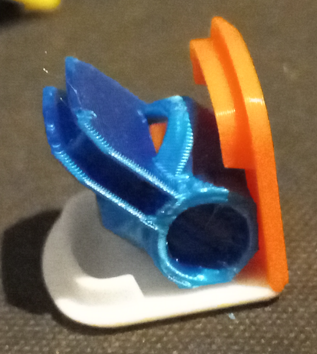
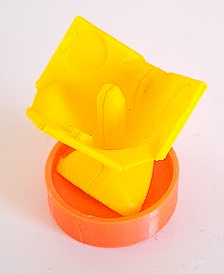
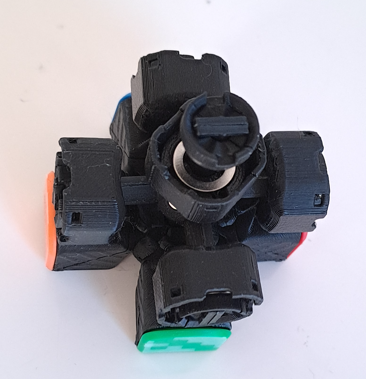
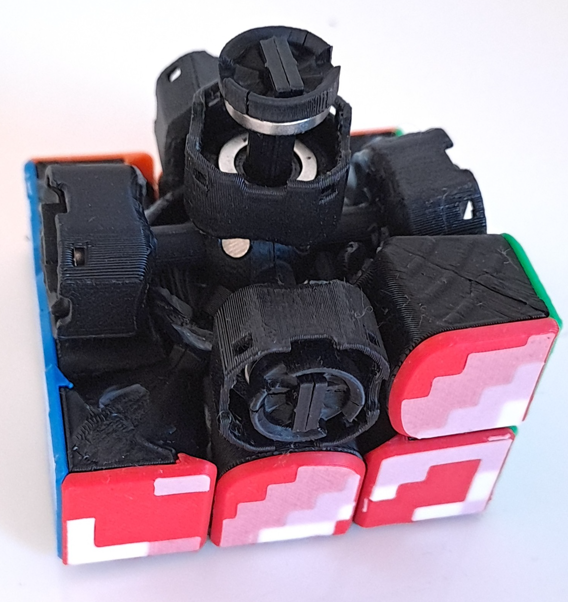
- Add the center blocks with maglev 1 by 1
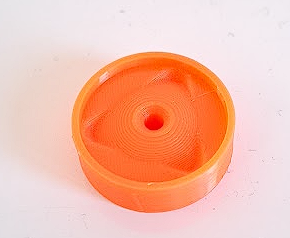
Add ring magnets to the “main disc”:
Put on the center pieces with the “main disc”:
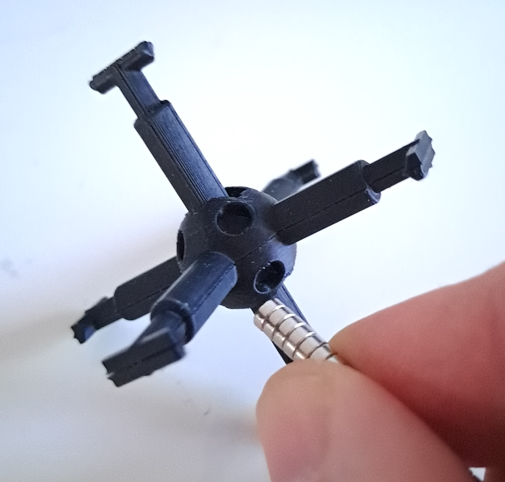
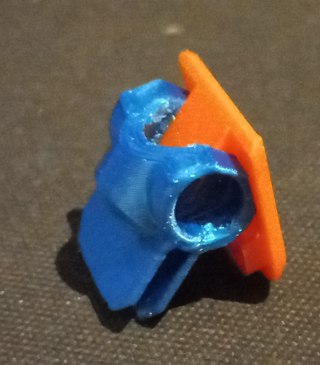
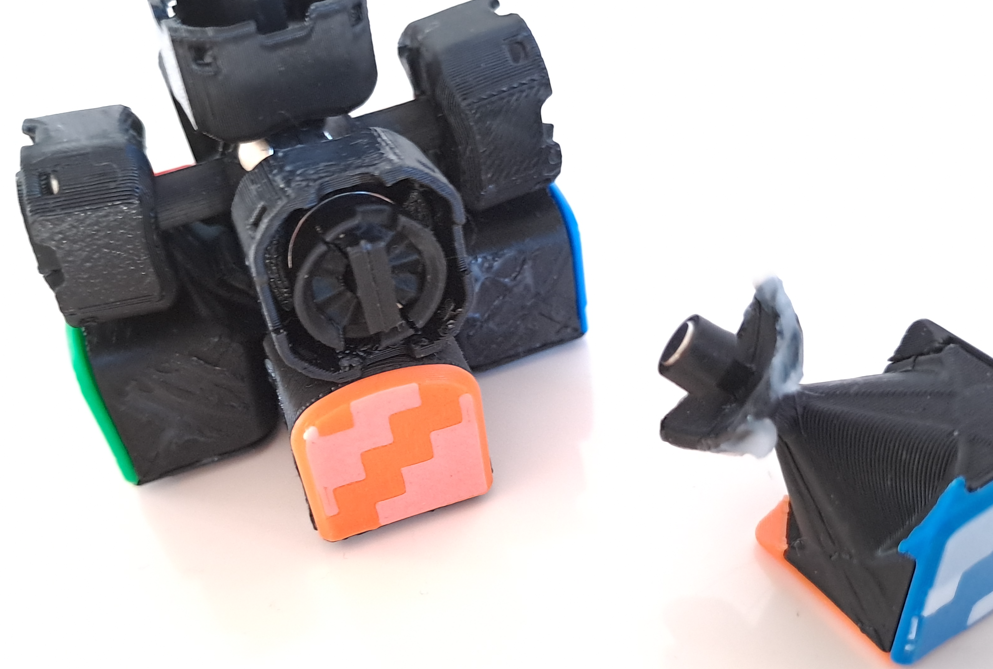
Now the most difficult part of the build! Take a seat and take your time to do this. Prepare the "outer disc" piece by putting it once in the ring magnet:
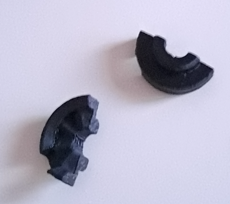
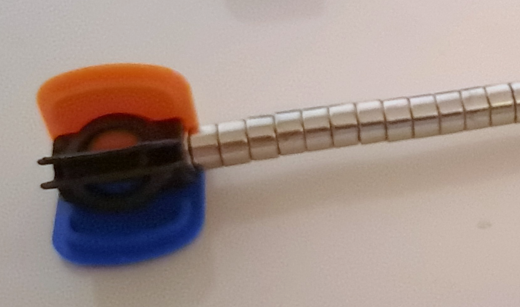
Now take the magnet and put it on the core, make sure polarity is pushing away from the other magnet (it should try to jump off from the core):
Push the outer disc parts together like this and try to get the magnet onto the parts with your other hand or a plastic tool.
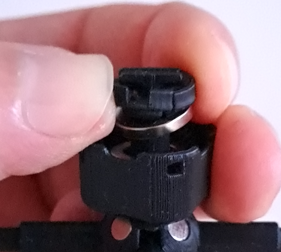
Once the magnet is a bit seated, you can push it to the end by pulling the center block with magnet to the other magnet. This should seat the outer magnet onto the outer disc.
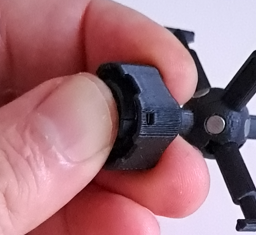
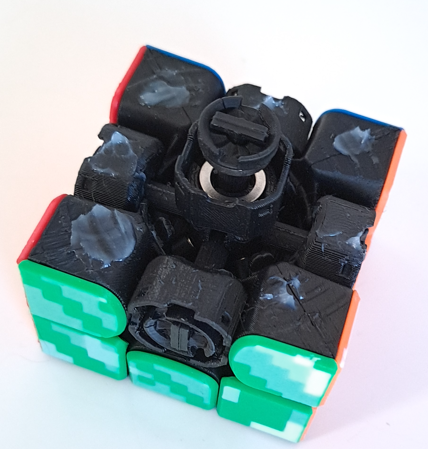
Complete the 6 center pieces, the rest should be fairly simple compared to this.
Edges
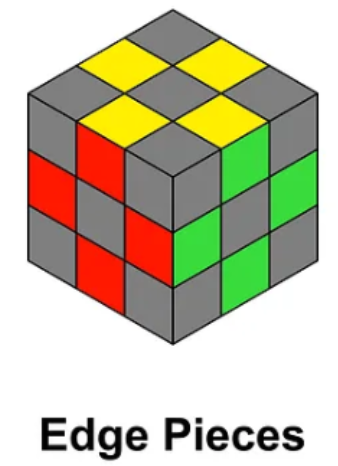
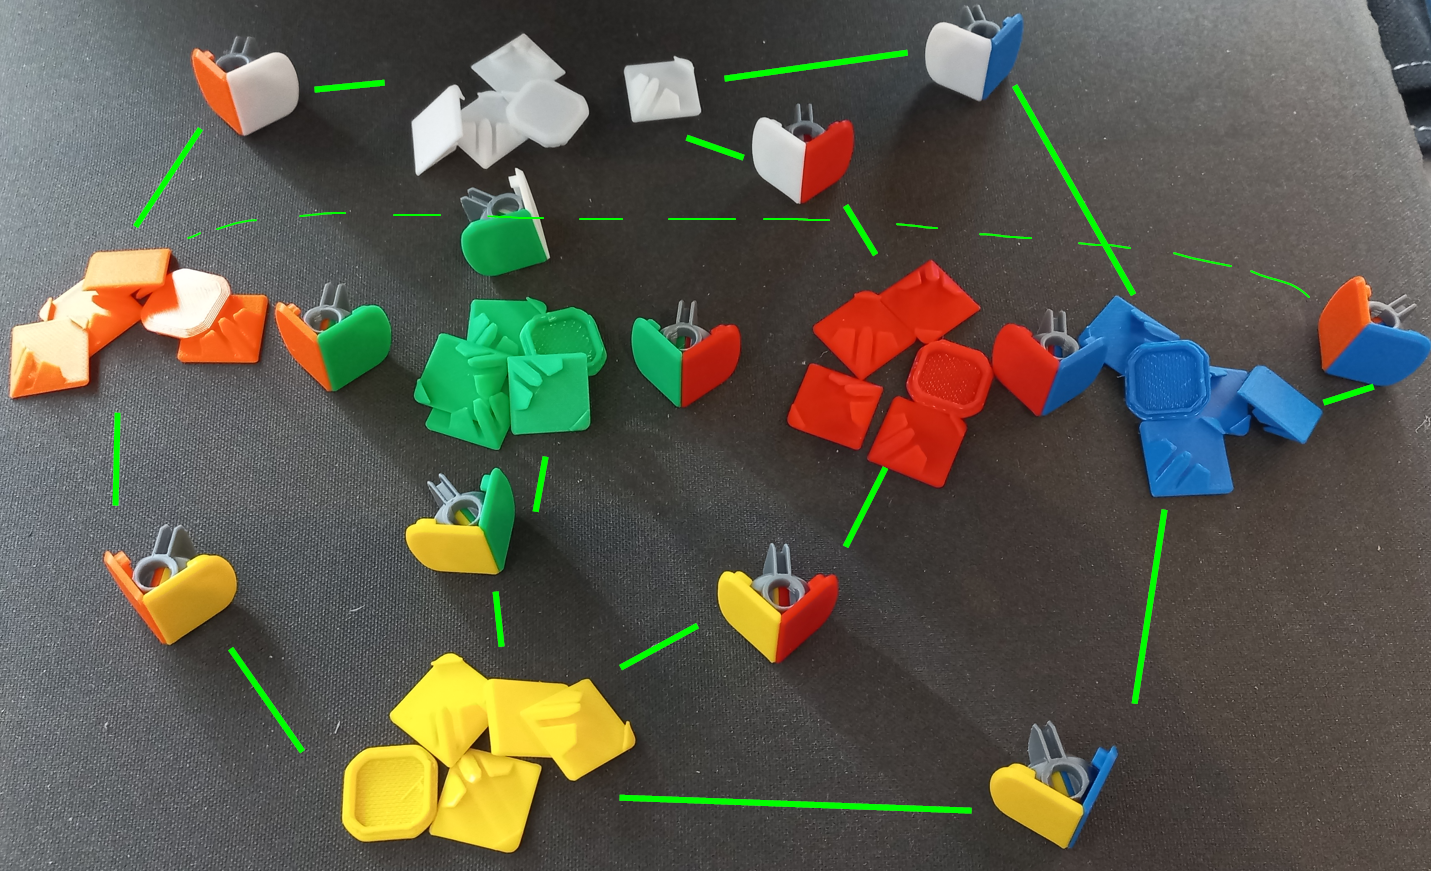
Start with laying out all colors in the correct schematic like you “unfolded” the cube to avoid making combo issues later on.
Now make all the matching edge pieces, add one color to the connector, than the other. Push firmly down till they are fully seated!
Now add all magnets in one time to avoid messing up polarity.
Feed the magnets onto the edges one by one from the same side of the magnet chain: one edge piece must repel another edge piece!
Now add the edge bodies one by one, making sure they are caught in the connector and snapfit onto the color piece:
=> There should be no visible gap between the pieces anywhere.
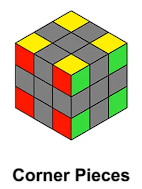
Corner pieces
Add all magnets in one time to the corner connectors to avoid messing up polarity.
Feed the magnets onto the edges one by one from the same side of the magnet chain: one edge piece must repel another edge piece!
Feed from the other side of the chain than you did on the edges pieces so they will attract each other.
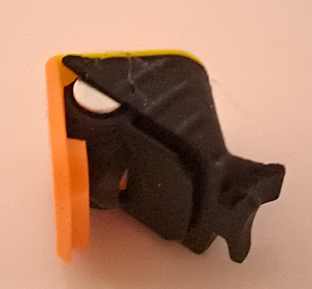
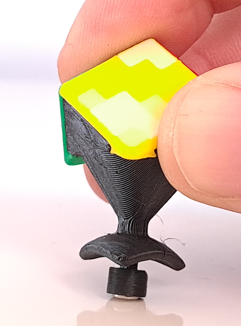
Time for the corner colors to be put onto the connectors. Use the corner tool to get the best alignment and avoid future fitment issues with the corner body.
Pay attention to the order, it's counter intuitive but you need to revers 1 pair of colors to get the correct orientation of colors on the corner piece!
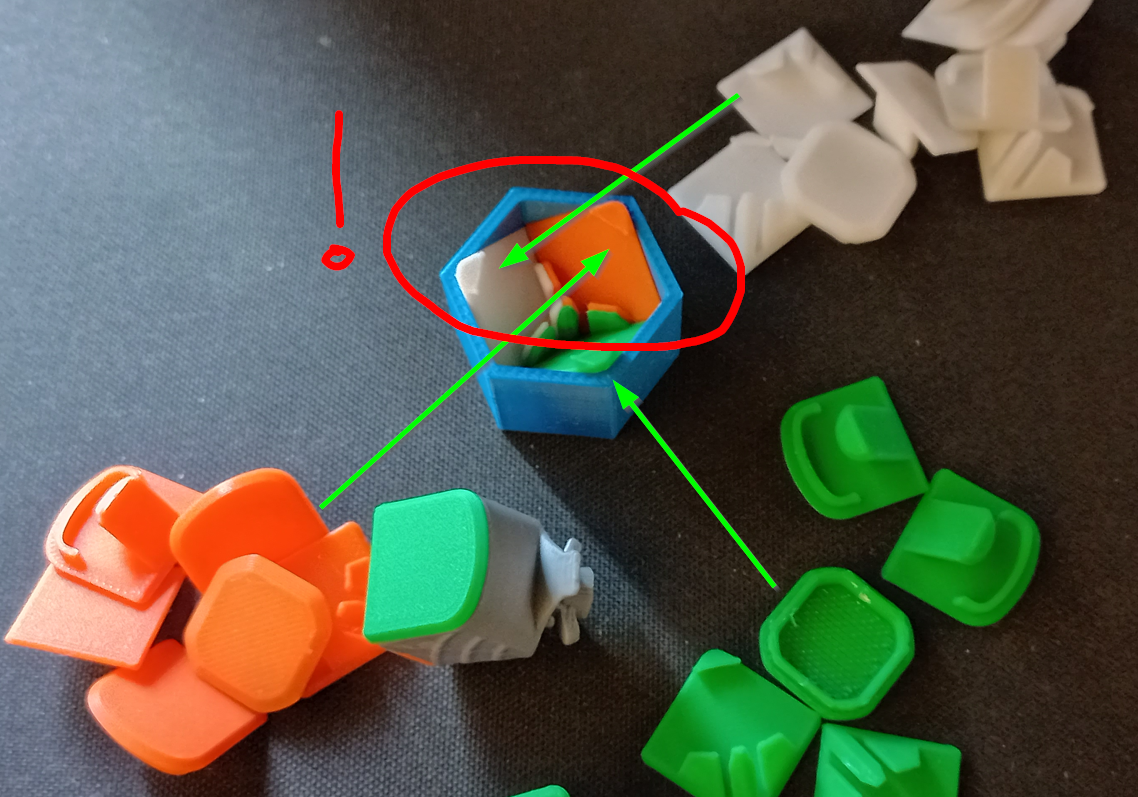
Once you triple checked the color orientation and made sure they are evenly seated into the tool, press on a connector with the magnets.
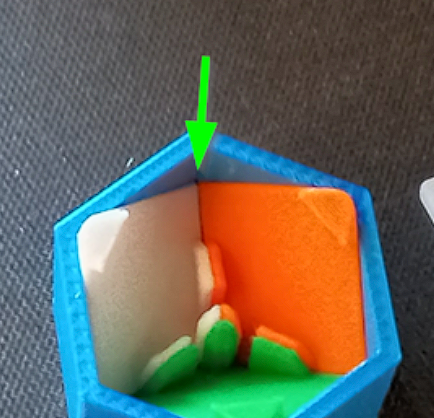
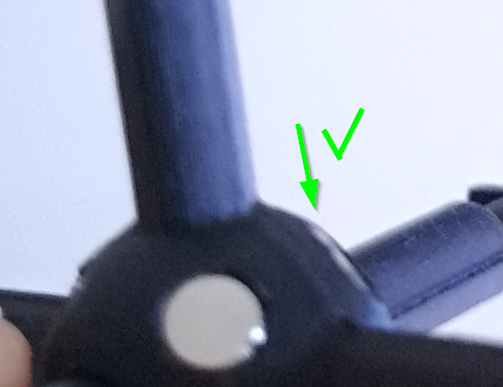
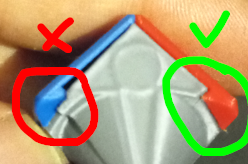
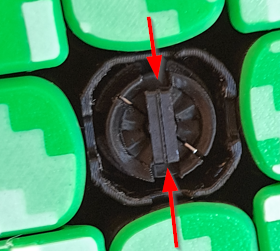
Make sure the connector is FULLY seated onto the colors, there should be NO GAP where the colors meet (green arrows).
Now use the corner-center-tool to push the connector onto the body:
Make sure the corners of the colors snap over the body:
If you want to use the core magnets for a bit snappier movement of the cube, push in the magnets to the retainer, again, do them all at the same time to avoid polarity issues and link the first with the core so avoid the magnet pushing instead of pulling.
Again: the magnet should be fully seated into the retainer.

To avoid issues with magnets coming loose it is advised that you add a very small drop of superglue on the tip of the body.
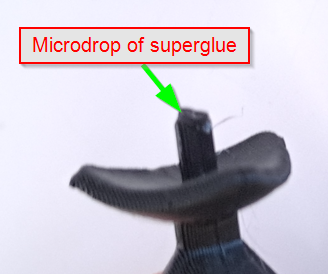
Push it onto the magnet, laying the magnet on a table. This will avoid you move the retainer vs the magnet, the body will just stop onto the magnet which is the intended fit.
Final assembly
Now start with 4 edge pieces on the bottom, to avoid issues with corner pieces, build the cube according correct color on each side.
Put in the corners of the lower layer, if you're using thicker lube, than add some to the side of the edge pieces before you put the corner piece in. Also add lube to the triangular part of the corner piece.
Add the edge pieces of the mid layer: add some lube to the lower layer corner and the center pieces.
Again, lube before you put on the final layer
Add the final layer but leave 1 corner piece out for now!!
Before you put in the final corner, make sure all tensioners are set to the loosest setting with the tool!
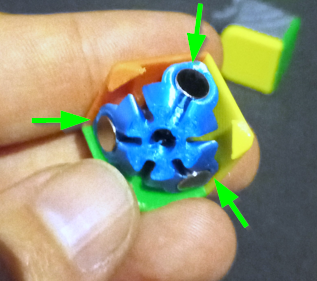
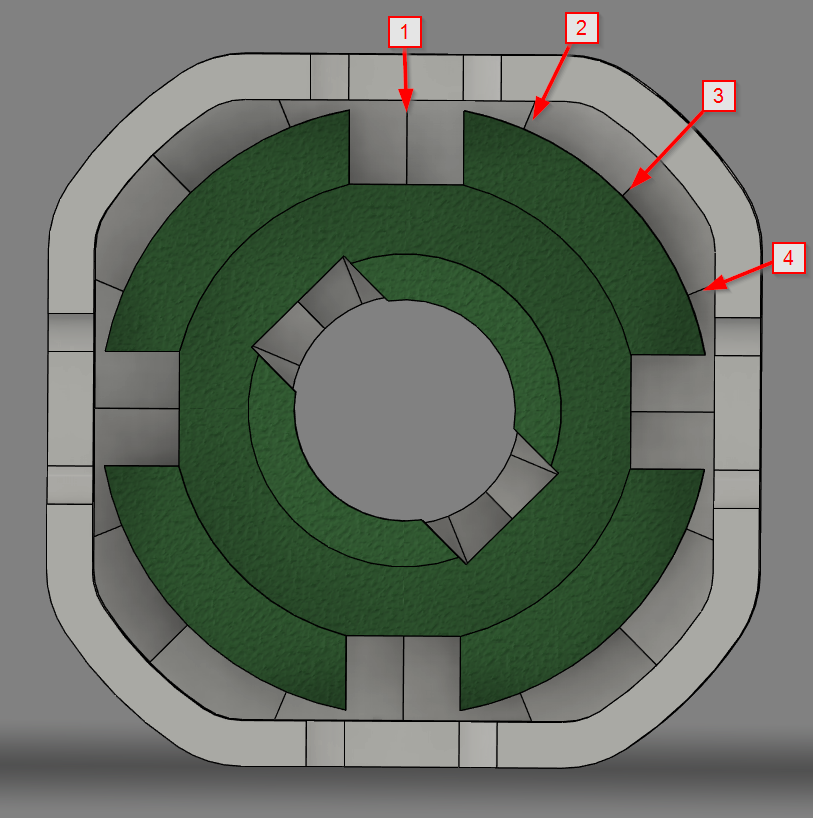
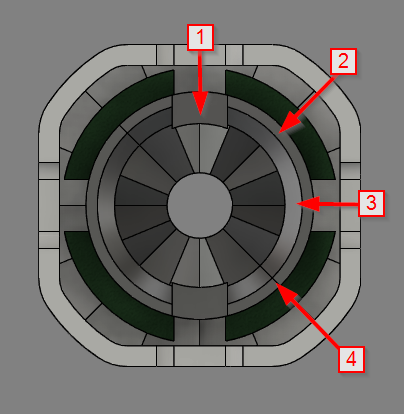
The core disc slots should point vertical and horizontal (4 positions = 90°):
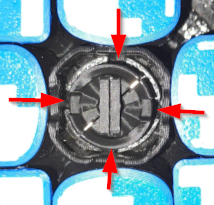

And the outer disc slots should align with the core indicator (4 positions = 180°):
Now that they are all on the loosest setting it's time to put the final corner in: put one tip of the “triangle” base inside and push the other 2 sides a bit open.
- It might help if you twist the corner piece back and forth around it's axis.
- Another help might be to slightly rotate one side a bit.
Center colors
Add the colors to finish the cube.

WAIT!! NOT YET!! You can start playing later a final step is working in the layers and lube, as mentioned 0.12mm layerlines is still fine sandpaper surface! Fastest way to work in is like this: Push on 2 opposite sides with some force and twist them a few times back and forth.
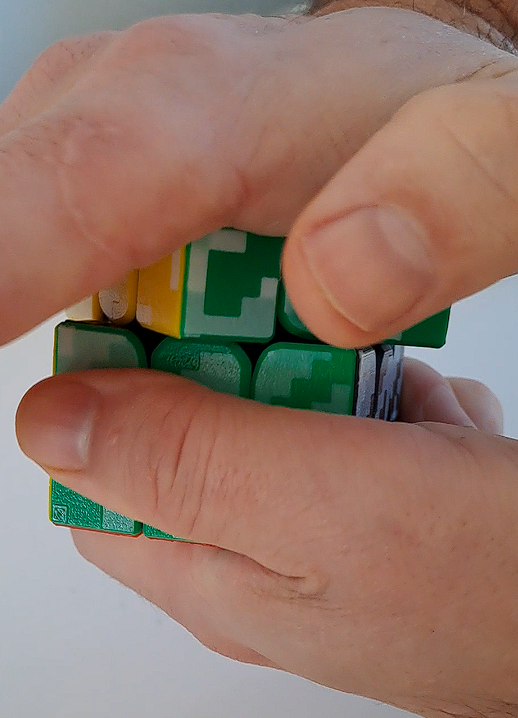
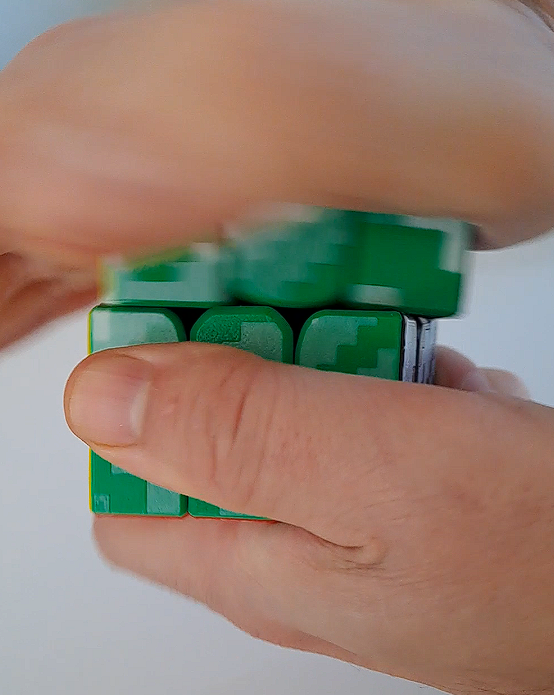
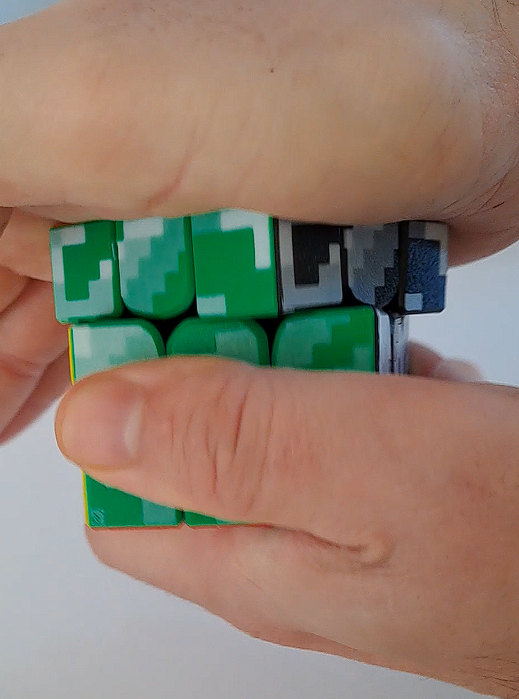
Do this for each side untill you feel it is a lot smoother than in the beginning.
=> a nice video showing before and after lubing and breaking in:
Adjustment of tension and stiffness: use the tool.
Dail position stiffness: 4 positions every 90°
Dail position tension: 4 positions every 180°
Show me some love, by first contacting me if you have issues before leaving negative feedback. Thanks!
I try to look to my profile a few times a week.
This model cost me a lot of evenings and nights and KILO's of test filament to get everything to perfection (or as close as possible) so if something is wrong, I will be glad to help fix it if I can. I'm a team of one so please be patient with me :-).
Speedcube maglev + adjustable core

Publicado em 2 de fev de 2025