Você está no 3DFinder
Buscamos em Thingiverse, MakerWorld e Printables ao mesmo tempo para te dar o melhor de cada uma.
Descrição
Summary
My trusty Logitech MX Master thumb button started not working as it used to so the very first time I disassembled I was following a youtube video where the guy slightly unscrewed the mini PCB where the temporary switch is located.
For several days it worked but suddenly I noticed that the mouse pointer was not working but instead all the macro gestures were activated so I knew that again was that thumb button that was stuck. Meanwhile the rubber started cracking due to the continuous activation of the button...
I really didn't want to dismiss the mouse so I decided to design a replacement by myself.
DISCLOSURE!!!
1 - This is not intended to be the final work as it can still be improved!
2 - If your button is still intact, PLEASE DO NOT PROCEED as it will require to completely cut the rubber that stays on top of the mini pcb...ONCE YOU CUT THE RUBBER, YOU ARE DONE...OBVIOUSLY.
3 - THIS PRINT NEED A WELL TUNED PRINTER WITH SPOT ON DIMENSION - DO NOT PROCEED IF IT'S NOT AS IT WILL NEED OPTIMAL DIMENSIONAL ACCURACY
4 - IF YOU DAMAGE THE MOUSE I'M NOT RESPONSIBLE, SO PROCEED AT YOUR OWN RISK.
Now that I have the attention of only the brave and the desperate ones, we can proceed.
Design decisions
I wanted this mod to be as similar as before, almost like it was designed by the logitech guys, so nothing fancy.
The only difference with the original is that the button is higher than the original rubber. This should make it easier to push the button with minimal force (according to your printer settings and material).
Assembly
In order to mount this mod, you will need to disassemble the mouse. On youtube there are many videos on how to do that.
Beware the anti slip pads, be careful with them. They tend to wrinkle and you will feel all the bumps when moving the mouse.
This mod will also replace the plastic bracket that holds the mini pcb as I needed a solid point to hold. No worries, the 3d printed part will act as a bracket for your button pcb and as the key.
Once you disassembled the bracket and the pcb you can move on by cutting the rubber that acted as the button. Use a sharp knife/cutter in order to leave nice edges. Don't go too far, just test fit the button and if you need more room you can either sand the 3d printed part or give another cut with the knife. See the photos to see how it should be.
I used all the original screws, so you don't need to find/buy them.
Store the original bracket somewhere safe, maybe in the mouse box...I lost it :(
The print should fit with no post production, but in case, take some files and sandpaper.
I’ve printed upright (like in the photo) in order to have a better finish quality in the in sight piece.
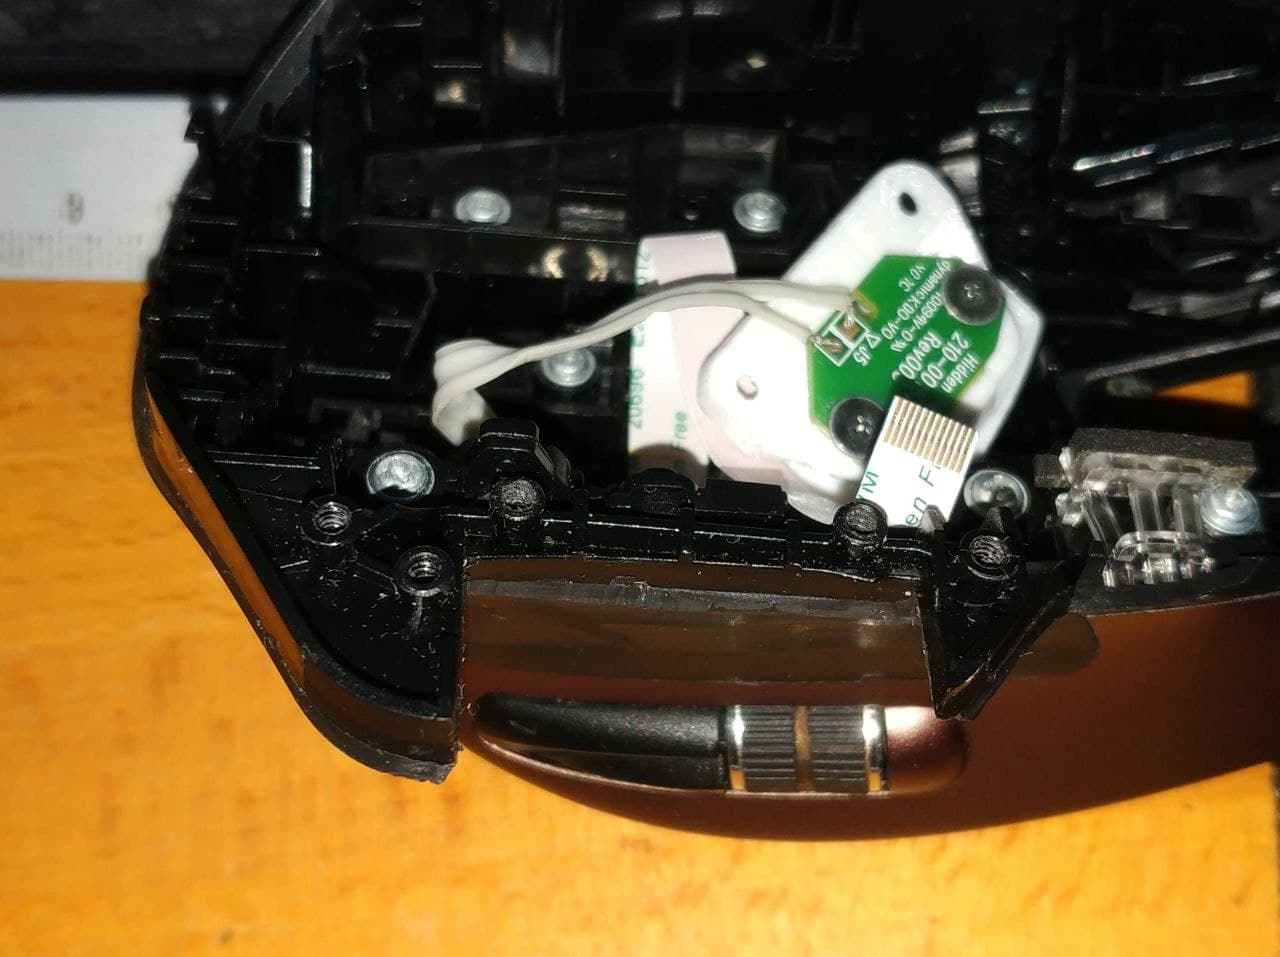
Use the hard plastic of the mouse frame to perform a clean cut, it has a slight curve. The rubber should be flush with the hard plastic underneath
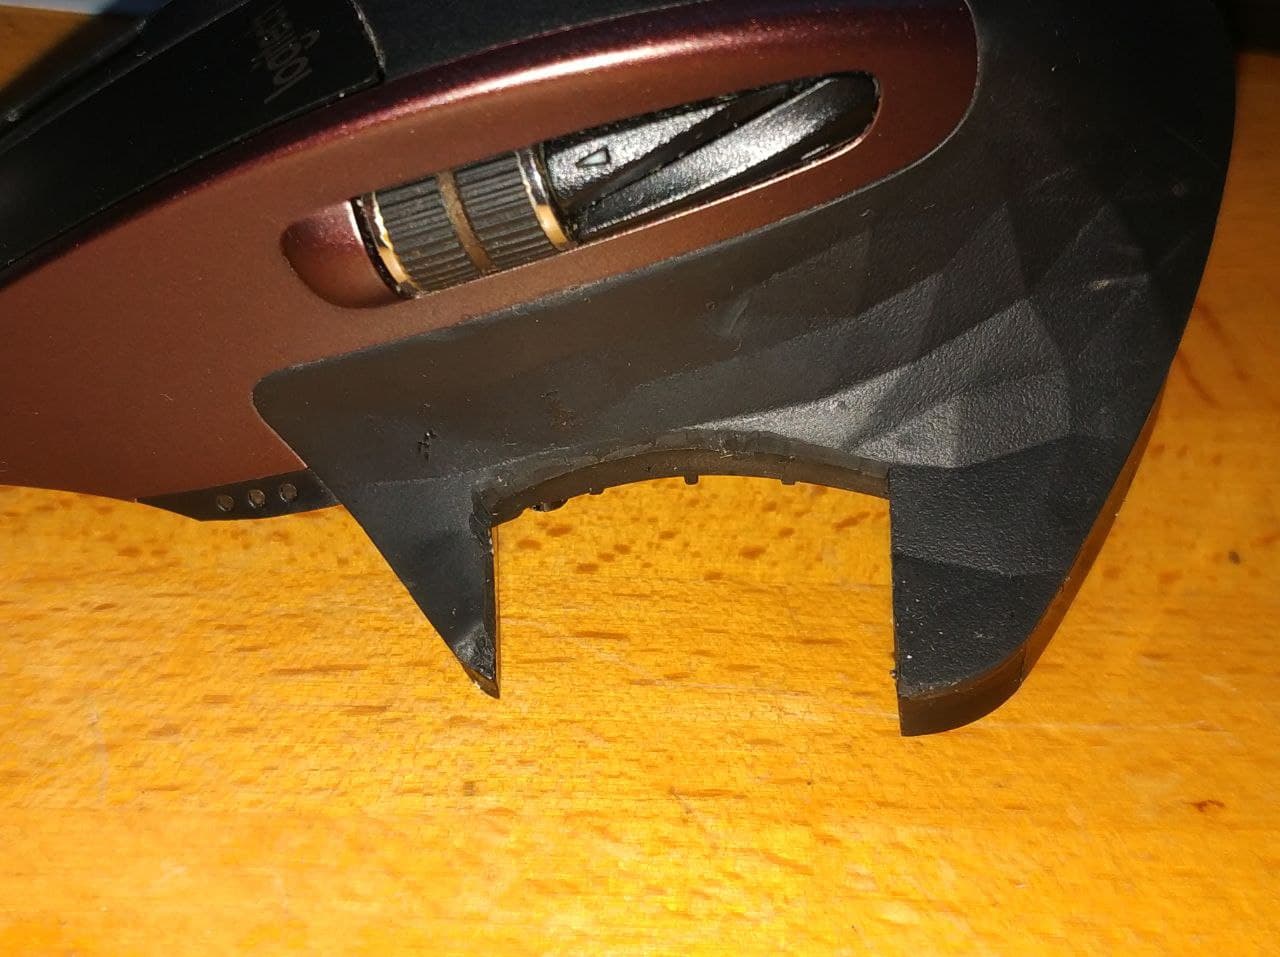
This is how it should look from the top
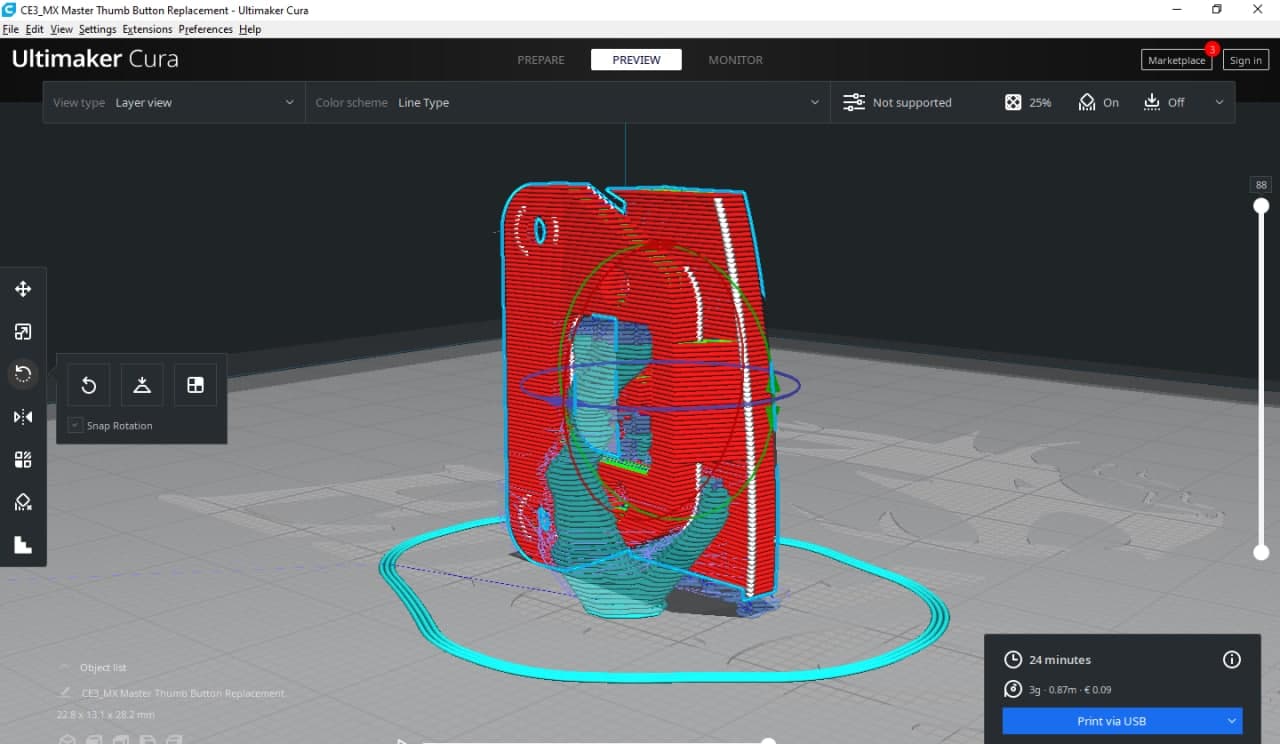
I printed like that, it's a strange model to print but I find that this is the best to print it
Printing suggestions
I used Fiberlogy pctg but petg should work just fine. We need a rigid filament as it needs to be stiff in order to support the pcb and not bend as the button is pushed.
So no TPU.
If you only have PLA you can give it a try.
You will need to feel that the piece is bending with a slight force, in order to act as a button and give some tactile feedback. Play with the slicer settings to get the desired result.
If you have a resin 3d printer, you should definitely print it with that. You will achieve a better looking and a smoother button.
Final Toughts
With this mod now I can use my beloved mx master as before.
If you need help just leave me message, I'll try to help you
MX Master thumb button replacement
Publicado em 19 de jan de 2025
Gostou deste modelo? Crie uma conta grátis para salvar seus favoritos e voltar a eles depois.
Criar conta