Você está no 3DFinder
Buscamos em Thingiverse, MakerWorld e Printables ao mesmo tempo para te dar o melhor de cada uma.
Descrição
I wrote a custom playing card generator in OpenSCAD. Here you will find details about how to use it to create your own custom cards, or alternatively you can print one of my 3 proof of concept decks.
These are the proof of concept decks I created with it. Commercial sales are NOT allowed.
- Classic deck (based on public domain artwork)
- Prime Tower Designs deck (illusionist theme, artwork is primarily AI-generated)
- Unofficial Bambu Lab deck (artwork is partially AI-generated)
- Custom suits: Bambu logo, MakerWorld logo, spools, build plates
- Note: The build plate graphic looks pretty rough when printed with a 0.4mm nozzle
While I can't yet seamlessly light up the “Customize” button here, I uploaded a zip of my OpenSCAD script and vector graphics so that technically-inclined folks can run it locally. See the “Create Your Own Custom Deck” section below for details on how to run the deck generator. Follow me for updates.
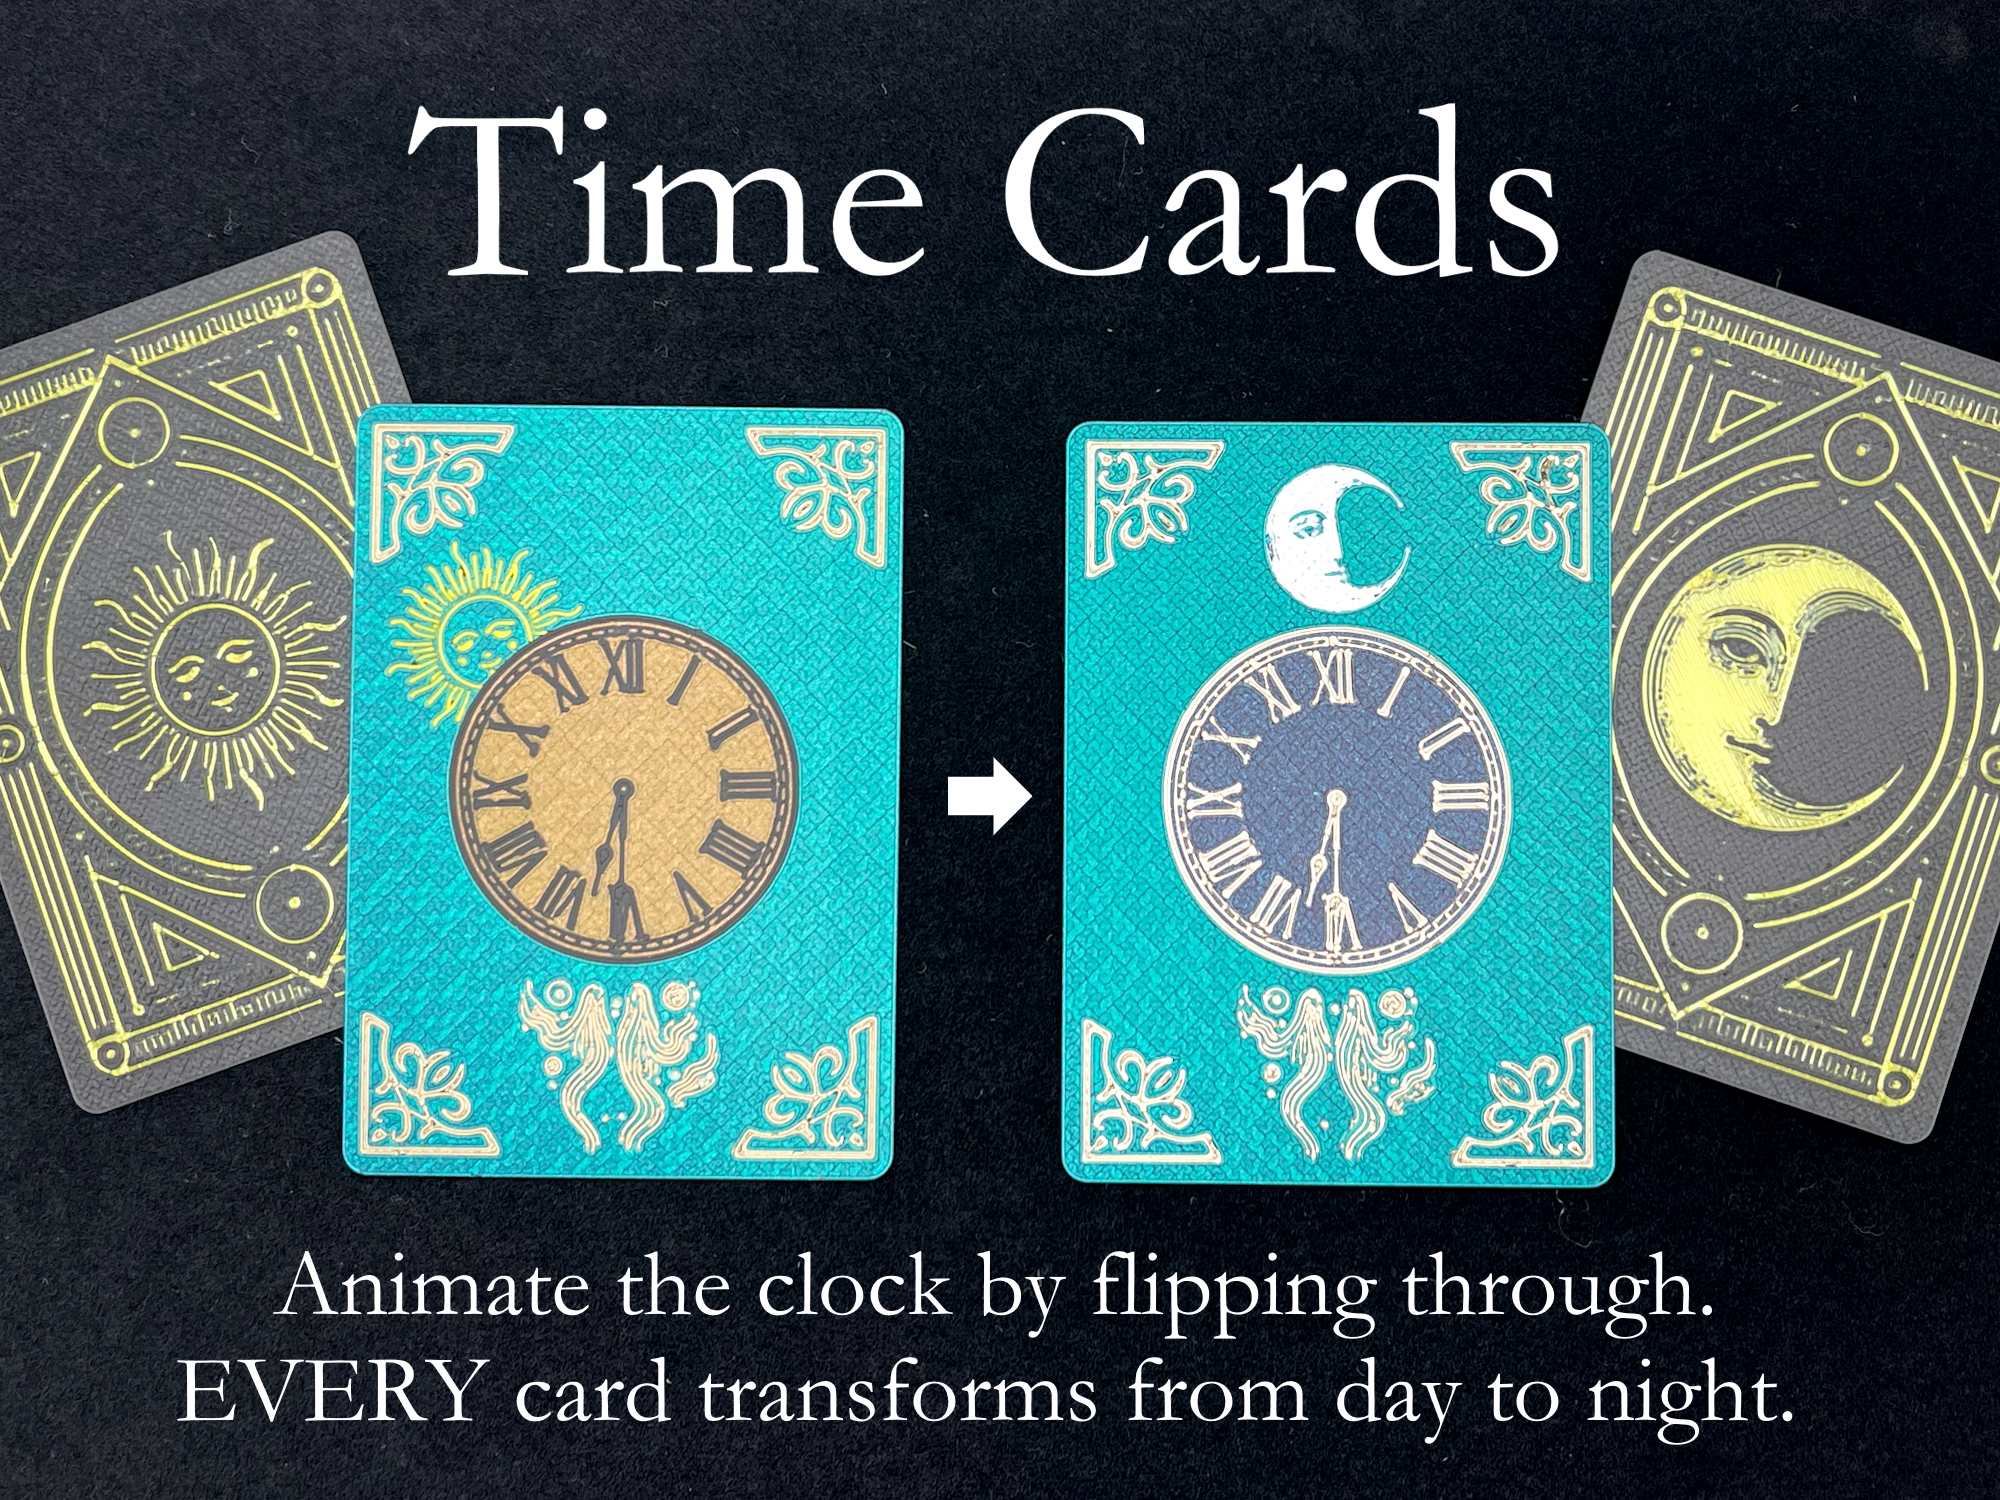
As a quick aside, the deck generator was always meant to be a stepping stone to a very special project which I've now released. Check out my magic trick prop - Time Cards.
3D Printed Playing Cards?!?
If you just need a pack of playing cards, buying one will be much easier. But if you’re looking for something unique...
Sure, you could try to print it on a traditional consumer inkjet. Good luck finding a suitable card stock which is glossy, thick, and won’t deform when going through the printer. And forget about adding shiny, sparkly, or glow accents!
I could try to sell you more on the idea, such as the fact that these cards are waterproof, but who am I kidding? If you try to play with them on the beach, they’re probably going to warp in the sun. Compromises are an important part of growing up.
I should add that these cards are a bit thicker than regular cards, but they feel pretty close to the real thing in how they bend and shuffle.
At the end of the day, face it, you’re looking for new stuff to print, and your friends will think your cards are cool. Just go with it.
Suitable (no pun intended) Filaments
My goal was to create a 3D printed deck that resembles a traditional deck. One of the hardest parts of achieving that was to have the card faces be white without too much light bleeding through. Cards aren’t much fun if everyone can see your hand.
I ran a bunch of experiments to balance the card translucency against other factors like how well the cards bend and how they look overall. While I certainly wouldn’t play high stakes poker with these cards, as there is light bleed if held up to a bright light, for casual purposes they work fine AS LONG AS YOU CHOOSE SUITABLE FILAMENTS!
Back of the Card: Use dark, opaque filaments (e.g., dark Bambu PLA Metallic). Avoid overly translucent options like Bambu’s Galaxy line.
Face of the Card: Can be light or dark; however, if opting for a light color, ensure your filament isn’t too translucent. I found that Bambu’s matte white works much better than PLA Basic white.
Note on Silk: For card faces, avoid PLA silk because it’s tough to remove from the build plate, prone to stringing, and leaves residues that affect subsequent prints.
Other Printing Tips
- Orientation: Print cards face down on a smooth build plate. This ensures they’re able to slide easily when being dealt. However, I didn’t get good results with a holographic plate.
- First Layer Temperature: Increase to 65°C to boost adhesion of fine details.
- Nozzle Size: All decks were printed with a 0.4mm nozzle. I’m sure they’d look better with a 0.2mm nozzle, but that’s a big time commitment.
- Reducing Imperfections: If issues like stringing or color blobs occur on the face of the card, try using custom filament ordering in the plate settings. You want the background of the card face to print first so that any stringing from colorful details gets hidden behind the background color.
- For additional opacity: For the 3rd (light blocking) layer, use the most opaque (low TD) filament you have, such as a matte black. To do this, use that filament as your card background color and set a pause on the 4th layer. When that pause is hit, swap that filament for the one you want as your background color. I've updated my deck customization script so that when I post it, the 3rd layer will have its own dedicated filament assigned to it and you won't need to use this pause technique.
- Card Removal:
- Let the plate cool a few minutes before removal.
- Flex the plate gently to lift the card edges.
- Use a scraper carefully just at the edges. Digging too far will likely damage the card due to the bend angle.
- Finally, use another card to help lift it. Wriggle gently to release without applying too much force.
Create Your Own Custom Deck (Advanced Users)
Send me a message if anything below is unclear or doesn't work.
Install & configure prerequisites:
You will need to install a recent development snapshot of OpenSCAD. As of today (3/16/25), the newest mainstream release of OpenSCAD is from 2021, and it is missing the “lazy union” feature needed to export the cards as separate parts for easy colorization in Bambu Studio or your slicer of choice. If you scroll down on the OpenSCAD downloads page, you should see the option to download a recent development snapshot.
Once installed, enable the “lazy-union” feature under Edit → Preferences → Features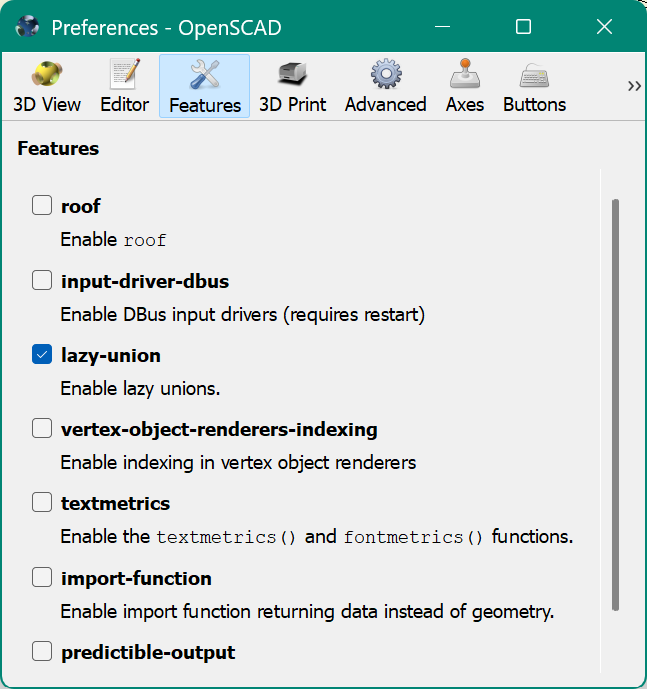
Download & expand the deck generator:
Download deck_generator.zip by clicking on the Download dropdown arrow (above these instructions) and selecting “Download STL/CAD Files"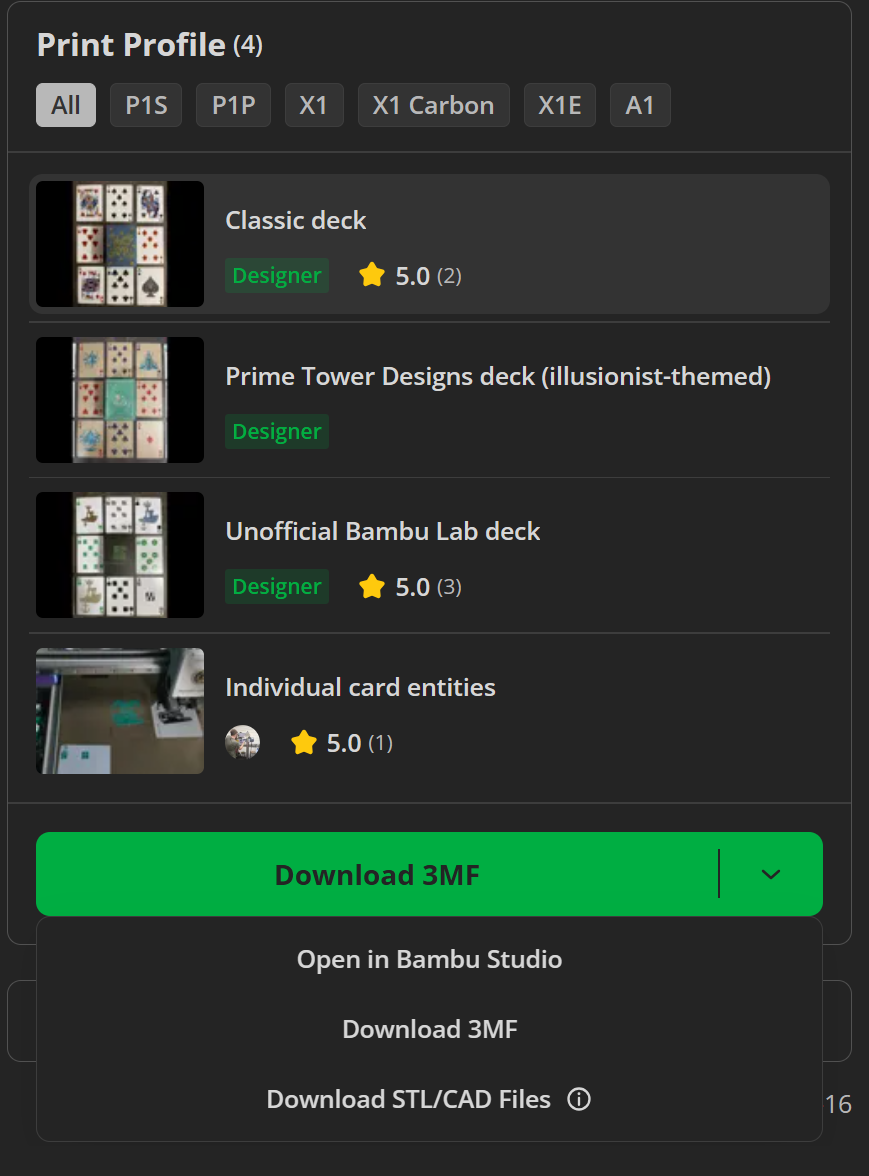
Expand deck_generator.zip. The directory structure is simple. Each subdirectory contains the vector artwork for a corresponding deck. At the root is the generator script (deck_generator.scad) as well as a deck.3mf file where you can import your generated cards. This 3mf is empty except for important settings and a dummy cube object (which you'll later delete).
Create your own deck directory:
You can copy one of mine as a starting point. You can also change the suit directory names if you want (like I did for the Bambu-themed deck) - just note you'll need to specify each suit name when later running deck_generator.scad (there's a cardSuit param near the top of it).Add your own vector art:
Add custom svg files to your new directory and make sure the filenames match mine, overwriting any svg files that you may have copied when you created the directory (unless of course you wish to re-use them). The svgs in the ids directory are pretty generic, so many users may wish to keep those as-is.
There are a million ways to create svg files. I won't add a lot of detail here, but I personally started with monochromatic (black on white) images and converted them using the “Black and white vectorization” feature at vectorization.eu. If you use that site, one caveat I found is that you need a healthy amount of whitespace fully surrounding the main image that you feed in. Otherwise, the resulting svg looks completely wrong.
My script supports up to 4 colors for the main graphic on each royalty card (jack, queen, king). To make it easy to set colors in your slicer, each color is represented by a separate svg file, and the script outputs each color as a separate part. Feel free to use fewer than 4 colors on the royalty card graphics. Two of my sample decks, in fact, only use 1 color per royalty graphic. Just omit the svg files for the colors you aren't using, and the script will skip over those with a mild warning (but will otherwise complete successfully).
If you do want to produce multi-color royalty graphics (using one svg file per color), again, there are a million ways to create svg files. I'm no expert, but for the classic deck my approach was to start with a multi-color (4 color) image. Using Paint.NET on Windows, I used the Magic Wand with global flood mode to select and copy all the pixels of each color (one color at a time), creating a separate png file per color. I then used the paint bucket tool on each of these png files to change the color from whatever it had been to black (the recolorization happens later). Finally, I used the “Black and white vectorization” tool I mentioned earlier to convert each png to svg. I had to add a whitespace border to each png due to the aforementioned quirk of the conversion tool.
Also important to note is that when reassembling these individual svg files into a color image for a royalty card, the script centers each one within the card. This works fine for rotationally symmetric artwork such as that in the classic deck, but in other cases the parts probably won't line up. The script has various offset params so you can manually correct the positions.Configure & run the script → export cards:
Tweak the script params. I've tried to document anything non-obvious inside the script. It runs quickly so you can always experiment to see what a variable does. The most important params are at the top to control things like which directory contains the artwork (use the new directory you created in step 3), which suit you want to render, how many cards you want to render at a time, etc. Your vector graphics will likely have different dimensions than mine, so you'll probably need to play around with the various dimension params to make things look right. The defaults in the script are based on the “classic” deck artwork.
Run the script once for each batch of cards - each batch represents a set of cards which you'll print on a single plate. Generally I figure most folks will produce 8 batches (2 batches per suit) given typical build plate sizes. While jokers are technically not part of a suit, I didn't want to separate them onto their own plates since that seemed inefficient. So by default, the script will render a joker in the first batch for each suit, but you can tweak the params if you only want 2 jokers rather than 4.
Tip: Try the full process end-to-end for one or two batches of cards before committing to a whole deck. This will save you time if something is off.If you want any suit-specific customizations (like making the artwork bigger just for the ace of spades) you'll need to edit the params before running that batch.
When you save changes to the script it will run in preview mode, but once you're happy with how everything looks you'll need to perform a full render (F6). Once the render completes you should hear a chime and you should then export as 3mf. Don't overwrite deck.3mf since that's the master 3mf file where you'll import everything. Instead, save each batch as a unique filename like spades_batch1.3mf.
Import cards into slicer:
Open deck.3mf in your slicer (the instructions here are for Bambu Studio but other slicers are generally similar) and import each batch of cards by clicking on the “Add” button and selecting one of your exported 3mf files from OpenSCAD.
Caveat: If your 3mf file currently has no objects in it and you use “Add” to import another 3mf file, Bambu Studio will simply open that other 3mf file and you'll lose any custom settings from your “empty” 3mf file. That's why I put a dummy cube object in deck.3mf. After you import your first batch of cards, you can delete the dummy cube.
When you import each 3mf, you should see 3 dialogue boxes.Dialogue 1) For the “Drop project file” window, select “Import geometry only." Otherwise, custom settings could get overwritten.
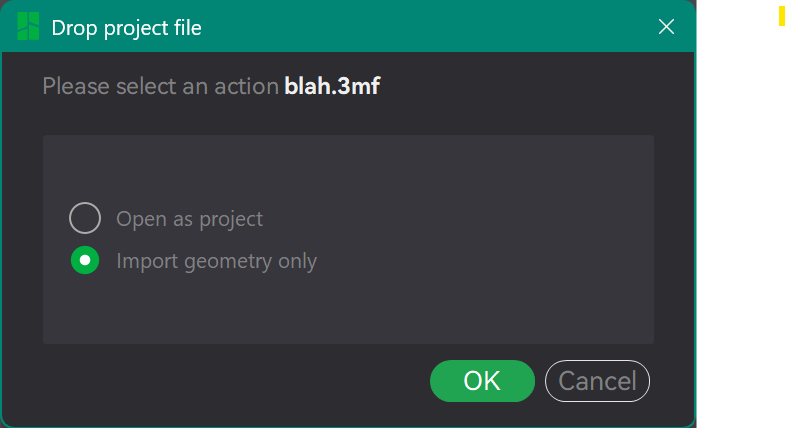
Dialogue 2) For the “Object too small” window, click “No.” Otherwise, the scaling will cause the dimensions to be wrong. NOTE THAT THE SCREENSHOT BELOW LOOKS LIKE “YES” IS BEING SELECTED - that's just how the dialog renders. Click NO.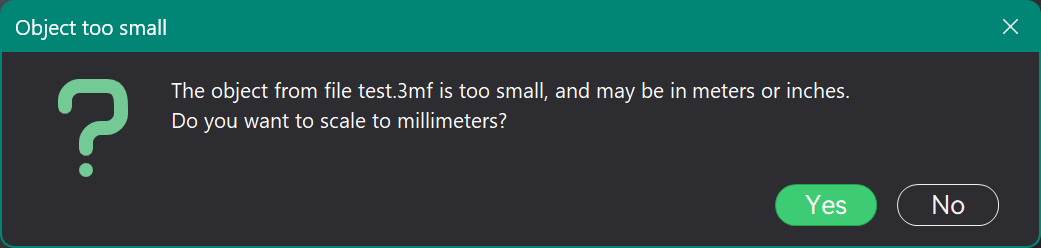
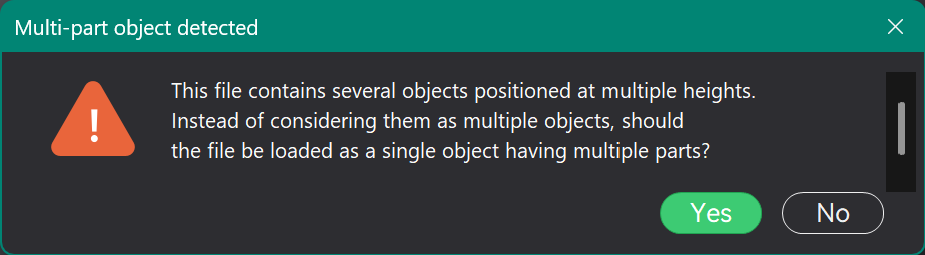
Dialogue 3) For the “Multi-part object detected” window, click “Yes.” Otherwise, you won't be able to easily colorize parts.
Colorize the cards:
Add a filament for each color you intend to use. Then, under the Objects tab, set each part to the appropriate filament. It might look intimidating, but it will go quickly once you get the hang of it, especially since the script outputs similar objects sequentially. Don't use Bambu Studio's paint tool because that just changes the surfaces and can lead to inefficient color swaps.
If you've rendered 7 cards, for example, the first 7 object parts will be card front backgrounds (usually meant to be white), the next 7 parts will be opaque light blocker layers, the next 7 parts will be back layer backgrounds, etc. The number cards have different amounts of pips, so not everything in this example is a multiple of 7, but similar parts are still sequential. Multi-select a range of object parts using the shift key, and then just press the number (on your keyboard) of the corresponding filament to set the entire range to that color.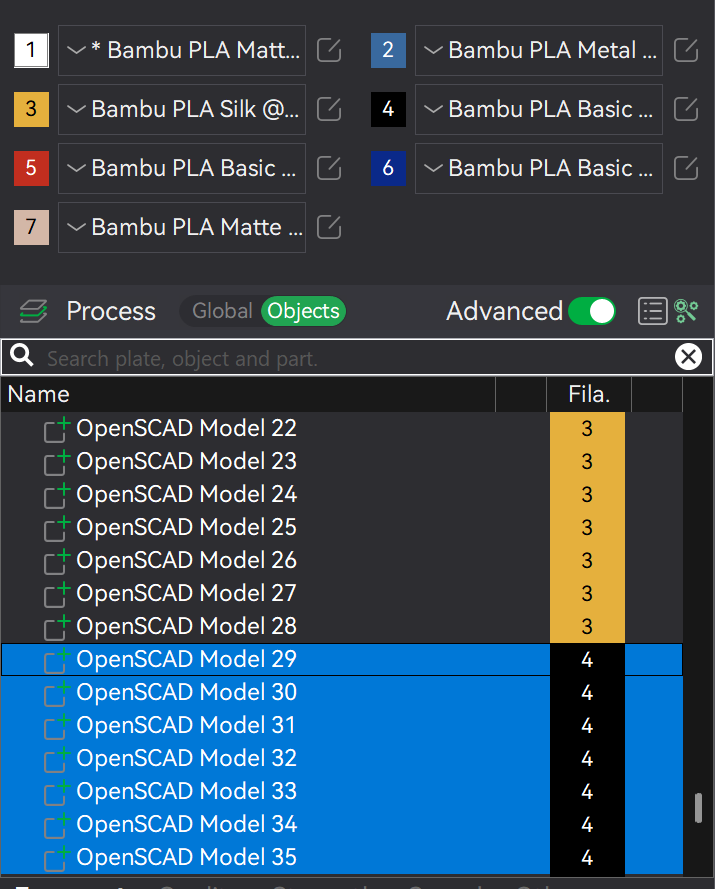
Once you start assigning filaments (colors), Bambu Studio will add a prime tower to that plate. You might need to move the tower to a place where it doesn't overlap the cards.
You might also need to zoom / rotate the cards to see the colorization because of z-fighting, where two overlapping parts compete to be displayed. This is resolved when the model is sliced, and parts which come later in the object ordering take priority. So verify that everything look as expected in the Preview tab before you print.
While in the preview tab, also verify the prime tower doesn't overlap the cards, since its size usually changes in Preview mode. Finally, it's a good idea to use the layer slider to see how each of the 4 layers gets colored, especially that the 3rd (blocker) layer uses an opaque filament.
- Print:
At this point, you're done generating your custom deck. I suggest you check out my filament & printing tips earlier in this model description to help you achieve optimal print results.
Feel free to share/publish your custom deck anywhere as long as you don't use the Illusionist or Bambu card artwork (Bambu has their own rules about when it's ok to use their logo). Otherwise, my only requirement is that you provide an attribution link back to this model page and let me know about it. Since I do this for free, consider doing me a solid (though it's not a requirement) by also linking to my profile page.
Finally, comment here with a pic of your creation - that's what really keeps me motivated!
Customizable Playing Cards

Publicado em 16 de jan de 2025
Gostou deste modelo? Crie uma conta grátis para salvar seus favoritos e voltar a eles depois.
Criar conta